Create Saved Searches
Here's how you can create saved searches in the Classic Sales UI either for yourself or for others in the organization. The saved searches you create are the same ones you create in Sales for Redwood. You're just creating them in a different UI.
-
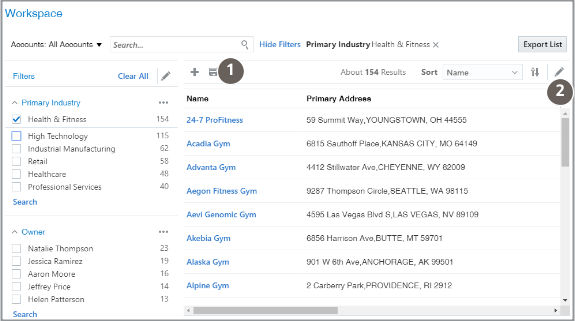
In Workspace, select a saved search as your starting point. For example, the All Accounts saved search provided by Oracle lets you create your saved search for all the accounts you can see.
-
Enter your search terms. You can enter search terms in the Search box, add filters, select filter values, or any combination of these.
-
You can add or change the columns displayed in the search results by clicking Edit Columns (the pencil icon highlighted by callout 2 in the following screenshot).
-
Click Save As (highlighted by callout 1).
-
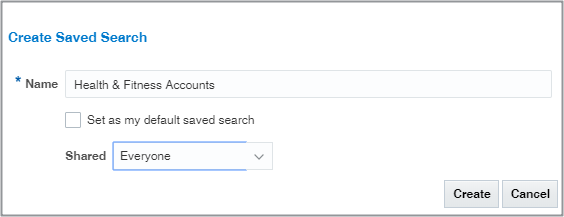
Enter the name for your saved search. Remember that the saved searches are listed in alphabetic order.
-
To make this saved search the default saved search for you personally, select the Set as my default saved search option. The default saved search is what you see whenever you navigate to Workspace.
-
Specify how you want to share the saved search you're creating. There are three options:
-
Only Me
-
Everyone
-
Specific Roles
-
-
If you selected Specific Roles, click Search (the people icon) and select the job roles.
-
Click Create.