Enable Address Mapping
You can quite literally put your accounts and contacts on the map by enabling geocoding as described in this topic. Geocoding turns the addresses you enter or import into longitude and latitude coordinates so that the locations can be displayed on a map.
Enabling address mapping involves two steps:
-
You enable the generation of geographic coordinates for a country
-
You run a process that converts the addresses into geographic coordinates
Salespeople must enter valid postal addresses for geocoding to work, so it's a good idea for you to validate the addresses in your application by subscribing to Oracle Address Verification Cloud Service.
What You're Enabling
Salespeople benefit from geocoding in two ways:
-
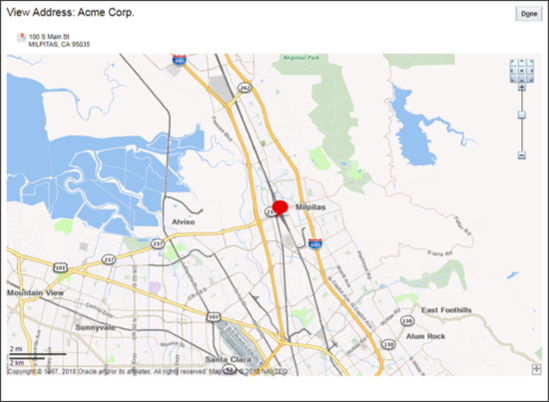
In the office, salespeople can view the location of an account address on the map while editing the account record.
-
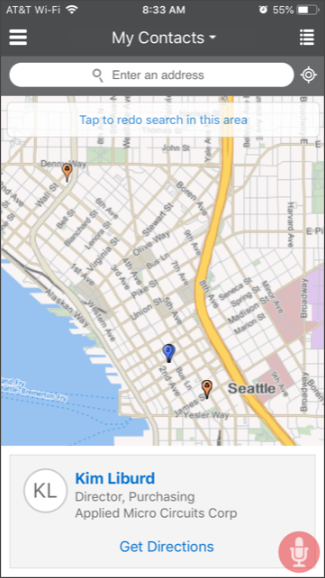
Using Oracle CX Sales Mobile on their smart phones, salespeople can view a map showing the locations of accounts and contacts within a certain radius of their current location, or any other location they choose. They can obtain travel directions to any of the locations with the tap of a finger (CX Sales Mobile passes the coordinates to the native mapping application on the phone).
Turn on Geocoding on the Manage Geographies Page
To turn on geocoding for a country, all you need to do is select the Geocoding Defined icon for the country where you want to turn it on. Here are the steps:
-
In the Setup and Maintenance work area, go to the following:
-
Offering: Sales
-
Functional Area: Sales Foundation
-
Task: Manage Geographies
-
-
On the Manage Geographies page, search for a country you imported using either its name or its two letter ISO code. For example, you can search by entering either the country name United States or the two letter ISO code US, and clicking Search.
-
Click the Geocoding Defined icon.
-
Click Done
Run the Populate Location Latitude and Longitude Process
Run the process that converts the addresses to the location latitude and longitude regularly and each time you import. Addresses that salespeople enter or addresses that you import don't show up on the map until the process completes, so schedule the process to run as frequently as necessary. If you imported geography data using Setup Assistant and turned on geocoding for any country, the process is already scheduled to run for you. Here's how to run the process:
-
In the Navigator, click Scheduled Processes under the Tools heading.
-
Click Schedule New Process.
-
Click the Name drop-down list icon and the Search link at the bottom of the list.
-
In the Search and Select: Name window, search for "Populate Location Latitude and Longitude Information".
-
Select the process name in the search results and click OK.
-
In the Schedule new Process dialog box, click OK to confirm your selection.
-
In the Process Details window, click Advanced to view the advanced options.
-
You can make the following entries on the Parameters Tab:
Parameter
What to Enter
Country Code
Leave this field blank if you want to generate the coordinates for all the countries you enabled for geocoding, or enter a specific country code.
Start Date, End Date, and Regenerate Geocode
Leave these fields blank. The geocoding process picks up any addresses that have not been geocoded previously.
Batch Size
Leave this field blank unless you're geocoding more than 50,000 addresses at a time. If you're processing a large number of addresses, then enter 1000. By default, the application launches a subprocess for each batch of 500 addresses. There's a maximum of 10 subprocesses, so, if you're processing more than 50,000 addresses, then you must run the process multiple times. You can increase the batch size up to a maximum of 1,000.
-
Schedule the process to run regularly:
-
Click the Schedule tab.
-
Select Using a Schedule and specify the frequency.
-
-
Click Submit.
The application confirms your process was submitted.
-
You can monitor the process completion on the Overview page.
The process spawns multiple processes, depending on the batch size and the number of addresses you need to process.