Enable the Verify Address Button
If your salespeople are diligent in using the search field to enter addresses, you can skip this step. Addresses added using search are already verified. The Verify Address button is only useful if you want to check that the accuracy of addresses entered manually or if you imported unverified addresses. You can enable the button only for countries you imported earlier.
Repeat these steps for each of the countries where you want the button. You can only enable the button for country geographies you imported.
-
Open the Manage Geographies task from the Setup and Maintenance work area:
-
Offering: Sales
-
Functional Area: Sales Foundation
-
Task: Manage Geographies
-
-
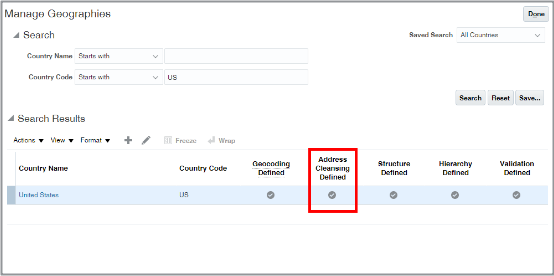
On the Manage Geographies page, search for each country you imported using either its name or its two letter ISO code. For example, enter either United States or US, and click Search.
-
Select the country in the Search Results area.
-
Click Go to Task (the circular icon) in the Address Cleansing Defined column.
Here's a screenshot of the Manage Geographies page highlighting the Go to Task icon and the Address Cleansing column.
-
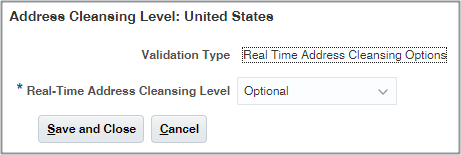
In the Address Cleansing Level window, select Optional for Real-Time Address Cleansing Level.
-
Click Save and Close.