Enable the Verification of Addresses, Emails, and Phone Numbers
After you enter the integration information, you enable the verification services that you want to use. Here's the easiest way, using the Quick Setup page provided for this purpose:
-
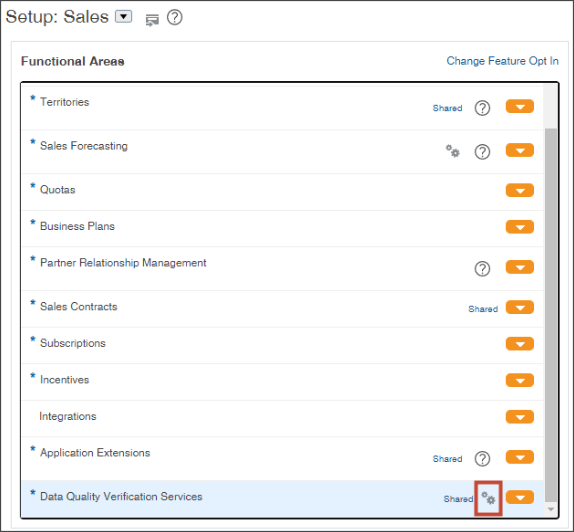
In the Setup and Maintenance work area, open the Sales offering.
-
In the Functional Areas section, the left pane of the page, scroll down to the Data Quality Verification Services, and click Quick Setup (the gears icon highlighted in the screenshot).
-
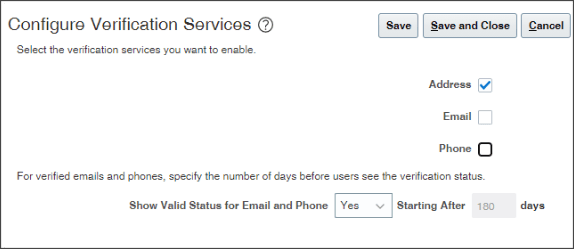
In the Configure Verification Services page, select the verification services you want to enable. Address is enabled by default.
-
Using Show Valid Status for Email and Phone field, you can specify if and when users see the status of Valid for verified phone numbers and emails.
Users see right away if the email address or phone number they enter are invalid, but they don't see a Valid status until later. By default, the Valid status displays after 180 days. Displaying the status makes it possible for users to verify the information again. In 6 months, the contact may be gone; the number may have changed.
-
To enable or disable the display of the Valid status, select Yes or No.
-
If you selected Yes, then enter the number of days before users see the Valid status.
-
-
Click Save and Close.
Using the Quick Setup page is the equivalent of setting the following profile options using the Manage Administrator Profile Values task:
-
Email Verification Service Enabled (ORA_ZCH_EMAIL_VERIFICATION)
-
Phone Verification Service Enabled (ORA_ZCH_PHONE_VERIFICATION)
-
Phone and Email Status Validity (ORA_ZCH_PHONE_EMAIL_STATUS_VALIDITY)