Add a Custom Field to the Edit Contact Page
In this next example, we're going to use Oracle Visual Builder Studio to add a field to a region on a Contact page. This example includes working with a custom field created in Application Composer.
You will also see why duplicating display logic rules instead of layouts can be more efficient. And you will add fields to a group.
Task Summary
To add a custom field to a page in Digital Sales, complete the following tasks:
-
Create the custom field in Application Composer.
-
Add your custom field to the Contact page.
-
Optionally add fields to a field group.
-
Preview the modified page with the new custom field for testing.
Create the Custom Field
In this example, you're adding a custom field to a Contact page. The custom field on the Contact object is a data model change. Before creating application extensions in VB Studio, you must first create all data model changes in Application Composer.-
In your Oracle Cloud application instance, make sure you're working in an active sandbox.
-
Navigate to Application Composer by clicking .
-
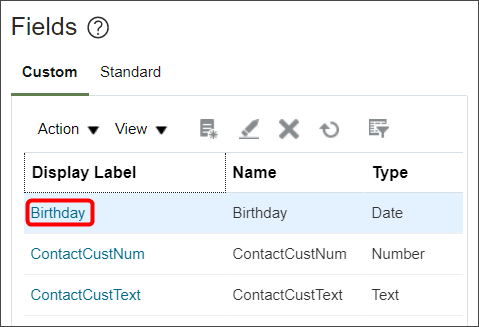
Open the Contact node under the Standard Objects node, and click Fields.
-
Click the Create a custom field icon.
-
Click the Date option, then click OK.
-
In the Display Label field, enter Birthday.
-
Click Save and Close.
Add Your Custom Field
-
In Digital Sales, navigate to the page that displays the area you want to extend. In this example, navigate to the My Contacts page, click a contact record, then click Contact Details.
-
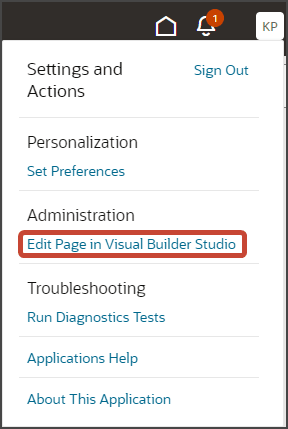
Under the Settings and Actions menu, select Edit Page in Visual Builder Studio.
-
Select the project that's already set up for you. If only one project exists, then you will automatically land in that project.
-
VB Studio opens a workspace for you. You might have to select a workspace if more than one exists.
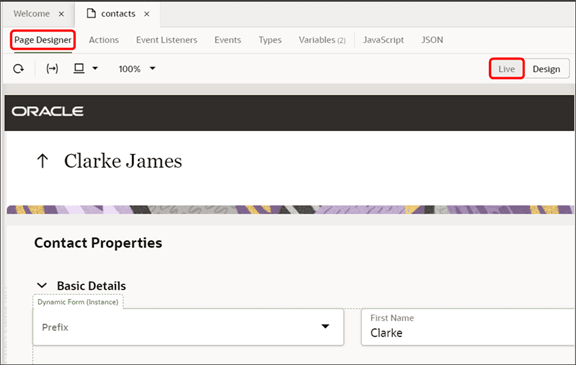
When you enter into your workspace in VB Studio, you should land on the Page Designer. This is where you can create your application extension. -
Since you launched VB Studio from a Contact page, you should see the Contacts page in the design area. You might have to navigate to get to the desired region that you want to modify. Click the Live button.
-
Click through the design area until you reach the region that you want to modify. In this case, we want to modify the Basic Details region, so navigate to a contact record, then click Contact Details.
-
Click the Design button to enter into Page Designer's Design mode.
-
Then in the design area, click the Basic Details region.
Note that the region now displays with a Dynamic Form handle.
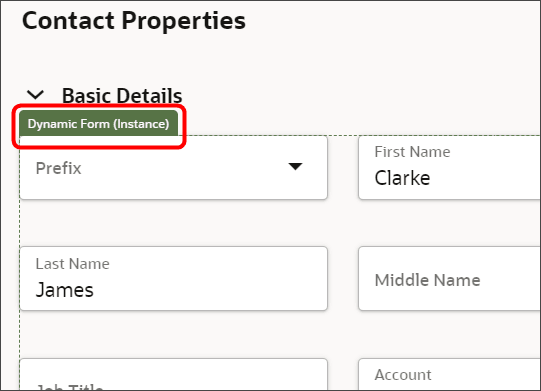
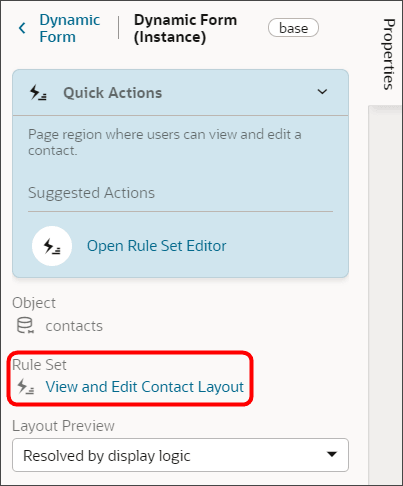
Additionally, the associated dynamic form's rule set displays in the Properties pane.
-
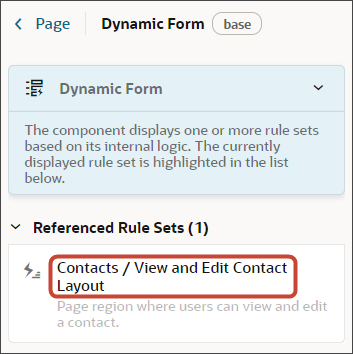
In the Properties pane, click the Contacts / View and Edit Contact Layout rule set.
-
Then click the View and Edit Contact Layout link.
-
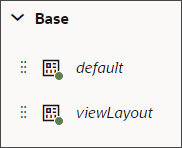
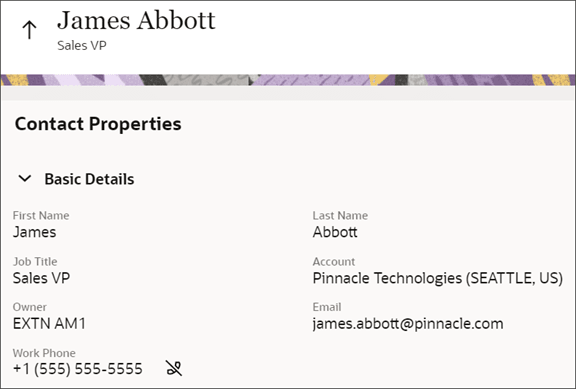
The Layouts region displays two base layouts. There is one viewLayout layout for the read-only version of the region that users see when they first click Contact Details. There is another default layout for the editable version of the region that users see when they click Edit.
Here's an example of the read-only version of the Basic Details region.
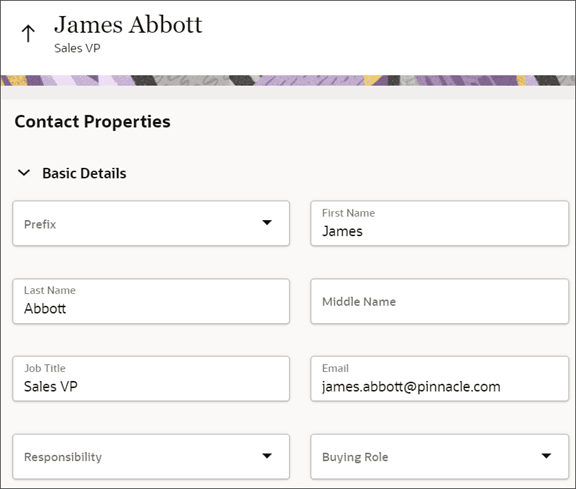
In contrast, here's an example of the editable version of the Basic Details region.
We need to modify both layouts.
Note:These layouts don't include the Address Details region that displays under the Basic Details region. To modify the Address Details region, navigate to Setup and Maintenance in your Oracle Cloud application and search for the Manage Address Formats task. See "Update Address Formats" in the Related Topics section below.
-
But first, notice the display logic that's already set on the two base layouts. VB Studio evaluates each rule from top to bottom.
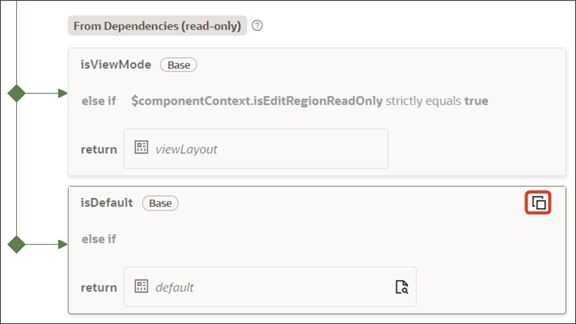
Let's look at each rule. The first rule (
$componentContext.isEditRegionReadOnly strictly equals true) says that if the page is read only, then VB Studio displays the viewLayout layout. Otherwise, VB Studio moves on to the second rule and displays the default layout.Remember our goal: we want to add a custom field, Birthday, to the contact's Basic Details region. To do this, we'll need to duplicate the two layouts because we can't modify base layouts. We can then add the custom field to the duplicated layouts.Instead of duplicating the layouts, however, let's duplicate the rules so that the rules are copied for us along with the layouts. This method is more efficient because it saves you from having to re-create the rule on the duplicated layout.To duplicate a rule, click the Duplicate Rule icon that displays when you hover over a rule.
-
In the Duplicate Rule dialog, accept the default rule name or enter a new name. The name you enter here is both the rule name and also the layout name, so enter a layout name that makes sense for you. Also, make sure the Also create a copy of the layout check box is selected.
Do this for the two rules that return the two base layouts.

-
After duplicating both rules, you will see two new rules that return two new custom layouts. Make sure that the sequence of the two rules is in the right order, with the view-only rule listed before the default rule. You are now ready to add the custom Birthday field to each layout. Click the Open icon to edit each layout.
You can click the Open icon in the rules themselves:
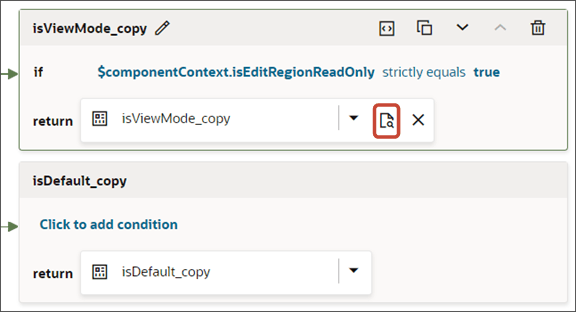
Or, click the Open icon that displays next to each layout name on the left side of the rules.
-
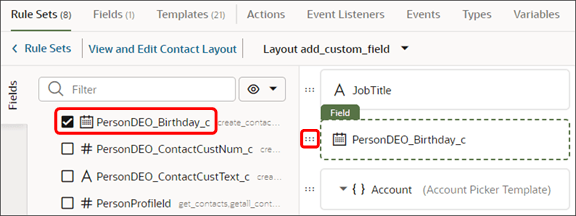
For each layout, scroll through the list of fields to find your custom field.
Tip:To find your custom field more quickly, use the Filter field. Enter either the field name or type
_cto display only custom fields in the list.For custom fields, VB Studio shows the internal API name (
name_c), not the display name. Moreover, custom fields that you add to the Account or Contact object are prefixed with the entity names,OrganizationDEO_andPersonDEO_, respectively. -
Select the custom field, Birthday, from the field list.
When you select a field, it displays in the list of fields to the right, at the bottom of the list. Use the field's handle to drag the field to the desired location.
-
Once you add the Birthday field to one custom layout, then add the field to the other layout.
Use the layout toggle in the menu bar to quickly and easily switch layouts.
 Note:
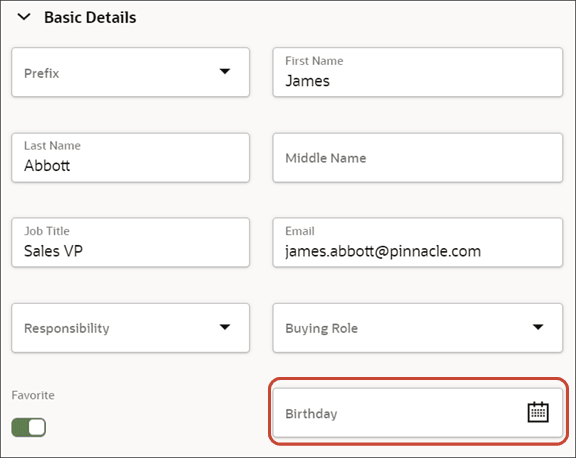
Note:The view-only Basic Details region displays a field only if the field has a value. For example, if a contact doesn't have a birthday specified, then the Birthday field won't display in the view-only Basic Details region at runtime. The Birthday field always displays in the editable version of the region, however.
Add Fields to a Group
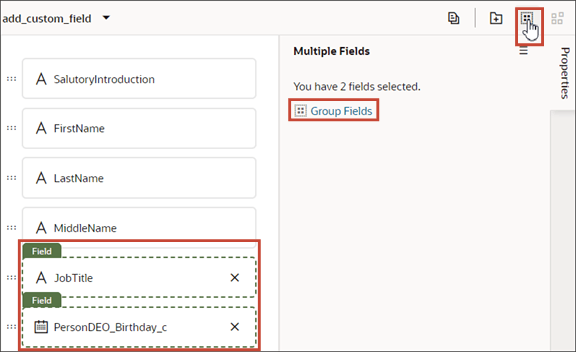
When creating a layout for a dynamic form on the Rule Sets tab, you can optionally group fields so that they're displayed together in a layout, and so you can treat them as a single entity. For example, a group makes it easy to add several fields to a different layout in one step, rather than adding them individually. In this example, let's add the Job Title and Birthday fields to a group.-
In the layout diagram, select the fields that you want to group together, either by holding down the CMD key (on macOS) or the Ctrl key (on Windows).
-
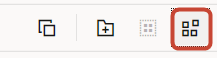
Click Group Fields in the Properties pane, or Group Fields in the toolbar.
-
The selected fields are grouped under a new folder in the layout diagram.
-
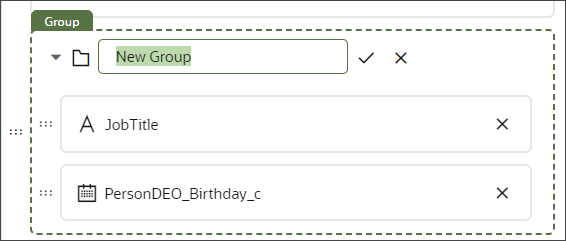
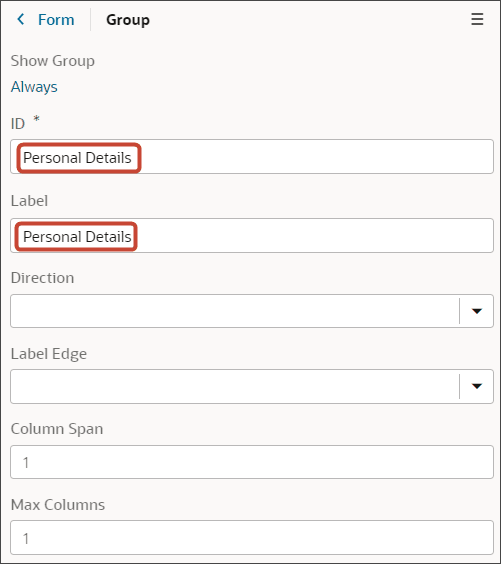
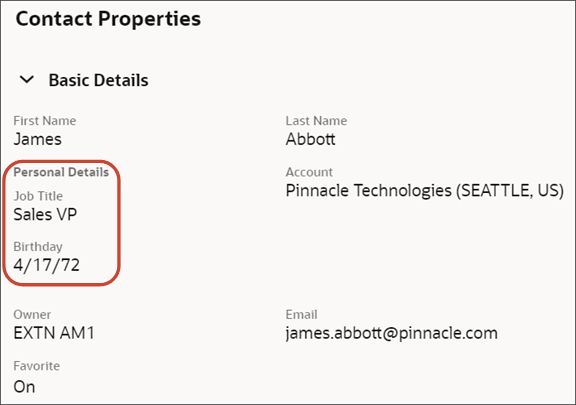
Replace New Group in the layout diagram with an ID for the new group, such as Personal Details. Click the check (Save) icon to save the ID.
-
In addition, enter a display label for the new group.
-
Optionally, use the Properties pane to set properties for the group.
After a group is created, you can still use the handles for fields to drag them into and out of a group. You can also click the Ungroup icon to ungroup the fields in a group.
For more information about groups, see "Add and Group Fields in Dynamic Form Layouts" in the Related Topics section below.
View the Custom Field
-
Click the Preview button to see your changes in your runtime test environment.

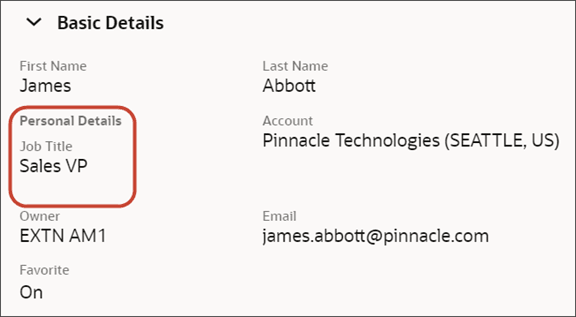
Here's an example where the Birthday field is grouped with the Job Title field under the Personal Details heading. But remember that in the view-only version of the Basic Details region, fields don't display if they have no values. In the below example, the field doesn't display because the contact doesn't have a birthday recorded.
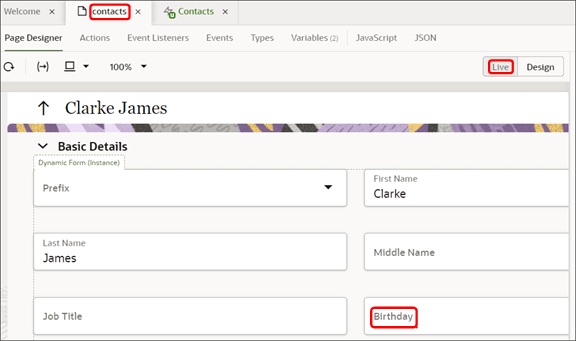
But, you can see the Birthday field in the editable version of the Basic Details region.
Let's add a birthday to this contact. After you save the record, notice that the view-only version of the Basic Details region now displays the Birthday field.
-
Alternatively, you can also view your changes directly in Page Designer. To do this, click the contacts tab to return to the Page Designer.
-
Click the Live button and navigate to the Edit Contact page.
-
Scroll down to view your custom field.