Add a Rollups Region to a Panel
Rollups summarize data across records, for an attribute of a business object and its related objects. The summarized value of a rollup appears as a business metric inside a panel on an object's detail page. You can add new rollups to a panel using Oracle Visual Builder Studio.
Where Do Rollups Appear?
Rollups appear inside panels on an object's detail page.
You can add rollups, either predefined or custom, to panels for both custom and standard objects. Some panels for standard objects are already delivered with a rollups region.
Here's a screenshot of a rollup that displays in a panel for a payment.

Prerequisites
You can add a predefined or custom rollup to a panel.
Before adding a custom rollup, you must first create the custom rollup.
-
In Application Composer:
-
For the desired object, create a rollup object and fields.
-
Then, create and publish the fields as rollups.
-
-
In the Sales Setup and Maintenance work area, in the Configure Adaptive Search task, enable the rollup object and attributes.
In the following example, we'll use a rollup object, called RollupObject, created for the Payment object. The RollupObject object has these fields:
-
Number of Payment Lines (number field)
-
Total Amount (currency field)
Create the Rollup Layout and Rule Set
To add a rollup to a panel, you must first create a layout for the rollup. You can then add the rollup layout to the panel.
Let's look at an example of adding a rollup to the Payment Lines panel on a payment's detail page.
First, create the rollup layout:
-
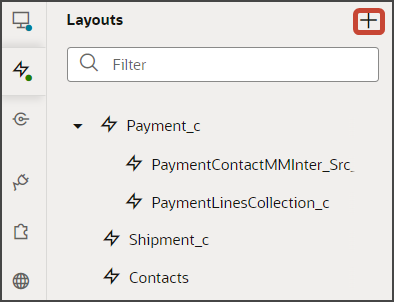
In Visual Builder Studio, click the Layouts tab, then click the Create Layout icon.
-
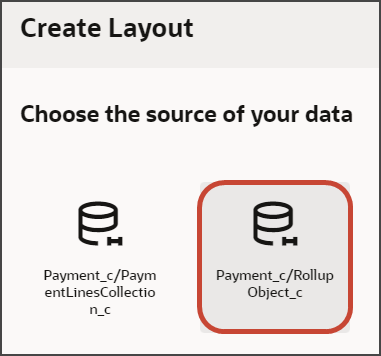
In the Create Layout dialog, click the REST resource for your child object.
In our example, the rollup object is called RollupObject. So, expand cx-custom and click Payment_c/RollupObject_c.
-
Click Create.
Next, create the associated rule set.
-
On the RollupObject_c layout tab, click + Rule Set to create a new rule set for the layout.
-
In the Create Rule Set dialog, in the Component field, select Dynamic Form.
-
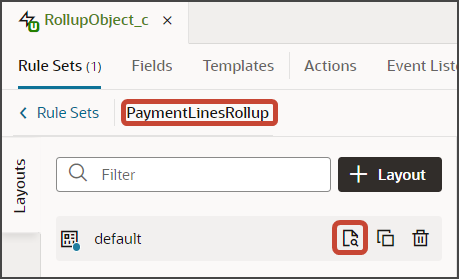
In the Label field, enter PaymentLinesRollup.
-
In the ID field, change the value to PaymentLinesRollup.
-
Click Create.
-
-
Add the rollup fields to the layout.
-
Click the Open icon next to the default layout.
-
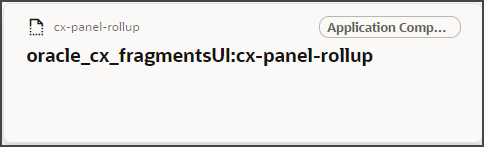
Click the cx-panel-rollup fragment.
This fragment provides the format for the rollup region.
-
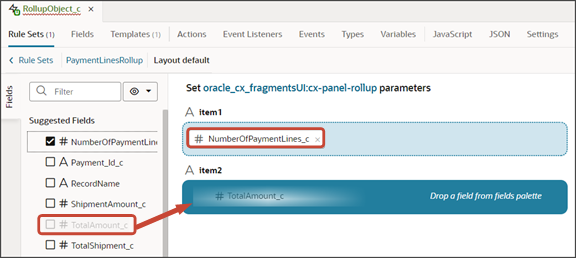
The rollup layout includes two slots. From the list of fields, drag a rollup field to the desired slot.
For example, drag the TotalAmount_c field to the item2 slot.
-
Add the Rollups Region to the Panel
In the previous section, you configured the rollups region using a layout and rule set.
Next, add the rollups region to a panel by adding a parameter to the panel's page and template. Here's how:
-
In Visual Builder Studio, click the App UIs tab.
-
Expand cx-custom > payment_c, then click the payment_c-detail node.
-
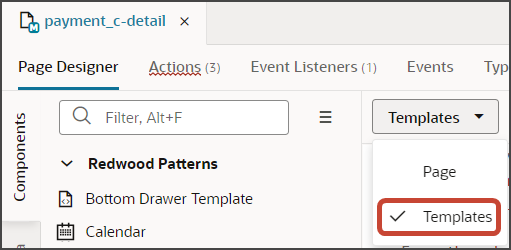
Click the payment_c-detail tab, then click the Page Designer subtab.
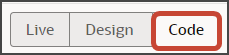
Click the Code button.
-
Select Templates from the drop-down list.
-
Add the following parameter to the fragment code.
<oj-vb-fragment-param name="rollupLayoutId" value="PaymentLinesRollup"></oj-vb-fragment-param>Be sure to replace the
rollupLayoutIdparameter's value with the appropriate value.The resulting template code should look something like this:
<template id="paymentLines">
  <oj-vb-fragment bridge="[[vbBridge]]" name="oracle_cx_fragmentsUI:cx-panel">
    <oj-vb-fragment-param name="resource"
      value='[[ {"name": $flow.constants.objectName, "primaryKey": "Id", "endpoint": $application.constants.serviceConnection } ]]'>
    </oj-vb-fragment-param>
    <oj-vb-fragment-param name="sortCriteria" value='[[ [{"attribute": "LastUpdateDate","direction": "desc" }] ]]'>
    </oj-vb-fragment-param>
    <oj-vb-fragment-param name="query"
      value='[[ [{"type": "selfLink", "params": [{"key": "Payment__c_Id", "value": $variables.id }]}] ]]'></oj-vb-fragment-param>
    <oj-vb-fragment-param name="child" value='[[ {"name": "PaymentLinesCollection_c", "primaryKey": "Id", "relationship": "Child"} ]]'></oj-vb-fragment-param>
    <oj-vb-fragment-param name="context" value="[[ {} ]]"></oj-vb-fragment-param>
    <oj-vb-fragment-param name="extensionId" value="{{ $application.constants.extensionId }}"></oj-vb-fragment-param>
    <oj-vb-fragment-param name="rollupLayoutId" value="PaymentLinesRollup"></oj-vb-fragment-param>
</oj-vb-fragment>
</template>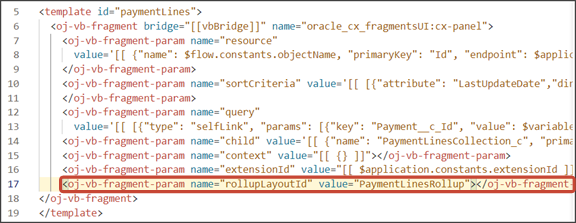
-
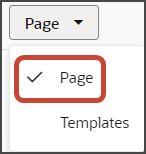
Select Page from the drop-down list.
-
Replace the existing
resourceparameter with the following code:<oj-vb-fragment-param name="resource" value="[[ {'name':'Payment_c', 'puid': $variables.puid, 'id': $variables.id, 'endpoint': $application.constants.serviceConnection ,'extensionId': $application.constants.extensionId, 'rollup': 'RollupObject_c'} ]]">Be sure to replace all attribute values with the appropriate values for your scenario.
The resulting code should look something like this:
<oj-vb-fragment bridge="[[vbBridge]]" name="oracle_cx_fragmentsUI:cx-detail" class="oj-flex-item oj-sm-12 oj-md-11"
  on-view-change-event="[[$listeners.fragmentViewChangeEvent]]">
    <oj-vb-fragment-param name="resource"
    value="[[ {'name':'Payment_c', 'puid': $variables.puid, 'id': $variables.id, 'endpoint': $application.constants.serviceConnection ,'extensionId': $application.constants.extensionId, 'rollup': 'RollupObject_c'} ]]">
    <oj-vb-fragment-param name="header" value="[[ {'resource': $flow.constants.objectName, 'extensionId': $application.constants.extensionId } ]]"></oj-vb-fragment-param>
    <oj-vb-fragment-param name="actionBar"  value='[[ { "applicationId": "ORACLE-ISS-APP", "subviewLabel": {"PaymentContactMMInter_Src_Payment_cToPaymentContactMMInter_c_Tgt": $translations.CustomBundle.Contacts()}, "resource": {"name": $flow.constants.objectName, "primaryKey": "Id", "puid": "Id", "value": $variables.puid }} ]]'></oj-vb-fragment-param>
    <oj-vb-fragment-param name="panels" value='[[ { "panelsMetadata": $metadata.dynamicContainerMetadata, "view": $page.variables.view } ]]'></oj-vb-fragment-param>
    <oj-vb-fragment-param name="context" value="[[ {'flowContext': $flow.variables.context} ]]"></oj-vb-fragment-param>
    <oj-vb-fragment-param name="row" value="{{ $variables.row }}"></oj-vb-fragment-param>
</oj-vb-fragment>
Test Your Panel
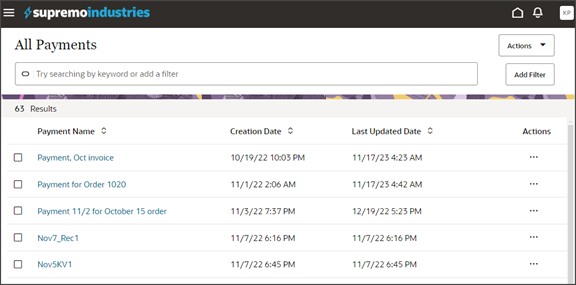
Test the rollups by previewing your application extension from the payment_c-list page.
From the payment_c-list page, click the Preview button to see your changes in your runtime test environment.

The screenshot below illustrates what the list page looks like with data.
-
If data exists, you can click any record on the list page to drill down to the detail page. The detail page, including header region and panels, should display.
You should now see the Payment Lines panel on the detail page, with a region for rollups.
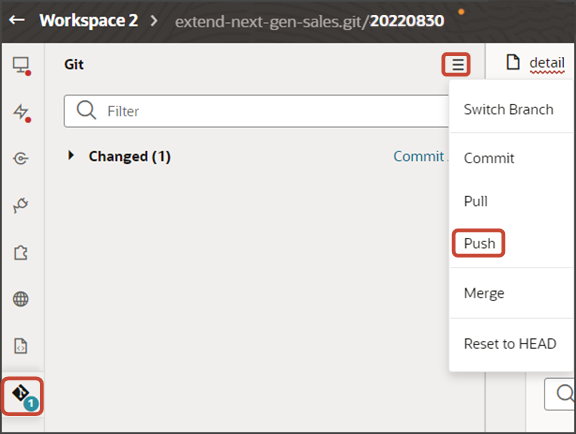
Save your work by using the Push Git command.
Navigate to the Git tab, review your changes, and do a Git push (which does both a commit and a push to the Git repository).