Configure the Contents of a Panel
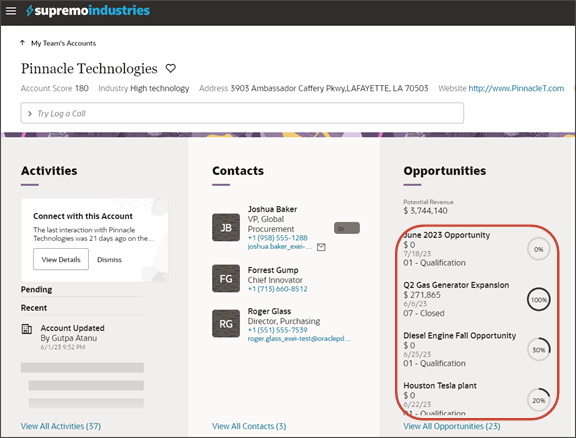
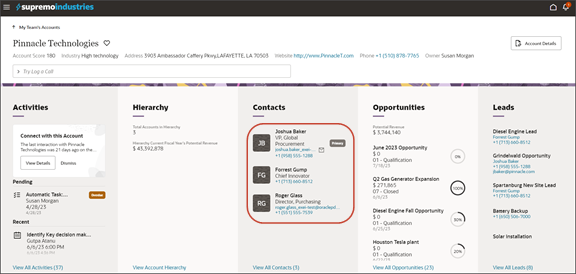
An individual record's detail page includes key information displayed in a region of panels. Each panel contains information related to the record, such as related contacts and opportunities. Most panels display information in a list format. You can configure these lists using Oracle Visual Builder Studio.
What's Inside a Panel?
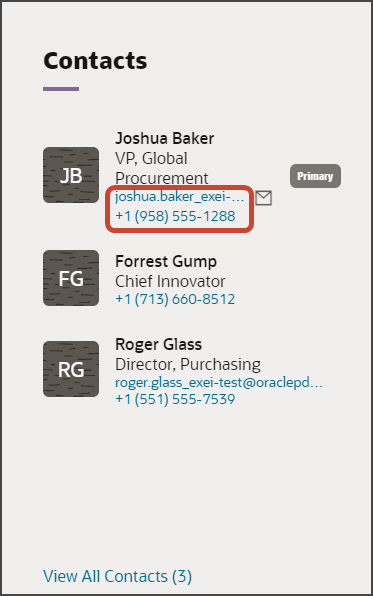
A panel often contains a list, which you can configure. Here's an example of a list inside a panel:
Lists can display up to 5 records, depending on screen size. If the screen size is small, then the list automatically adjusts to display fewer records. However, users can click the View All link that displays at the bottom of the panel to navigate to a second page to see all records in the list. This second page is called the subview.
What Can You Change in a List?
In Visual Builder Studio, you can modify the information that displays in each list.
You can:
-
Add and remove fields
-
Change the display order of fields in the list
This topic illustrates how to change the display order of fields that display on panels on an account's detail page. We'll look at both the Contacts panel and Opportunities panel.
To configure the subview, see Configure the Subview Layout.
Change the Display Order of Contact Panel Fields
Let's change the display order of fields in a panel list. In this example, we'll switch the order of the email and phone number fields on the Contacts panel on the Account detail page.
-
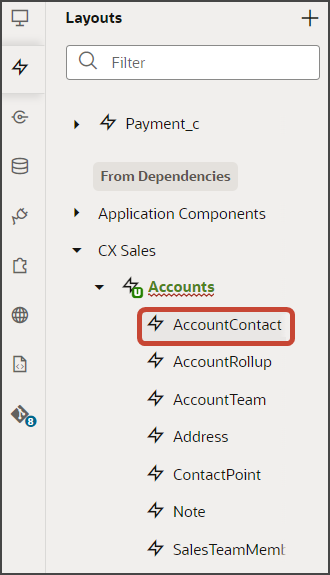
In Visual Builder Studio, navigate to the Layouts tab and expand the CX Sales node > Accounts > AccountContact.
The AccountContact node contains the rule sets for the Contacts panel on the Account object.
 Note:
Note:When configuring the contents of a panel, consider what kind of relationship the panel's object has with the primary object. In this case, the Account object has a many-to-many relationship with Contact. This means that you'll find layouts for the Contact object on the AccountContact node, nested under the Accounts node.
-
On the AccountContact tab > Rule Sets subtab, click the Panel Card Layout.
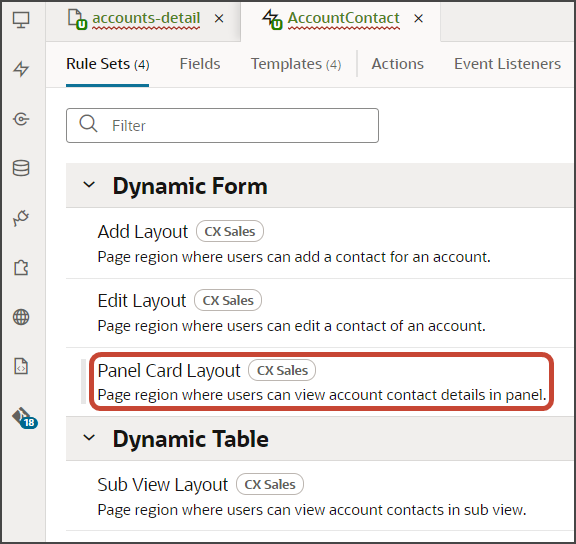
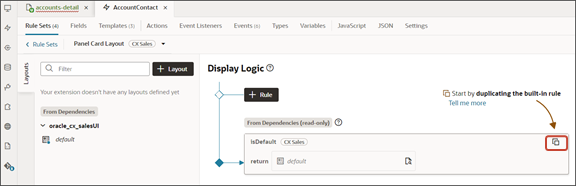
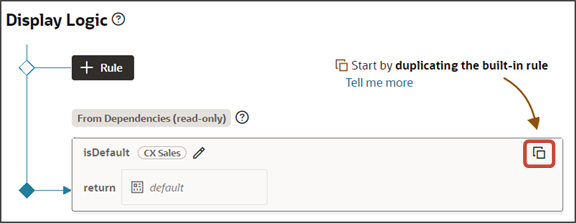
Both a default layout as well as a default rule are displayed for the Panel Card Layout.
-
Click the Duplicate Rule icon.
-
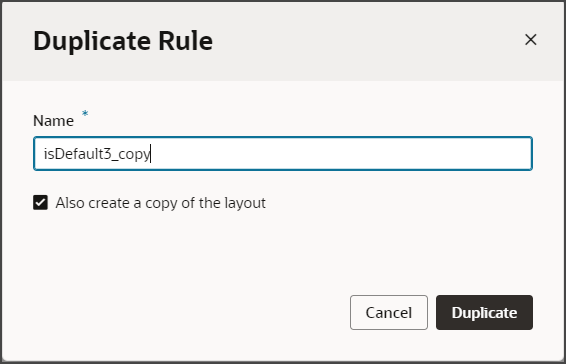
In the Duplicate Rule dialog, accept the default rule name or enter a new name. The name you enter here is both the rule name and also the layout name, so enter a layout name that makes sense for you.
Also, make sure that the Also create a copy of the layout checkbox is selected.
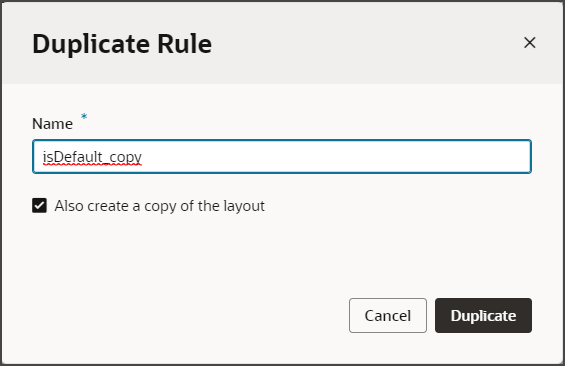
- Click Duplicate.
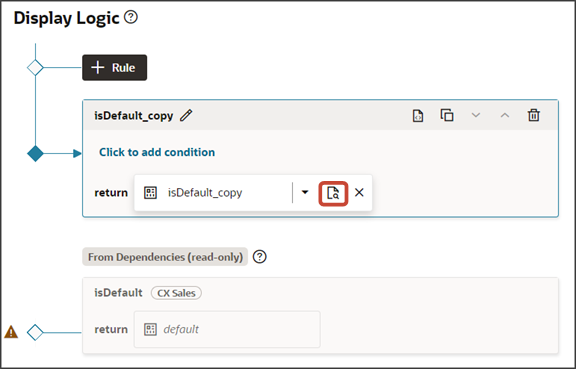
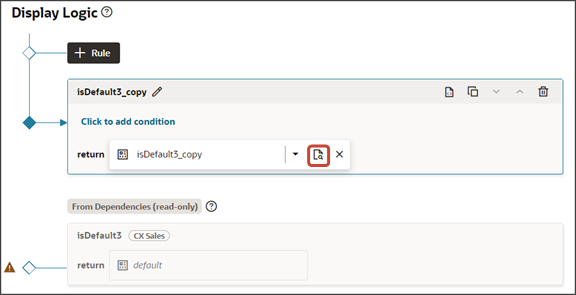
The new rule displays at the top of the list of existing rules, which means that this rule will be evaluated first at runtime. If the rule's conditions are met, then the associated layout is displayed to the user.
In this example, we're not adding any conditions which means that the associated layout will always be displayed.
-
Modify the rule's copied layout.
-
Click the Open icon to edit the copied layout.
-
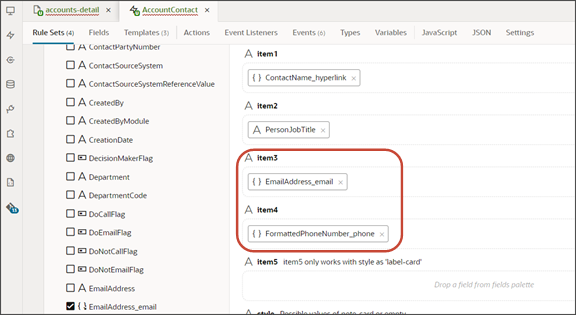
Scroll down the list of fields in the layout until you locate the email and phone fields.
-
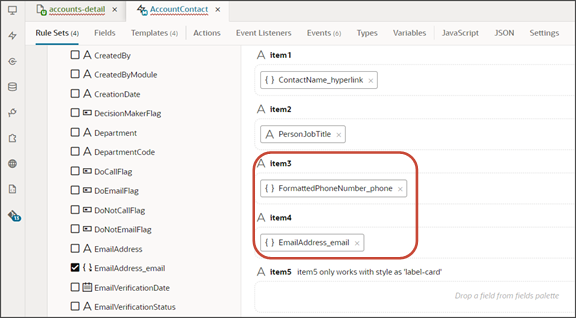
Delete each field from the Item3 and Item4 slots, and then add the fields back. This time, however, switch the order so that the phone field is in the Item3 slot and the email field is in the Item4 slot.
-
-
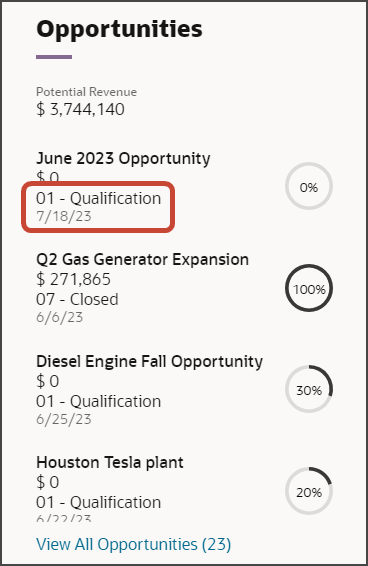
Click the Preview button to see your changes in your runtime test environment.

The preview link must include the
application/containersegments in the URL. If not, then change the preview link using the following example URL:https://<servername>/fscmUI/redwood/cx-sales/application/container/accounts/accounts-detail?id=300000003513233&puid=7050&view=foldout
Change the Display Order of Opportunity Panel Fields
In this example, we'll switch the order of the sales stage and effective date fields on the Opportunities panel on the Account object.
-
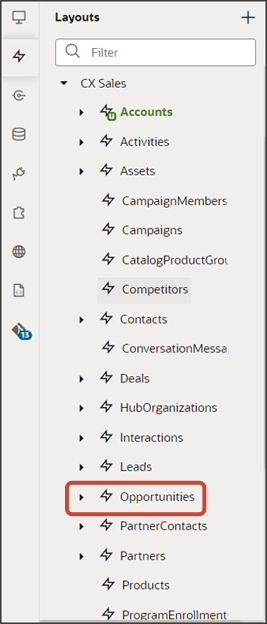
In Visual Builder Studio, navigate to the Layouts tab and expand the CX Sales node > Opportunities.
The Opportunities node contains the rule sets for the Opportunities panel on the Account object.
 Note:
Note:When configuring the contents of a panel, consider what kind of relationship the panel's object has with the primary object. In this case, the Account object has a one-to-many relationship with Opportunity. This means that you'll find layouts for the Opportunity object on the Opportunities node.
-
On the Opportunities tab > Rule Sets subtab, click the Panel Card Layout.
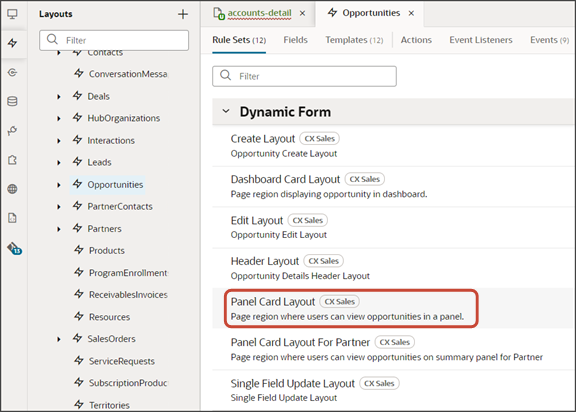
Both a default layout as well as a default rule are displayed for the Panel Card Layout.
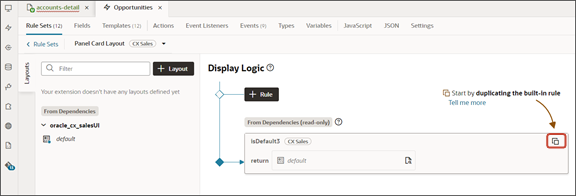
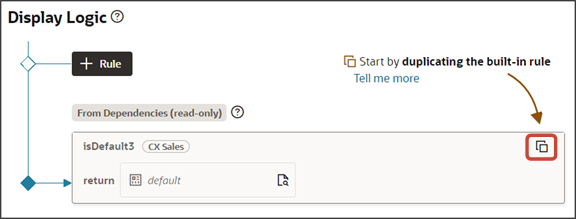
-
Click the Duplicate Rule icon.
-
In the Duplicate Rule dialog, accept the default rule name or enter a new name. The name you enter here is both the rule name and also the layout name, so enter a layout name that makes sense for you.
Also, make sure that the Also create a copy of the layout checkbox is selected.
- Click Duplicate.
The new rule displays at the top of the list of existing rules, which means that this rule will be evaluated first at runtime. If the rule's conditions are met, then the associated layout is displayed to the user.
In this example, we're not adding any conditions which means that the associated layout will always be displayed.
-
Modify the rule's copied layout.
-
Click the Open icon to edit the copied layout.
-
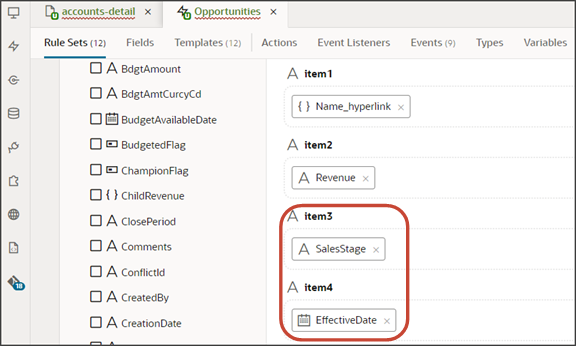
Scroll down the list of fields in the layout until you locate the sales stage and effective date fields.
-
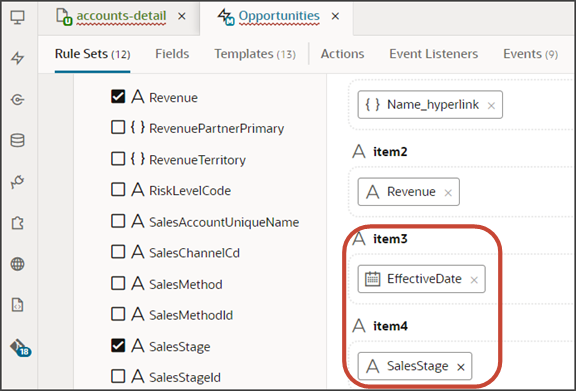
Delete each field from the Item3 and Item4 slots, and then add the fields back but switch the order.
-
-
Click the Preview button to see your changes in your runtime test environment.
The preview link must include the
application/containersegments in the URL. If not, then change the preview link using the following example URL:https://<servername>/fscmUI/redwood/cx-sales/application/container/accounts/accounts-detail?id=300000003513233&puid=7050&view=foldout