Configure What Information Displays in the Product Catalog
Here's how to configure what information displays in the product catalog in your Sales in the Redwood User Experience application. You can configure both product groups and products and you can configure different layouts for different roles in your organization.
Before you start, make sure that the product catalog includes products, product groups, and the attributes that you want to expose. Attributes that are blank don't show up in the UI.
You open Visual Builder Studio from the Product Catalog page and the page must show what you're configuring: product groups and a product under the Recent heading.
Configure Product Groups
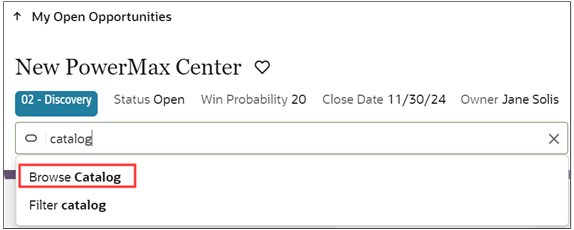
- Open an opportunity.
Enter Catalog in the Action Bar and select Browse Catalog.
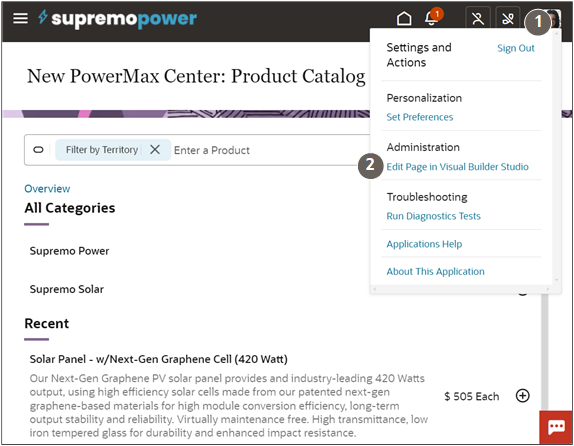
In the Product Catalog page, click your profile and select to open Visual Builder Studio (VBS).
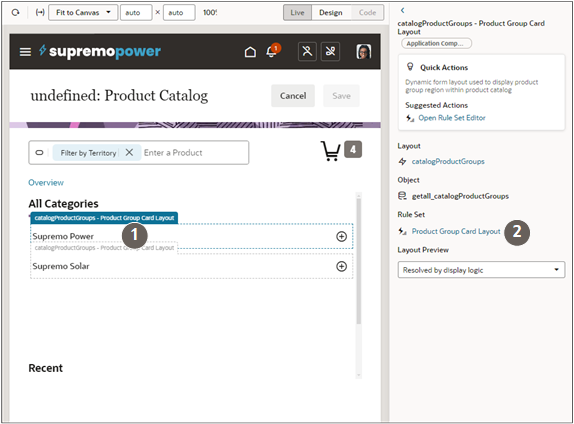
- In the central VBS panel, click one of the product groups in the page under the All Categories heading to display a border for the Product Group Card Layout (callout 1 in the following screenshot).
Under the Rule Set heading in the right pane, click the Product Group Card Layout link (callout 2).
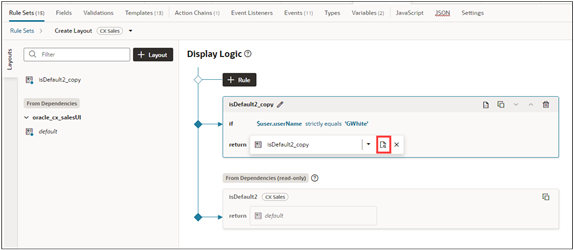
Duplicate the default layout and open it by clicking the Open button highlighted in the following screenshot.
You can drag additional fields from the Fields tab. Or you can remove and reorder them.

Preview your configuration by clicking the Preview button.

- Click Publish to make your configuration permanent.
Configure Products
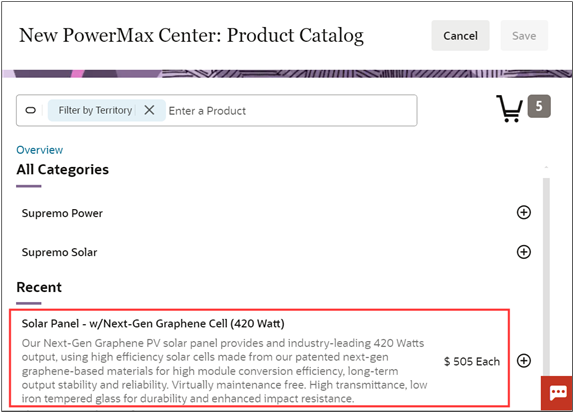
The steps to configure products is very similar to configuring product groups. The main difference: To easily identify the layout, you must display a product under the Recent heading of the product catalog. You can do this by adding a product to the opportunity from the catalog and then adding another.
Here's a screenshot of the product catalog showing a product under the Recent heading.
Here's a recap of the detailed steps:
- Open an opportunity.
- Enter Catalog in the Action Bar and select Browse Catalog.
- Add a product to the opportunity from the catalog and save.
- Add a second product. The first product should appear under the Recent heading.
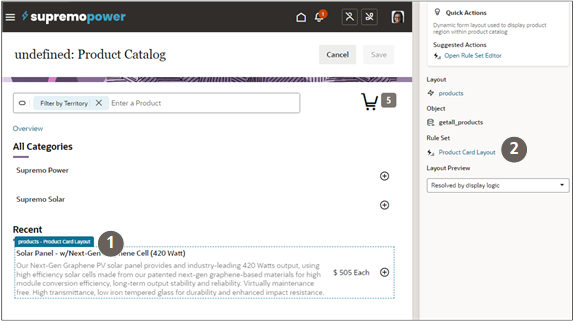
- From the Product Catalog page, click to open Visual Builder Studio.
- Click the product in the page under the Recent heading to display a border for the Product Card Layout (callout 1 in the following screenshot).
Under the Rule Set heading in the right pane, click the Product Card Layout link (callout 2).
- In the Display Logic pane, duplicate the default layout and open it.
- Drag additional fields from the Fields tab. You can also remove and reorder fields.
-
Preview your configuration by clicking the Preview button.
- Click Publish to make your configuration permanent.