Steps to Launch Products
After you set up the framework for your products and product bundles, you launch the products using the Product Workbench.
A streamlined product launch workflow ensures that products are configured, priced, and ready for sales in a single process. It empowers businesses to bring products to market quickly and effectively. The step-by-step process leverages modern functions of Oracle CPQ's Configuration and Pricing capabilities.
Here are the high-level steps:
- Create a product.
- Specify additional product details.
- Add the product to the Sales Catalog.
- Define the product structure.
- Configure the product in Oracle CPQ.
- Specify the product price.
- Launch the product.
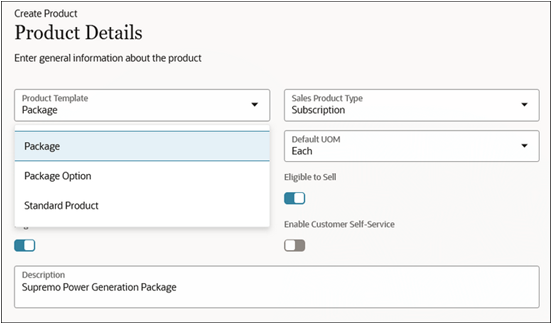
Step 1: Create a Product
You can use the predefined templates (for example, Finished Goods: Standard Product, PTO Model: Package, PTO Option: Package Option Class) to define popular sales product offering structures like KIT or Configured product as per your business need.
- Navigate to the Products list page.
- Create a product.
- Select the product template and sales product type, according to your business requirements.
Note these important product attributes:
- Product Template: Indicates the configured item templates in Product Hub/PIM (Product Information Management) that can be selected to define various Sales product structures with defaulted attributes.
- Sales Product Type: Indicates whether this product can participate in specific Sales management processes by default, without additional configurations. For example, if the value is Subscription, the products will follow Subscription Management (that is, the Subscription Sales Management process).
- Product Number: Refers to alphanumeric Public Unique Identifier (PUID) of the product. If you leave this field blank, the application auto-generates the product number as configured in Public Unique Identifier Sequence Generation setup.
- Eligible to Sell: Indicate whether to allow a product to be sold to external customers.
This image shows an example of the Product Details page in the Create Product flow:
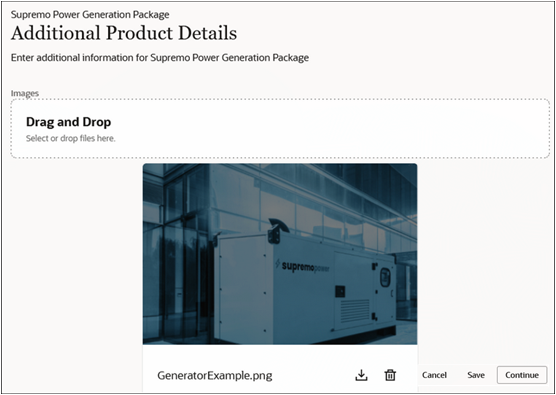
Step 2: Specify Additional Product Details
Specify additional product details. You can add product images and you can customize this step to include more product attributes using Oracle Visual Builder Studio.
This image shows an example of the Additional Product Details page:
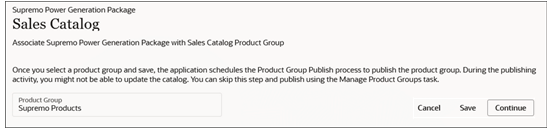
Step 3: Add the Product to the Sales Catalog
Add the product to the Sales Catalog. In this step, you associate the product with a specific product group in the Sales Catalog. After you add the product to the catalog, you make the product discoverable in the Sales Catalog, but only after it's launched.
This image shows an example of the Sales Catalog page where you associate the product with a product group:
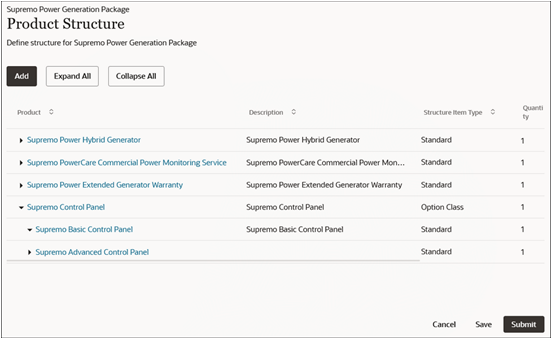
Step 4: Define the Product Structure
Define the product structure. You can define a multilevel, hierarchical product structure that meets your business requirements.
Make sure you have the individual product components (of structure item type Standard/Option Class/Model) available to "Add" to the product structure. This step enables you to package hybrid products into a bundle and lets you price and sell competitively.
Saving at any step saves your product definition in Draft status and lets you continue editing the product definition from the list page. When you submit, this:
- Finishes your product design
- Updates the product definition to Created status
- Syncs the product data to the Oracle CPQ product definition
- Makes the product available for you to continue with pricing
The following two images show examples of the Product Structure page where you define the structure of a product:

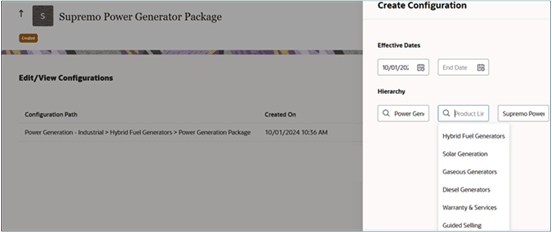
Step 5: Configure the Product
Configure the product. Once the product is created, the Configure action gets enabled only for those products that have the Model type of structure. The Configure action:
- Connects to Oracle CPQ's Model Configuration
- Maps products to the product model catalog
- Deploys the configuration for runtime quoting
This image shows an example of a product configuration in progress:
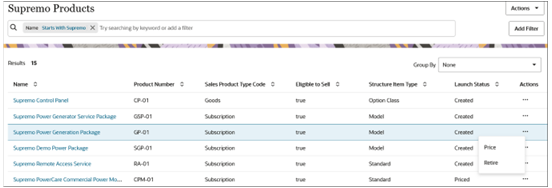
Step 6: Specify the Product Price
Specify the product price. Once the product is created, the Price action is enabled that lets you define the product price.
Make sure you set up your price definition and business functions in the Oracle CPQ Pricing Portal to enable competitive product pricing in the Product Workbench. Also see: Overview of Pricing Integration in this guide.
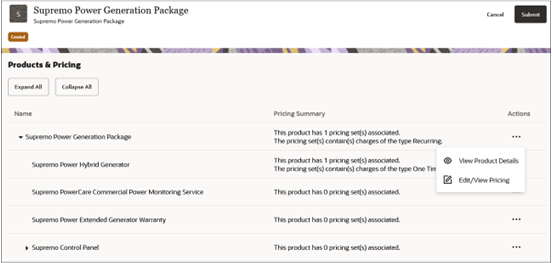
This image shows an example of the Products and Pricing page where you set the product price (or you can retire the product):
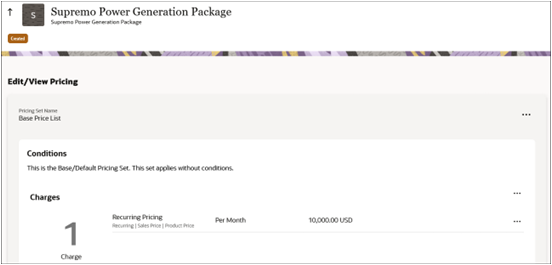
Specify the pricing set, condition, and charge details, and submit to save the product pricing.
This image shows an example of the Products and Pricing page where you access the Edit/View Pricing page:
In this sample image, in the Edit/View Pricing page, you specify the pricing set, the condition, and charge details for the product:
Step 7: Launch the Product
Launch the product. Once you price the product, the product status becomes Priced and the Launch action is enabled in the product list page, so that you can launch the product.
After you launch the product, the Eligible to Sell attribute for the product is set to Yes, the product status becomes Launched, and the product is available for salespeople to sell.