Manage List of Personal Saved Searches
From the My List tab of the Workspace UI, you can manage your own personal saved searches exclusively, separate from the saved searches that are shared with the broader organization.
Here are the steps to help you manage your own personal saved searches for a business object:
-
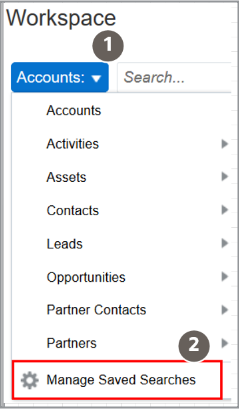
Select the business object.
-
From the same menu select Manage Saved Searches, then select the My List tab.
Here's a screenshot of the list of items that appears when you click the selector. The image highlights the Manage Saved Searches task, the last selection on the list.
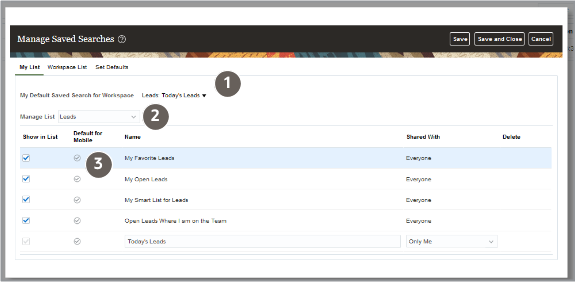
This screenshot shows the My List tab as seen by administrators. The table describes the columns highlighted in the screenshot by callouts.
Callout Number
Column Name
Description
1
My Default Saved Search for Workspace
This is the signed in user's personal default saved search. The user can keep the default saved search assigned by the administrator, or change the saved search to a different one contained in the drop-down list.
2
Manage List
The business object containing the saved searches you're managing. For example, by selecting Accounts for Manage List, saved searches based on the Account business object will appear.
3
Default for Mobile
The saved search appears in the list of saved searches for mobile users when this option is selected. While you can't delete lists provided by Oracle, you can hide them from mobile users by deselecting the Default for Mobile option.
-
Update your personal saved searches. You can:
-
Rename saved searches you created
-
Hide any of the shared searches from the shared group by deselecting Show in List.
-
Specify searches for the whole organization by selecting Everyone from the Shared With list.
-
Specify searches for users with one or more specific job roles, by selecting Specific Roles from the Shared With list. The saved search can then be managed from the Workspace List tab, where you assign the specific roles permission to view the saved search. You must click Save before proceeding to the Workspace List tab.
-
Delete saved searches you created from the application by clicking Delete.
-
-
Click Save and Close when you're done.
If you're sharing a saved search with other user roles, click Save to proceed and manage those saved searches in the appropriate Workspace List or Set Defaults tabs.