Modify the Overview Subtab
You can modify the Overview subtab for accounts, contacts, households, and partners. You can hide or show fields that appear on the left side of the subtab. Additionally, you can rearrange the position and grouping of the summary boxes, formerly referred to as infolets,
Extensibility on the Overview Subtab
The Overview subtab for accounts, contacts, households, and partners is the top subtab that appears for an account, contact, household, or partner record. Data that appears in the Overview subtab is read only, but your users can drill down to more details from here.
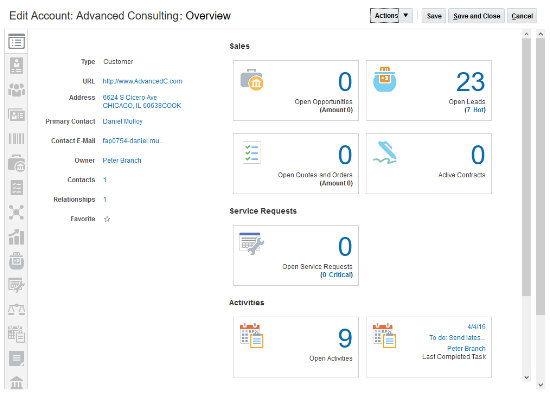
On the left side of the Overview subtab, key fields for the account, contact, household, or partner record are displayed. Use Application Composer to show or hide these read-only fields.
On the right side of the subtab, key data points about related object records are displayed as number totals in summary boxes. Use Application Composer to rearrange the position and grouping of the summary boxes. You can also create new summary boxes to highlight key data points for custom objects.
Hiding and Showing Fields
The Overview subtab includes a region on the left with a standard set of fields that display. You can further modify those fields by hiding existing fields, and showing new fields. You can also reorder these fields.
These fields are read only. Your end users can edit these fields at run time on the Profile subtab.
To hide and show fields, and reorder them, on the Overview subtab:
-
In Application Composer, navigate to the Application Pages tab for either the account, contact, household, or partner object.
-
On the Application Pages tab, scroll down to view the Details Page Layouts table.
Duplicate the standard layout to create a new layout to edit, or edit another existing layout.
-
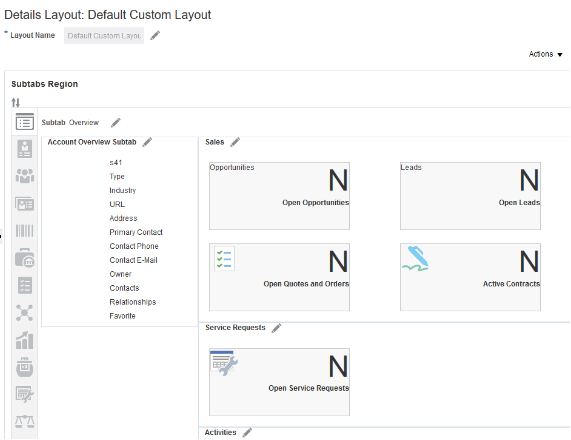
Within the selected details page layout, navigate to the Overview subtab.
Click the Edit icon next to the Overview Form heading to configure which fields display at run time, and in which order.
Summary Box
A summary box, formerly referred to as an infolet, is a container on a page which summarizes some key information about the record's related object records, so that your end users don't have to navigate to other tabs. For example, a summary box might display the number of total open opportunities that you're responsible for. At run time, users can click that number to drill down to more details. Typically, clicking a number in a summary box takes the user to another subtab for the object record.
The summary boxes that appear on the Overview subtab for accounts, contacts, households, and partners are different from the infolets that you can embed in Business Intelligence (BI) dashboards, and thus aren't interchangeable.
Below is an example of four summary boxes that display on the Account Overview subtab. These four summary boxes are arranged within a summary box group called Sales.
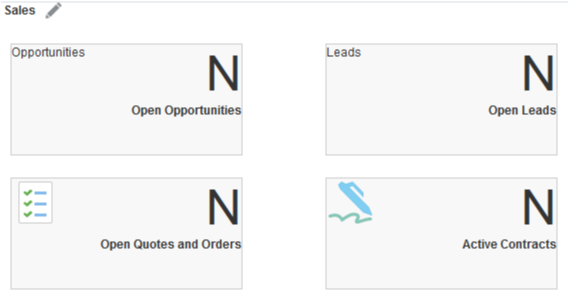
The account, contact, household, and partner objects have a set number of summary boxes that you can rearrange and group. Summary boxes are grouped by default, but you can create new groups and rearrange the summary boxes to fit the needs of your users. In addition, you can create new summary boxes for custom objects only.
To view the available summary boxes for an object:
-
In Application Composer, navigate to the Application Pages tab for either the account, contact, household, or partner object.
-
On the Application Pages tab, scroll down to view the Summary Boxes table.
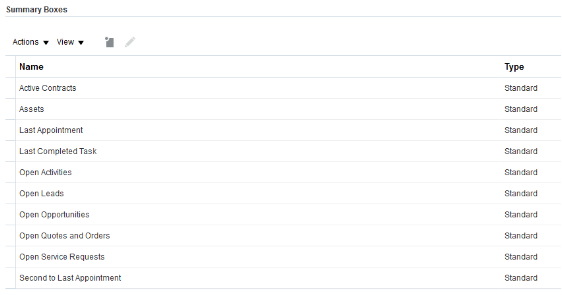
This table lists the available summary boxes that are registered for the object. Review the next section for tips on working with summary boxes and summary box groups.
Working with Summary Boxes
The Overview subtab includes a region on the right where summary boxes display. Summary boxes are grouped and arranged by default, but you can rearrange the position and grouping of these summary boxes. You can remove a summary box from an existing summary box group, and add it to another existing summary box group. Or, you can create a new summary box group, or delete existing summary box groups.
To rearrange summary boxes:
-
In Application Composer, navigate to the Application Pages tab for either the account, contact, household, or partner object.
-
On the Application Pages tab, scroll down to view the Details Page Layouts table.
Edit any custom layout. If none exists, then duplicate the standard layout and edit the resulting custom layout.
-
Within the selected details page layout, navigate to the Overview subtab to configure summary box groups.
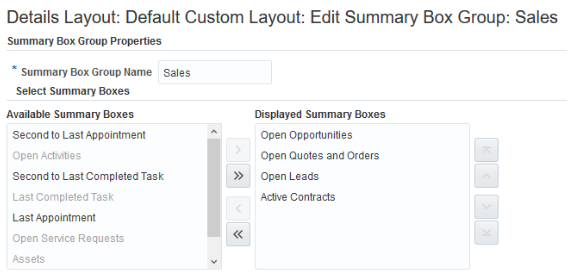
Click the Edit icon next to the summary box group that you want to configure.
-
Use the Available Summary Boxes and Displayed Summary Boxes lists to control which summary boxes are displayed within this summary box group at run time. Within the Displayed Summary Boxes list, use the up or down arrows to control the order of the summary boxes within the group.
If a summary box is listed under Available Summary Boxes but you can't select it, then this means that the summary box is already displayed inside another summary box group. If you want to include that summary box in the current group, then you must remove it from the other summary box group first, before you can add it to the current group.
-
You can delete summary box groups from this page by clicking Delete. Deleting a summary box group doesn't delete any included summary boxes.
To create a new summary box group:
-
In Application Composer, navigate to the Application Pages tab for either the account, contact, household, or partner object.
-
On the Application Pages tab, scroll down to view the Details Page Layouts table.
Edit any custom layout. If none exists, then duplicate the standard layout and edit the resulting custom layout.
-
Within the selected details page layout, navigate to the Overview subtab to configure summary box groups.
-
Navigate to the bottom of the page and click Create Summary Box Group.
Creating Summary Boxes
You might want to highlight custom object data on an Overview subtab. Use Application Composer to create new summary boxes that summarize key data points about custom objects.
You can't create summary boxes for standard objects.
To create a new summary box for a custom object:
-
In Application Composer, navigate to the Application Pages tab for either the account, contact, household, or partner object.
-
On the Application Pages tab, scroll down to view the Summary Boxes table.
-
Click New.
-
Enter the name of the summary box. The name that you enter displays to your users as the heading of the summary box.
-
Select the target object for the summary box. Select from the custom objects that are related to the current object: account, contact, household, or partner.
-
Select the mathematical operation that you want the summary box to perform on the related object's records. For example, do you want the summary box to display a count of all records?
-
Optionally add filters to the summary box to constrain the records that are included in the results. For example, maybe you want to include only records created by a specific person.
-
Click Save and Close.
After creating a summary box, you must add it to all details page layouts where you want the summary box to display. Remember that you can add your new summary box to only one summary box group. Use the instructions above to add your custom summary box to a summary box group.