Content Blocks
Administrators can easily customize sites by adding, deleting, hiding, moving and editing content containing text and images using pre-defined content blocks. Content blocks are available on all the pages of your sites.
The look and content of your site's pages can be configured, customized and branded quickly and easily using one of Site Builder's most powerful features, configurable content blocks. Different content layouts are available to the user depending on what page they are configuring and where on the page they are placing the content. Content blocks can contain text that can be enhanced with a rich text editor and images that can contain links to other pages. Content blocks can be deleted, hidden and moved to customize the layout of a site.
Custom content blocks are multilingual enabling Administrators to configure the content blocks in Site Builder with content that can be translated to each locale and can be unique to each locale. When site users toggle their language preference, the content in the custom content blocks will display in that language, provided the blocks have been configured in the locale/language selected.
If for whatever reason content is not entered into an active locale, these locales with missing content will borrow the content from the Default Locale. This ensures that users will see actual content, although perhaps not in the language of their choice, instead of the placeholder Lorem Ipsum text and the placeholder image delivered with the blocks.
All of the system locales, including inactive ones, are available to select in Site Builder to allow Administrators to immediately configure the multilingual content blocks. Content blocks in inactive locales can be pre-configured to make efforts more scalable. Administrators can freely create content in inactive locales without risk of exposing incomplete or inaccurate content as that content remains internal until that locale is activated.
Adding Content Blocks
To add content, users click on the [+] symbol and the available content block types display.
Path: [Sourcing] Login as Administrator > Configuration > Site Builder > Edit Site
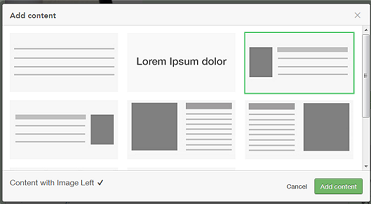
Users get presented a series of relevant content blocks to choose from for creating the new content. The following content formats are available:
-
Paragraph Text
-
Text with Heading
-
Heading
-
Content with Image Left
-
Content with Image Right
-
Two Columns, Image Left
-
Two Columns, Image Right
-
Image
-
Three Columns, Images and Text
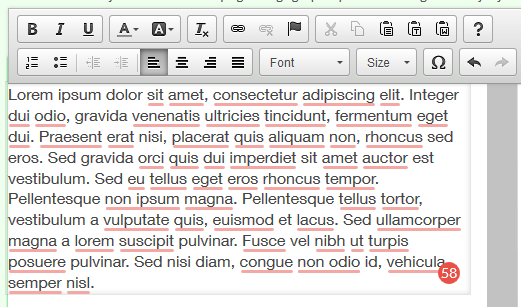
When a block is selected, the content template is created and ready to edit and format. A rich text editor is available on all content blocks enabling content font type, color, size, orientation, styles, etc. to be customized for each individual block.
Images and Redirection Links
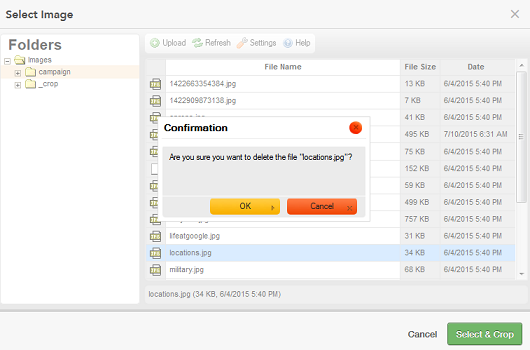
When you choose to create a content block that includes an image, clicking on the white space of the image displays upload options where you can select and crop the image. To keep a more concise and organized list of images, you can delete images by selecting the image in the list and pressing delete on the keyboard.
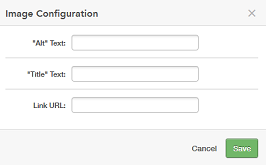
Clicking on the gear icon of the image enables you to configure the image to include hover text as well as embed a link within the image. A link could potentially be a URL to a specific Landing page or another site, so that clicking on the image would take users directly to that Landing page or site. The link embedded in an image will open a new tab in the user's browser.
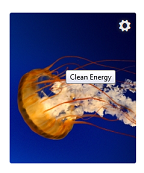
If you want to keep your user within the same tab, you can place a link using the rich text editor. A hyperlink in the text redirects the user to the URL set up within the same browser tab.
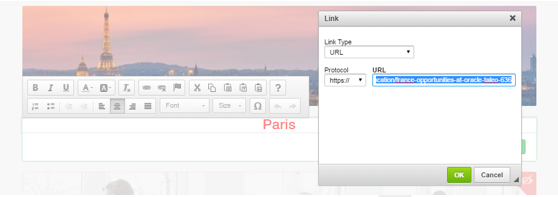
This example below is composed of one Image block with one Heading block placed beneath it. The link is placed on the Paris Heading block so that the Landing page for Paris will open within the same browser tab.

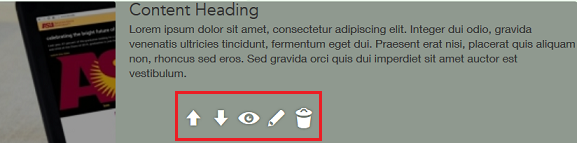
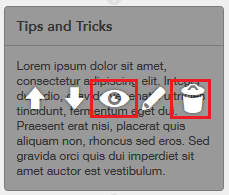
Once a new content block is added to a page it can be edited, moved, hidden or deleted.
Changes are saved as the user works and saves throughout the Site Editor. Flipping the blocks triggers a refresh that allows the user to see the content in the Site Builder mode, but these changes are not published to the live site until the user selects Publish.
Deleting and Hiding Content Blocks
One of the benefits of this feature is the ability to create a clean site or whitespace where you can begin creating a customized site. This is accomplished by hiding or deleting content blocks and disabling modules. Disabling modules is detailed in the next section of this chapter.
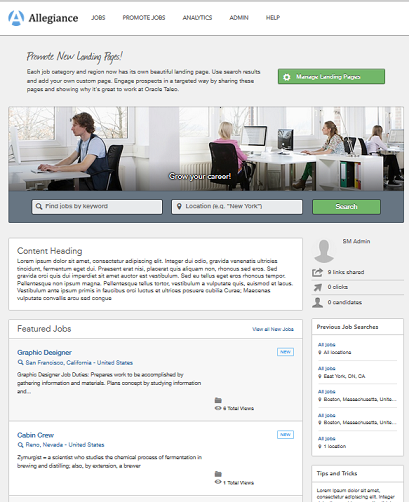
For example, the image below is an example of the default site accessed through Site Builder:
Very quickly the site shown above can be transformed into the site shown below with a few clicks.
To hide content, users click on the Eye icon. To delete content, users click on the Trash Can icon.
While not a necessary starting point, users can continue to hide and disable content until they are left with a white space to begin their custom site if that's their preference.