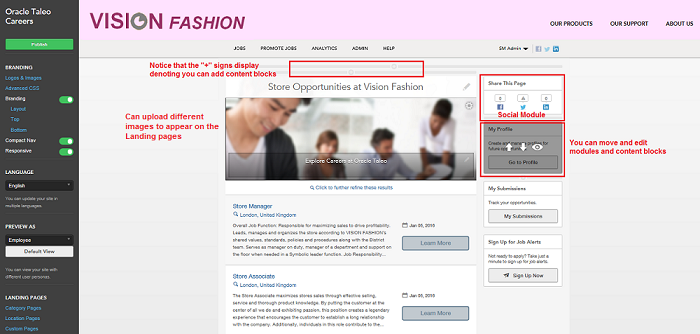
Landing Page Management and Landing Page Tiles
Although aspects of Landing Pages can be managed and maintained outside of Site Builder, the focus of this chapter is creating, managing and branding Landing pages within the context of Site Builder.
Location and Category Landing Pages
When Landing pages are enabled, Site Builder automatically populates and creates the Location and Category Landing pages. Administrators can then select any of those locations and categories from within Site Builder and customize and brand the associated Landing pages. An unlimited number of Landing pages may be created. As explained earlier in this document, the goal of a Landing page is to ease the navigation for users by targeting specific populations. For example, a Location Landing page could target the candidates that were interested in job opportunities in New York, whereas a Category Landing page could target the candidates that were interested in Retail Store opportunities. Landing pages take users directly to the information they're interested in; they do not have to look through the entire site for the opportunities in New York or for Retail Store opportunities; one click and they are there. Administrators can copy and email Landing page URLs or they can also post the Landing page URL to social media sites with one click using the Share module.
The image below is an example of how a default Category Landing page displays in Site Builder. Notice that the only jobs that are listed are those within the Sales and Marketing category.
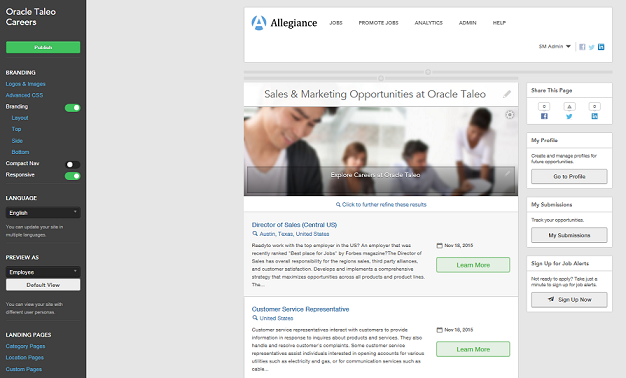
If you are working with a site that you've branded, such as our example, Vision Fashion, the branding elements you've already established will be carried over to the Landing pages. You can then continue to customize your Landing pages by adding or removing content blocks, enabling and disabling modules, etc.
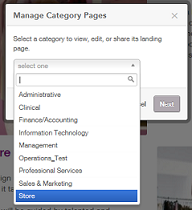
Path: [Sourcing] Login as Administrator > Configuration > Site Builder > Edit Site > [Landing Pages] > Category Pages
Custom Combination Landing Pages
A Custom Combination Landing page allows the combination of both category and location. For example, this may be useful if a company has many retail stores but wants to promote the jobs within a new store that is opening in a particular location. A Custom Landing page could gather all jobs that are store-related (category) in New York (location) only. The Promo module needs to be enabled to create Custom Combination Landing pages. Once it's enabled, be sure to Publish so that the change gets pushed to your site. Then, to create a Custom Landing page, perform a job search entering parameters for both category and location on your newly published site. Once you do this the Create a Landing Page button displays. Click this button and your new Landing page displays. You can then give your page a title and edit this page to your liking inside Site Builder. Once published, this Custom Landing page is available from within Site Builder as a choice under Landing Pages > Custom Pages.

Pinning Landing Page Tiles to the Home Page
If an organization chooses to use Landing page tiles on their Home page, Administrators can select which Category and Location Landing page tiles display by pinning tiles. Sourcing uses logic that places the tile with the highest number of new job openings first. There must be 3 new jobs for a tile to display. Then, if that requirement is met in more than one location or category, the tiles display in order of the number of jobs that are new. For example, if both Sales and Design have 10 open jobs, and 3 jobs in Sales are new and 6 jobs in Design are new, the Design tile is displayed first. Pinning Landing page tiles allows Administrators to override this existing logic.
Pinning Category and Location tiles and overriding this logic is useful as an organization may, for example, always have a need for Engineers or Sales Managers, no matter if these categories have new jobs in them. Or, they may generally have a high demand for jobs in certain geographic locations. The ability to pin tiles to the Home page gives Sourcing users the benefit of highlighting particular areas of need in their organizations. These needs are displayed using tiles on the Home page, which then links users directly to the associated Landing pages.
-
If there are 3 open jobs, not just new jobs, in any category or location, the tile can be pinned.
-
If a pinned tile has at least 3 open jobs, then it will display on the Home page; if not, it will stay hidden until there are enough jobs to populate a tile.
-
A maximum of 6 tiles can be pinned.
-
Unpinning the Landing page tile defaults it back to the original display logic.
-
The tile in the upper left is generated by the current algorithm and persists. It cannot be edited; this is the anchor.
-
If a candidate has selected preferences for specific job categories and locations, the tile will display according to their preferences if the 3 new jobs criteria is met.
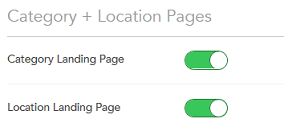
To be able to take advantage of pinning tiles, Landing pages must be enabled and you must select to have more than one tile displayed on your Home page. Both of these settings are in the Site Settings of your site.
Path: [Sourcing] Login as Administrator > Configuration > Site Builder > Edit Site Settings (Gear icon) > [Settings] > Category + Location Pages
Path: [Sourcing] Login as Administrator > Configuration > Site Builder > Edit Site Settings (Gear icon) > [Settings] > Home Page

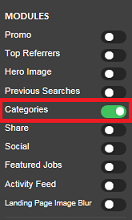
Also, for the tiles to display on the Home page, the Categories module must be enabled in the Site Builder.
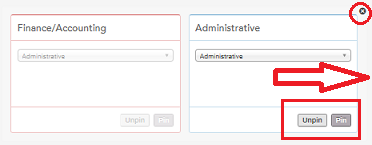
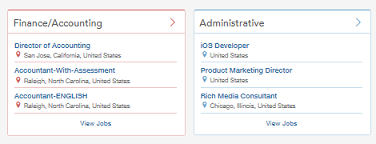
The image shows two Category tiles.
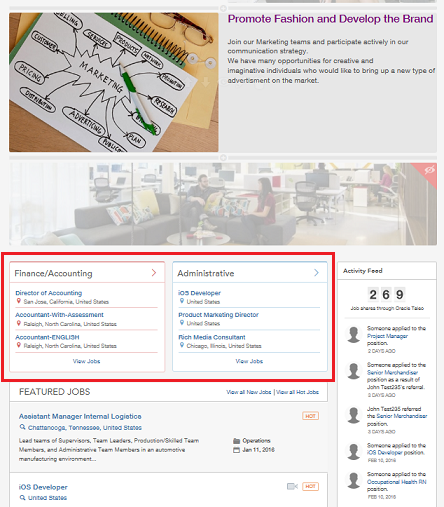
When pinning tiles, flipping the page by clicking on the X triggers a refresh and allows users to see the new tiles in the Site Builder mode.