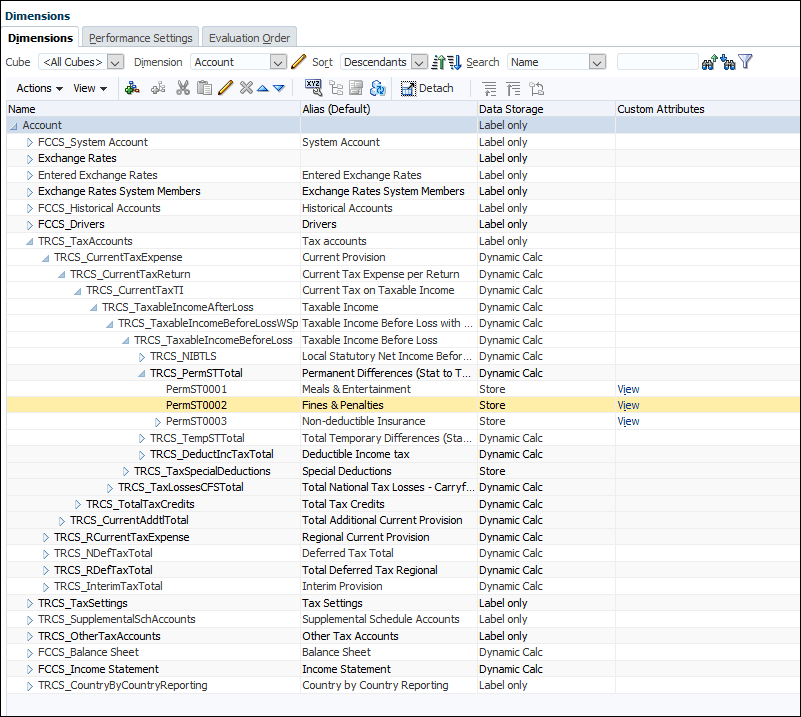
Account Dimension
The Account dimension represents a hierarchy of natural accounts. Accounts store financial data for entities and scenarios in an application, and provides the Account properties for Income Statement Accounts. Each account has an Account type, such as Revenue or Expense, that defines its accounting behavior. Every application must include an Account dimension.
Note:
The Account dimension is usually defined as dense, so you cannot assign attributes to it unless it is changed to sparse for all application types. After migrating an application to a Dense/Sparse Optimized (DSO) application, where Account is a sparse dimension, you can create Custom attributes for the Account dimension. If you change a dimension from sparse to dense, all attributes and attribute values for that dimension are automatically deleted..The Account dimension stores:
- Trial Balance Chart of Accounts or Book Balance accounts
- Tax Accounts for calculation of a tax provision or Country-by-Country (CbCR) report
- Permanent or Temporary Differences
- R & D and other credits
- Net operating losses
- Additional Provision items

To define an Account Dimension:
- From the Home Page, select Applications, then Overview, and then the Dimensions tab.
- Click Account to display the Account dimension properties.

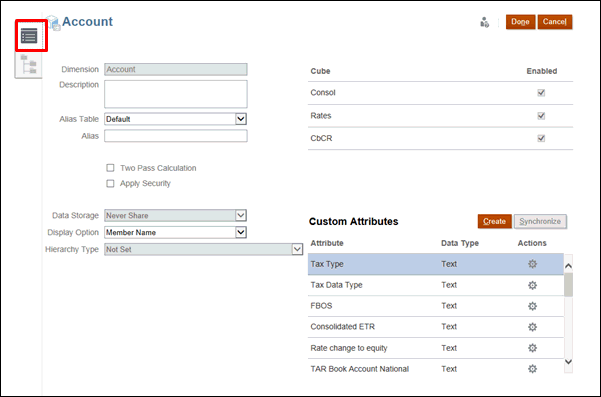
- Click the Edit Dimensions Properties tab
 .
.
- Select the appropriate optional properties for your application:
- Enter a Description for the Account dimension.
- Select an Alias Table, if available.
- Enter an Alias name for the Account dimension.
- Select Two Pass Calculation.
- Check to Apply Security.
- Select the type of Data Storage to be applied to the dimension:
- Label Only
- Never Share
- Dynamic Calc (Used for Parent members)
- Dynamic Calc and Store
- Store (Used for Base members)
- Under Display Option, select the option you want to display on the report: the Member Name or Alias in reports.
- Member Name
- Alias
- Member Name:Alias
- Alias:Member Name
- Select Hierarchy Type, if available.
- Under Cube, select which cubes you want to use. You can use Consol, Rate or CbCR.
- Optional: Under Custom Attributes, under Actions, select Edit to modify the custom attribute, or Delete to remove the attribute.
- Under Custom Attributes, click Create to add a new custom attribute. Enter a name for the attribute, and select the Data Type.

- Click Done.