Defining RTA Automation Rules
Return to Accrual (RTA) calculates the difference between the prior year provision and the tax return as filed.
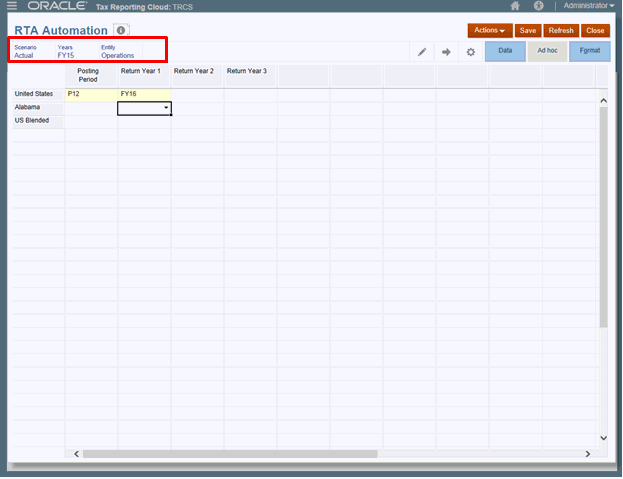
You use the RTA Automation screen to define rules for copying RTA adjustments. You can enter the source and destination Scenario and Reporting Standard members for copying RTA balances.
Note:
To define RTA Automation rules, you must have Administrator or Power User security rights.By default, Return to Accrual (RTA) amounts are calculated using the current year tax rate. If you want to use prior year tax rates on RTA amounts, see Applying Prior Year Rate on RTA Amounts.
Before you begin, in order for adjustments to be posted, the following tasks must be performed:
- The RTA form for the return year must be completed.
- The RTA period for the return year must be consolidated. See Working with RTA (Return to Accrual).
- Data Status should be OK for the RTA period in the return year.
To define RTA Automation rules:
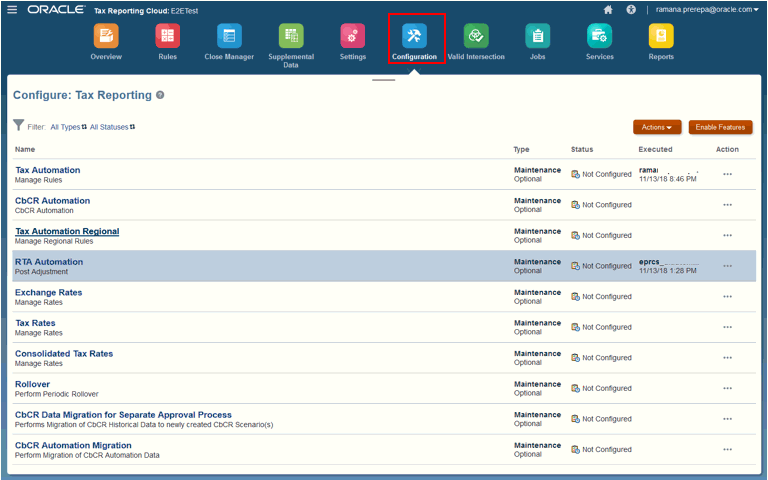
- From the Home page, select Applications, and then click Configuration.

- Select RTA Automation.

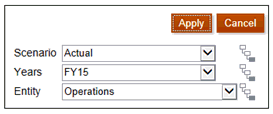
- Optional: Click
 to modify the POV for which the RTA automation has been configured, and then click Apply.
- From the drop-down under Posting Period, select the period to which you want to post the return adjustment.
- From the drop-downs under Return Year 1, Return Year 2, and Return Year 3, select the prior return year from which you want to pull the adjustments.
You can post return adjustments for up to three prior years to the same target provision year. Use Return Year 1, 2, and 3 to specify the prior return years to pull the adjustments from. For example, you may want to post the return adjustments from FY14 and FY15 into P10 of FY16.
- Click Save.
- Consolidate every scenario, year, entity, and period for which you have modified the RTA automation.