Creating a Confidential Application in OTM IDCS
The OTM-side confidential application registers OTM as a trusted resource server and validates tokens presented by AI Agent Studio, thus enforcing secure authentication and access.
- Sign in to the OTM IDCS Admin Console.
- On the Welcome page, select Take me there to go to the Identity Domain.
- Navigate to Identity > Domains.
- On the Domain page, select Integrated applications. This page is where you'll add an OAuth2 confidential client application.
- Select Add application.

- On the next page, select Confidential Application and select Launch workflow.
- On the Add Confidential Application page, provide a unique application
Name (for example
OTM_GTM_CONF_APP) and a Description.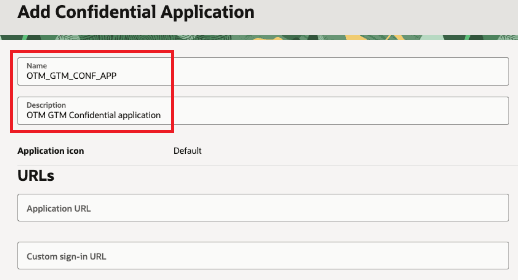 Remember: In the Prerequisites, write down the OTM IDCS confidential app Name. You will need it later.
 -
Select Submit. A new confidential application is created.
On the new application screen now configure OAuth as follows:
- Select the OAuth configuration tab.
- Select Edit OAuth configuration.
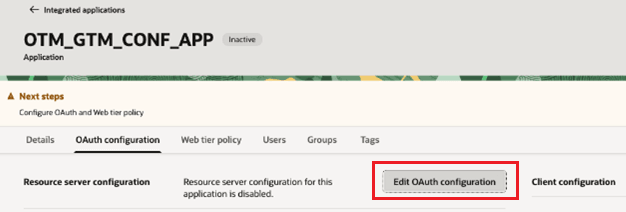
The OTM confidential application needs to be configured both as a Resource Server and Client Configuration. First, add a resource server.
- In the Resource server Configuration section, select the Configure this application as a resource server now option. The page will change to show more fields.
- Enter a Primary audience to protect the OTM APIs. The
primary audience should be your OTM instance URL (For example,
https://<otm_host_name>).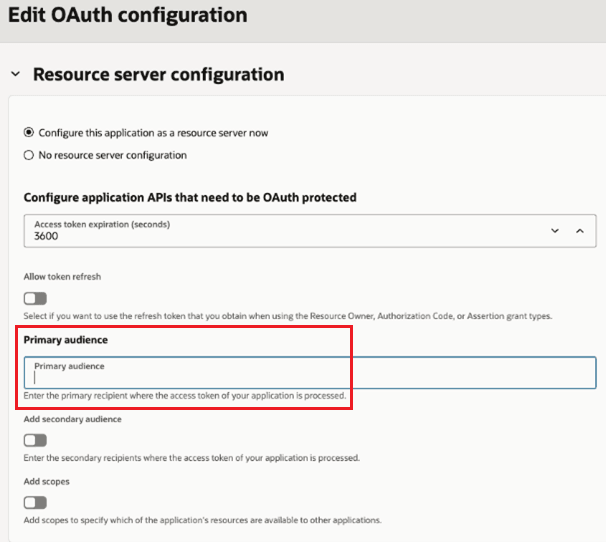 Remember: In the Prerequisites, write down the IDCS of OTM confidential app Primary audience which is the URL of your OTM instance. You will need this later.
Next, you add a scope.
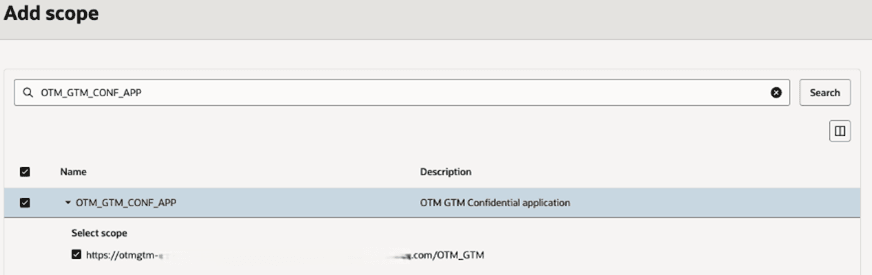
- Scroll down and select the Add scopes option.
- Select Add in the Scopes
section.

- Add a Scope (for example,
OTM_GTM_CONF_APP) and a Description.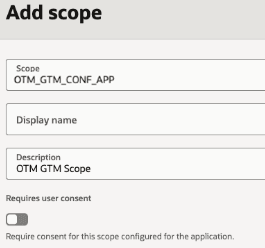 Remember: In the Prerequisites, write down the IDCS of OTM confidential app Scope. You will need this later.
 - Select Add.
Next, enable Client Configuration for this OAuth application.
- With the new scope added, select the Submit button.
You need to submit the OAuth configuration and then edit it again to see the scope that you just added.
- Select the Edit OAuth configuration button.
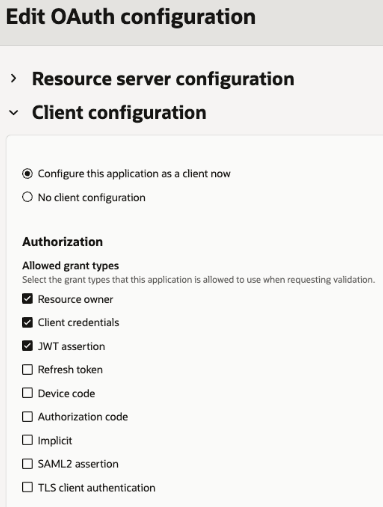
- Scroll down to the Client Configuration section and check the Configure this application as a client now option.
- Select the allowed grant types of Resource owner,
Client credentials, and JWT
assertion.
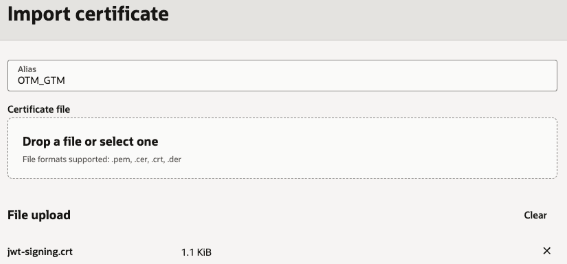
- Scroll down and select Import certificate.
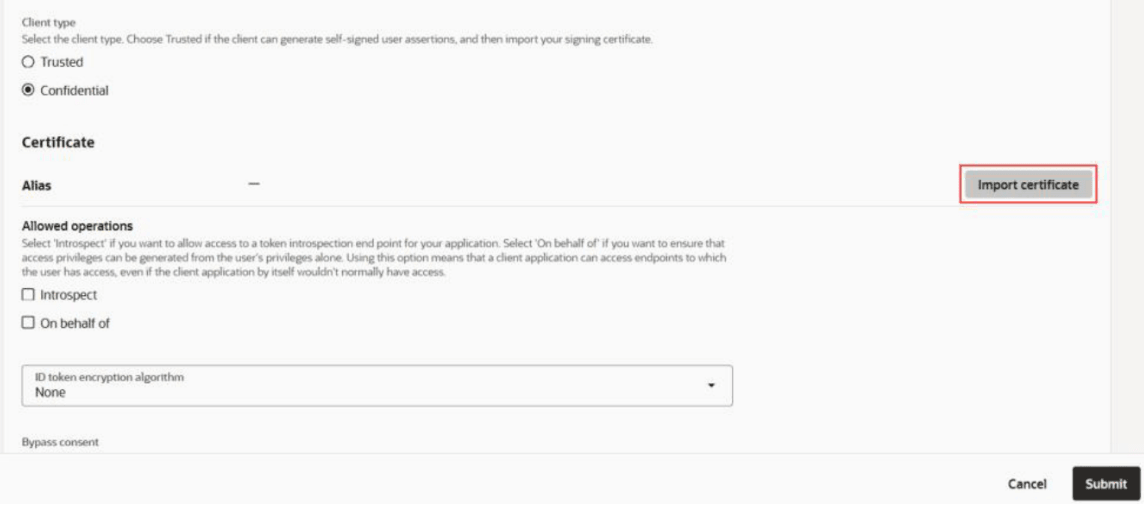
- Add an Alias for the certificate. For example,
OTM_GTMRemember: In the Prerequisites, write down the IDCS of OTM confidential certificate Alias. You will need this later. - Use the Drop a file or select one field to upload the
certificate. Upload the certificate
jwt-signing.crtthat was created earlier.Remember: Import the certificate that you created earlier. Generating Public/Private Keys with a Certificate - Once the certificate is uploaded, select Import.
- Scroll down and select Add resources.
- Select Add scope.
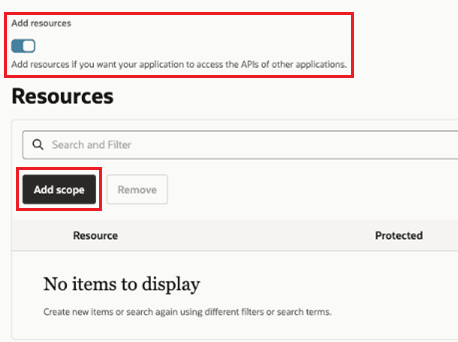
- Under Add scope, select the Scope
created previously.Remember: Use the value that you wrote down for the IDCS of OTM confidential app Scope in Prerequisites.
- Select Add.
- Select the Submit button to complete the OAuth set up.
- Select Actions and select
Activate.
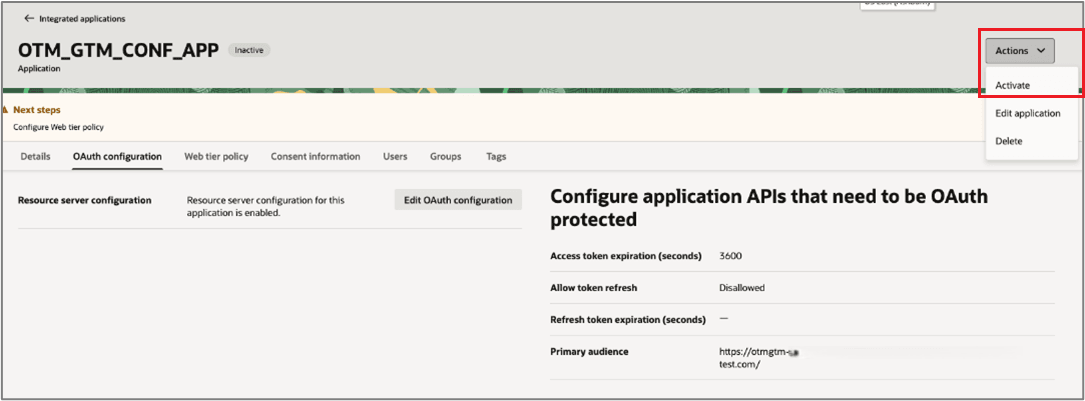
- On the Activate application message, select Activate application.