Package UOM
Define UOM at the Item Level
You now can define the Primary UOM for an Item in Item UI. By defining UOM at the item level, you can manage inventory in the warehouse better. When warehouses are dealing with various items, then having UOM for each items makes clear distinction about the properties of them.
You also now can configure UOM at the Pack and Case level. With support for UOM at the packs/case level, you can configure any UOM's which will help in floor operation for better understanding.
To help you manage UOM, the following three fields are now available in the Item UI:
- Primary UOM :Primary UOM field is displayed below the Barcode field in the Item UI.
- Pack UOM:Pack UOM is displayed below the Std Pack Qty field in the Item Detail UI.
- Case UOM:Case UOM is displayed below the Std Case Qty field in the Item Detail UI.
Three new filters have been introduced for the Item UI to filter items based on the UOM, each filters has all the UOM configured. On selecting specific UOM in the filter, the system displays items matching with the filter criteria.
UI Package UOM
The following columns are available in the Item UI to define UOM:
- Primary UOM: Default value for primary UOM is set to Units.
- Pack UOM: Default value for Pack UOM is set as blank.
- Case UOM: Default value for Case UOM is set as blank.
The following column is available on the Item Facility entity to define the following UOM:
- Primary UOM: Default value for primary UOM is blank for item facility.
Selecting Pack and Case UOM for an Item
When creating an item, you can choose UOMs that are configured as a Package UOM in the UOM UI screen and based on the UOM class code, the Pack UOM and Case UOM can be selected for an item. The system allows the UOMs that have ‘is Package UOM Flag’ enabled for Pack UOM and Case UOM field. And, if the Primary UOM belongs to a non-system UOM class, then Pack UOM and Case UOM is fetched from Primary UOM class once is Package UOM flag enabled in the UOM screen.
- In the Pack UOM/Case UOM drop-down list, only the UOMs within the same class as the item Primary UOM is available for selection
- To configure Pack UOM/Case UOM, you have to provide values for Standard Pack Quantity and Standard Case Quantity, respectively
- Once the item is created, the default values are displayed as 'Packs' and ‘Cases’
- For the Item Input Interface file, the validation has been introduced and you can upload following the same process as Item UI.
Create Derived Volume and Area Dimension from Input Interface
You can derive the volume value and volume UOM based on the dimensions that were sent in the interface file. The system can now determine the volume UOM based on the dimensions from the input interface file.
You can support UOMs for dimension/volume and then the system can determine the volume based on the input from dimension UOM.
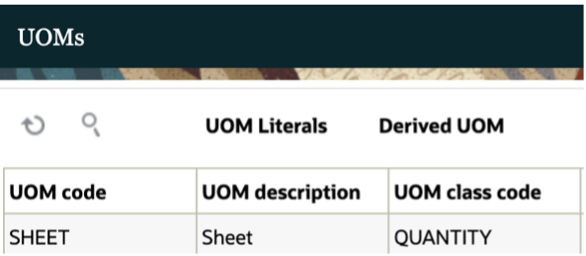
To create derived volume UOM and derived area UOM, Select the ‘Derived UOM’ action button. The following fields are available in the Create/Copy/Edit flow:
- Dimension UOM
- Derived Volume UOM
- Derived Area UOM
The following preceded entries define the Derived Volume, Derived Area UOMs:
| Dimension UOM | Derived Volume UOM | Derived Area UOM |
|---|---|---|
| Millimeter | Cubic Millimeter | Square Millimeter |
| Centimeter | Cubic Centimeter | Square Centimeter |
| Meter | Cubic Meter | Square Meter |
| Foot | Cubic Foot | Square Foot |
| Inch | Cubic Inch | Square Inch |
| Yard | Cubic Yard | Square Yard |
For the Predefined flag:
- Flag value is set as Yes for the seeded data.
- Flag value is set as No for user created derived Volume UOM and Area UOM.
A child UI is available for you to configure the derived Volume UOM and Area UOM for dimension UOM class+.
The following permissions are required to control CRUD operations of derived UOM:
- UOM/ Can Create Derived UOM: On having "UOM/ Can Create Derived UOM" permission, you are allowed to create the derived Volume/ derived Area UOM against the dimension UOM.
- UOM/ Can Edit Derived UOM: On having "UOM/ Can Edit Derived UOM" permission, you are allowed to edit and save the derived Volume/ derived Area UOM against the dimension UOM.
- UOM/ Can Delete Derived UOM: On having "UOM/ Can Delete Derived UOM" permission, you are allowed to delete the derived Volume/ derived Area UOM against the dimension UOM.
- By default, all three new permissions cannot be assigned to users (Except users with an administrator role).
- Users with group permissions enabled for their respective groups can perform the CRUD operations on derived UOM.
You can only select those dimension UOM for which the Derived Volume or Derived Area is not defined.
After selecting the dimension UOM:
- You can now select Volume description from the available volume UOMs in the derived volume UOM field.
- You can select area description from the available area UOMs in the derived Area UOM field.
Define Primary UOM for Items in Item Interface
In order to better track inventory in the warehouse, you can define the Primary UOM for items through Item Interface and you can define the UOM against each item., Six fields are available on the Item Interface for (XML/PSV/XLS) formats:
- Primary UOM
- Pack UOM
- Case UOM
- Weight UOM
- Volume UOM
- Dimension UOM
- The conversion happens based on the Weight/Volume/Dimension UOMs set at the company level.
- Additionally, The Weight, volume and dimension UOMs is the same class as defined at the company UOM class.
Sort Inventories Based on Primary UOM using Selection Criteria
Item Primary UOM and Item Facility Primary UOM selection criteriacolumns are available in multiple screens. These are useful for you to sort the inventories based on the primary UOM and you can represent the inventories handled within the warehouse with other UOM classes such as Quantity, Weight, Length, Volume, and Area.
The following screen contains the new selection criteria:
In the Putaway Type CalcRule screen:
- Select Final Putaway type.
- Click Selection Criteria.
- Click Insert Basic Operation and select Sql Operator from the drop-down list.
- Select Item primary UOM or Item Facility Primary UOM from the Column Name drop-down list.
- Provide the Column Value and click Save.
In the Task Creation Template screen:
- Select Template Type.
- Click Details and select Task Creation Template.
- Click Selection Criteria.
- Click Insert Basic Operation and select Sql Operator from the drop-down list.
- Select Item primary UOM or Item Facility Primary UOM from the Column Name drop-down list.
- Provide the Column Value and click Save.
- Click Ordering Criteria.
- Select
 icon.
icon. - Enter Sequence number and select Item primary UOM or Item Facility Primary UOM from the Order by Column drop-down list.
- Enter the Break by Count.
- Click Save.
- Select
In the Cubing Rule screen:
- Select Cubing Rule and click Details.
- Once the cubing rule is selected, click Selection.
- Click Insert Basic Operation and select Sql Operator from the drop-down list.
- Select Item primary UOM or Item Facility Primary UOM from the Column Name drop-down list.
- Provide the Column Value and click Save.
- Click Ordering Criteria.
- Click the + icon.
- Enter the Sequence number and select Item primary UOM or Item Facility Primary UOM from the Order by Column drop-down list.
- Enter the Break by Count.
- Click Save.
In the Wave Template screen:
- Select an existing or newly created Template.
- Click Wave Template Search.
- Select an order and click Dynamic Wave Search.
- Select any existing or newly created order and click Selection Criteria.
- Click Insert Basic Operation and select Sql Operator from the drop-down list.
- Select Item primary UOM or Item Facility Primary UOM from the Column Name drop-down list.
- Provide Column Value and click Save.
In the Outbound Audit Rule screen:
- Select an existing or newly created Outbound Audit.
- Click Selection Criteria.
- Click Insert Basic Operation and select Sql Operator from the drop-down list.
- Select Item primary UOM or Item Facility Primary UOM from the Column Name drop-down list.
- Provide Column Value and click Save.
In the OBLPN Putaway Type Determination screen:
- Select an existing or newly created OBLPN Putaway.
- Click Details and select any Final Putaway Type.
- Click Selection Criteria.
- Click Insert Basic Operation and select Sql Operator from the drop-down list.
- Select Item primary UOM or Item Facility Primary UOM from the Column Name drop-down option.
- Provide the Column Value and click Save.
In the Inbound Sorting screen:
- Click the + icon.
- Enter Sort Zone and select Item primary UOM or Item Facility Primary UOM from the Criteria 1 drop-down list. You can select Criteria 2 if needed.
- Click Save.
In the Sort Receive screen:
- Click the + icon.
- Select Receive Station from the drop-down list.
- Select Item primary UOM or Item Facility Primary UOM from the Criteria 1 drop-down list. You can select Criteria 2 if needed.
- Select Condition from the drop-down list.
- Click Save.
You can configure the selection criteria values with different operators ( =, IN, NOT IN, etc.) and multiple rules can be configured for the selection criteria for a single rule.