Receiving
This section describes the Receiving transaction module.
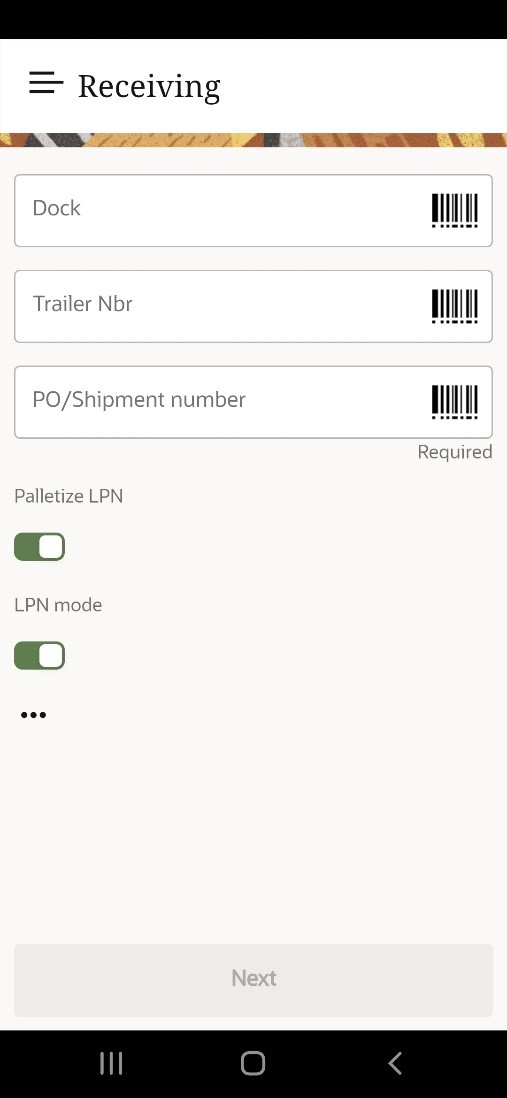
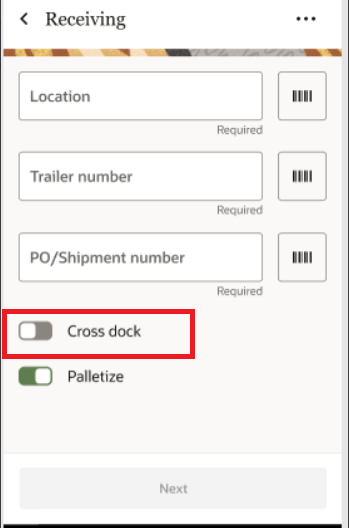
Login to your Mobile App > tap the Receiving module. The Receiving screen appears.
| Fields | Description |
|---|---|
| PO/Shipment number (Required) | Accepts PO or Shipment Number. If the PO has multiple shipments available, then a pop-up window is displayed with a list of possible values. |
| Dock | Accepts the Location barcode or dock number. |
| Trailer Nbr | Accepts the Trailer number. |
| Palletize LPN |
Enabled, by default. Accepts the pallet number of the LPN and the pallet screen appears. If the toggle is off, the respective receiving mode appears. |
| LPN Mode |
Enabled, by default. Receives LPN and prompts you to enter the content for the LPN. If the toggle is off, the receiving mode is switched to SKU mode receiving. An advantage of SKU mode is you can receive multiple LPNs that have the same content. |
| Cross Dock | Disabled, by default. Allows you to cross dock LPNs during receiving to help fasten the order fulfillment. |
| … | Allows you to customizes the Receiving screen layout. |
| Next | Click to proceed to the next screen. |
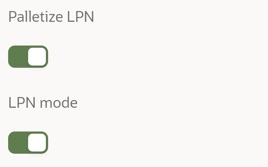
The Receiving screen has toggle buttons that are enabled, by default:
- Palletize LPN: When this toggle is enabled, you are prompted to scan a pallet in the next screen.
- LPN Mode: If the LPN mode toggle is enabled, you are prompted to scan a LPN and then the SKUs or inventory that belong to the LPN. If this toggle is disabled, you will be receiving using SKU mode.
- Cross Dock: The cross dock LPN is functional only after enabling the toggle and configuring a valid parameter values.
-
- Enter/scan the dock number or trailer number. Note: If you scan a dock number and an appointment is checked-in, the system will auto-populate the Trailer Number and PO/Shipment number fields.
- Enter the PO/Shipment number.
In order to find if the number entered is a PO or Shipment Number, the system will first look at the PO table and search for a matching number whose status is < than Received. Otherwise, it will look into the Shipment table and search for a matching number where the status is < than Receiving Complete.
-
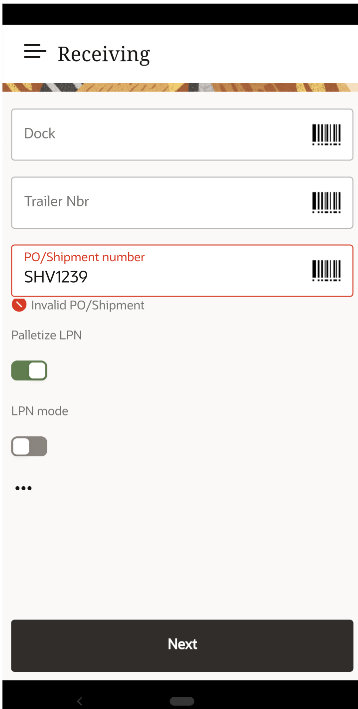
If an invalid PO or Shipment number is entered, the system displays an Invalid PO/Shipment error message. For example,
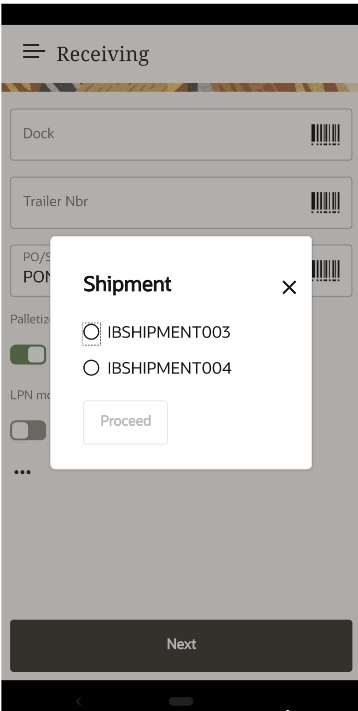
- If a value is available in the PO table, and the PO is related to
multiple shipments, then a pop-up is displayed for you to provide with
the Shipments linked to the PO. It will only show Shipments that are in
a status less than receiving completed. On selecting the shipment value,
the system will start the receiving process for the IB Shipment.
-
LPN Mode Receiving
- If Palletize LPN toggle and LPN Mode toggle is enabled. The system prompts for the pallet number in the next screen.
- Click Next.
- Enter the Pallet number in the Pallet Nbr field.
- Select the type from the list of values in the LPN type drop-down field.
- Choose the Pallet contains type:
- Click Single item LPNradio button to receive single item LPNs and click Next.
- Enter the LPN number in the LPN field > Enter the item Barcode in the Item Barcode field.
- Enter the quantity in the Units to receive > Quantity
field.
After successful receiving, the summary screen is displayed with the following options: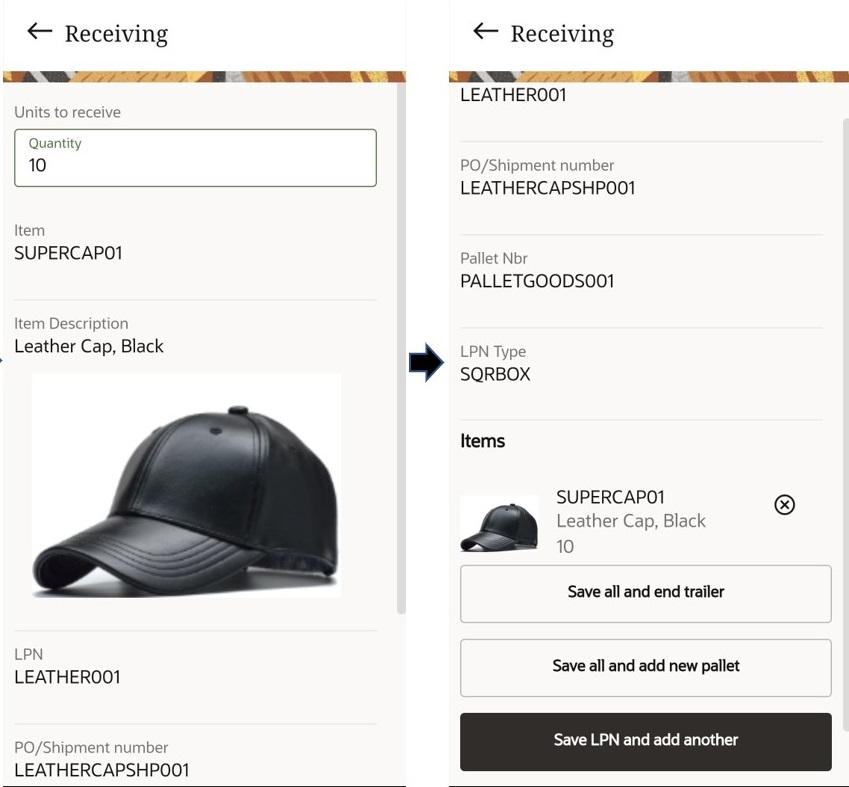
Summary Screen
Options Description Save all and end trailer Saves all the records, ends the trailer, and the app routes you back to the main Receiving screen to scan a new shipment. Save all and add new pallet Saves all the LPN records and ends the current pallet. You can use this option to add the remaining SKU from the same shipment but on a new Pallet. The screen flow returns back to the Pallet screen where you scan a new pallet number.Note: Enter a different LPN number for the new pallet.Save LPN and add another Save the current LPN and add the same or different SKU from the same pallet but on a different LPN. The screen flow returns back to the LPN screen where you can scan a new LPN for the same pallet. - Multi-item LPN: Supports receiving of multi- item LPNs.
- Select the Multi-item LPN button and click Next.
- Enter the LPN number in the LPN field > Enter the item Barcode in the Item Barcode field.
- Enter the quantity in the Units to receive >
Quantity field.
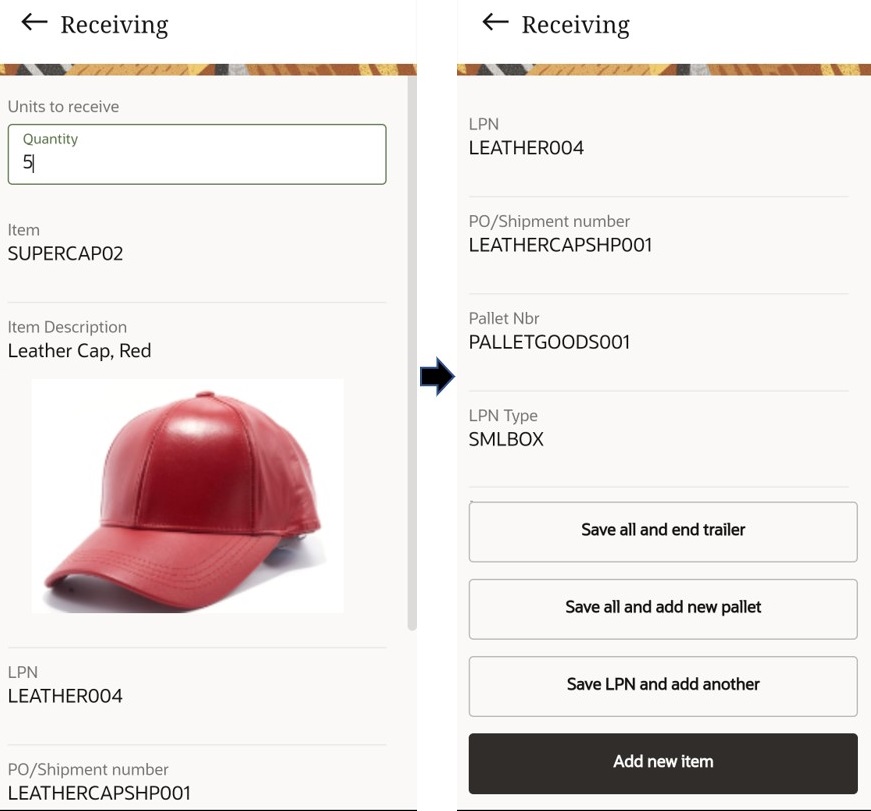
After successful receiving, the summary screen is displayed with the following options:Summary Screen
Options Description Save all and end trailer Saves all the records, ends the trailer, and the app routes you back to the main Receiving screen to scan a new shipment. Save all and add new pallet Saves all the LPN records and ends the current pallet. You can use this option to add the remaining SKUs from the same shipment but on a new Pallet. The screen flow returns back to Pallet screen where you scan a new pallet number.Note: Enter a different LPN number for the new pallet.Save LPN and add another Save the current LPN and add the same or different SKU from the same pallet but on a different LPN. The screen flow returns back to the LPN screen where you can scan a new LPN for the same pallet. Add new item This option is visible only if you receive multiple items by selecting Multi-item LPNs radio button Pallet screen. On tapping this option, the application takes you back to scanning the item barcode screen.
- Multi-item LPN: Supports receiving of multi- item LPNs.
SKU Mode Receiving
This is a great mode if you receive LPNs that contain the same inventory multiple times. In this mode, you are prompted to first scan the SKU, quantity, and then the LPN number. You can continue to scan all of the LPN at once, unless you need to change another set of inventory or LPN containing different SKUs.
The following shows the flow for receive a shipment in SKU mode:
- From the Receiving screen, enter the PO/Shipment number.
- If Palletize LPN toggle = enabled and LPN Mode = disabled. The system
prompts for the pallet number in the next screen.

-
Click Next.
- Enter the pallet number in the Pallet Nbr field > choose the pallet contains > Click Next.
- Enter the item Barcode in the Item Barcode field > Enter the quantity in Units to receive > Quantity field.
- Enter the LPN number in the LPN field.
After successful receiving, the summary screen is displayed with the following four options: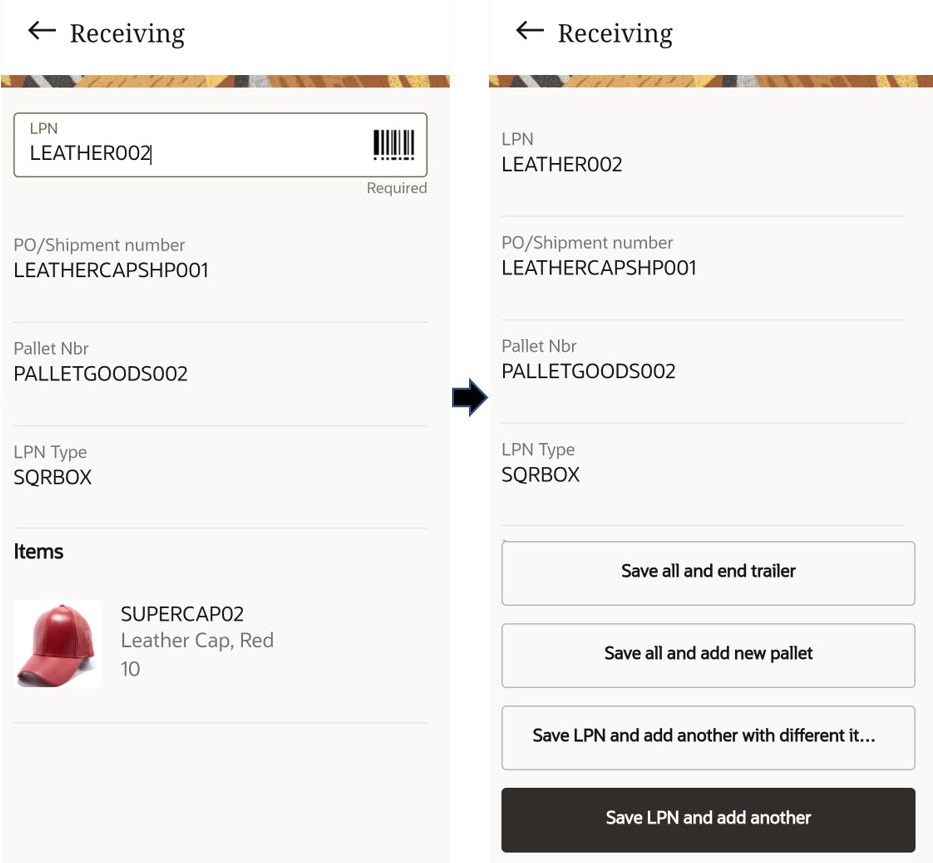
Summary Screen
Options Description Save all and end trailer Saves all the records, ends the trailer, and the app routes you back to the main Receiving screen to scan a new shipment Save all and add new pallet Saves all the LPN records and ends the current pallet. You can use this option to add the remaining SKU from the same shipment but on a new Pallet. The screen flow returns back to Pallet screen where you scan a new pallet number.
Note: Enter a different LPN number for the new palletSave LPN and add another with different item Saves the records and prompts you to scan another item barcode from the same shipment, quantity, and LPN. This screen flow returns back to Item Barcode screen. Save LPN and add another Save the current LPN and add the same or different SKU from the same pallet but on a different LPN. The screen flow returns back to the LPN screen where you can scan a new LPN for the same pallet.
Receiving LPN or SKU without Palletize mode
The following depicts the flow of receiving for a non-palletized shipment:
- From the Receiving screen, enter the PO/Shipment number. If
Palletize LPN = disabled and LPN Mode = disabled/enabled, the
application prompts you to the LPN type screen.

- Click Next.
- Choose the LPN type from the list of available LPN type descriptions > Click Save.
- Enter the LPN number in the LPN field > Enter the item barcode from the Item Barcode field.
- Enter the quantity in the Units to receive > Quantity
field.
After successful receiving, the summary screen is displayed with following options: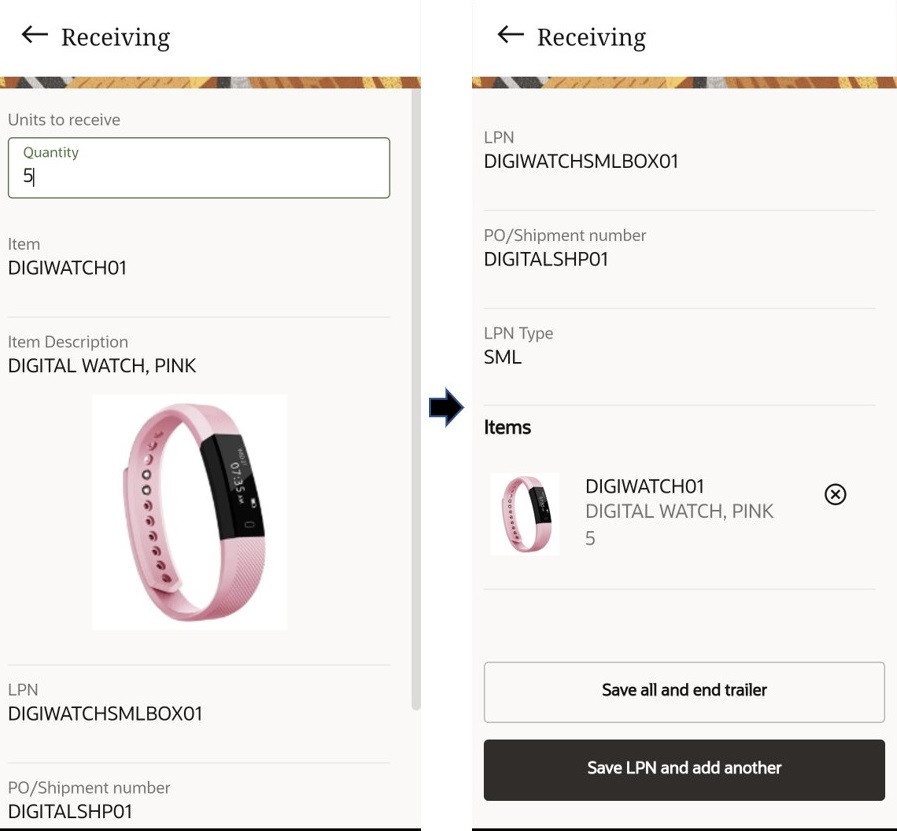
Non-Palletize Mode Summary Options
Options Description Save all and end trailer Saves all the records, ends the trailer, and the app routes you back to the main Receiving screen to scan a new shipment Save LPN and add another Saves the current LPN and add the same or different SKU from the same pallet but on a different LPN. The screen flow returns back to the LPN screen where you can scan a new LPN for the same pallet.
Cross Dock LPNs during Receiving
In your Receive module, enable the “Cross dock” toggle. On launching the receiving module, the Cross-dock toggle will be disabled, by default.
To help reduce the time needed for order fulfilment during receiving, configure the xdock-mode in the receiving module with the following parameter values:

| Parameter Values | Description |
|---|---|
| None | Do not cross dock |
| LPN Nbr and Single SKU Xdock | The system first checks the receiving LPN with the orders and their required LPN number. If the LPN number does not match, then the system will perform single SKU Xdock until the single SKU LPN. |
| LPN Nbr Xdock | Checks the receiving LPN with orders that required LPN number. |
| LPN Nbr , single, multi sku xdock facility | The system first matches the LPN with an order. If the LPN number does not match, then the system will Xdock single sku. If the LPN is multi sku, the system will Xdock facility, only if it is a facility order. |
| LPN Nbr Single and Multi-SKU Xdock | The system first matches the LPN with an order. If the LPN number does not match, then the system Xdock single sku but if the LPN is a multi sku, then the system will Xdock. |