Putaway
You can directly putaway one or more IB LPN to a location via the Putaway module. This transaction uses putaway types and putaway rules to determine the location. For more information on how to configure please refer to the putaway section of the Online Help.
Before you begin, configure the following screen parameter:
- Make sure you have an LPN that has a Putaway type defined.
- Configure the Putaway method priority.
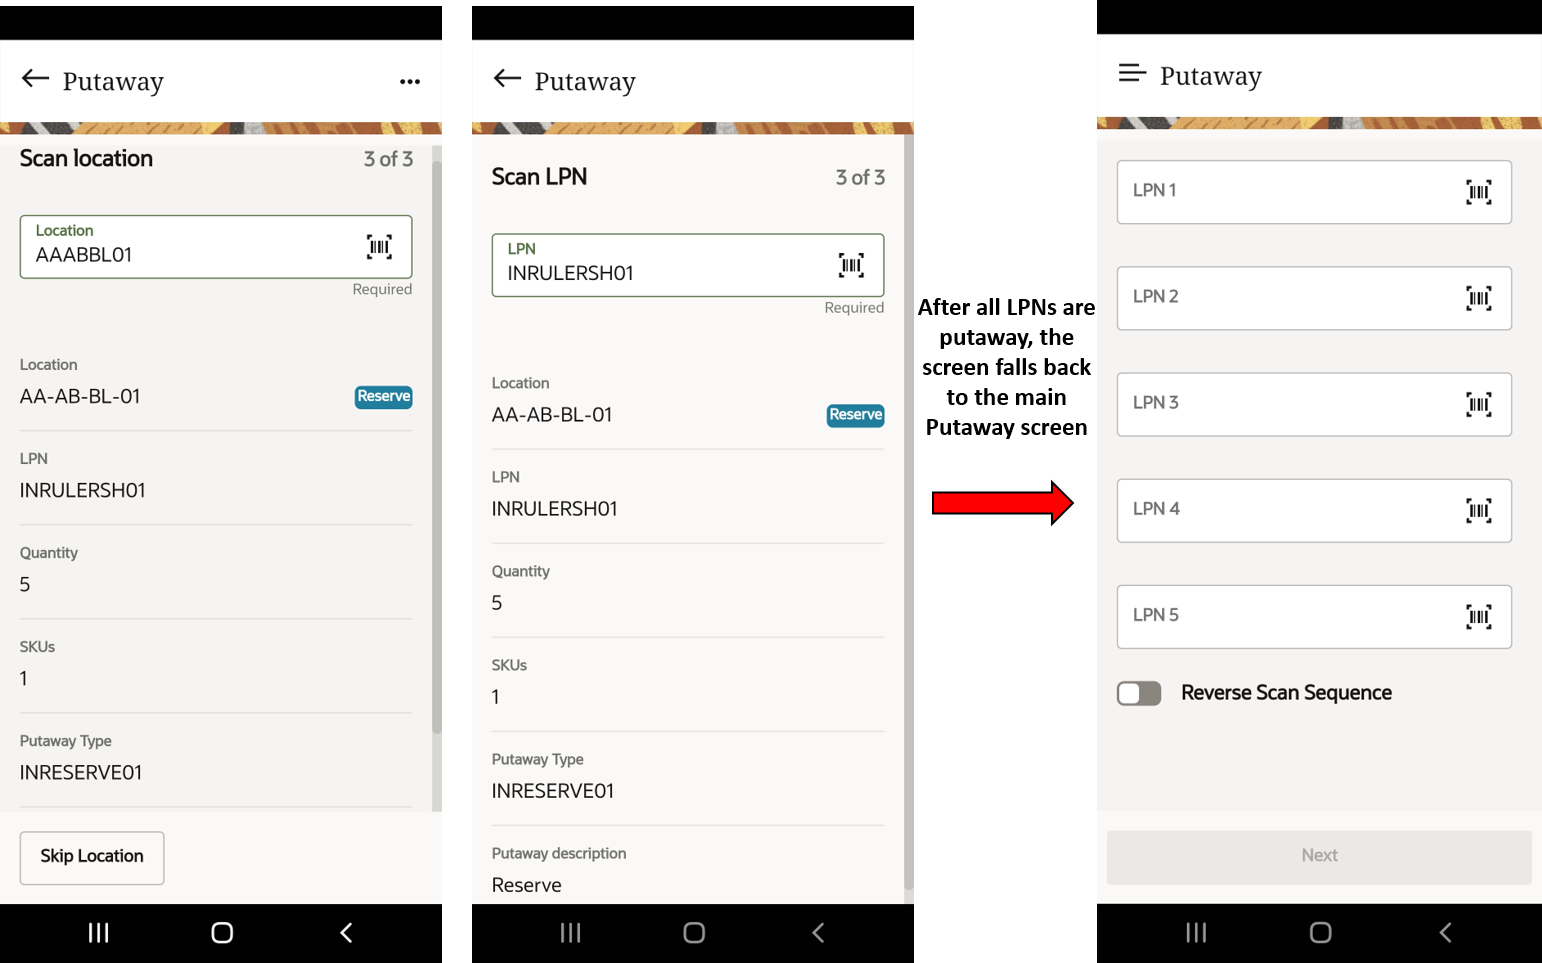
In the first screen, you are prompted to scan the LPNs that you want to putaway based on the numbers of scans defined by the screen parameter Max-lpns-to-putaway. To configure, do the following:
- Go to Modules > Putaway (VBCS) > Screen Parameter. Configure the
max-lpns-to-putaway parameter value. Note: The recommend parameter value that can be configured is up to 50.

Here, the parameter value is set to 5, and therefore the screen displays up to 5 LPN scan fields. Even though, the configure value is 5, it is not mandatory for you to scan all of the fields to continue Putaway.
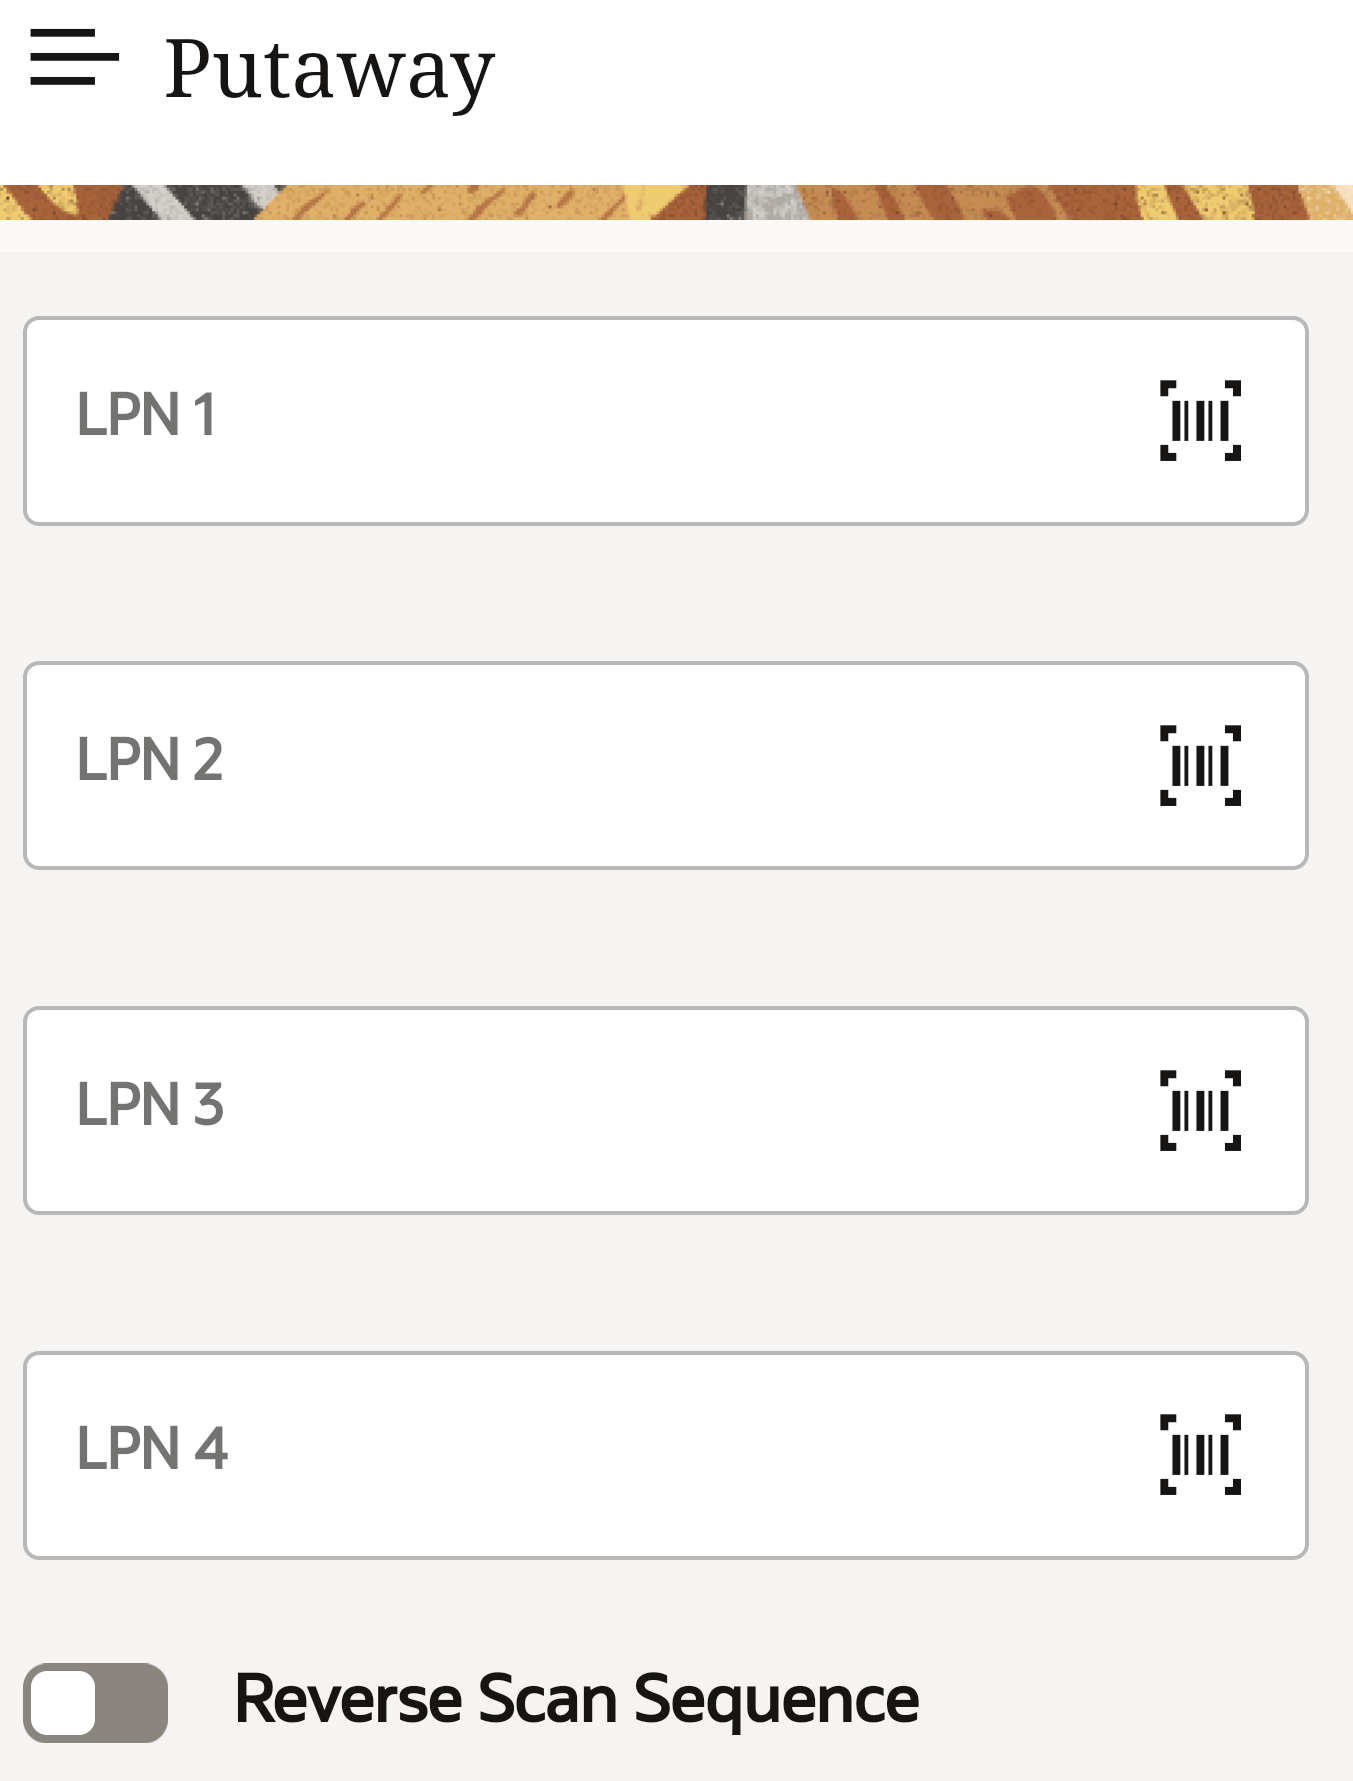
| Fields | Description |
|---|---|
| LPN | Enter/scan the LPN barcode. |
| Reverse Putaway Sequence toggle |
When the toggle is:
|
| Next | This button enables you to proceed when an LPN is scanned. Note: You do not necessarily have to scan all the
LPNs to continue. |
Reverse Putaway Sequence Toggle
The Reverse Putaway Sequence toggle allows you to decide the logic the system will use to direct you to the location.
| LPN | Location Putaway sequence |
|---|---|
| INLEGOSH01 | 101 |
| INWIRESH01 | 205 |
| INRULERSH01 | 150 |
When the toggle is disabled, the system will order the locations based on the putaway sequence. Therefore, you’ll be first picking INLEGOSH01 (LPS - 101), then INRULERSH01 (LPS - 150), and lastly INWIRESH01 (LPS - 205). This mode is focused on productivity. As you will be prompted to go to the location with the lower sequence, and putaway the inventory respectively.
The suggested loading sequence screen is a great tool. If you have equipment that allows you to accept multiple lpns such as a forklift, you will have a better picture of how to organize your LPNs. So, when you get to the location your LPN is accessible and you don’t have to waste time unloading and finding the LPN you need to putaway.
- Login to your Mobile App > tap Putaway module > Enter the LPN(s).
- When the toggle is enabled: You’ll pick the last LPN scanned and route to the locations according to the order that you have stacked the LPNs. That is, you’ll will be directed to putaway the LPNs where first you lift the INRULERSH01, then INWIRESH01, and lastly INLEGOSH01.
- In the Suggested Loading Sequence screen, you will see the reverse order of how you scanned your LPNs. You first stack INLEGOSH01 at the bottom in order for you to putaway INRULERSH01 first, and then go to the location for INWIRESH01, and lastly INLEGOSH01.
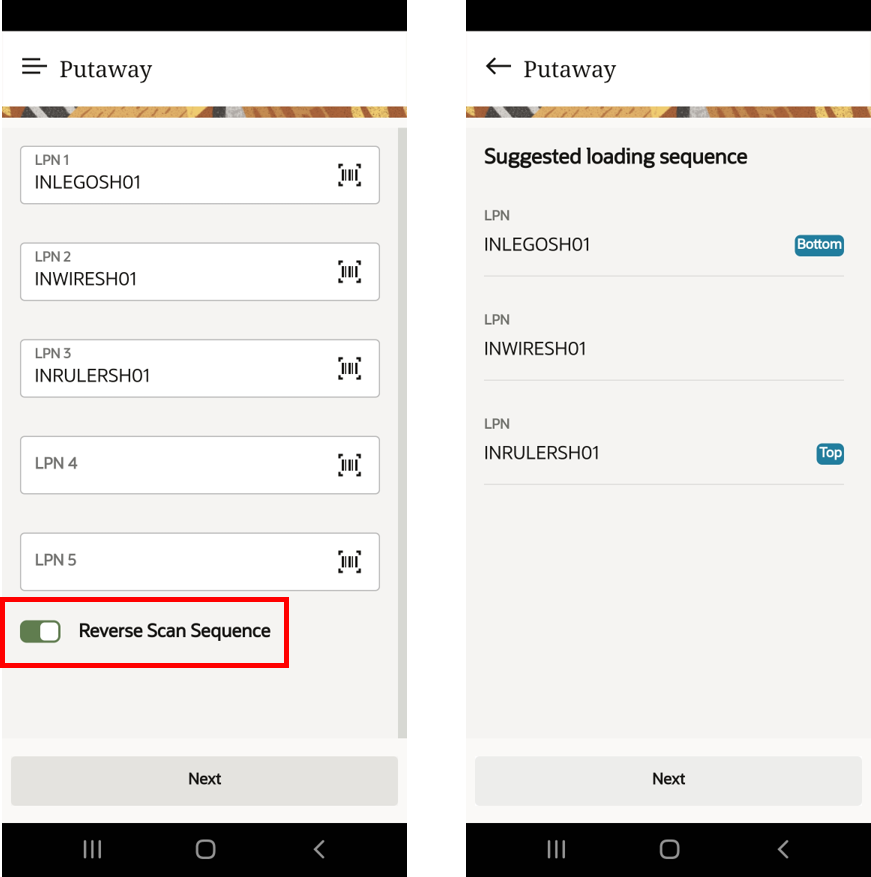
Ideally, this is a great functionality for you to putaway LPNs in scenarios where delicate items can be arranged accordingly to their weight or size. For example - you can avoid stacking heavier LPN boxes on top of fragile items that might causes damages.
User Directed Putaway
In user directed putaway, the Suggested Loading Sequence screen suggests the order you can load/stack LPNs to your putaway equipment.
If the toggle is disabled, the system will do putaway based on the calculated Putaway Location sequence. This optimizes organization of your inventory and will save you time during loading.
- After you enter the LPNs, disable the toggle and continue to click Next. The
Suggested location sequence screen appears.
You either click Next to proceed with the suggested order or return back to the main screen and enable the toggle to reverse.
- The location screen prompts you to scan the location. Here, the system picks the
INRULERSH01 LPN to scan the location (AA-AB-BL-01) first based on the suggested
sequence.
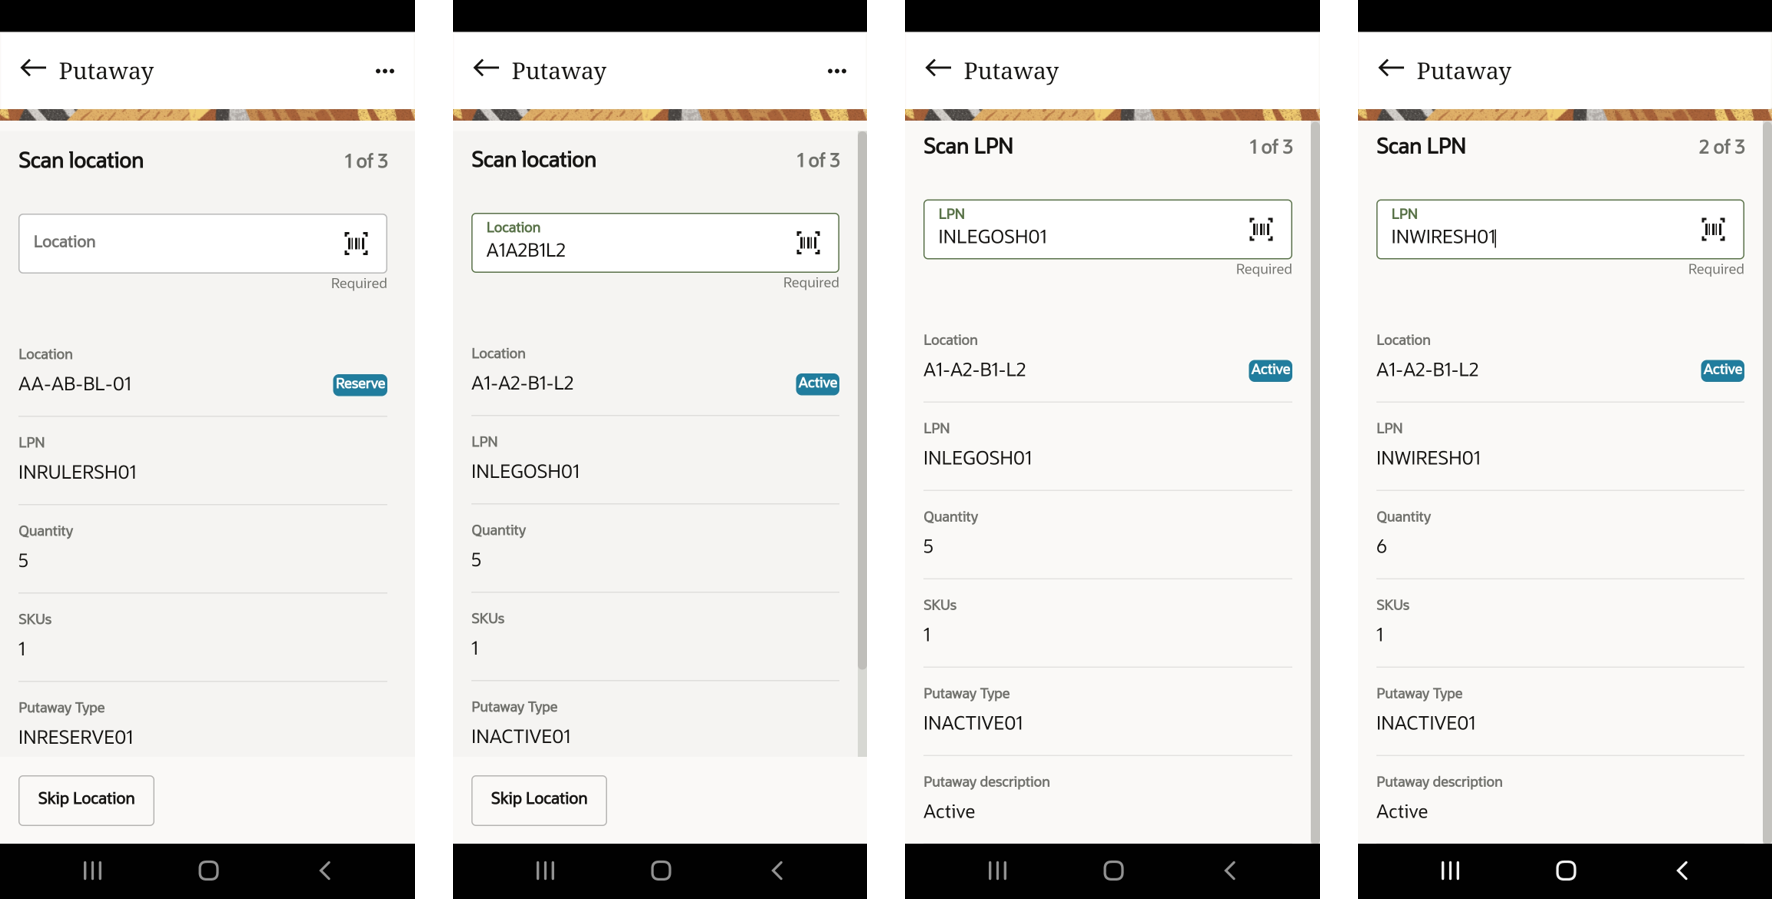
You can scan the location or skip the displayed location.
Skip Location: This button is available only in the Location screen. For example, you could use this button to skip a particular location - perhaps there is a spill - and continue to putaway other LPNs to their location. After putting away all the LPNs, the system loops back to the skipped location and prompts you to scan the location again.
- Click Skip Location on the Scan Location screen to skip. The system takes you to the next Scan location screen.
- Scan/enter the next location barcode for the LPN, here A1A2B1L2. The location
details for the LPN is already displayed in the Location field. Note: The LPN will be directed to the location based on location putaway sequence.You can choose to Skip the location again or continue by clicking Next.
- Scan/enter the LPN barcode in the Scan LPN screen.
The LPN detail is displayed in the LPN field. You can continue to scan as many LPNs as you want.
-
After scanning all the LPNs, the system returns back to the skipped location. Here, the system loops back to scan the location AAABBL01 for LPN-INRULERSH01.
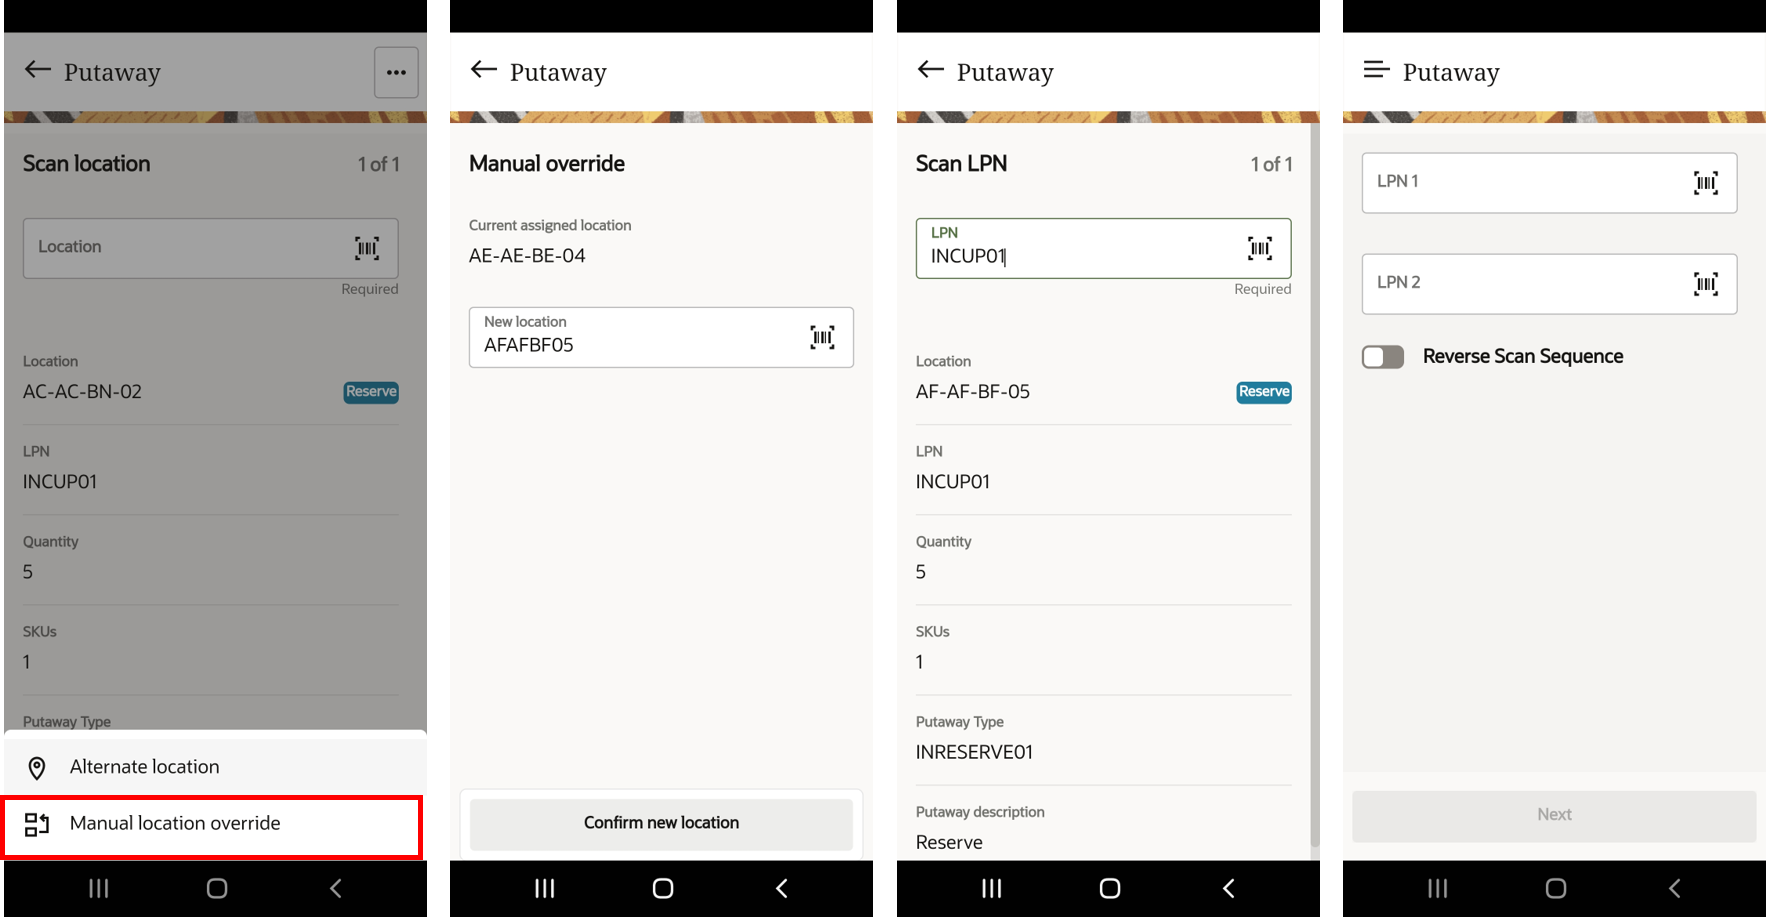
Overflow Menu Screen
The Putaway module also offers you the following two option in the overflow menu screen:
- Alternative location: This option will direct you to alternate locations based on the next putaway sequence.
- Manual location override: This option allows you to manually override and
specify the location where you would like to putaway your inventory.
- Login to your Mobile App > tap Putaway module > Enter LPN.
- Click the icon (…) in the Scan location screen opens an overflow menu
screen.
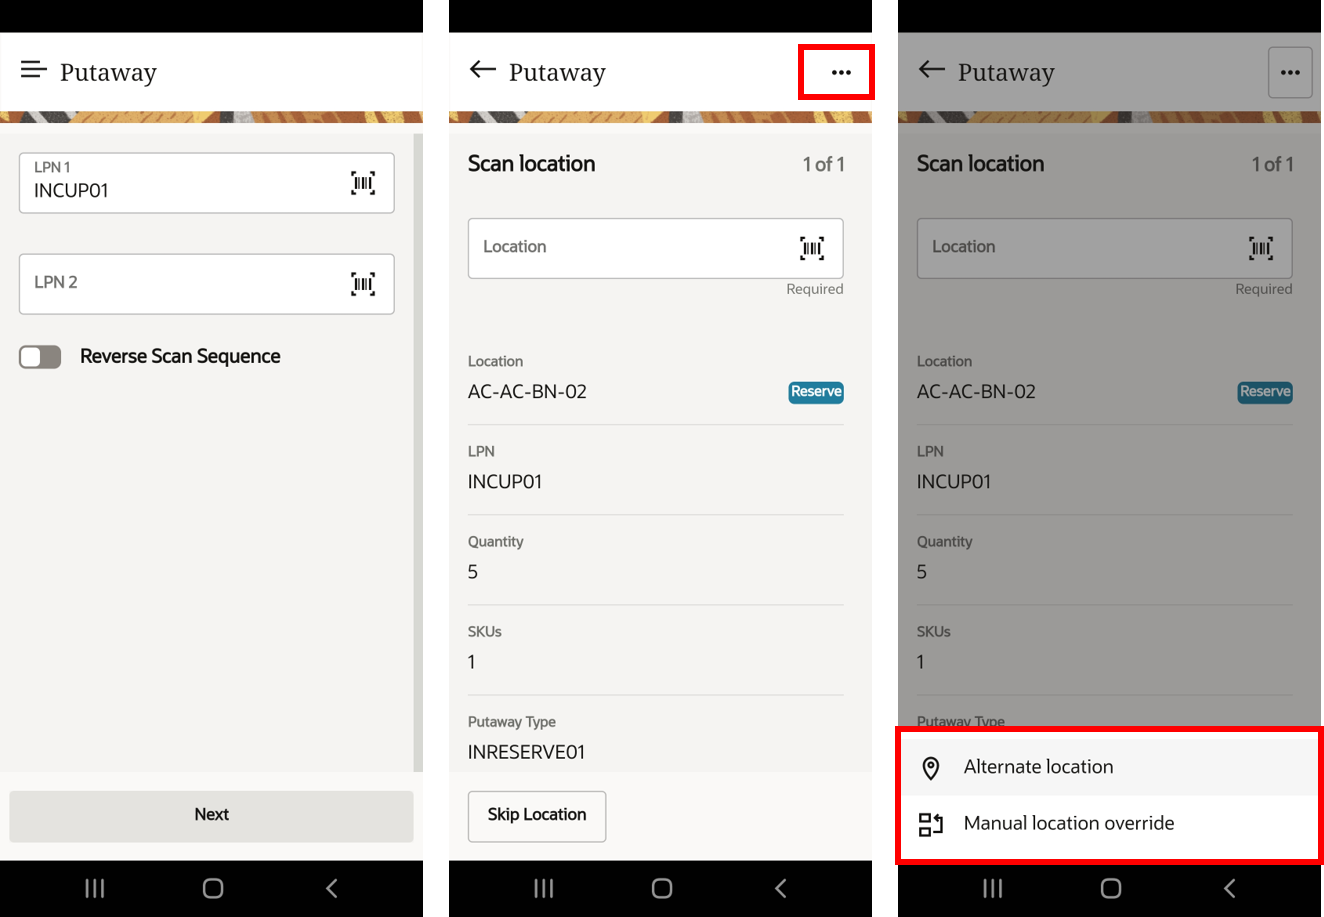
Alternate Location
- When you click Alternate location button, the Putaway Alternate
location screen appears with current location and Reason for Alt.
Location drop-down.
In this screen, you can choose the reason code from the list and request for a change location. On confirming, the application records the reason code and keeps a track of the reason.
-
Click Change Location, the screen displays previously, and alternative location and the Suggest another button is enabled.Note: The application writes an IHT activity 'IHT-86- Alternate location Reason code'. If you tap Cancel, you will be directed to the Scan Location screen where the original location of the LPN ready for putaway is displayed. When you click Alternate location button, the Putaway Alternate location screen appears with current location.
- You can click the Suggest another button to choose a different location. For example, AE-AE-BE-04 appears on the Alternative location. Click Change location.
- The LPN’s location will be updated in the Scan Location screen as shown
below:
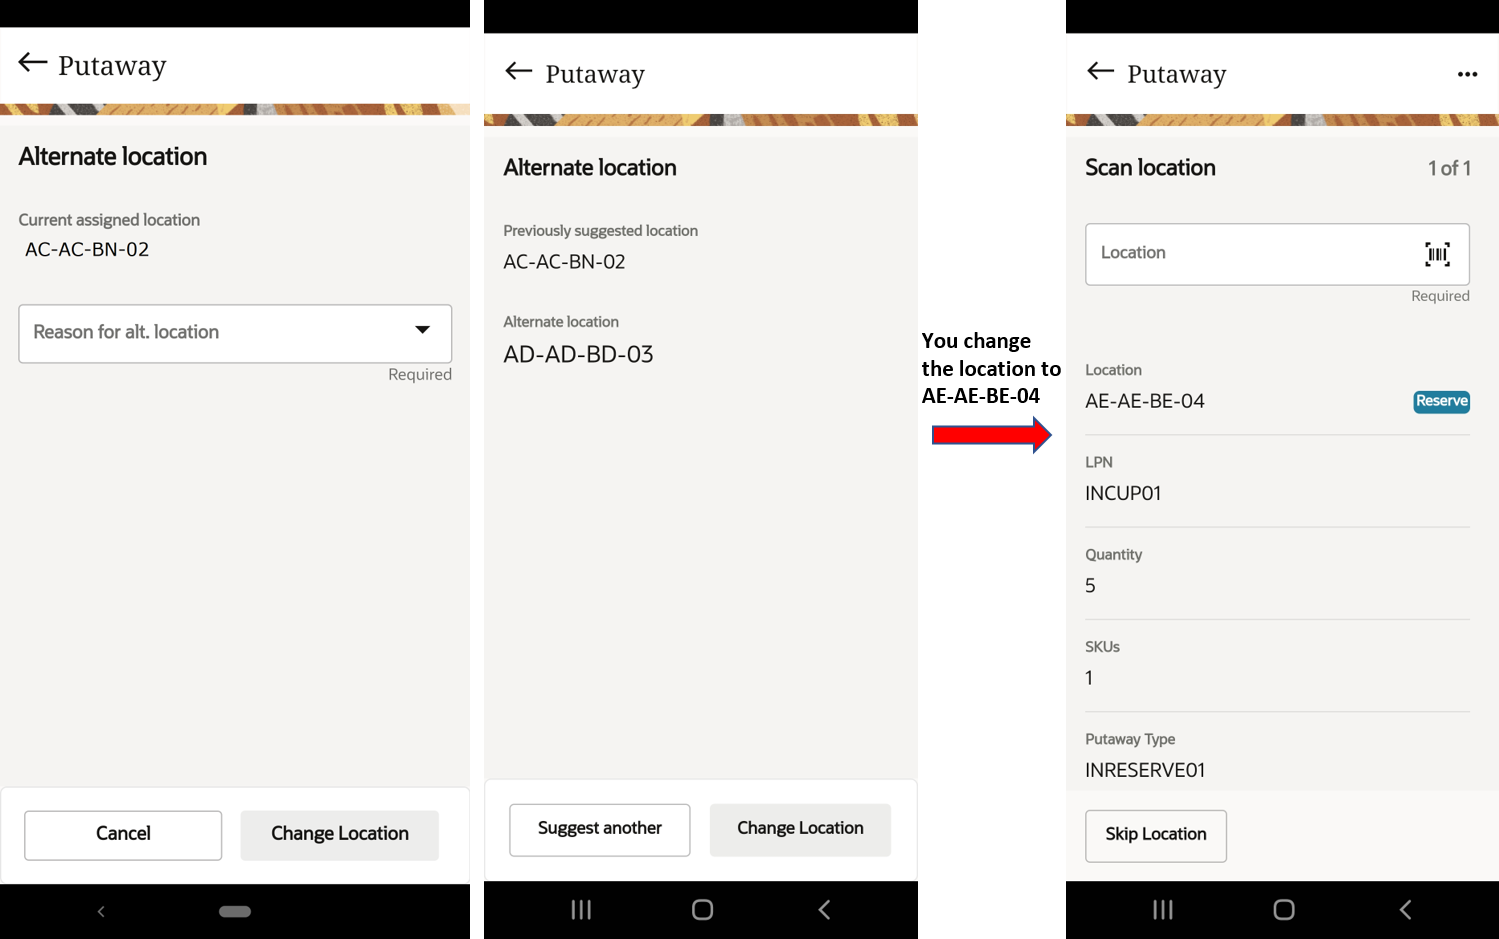
- Scan the alternative location barcode and proceed to putaway the LPN.
Manual Location Override
You can manually override the location based on your preference and scan a new location to putaway your LPN.
- Click on the icon (…) and select the Manual location override.
- The Manual override screen appears and prompts you to enter or scan the new location.
- Click the Confirm new location button to proceed.
- The system updates the new location in the Scan LPN screen and proceeds to putaway the LPN.
- After successful putaway, the screen routes you back to the main Putaway
menu.