Agent Builder
Use the Agent Builder or Workflow Builder to build, test, and deploy intelligent agents for any use case. Automate complex processes by combining modular components such as language models, data connectors, APIs, and specialized agents, all without extensive programming.
Agent Factory includes the following features:
- Drag-and-drop interface: Construct workflows visually by connecting nodes that represent specific actions, tools, or data sources.
- AI and automation integration: Build intelligent workflows using components such as large language models (LLMs), chat agents, and data processing tools.
- Custom agent creation: Define agents that autonomously perform tasks, make decisions, or interact with systems according to workflows.
- Multi-agent orchestration: Set up hierarchical agent flows, allowing a manager agent to delegate work to multiple specialist sub-agents.
- Connectivity: Integrate with enterprise systems, third-party services, cloud APIs, and databases.
- Reusable templates: Access adaptable workflow templates to meet various business requirements.
- Conversational context: Converse with the context of the previous 10 queries or messages retained within the conversational history.
- Validation and error messaging: Use enhanced workflow validation and improved error messages to construct workflows efficiently.
- Diagnostics collection: Collect application logs as a ZIP file for troubleshooting and support. See Collect Diagnostics.
Build Agents
An Agent Builder workflow is a graph of nodes connected by typed inputs and outputs. At runtime, Agent Factory evaluates the graph, passes values between connected nodes, invokes model or tool calls when a node requires them, and returns the final output through an output node.
Common output and input types include message, language model, dataframe, JSON, markdown, tool, embedding, agent, and Select AI. When a node cannot connect to another node, verify that the source output type matches the target input type. See Agent Builder Nodes and Sample Workflows to learn about the nodes available in Agent Builder and how to use them to build your custom workflows.
Use these practices when building workflows:
- Keep each node’s purpose narrow and explicit.
- Name prompts, tools, and agents with action-oriented descriptions.
- Use parser and type conversion nodes when a model response must become JSON, text, or another structured type.
- Restrict REST and MCP tools to the operations the workflow actually needs.
- Test in Playground after each major change instead of building a large graph all at once.
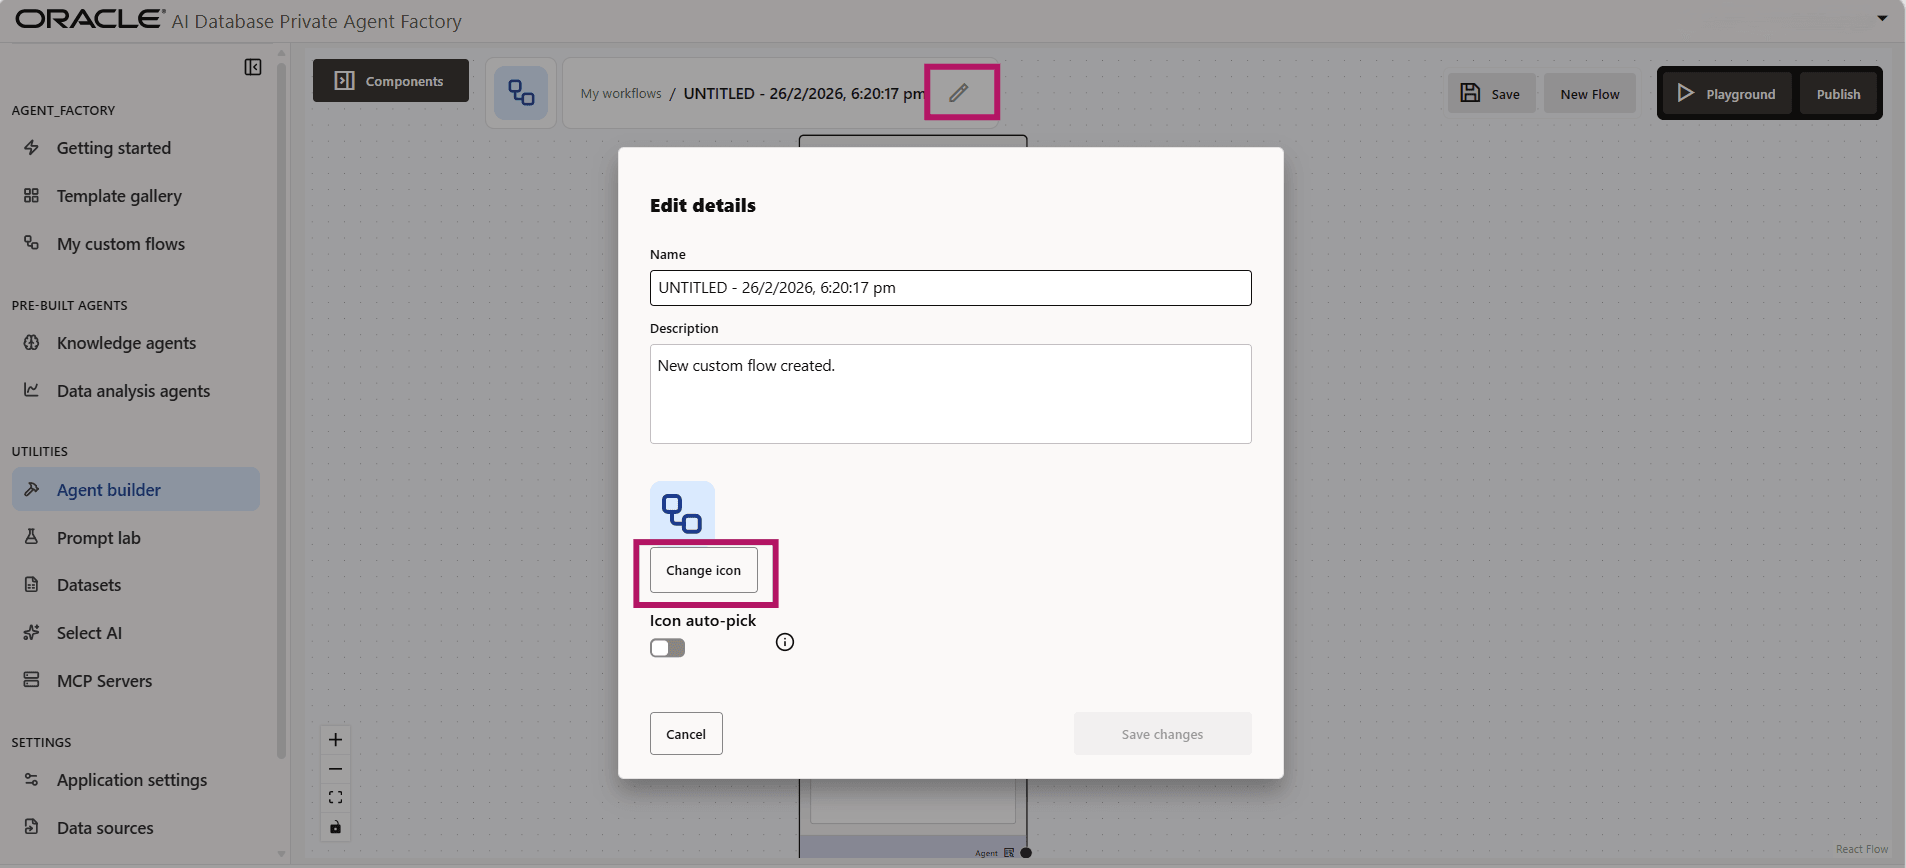
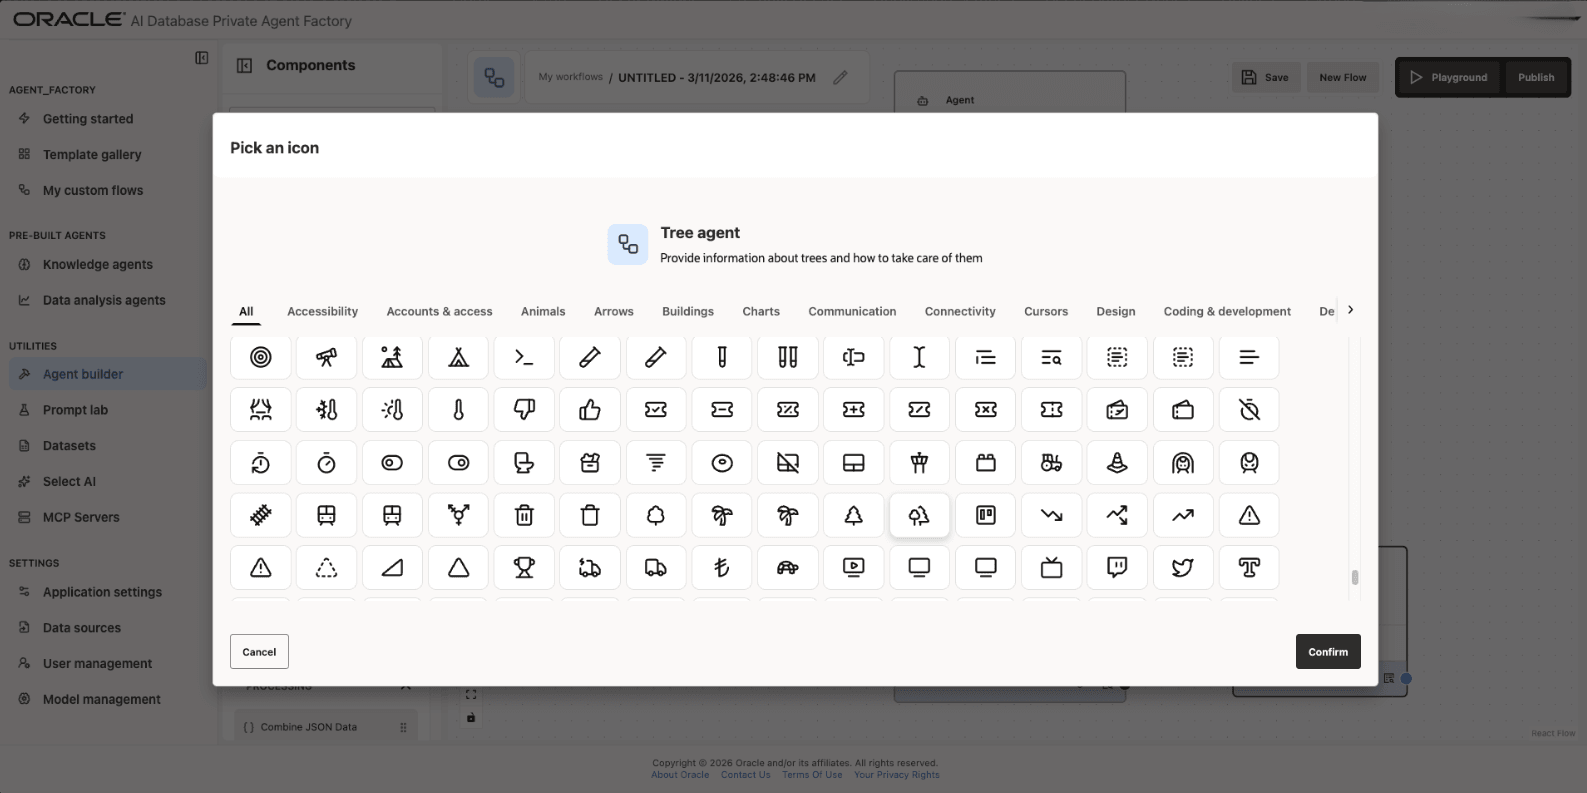
Provide a Name and Description for your custom flows by clicking the Edit icon. To personalize your agent, select an icon of your choice by clicking Change Icon and choosing from the full icon library. Enable Icon auto-pick to automatically select an icon based on the agent’s name and description.
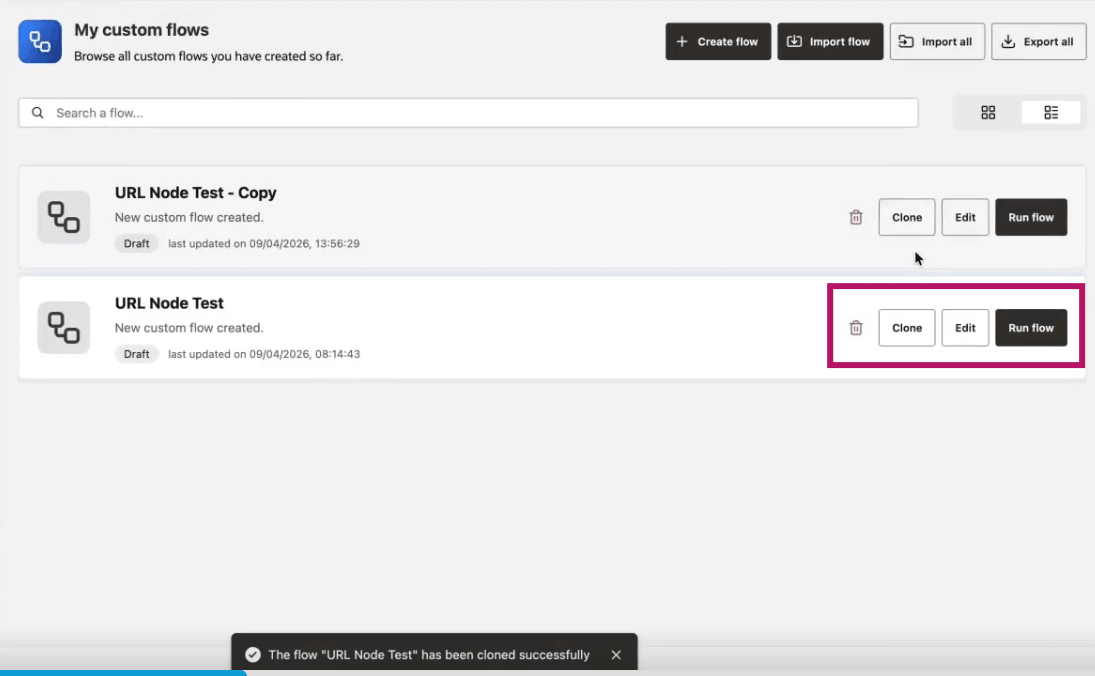
You can view your workflows under My Custom Flows in the left navigation menu. From there, you can edit, delete, run (to execute and validate), or clone a workflow to create a copy.
Test and Debug Agents
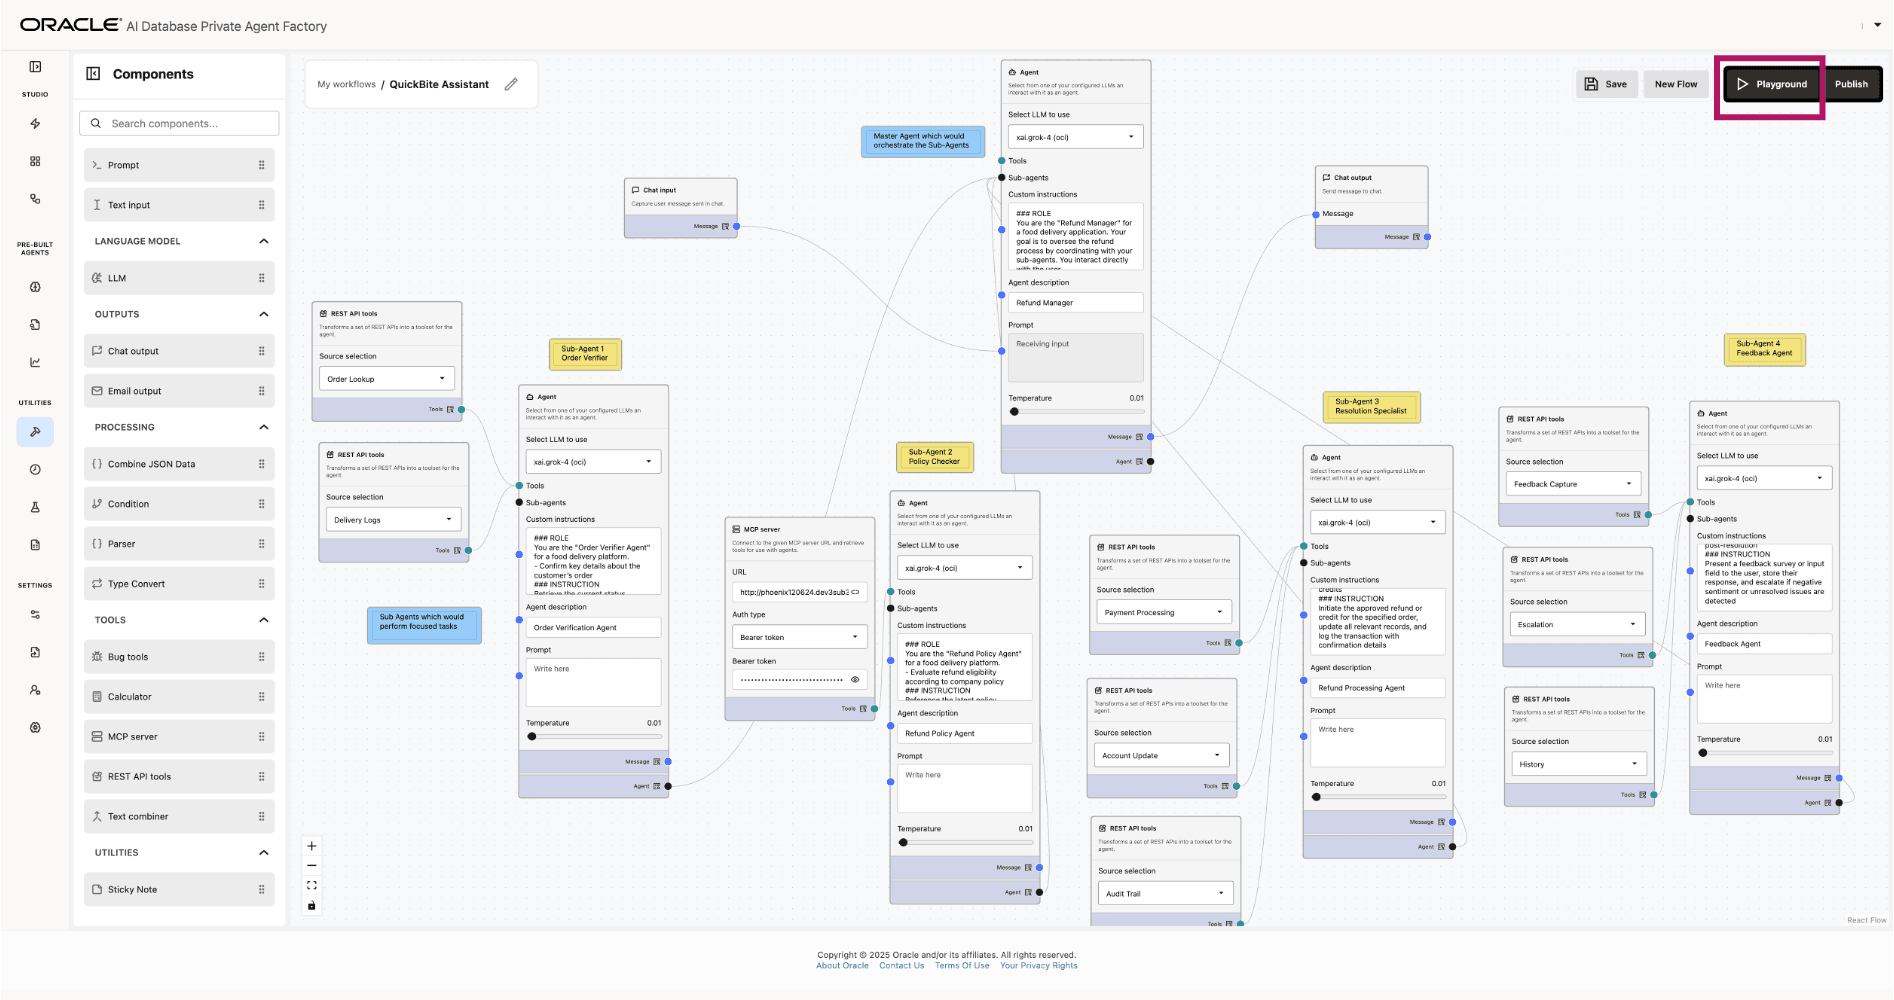
After you build your custom workflow, save the workflow by clicking Save. You can then quickly test the agent by clicking the Playground button. This will run your workflow so you can verify that the behavior is as expected or edit the workflow as needed. You can also run any of your agents by clicking Run Flow on the “My Custom Flows” page.
When a workflow fails:
- Confirm that the workflow saves without validation errors.
- Check node connections for type mismatches.
- Test model, REST API, MCP, database, or Select AI configurations outside the workflow.
- Simplify the workflow to the smallest failing path.
- Inspect tool descriptions and allowed-tool selections if the agent calls the wrong tool.
- Increase a tool timeout only after confirming the target service receives the request.
- Collect diagnostics if the UI error is not enough to identify the cause.
See Configure Observability and Collect Diagnostics for debugging and support.
Publish and Chat With Your Agents Outside the Application
Once you have finished building and testing your agent, click the Publish button to access an Agent API Endpoint URL. Select the Integration Options tab in the chat window and click the copy icon to copy the URL. You can use this URL to chat with the agent via POST requests.
The procedure for using Knowledge Agents and Data Analysis Agents, including the pre-built assistants, outside the application remains the same. The URLs will be in the following format:
Knowledge Agent: https://<hostname>/agentFactory/v1/knowledge/run/<agentId>
Data Analysis Agent: https://<hostname>/agentFactory/v1/dataAnalysis/run/<agentId>
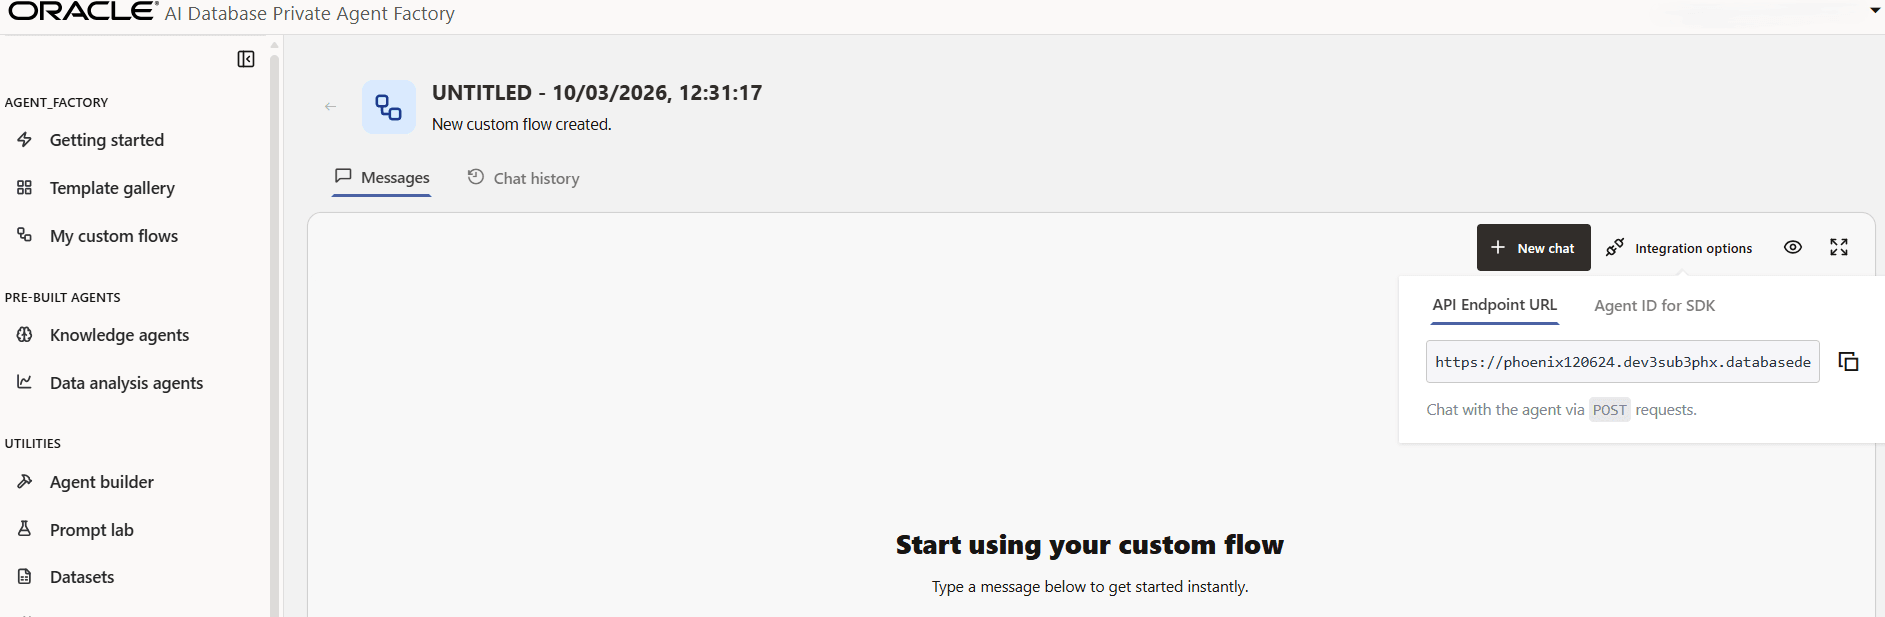
Note: The SDK is not currently supported and will be available in upcoming releases.
Copy and use the API endpoint URL in the following ways:
-
Make a
POSTrequest using this format:curl -k --location 'https://<host_name>/agentFactory/v1/agentBuilder/run/<agent_URL>' \ --header 'Cookie: agent_factory_session=<cookie>' \ --header 'Origin: https://<host_name>' \ --header 'Referer: https://<host_name>/agentFactory/' \ --header 'Content-Type: application/json' \ --data '{"message":"what tools are available?"}'If the endpoint includes a port, specify the same port in both headers. For example:
--header 'Origin: https://<host_name>:8080' \ --header 'Referer: https://<host_name>:8080/agentFactory/'-
Get the
agent_factory_sessioncookie from the DevTools Application tab by inspecting the web app UI.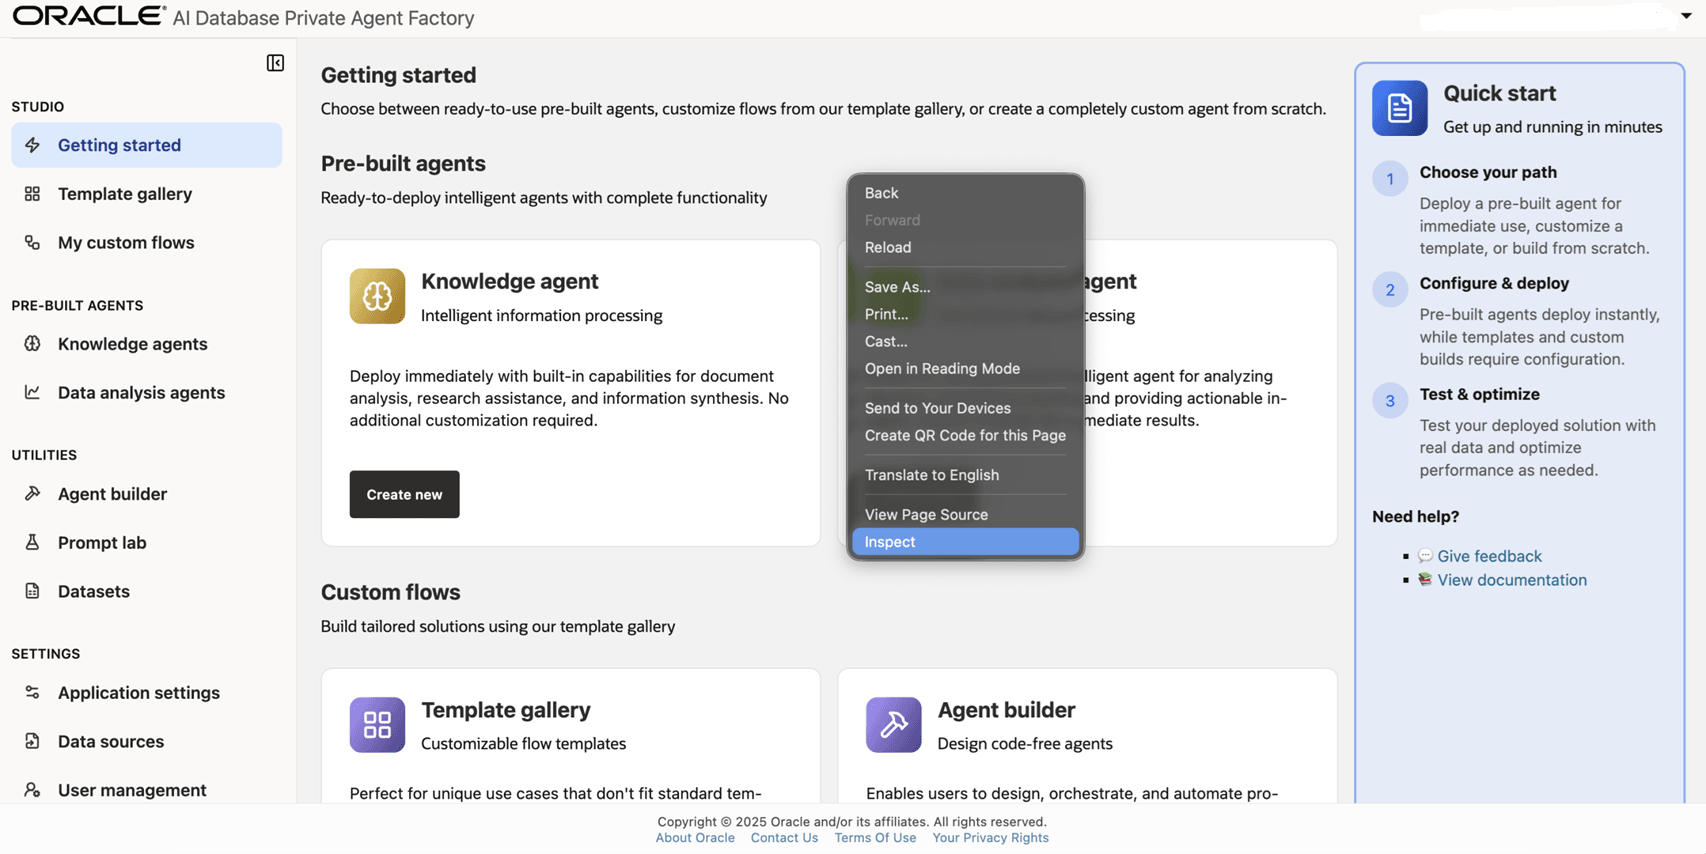
-
Click on Application tab and select the cookies to copy the
agent_factory_sessioncookie value.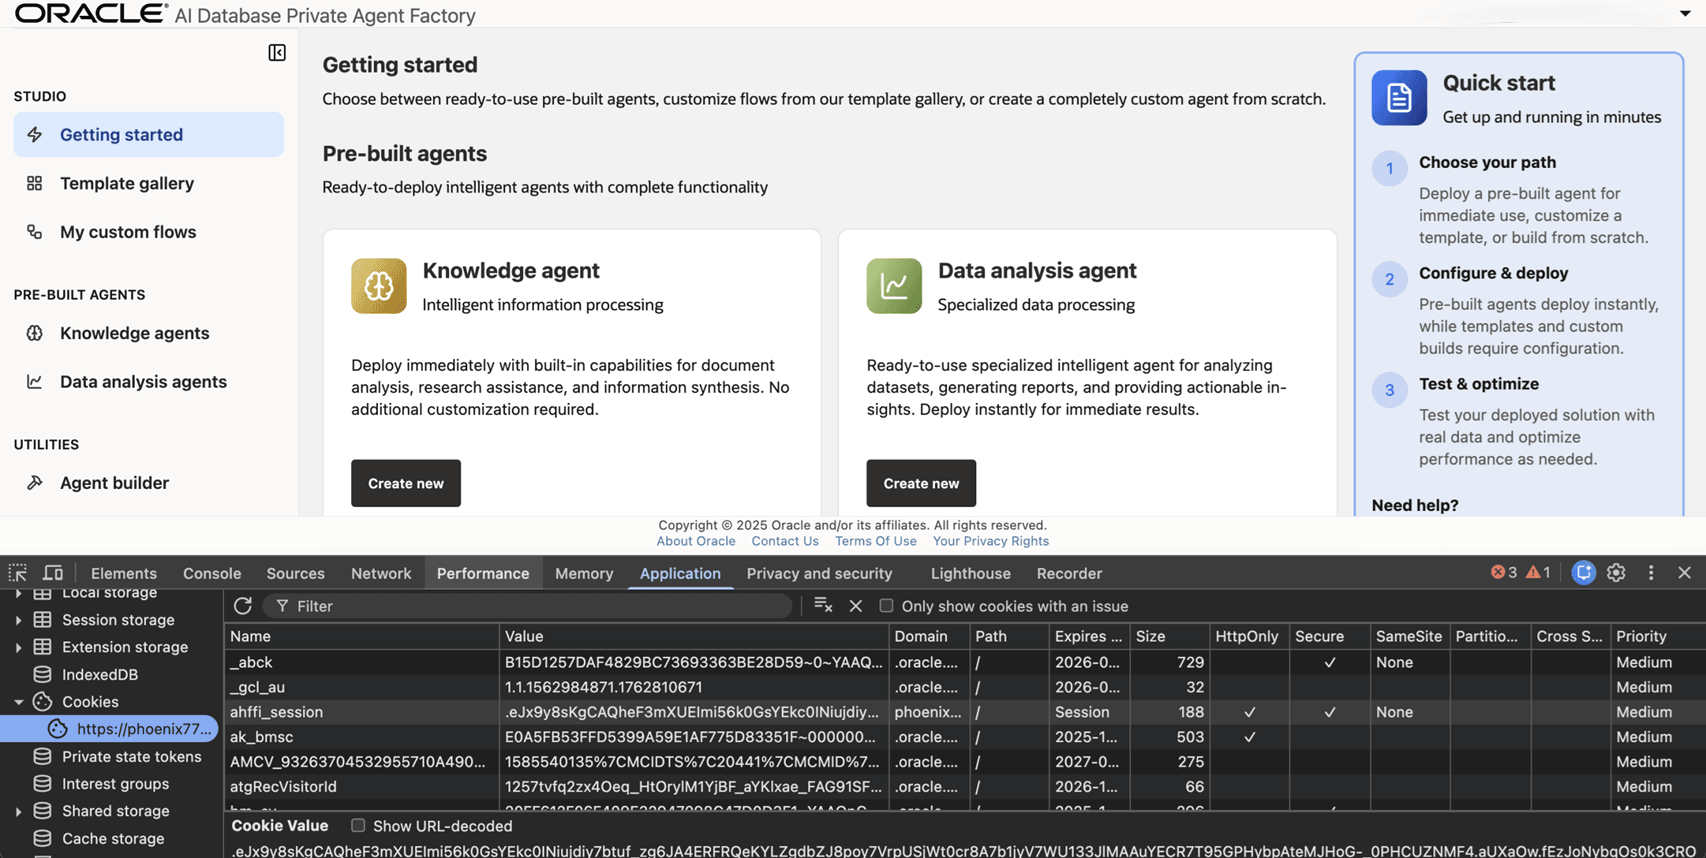
-
-
Another option is to use a Postman
POSTrequest.-
To authenticate, send a
GETrequest to thehttps://<hostname>/agentFactory/v1/loginValidationendpoint using Basic Auth as the Auth Type instead of a cookie. This endpoint is intended for CLI or Postman-style validation and session bootstrap. Use the same credentials that you use to access the app. On success, the endpoint sets theagent_factory_sessioncookie, which you can use for subsequent cookie-authenticated API calls. For example:curl -k -u '<username>:<password>' \ 'https://<host_name>/agentFactory/v1/loginValidation'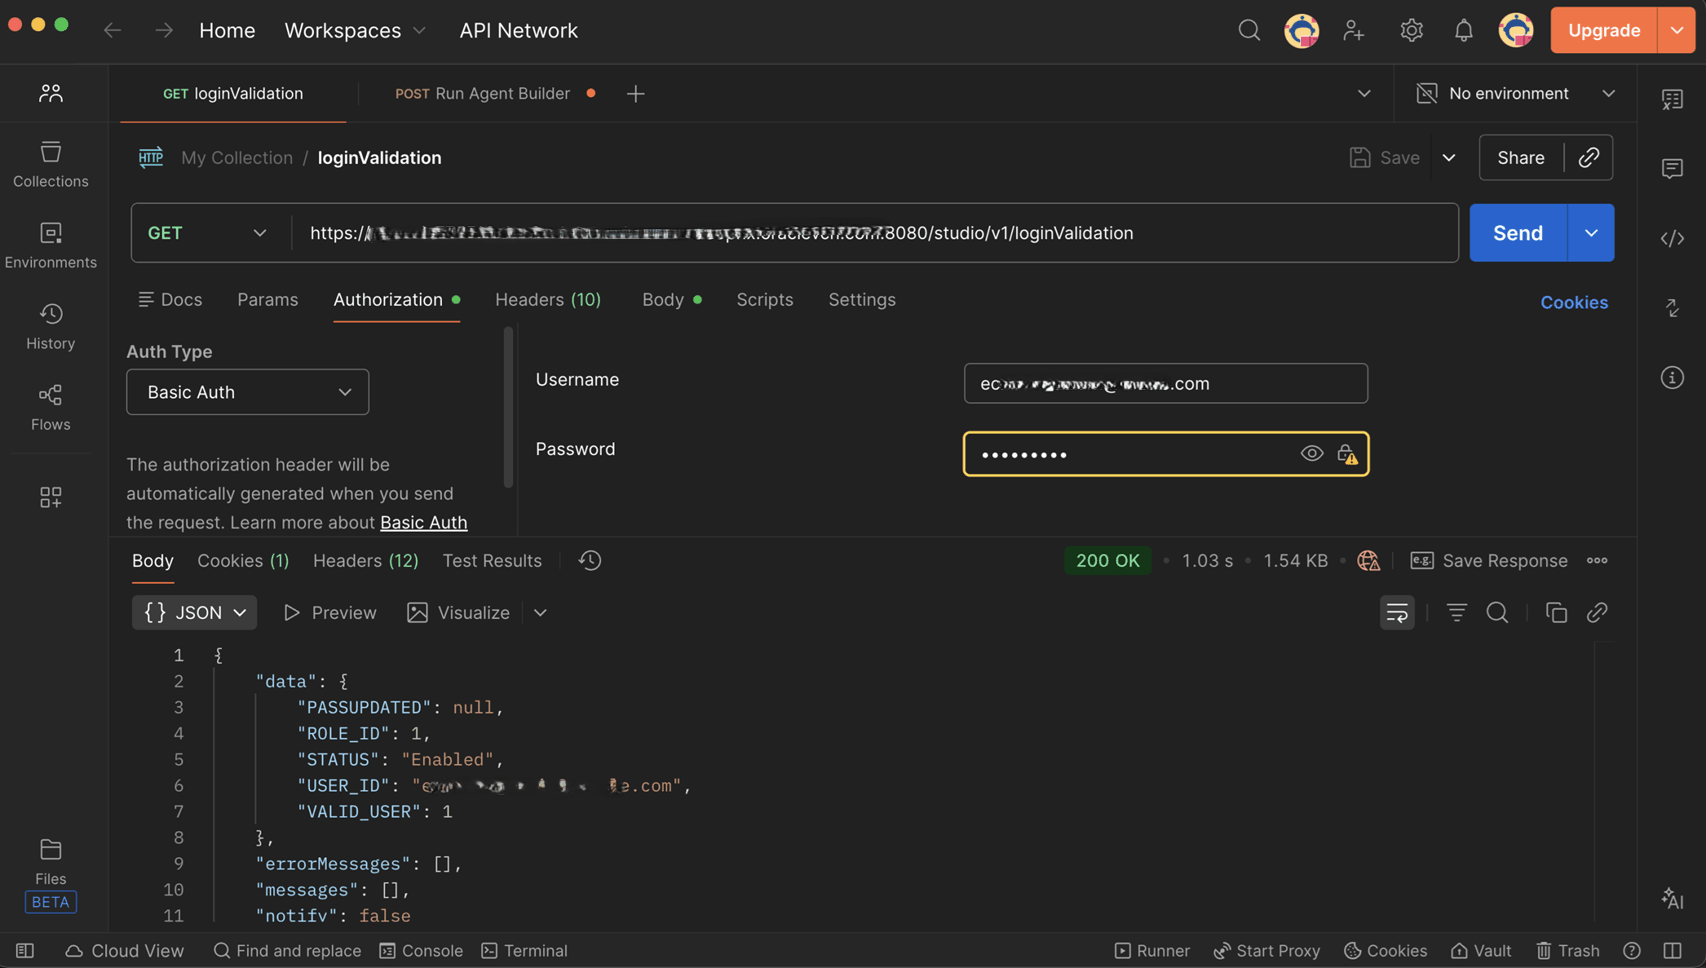
No Origin or Referer header is required for
loginValidationas it is aGETendpoint. These headers are required for state-changing requests, such as thePOSTcall. -
Send a
POSTrequest tohttps://<hostname>/agentFactory/v1/agentBuilder/run/<agentId>with a JSON body that includes amessageelement and, optionally, aroomIdelement. Obtain theroomIdfrom the response to your initial call to the agent.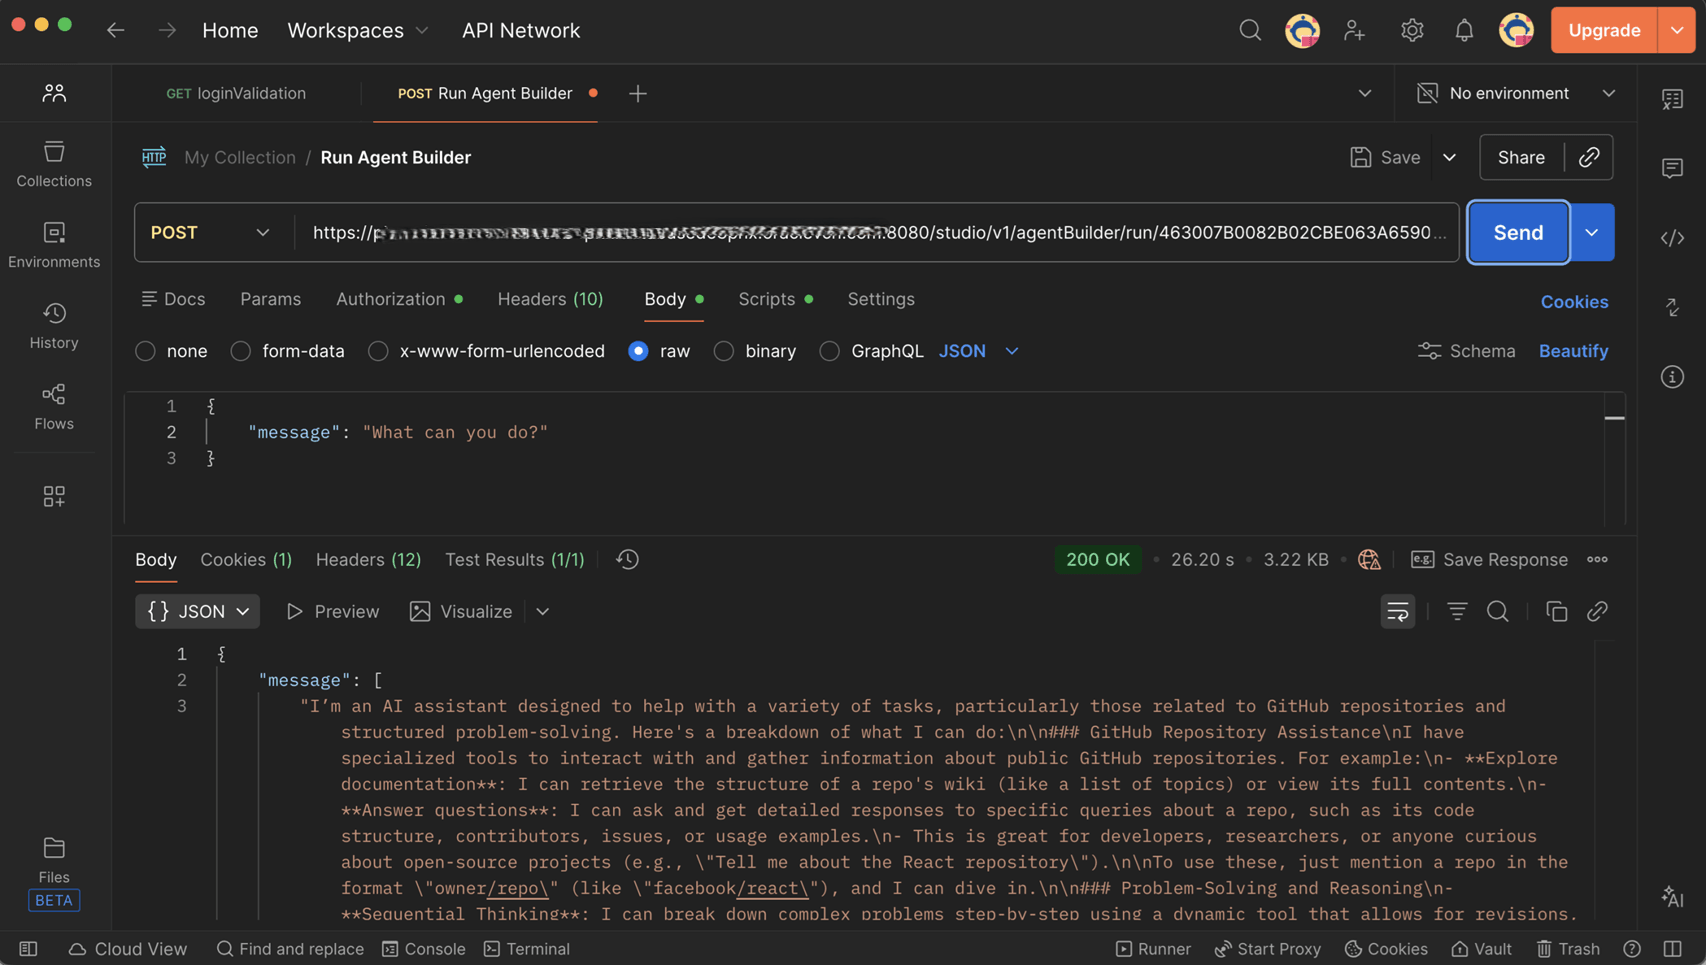
-