17.1 Creating Applications with Data Loading Capability
Create applications with data loading capability to enable end users to dynamically import data into a table within any schema to which the they have access.

17.1.1 About Creating a Page with Data Loading Capability

Add data loading capability to an application by creating a Data Load Definition and then a Data Load page.

A Data Load Definition is comprised of a Data Load Definition, Data Profile, and Data Profile Columns. Data can be loaded either to an existing table in your schema or to a collection. You can define SQL Expression, SQL Query, Lookups, or Transformation Rules for each data profile column. These definitions are used in the Native Data Loading page process type.

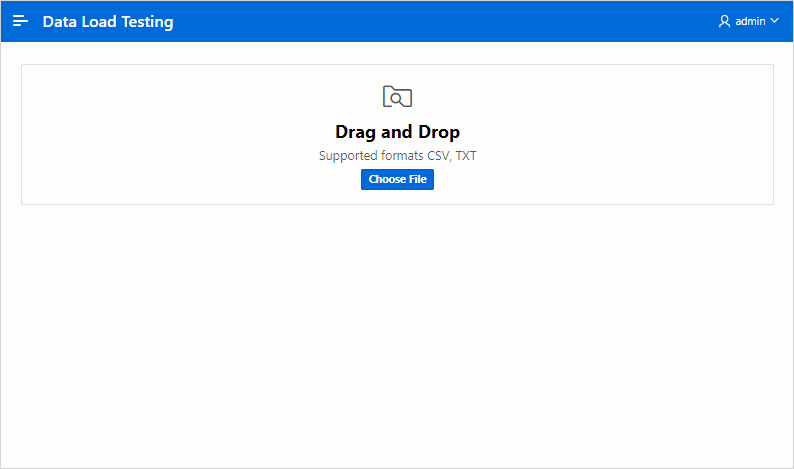
When you create a Data Load Definition, the wizard prompts you to add a Data Loading page in your application. However, if a Data Load definition exists, you can also add a Data Loading page later by running the Create Page Wizard. A Data Loading page consists of a single page with a Native Data Loading page process which enables users to upload data from a file or by copy and paste, preview the data, and then upload the data.

Key features of application new data loading include:

  • New application data loading supports CSV, XLSX, XML, and JSON formats.

  • Column mapping occurs at design time, removing the burden for end users.

  • Flexible column mappings based on simple names or regular expressions.

  • Data conversion with transformation rules or lookup queries.

  • Easy work flow for end users: upload the file, verify the preview, and load data.

  • CSV, XLSX, XML, and JSON data formats can be loaded to tables or collections.

  • Configure data loading to Append, Merge or Replace data, with or without Error Handling.

  • Simple new Process Type Data Loading: Customize Data Loading pages as you wish.

  • APEX_DATA_LOADING PL/SQL API available for custom processing.

  • Maximum number of columns to load is 300. Note that Legacy data load supports up to 45.

Note:

A Data Load Wizard is not designed or intended to load hundreds of thousands of rows of data. While it is possible to use a Data Load Wizard to load this high volume of data, you may encounter performance issues with both transmitting and loading large data files. Tools like Oracle SQL Developer and Oracle SQL*Loader are better suited to loading large volumes of data.

Supported Data Types

New Data Load supported data types:

  • VARCHAR2

  • NUMBER

  • DATE

  • TIMESTAMP

  • TIMESTAMP WITH LOCAL TIMEZONE

  • TIMESTAMP WITH TIMEZONE

  • CLOB

17.1.2 Creating a Data Load Definition

Create a Data Load Definition in Shared Components.

When you create a Data Load Definition, the wizard prompts you to create a Data Loading page. You can also create it later by running the Create Page Wizard later as described in Creating a Data Loading Page Using the Create Page Wizard.

The Create Data Load definition wizard supports uploading of the following sample file formats: CSV, XLSX, XML or JSON. The uploaded file format is saved as data load definition data profile format. This format dictates the type of file end users can upload. For example, if you create a data load definition using a CSV sample file, only TXT or CSV file types can be uploaded from a page using the data load definition. Similarly, if you create a data load definition using a XLSX sample file, only XLSX file types can be uploaded from a page using the data load definition. The following task includes sample images in which the Data Load Definition is created on the EMP table using EMP .csv file.

Note:

You can load this sample table by installing the EMP/ DEPT Sample Dataset. See Using Sample Datasets in Oracle APEX SQL Workshop Guide

To create a Data Load Definition:

  1. Create a new application.
  2. Navigate to the Data Load Definitions page:
    1. On the Application home page, click Shared Components.
      The Shared Components page appears.
    2. Under Data Sources, click Data Load Definitions.
  3. Click Create.
  4. On Method:
    1. Create Data Load - Select the method by which you would like to create the Data Load Definition. Options include: From Scratch and As a copy of an existing Data Load Definition.
      This task assumes you select From Scratch.
    2. Click Next.
  5. On Target:
    1. Name - Enter a name for the Data Load Definition.
    2. Target Type - Specify whether the data will be uploaded to a table or an APEX collection (for example, select Table).
    3. Table Owner - Specify the owner of the table to load data. If nothing is selected, the application parsing schema is used.
    4. Table Name - Select the table to which the data will be loaded (for example, select EMP).
      If entering the table name manually, the table name is case sensitive.
    5. Click Next.
  6. On Sample Data:
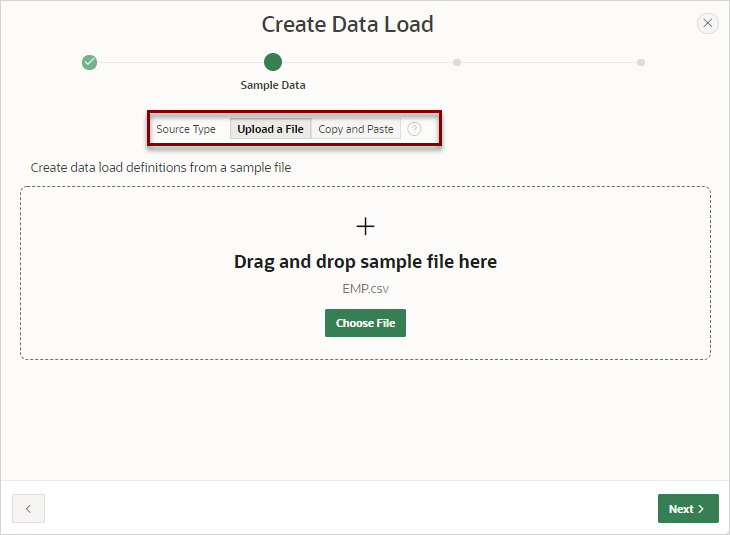
    1. Source Type - Select how the sample data will be uploaded from a file. The Source Type you select determines what appears next.

      Options include:

      • If Upload a File - Drag and drop or click Choose File to navigate to the file. Supported formats include CSV, XLSX, XML or JSON.

      • If Copy and Paste - Copy and paste delimited text data.

      Description of sample_data_load.png follows
      Description of the illustration sample_data_load.png

      Note that EMP.csv displays in the center of region indicating the EMP.csv sample file has been uploaded.

    2. Click Next.
  7. On Map Columns - Column mapping is done automatically by matching the Sample Data columns with the table column. Accept the defaults.
    Description of data_load_map_columns.png follows
    Description of the illustration data_load_map_columns.png

    In the previous example, note that Primary Key is selected for the EMPNO column.

    Determine whether to create just the Data Load Definition or the Data Load Definition and the Data Load page. Click one of the following buttons:

    • Create Data Load - Creates just the Data Load Definition. If you select this option, you can create a Data Load page later by running the Create Page Wizard.

    • Create and Add Page - Creates the Data Load Definition and then prompts you to create the Data Load page.

      This task assumes you select Create and Add Page.

  8. For Page Definition:
    1. Page Number - Displays the page number which is an integer value that identifies a page within an application.
    2. Name - Specify a text name for this page. This name is visible only during the application development process.
    3. Page Mode - Identify the page mode. To learn more, see field-level Help.
  9. For Data Load Attributes:
    1. Data Load - Select the data load definition to use.
    2. Upload Data From - Select if application users will provide data by uploading files or by using copy and paste of delimited text data.
    3. Maximum File Size ( MB ) - Enter the maximum file size (in MB) that should be accepted for the file upload.
  10. For Navigation:
    1. Breadcrumb - Select whether you want to use a breadcrumb navigation control on your page and which breadcrumb navigation control you want to use.
    2. Select how you want this page integrated into the Navigation Menu. To learn more, see field-level Help.
  11. Click Create Page.
    Page Designer appears displaying the new page.
  12. Test the new page:
    1. Click Save and Run Page.
    2. Upload a sample file. Drag and Drop a file or click Choose File.
    3. Click Load Data. The sample data is loaded into the target table with Merge loading method.

17.1.3 Creating a Data Loading Page Using the Create Page Wizard

If a Data Load Definition exists, run the Create Page Wizard to add a Data Loading page.

When you create a Data Load Definition, the wizard prompts you create Data Loading page. You can also create it later by running the Create Page Wizard.
The Create Page Wizard creates a single page with a Native Data Loading page process to provide the ability to upload data from a file or copy and paste. The copy and paste option is available only if selected data load definition data profile format is CSV. The type of file users can upload depends on the data load definition data profile format.

To create a Data Loading page by running the Create Page Wizard:

  1. Create a Data Load Definition as described in Creating a Data Load Definition.
  2. Run the Create Page Wizard:
    1. On the Workspace home page, click the App Builder icon.
    2. Select the application.
    3. Click Create Page.

      Create a Page appears and features three tabs: Component, Feature, and Legacy Pages.

  3. Under Component, select Data Loading.
  4. Page Definition:
    1. Page Number - Displays the page number which is an integer value that identifies a page within an application.
    2. Name - Specify a text name for this page. This name is visible only during the application development process.

      Tip:

      This text is also used for page Title. After page creation, you can modify the Title in Page Designer.

    3. Page Mode - Identify the page mode.

      See field-level Help for more details.

  5. Data Load Attributes:
    1. Data Load - Select the data load definition to use.
    2. Upload Data From - Select if application users will provide data by uploading files or by using copy and paste of delimited text data.
    3. Maximum File Size ( MB ) - Enter the maximum file size (in MB) that should be accepted for the file upload.
  6. Navigation - Expand the region and enable or disable navigation. If either flag is enabled, additional attributes appear. To learn more about an attribute, see field-level Help.
    1. Breadcrumb - Enable to create a breadcrumb entry for this page. By default, the page name is used as breadcrumb entry name.
    2. Navigation - Enable to create a navigation menu entry for this page. By default, the page name is used as breadcrumb entry name.
    3. Click Next.
  7. Click Create Page.
    Page Designer appears displaying the new page.
  8. Test the new page:
    1. Click Save and Run Page.

      The new Data Load page appears.

    2. Upload a sample file. Drag and Drop a file or click Choose File.

      A Preview page appears.

    3. Click Load Data. The sample data is loaded into the target table with Merge loading method.

17.1.4 Editing a Data Load Definition

Edit a Data Load Definition in Shared Components.

A Data Load Definition is comprised of a target data load table, loading method, error handling attributes, and data profile.

To edit a Data Load Definition:

  1. Select the application associated with the Data Load Definition.
    1. On the Workspace home page, click the App Builder icon.
    2. Select the application.
  2. Navigate to the Data Load Definitions page:
    1. On the Application home page, click Shared Components.
      The Shared Components page appears.
    2. Under Data Sources, click Data Load Definitions.
  3. Click the Data Load Definition you want to edit.

    The Data Load Definition Details page appears.

  4. For Data Load:
    1. Name - Defines the name for the data load definition.
    2. Static ID - Use the Static ID to reference the Data Load definition in API Calls.
  5. For Target:
    1. Target Type - Select whether data is to be loaded into a table or an APEX collection.
    2. Table Owner - Defines the owner of the table into which the data is loaded.
    3. Table Name - Defines the name of the table into which the data is loaded.
  6. For Settings:
    1. Loading Method - Specifies the loading method to use. Options include:
      • Append - Append rows to the table or collection. If one or more primary key columns are defined in the Data Profile, existing rows are not changed and new rows are appended. If the data profile has no primary key definition, all rows will be simply appended.

      • Merge - Merge rows into the table. To use this option, the data profile must have a Primary Key defined. If a row for the given primary key value exists, the row is updated. Otherwise the row will be created. This option is only available for loading data into tables.

      • Replace - Existing data in the target table or collection is removed before new data is loaded.

    2. Commit Interval - Specify the commit interval to use during data load. If no commit interval is specified, the whole data load is one transaction, with a commit after the last row. If an interval is specified, APEX commits each time after the specified amount of rows have been processed.
  7. For Error Handling:
    1. When on Error - Specify how to handle errors during data load. Options include:
      • Ignore - The error rows are silently ignored and Data Loading simply continues.

      • Stop - Data loading stops on the first error and raises an error message.

      • Log Error into Collection - Error rows are logged into an APEX collection.

      • Log into Error Log - Error rows are logged into a DML error logging table using the DML Error Logging database functionality. This is only available when loading into a table and only if the Append method is used without a primary key.

  8. Data Profile - Displays the Data Profile format and number of columns. Click Edit Profile to view and edit the Data Profile.

    Data Profiles describe how Data Source format are being parsed and converted to rows and columns. For XML or JSON data format, the Row Selector attribute stores an XML or JSON path expression pointing to the node containing the collection of rows. Data Profile Columns determine how one row is parsed and converted to multiple columns.

  9. Subscription - Lists the Data Load Definitions that subscribe to this definition.
  10. Comments - Add comments that describe this Data Load Definition. Comments only display within App Builder and never display when running the application.
  11. Click Apply Changes.

17.1.5 Example: Log Errors to a DML Error Log

Edit the Data Load Definition so that errors are logged into a DML error log.

The following example demonstrates how to edit a Data Load Definition that loads data into the EMP table. If the data load fails, errors are logged into a DML error log named ERR$_EMP.

To edit the Data Load Definition and log errors are logged into a DML error log:

Create a DML error log:

  1. Create a DML error log table in SQL commands:
    1. On the Workspace home page, click SQL Workshop and then SQL Commands.
    2. In the Command Editor, enter the SQL command to create a DML error log named ERR$_EMP. For example:
      begin
          dbms_errlog.create_error_log( dml_table_name => 'EMP' );
      end;
    3. Click Run (Ctrl+Enter) to execute the command.
    The results appear in the Results pane.

    Tip:

    The table ERR$_EMP now appears in Object Browser.

Edit the Data Load Definition and change the Loading Method and define the Error Handling:

  1. Navigate to the Data Load Definitions page:
    1. Select the application associated with the Data Load Definition.
    2. On the Application home page, click Shared Components.
      The Shared Components page appears.
    3. Under Data Sources, click Data Load Definitions.
  2. Click the Data Load Definition you want to edit.
    Data Load Definition Details page appears.
  3. Change the Loading Method and specify the Error Handling:
    1. Settings, Loading Method - Click Replace.
    2. Error Handling, When on Error - Select Log into Error Log.
    3. Error Handling, Error Logging Table - Select the DML error log table (for example, ERR$_EMP (TABLE).
    4. Click Apply Changes.

Create another Data Loading page:

  1. Run the Create Page Wizard:
    1. Click Edit Page X in the toolbar in the header region (where X represents the page number).
      Page Designer appears.
    2. Select the Create menu in the Page Designer toolbar and select Page.
      The Create Page Wizard appears.
  2. On Create a Page, select Data Loading.
  3. For Page Definition:
    1. Page Number - Displays the page number which is an integer value that identifies a page within an application.
    2. Name - Specify a text name for this page. This name is visible only during the application development process.
    3. Page Mode - Identify the page mode. To learn more, see field-level Help.
  4. For Data Load Attributes:
    1. Data Load - Select the data load definition you edited previously.
    2. Upload Data From - Select if users will provide data by uploading a file, or by using copy and paste of delimited text data. For this example, select File.
    3. Maximum File Size ( MB ) - Enter the maximum file size (in MB) that should be accepted for the file upload.
  5. For Navigation:
    1. Breadcrumb - Select whether you want to use a breadcrumb navigation control on your page and which breadcrumb navigation control you want to use.
    2. Navigation - Select whether you want this page integrated into the Navigation Menu. To learn more, see field-level Help.
  6. Click Create Page.
    Page Designer appears displaying the new page.
  7. Test the new page:
    1. Click Save and Run Page.

      The new Data Load page appears.

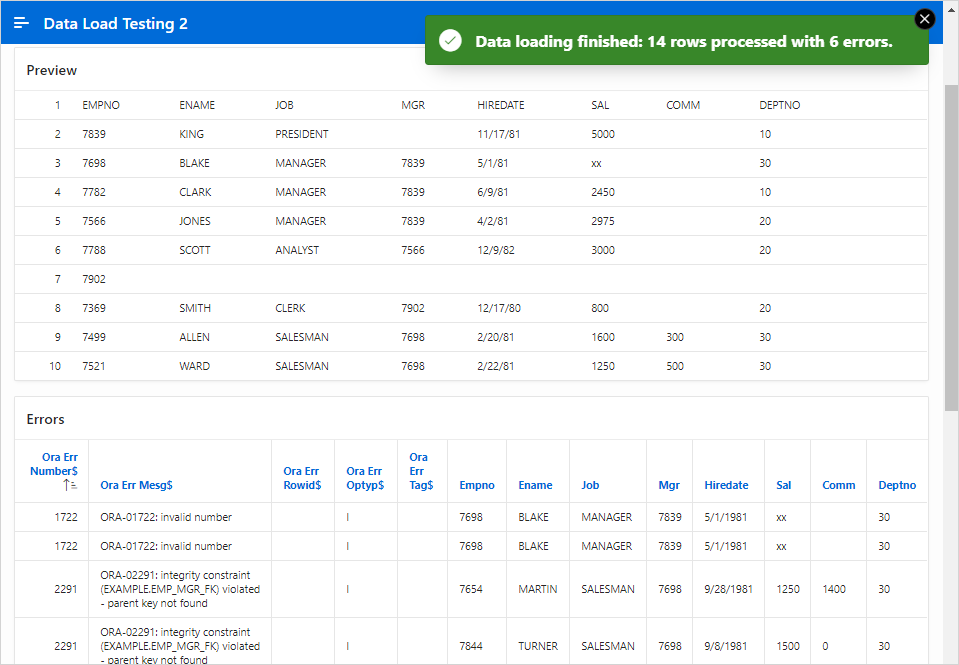
    2. Upload a sample file that fails loading to see the error log report. For example, load string value for the SAL column where a NUMBER column type is expected. Drag and drop a file, or click Choose File.

      A Preview page appears.

    3. Click Load Data.

    An error message appears and the errors display at the bottom of the page as shown in the following example.

    Description of test_data_load_error.png follows
    Description of the illustration test_data_load_error.png