16.6.6 Creating a Search Page Manually

Learn how to create a Search page manually in Page Designer.

In previous examples, you create a search page by running the Create Page Wizard. You can also create a blank page and add search components to it manually.

Tip:

This task uses the tables and search configurations described in Creating Standard Search Configurations. Once you create your new application, access Shared Components and click Copy to copy them from another application.

To create a search page manually:

  1. Create an application and then your search configurations.
  2. Run the Create Page Wizard and create a blank page.
    1. On the Application home page click the Create Page button.
    2. Under Component, select Blank Page.
    3. Page Definition:
      • Page Number - The page number is an integer value that identifies a page within an application.
      • Name - Specify a text name for this page (for example, Manual Search Page).

        This text is also used for page Title. After page creation, you can modify the Title in Page Designer.

      • Page Mode - Identify the page mode. For this example, select Normal.
    4. Navigation - Accept the defaults and enable navigation.
    5. Click Create Page.
  3. Create a text field for the search input:
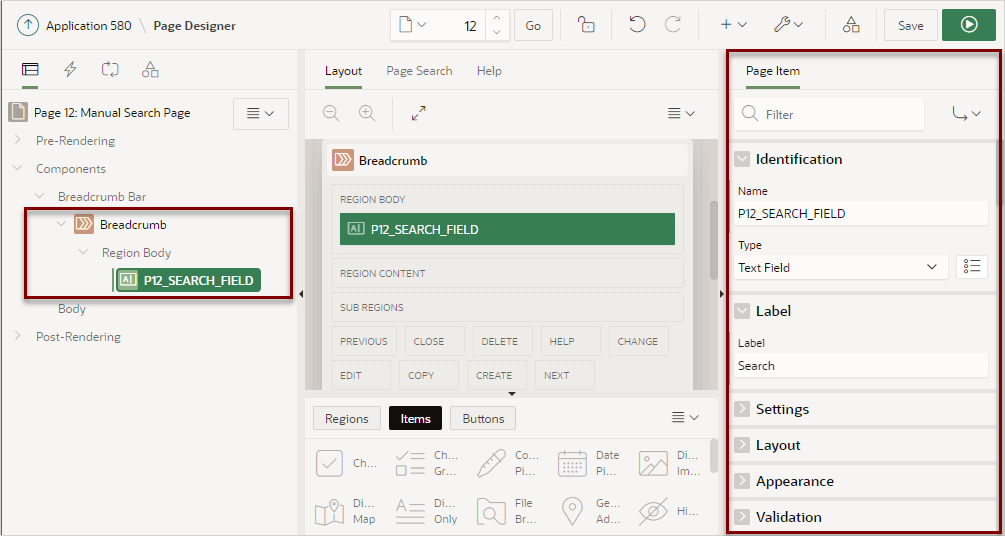
    1. In the Rendering tab, right-click Breadcrumb and select Create Page Item.
      The New item appears.
    2. Select the new item and edit following attributes in the Property Editor:
      • Identification Name - Enter the name of this item (for example, PX_SEARCH_FIELD, where X is the page number).
      • Label, Label - Enter the field label for the page item (for example, Search).
      • Advanced, Warn on Unsaved Changes - Select Ignore.
      • Click Save.
  4. Create a search region:
    1. In the Rendering tab, right-click Body and select Create Region.
      The New region appears.
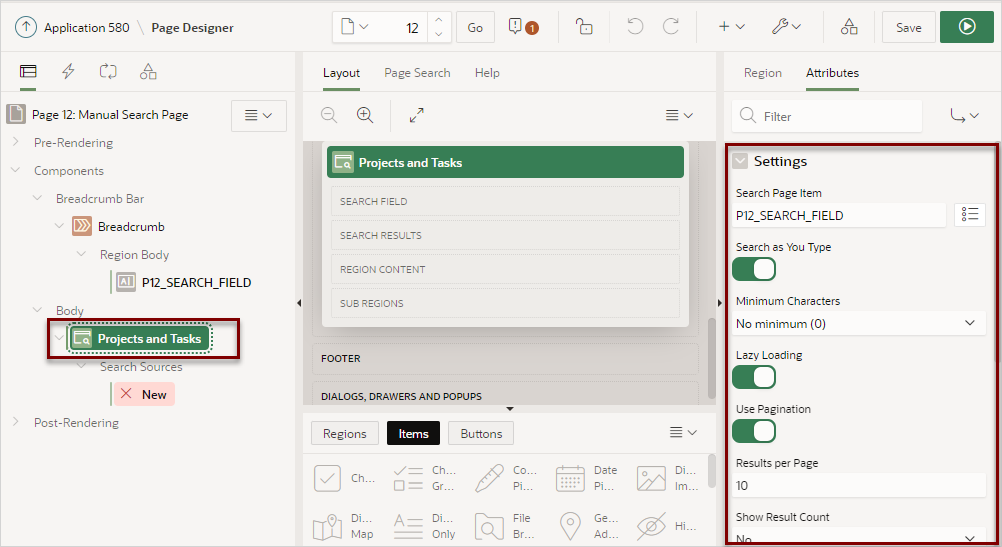
    2. Select the New region and edit the following Region attributes:
      • Identification, Title - Enter a region title (for example, Projects and Tasks).
      • Identification, Type - Select Search.
      • Click Save.
    3. Click the Attributes tab and edit the following:
      • Settings, Search Page Item - Select or enter the page item in to which users type their search (for example, P12_SEARCH_FIELD).
      • Settings, Results per Page - Specify the results to display on the page (for example, 10).
  5. Define the first Search Source:
    1. In the Rendering tab under Search Sources, select New.
    2. Edit the following attributes in the Property Editor:
      • Identification, Name - Enter a descriptive name for this search source (for example, Search Projects).
      • Identification, Search Configuration - Select a search configuration to search within (for example, Search Projects).
  6. Define the second Search Source:
    1. In the Rendering tab, right-click Search Sources and select Create Search Source.
      The New Search Source appears.
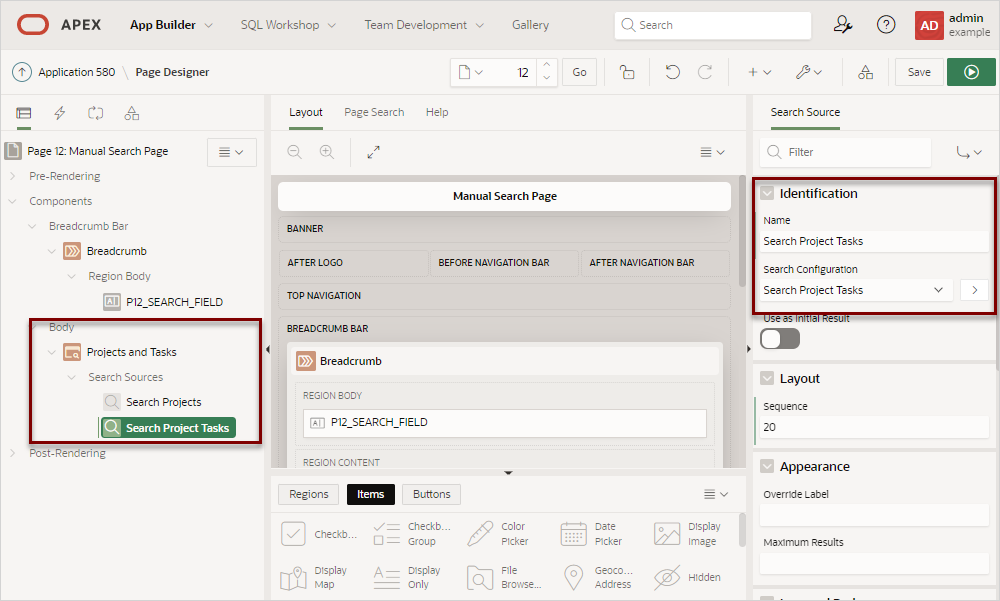
    2. In the Rendering tab under Search Sources, select New and edit the following Region attributes in the Property Editor:
      • Identification, Name - Enter a descriptive name for this search source (for example, Search Project Tasks).
      • Identification, Search Configuration - Select a Search Configuration to search within (for example, Search Project Tasks).
  7. Run and test the page:
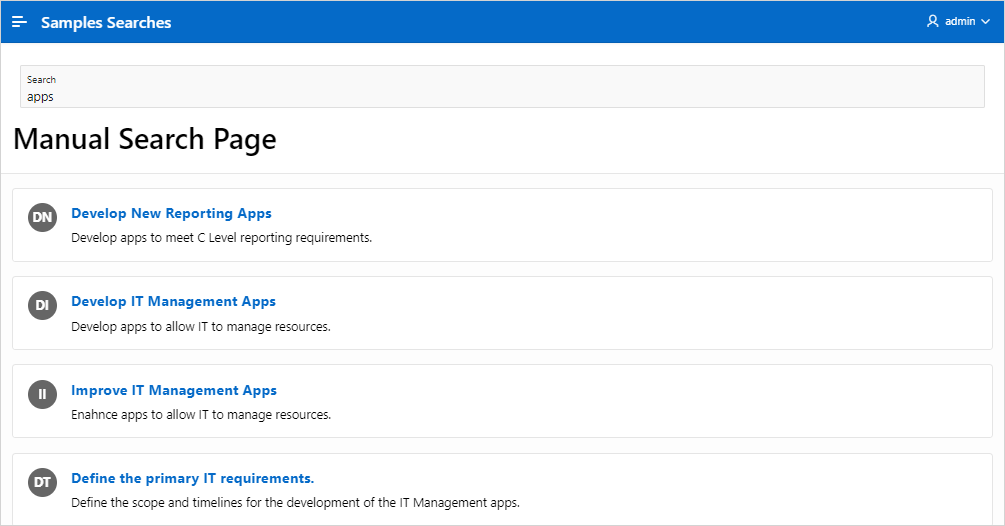
    1. Click Save and Run Page.
      The Search Projects page appears.
    2. In the search field, enter a search (for example, apps).