8.8.5 Managing Interactive Grid Region Attributes
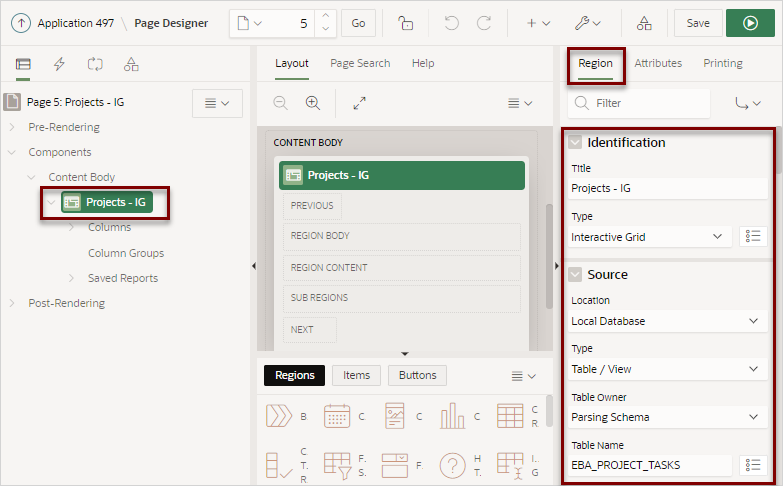
Edit region attributes to alter the SQL source, change the region layout and appearance, define a region displays selector, and create region conditions.

8.8.5.1 Editing Interactive Grid Region Attributes

Edit interactive grid region attributes in Page Designer.

To edit interactive grid region attributes:

  1. View the page in Page Designer:
    1. On the Workspace home page, click the App Builder icon.
    2. Select an application.
    3. Select a page.
    Page Designer appears.
  2. In the Rendering tab, select the region.

    In the Property Editor, the Region tab displays the attributes. Attributes are organized in groups.

    Use region attributes to alter the SQL source, change the region layout and appearance, create a master detail, define a region displays selector, or create conditions.

  3. To find a group or attribute:
    • Search for the group or attribute - Enter keywords in the Filter Properties field. The Property Editor displays the group or attributes. To return to the default display, delete the keywords.
    • Use Go to Group - Click Go to Group and select the group. To return the default display, click Go to Group again and select Expand All.
  4. Edit the appropriate attributes.

    Tip:

    To view help for an attribute, select the attribute in the Property Editor and click the Help tab in the central pane.

  5. To save your changes click Save. To save and run the page, click Save and Run Page.

8.8.5.2 Displaying Interactive Grids Conditionally

Dispay interactive grids conditionally by editing region attributes.

To display an interactive grid conditionally:

  1. View the page in Page Designer:
    1. On the Workspace home page, click the App Builder icon.
    2. Select an application.
    3. Select a page.
    Page Designer appears.
  2. In the Rendering tab, select the region.
    The Property Editor displays the Region tab. Attributes are organized in groups.
  3. Edit Server-side Condition:
    1. Find the Server-side Condition group.
    2. Type - Select a condition type and follow the on-screen instructions.

    The UI changes based on the Type you select.

    Tip:

    To view help for an attribute, select the attribute in the Property Editor and click the Help tab in the central pane.

  4. To save your changes click Save. To save and run the page, click Save and Run Page.