Oracle
Application Express 18: Creating a Data Load Wizard for Your Application
Before You Begin
This 15-minute tutorial shows you how to use the Data Loading
Wizard to create four data loading pages in an application. By
using the data loading pages, you can load data into a table.
Background
Oracle Application Express provides data loading capability
that allows you to dynamically import data into a table within
any schema to which you have access. You can create a series of
data load wizard pages in your application by using the Data
Loading page wizard. To do this, you run the Data Load Wizard
that uploads data from a file or copies and pastes data entered
by you directly into the wizard. The wizard allows you to add
table lookups and transformation rules that are executed when
the Data Load Wizard runs.
In this tutorial, you will do the following:
Create the Data Load wizard pages in your Create App
Wizard application by using the Data Load Wizard
Test the Data Loading wizard
Review the definition of the Data Loading Wizard
What Do You Need?
To complete this tutorial you need to:
Access to Oracle Application Express 18.1 or later
The
data_load.zip file containing the data_load_data.csv
file
Accessing your Development Environment
How you sign in and access Oracle Application Express depends
upon where Oracle Application Express resides. Oracle
Application Express may reside in a local on-premises Oracle
Database or in a hosted environment, such as the Oracle Cloud.
The sign in credentials you use to sign in differ depending upon
the installation type.
Free Workspace: Give Oracle Application Express a
test run by signing up for a free workspace. To request an
evaluation workspace, go to apex.oracle.com, and click Get
Started for Free.
Oracle Cloud: Develop and deploy applications without
worrying about infrastructure, repair, and downtime. Oracle
Application Express is available in Exadata Express Cloud
Service and Database Cloud Service. However, you need to
manually customize your databases to install and enable Oracle
Application Express. To learn more, see Oracle Database Cloud Service.
Oracle Application Express On-premises: Install
Oracle Application Express directly within any Oracle Database
and then sign in to your workspace using your sign in
credentials. For details on your sign in credentials, contact
your administrator or see Oracle Application Express Installation
Guide
Oracle Application Express Pre-Built VM: Install a
Pre-Built Virtual Machine (VM) which includes an Oracle
Database and Oracle Application Express 18.1. To learn more,
see Hands-On Lab.
Once the VM is installed, start the VM:
Click the big red circle labeled Start.
Click the APEX shortcut, or enter the following URL:
http://localhost:8080/ords/f?p=4550:1.
When prompted to sign in, enter the sign in credentials
(unless given other credentials to use):
Workspace: obe
Username: obe
Password: oracle
Note your Application ID may be different when compared to the
screenshots in this tutorial. Your Application ID is assigned
automatically when you create the application.
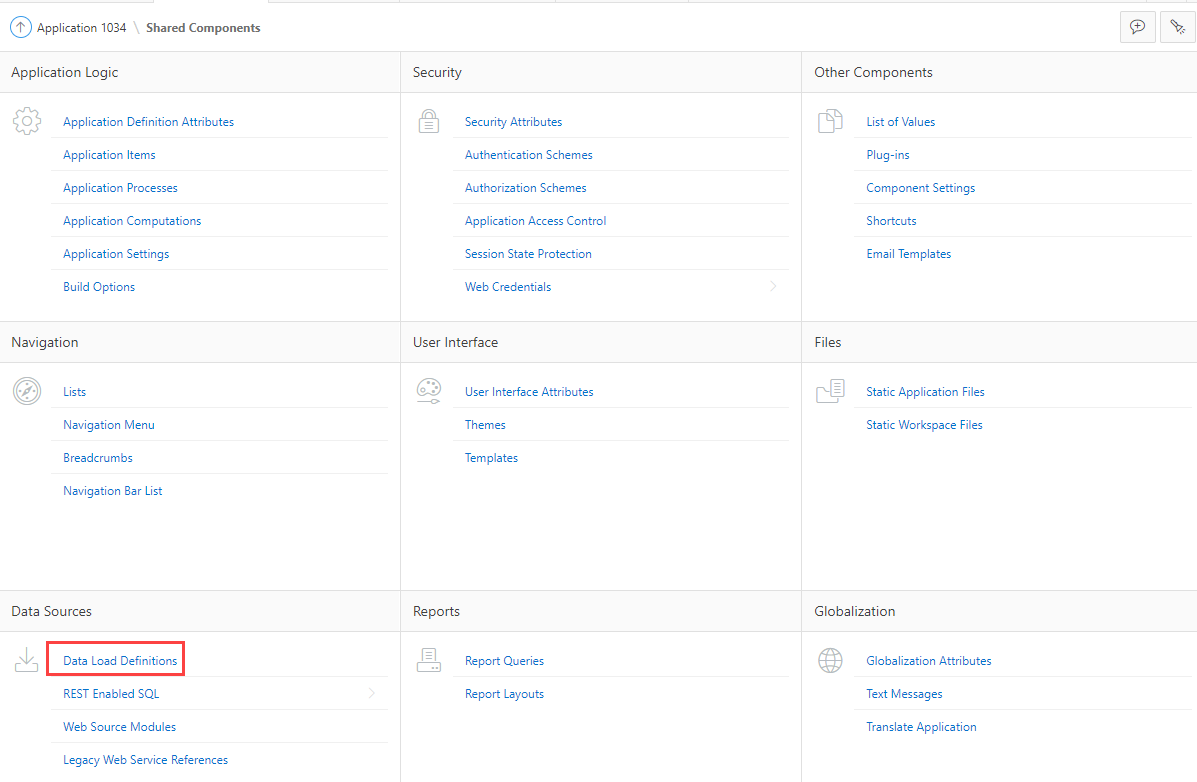
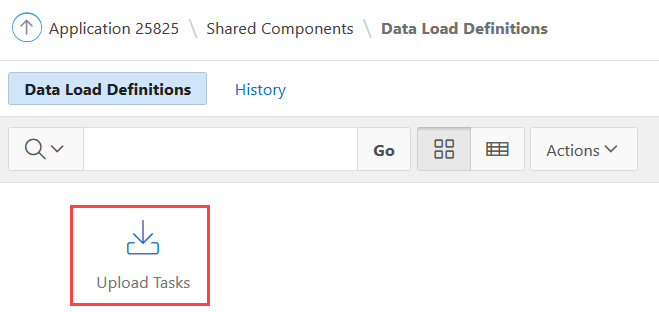
Create
a Data Load Wizard Using the Data Loading Page Wizard
In this section, you will use the Data Loading Page wizard to
create a Data Load Wizard in the Create App Wizard application.
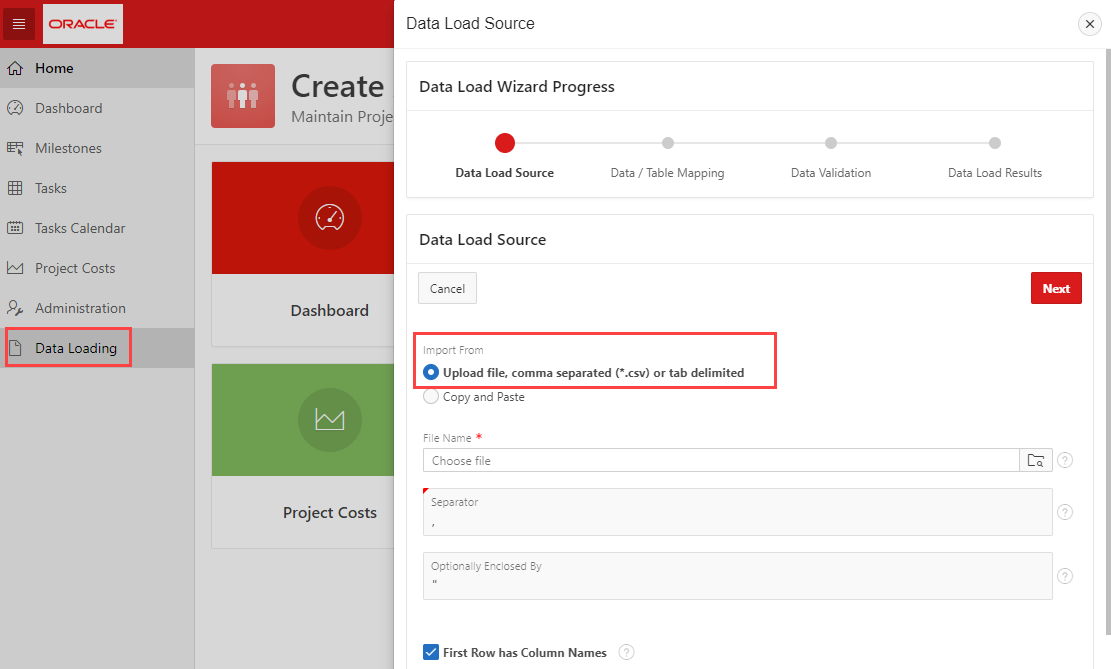
To create the Data Load wizard:
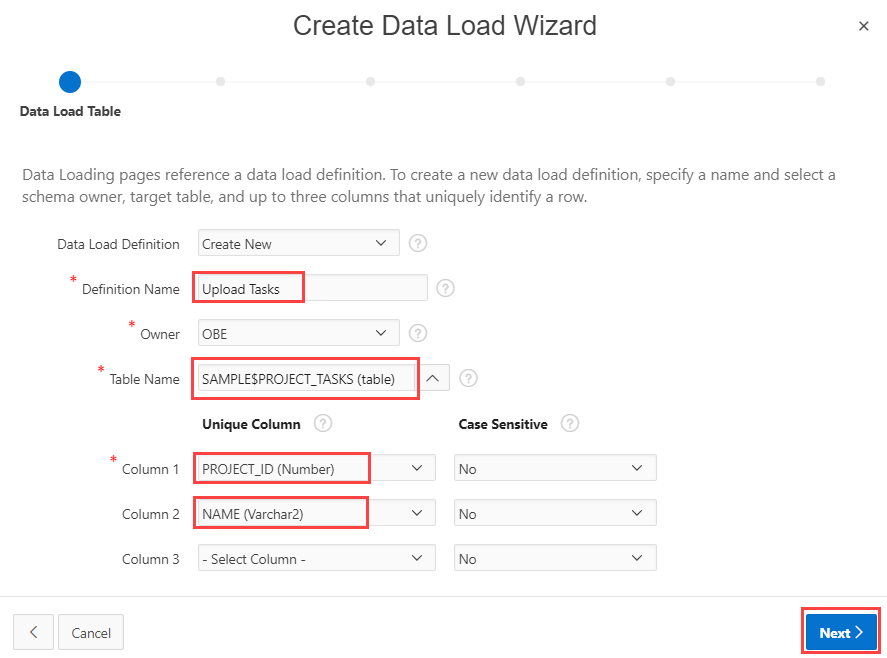
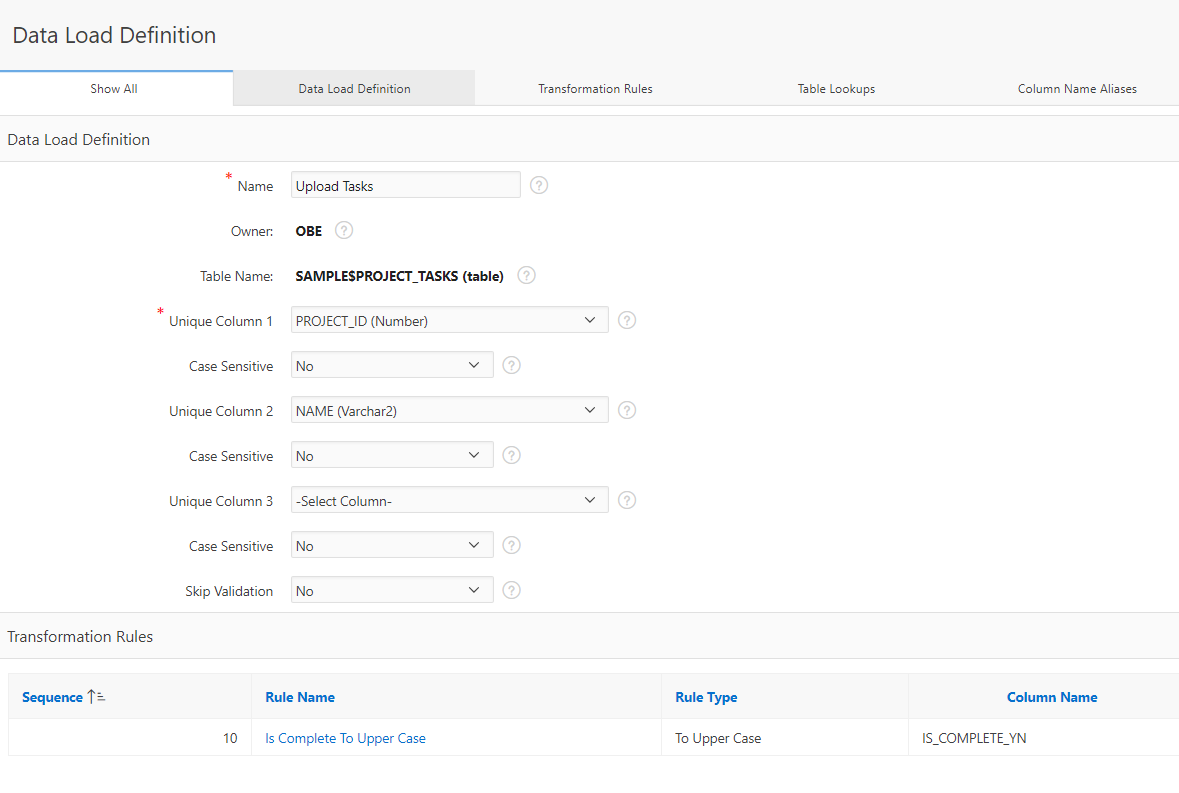
You must specify the table into which you want to load data
and the columns that uniquely identify the dependent in the
table. In this case, the PROJECT_ID and NAME
uniquely identify a dependent in the SAMPLE$PROJECT_TASKS
table. Specify the following in the Data Load Table
dialog of the Create Data Load wizard:
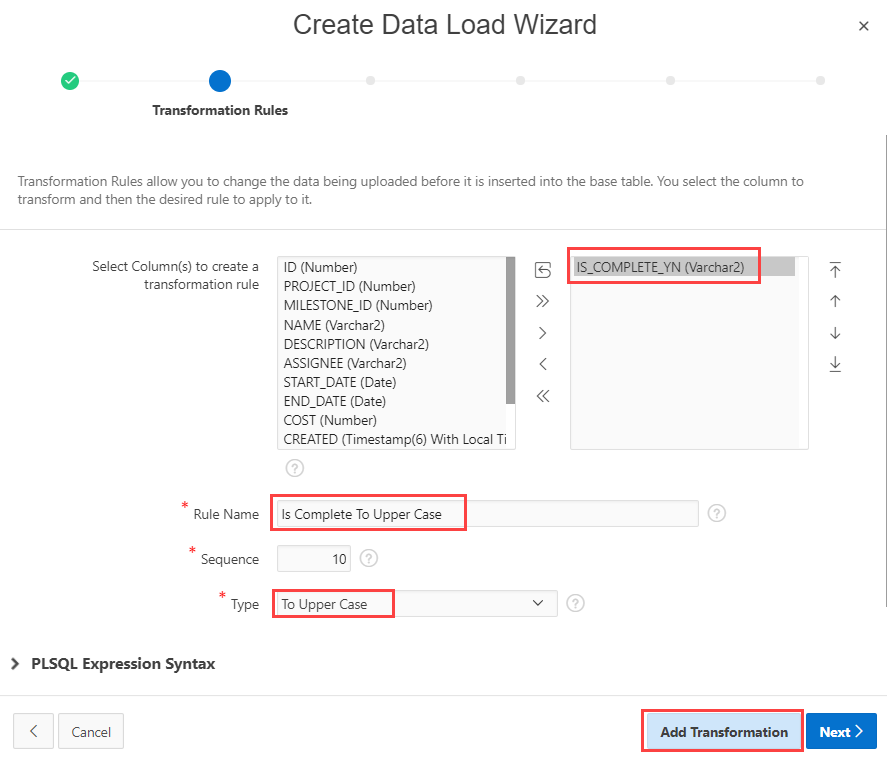
To create a transformation rule, select the column for which
you want to create the rule. In this tutorial, you will create
a transformation rule to ensure that when data is stored, the
data in the IS_COMPLETE_YN column is stored in
upper case. Specify the following under Transformation
Rules dialog of the Wizard:
Select IS_COMPLETE_YN and click the right
arrow to create a transformation rule for the column.
Rule Name: Type Is Complete To Upper
Case
Type: Select To Upper Case
Click Add Transformation
After the transformation rule Is Complete
To Upper Case is created, click Next
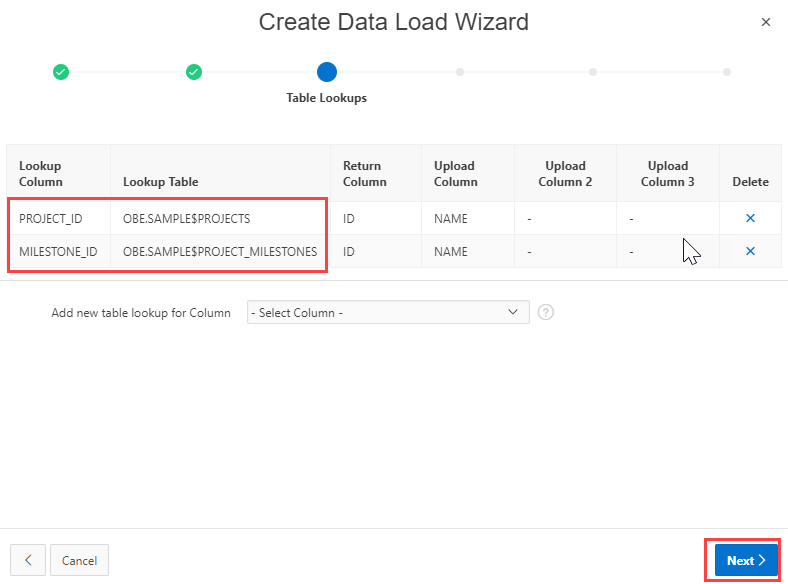
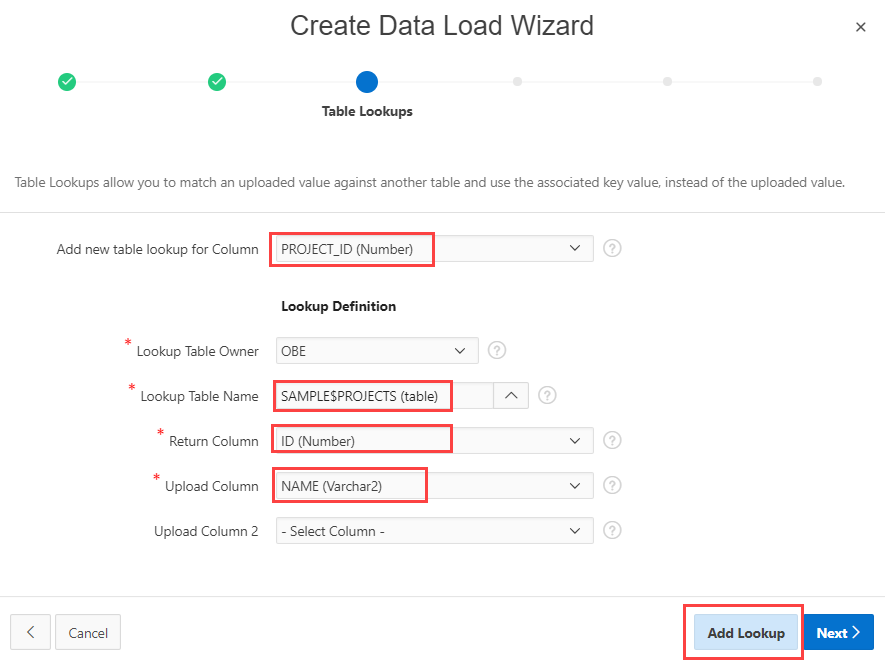
In the TableLookup section, you will add two lookups for the
tables SAMPLE$PROJECTS and SAMPLE$PROJECT_MILESTONE.
To add the first lookup for the column PROJECT_ID
in the table SAMPLE$PROJECTS, specify the
following values in the Table Lookups dialog of the
wizard:
Add a New Table lookup for Column: Select PROJECT_ID(Number) Note: The PROJECT_ID
should correspond to the ID in the SAMPLE$PROJECTS
table so that it is a valid value.
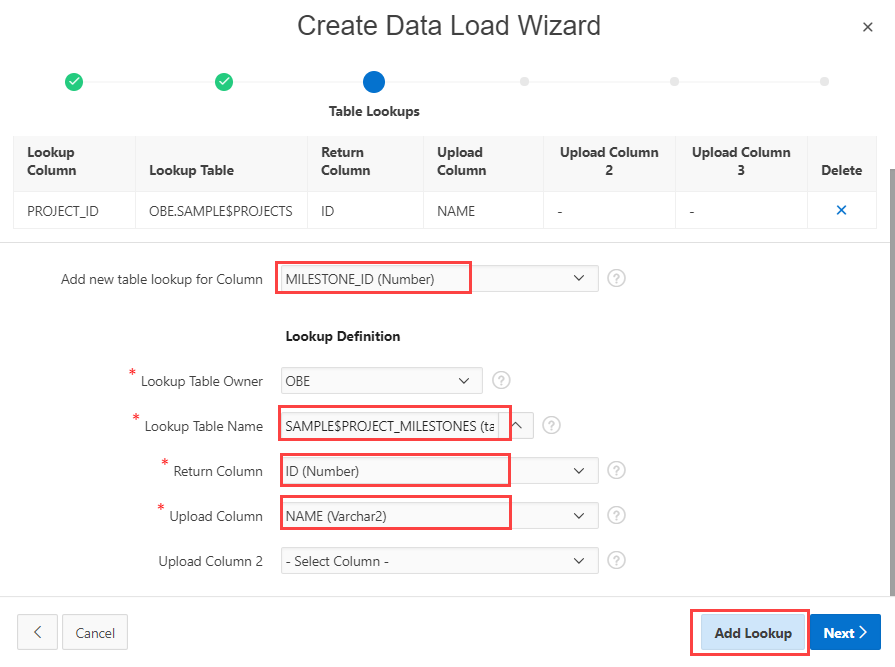
To add the second lookup for the column MILESTONE_ID
in the table SAMPLE$PROJECT_MILESTONES, specify
the following:
Add a New Table lookup for Column: Select MILESTONE_ID
(Number) Note: The MILESTONE_ID
should correspond to the ID of the SAMPLE$PROJECTS_MILESTONES
table so that it is a valid value.
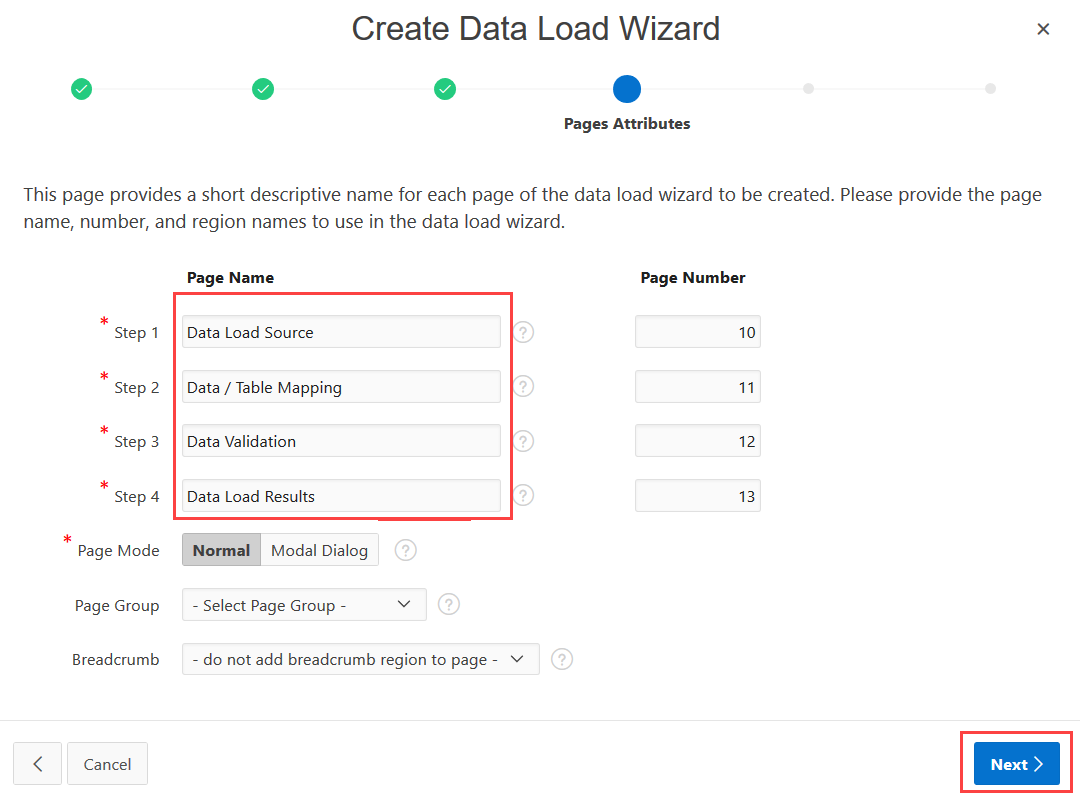
The Data Load wizard will contain the four pages - Data
Load Source, Data/Table Mapping, Data Validation, and Data
Load Results, as described in the Pages Attributes
dialog in the wizard. Click Next. Description
of the illustration page_attributes.png
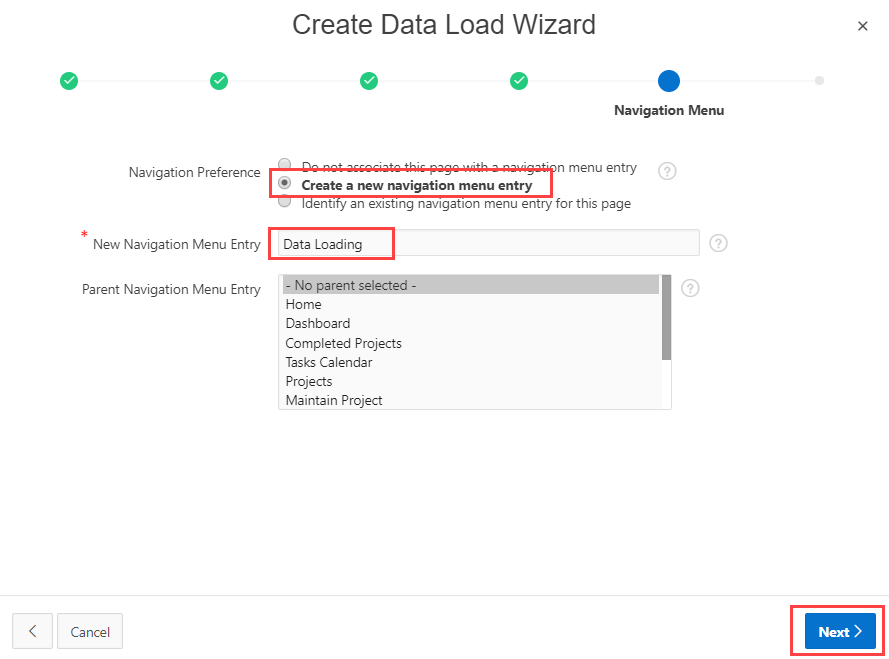
Select Navigation Menu preferences:
Navigation Preference: Select Create a new
Navigation menu entry
Existing Navigation Menu Entry: Select Data
Loading
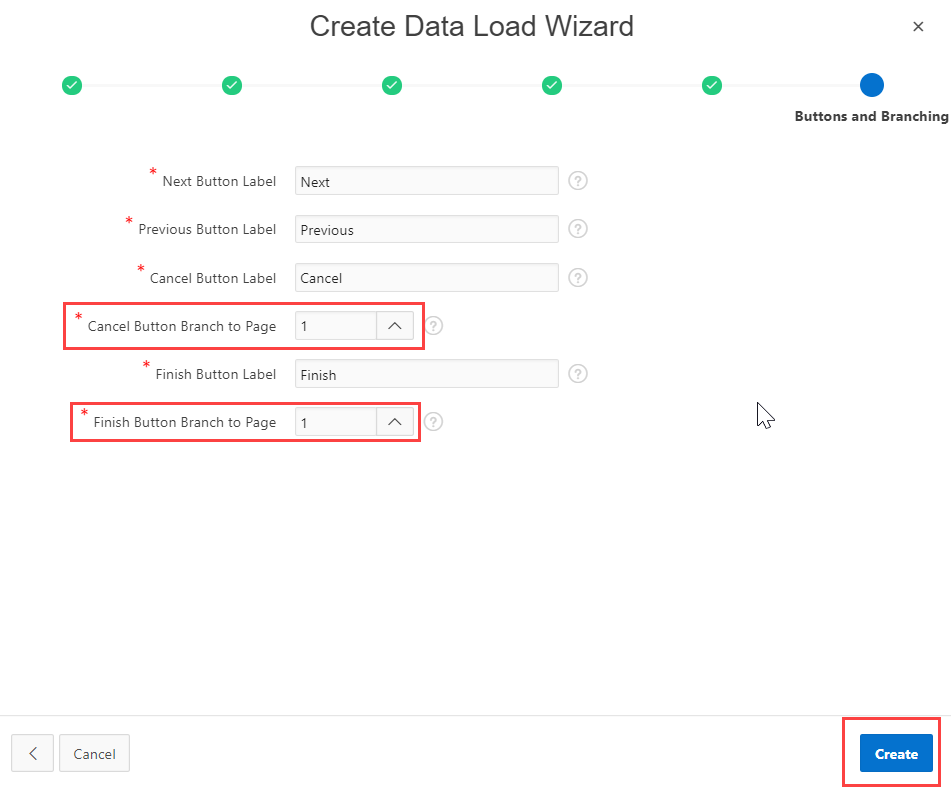
In the Buttons and Branching dialog of the wizard,
define the navigation behavior of the wizard when you click Cancel
or Finish. When you click Cancel or Finish,
then the Home page should be displayed. For this, set
the following:
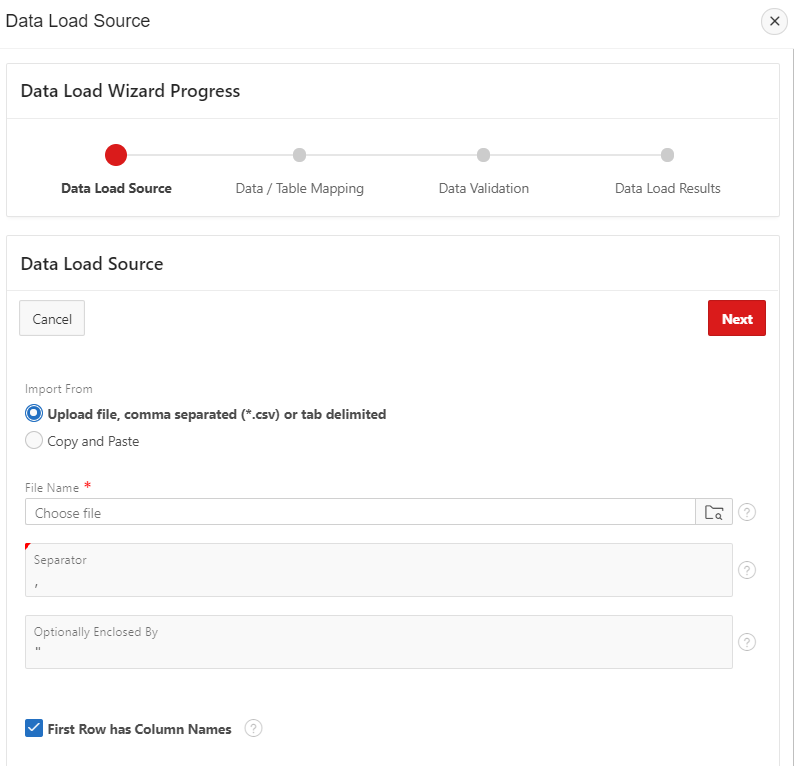
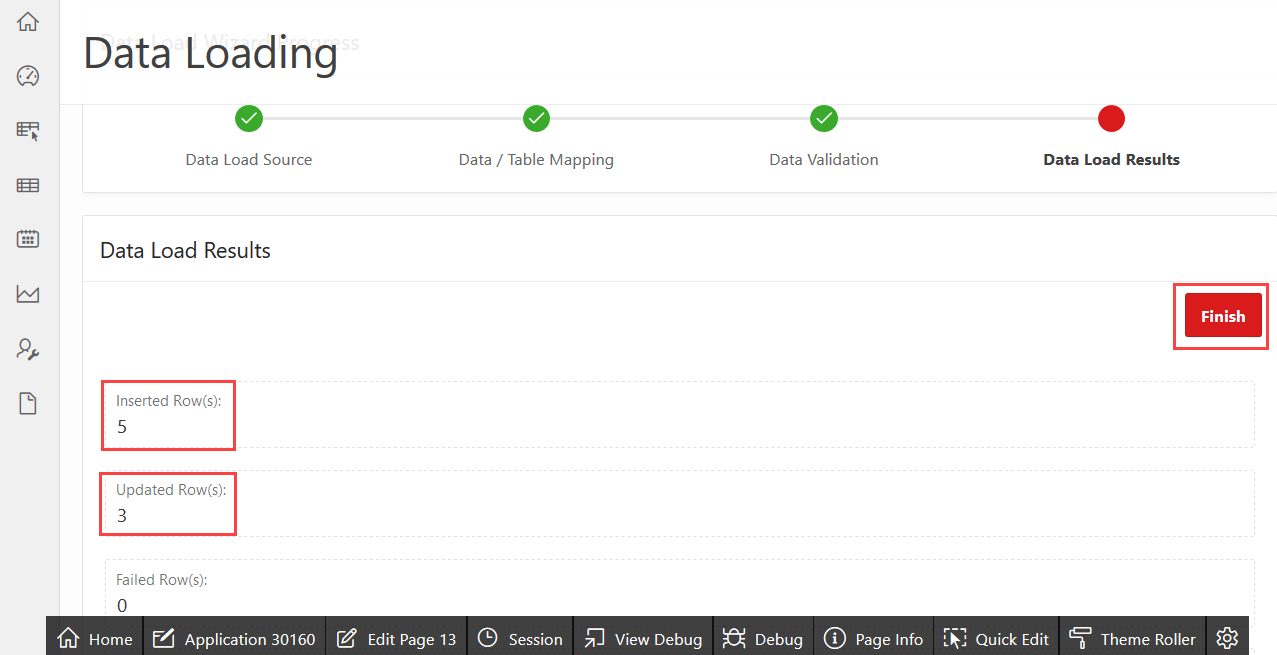
In section 1 of this tutorial, you created the Data Load Wizard
containing four pages that are Data Load Source,
Data/Table Mapping, Data Validation, and Data Load
Results. In this section, you will test the pages of the
Data Load Wizard:
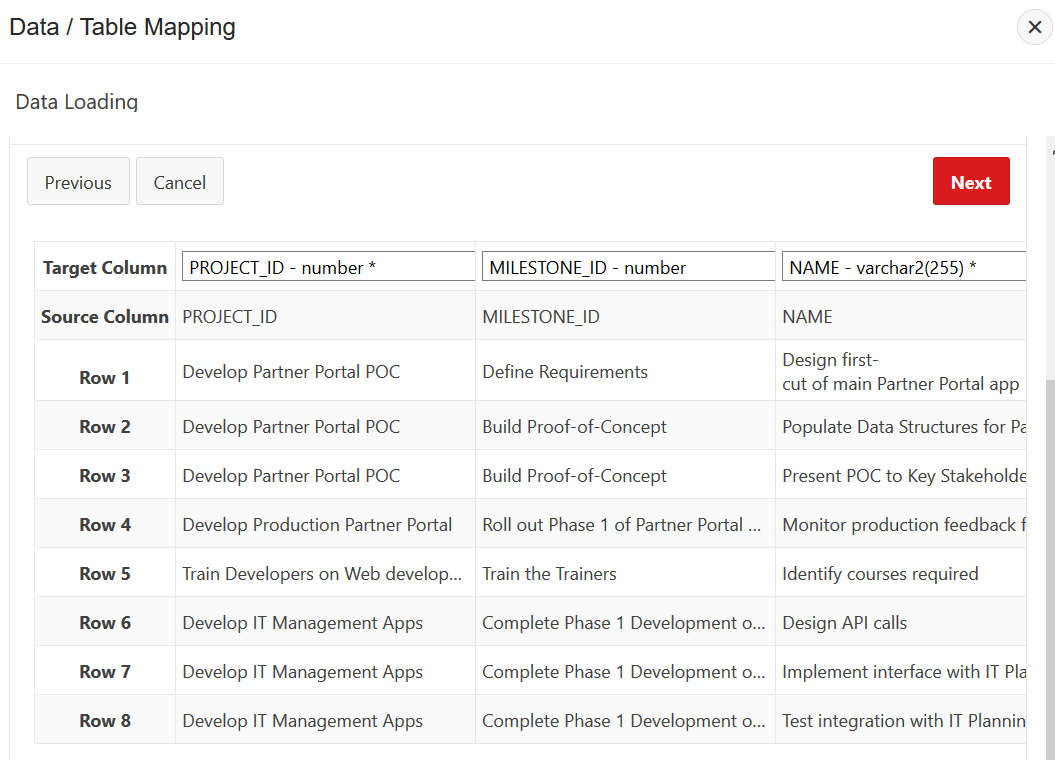
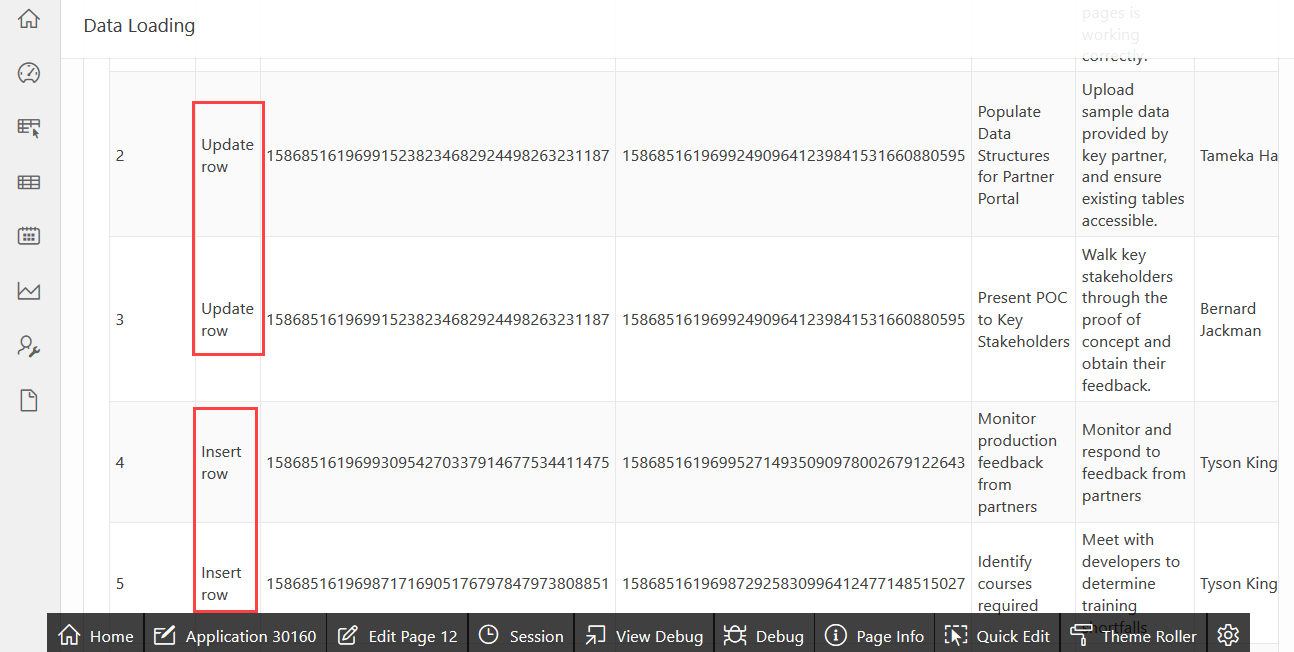
In the Data/Mapping dialog of the wizard, you can
see that the data from the csv file is picked
up. Click Next. When you click Next, the
Lookup and Transformation Rules will be applied.
Description
of the illustration data_table_mapping.png
The Home page opens. This completes the task of loading data
using the Data Load Wizard.
In the next section, you review the data load definition.
Click the Application link in the developer toolbar.
 Oracle
Application Express 18: Creating a Data Load Wizard for Your Application
Oracle
Application Express 18: Creating a Data Load Wizard for Your Application
 Before You Begin
 Create
a Data Load Wizard Using the Data Loading Page Wizard
Create
a Data Load Wizard Using the Data Loading Page Wizard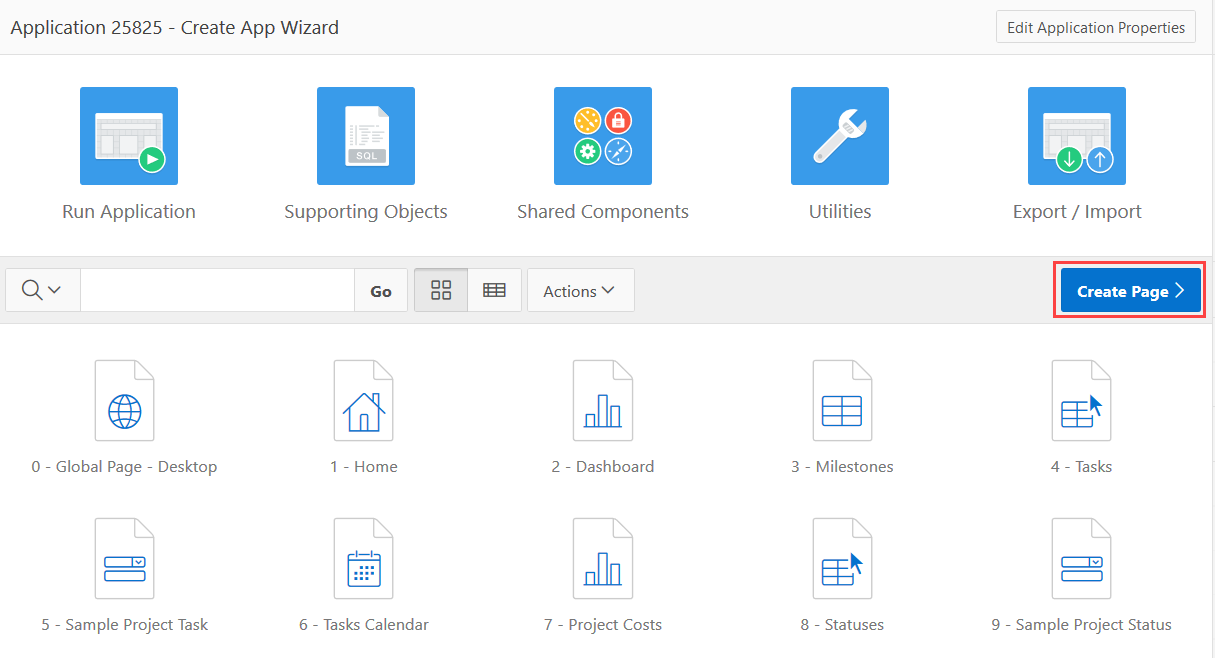

 Review
the Data Load Definition
Review
the Data Load Definition
 Test
the Data Load Wizard
Test
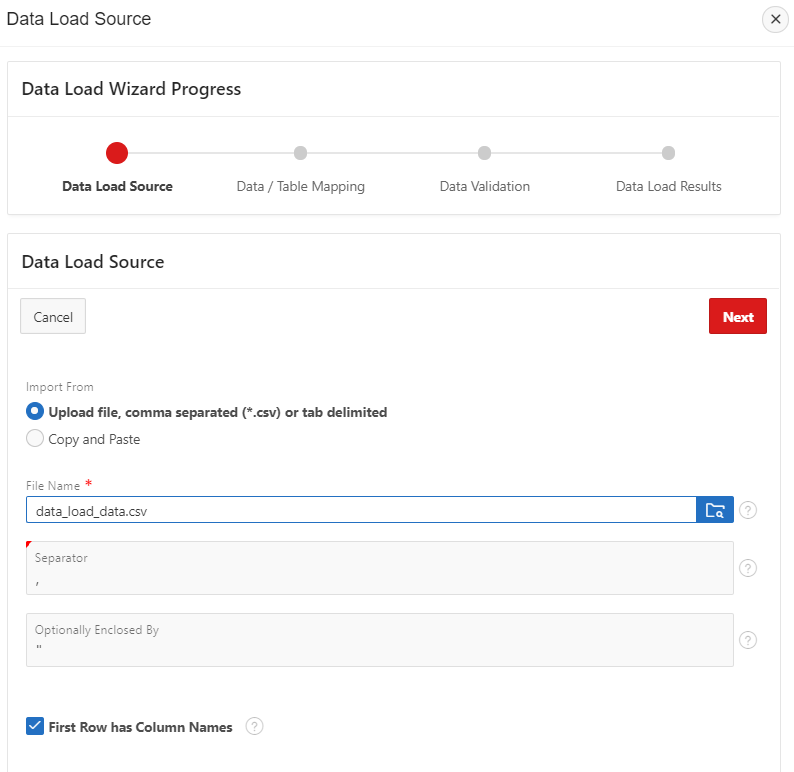
the Data Load Wizard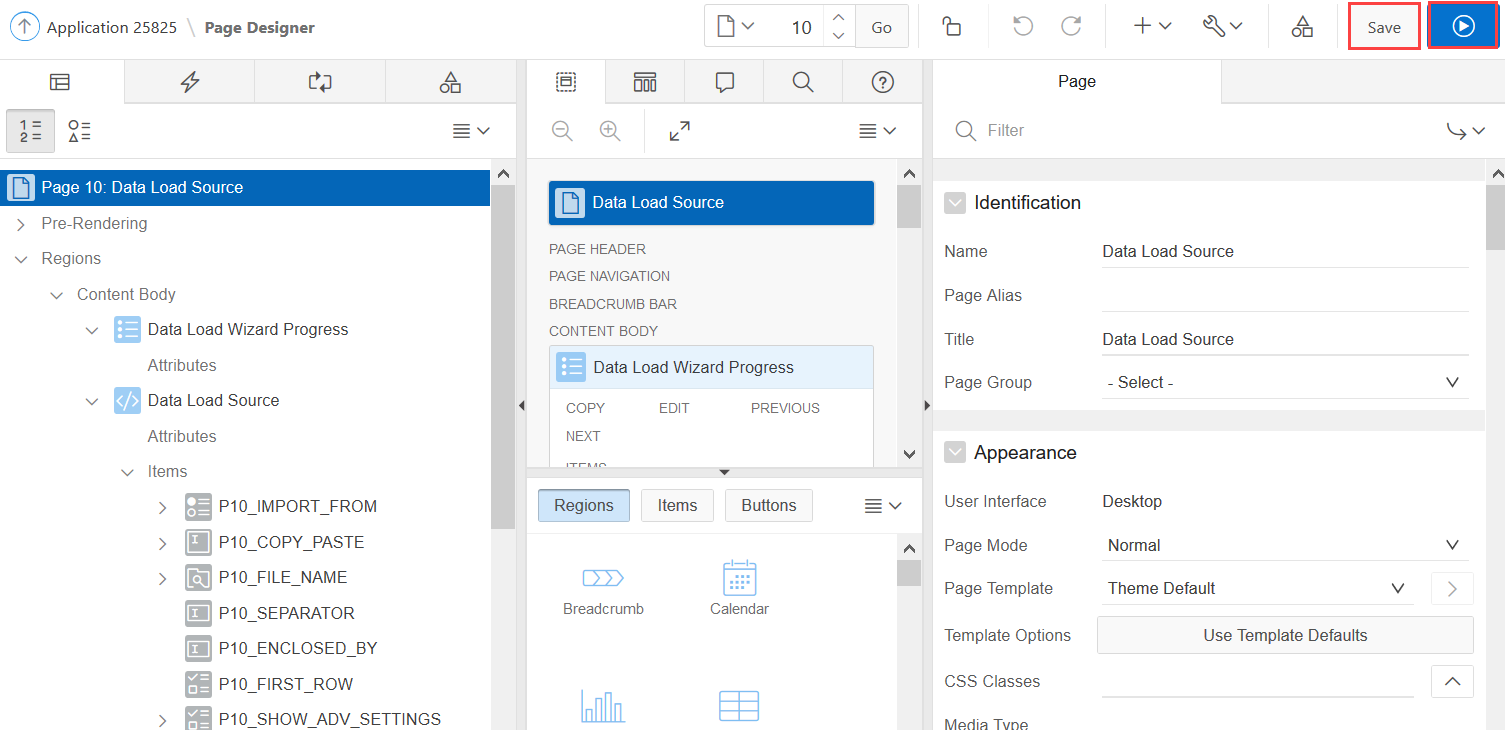
 , the browse icon
to select the data file.
, the browse icon
to select the data file.