4 Creating the Initial Application

About This Lesson

In this lesson, you use the Create Application Wizard to build the foundational pages of your application based on the sample dataset.

After you build the foundation of your app, use Page Designer’s Create Page Wizard to add a new page to the existing app and run the app for the first time.

WARNING:

It is important to complete this chapter in one sitting. You cannot save your work until the end of the chapter. If you stop before completion and your session times out, all your progress will be lost, and you will have to start the chapter again.

4.1 Running the Create Application Wizard

With the tables populated in your workspace, you can get started quickly with the Create Application Wizard.

The Create Application Wizard enables you to create many different types of pages, including reports, forms, and a master detail.

To create the initial application:

  1. Click App Builder and select Create.

    The Create Application Wizard appears.

    Tip:

    You can also click the down arrow icon on the tabs at the top of the screen to view a list of shortcuts to the wizard and other pages.
  2. Click New Application.

To customize your app name and appearance:

  1. In Name, enter Demo Projects

    Note:

    The Create Application Wizard creates a Home page automatically.
  2. Click the Set Appearance icon.
    The Appearance dialog displays.
  3. Click Vita - Red.
  4. For Application Icon, click Choose New Icon.

    The Choose Application Icon dialog displays.

  5. Click the red circle icon.
  6. Choose a new application icon, such as the trio of people.
  7. Click Set Application Icon and click Save Changes.

4.2 Adding a Cards Page

Often at the beginning of development, you only know some of the pages that your application requires. You can create as few or as many pages as you want in the Create Application Wizard. Save some time by generating a small batch of pages now. You can always add more later with a different wizard (the Create Page Wizard).

Start with a cards page that enables employees to quickly view and maintain their contact information.

Note:

A cards page consists of individual boxes, which resemble index cards, laid out on a page. Each card holds up to three pieces of information.

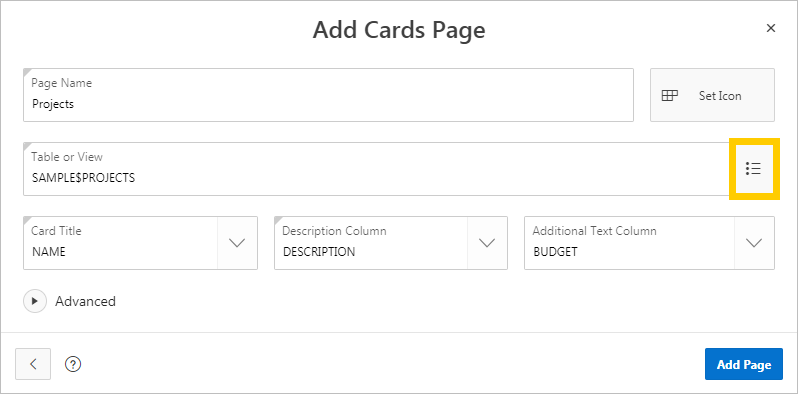
To add a cards page based on the SAMPLE$PROJECTS table:

  1. In the Pages section, click Add Page.
  2. Click Cards.
  3. Enter the following:
    1. Page Name - enter Projects
    2. Table or View - click the LOV icon (bullet points and lines) and select SAMPLE$PROJECTS
    3. Card Title - select NAME
    4. Description Column - select DESCRIPTION
    5. Additional Text Column - select BUDGET
    6. Click Add Page.

4.3 Adding a Dashboard Page

Next, add a dashboard page. A dashboard page consists of up to four charts. As a developer you can specify the specifics of each chart or leave the default sample charts, then update the page later.

To add a dashboard page:

  1. Click Add Page.
  2. Click Dashboard.

Dashboard pages come populated with useful metrics. Configure two of the charts for tracking project budget and project status, and leave the other two unconfigured. You can evaluate whether to keep them later.

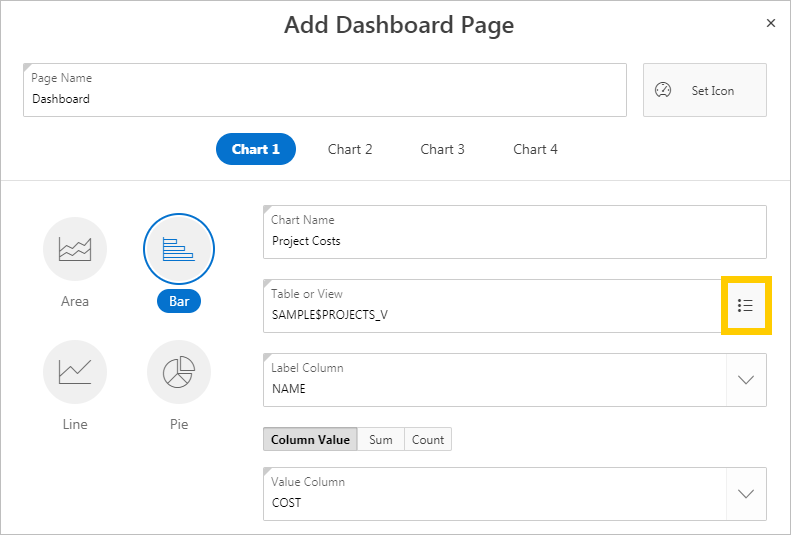
To configure the charts:

  1. Enter the following for Chart 1:
    1. Chart Type - click Bar
    2. Chart Name - enter Project Costs
    3. Table or View - select SAMPLE$PROJECT_V
    4. Label Column - select NAME
    5. Aggregate Type - click Column Value
    6. Value Column - select COST
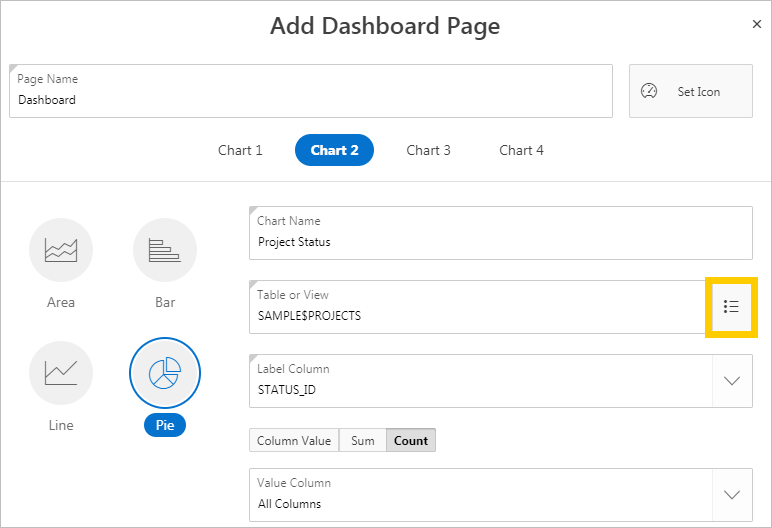
  2. Click Chart 2.
  3. Enter the following:
    1. Chart Type - click Pie
    2. Chart Name - enter Project Status
    3. Table or View - select SAMPLE$PROJECTS
    4. Label Column - select STATUS_ID
    5. Aggregate Type - click Count
  4. Click Add Page.

4.4 Moving Pages in the Create Application Wizard

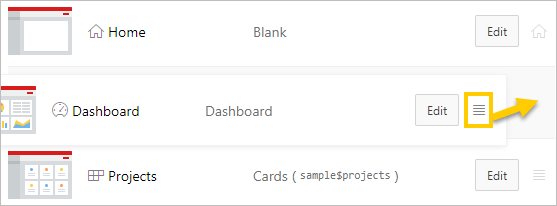
Once you create a page, you can click the Edit icon to edit the page name, change the icon that displays in the navigation menu, edit Advanced options, or delete the page. In addition to the Edit button, you can change the order of pages by dragging and dropping.

To move a page in the Create Application Wizard:

  1. For the Dashboard page, adjacent to the Edit button, click and hold the hamburger icon (horizontal lines).
    Hamburger Icon
  2. Drag the Dashboard page above the Projects page and release the mouse.
    The Dashboard page snaps into place.
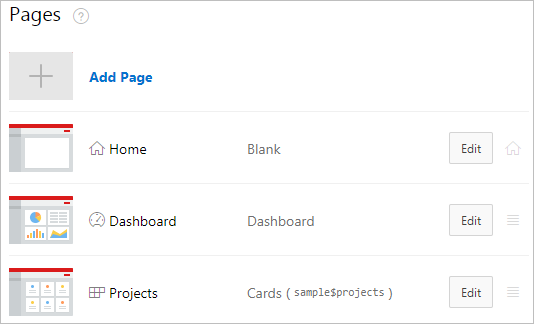
  3. Verify that your list contains three pages in the following order:
    1. Home, Blank

    2. Dashboard, Dashboard

    3. Projects, Cards (sample$projects)


4.5 Configuring Features and Advanced Settings

Features provide application-level functionality and are typically added once per application. Features broaden the application's capabilities, making it more suitable for wide distribution, rather than just being suitable for a proof-of-concept.

Tip:

While sometimes more complicated, you can also add Features to an existing app later with the Create Page Wizard.

To add Features to the application:

  1. Next to the Features heading, click Check All.

    Check All button

Settings are application-wide and define attributes used to generate the application.

To edit advanced settings:

  1. In the Settings section, in the Advanced Settings field, click the Define Advanced Settings icon (arrow in box).

    Define Advanced Settings icon

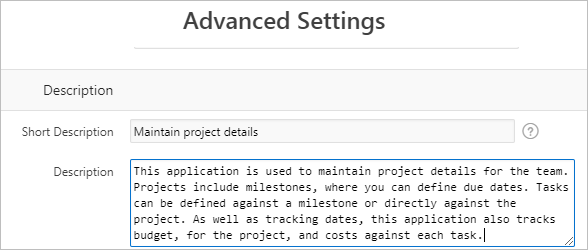
  2. Under the Description section, enter the following:
    1. Short Description - enter Maintain project details
    2. Description - copy and paste the following text:
      This application is used to maintain project details for the team. Projects include milestones, where you can define due dates. Tasks can be defined against a milestone or directly against the project. As well as tracking dates, this application also tracks budget, for the project, and costs against each task.
    3. Click Save Changes.

4.6 Completing the Create Application Wizard

To complete the Create Application Wizard:

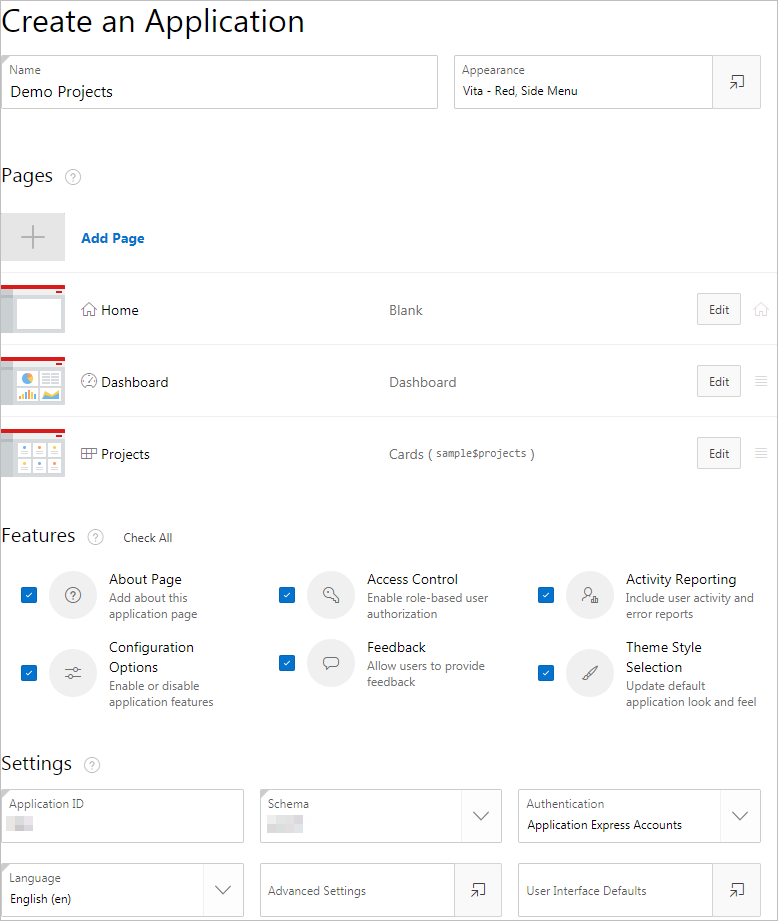
  1. Compare your app with the following screenshot:
  2. Click Create Application.

    A progress bar displays. When complete, Application Express navigates to the Application home page in App Builder.

    Note:

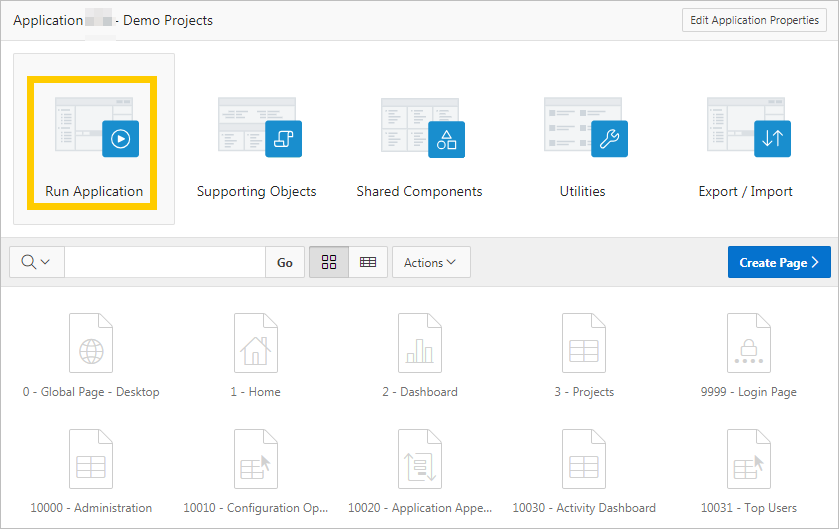
    Page 0 is a global page where you can define components to be displayed on all pages. Page 9999 is the Sign In page where end users authenticate when first accessing the application (enter their username and password). Pages 1000 and greater are administrative pages created for the features that you selected.

4.7 Running the Application for the First Time

Your app is functionally ready to run.

When you "run" an app, you are telling Application Express to open a new browser window and render the app. The rendered app is called the "application runtime" (or just "runtime"). As you create new pages, you can run them individually, or run an entire application.

Run the app for the first time from the Application home page and review the application runtime.

To run the application from the Application home page:

  1. Click Run Application.
    A Sign In page appears.
  2. Enter your Application Express credentials and click Sign In.

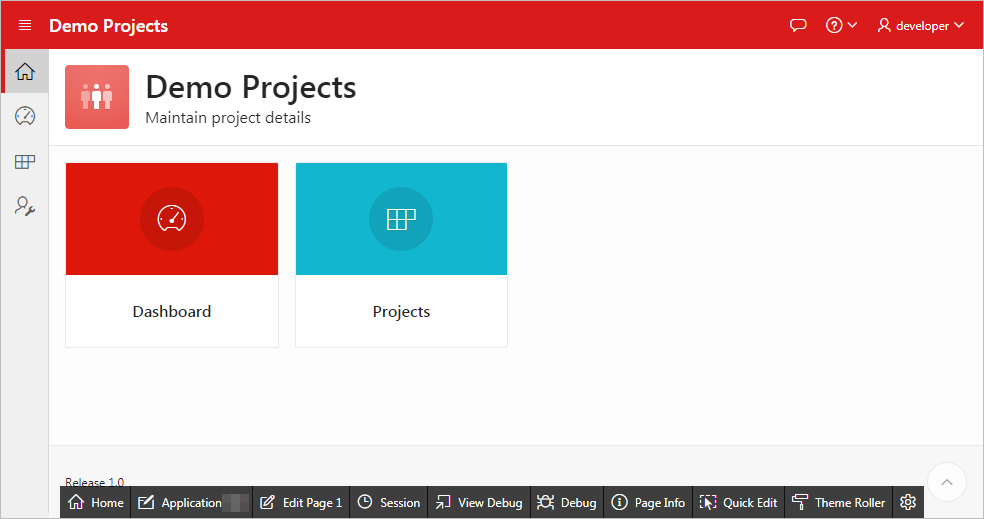
    Your application opens to the Home page.

  3. Explore the application by clicking on menu items and navigating to different pages in the navigation pane.

    The sample tables and data display on various pages in a raw format. The rest of this tutorial guides you through the development process to improve both the presentation and functionality of this data for your end users.

Proceed to the next lesson.