11.1.4 Using Theme Roller and Edit Logo
Use Theme Roller and Edit Logo to quickly transform the appearance of an application without editing any code.
Note:
Concurrent use of the Live Template Options, Theme Roller, and Logo Editor is not supported.- About Theme Roller and Edit Logo
Learn about the Theme Roller and Edit Logo options available on the Customize menu on the Runtime Developer toolbar. - Using the Theme Roller Dialog
Use the Theme Roller dialog to quickly change the appearance of an application without editing any code. - About Developer Console Integration
Use the exposed functionapex.utr.config();in your web browser developer's console to get and set the custom CSS code and LESS compilation configuration - About the Redwood Light Theme Style
The Redwood Light theme style features a number of unique class options in Theme Roller. - Using Edit Logo
Use Edit Logo to quickly change the logo that displays at runtime.
Parent topic: Using Themes
11.1.4.1 About Theme Roller and Edit Logo
Learn about the Theme Roller and Edit Logo options available on the Customize menu on the Runtime Developer toolbar.
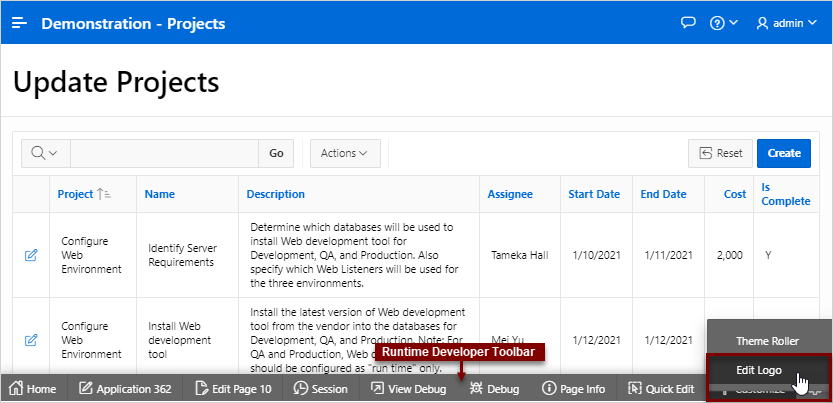
When you run an application from App Builder and view a page, the Runtime Developer toolbar displays at the bottom of any editable running page. Clicking the Customize menu displays two menu options: Theme Roller and Edit Logo.
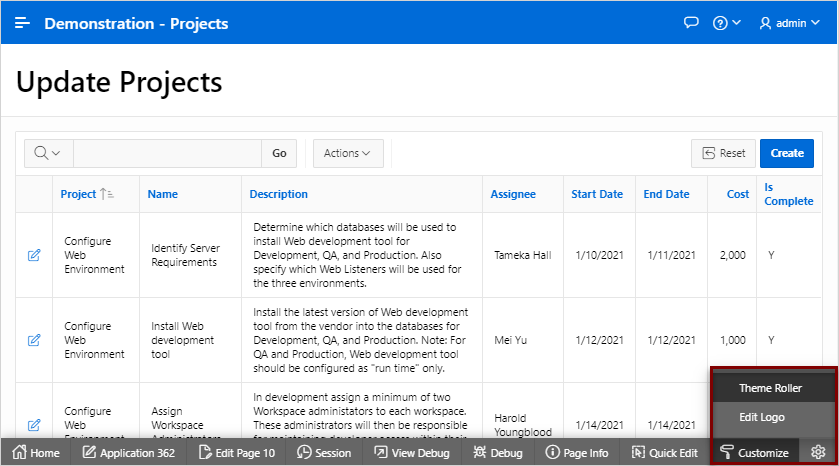
Description of the illustration customize_menu.png
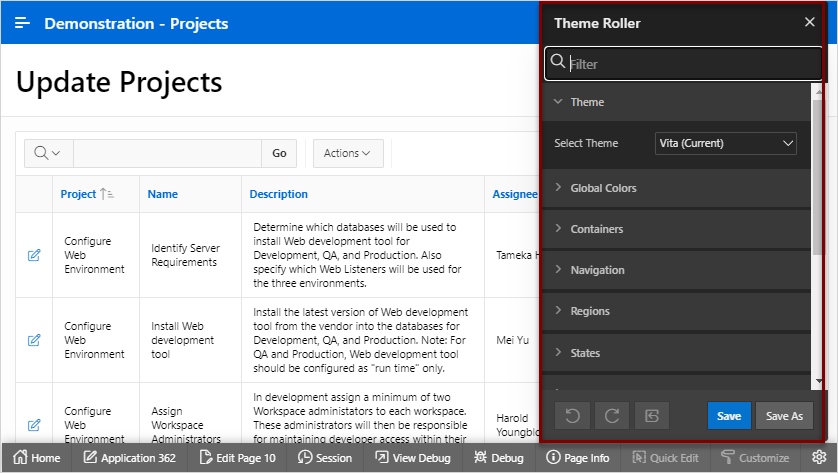
Theme Roller is a live CSS editor that enables you to quickly change the theme style, colors, rounded corners and other application attributes.
In order for Theme Roller to appear on the Runtime Developer toolbar:
-
Theme styles must be defined.
-
At least one theme styles must have the Input Parameter File URLs attribute defined.
Edit Logo offers a quick way to add or edit the logo users see at runtime.
See Also:
Parent topic: Using Theme Roller and Edit Logo
11.1.4.2 Using the Theme Roller Dialog
Use the Theme Roller dialog to quickly change the appearance of an application without editing any code.
Tip:
Theme Roller displays on the Runtime Developer toolbar if theme styles have been defined and at least one theme styles has the Input Parameter File URLs attribute defined.Parent topic: Using Theme Roller and Edit Logo
11.1.4.3 About Developer Console Integration
Use the exposed function apex.utr.config(); in your web
browser developer's console to get and set the custom CSS code and LESS compilation
configuration
To get styles, write apex.utr.config() without parameters into the
console:
apex.utr.config();
Paste the following line of code into the JS console to load your current configuration into Theme Roller:
  apex.utr.config({"classes":[],"vars":{},"customCSS":"","useCustomLess":"Y"});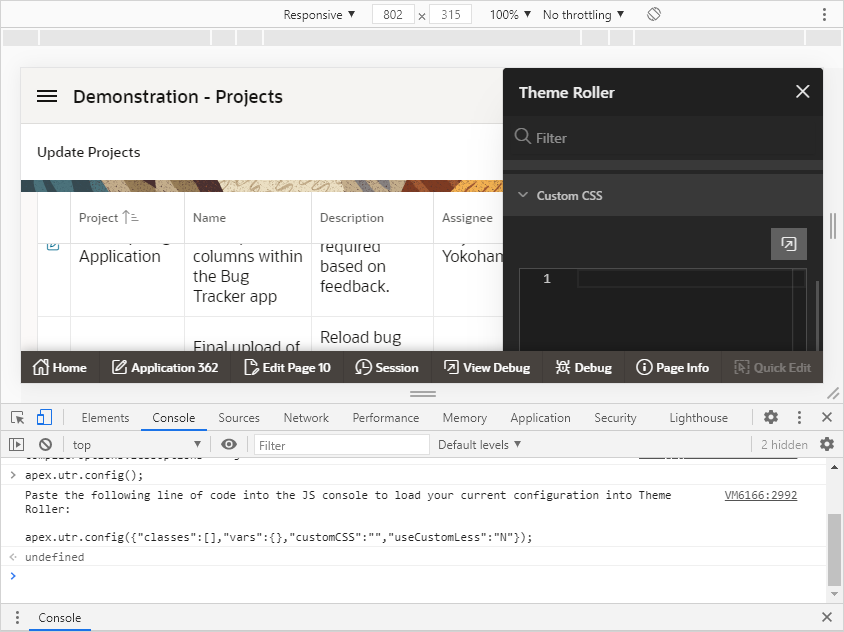
Description of the illustration dev_console_1.png
To set styles, add less or css code in the customCSS object of the JSON configuration into the console:
apex.utr.config({"classes":[],"vars":{},"customCSS":"h1 { color: #111; font-family: 'Helvetica Neue', sans-serif; ... }", "useCustomLess":"Y"});The custom CSS will be added to the theme roller Code Editor and applied to the page automatically.
Parent topic: Using Theme Roller and Edit Logo
11.1.4.4 About the Redwood Light Theme Style
The Redwood Light theme style features a number of unique class options in Theme Roller.
-
Pillar - The Pillar class enables users to change the background and header images.
-
Layout - The Layout class enables users to switch the following layout options: Edge to Edge, Floating, or Contained.
-
Appearance - Attributes under Appearance include Header, Navigation, Body Header, and Background.
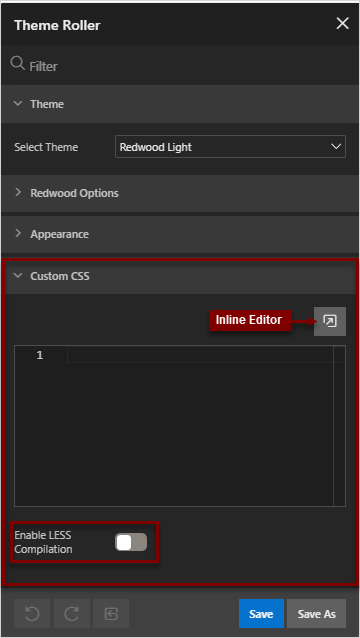
The following image shows Theme Roller with the Redwood Light theme style selected.
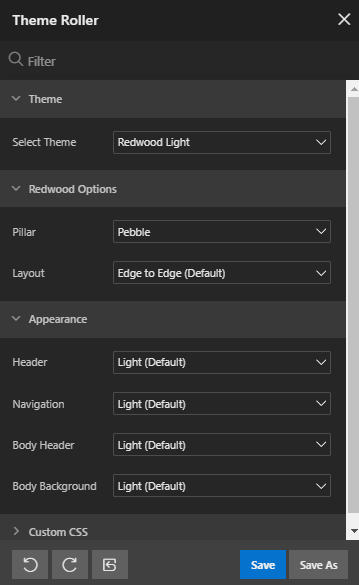
Description of the illustration theme_roller_redwood.png
Parent topic: Using Theme Roller and Edit Logo
11.1.4.5 Using Edit Logo
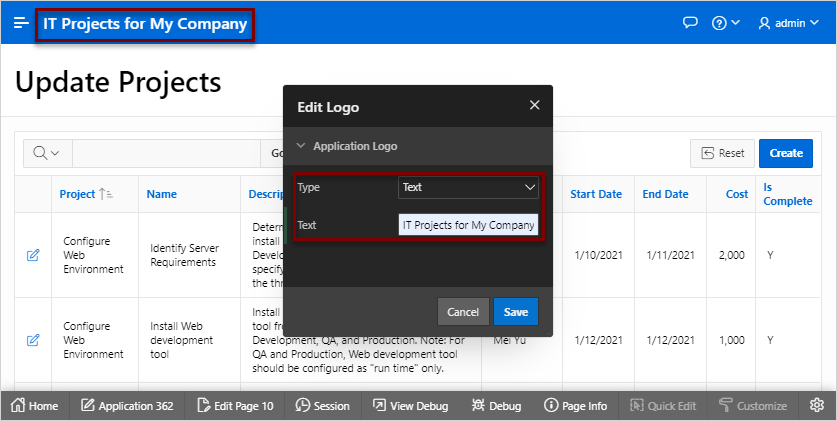
Use Edit Logo to quickly change the logo that displays at runtime.
To include a logo, your page template must include the
#LOGO# substitution string.
Note:
You can also edit an application logo by editing the application User Interface attributes. See "Defining an Application Logo."To use Edit Logo:
Parent topic: Using Theme Roller and Edit Logo
