Configuring MCP Servers for Public LLMs
This topic describes the procedure to configure new MCP servers for public LLMs.
MCP (Model Context Protocol) Server act as a middleware for LLMs and enable them to interact with external tools (such as GitHub or Docker) and services, manage contexts, and complete task flows. Database Navigator lets you configure MCP servers to use with the public LLMs in the Database Assistant module.
Follow these steps to configure a new MCP Server:
- From the Main menu of the Database Navigator toolbar, select DB Navigator > Settings > Assistant tab.
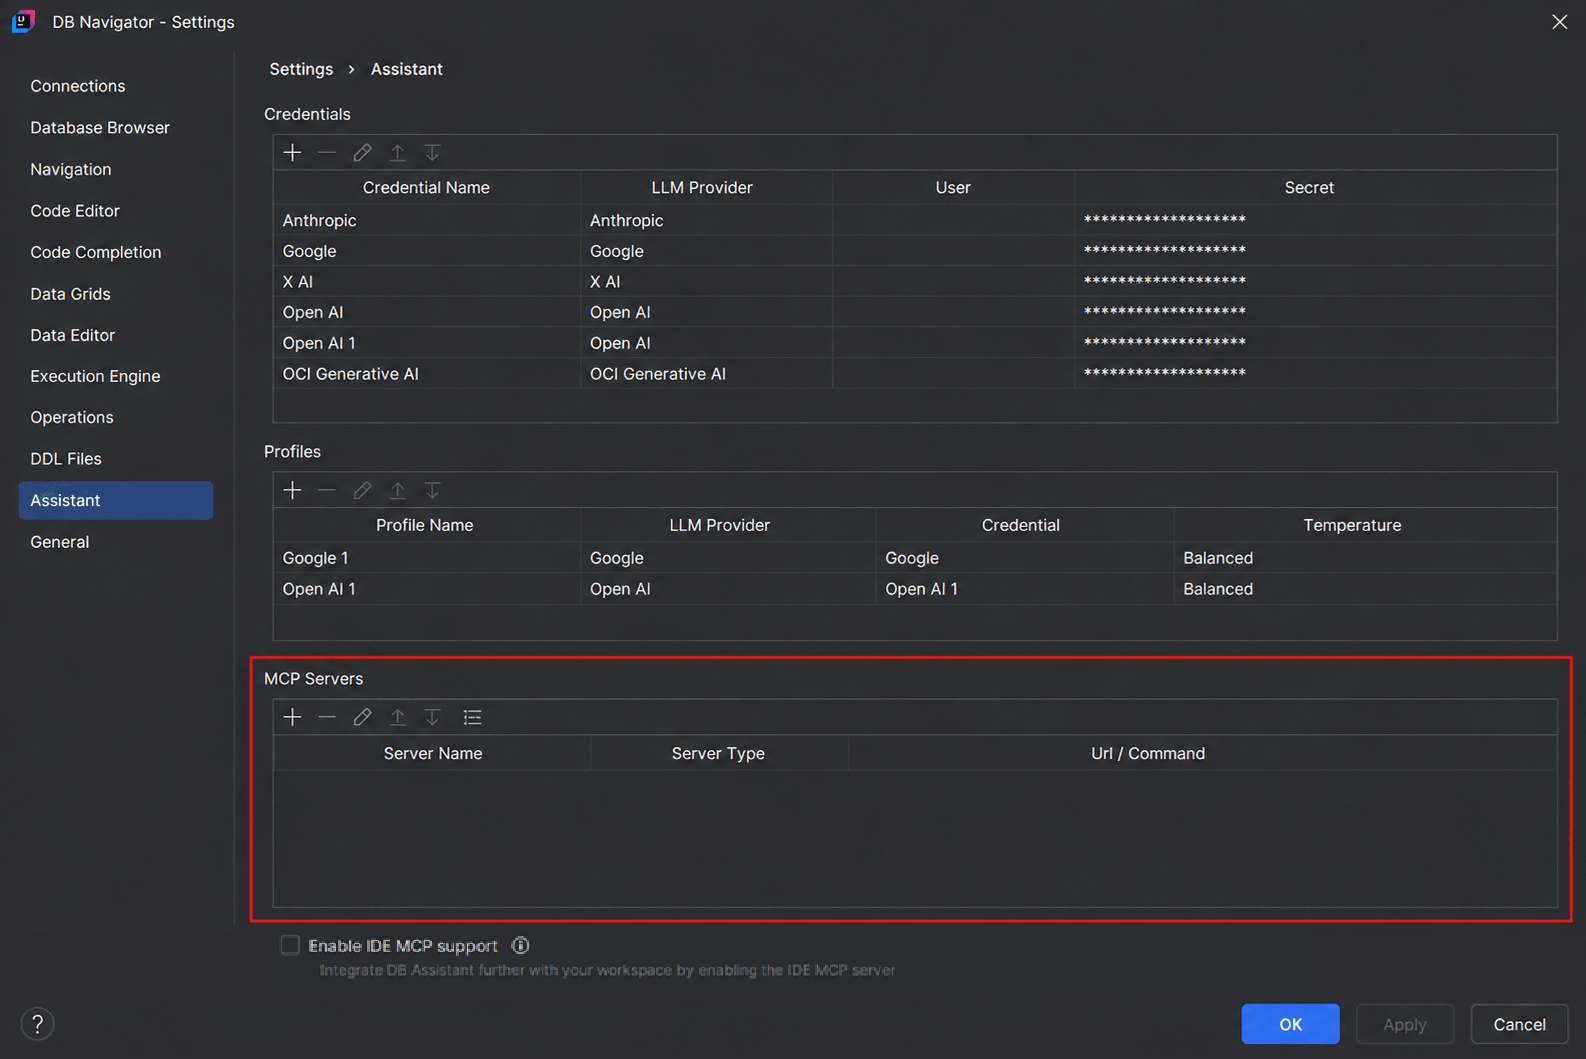
- Click the Add (+) icon to open the DB Navigator - Create MCP Server Config dialolg box.Enter the following information:
- Server Name - Enter a name for the MCP server.
- Server Type - Select the transport type of MCP server to communicate with MCP clients:
- HTTP (Streamable HTTP) - In this option, the server runs independently and exposes and HTTP endpoint, for example,
http://127.0.0.1:<port>/mcp. Connecting an MCP server through HTTP enables AI agents to access tools and resources remotely. - STDIO (Standard I/O) - In this option, the MCP client launches your server process directly and communicates with it through
stdin/stdoutrequests and responses. Connecting a MCP server through STDIO allows integrations between AI applications and tools and resources through local processes.
- HTTP (Streamable HTTP) - In this option, the server runs independently and exposes and HTTP endpoint, for example,
- URL - Displays if you select HTTP Server type. Enter the HTTP endpoint URL.
- Command - Displays if you select STDIO Server type. Enter the location of the MCP server file.
DB Navigator - Create MCP Server Config window with HTTP Server type -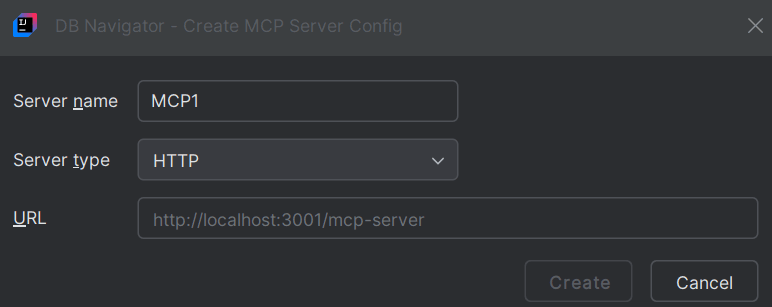 DB Navigator - Create MCP Server Config window with STDIO Server type -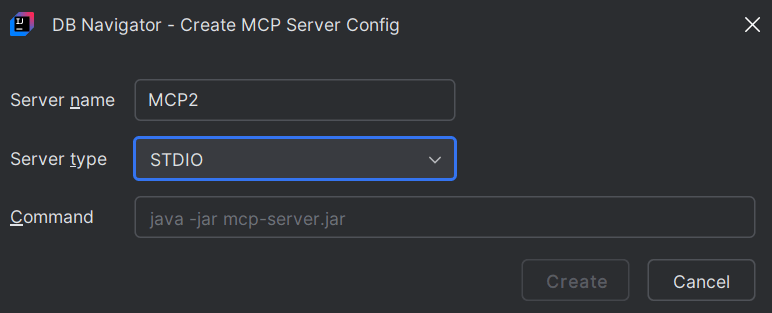
- Click Apply and OK to add the configured server to the MCP Servers section.
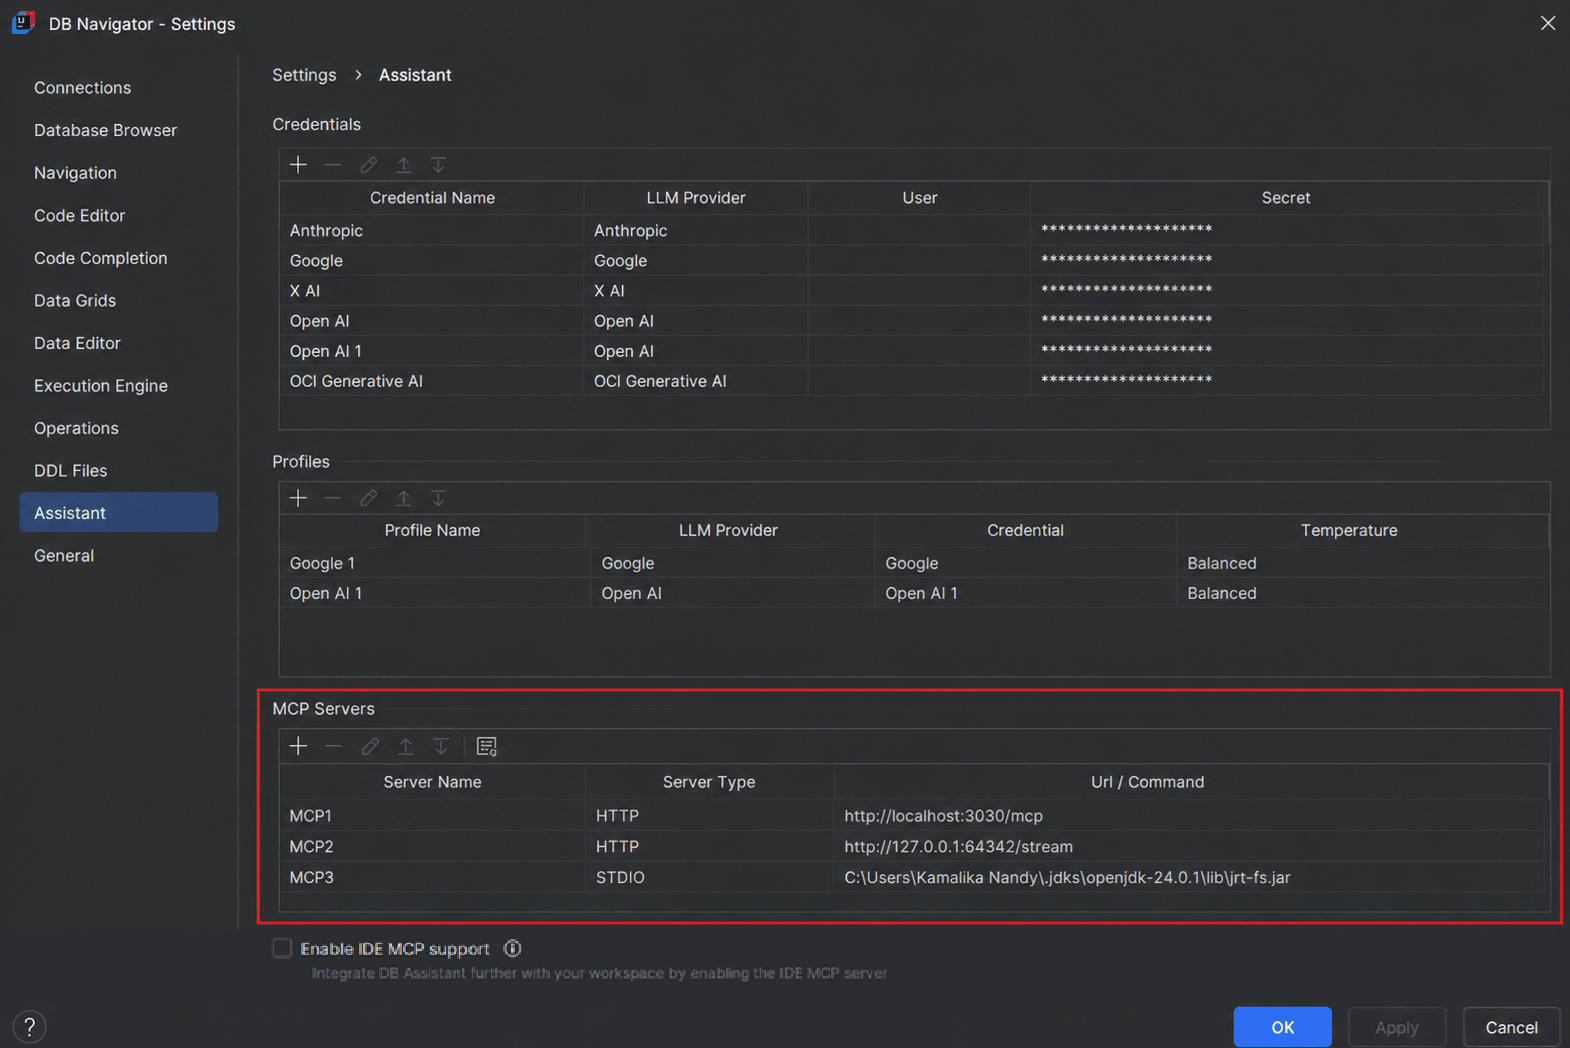 Database Navigator also provides support to utilize the IDE's own MCP server configuration and integrate that with Database Assistant workspace. To enable this feature, select the Enable IDE MCP support check box under the MCP server section. Once you enable the check box, DBN checks whether the IDE MCP server is enabled. If not, you are prompted to first enable the MCP server from the corresponding IDE's Settings page through the Enable link.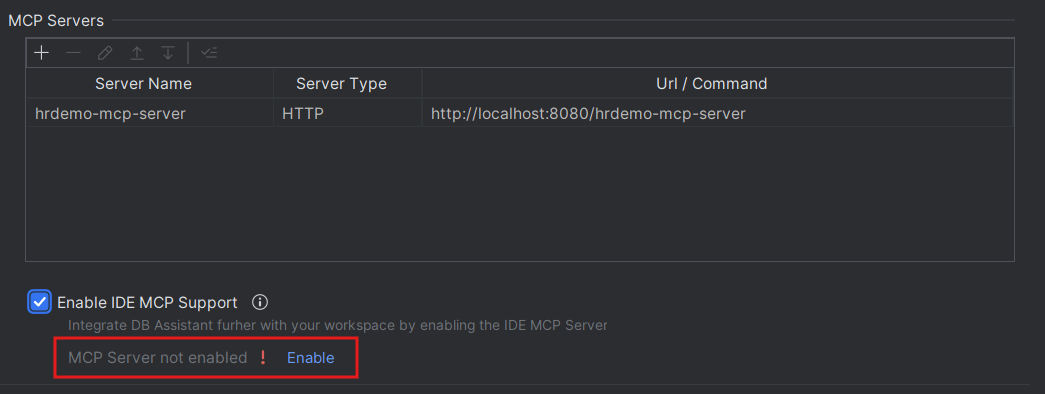
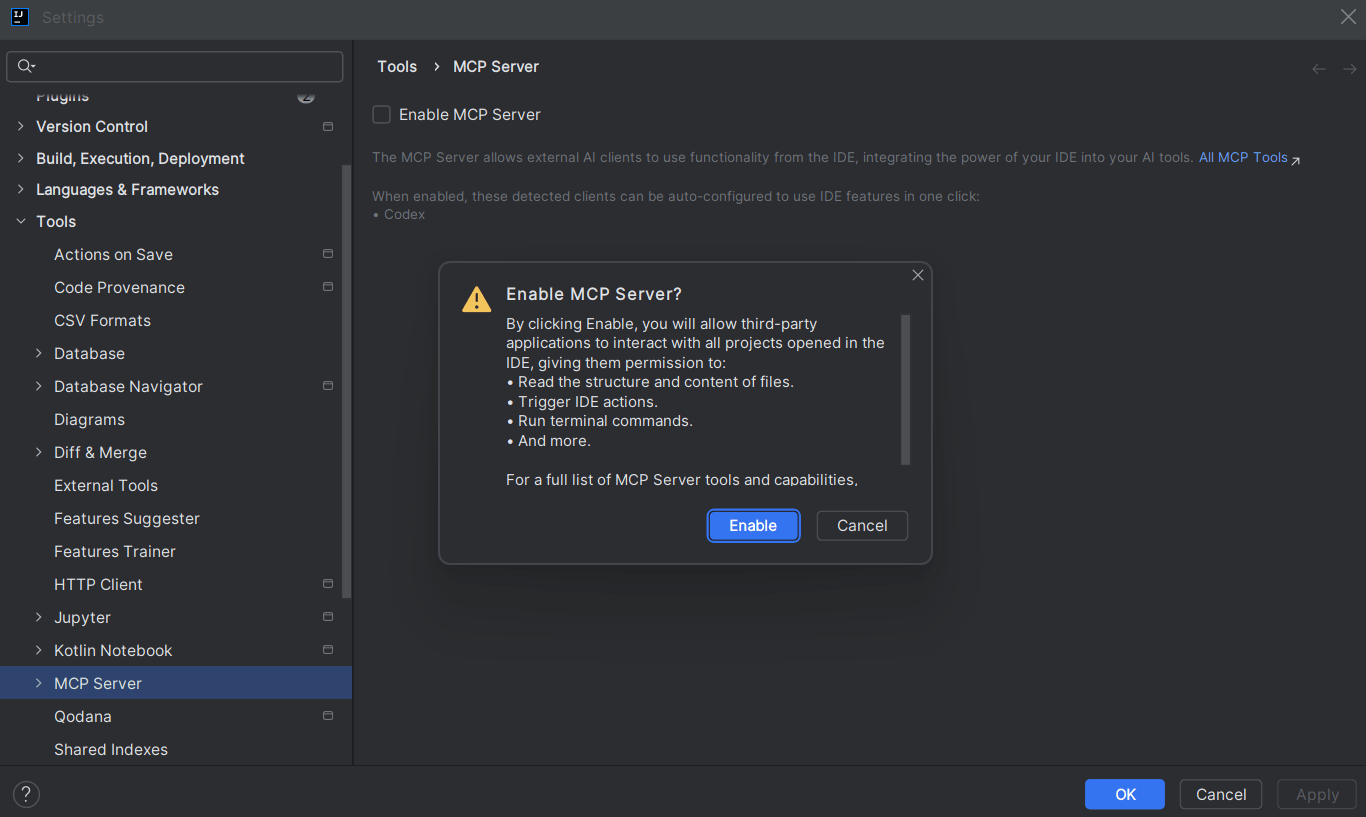
On the MCP Server Settings page, select the Enable MCP Server check box and review the configurations.
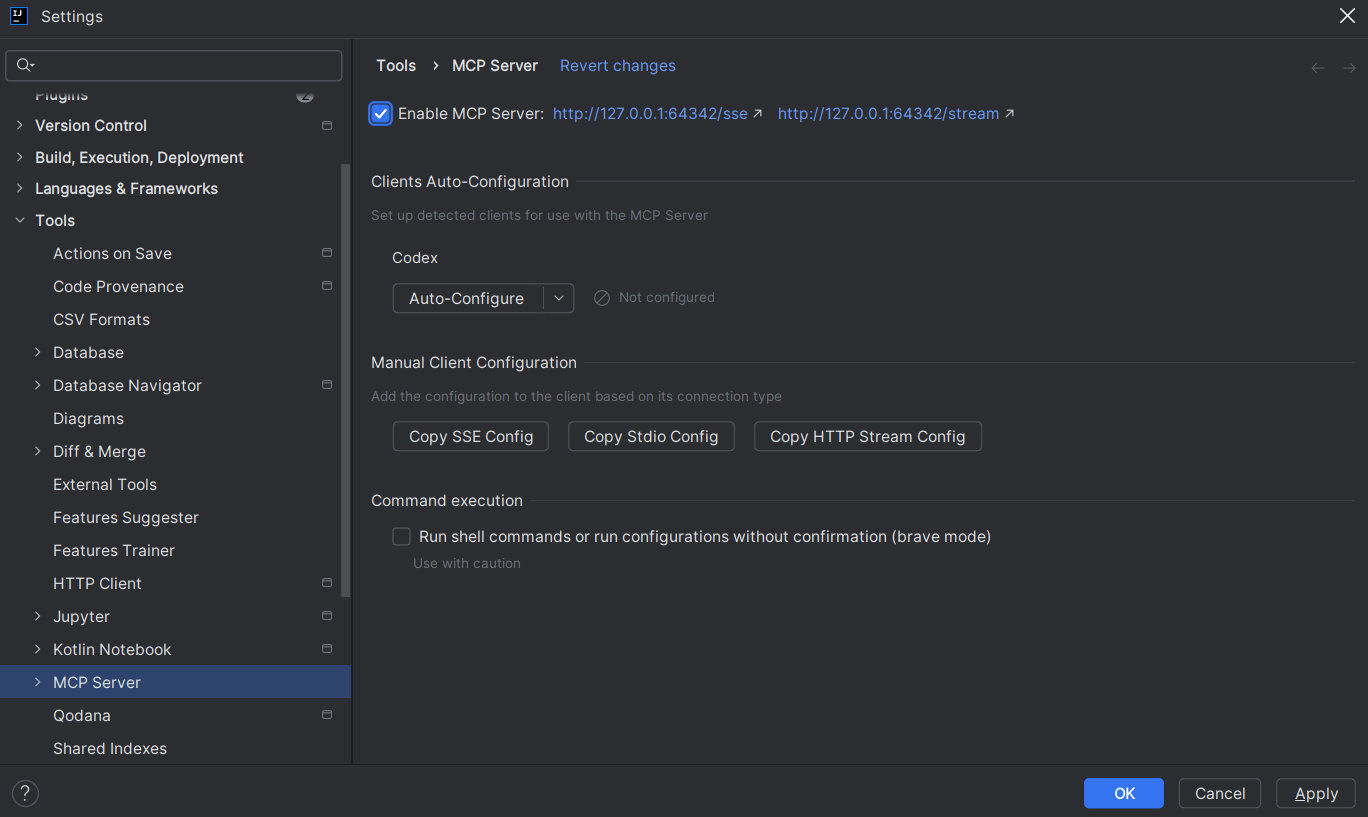
Once enabled, the IDE MCP server can be integrated with your workspace through Database Assistant.
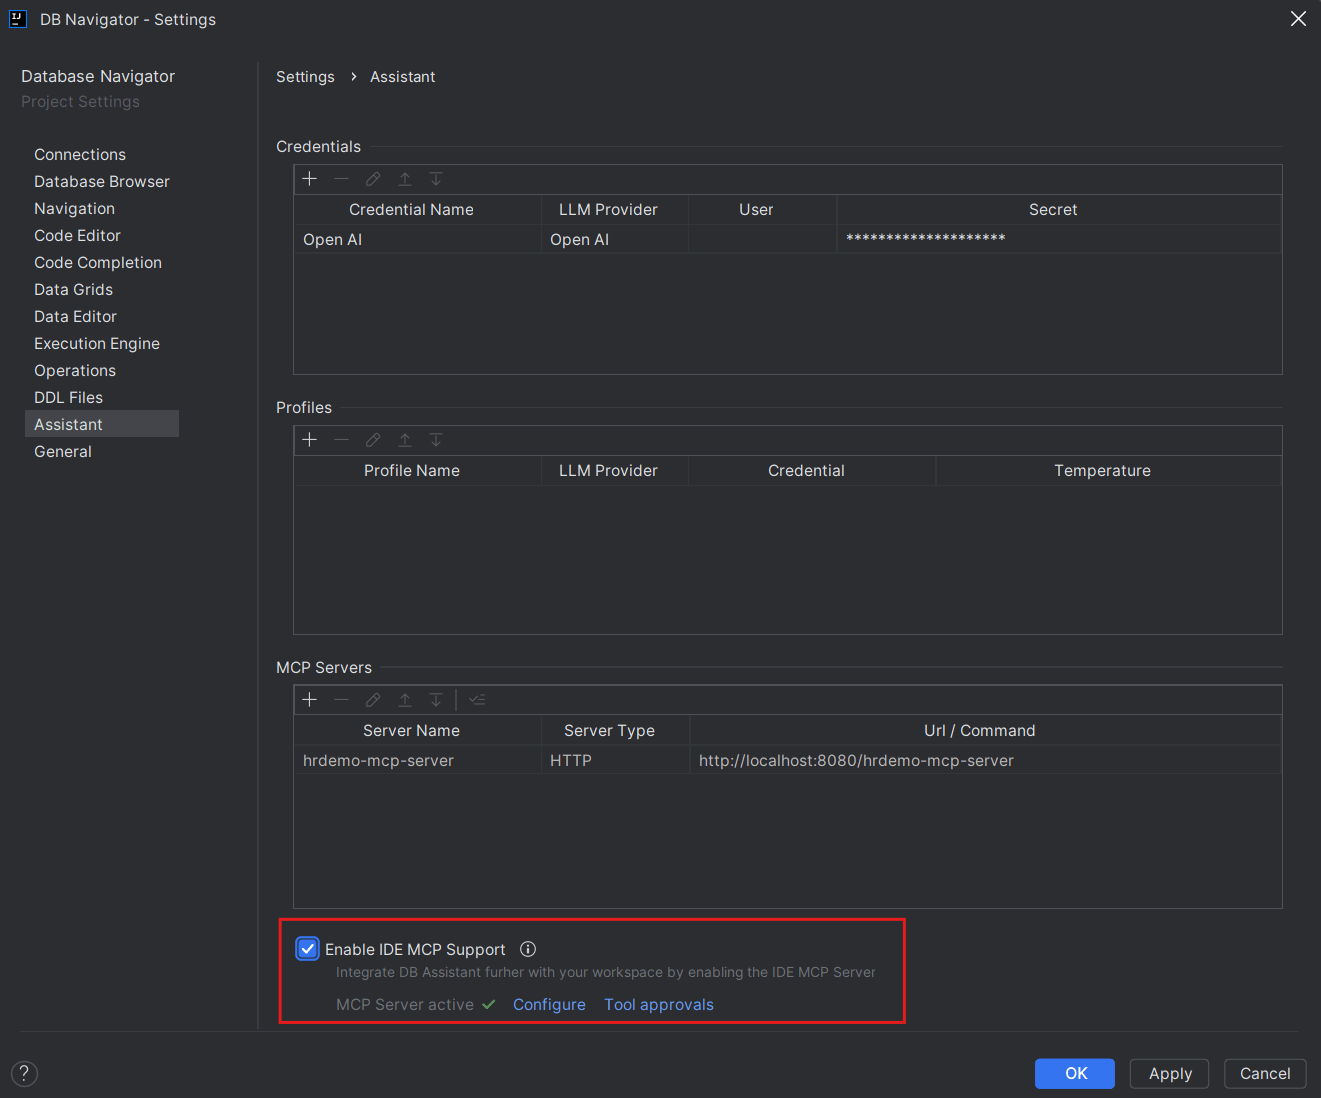
- Click OK to close the DB Navigator - Settings window. The MCP servers you add (including the IDE MCP Server, if enabled) will be available for selection in the MCP Servers drop-down list of the DB Assistant chat box window.
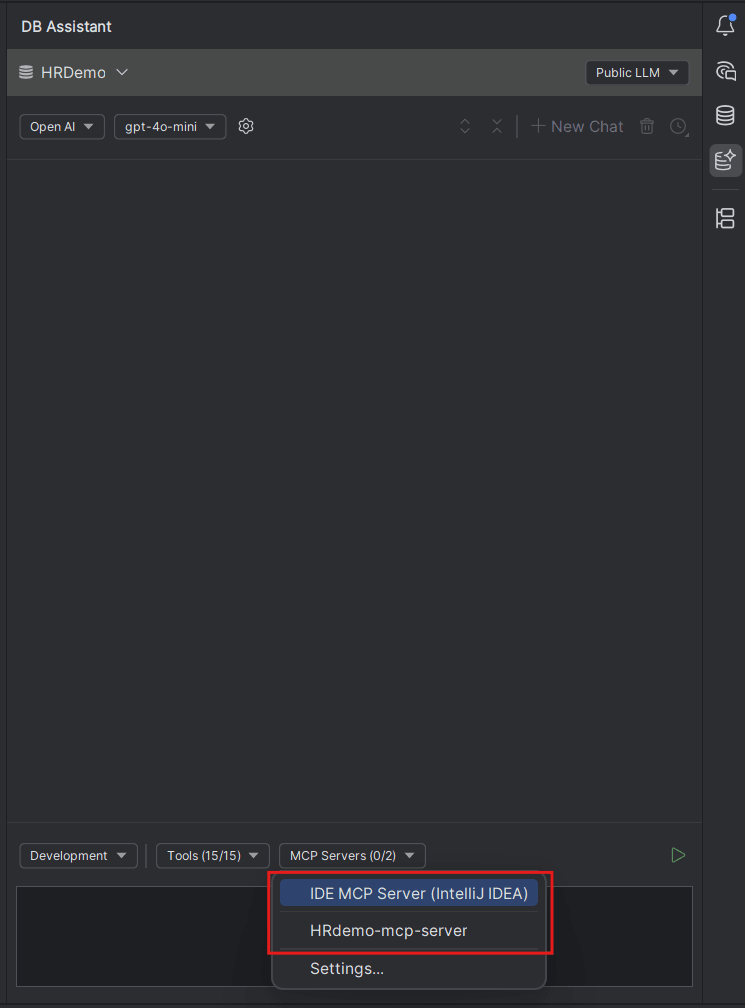 You can access the same Settings window to modify any existing server details or create new MCP server from the DB Assistant chat box window.
Parent topic: Public LLMs