Setting Up the AWR Warehouse

Ensure that these prerequisites are satisfied before designating a database as the AWR Warehouse:

  • The target database must be an existing version 12.1.0.2 or higher or 11.2.0.4 with the appropriate patch level managed target in Enterprise Manager Cloud Control. Oracle recommends that the selected database not be used by any other application and that the Enterprise Manager Cloud Control repository not be used as the warehouse.

  • There is sufficient space available to accommodate the data to be uploaded, as a factor of per source database per day. Rule of thumb is a range of 4-10MB per database per day.

  • You must have Super Administrator privileges to configure the AWR Warehouse.

  1. From the Targets drop-down menu, select Databases.

    The Databases page appears with a list of the available target databases.

  2. Access the Database Home page for the target database.

    See "Accessing the Database Home Page" for more information.

  3. On the Databases page, click Performance drop-down, then select AWR Warehouse.

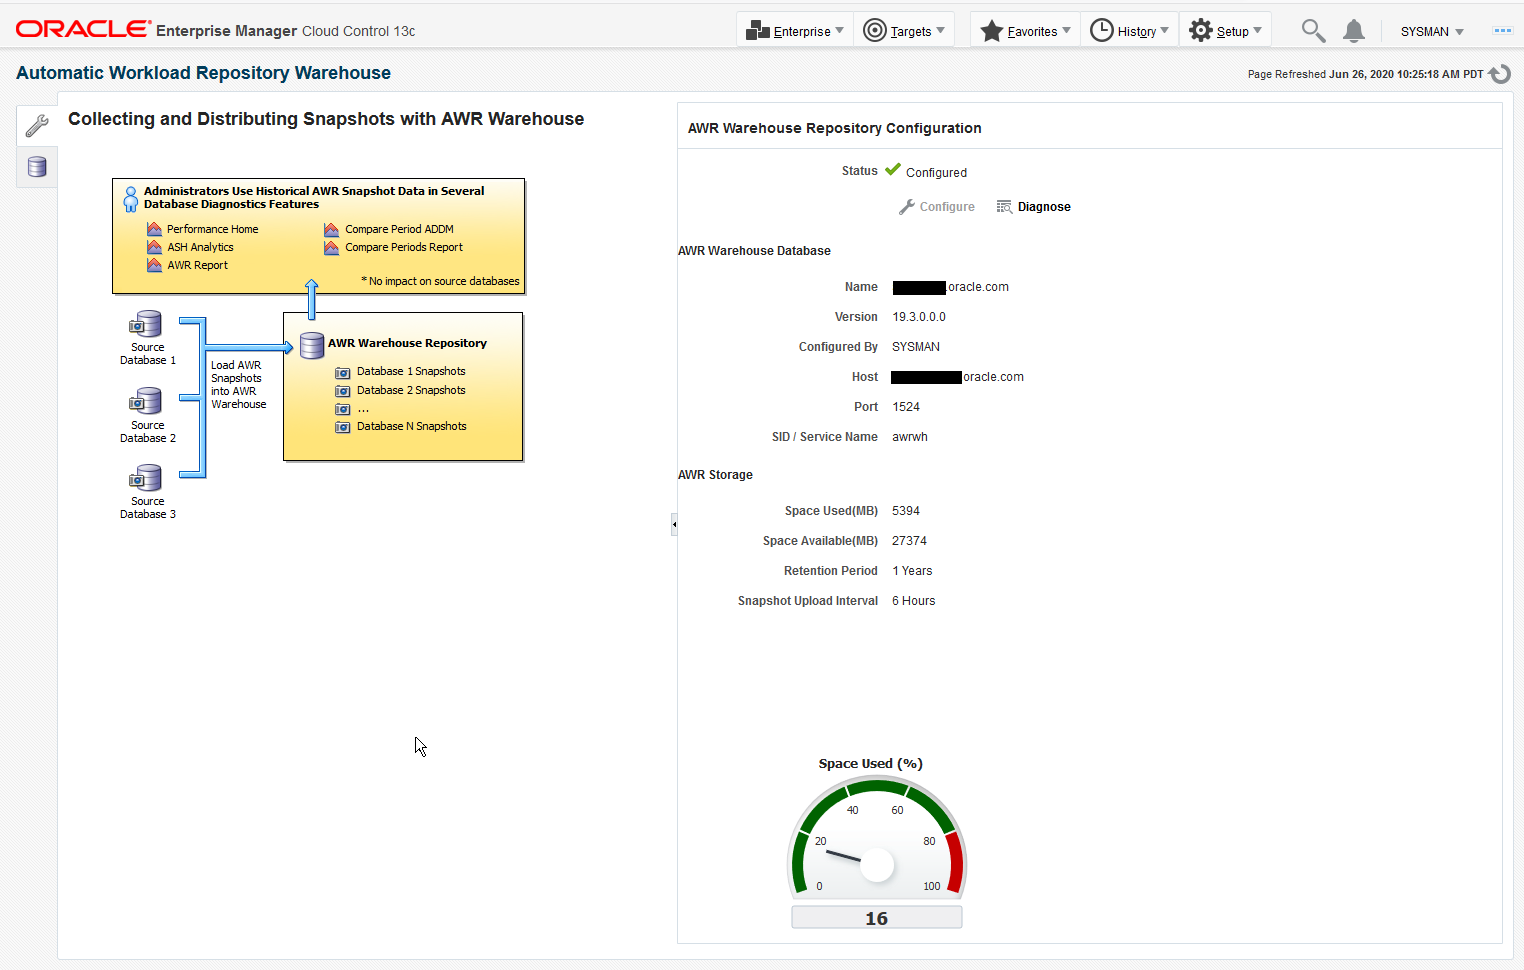
    If it has not previously been configured, a workflow diagram appears with aConfigure button in the right-hand pane. If it has been configured, the tool icon takes you to the configuration page.

    Prior to warehouse setup, the page displays a feature workflow on the left and configuration access on the right.

    AWR configuration screen already configured.

    Note:

    When adding a new AWR source database, you can specify dump locations for extract. The location should be a valid directory inside the source database host (or a shared location in case of a cluster) and accessible by the host credential specified. By default, the field is empty and means the dump file location is the default agent directory.

    After setup, the right side of the page summarizes the warehouse configuration and graphically depicts space used as a percentage of space available.

    Screen shot of the AWR Warhouse dashboard.
  4. Click Configure in the pane to the right of the workflow diagram. The first configuration page (Repository) appears.
  5. Click the search icon to select the database to serve as the AWR Warehouse.
  6. Select the preferred or named credentials established for the target database. You can also provide new credentials.
    You can specify a password compliant with password policy for staging schema during warehouse configuration. If none specified, a complex random password is used by default.
  7. Select the preferred or named credentials established for the target database host. You can also provide new credentials.
  8. Click Next. The second configuration page (AWR Snapshot Management) appears.
  9. Set the retention period to a number of years. Optionally, you can choose to retain the data indefinitely.
  10. Set the snapshot upload interval. The default is 24 hours The minimum interval is one hour. You can also upload snapshots on-demand.
  11. Select where on the warehouse database host to save exported dump files. For a single instance database, the location defaults to the agent state directory. For a cluster database, you have to specify a location that is accessible to all nodes.
  12. Click Submit. This submits a job with the prefix CAW_LOAD_SETUP_.

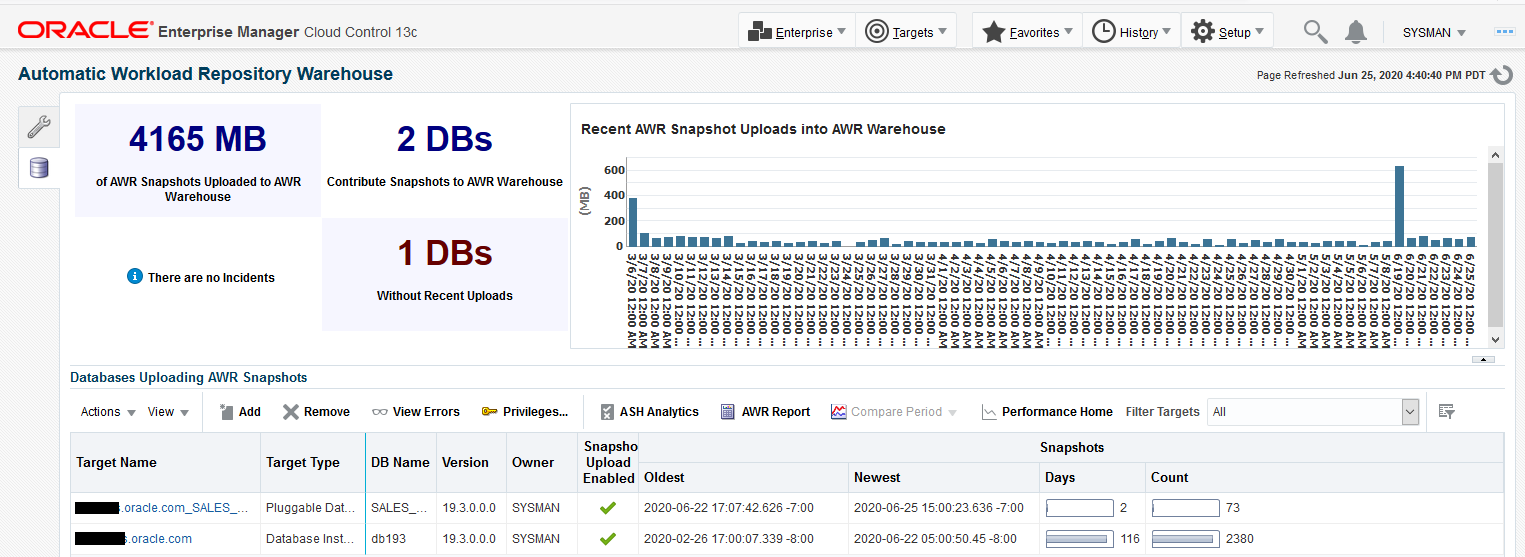
After initial setup, the AWR Warehouse page becomes a dashboard where you can perform the following tasks:

  • Add and remove source databases.

  • Enable and disable snapshot uploads.

  • Upload snapshots on-demand.

  • Give administrators access to AWR data stored in the warehouse.

  • Monitor and research incidents and errors.

  • Run performance reports and analytics on the warehouse the same as you would on local AWRs.

  • Edit Warehouse properties after the configuration is done with the Edit button. Properties that can be changed are:

    1. Database Credential
    2. Host Credential
    3. Retention period
    4. Upload Interval
    5. Staging Schema Password

    Note:

    Modifying Warehouse properties affects all the sources and overrides source level custom properties, if any.
  • Edit the properties of a source database.

    1. Host Credential
    2. Database Credential
    3. Upload Interval
    4. Retention period

    Note:

    If you modify Host Credential, Database Credential, or Upload Interval, a Reconfigure Job is triggred and re-schedules the extract and transfer jobs with the new values.
  • Specify dump locations for extract when adding a new AWR source database.

    Note:

    The location should be a valid directory inside the source database host (shared location in case of a cluster) and accessible by the host credential specified. By default, the field is empty and uses the default agent directory.