1 Getting Started with Oracle REST Data Services
This tutorial is designed to let you get started quickly developing RESTful services using Oracle REST Data Services.
1.1 Getting Started with RESTful Services
Prerequisites
The following are the prerequisites before you start performing the steps in this tutorial:
- Ensure that you have installed Oracle REST Data Services and configured with a currently supported version of Oracle database.
- Ensure that you have installed a currently supported version of client
applications.
This tutorial uses the following clients to create a RESTful service:
- Oracle Database Actions
- Oracle SQLcl
Note:
The latest version of SQLcl can be downloaded from one of the following:- SQLcl Downloads
- Through Homebrew using the command:
 brew
                                        install --cask sqlcl
. Additional SQLcl installation information can be found on SQLcl Homebrew.
- Oracle SQL Developer
- Oracle strongly recommends you to install a browser extension
that enables you to view JSON in the web browser. Popular browser extensions
include one of the following:
- JSON Formatter for Google Chrome
- JSONView Add-on for Mozilla Firefox
This tutorial assumes the following:
- Oracle REST Data Services has been installed and configured on
the following server, port, and context path:
localhost:8080/ords/ - Oracle REST Data Services is running in a standalone mode
- Oracle REST Data Services installation was performed using the
Basic Connection type with the following attributes:
- Server:
localhost - Port:
1521 - Service name:
ORCLPBD1
- Server:
The examples in this tutorial assume that Oracle REST Data Services has been installed and configured in a single instance database or Pluggable Database (PDB). The examples and images in this tutorial refer to the PDB as
ORCLPDB1.
Client Applications used in this tutorial for Creating the RESTful Services
The examples in this tutorial use the following client applications:
- Oracle Database Actions
- SQLcl
Web browser requirements
For a complete list of currently supported web browsers, refer to Oracle Software Web Browser Support Policy.
1.1.1 Creating a RESTful Service Using Oracle SQLcl
This section describes the steps for creating a RESTful service using Oracle SQLcl.
Note:
Oracle recommends that you perform the following steps in this tutorial using the specified names for schemas and database objects. After you have completed the tutorial, you can follow the same steps again using alternate schema and database object names.1.1.1.1 Creating a New Database User and REST-enabling Schema
To create a new user, perform the following steps:
- Using SQLcl, connect to your database as an administrator or using
an account with the DBA role.
Figure 1-1 Connecting to the Database as an Administrator or an User with DBA Role
- Run the following commands to create a new
ORDSTESTuser with the required privileges, roles, and tablespace:CREATE USER ORDSTEST IDENTIFIED BY <password>; GRANT "CONNECT" TO ORDSTEST; GRANT "RESOURCE" TO ORDSTEST; GRANT UNLIMITED TABLESPACE TO ORDSTEST;Figure 1-2 ORDSTEST User with required Privileges, Roles, and Tablespace
1.1.1.2 REST-enabling a Schema
ORDS_ADMIN.ENABLE_SCHEMAFigure 1-3 Executing the ORDS.ENABLE_SCHEMA PL/SQL Procedure
Figure 1-4 ORDS.ENABLE_SCHEMA PL/SQL Procedure
See Also:
ORDS PL/SQL Package Reference1.1.1.3 Accessing the Database Actions
To access the Database Actons, perform the following steps:
Now that ORDSTEST user schema is REST-enabled, you can
now access Database Actions as the ORDSTEST user.
- Navigate to the URL:
http://[server]:[port]/ords/sql-developerto display the Sign-in page.Figure 1-5 Accessing Database Actions as the ORDSTEST User
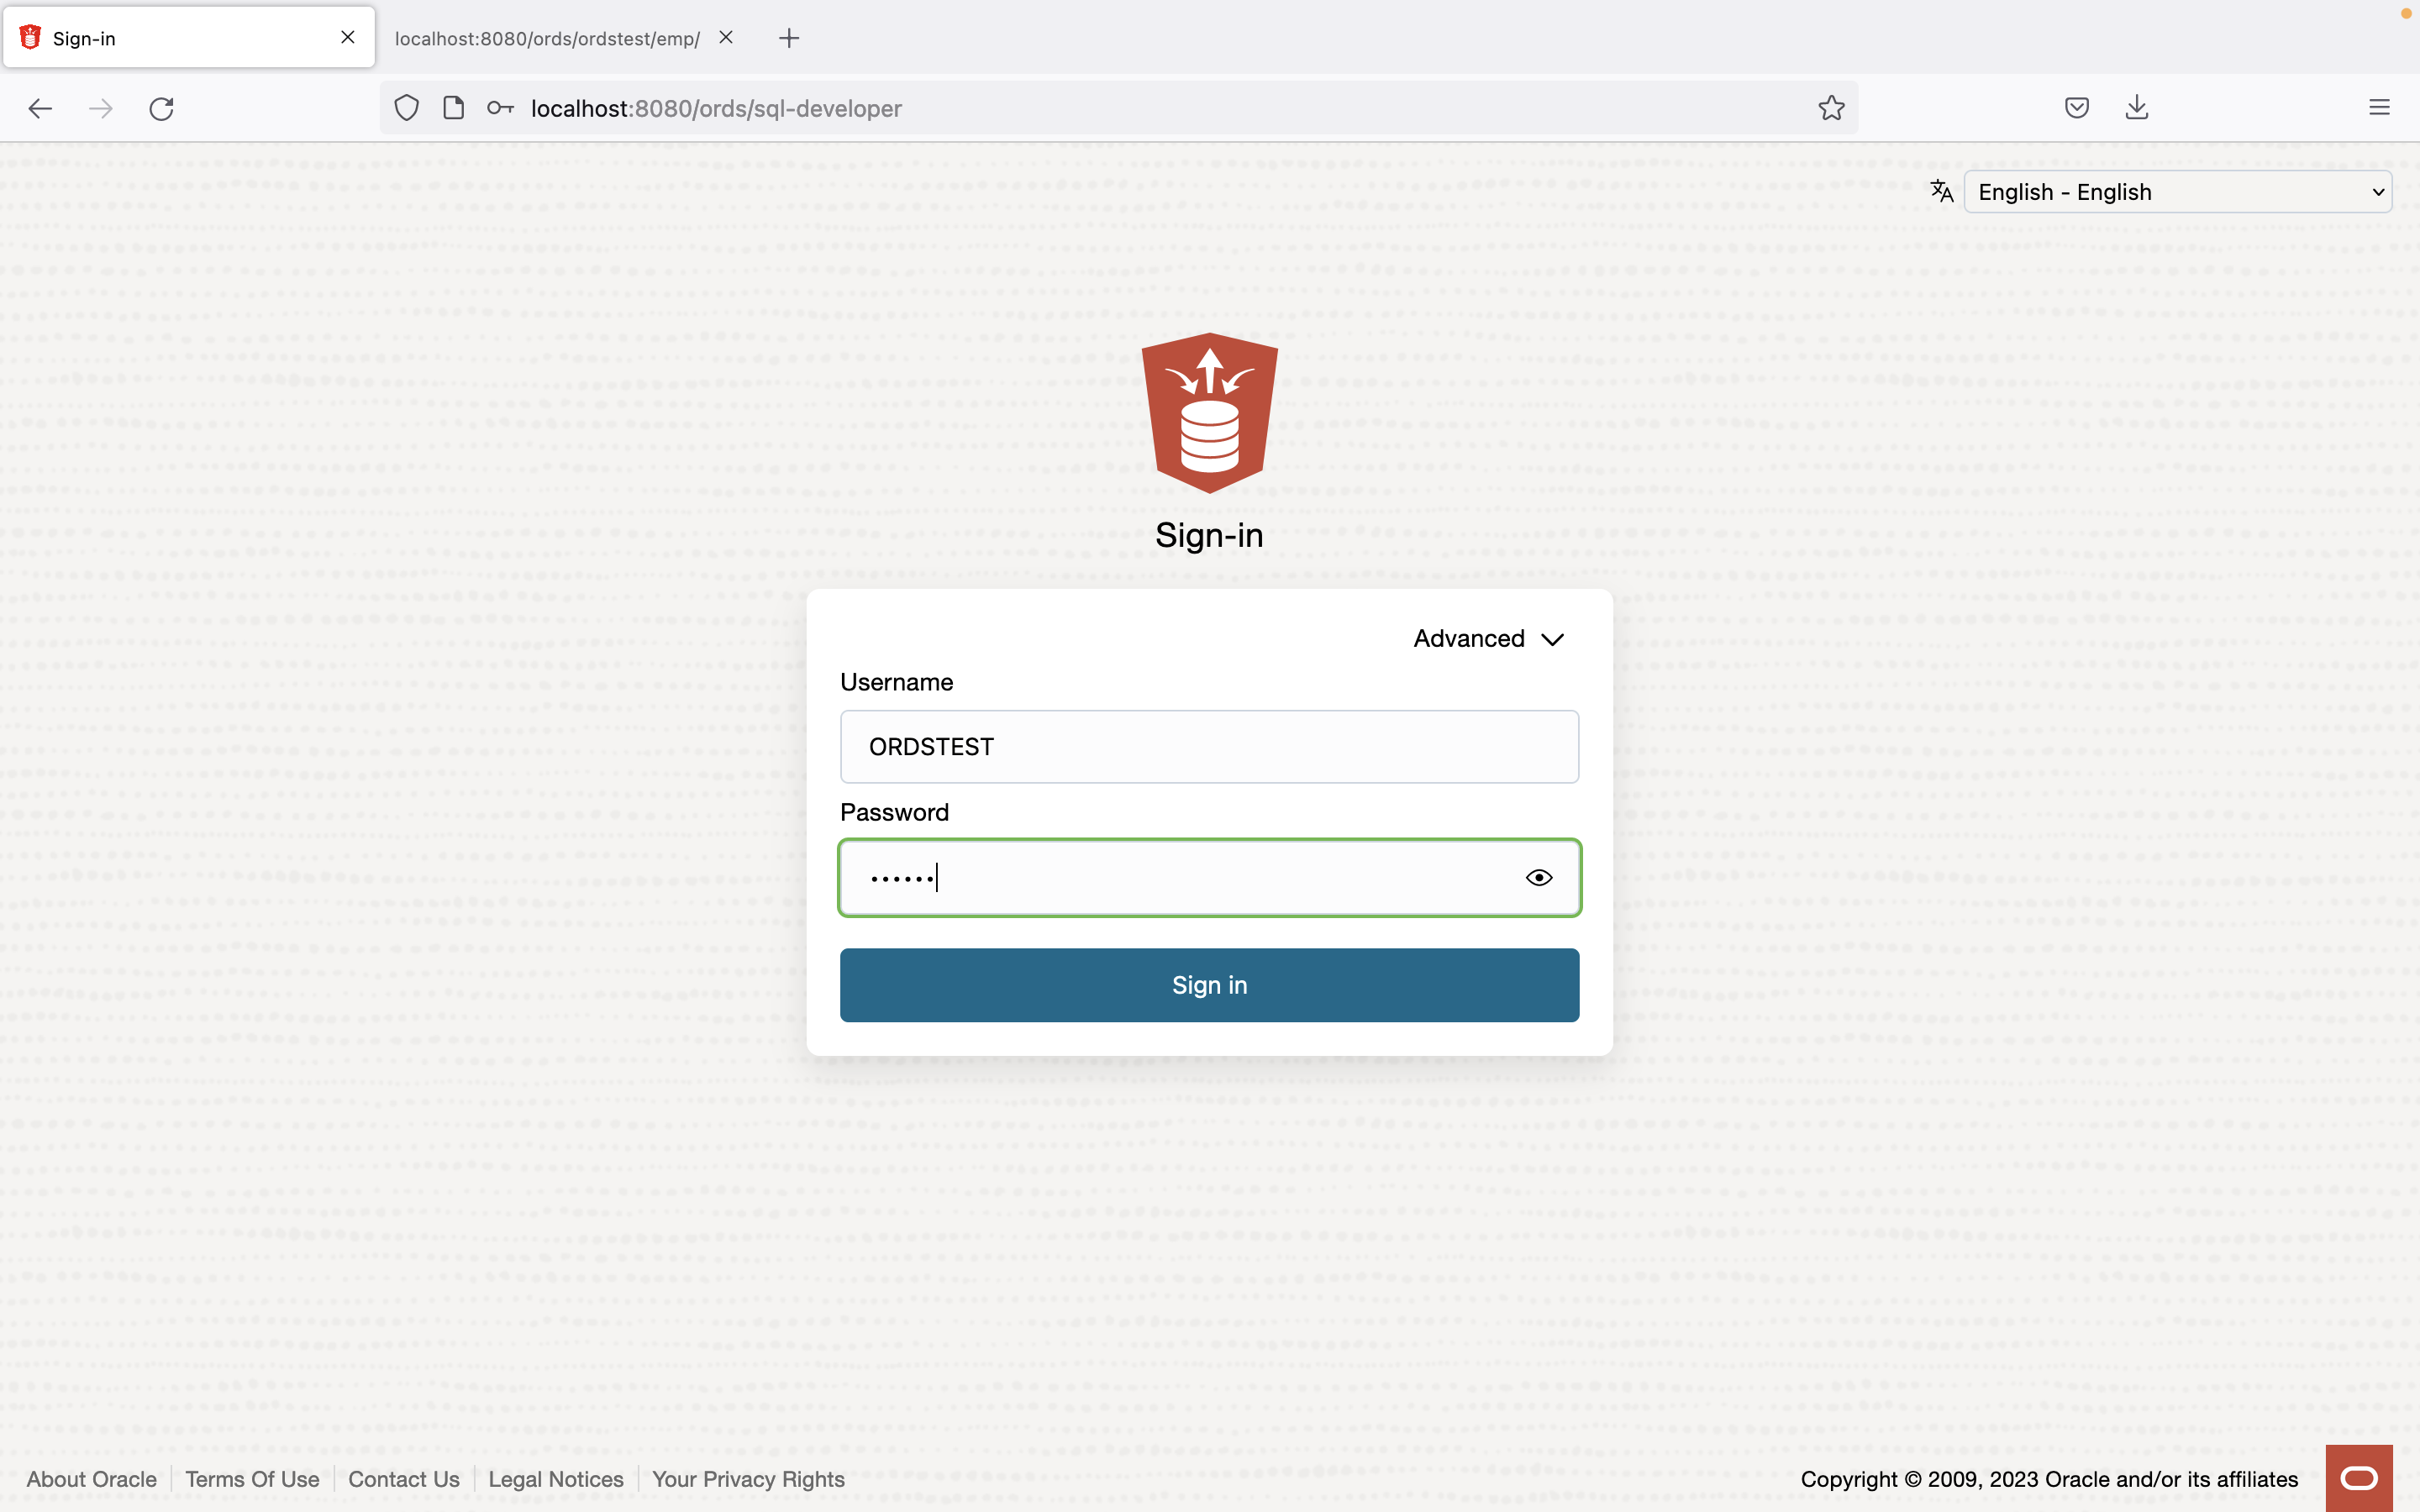
Description of "Figure 1-5 Accessing Database Actions as the ORDSTEST User" - Sign-in as the
ORDSTESTuser with <username>:ORDSTESTand <password>:[Password]. - Click on Sign in button.
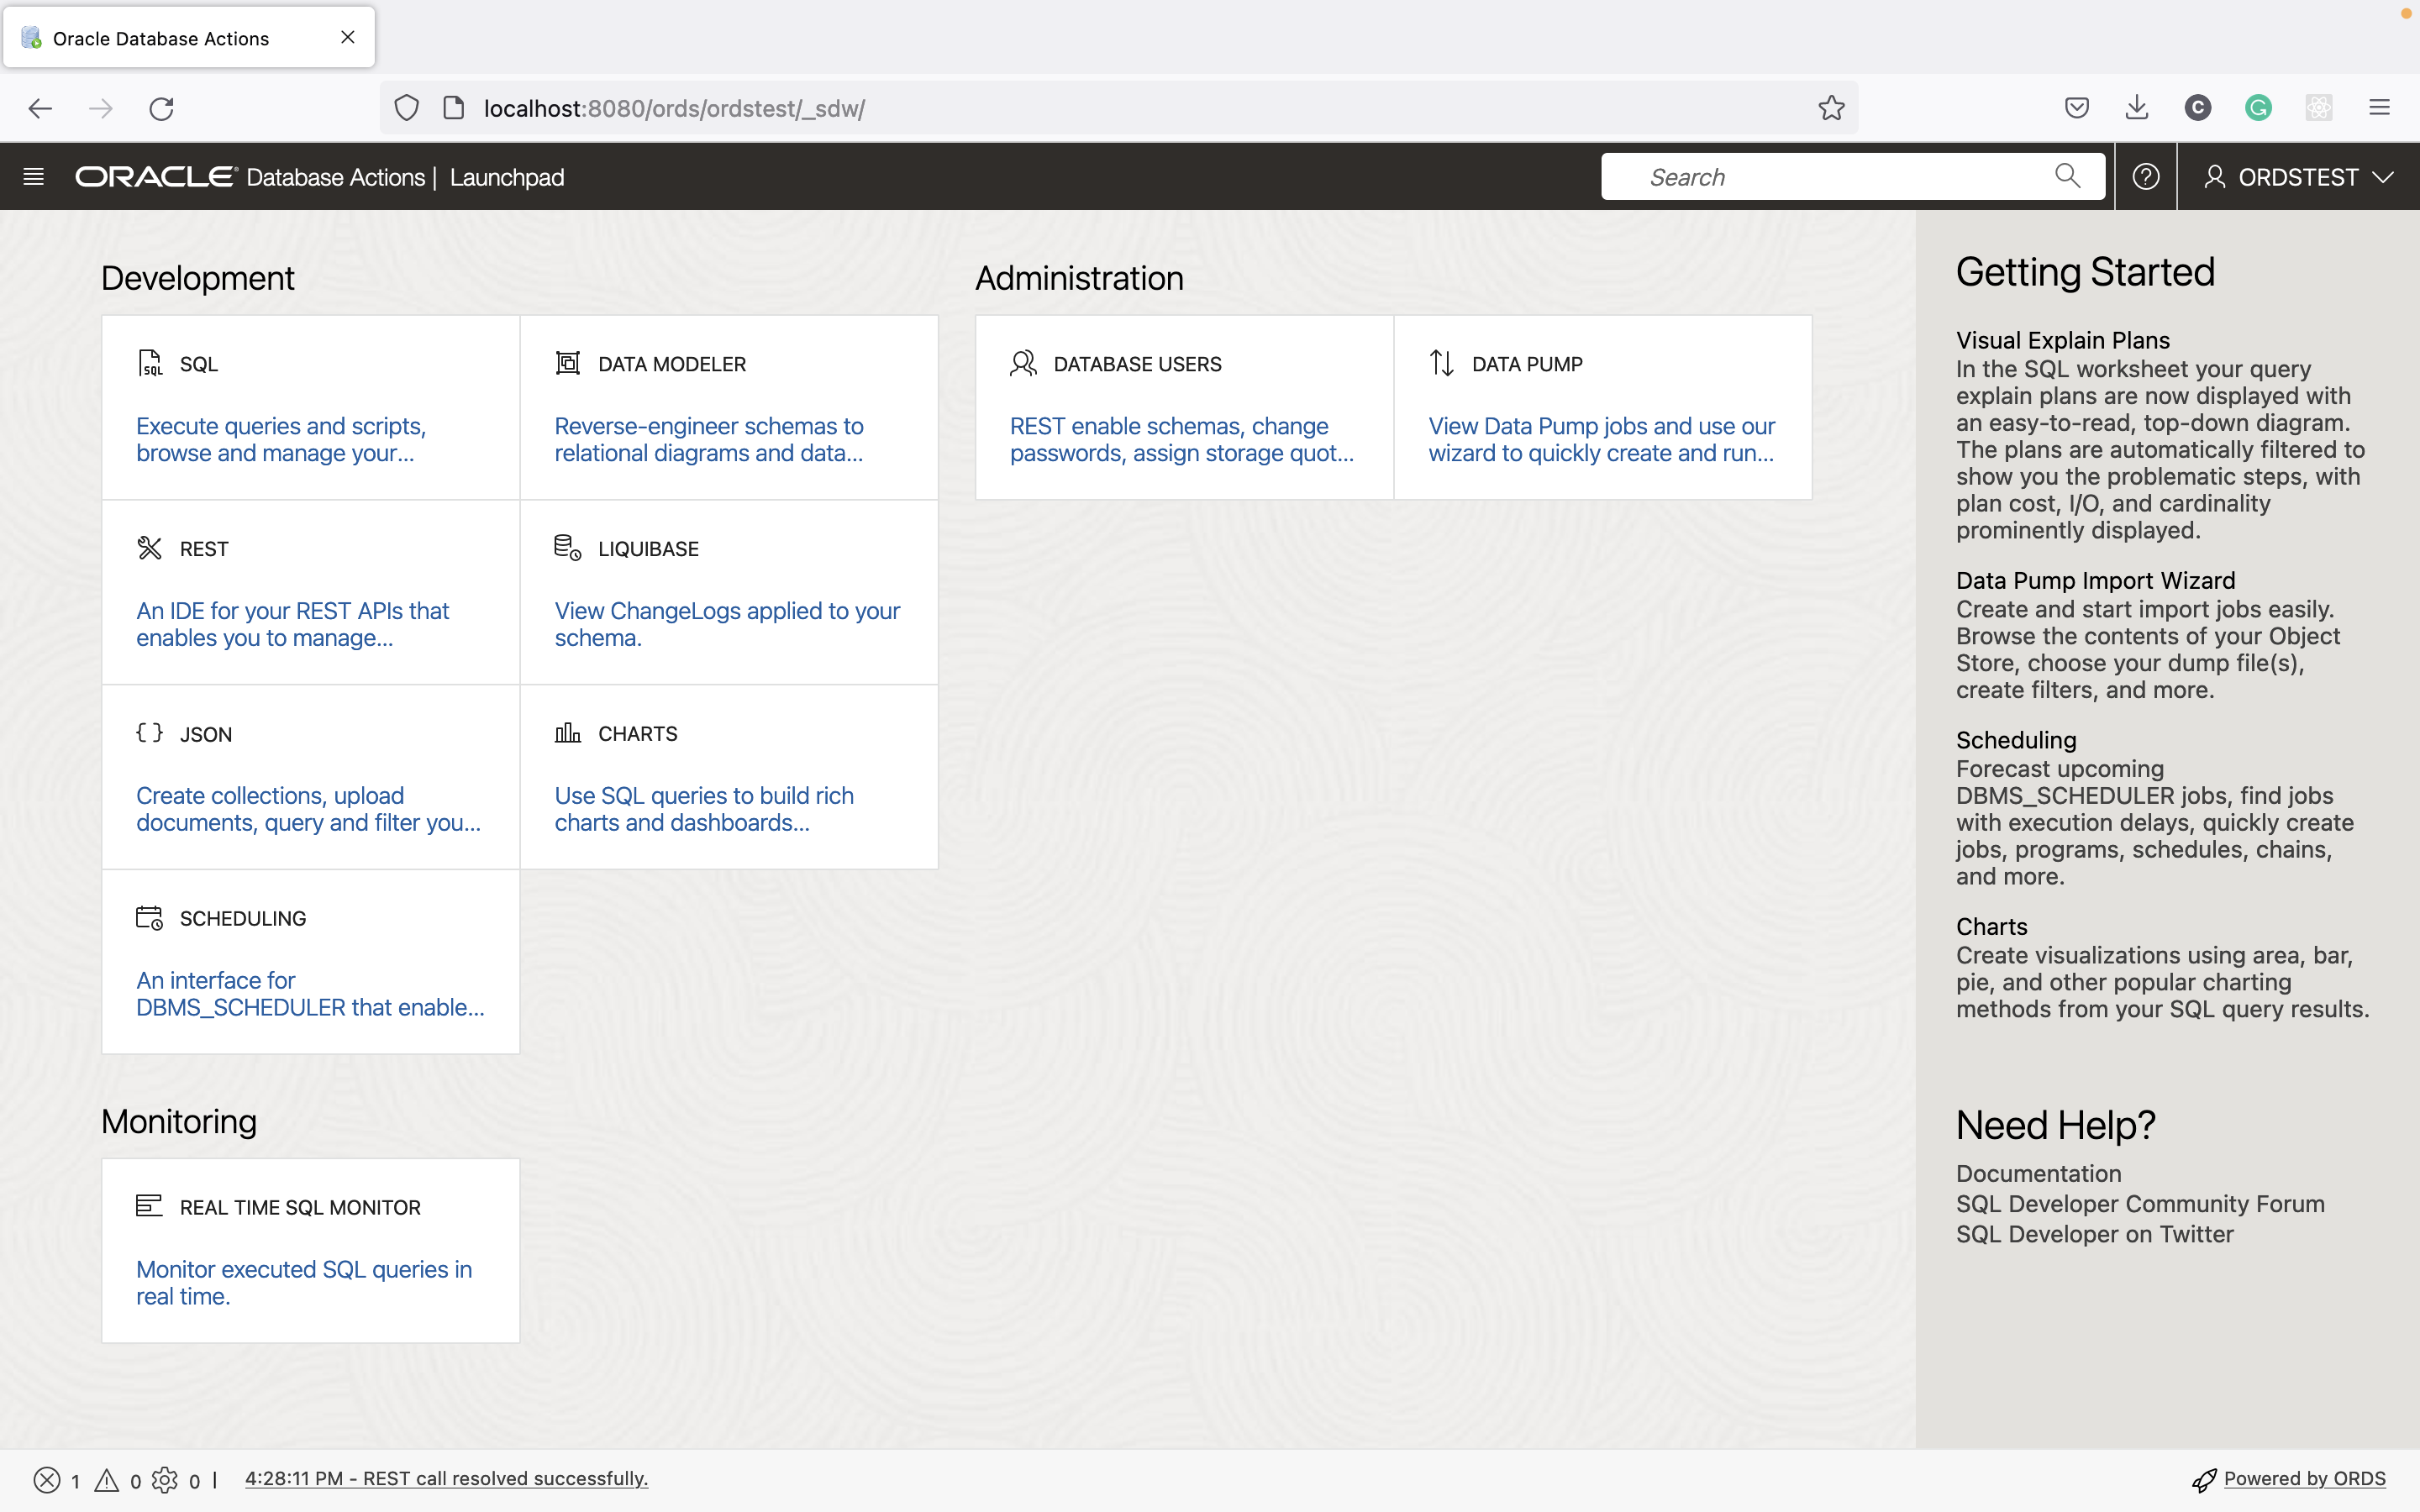
- Database Actions Launchpad home page appears. It comprises of six
main categories: Development, Data Studio, Administration,
Monitoring, Downloads, and Related Services. Each
category consists of feature-based icons that you can click to navigate to the
respective pages available to the
ORDSTESTuser.See Also:
About SQL Developer Web
1.1.1.4 Auto REST-enabling a Table
Note:
The tasks listed in this section are completed with the user logged-in as an ORDSTEST user.1.1.1.4.1 Creating a Database Table
- From the Database Actions launchpad, select SQL, under the Development category of the dashboard.
- After the SQL Worksheet is loaded, enter the following SQL query to create the EMP table:
CREATE TABLE EMP (
        EMPNO NUMBER(4,0),
        ENAME VARCHAR2(10 BYTE),
        JOB VARCHAR2(9 BYTE),
        MGR NUMBER(4,0),
        HIREDATE DATE,
        SAL NUMBER(7,2),
        COMM NUMBER(7,2),
        DEPTNO NUMBER(2,0),
        CONSTRAINT PK_EMP PRIMARY KEY (EMPNO)
        );
1.1.1.4.2 Inserting the Sample Data
- After the
EMPtable is successfully created, insert the following sample data:Insert into EMP (EMPNO,ENAME,JOB,MGR,HIREDATE,SAL,COMM,DEPTNO) values (7369,'SMITH','CLERK',7902,to_date('17-DEC-80','DD-MON-RR'),800,null,20); Insert into EMP (EMPNO,ENAME,JOB,MGR,HIREDATE,SAL,COMM,DEPTNO) values (7499,'ALLEN','SALESMAN',7698,to_date('20-FEB-81','DD-MON-RR'),1600,300,30); Insert into EMP (EMPNO,ENAME,JOB,MGR,HIREDATE,SAL,COMM,DEPTNO) values (7521,'WARD','SALESMAN',7698,to_date('22-FEB-81','DD-MON-RR'),1250,500,30); Insert into EMP (EMPNO,ENAME,JOB,MGR,HIREDATE,SAL,COMM,DEPTNO) values (7566,'JONES','MANAGER',7839,to_date('02-APR-81','DD-MON-RR'),2975,null,20); Insert into EMP (EMPNO,ENAME,JOB,MGR,HIREDATE,SAL,COMM,DEPTNO) values (7654,'MARTIN','SALESMAN',7698,to_date('28-SEP-81','DD-MON-RR'),1250,1400,30); Insert into EMP (EMPNO,ENAME,JOB,MGR,HIREDATE,SAL,COMM,DEPTNO) values (7698,'BLAKE','MANAGER',7839,to_date('01-MAY-81','DD-MON-RR'),2850,null,30); Insert into EMP (EMPNO,ENAME,JOB,MGR,HIREDATE,SAL,COMM,DEPTNO) values (7782,'CLARK','MANAGER',7839,to_date('09-JUN-81','DD-MON-RR'),2450,null,10); Insert into EMP (EMPNO,ENAME,JOB,MGR,HIREDATE,SAL,COMM,DEPTNO) values (7788,'SCOTT','ANALYST',7566,to_date('19-APR-87','DD-MON-RR'),3000,null,20); Insert into EMP (EMPNO,ENAME,JOB,MGR,HIREDATE,SAL,COMM,DEPTNO) values (7839,'KING','PRESIDENT',null,to_date('17-NOV-81','DD-MON-RR'),5000,null,10); Insert into EMP (EMPNO,ENAME,JOB,MGR,HIREDATE,SAL,COMM,DEPTNO) values (7844,'TURNER','SALESMAN',7698,to_date('08-SEP-81','DD-MON-RR'),1500,0,30); Insert into EMP (EMPNO,ENAME,JOB,MGR,HIREDATE,SAL,COMM,DEPTNO) values (7876,'ADAMS','CLERK',7788,to_date('23-MAY-87','DD-MON-RR'),1100,null,20); Insert into EMP (EMPNO,ENAME,JOB,MGR,HIREDATE,SAL,COMM,DEPTNO) values (7900,'JAMES','CLERK',7698,to_date('03-DEC-81','DD-MON-RR'),950,null,30); Insert into EMP (EMPNO,ENAME,JOB,MGR,HIREDATE,SAL,COMM,DEPTNO) values (7902,'FORD','ANALYST',7566,to_date('03-DEC-81','DD-MON-RR'),3000,null,20); Insert into EMP (EMPNO,ENAME,JOB,MGR,HIREDATE,SAL,COMM,DEPTNO) values (7934,'MILLER','CLERK',7782,to_date('23-JAN-82','DD-MON-RR'),1300,null,10); commit;
1.1.1.4.3 REST-enabling the EMP Table
- From the navigator panel, right mouse-click on the table name, navigate to
REST and then click Enable.
Figure 1-8 Auto REST-enabling the EMP table
- A REST Enable Object screen appears. After reviewing the parameters that got automatically generated, click on Enable located at the bottom of the screen.
-
A message slider appears confirming that the EMP table has been REST-enabled.
Figure 1-10 Table REST-enabled Confirmation
1.1.1.5 Testing the Auto REST-enabled Object
Note:
An icon next to the database objects indicates that the database objects have been auto-REST enabled.Figure 1-11 Icon showing Database Object is Auto REST-enabled
Note:
If you do not see the icon, then click Refresh in the Navigator Panel to display the icon.
- Right-click on the name of the object, click REST and then select
cURL command:
Figure 1-12 Locating Curl Command to Test the Rest Endpoint
- A slider cURL for the table EMP appears with the following HTTP
methods available to an auto-REST enabled resource:
GET ALLGET SinglePOSTBATCH LOADPUTDELETE
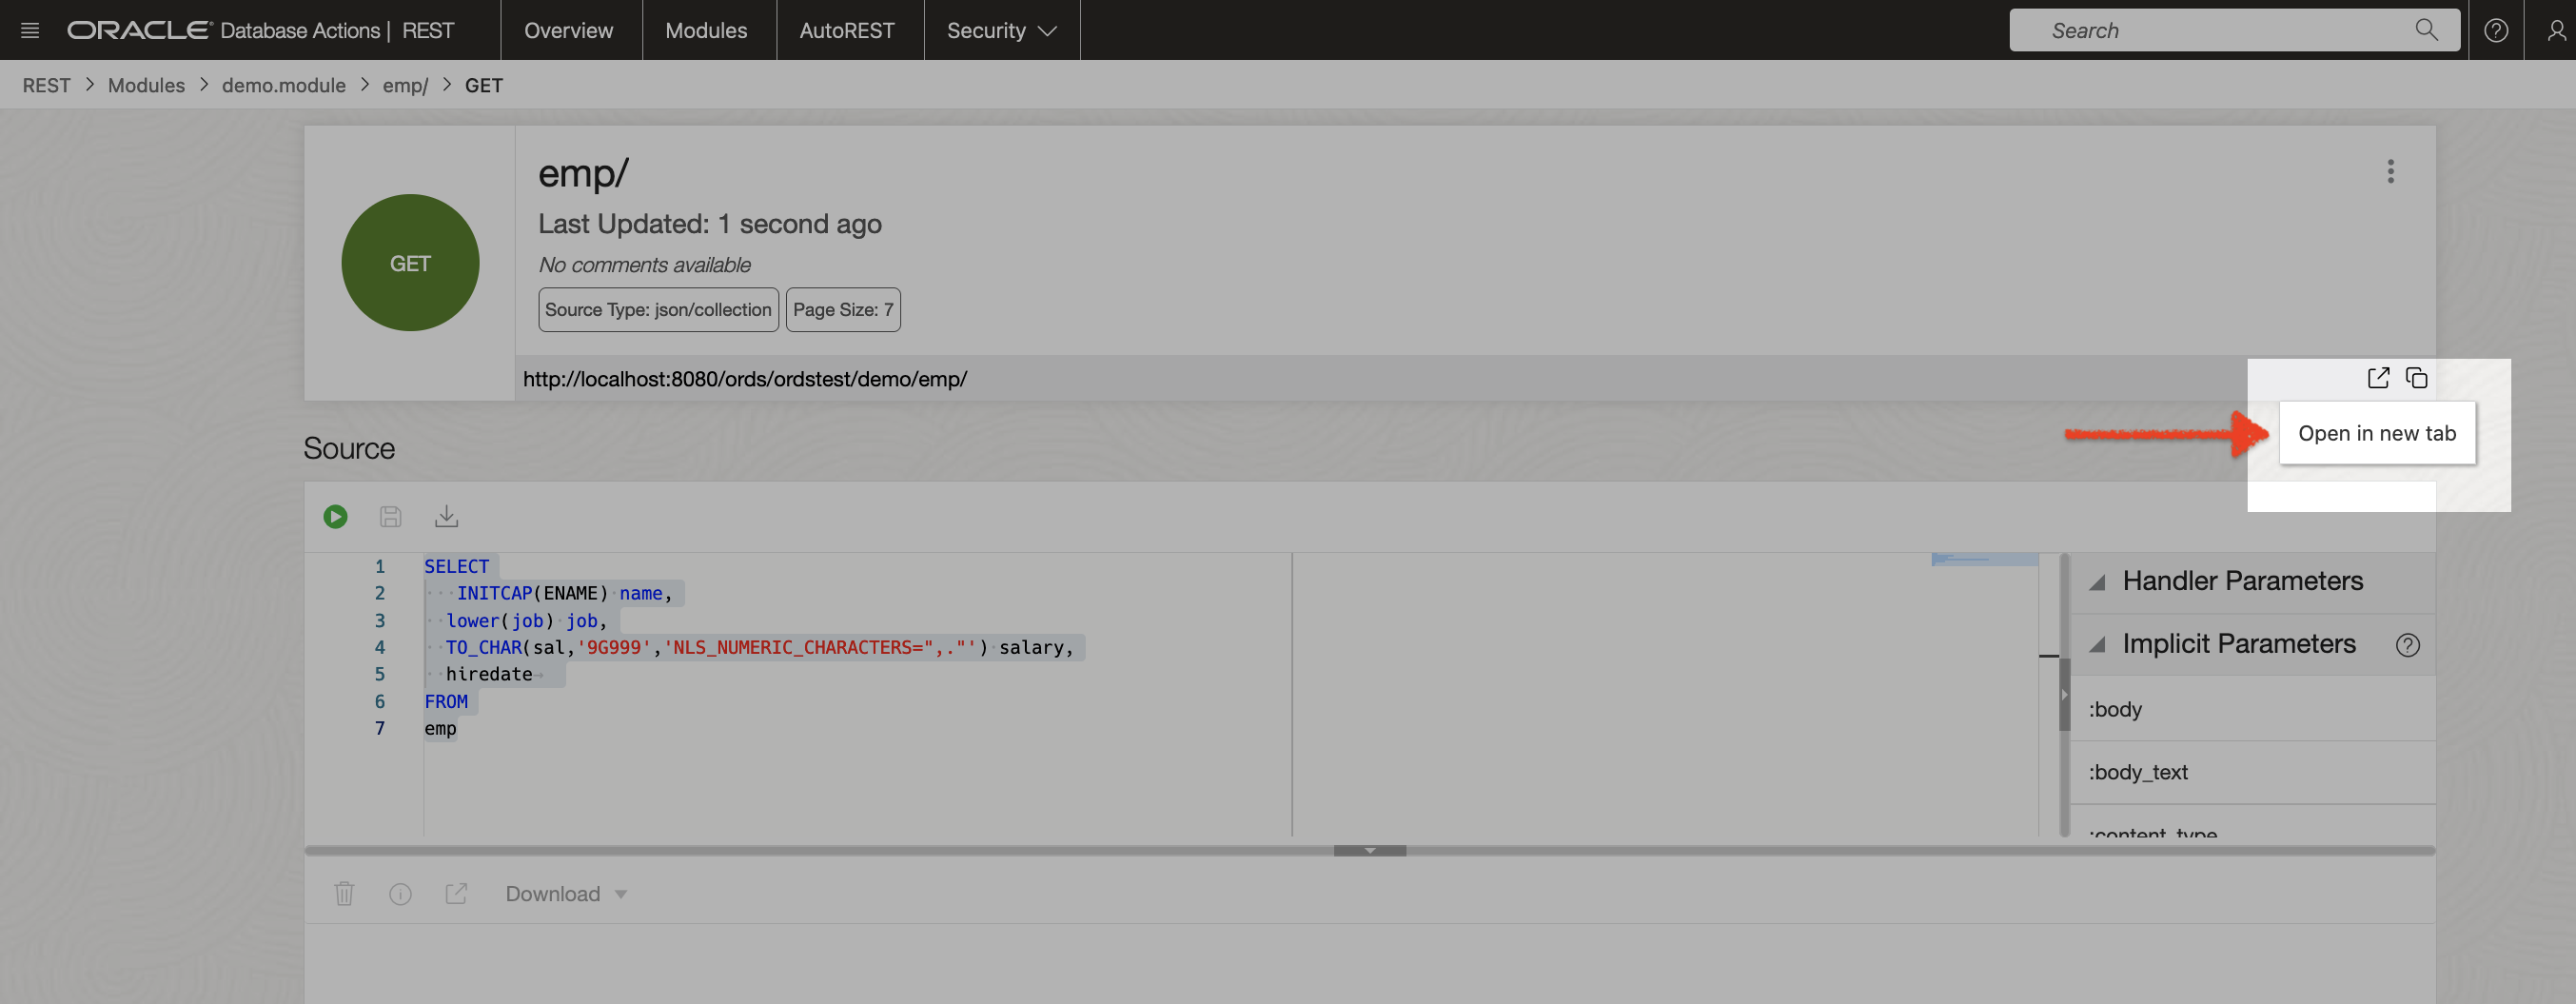
- Copy the URL portion of the
GET ALLcURL command. - Open a new browser and paste the URL in the address bar, and
press Enter on your keyboard.
Figure 1-13 Results Atfer Testing the Emp URL in the Browser
- A list of the first 25 items in the EMP table are displayed.
- If you collapse the preceding items list, it reveals the other
helpful links that are automatically included with all the auto-REST enabled
resources.
1.1.2 Creating a RESTful Service Through the REST Workshop
This section explains how to create a RESTful service using REST Workshop of Database Actions. The REST Workshop enables you to create and edit the RESTful service definitions.
1.1.2.1 Navigate to the REST Workshop
Perform the following steps to navigate to the REST Workshop:
- Log in as the ORDSTEST user and navigate to the Database Actions Launchpad.
- Select REST under the Development section.
Figure 1-14 Navigating to the REST Workshop from the Launchpad
1.1.2.2 Create a Module
-
After the REST workshop screen loads, click on Modules widget.
- Modules dashboard appears. Click on Create Module button located at the upper right-hand corner of the dashboard.
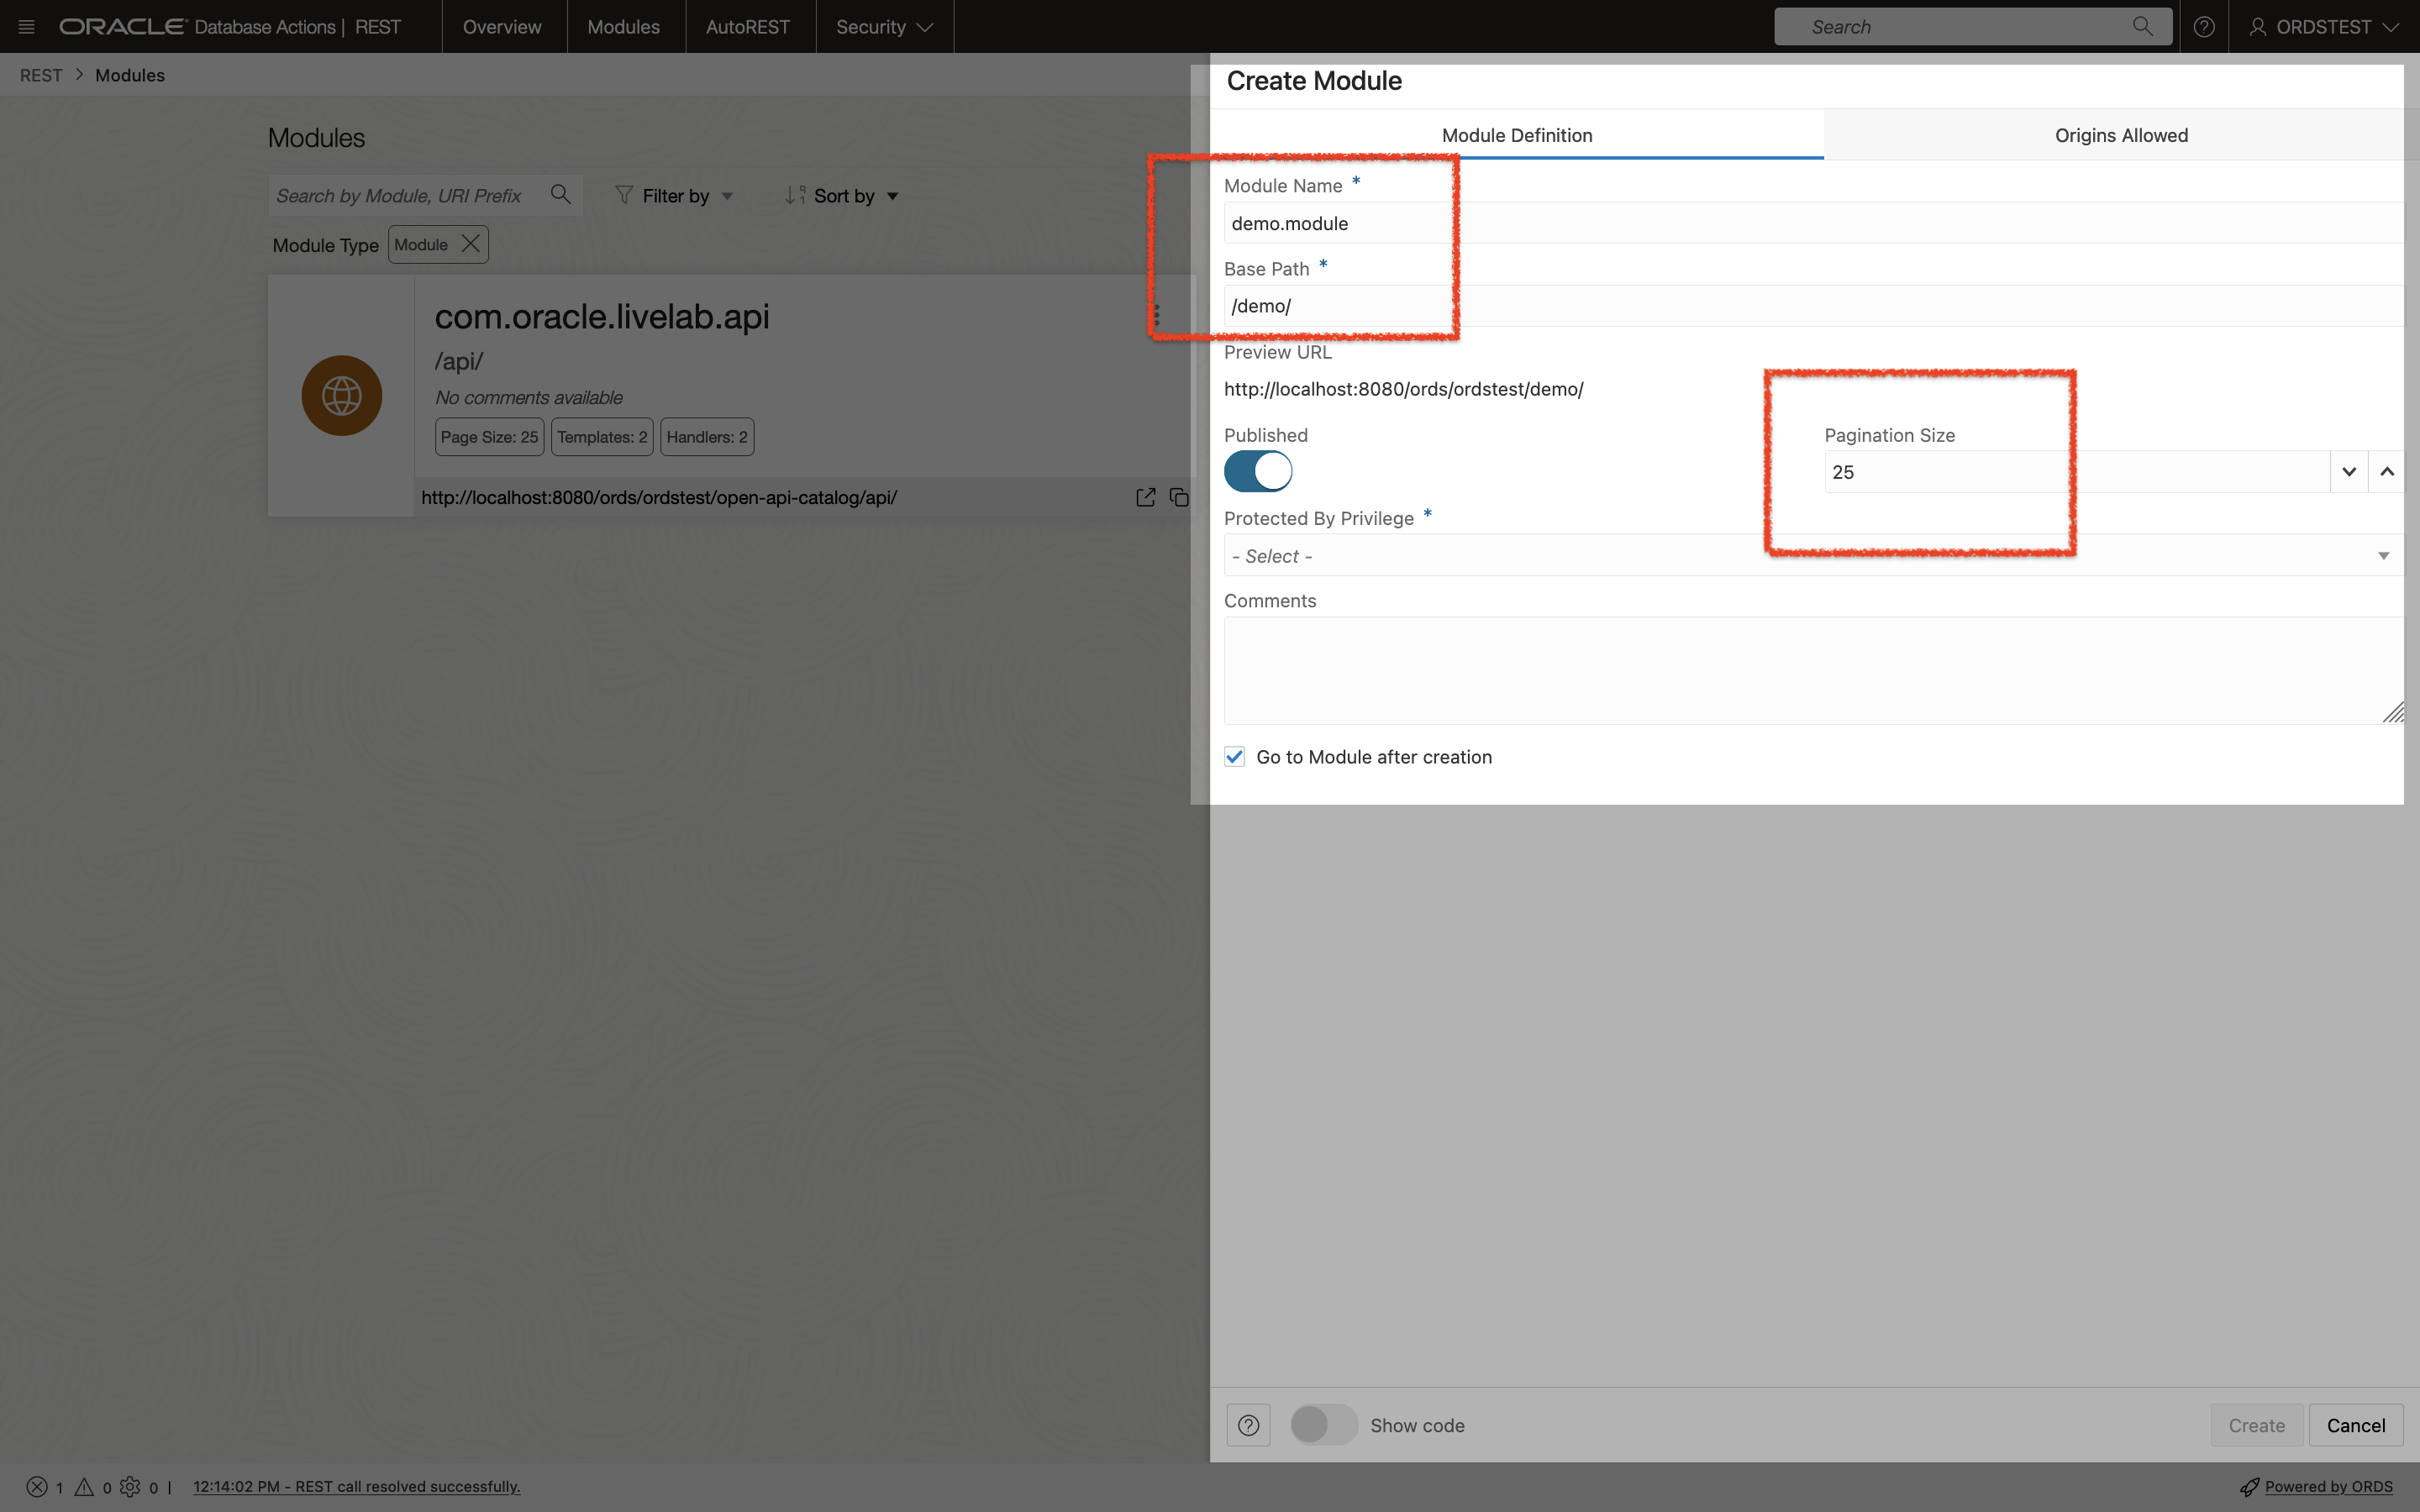
- A Create Module slider appears.
Enter he following values in the respective fields:
Figure 1-16 Entering Values in the Create Module Screen
-
Module Name: Any desired name for the connection. For example,
demo.module. - URI Prefix:
/demo/ - Pagination Size:
25 - In the Protected by Privilege field, select
Not Protected
-
- Click on Create, the module settings are saved, and a confirmation message is displayed to confirm that the module is created.
1.1.2.3 Create Template
- After creating a Module, you will be automatically taken to the
Create Template screen. Click on Create
Template button.
- A Create Template screen appears. In the URI Template
field, enter
emp/.Note:
For this demonstration, retain the detault settings. - You are automatically taken to the Create Handler page.
1.1.2.4 Create Handler
Note:
For this tutorial, aGET method is created.
- Click on Create Handler button to display the
Create Handlerscreen. Verify the following settings:- Method:
GET - Items Per Page:
7 - Source Type:
Collection Query
- Method:
- In the Source field, enter the following SQL
query:
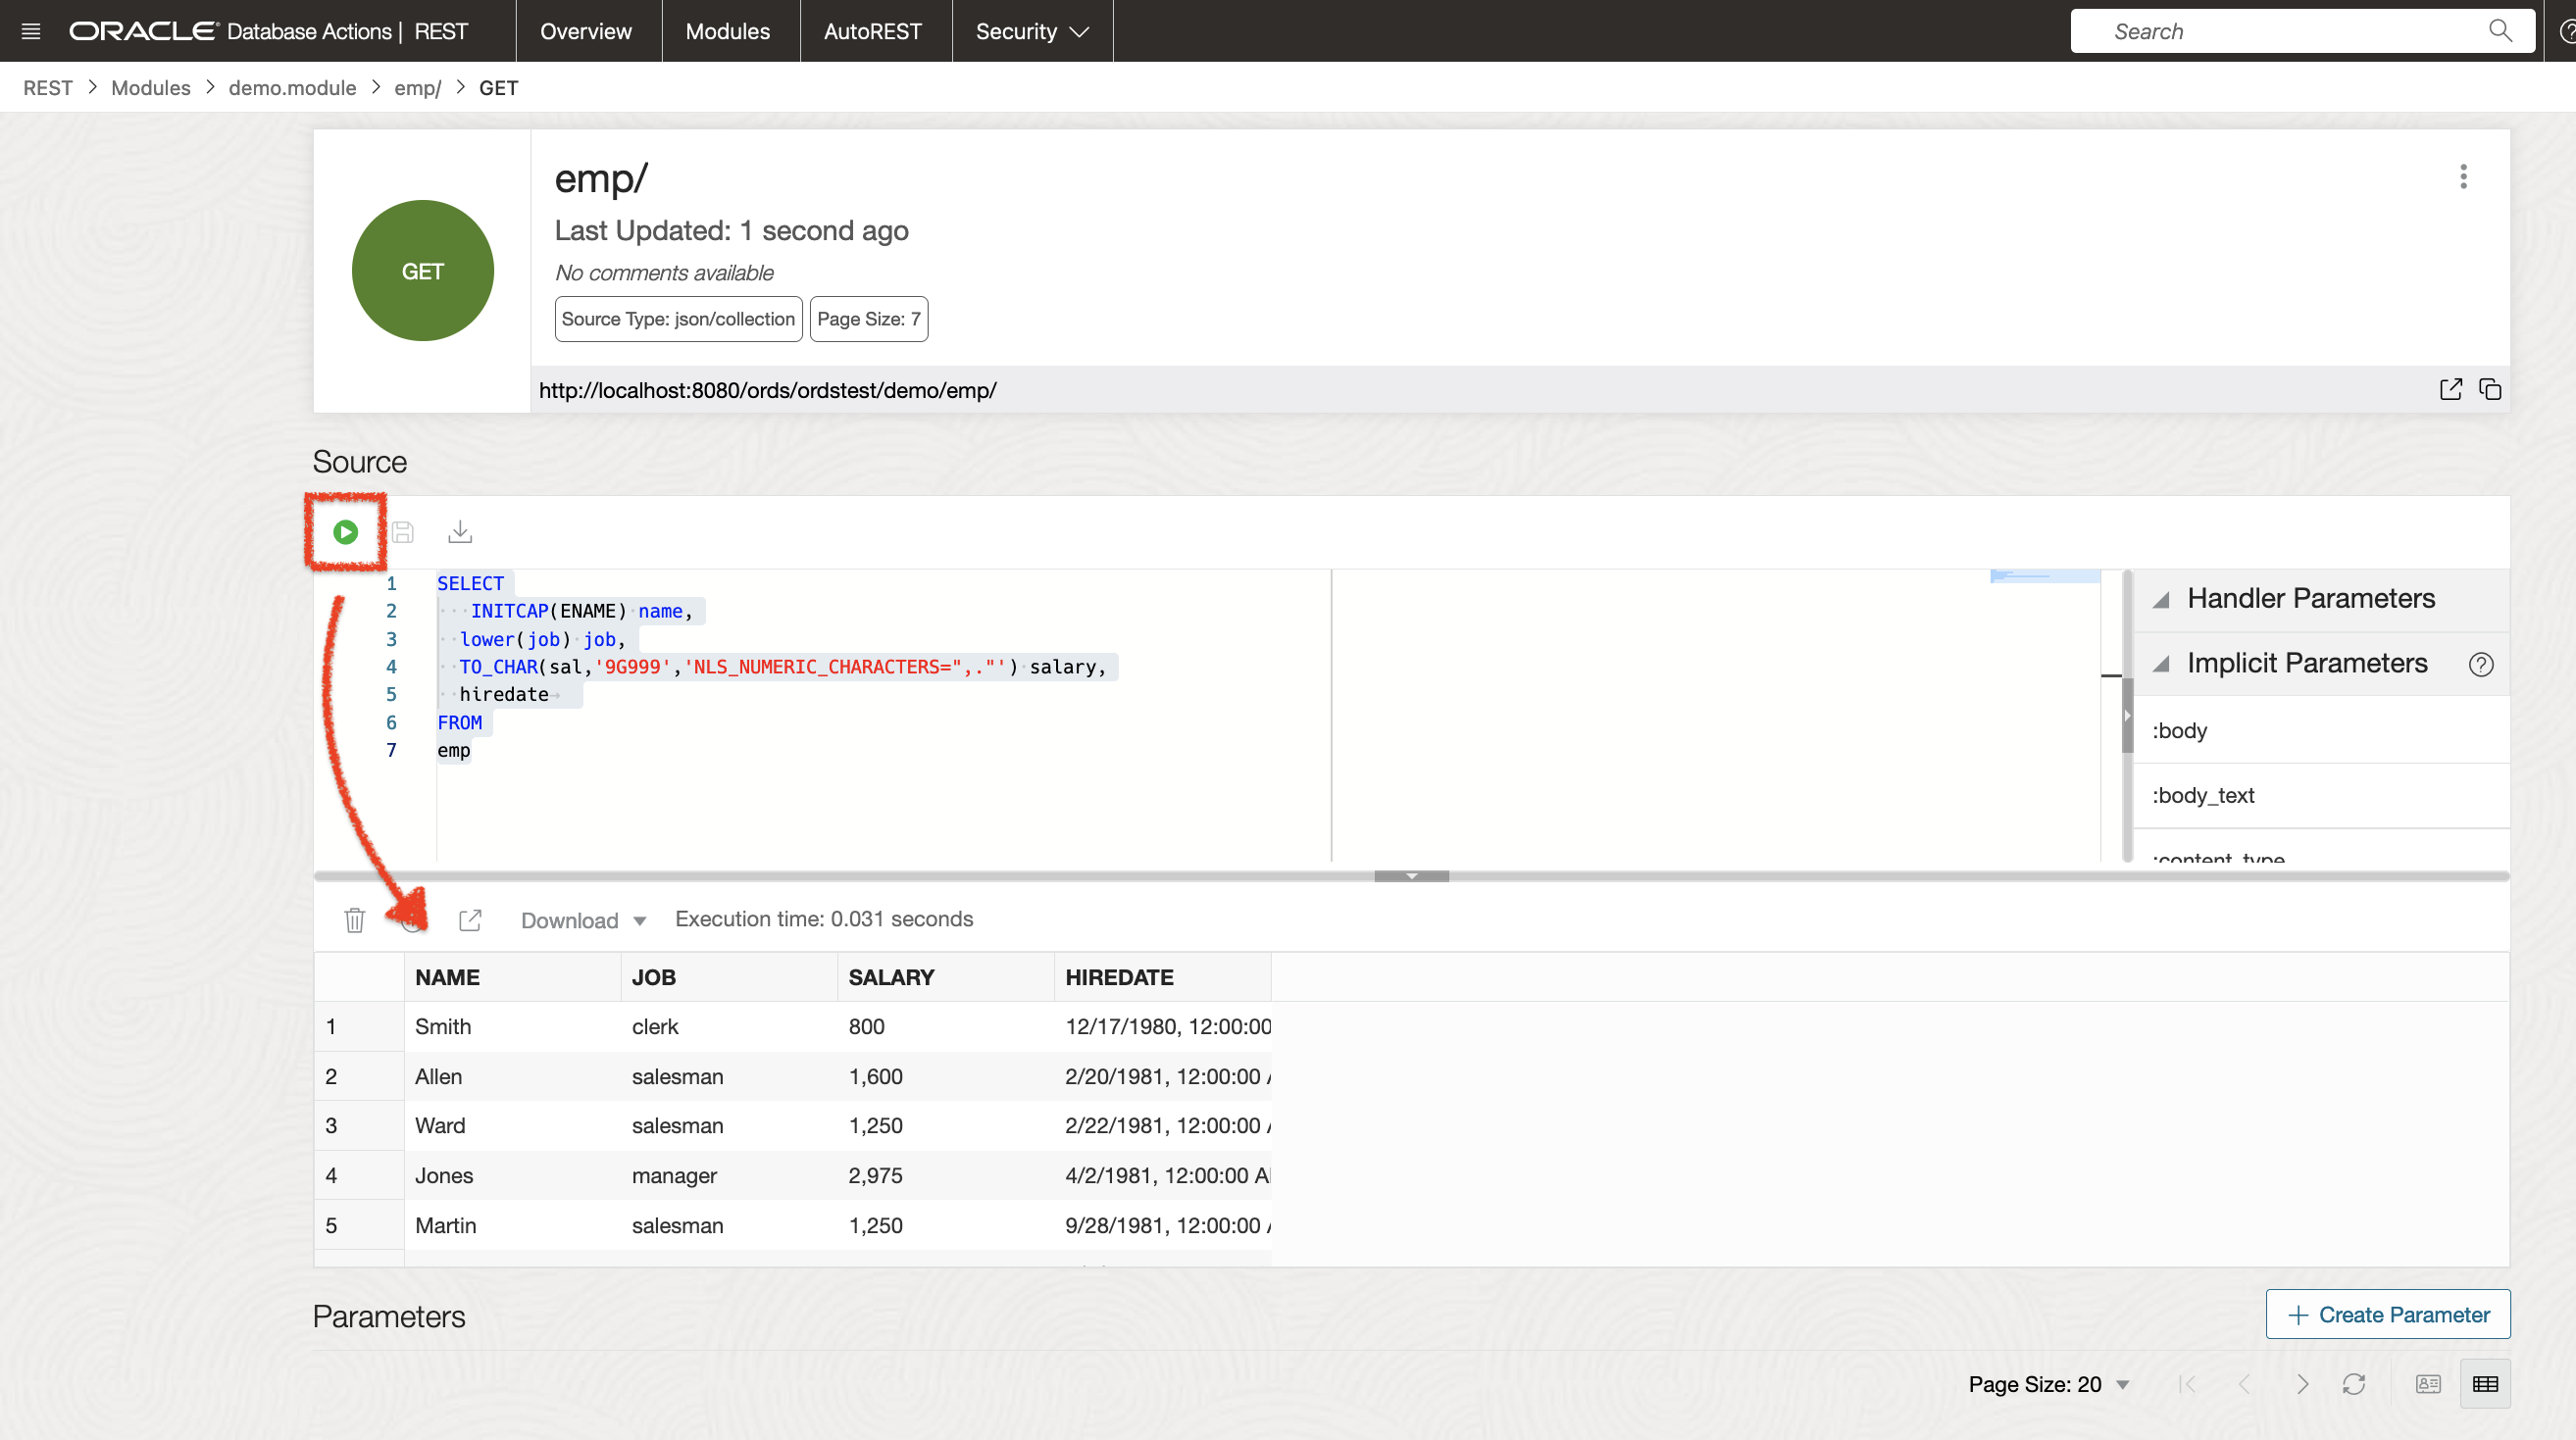
SELECT INITCAP(ENAME) name, lower(job) job, TO_CHAR(sal,'9G999','NLS_NUMERIC_CHARACTERS=",."') salary, hiredate FROM empClick on the Create button to automatically open the Resource Handler page with a confirmation message indicating that the handler is created.
- You can then test the SQL query. To do so, click on the Play
icon. The results of the query appears in the output window.
Figure 1-19 Resource handler SQL query results
1.1.3 Creating a Privilege Using Database Actions
This section describes how to create a privilege and control access to protected resources.
Privileges are defined to control access to protected resources. Privileges restrict access to those users who have access to at least one from a set of the specified roles. A privilege is then associated with one or more resource modules. Before accessing those resource modules, the user must be authenticated and then authorized to ensure that the user has one of the required roles.
1.1.3.1 Steps to Create a Privilege
This section describes the steps to control access to the protected resources.
- Navigate to the REST Workshop
- Under the Security menu item, select
Privileges.
Figure 1-22 Selecting Privileges Menu Option
- Click on Create Privilege to display the Create Privilege screen.
- Enter the following values in the respective fields:
- Label:
Demo module privilege - Name:
demo.module.privilege - Description:
A Privilege created for demonstrating privileges for the demo.module Resource Module. - Navigate to the Protected Modules table. Move
the
demo.moduleResource Module from the left column to the right column. This ensures that thedemo.moduleResource Module is associated with this Privilege.Figure 1-23 Associating Resource Module with the Privilege
- Click on the Create button. A confirmation
message appears indicating successful creation of a new privilege.
Note:
The newly created privilege can now be viewed in the Privileges dashboard.
- Label:
- To test the Privilege created, navigate to the path of the
demo.module.Figure 1-25 Navigating to the demo module to Test the Privilege
- Copy the
emp/URI.Figure 1-26 Copying the URI to Test the Privilege
- Sign out of Database Actions. Open a new browser window. Paste the URI in the address bar and press Enter
- A 401 unauthorized error message is displayed to indicate that the resource is protected. Notice that a sign-in prompt appears. Since this Privilege has not been associated with a specific role, any user who has been granted the Connect role can sign-in to view the response from this request.
- Sign-in with your database credentials to view the
resource.
Figure 1-27 Sign-in to Test Path Privilege
- After you sign-in, the contents of the JSON document can be viewed.
1.1.4 Register an OAuth Client Application to Access the REST API
This topic explains how to register your applications (called third-party applications here) to access a REST API.
OAuth 2.0 is a standard internet protocol that provides a means for HTTP servers providing REST APIs to give limited access to third party applications on behalf of an authenticated end user.
- It must be registered and
- The authenticated end user must approve access
Note:
In a real application, you must provision specific users who can register OAuth clients. Such users must be granted the OAuth Client Developer role.
Note:
The following example is not intended to serve as a full-featured demonstration for creation and integration for a third party application. The example provided in this section, only outlines the core concepts of the OAuth 2.0 protocol.1.1.4.1 Registering your Application to Access a REST API
Perform the following steps to register your application to access a REST API:
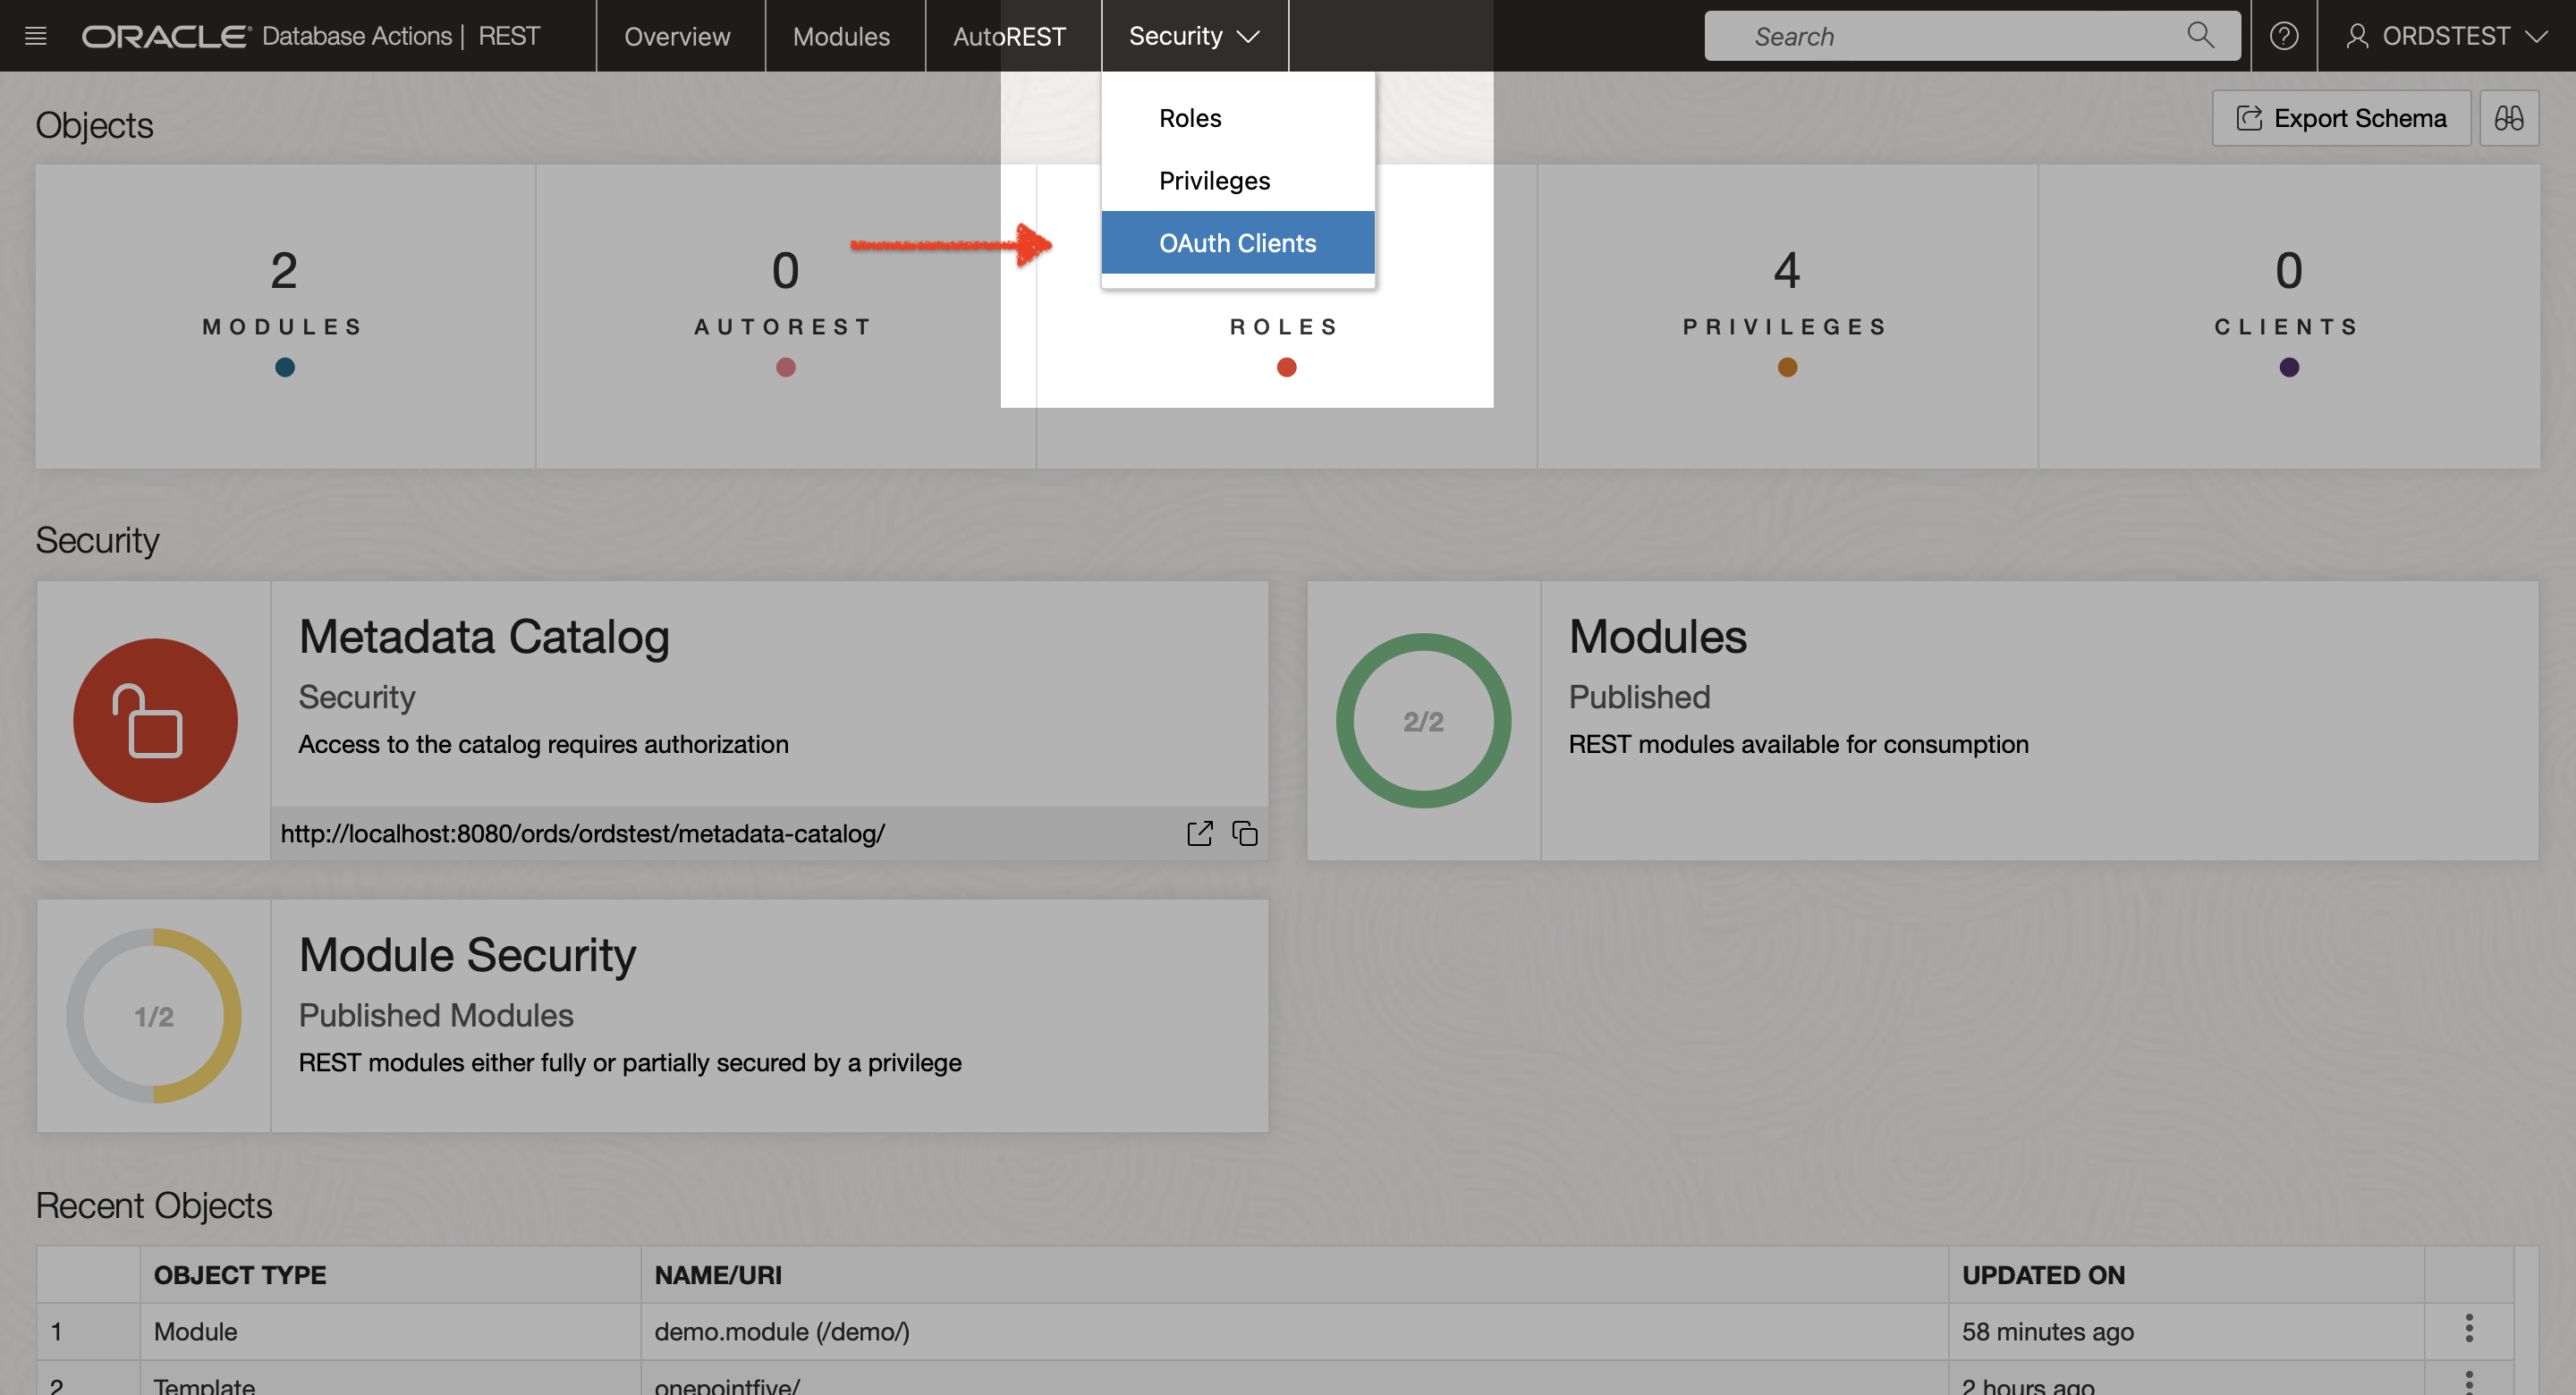
- From the REST Workshop dashboard, select OAuth Clients
option from the Security menu.
Figure 1-28 Navigating to OAuth Client Menu Option
- The OAuth Clients dashboard appears. From the OAuth Clients dashboard, click on Create OAuth Client.
- The Create OAuth Client slider appears.
Figure 1-30 Checking Client Credentials Selected
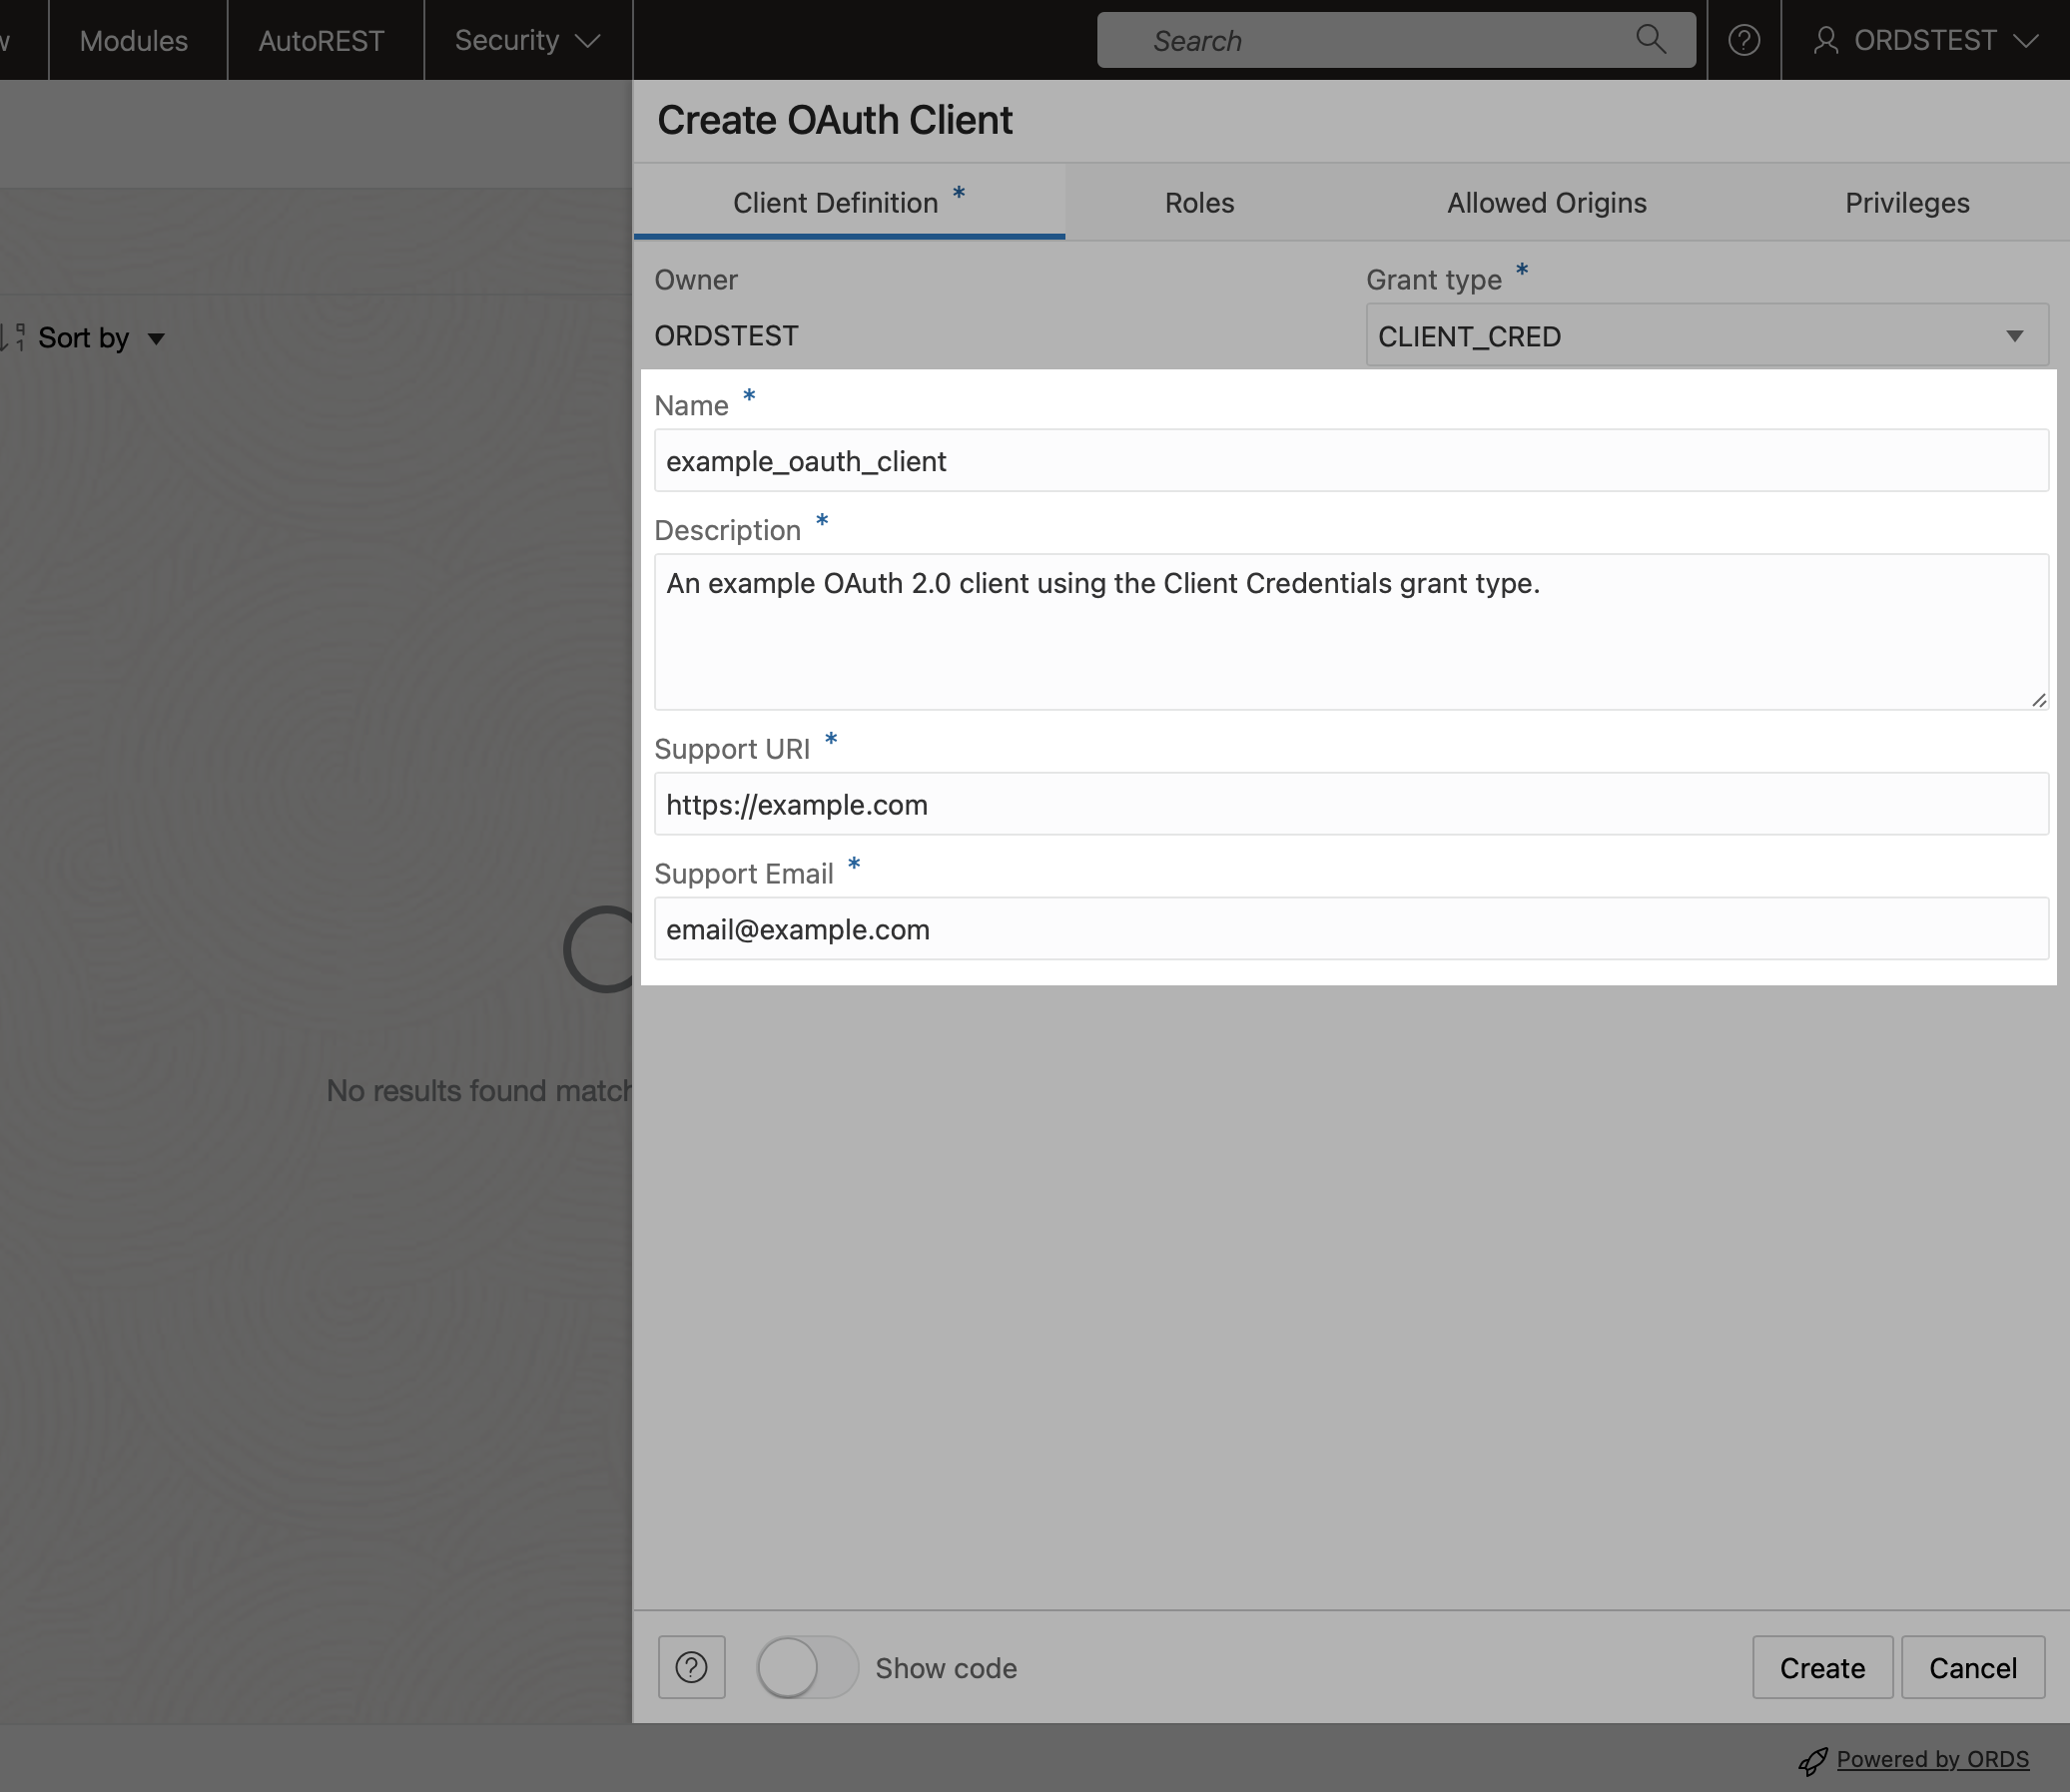
- Enter the following values in the Create OAuth Client
slider:
- Name:
example_oauth_client - Description: An example OAuth 2.0 client using the Client Credentials grant type.
- Support URI:
https://example.com - Support Email:
email@example.com
Figure 1-31 Entering Values in Create OAuth Client Slider
- Name:
- Navigate to the Privileges tab of the screen. Locate the privilege you
created in the preceding section. Move it from the Available Privileges
column to the Selected Privileges column.
Figure 1-32 Move Privilege to Selected Column
Note:
The double arrow moves all the available privileges to the Selected Privileges column. The single arrow moves only the currently selected privileges to the Selected Privileges column. - Click on Create.
- After returning to the OAuth Clients dashboard, you can find the newly-created OAuth client.
- After the OAuth Token appears, select the correct shell
environment.
Figure 1-34 Selecting Correct Shell Environment
- Copy brearer token curl command to your clipboard.
- Using the Client ID and Client Secret provided to you, issue the following curl
command to obtain an Access
Token:
curl \ --user Bx2vfYZkLa9D8_CZXvFL0Q..:xH1nn_CPtitiW5vOUQXrrg.. \ --data 'grant_type=client_credentials' \ http://localhost:8080/ords/ordstest/oauth/token - You will receive an Access Token, with expiration time.
- You can now access the
emp/endpoint. Create your curl command ensuring that you have included the Access Token as a header in your curl command:curl -H "Authorization: Bearer PWMGyNYtzhg9J1r85_oJGQ" http://localhost:8080/ords/ordstest/demo/emp/ | jqFigure 1-36 jq Response from the Get Request
Note:
You can optionally pipe in thejqcommand so that the JSON response payload is structured in a readable format.
1.1.5 Creating a RESTful Service Using Oracle SQL Developer
This section describes the steps involved in developing the RESTful services using Oracle SQL developer desktop application (aka client).
Topics:
1.1.5.1 REST-Enable a Database Table
To enable a table for REST access, follow these steps.
Note:
It is recommended that you follow the steps as closely as possible, including using the specified names for schemas and database objects. After you have successfully completed the tutorial using this approach, feel free to try it again using other values if you wish.
-
Create a user
ordstestwith the following privileges or roles:CREATE USER ordstest IDENTIFIED BY <password>; GRANT "CONNECT" TO ordstest; GRANT "RESOURCE" TO ordstest; GRANT UNLIMITED TABLESPACE TO ordstest -
Connect to the
ordstestschema. In SQL Developer create a connection to theordstestschema, connect to it, and open a SQL worksheet. -
Create a database table. For example, enter the following in the SQL Worksheet to create an example table named EMP:
CREATE TABLE EMP ( EMPNO NUMBER(4,0), ENAME VARCHAR2(10 BYTE), JOB VARCHAR2(9 BYTE), MGR NUMBER(4,0), HIREDATE DATE, SAL NUMBER(7,2), COMM NUMBER(7,2), DEPTNO NUMBER(2,0), CONSTRAINT PK_EMP PRIMARY KEY (EMPNO) );
-
Insert some sample data into the table. For example:
Insert into EMP (EMPNO,ENAME,JOB,MGR,HIREDATE,SAL,COMM,DEPTNO) values (7369,'SMITH','CLERK',7902,to_date('17-DEC-80','DD-MON-RR'),800,null,20); Insert into EMP (EMPNO,ENAME,JOB,MGR,HIREDATE,SAL,COMM,DEPTNO) values (7499,'ALLEN','SALESMAN',7698,to_date('20-FEB-81','DD-MON-RR'),1600,300,30); Insert into EMP (EMPNO,ENAME,JOB,MGR,HIREDATE,SAL,COMM,DEPTNO) values (7521,'WARD','SALESMAN',7698,to_date('22-FEB-81','DD-MON-RR'),1250,500,30); Insert into EMP (EMPNO,ENAME,JOB,MGR,HIREDATE,SAL,COMM,DEPTNO) values (7566,'JONES','MANAGER',7839,to_date('02-APR-81','DD-MON-RR'),2975,null,20); Insert into EMP (EMPNO,ENAME,JOB,MGR,HIREDATE,SAL,COMM,DEPTNO) values (7654,'MARTIN','SALESMAN',7698,to_date('28-SEP-81','DD-MON-RR'),1250,1400,30); Insert into EMP (EMPNO,ENAME,JOB,MGR,HIREDATE,SAL,COMM,DEPTNO) values (7698,'BLAKE','MANAGER',7839,to_date('01-MAY-81','DD-MON-RR'),2850,null,30); Insert into EMP (EMPNO,ENAME,JOB,MGR,HIREDATE,SAL,COMM,DEPTNO) values (7782,'CLARK','MANAGER',7839,to_date('09-JUN-81','DD-MON-RR'),2450,null,10); Insert into EMP (EMPNO,ENAME,JOB,MGR,HIREDATE,SAL,COMM,DEPTNO) values (7788,'SCOTT','ANALYST',7566,to_date('19-APR-87','DD-MON-RR'),3000,null,20); Insert into EMP (EMPNO,ENAME,JOB,MGR,HIREDATE,SAL,COMM,DEPTNO) values (7839,'KING','PRESIDENT',null,to_date('17-NOV-81','DD-MON-RR'),5000,null,10); Insert into EMP (EMPNO,ENAME,JOB,MGR,HIREDATE,SAL,COMM,DEPTNO) values (7844,'TURNER','SALESMAN',7698,to_date('08-SEP-81','DD-MON-RR'),1500,0,30); Insert into EMP (EMPNO,ENAME,JOB,MGR,HIREDATE,SAL,COMM,DEPTNO) values (7876,'ADAMS','CLERK',7788,to_date('23-MAY-87','DD-MON-RR'),1100,null,20); Insert into EMP (EMPNO,ENAME,JOB,MGR,HIREDATE,SAL,COMM,DEPTNO) values (7900,'JAMES','CLERK',7698,to_date('03-DEC-81','DD-MON-RR'),950,null,30); Insert into EMP (EMPNO,ENAME,JOB,MGR,HIREDATE,SAL,COMM,DEPTNO) values (7902,'FORD','ANALYST',7566,to_date('03-DEC-81','DD-MON-RR'),3000,null,20); Insert into EMP (EMPNO,ENAME,JOB,MGR,HIREDATE,SAL,COMM,DEPTNO) values (7934,'MILLER','CLERK',7782,to_date('23-JAN-82','DD-MON-RR'),1300,null,10); commit; -
Enable the schema of the EMP table for REST. In SQL Developer, right-click the
ordstestconnection, and select REST Services > Enable RESTful Services to display the following wizard page:Figure 1-37 Enabling the Schema of the EMP Table for REST

Description of "Figure 1-37 Enabling the Schema of the EMP Table for REST"Enable schema: Enable this option.
Schema alias: Accept
ordstestfor the schema alias.Authorization required: For simplicity, this tutorial does not require authorization, so disable this option.
Click Next.
-
On the RESTful Summary page of the wizard, click Finish.
-
Enable the EMP table. In SQL Developer, right-click EMP table in the Connections navigator, and select REST Services > Enable RESTful Services to display the following wizard page:
Enable object: Enable this option (that is, enable REST access for the EMP table).
Object alias: Accept
empfor the object alias.Authorization required: For simplicity, this tutorial does not require authorisation, so disable this option.
-
On the RESTful Summary page of the wizard, click Finish.
The EMP table is now exposed as a REST HTTP endpoint .
Note:
DELETE, PUT, POST, and metadata-catalog endpoints are also auto-generated. -
Test the REST endpoint. In a web browser, enter the URL
http://localhost:8080/ords/ordstest/emp/as shown in the following figure:-
The ORDSTEST schema has been exposed at the
/ordstest/path. -
The EMP table has been exposed at the
/emp/path.
Figure 1-39 Testing the REST Enabled Table

Description of "Figure 1-39 Testing the REST Enabled Table" -
1.1.5.2 Creating a RESTful Service through the Connections Navigator
This section explains how to create a RESTful service by using REST Data Services node in the Connections navigator. Oracle REST Data Services provides an option through the Connections navigator that enables you to create and edit RESTful service definitions.
To create and test a RESTful service by using REST Data Services node in the Connections navigator, follow these steps:
-
Under ordstest schema, select REST Data Services.
Figure 1-40 REST Data Services option under Connections Navigator

Description of "Figure 1-40 REST Data Services option under Connections Navigator"The following steps create and test the RESTful service.
-
Under REST Data Services node, right-click the
Modulesnode, click New Module, and enter information on the Specify Module page:Figure 1-41 Entering Information on the Specify Module Page

Description of "Figure 1-41 Entering Information on the Specify Module Page"Module Name: Any desired name for the connection. For example,
demoURI Prefix:
/demo/Publish - Make this RESTful Service available for use: Enable (check).
Pagination Size:
25 -
Click Next, and enter information on the Specify Template page:
Figure 1-42 Entering Information on the Specify Template Page

Description of "Figure 1-42 Entering Information on the Specify Template Page"URI Pattern:
emp/Accept the defaults for the remaining options.
-
Click Next to go to the RESTful Summary page of the wizard, then click Finish. Expand the Modules node to display the resource module that you created.
-
Expand the module, Demo and right click on the
emp/node, select Add handler and then select GET method. -
Enter the information on the Create Resource Handler page.
Figure 1-43 Entering Information on Create Resource Handler Page:

Description of "Figure 1-43 Entering Information on Create Resource Handler Page:"Source Type:
Collection QueryPagination Size:
7Click Apply.
Next step is to define the query for the GET resource handler.
-
In the SQL Worksheet, enter the following query:
SELECT INITCAP(ENAME) name, lower(job) job, TO_CHAR(sal,'9G999','NLS_NUMERIC_CHARACTERS=",."') salary, hiredate FROM emp -
Click Save REST Handler icon. A confirmation message appears in the Messages - Log pane to confirm that the handler is saved to the database.
Note:
If you do not see the Messages - Log pane, go to the View menu and then select Log. -
Test the RESTful service. In a web browser enter the URL http://localhost:8080/ords/ordstest/demo/emp/ as shown in the following figure:
-
The ORDSTEST schema has been exposed at the /ordstest/ path.
-
The query has been exposed at the /demo/emp/ path.
-
Related Topics
1.1.5.2.1 Creating a Privilege under REST Data Services
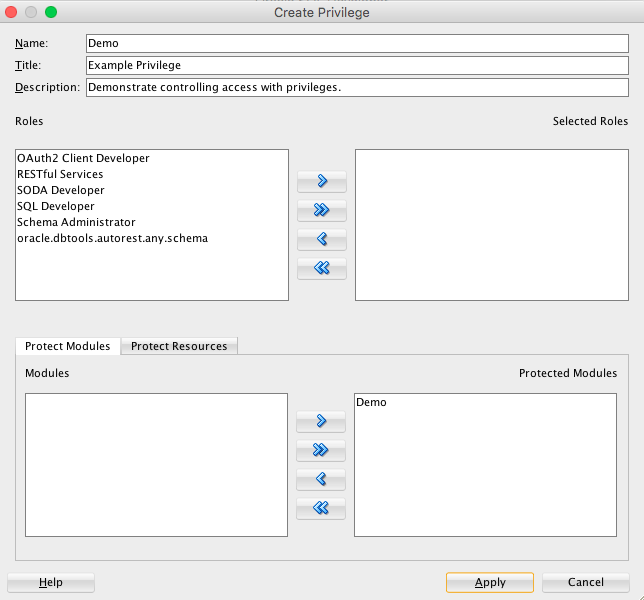
Controlling access to protected resources is done by defining privileges. Privileges restrict access to only users having at least one of a set of specified roles. A privilege is then associated with one or more resource modules: before those resource modules can be accessed, the user must be authenticated and then authorized to ensure that the user has one of the required roles.
To protect resources, follow these steps.
1.1.5.3 Creating a RESTful Service from a SQL Query
Oracle REST Data Services provides a REST API (called the Resource Modules API) that enables Oracle SQL Developer to create and edit RESTful service definitions. This option is available when you do not have direct access to the database. Access to the Resource Modules API is protected, a user with the correct role must be provisioned, and the created user's credentials must be used when accessing the API from SQL Developer.
To create a RESTful service from a SQL query, follow these steps.
-
In the folder where Oracle REST Data Services was installed, enter the following command at a command prompt:
java -jar ords.war user test_developer "SQL Developer"
-
You will be prompted to enter a password.
-
This command creates a user named
test_developerand grants the user the role namedSQL Developer. Only users with theSQL Developerrole are permitted to access the resource module's API. -
The user details are stored in a file named
credentialsin the ORDS configuration folder. However, it is not recommended to store user credentials in the credentials file in production deployments; instead, users should be provisioned in the host application server.
The remaining steps create and test the RESTful service.
-
-
Create RESTful connection. In SQL Developer, select View > REST Data Services > Development.
-
In the REST Development pane, right-click REST Data Services > Connect.
-
In the RESTful Services Connection dialog box, click the + (plus sign) icon to add a connection to the list available for selection.
-
In the New RESTful Services Connection dialog box, enter the necessary information:
Figure 1-48 Entering Information for New RESTful Services Connection

Description of "Figure 1-48 Entering Information for New RESTful Services Connection"Connection Name: Any desired name for the connection. Example:
ordstestUsername:
test_developerhttp or https: Select
httpfor simplicity in this tutorial.Hostname:
localhostPort:
8080Server Path:
/ordsWorkspace:
ordstestClick OK, then enter the password for the
test_developeruser at the prompt. -
Create the module. Right-click the
Modulesnode in the REST Development view, click New Module, and enter information on the Specify Module page:Figure 1-49 Entering Information on the Specify Module Page

Description of "Figure 1-49 Entering Information on the Specify Module Page"Module Name: Any desired name for the connection. Example:
testURI Prefix:
/testPublish - Make this RESTful Service available for use: Enable (check).
Pagination Size:
7 -
Click Next, and enter information on the Specify Template page:
Figure 1-50 Entering Information on the Specify Template Page

Description of "Figure 1-50 Entering Information on the Specify Template Page"URI Template:
/emp/Accept the defaults for the remaining options.
-
Click Next, and enter information on the Specify Handler page:
Figure 1-51 Entering Information on the Specify Handler Page:
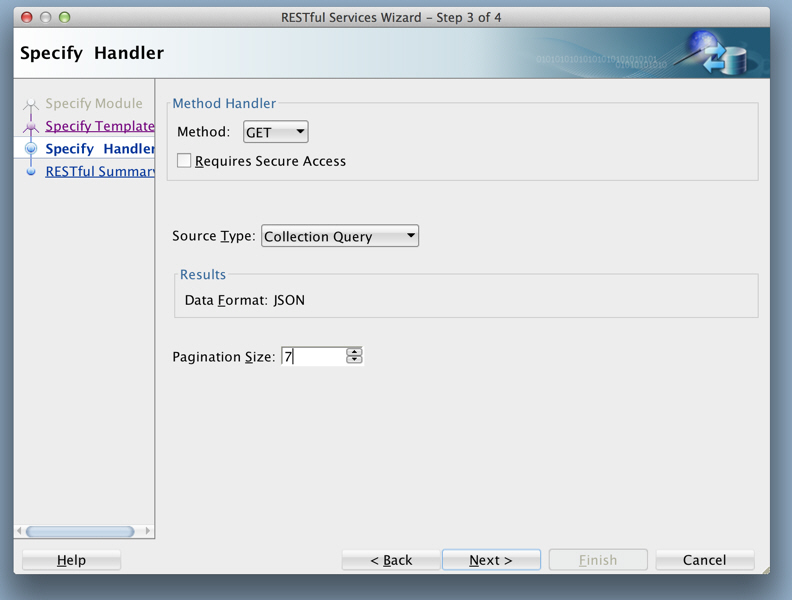
Description of "Figure 1-51 Entering Information on the Specify Handler Page:"Method:
GETRequires Secure Access: Disable (uncheck) for this tutorial.
Source Type:
Collection QueryPagination Size:
7 -
Click Next to go to the RESTful Summary page of the wizard, then click Finish.
The resource module is now created, the next step is to define the query for the GET resource handler.
-
Define the query for the GET resource handler.
-
Expand the
testnode under theModulesnode in the REST Development view. -
Expand the
/emp/node, right-click theGETnode, and select Open. -
In the SQL Worksheet that opens for
GET /emp/, enter the following SQL query:select * from emp
-
Right-click on the test node under the 'Modules' node in the 'REST Development' view
-
Click 'Upload...'. A confirmation dialog will appear confirming the module has been uploaded.
-
-
Test the RESTful service. In a web browser enter the URL
http://localhost:8080/ords/ordstest/test/emp/as shown in the following figure:-
The ORDSTEST schema has been exposed at the
/ordstest/path. -
The query has been exposed at the
/test/emp/path.
Figure 1-52 Testing the RESTful Service Created from a SQL Query

Description of "Figure 1-52 Testing the RESTful Service Created from a SQL Query" -
Related Topics
1.1.5.4 Protect Resources
Up to this point the tutorial has deliberately disabled security on the RESTful endpoints you created, because it is easier to test them without security. In this topic you protect the /test/emp/ service, requiring users to authenticate before accessing the service.
Controlling access to protected resources is done by defining privileges. Privileges restrict access to only users having at least one of a set of specified roles. A privilege is then associated with one or more resource modules: before those resource modules can be accessed, the user must be authenticated and then authorized to ensure that the user has one of the required roles.
To protect resources, follow these steps.
1.1.5.5 Register an OAuth Client Application
This topic explains how to register your applications (called "third-party" applications here) to access a REST API.
OAuth 2.0 is a standard Internet protocol that provides a means for HTTP servers providing REST APIs to give limited access to third party applications on behalf of an end user.
-
The author of the third-party application must register the application to gain client credentials.
-
Using the client credentials the third party application starts a web flow that prompts the end-user to approve access.
So, before a third party application can access a REST API, it must be registered and the user must approve access. And before the application can be registered, it must be assigned a user identity that enables the user to register applications. Users possessing the SQL Developer role (such as the test_developer user created in Creating a RESTful Service from a SQL Query) are permitted to register OAuth clients.
Tip:
In a real application, you may want to provision specific users that can register OAuth clients; these users should be granted the OAuth Client Developer role.
This topic outlines how to complete these actions. It is not a full-featured demonstration of how to create and integrate a third party application; it just outlines the concepts involved.
-
Register the client application.
-
In a web browser enter the following URL:
http://localhost:8080/ords/ordstest/oauth/clients/
-
At the prompt, click the link to sign in and enter the credentials for the
test_developeruser. -
Click New Client and enter the following information:
Name:
Test ClientDescription:
An example OAuth ClientRedirect URI:
http://example.org/redirectSupport e-mail:
info@example.orgSupport URI:
http://example.org/supportRequired Privileges:
Example Privilege -
Click Create.
The client registration is created, and the Authorization URI for the client is displayed. You have created a client that will use the Implicit Grant authorization flow (explained at
https://tools.ietf.org/html/rfc6749#section-4.2).Note the Client Identifier assigned to the client and the Authorization URI value. These values are used to start the authorization flow (next major step).
-
-
Approve the client application.
In a real third-party client application, the client will initiate the approval flow by directing a web browser to the Authorization URI. The end user will be prompted to sign in and approve access to the client application. The browser will be redirected back to the client's registered Redirect URI with a URI fragment containing the
access_tokenfor the approval. To simulate this process:-
In a web browser, enter the Authorization URI that you noted in the previous step. The URL should look like the following (though you should not copy and paste in this example value):
http://localhost:8080/ords/ordstest/oauth/auth?response_type=token&client_id=5B77A34A266EFB0056BE3497ED7099.&state=d5b7944-d27d-8e2c-4d5c-fb80e1114490&_auth_=force
The
client_idvalue must be the value of the client identifier assigned to the application. Be sure you are using the correctclient_idvalue. Do not use the value in the preceding example; replace it with the client identifier assigned to your application.The
statevalue should be a unique, unguessable value that the client remembers, and can use later to confirm that the redirect received from Oracle REST Data Services is in response to this authorisation request. This value is used to prevent Cross Site Request Forgery attacks; it is very important, cannot be omitted, and must not be guessable or discoverable by an attacker. -
At the prompt, click the link to sign in and enter the credentials for the
test_developeruser. -
Review the access being requested, and click Approve.
The browser is redirected to a URL similar to the following:
http://example.org/redirect#token_type=bearer&access_token=-i_Ows8j7JYu0p07jOFMEA..&expires_in=3600
When registering the OAuth client, you specified
http://example.org/redirect as the Redirect URI. On completion of the approval request, the browser is redirected to this registered redirect URI. Appended to the URI is the information about the access token that was generated for the approval.In a real application, the third party application would respond to the redirect to the redirect URI by caching the access token, redirecting to another page to show the user that they are now authorized to access the REST API, and including the access token in every subsequent request to the REST API. However, in this tutorial you just make note of the access token value and manually create a HTTP request with the access token included, as explained in the next major step.
The value of the access token (which in the preceding example is
-i_Ows8j7JYu0p07jOFMEA..) will change on every approval.Note that the access token expires. In the preceding example it expires after 3600 seconds (
&expires_in=3600), that is, one hour.
-
-
Issue an authorized request.
After an access token has been acquired, the client application must remember the access token and include it with every request to the protected resource. The access token must be included in the HTTP Authorization request header (explained at https://datatracker.ietf.org/doc/html/rfc2616#section-14.8) as in the following example:
Host: localhost:8080
GET /ords/ordstest/test/emp/
Authorization: Bearer -i_Ows8j7JYu0p07jOFMEA..
To emulate creating a valid HTTP request, use the cURL command line tool (if necessary, install cURL). In a real application this request would be performed by the client making an HTTP request, such as an
XMLHttpRequest. For example:curl -i -H'Authorization: Bearer -i_Ows8j7JYu0p07jOFMEA..' http://localhost:8080/ords/ordstest/test/emp/
However, in this example replace
-i_Ows8j7JYu0p07jOFMEA..with the access token value that you previously noted.Output similar to the following JSON document should be displayed:
HTTP/1.1 200 OK
Content-Type: application/json
Transfer-Encoding: chunked

{
 "items":[
  {"empno":7369,"ename":"SMITH","job":"CLERK","mgr":7902,"hiredate":"1980-12-17T00:00:00Z","sal":800,"comm":null,"deptno":20},
  {"empno":7499,"ename":"ALLEN","job":"SALESMAN","mgr":7698,"hiredate":"1981-02-20T00:00:00Z","sal":1600,"comm":300,"deptno":30},
  {"empno":7521,"ename":"WARD","job":"SALESMAN","mgr":7698,"hiredate":"1981-02-22T00:00:00Z","sal":1250,"comm":500,"deptno":30},
  {"empno":7566,"ename":"JONES","job":"MANAGER","mgr":7839,"hiredate":"1981-04-01T23:00:00Z","sal":2975,"comm":null,"deptno":20},
  {"empno":7654,"ename":"MARTIN","job":"SALESMAN","mgr":7698,"hiredate":"1981-09-27T23:00:00Z","sal":1250,"comm":1400,"deptno":30},
  {"empno":7698,"ename":"BLAKE","job":"MANAGER","mgr":7839,"hiredate":"1981-04-30T23:00:00Z","sal":2850,"comm":null,"deptno":30},
  {"empno":7782,"ename":"CLARK","job":"MANAGER","mgr":7839,"hiredate":"1981-06-08T23:00:00Z","sal":2450,"comm":null,"deptno":10}
 ],
 "hasMore":true,
 "limit":7,
 "offset":0,
 "count":7,
 "links":[
  {"rel":"self","href":"http://localhost:8080/ords/ordstest/test/emp/"},
  {"rel":"describedby","href":"http://localhost:8080/metadata-catalog/test/emp/"},
  {"rel":"first","href":"http://localhost:8080/ords/ordstest/test/emp/"},
  {"rel":"next","href":"http://localhost:8080/ords/ordstest/test/emp/?offset=7"}
 ]
}
However, if the
Authorizationheader is omitted, then the status401 Unauthorizedis returned instead.
See Also:
curl_haxx


