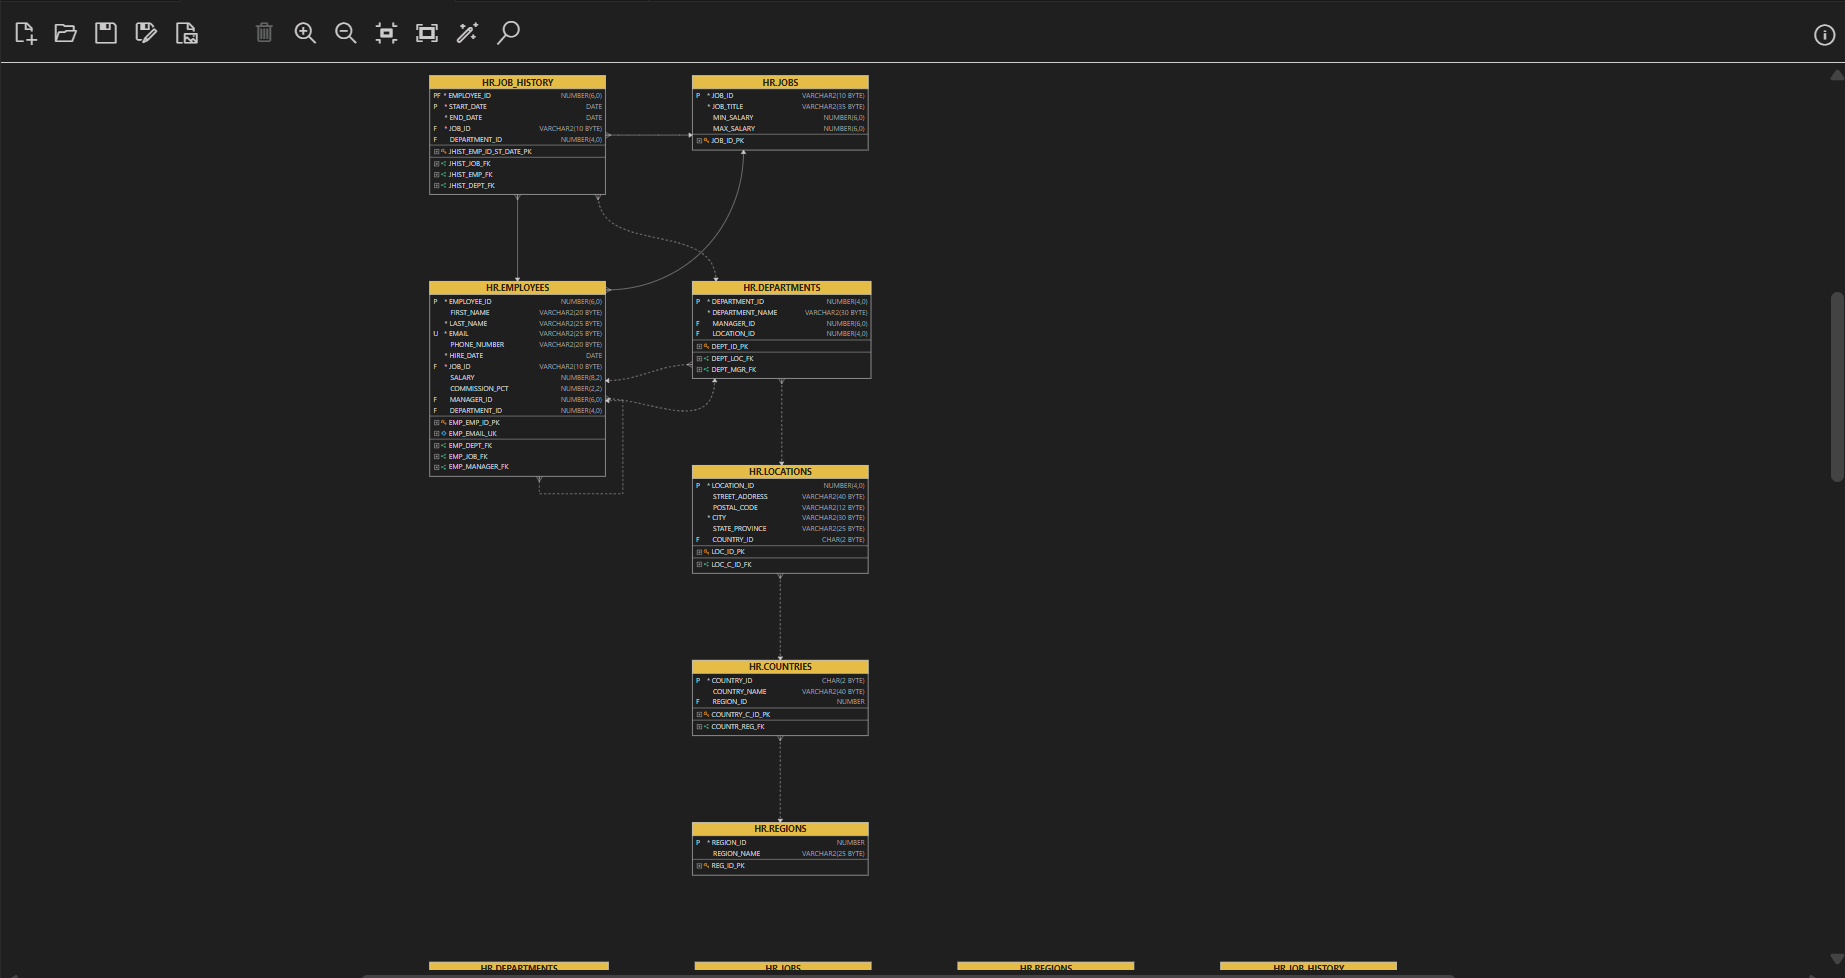
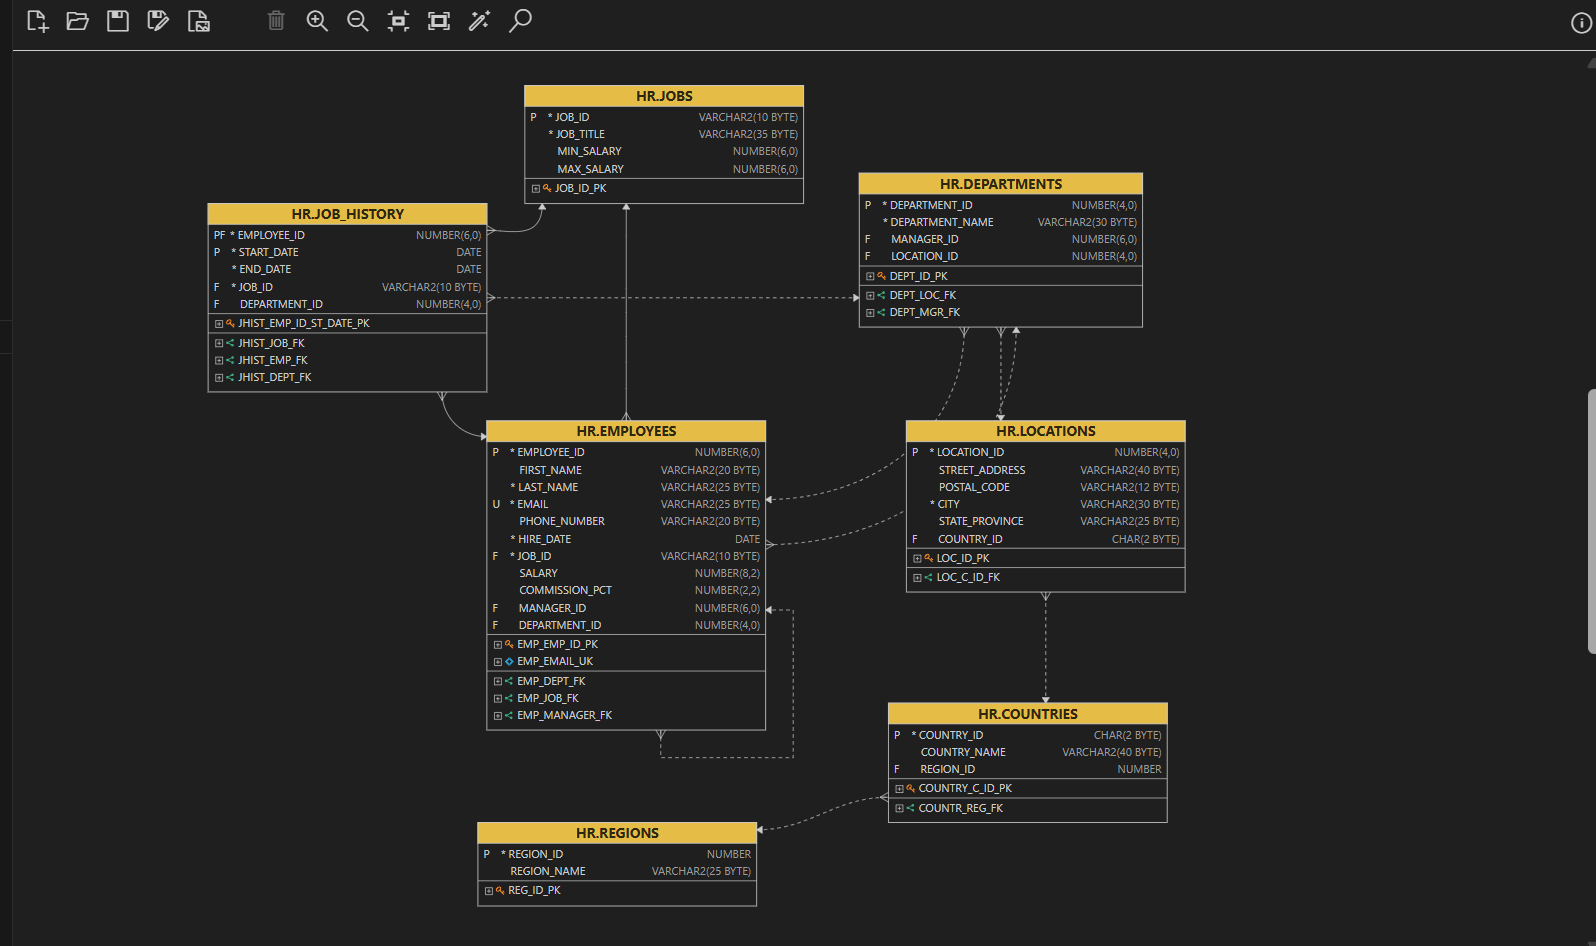
3.9 Working with Diagrams
The SQL Developer extension for VS Code allows you to visualize database objects, such as tables, views, and duality views on diagrams.
You can save, export, and reopen these diagrams with ease. Additionally, it allows you to explore dependencies between various database objects and provides a search function to quickly find objects within the diagram.
To open a new diagram, right-click the connection name in the Connections panel and select Open Diagram.
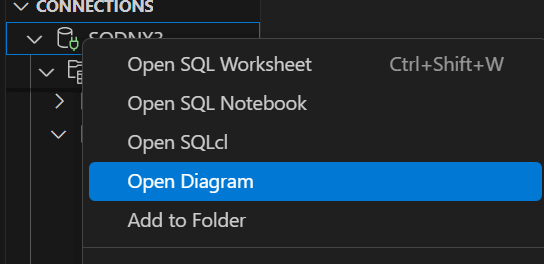
Description of the illustration open_diagram_menu.png
A diagram window, along with the instructions for working with
diagrams, is displayed on the right pane. You can now add objects to this
diagram.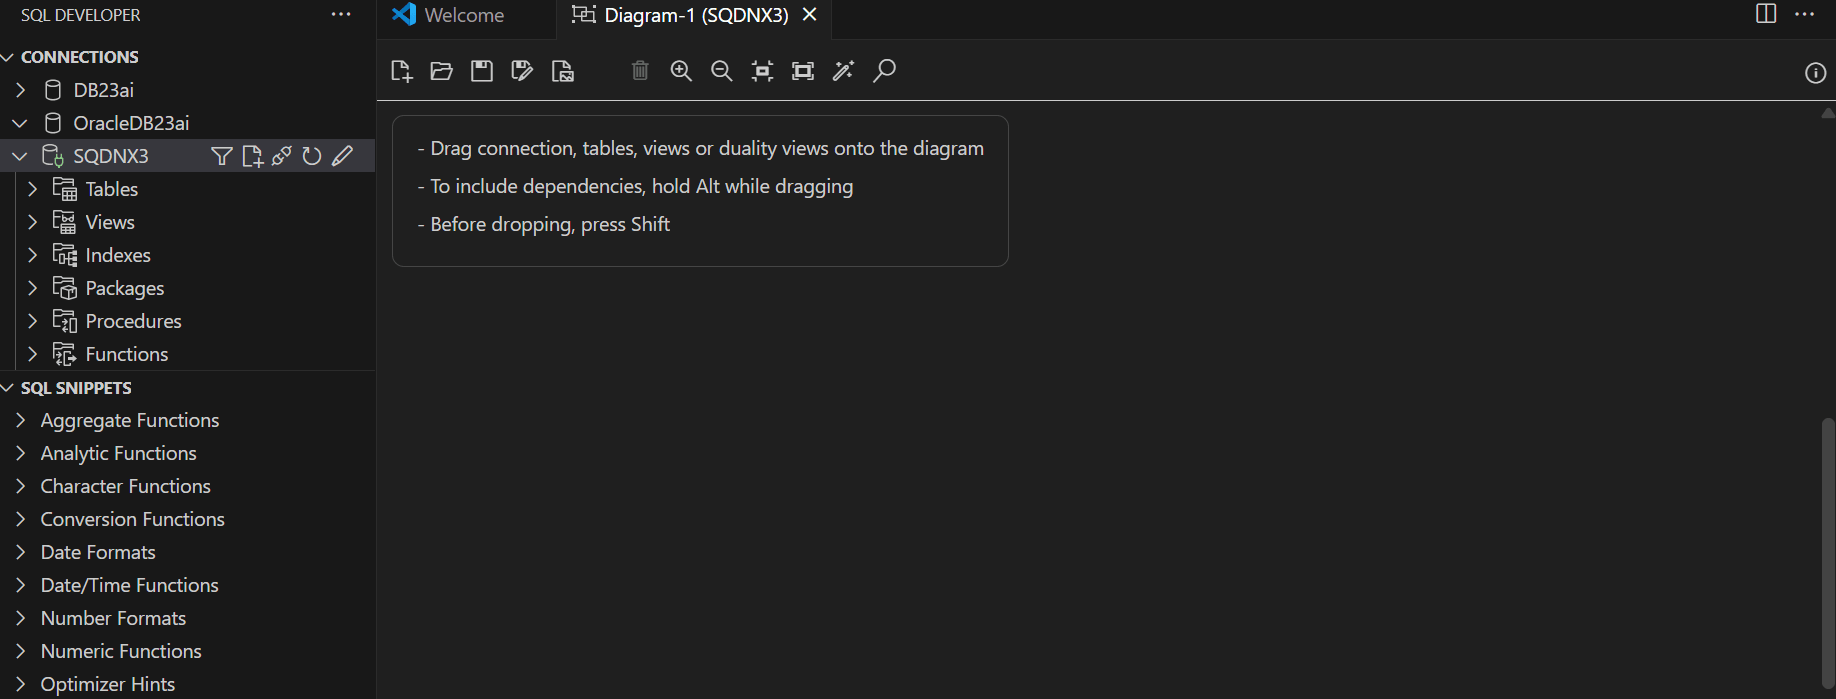
Description of the illustration diagram_editor.png
Adding Objects to a Diagram
You can add objects to the diagram using drag-and-drop functionality from the connection folder (node), object type folders, or individual objects. The supported object types for diagrams are Tables, Views, and Duality Views.
Different types of selections cannot be combined in a single drag-and-drop action. Selection is processed according to the following priority: Connection Folder (Node), Object Type Folders (for example, Tables, Views), Individual Objects. If a higher-priority item is selected, any lower-priority items included in the selection will be ignored. For example, if you select both a connection folder and individual tables, only the connection folder will be processed.
- Select the connection folder and drag it with your mouse.
- When your cursor is positioned over the diagram, press
the Shift key once.
All tables, views, and duality views from the schema associated with the connection will be retrieved and laid out on the diagram.
For example, when you select the entire connection, the required details for all tables, views, and duality views within the schema are retrieved from the database, and the objects are systematically arranged on the diagram.
Using Object Type Folders
Supported object type folders include Tables, Views, and Duality Views. You can select type folders from your schema or from the Other Users folder (for objects in other schemas). Select one or more type folders from one or multiple schemas and drag them to the diagram, then press the Shift key once when the cursor is over the diagram. All objects contained in the selected type folders will be added to the diagram.
For example, if you select the Tables folder, drag it to the diagram window, press the Shift key, and then release the mouse button to drop it. All the tables will be added to the diagram.
Using a Selection of Supported Objects
You can select individual supported objects (table, view, duality view) from one or multiple schemas (provided your connection user has access). Drag the selected objects to the diagram and press the Shift key once when the cursor is in the diagram area.
Adding Supported Objects with Dependencies
Note:
To process and include dependencies, ensure you hold the Alt key during the drag-and-drop action.
For example, if you want to view the dependencies for the
COUNTRIES table, hold the
Alt key while dragging the
COUNTRIES table. Then press the
Shift key before dropping the table
onto the diagram window. The objects referenced by the selected
object, and the objects referencing the selected object will also be
added to the diagram.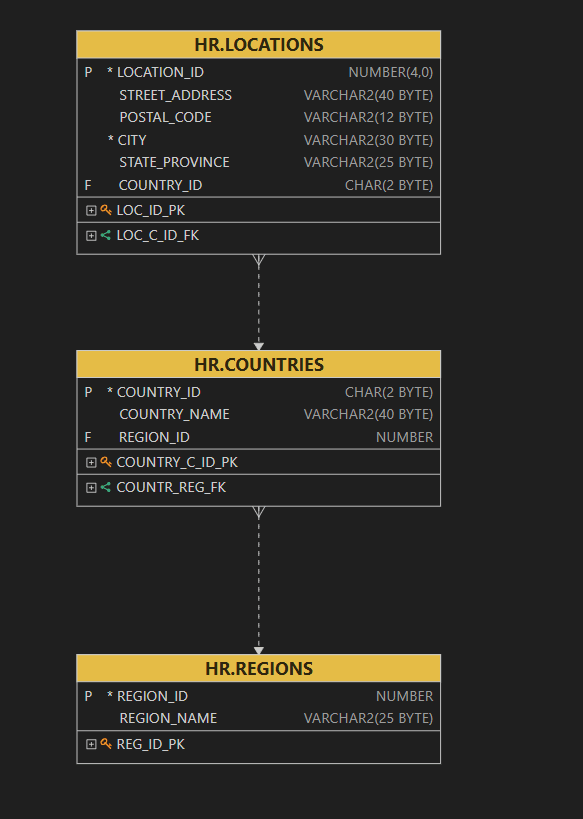
Description of the illustration diagram_dependency.png
- New Diagram (Shift+Alt+N) opens a new diagram window.
- Open Diagram (Shift+Alt+O) opens a previously saved diagram in the diagram window.
- Save Diagram
(Shift+Alt+S) saves the diagram. The
diagram will be saved as
.dgmfile - Save Diagram As... saves the current diagram under a new name or in a different location.
- Export Diagram (Shift+Alt+E) exports the diagram to the SVG format.
- Remove Object removes one or more selected objects from the diagram. To select multiple objects, press the CTRL key and select the objects.
- Zoom In enlarges the diagram to make the details easier to see.
- Zoom Out displays less detail, and potentially more objects, in the currently selected diagram.
- Fit to Screen makes all relevant objects fit in the window for the currently selected diagram.
- Actual Size displays the diagram at its original size, without any zooming in or out.
- Auto Layout rearranges the objects in the diagram to a layout that may be more meaningful and attractive.
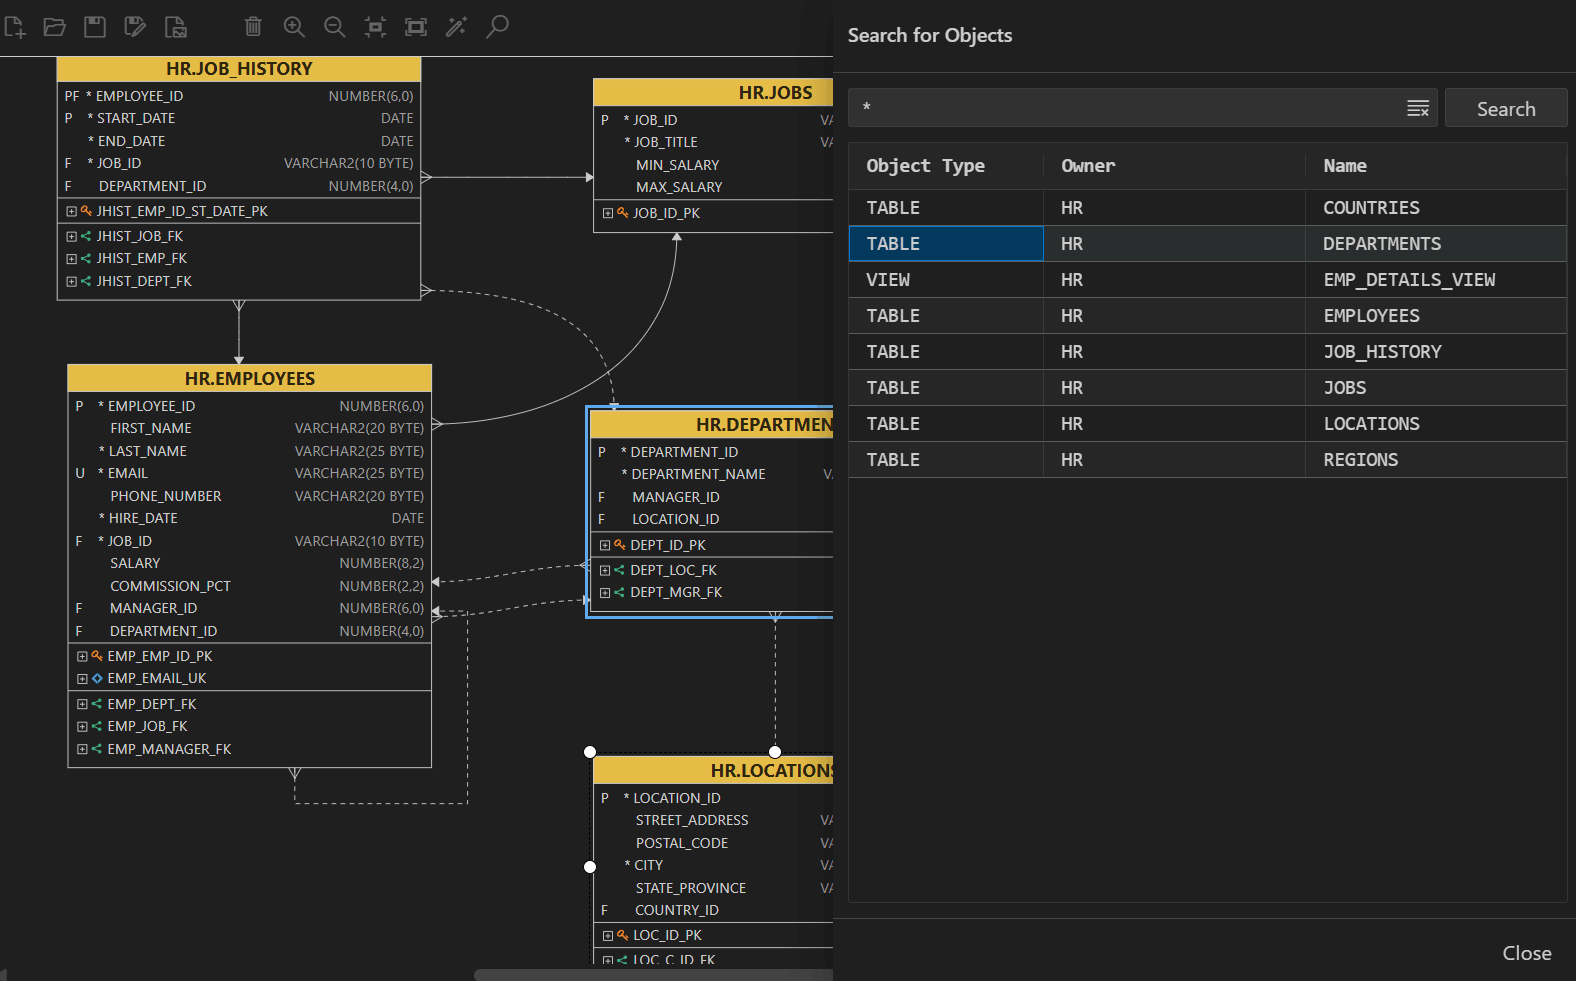
- Search displays the Search for Objects dialog box to search for an object type. Type * to list all the objects of an object type (tables, views, or duality views) in the schema. You can also search by typing a few characters.
-
 displays the number of tables, views,
duality views, and foreign keys in the
diagram.
3.9.1 Database Object Details
When you double-click an object in the diagram, you are navigated to the object details window.
For example, double-clicking the LOCATIONS table in
the diagram will open several tabs with detailed information about the
LOCATIONS table.
You can select the respective tabs to view details about the object.
Selecting the SQL tab generates the DDL for the
LOCATIONS table object.
Similarly, you can also view detailed information about views and duality views.
3.9.2 Understanding Diagram Elements
On the diagram window, the objects are represented distinctly, making them easy to identify.
The tables and views are represented with rectangles. The table rectangles have table names displayed on a yellow background, while the view and duality view rectangles have rounded corners and their names are shown on a green background.
The columns are prefixed with P,
F, and U to indicate primary, foreign, and
unique key constraints, respectively. An asterisk (*) denotes a mandatory
column. Optional foreign keys are represented by dashed lines, while
mandatory foreign keys are represented by solid lines.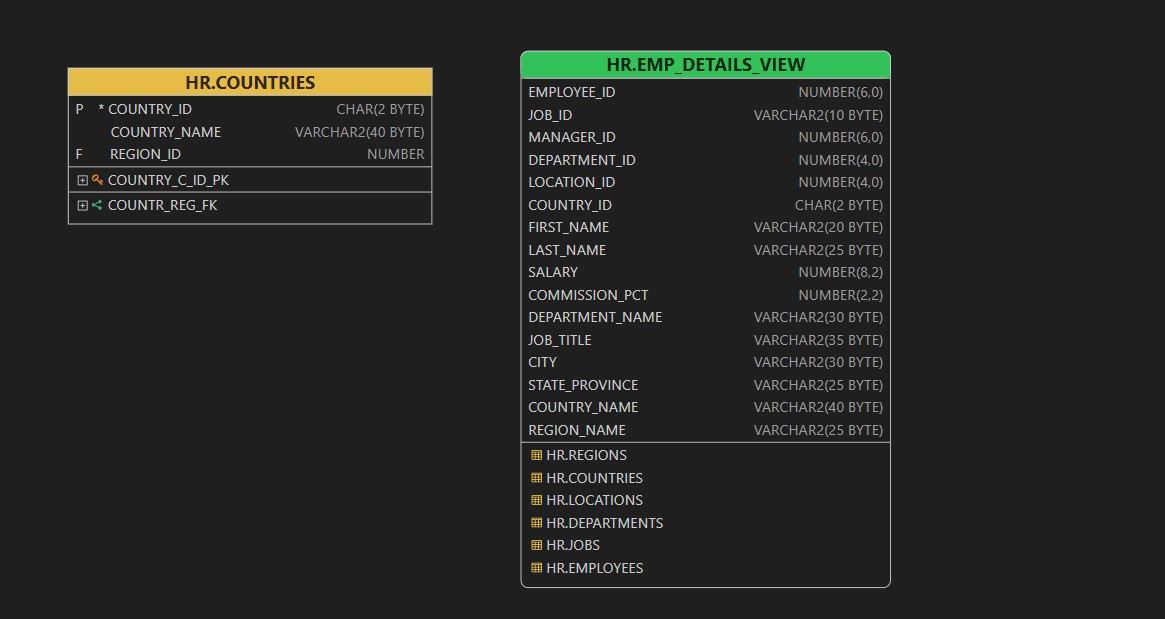
Description of the illustration table_view_rectangles.png
When you click the expand button next to a constraint, it shows the columns that are tied to that specific constraint, helping you understand the structure and relationships in the database schema.
Navigating Through Foreign Key Names
In the diagram window, hold the Alt key and click the foreign key name. The diagram will automatically center and highlight the referenced object. This action is available only if the referenced table or view is present on the current diagram.In the Exported SVG (when viewed in a web browser), clicking the foreign key name will also center and display the referenced object, provided it exists in the diagram.
