Create a Duality View
You can use the Duality View Builder to create a duality view.
Note:
The tables used to define a duality view must satisfy certain requirements. If these requirements are not met, an error is raised when you try to create the view.
-
In the Connections panel, right-click the Duality Views node and select Duality View Builder.
The Duality View Builder interface appears. It consists of three parts: the diagram panel, the preview panel, and the definition panel. Enter a name for the duality view in the Name field on top, and click Save to File to save and continue working at a later time.
Diagram Panel
-
From the toolbar, select Add Root Table. In the following figure, the table
Employeesis selected.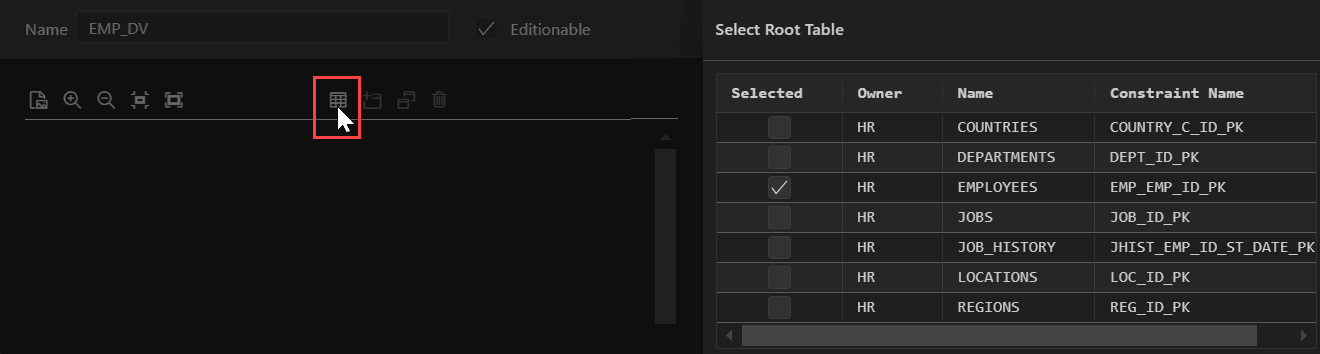
-
In the Select Root Table pane, select the checkbox for the root table that you want, and click Apply.
The selected table appears in the diagram pane. You can zoom in and zoom out and export to SVG format using the icons in the toolbar.
-
You can now select Parent and Child Tables. Select the table in the diagram (when selected, a blue border appears around the table) and from the toolbar, and select Add Parent Table(s). Following this, if you want to add child tables, select the parent table and select Add Child Table(s) from the toolbar.
In the following figure,
DepartmentsandJobsare selected as parent tables.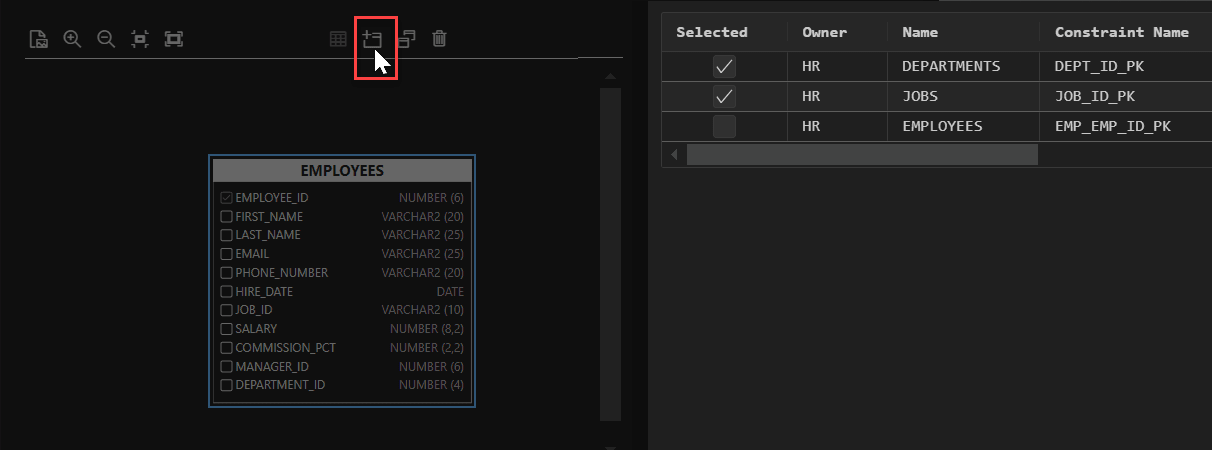
Preview Panel
-
You can select additional columns for the table by selecting the appropriate checkbox in the diagram panel. As you select, these changes instantly appear in the preview panel. Select an object in the preview panel to set additional properties such as Alias, Nested Key Name, Allow Update, Allow Insert, Allow Delete, Check, and Filter.
In the following figure, the
First_Namecolumn is selected in the diagram panel and it immediately appears in the preview panel. SelectFirst_Namein the preview panel to set additional properties such as Nested Key Name, Check and Allow Update.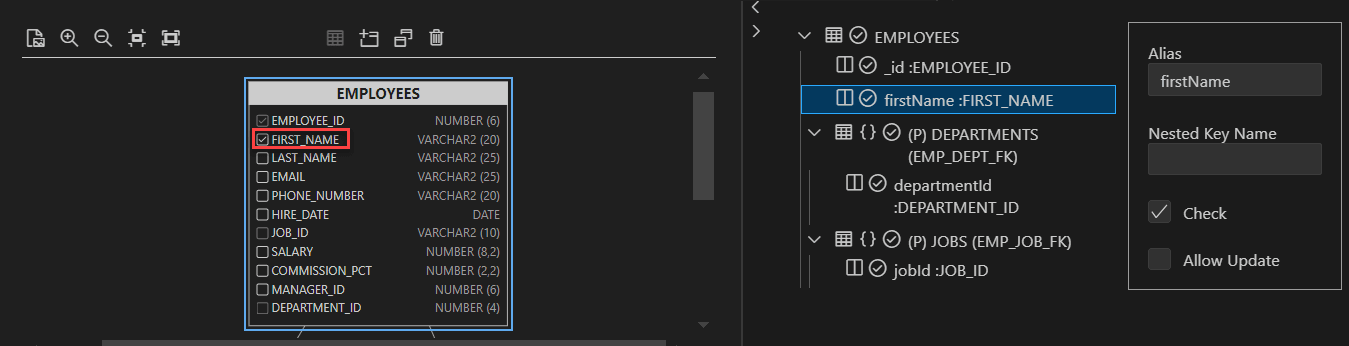
Definition Panel
-
In the Definition tab, the duality view definition is automatically generated as a SQL Statement.
-
To test the SELECT statement, select the Test Query tab and click the Run Query icon.
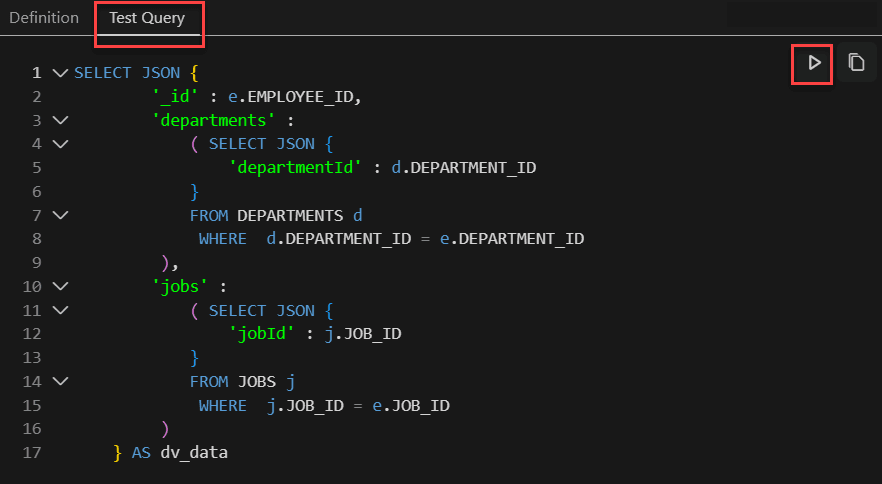
The output is displayed below the defintion panel.
Create Duality View
-
After confirming the output, you can create the duality view. In the top right corner, click Create Duality View.
To view the newly created duality view, refresh the Connections panel and expand the Duality View node. Click the duality view name to open it in the right panel.