4.6 Creating RESTful Web Services

Create RESTful web services using the Modules, Templates and Handlers pages.

To create a RESTful web service, you need to:

  • Define a resource module

  • Define a resource template

  • Define one or more resource handlers such as GET, PUT, POST or DELETE. Optionally, define parameters that you need to pass to the resource handler.

The following sections provide information on how to create resource modules, resource templates and resource handlers.

4.6.1 Managing Resource Modules

You can define, edit and delete resource modules in the Modules page.

To navigate to the Modules page, in the REST Overview page, click Modules in Objects, or from the menu in the header, select Modules.

The module attributes displayed by default in card view are shown in the following figure.

The module status can be published or unpublished. If the status is unpublished, the icon is displayed in a red color.

Click the module name in card view to go to the Templates page for that module. You can also navigate to the Templates page through the context menu.

The actions available in the context menu are:

4.6.1.1 Creating a Resource Module

This section describes how to create a resource module.

  1. In the Modules page, click Create Module.
  2. Enter the following fields. The fields with an asterisk (*) are mandatory:

    Module Definition tab

    • Module Name: Enter the name of the module. This field is case sensitive.

    • Base Path: Enter the base of the URI for accessing the RESTful service. For example: hr/ means that all URIs starting with hr/ will be serviced by this resource module. Note the change in the Preview URL as you enter the base path.

    • Is Published: Enable to make the RESTful service available for use.

    • Pagination Size: Enter or select the number of results to return on each page based on a database query. The default value is 25.

    • Protected By Privilege: Select a privilege to protect the module from the drop-down list.
    • Comments: Enter descriptive comments.

    • Go to Module after creation: Select this option to go to the Templates page after the module is created.

    Origins Allowed tab

    • Enter origins that are allowed to access the resource templates. Click Add (+) to add each origin. For example:

      http://example1.org

      https://*.example2.com

  3. Click Create.

    The new module is displayed on the Modules page. If you cannot see it, locate the module using the Search field.

4.6.1.2 Editing a Resource Module

This section describes how to edit a resource module.

  1. In the Modules page, for the specific module, click context menu icon and select Edit.
  2. Edit the required fields and click Save. For a description of the fields, see Creating a Resource Module.

4.6.1.3 Deleting a Resource Module

This section describes how to delete a resource module.

  1. In the Modules page, for the specific module, click context menu and select Delete.

    A prompt appears asking you to confirm.

  2. Click OK to delete.

4.6.1.4 Publishing/Unpublishing a Resource Module

This section describes how to make a resource module available or not.

  1. In the Modules page, for the specific module, click context menu and then select Publish or Unpublish.

    You see a prompt to confirm.

  2. Click OK.

4.6.1.5 Exporting a Resource Module

You can export PL/SQL source code or Open API (Swagger) JSON code for a resource module or RESTful service. If the module has templates, handlers, parameters, roles, and so on, these objects are also displayed and exported.

  1. In the Modules page, for a specific module, click context menu and select Export Module.
  2. Select PL/SQL to copy or export the PL/SQL source code for the module. Select OpenAPI to copy or export the Open API (Swagger) JSON code for the module.
  3. Click Copy to Clipboard to copy the code or click Download to download to your local computer.

4.6.1.6 Viewing the Module in OpenAPI View

This section describes how to open the module in Open API view.

The Open API view option is available for modules that are published and not protected.
  1. In the Modules page, for the specific module, click context menu and select OpenAPI View.
  2. The module is displayed as a Swagger UI implementation.
    You can view and execute the handlers, pass parameters to the handlers, and copy or download the responses.

    To learn more about Swagger UI implementation, refer to the official Swagger UI website.

4.6.2 Managing Resource Templates

You can define, edit and delete resource templates for a module in the Templates page.

To navigate to this page, in the Modules page, click context menu icon for a module and select Templates, or click the name of the module in card view.

At the top of the page, the module card is available with context menu options such as Edit, Delete, Publish and Export.

The templates attributes displayed by default in card view are shown in the following figure.

Click the template name in card view to go to the Handlers page. You can also navigate to the Handlers page through the context menu.

The actions available in the context menu are:

4.6.2.1 Creating a Resource Template

This section describes how to create a resource template.

  1. In the Templates page for a module, click Create Template.
  2. Enter the following fields. The fields with an asterisk (*) indicate that they are mandatory:
    • URI Template: Enter the URI pattern for the resource template.

      For example, a pattern of /objects/:object/:id? will match /objects/emp/101 (matches a request for the item in the emp resource with id of 101) and will also match /objects/emp/ (matches a request for the emp resource, because the :id parameter is annotated with the ? modifier, which indicates that the id parameter is optional).

      Note that the Preview URL changes as you type the URI template.

    • Priority: Enter or choose the priority for how the resource template should be evaluated (1 is low priority and 9 is high priority).

    • HTTP Entity Tag Type: Select the type of entity tag to be used by the resource template. An entity tag is an HTTP Header that acts as a version identifier for a resource.

      Options include:

      • Secure HASH (default): The contents of the returned resource representation are hashed using a secure digest function to provide a unique fingerprint for a given resource version.

      • Query: Define a query manually that uniquely identifies a resource version. A manually defined query can often generate an entity tag more efficiently than hashing the entire resource representation.

      • None: Do not generate an entity tag.

    • Comments: Enter descriptive comments if any.

    • Go to Handlers after creation: Select this option to go to the Handlers page after the template is created.

  3. Click Create.

    The new template for the module is added to the Templates page.

    If "Go to Handlers after creation" is selected, you can use the module name in the breadcrumbs at the top of the page to see the list of templates for the module.

4.6.2.2 Editing a Resource Template

This section describes how to edit a resource template.

  1. In the Templates page, for a specific template, click context menu icon and then select Edit.
  2. Edit the required fields and click Save.

    For a description of the fields, see Creating a Resource Template.

4.6.2.3 Deleting a Resource Template

This section describes how to delete a resource template.

  1. In the Templates page, for a specifc template, click context menu icon and then select Delete.

    You are prompted to confirm.

  2. Click OK to delete.

4.6.3 Managing Resource Handlers

You can create, edit and delete resource handlers for a template in the Handlers page.

To navigate to this page, in the Templates page, click context menu icon for a template and select Handlers, or click the name of the template in card view.

At the top of the page, the template card is available with context menu options such as Edit and Delete.

Tthe handler attributes displayed by default in card view are shown in the following figure.

The HTTP Method can be one of the following: GET, PUT, POST and DELETE.

Click the handler name to go to the HTTP method page or you can also navigate to the HTTP method page using the context menu.

The actions available in the context menu are:

4.6.3.1 Creating a Resource Handler

This section describes how to create a resource handler.

  1. In the Handlers page, click Create Handler.
  2. Specify the properties of the resource handler. The specific options depend on the method type.

    Handler Definition Tab

    • Method: Enter the HTTP request method for this handler: GET (retrieves a representation of a resource), POST (creates a new resource or adds a resource to a collection), PUT (updates an existing resource), or DELETE (deletes an existing resource). Only one handler for each HTTP method is permitted.

    • Items Per Page: Enter or choose the default pagination size, or the number of rows to return for a database query. This option is only available for GET handlers. If this value is not defined, the number of items per page is the one defined in the module.

    • Source Type: Select the source implementation for the selected HTTP method. The default is collection query.

      • Collection Query: Executes a SQL query and transforms the result set into a JSON representation. Available when the HTTP method is GET.

      • Collection Item: Executes a SQL query returning one row of data into a JSON representation. Available when the HTTP method is GET.

      • Media: Executes a SQL Query conforming to a specific format and turns the result set into a binary representation with an accompanying HTTP Content-Type header identifying the Internet media type of the representation.

      • PL/SQL: Executes an anonymous PL/SQL block and transforms any OUT or IN/OUT parameters into a JSON representation.

    • Source: Enter the SQL query or the PL/SQL block for the HTTP method. In the handler details page, you can test the SQL or PL/SQL handler code in the handler editor.

    • Go to Handler after creation: Select this option to go to the details page after the handler is created.

    MIMEs Allowed tab

    Identifies the type of information included in the HTTP Request Body. For example, if the POST Handler is expecting JSON in the request, add "Application/JSON" as the MIME type.

  3. Click Create.

    The handler is displayed on the Handlers page for the specific template.

    You can test the REST service endpoint using a REST client or a command-line tool such as cURL.

4.6.3.2 Editing a Resource Handler

This section describes how to edit a resource handler.

  1. In the Handlers page, for a specific handler, click context menu icon and then click Details.
  2. Edit the required fields and click Save.

    For a description of the fields, see Creating a Resource Handler.

4.6.3.3 Deleting a Resource Handler

This section describes how to delete a resource handler.

  1. In the Handlers page, for the specific handler, click context menu icon and then click Delete.

    You are prompted to confirm.

  2. Click OK to delete.

4.6.4 Example: Inserting a Record using a POST Handler

The following example illustrates how to insert a record in the DEPT table.

Prerequisites

  • Using the worksheet in the SQL page, create a DEPT table.

    CREATE TABLE DEPT(  
      DEPTNO     number(2,0),  
      DNAME      varchar2(14),  
      LOC        varchar2(13),  
      CONSTRAINT PK_DEPT PRIMARY KEY (DEPTNO)  
    )
    
  • Create a module named example. See Creating a Resource Module

  • Create a template named emp/ for the module. See Creating a Resource Template

To insert a record:
  1. In the Handlers page, click Create Handler.
  2. Enter the following details:
    • In the Method field, select POST.

    • In the Source Type field, select PL/SQL.

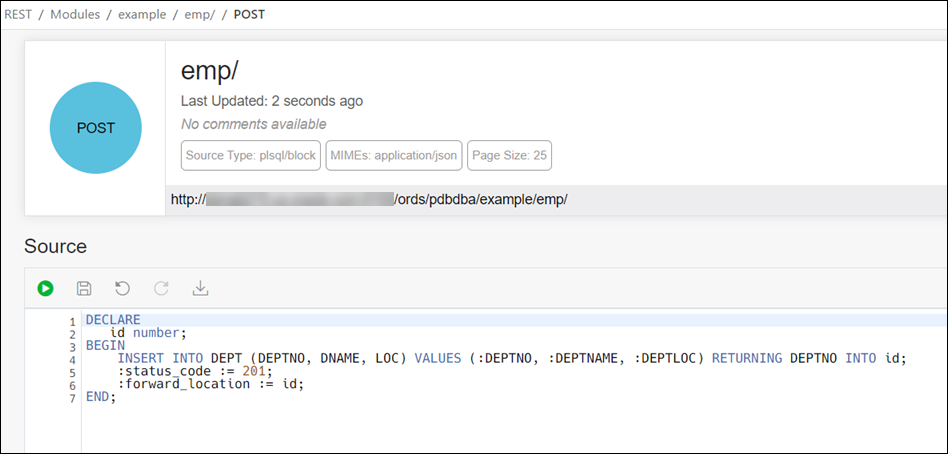
    • In the Source field, enter the following PL/SQL block:

      DECLARE  
         id number;
      BEGIN
          INSERT INTO DEPT (DEPTNO, DNAME, LOC) VALUES (:DEPTNO, :DEPTNAME, :DEPTLOC) RETURNING DEPTNO INTO id;
          :status_code := 201;
          :forward_location := id;
      END;
      

      where

      • RETURNING DEPTNO INTO id returns the value assigned to DEPTNO into the variable id.

      • :status_code is an implicit parameter that is assigned 201 to indicate that the resource is created.

      • :forward_location is an implicit parameter that is assigned the id that contains the value of DEPTNO. This parameter specifies the location to forward a GET request to produce the response for the POST request.

    • Ensure Go to Handler page after creation is selected.

    • In the MIMEs Allowed Tab, select application/json from the drop-down list and click Add +.

    • Click Create.

    The Handler POST page appears.

    You can test the source code by clicking Execute execute icon in the Source editor.

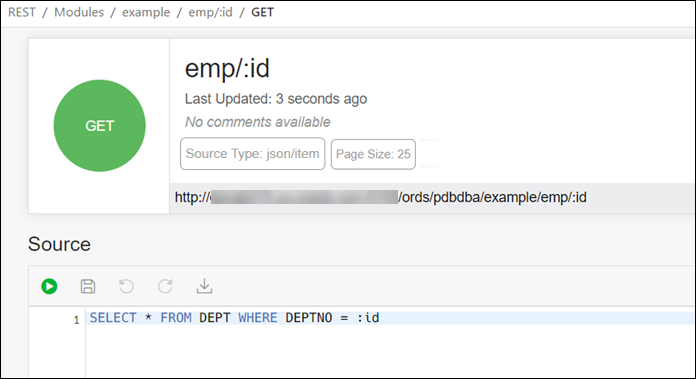
  3. Create a GET resource handler to produce a response for the POST request.

    In the Example module, create a template named emp/:id.

    Create a GET resource handler where Source Type is Collection Item and Source contains the following query:

    SELECT * FROM DEPT WHERE DEPTNO = :id
    
  4. Test the RESTful service endpoint using the following command in cURL. You can copy the URL (http://xyz.us.comp.com:1234/ords/pdbdba/example/emp) using the Copy to Clipboard icon in the POST handler card at the top.
    curl --location --request POST --header "Content-Type: application/json" 
    --data '{"DEPTNO": 54, "DEPTNAME": "HR", "DEPTLOC": "America" }' 'http://xyz.us.comp.com:1234/ords/pdbdba/example/emp/'

    The output is:

    {"deptno":54,"dname":"HR","loc":"America","links":[{"rel":"collection",
    "href":"xyz.us.comp.com:1234/ords/pdbdba/example/emp/"}]}
  5. In the SQL page, check the DEPT table to see if the new record has been inserted by using the following statement:
    SELECT * FROM DEPT;

4.6.5 Viewing Resource Handler Details and Managing Parameters

You can view resource handler details and manage parameters in the HTTP method page.

To navigate to this page, for a specific handler, click context menu icon and then select Details or click the name of the handler in card view.

At the top of the page, the handler card is available with context menu options such as Edit and Delete.

The Handler HTTP method page has two major sections:

  • A code editor for executing the SQL or PL/SQL source code that was defined in the resource handler. You can execute the code, save, undo, redo, download and clear output. For more information about the editor, see Executing SQL Statements in the Code Editor.

    Implicit parameters used in REST service handlers are displayed in a scrolling list towards the right side of the editor. See Implicit Parameters

  • A section for managing parameters required for running the HTTP method.

By default, the parameters are displayed in grid view. The attributes displayed on a parameter in card view are shown in the following figure.

The actions available in the context menu are:

4.6.5.1 Creating a Parameter

This section describes how to create a parameter for a resource handler.

  1. In the handler HTTP method page, click Create Parameter.
  2. Enter the following fields. The fields with an asterisk (*) are mandatory:
    • Parameter Name: Enter the name of the parameter, as it is named in the URI Template or HTTP Header. The name defines how the parameter is identified in the incoming request or how the parameter is named in the Response.

    • Bind Variable Name: Enter the name of the parameter, as it will be referred to in SQL. If NULL is specified, then the parameter is unbound.

    • Source Type: Select the type that is identified if the parameter originates in the URI Template or HTTP Header.

    • Parameter Type: Select the native type of the parameter.

    • Access Method: Select the parameter access method. Indicates if the parameter is an input value, output value, or both.

  3. Click Create.

    The parameter is added in the Parameters section.

4.6.5.2 Editing a Parameter

This section describes how to edit a parameter.

  1. In the Parameters section, for the specific parameter, click context menu icon and then select Edit.
  2. Edit the required fields and click Save.

    For a description of the fields, see Creating a Parameter.

4.6.5.3 Deleting a Parameter

This section describes how to delete a parameter.

  1. In the Parameters section, for the specific parameter, click context menu icon and then select Delete.

    You are prompted to confirm.

  2. Click Yes to delete.

4.6.5.4 Implicit Parameters

This section describes the implicit parameters in the Resource Handler Details page. These parameters are automatically added to the resource handlers.

Table 4-1 Implicit Parameters

Name Type Access Mode HTTP Header Description

:body

BLOB

IN

N/A

Specifies the body of the request as a temporary BLOB.

:body_text

CLOB

IN

N/A

Specifies the body of the request as a temporary CLOB.

:content_type

VARCHAR

IN

Content-Type

Specifies the MIME type of the request body, as indicated by the Content-Type request header.

:current_user

VARCHAR

IN

N/A

Specifies the authenticated user for the request. If no user is authenticated, then the value is set to null.

:forward_location

VARCHAR

OUT

X-ORDS-FORWARD-LOCATION

Specifies the location where Oracle REST Data Services must forward a GET request to produce the response for this request.

:fetch_offset

NUMBER

IN

N/A

Specifies the zero-based offset of the first row to be displayed on a page.

:fetch_size

NUMBER

IN

N/A

Specifies the maximum number of rows to be retrieved on a page.

:page_offset

NUMBER

IN

N/A

Specifies the zero based page offset in a paginated request.

Note: The :page_offset parameter is deprecated. Use :row_offset parameter instead.

:page_size

NUMBER

IN

N/A

Specifies the maximum number of rows to be retrieved on a page.

The :page_size parameter is deprecated. Use :fetch_size parameter instead.

:row_offset

NUMBER

IN

N/A

Specifies the one-based index of the first row to be displayed in a paginated request.

:row_count

NUMBER

IN

N/A

Specifies the one-based index of the last row to be displayed in a paginated request.

:status_code

NUMBER

OUT

X-ORDS-STATUS-CODE

Specifies the HTTP status code for the request.

For more information about the implicit parameters, see Oracle REST Data Services Installation Guide.