The Data Pump Page

Note:

This feature is only available for Oracle Database 12.2 and later releases.
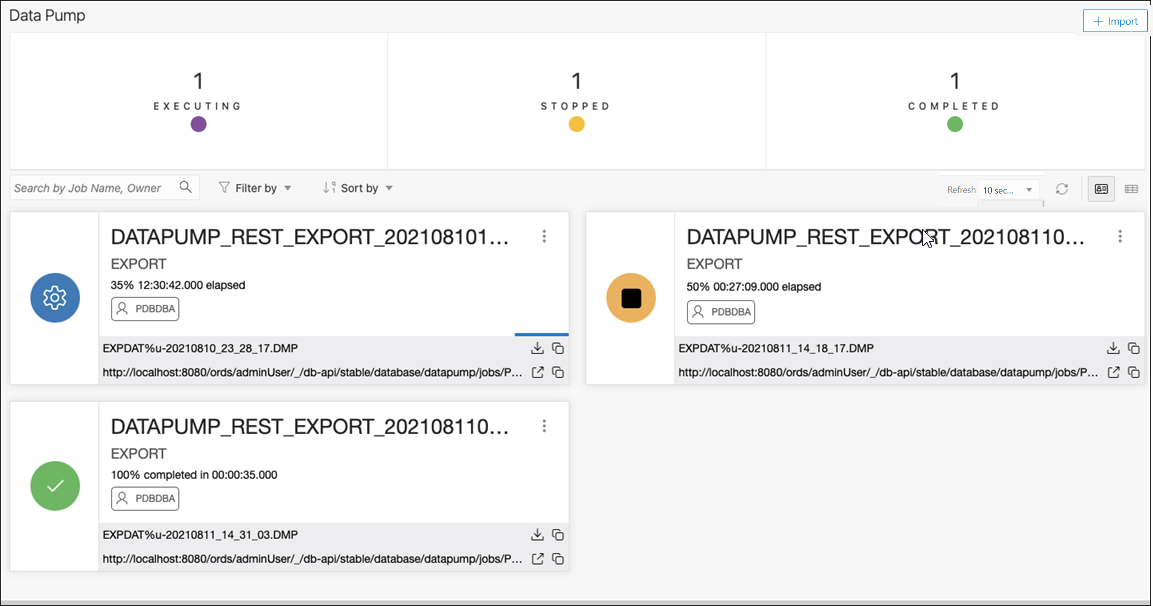
The Data Pump page enables you to to monitor Data Pump jobs that were initiated through the available Database API endpoints, the DBMS_DATAPUMP package, or the SQL Developer Data Pump Export and Import wizards.

To import data using Data Pump, click Import Data. For more information, see Import Data Using Oracle Data Pump.

The section at the top displays the total number of executing jobs, stopped jobs, and completed jobs. Click a tile (example, STOPPED) to filter and view the corresponding list of STOPPED jobs in the default card format.

You can filter or sort the jobs and set the time period by which to refresh the data.

A job card displays the following details: Job name, import or export operation, percentage of completion and time elapsed, and links to dump files and logs. The status of the job is indicated by the colour of the icon on the left side of the card. Green indicates successful jobs, yellow indicates that the jobs need to be reviewed, and blue indicates that the jobs are in progress.

In a job card, you can:

  • Use download icon Download to access dump files for completed jobs.

  • Use log icon Log to access the log files.

Import Data Using Oracle Data Pump

The Data Pump page enables you to import data from Data Pump files into your on-premises or cloud database.
See Data Pump Import in Oracle Database Utilities for more information.
  1. In the Data Pump page, on the top right, click Import.

    The Import wizard appears.

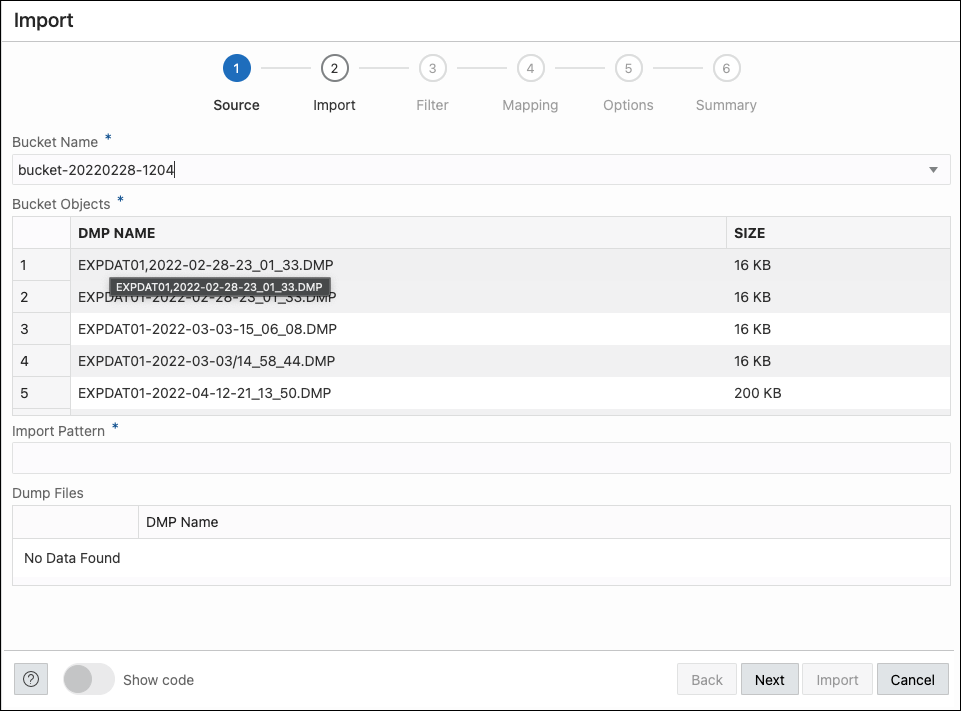
  2. The Source step in the wizard is based on whether the source files reside on an on-premises database or Oracle Cloud Infrastructure Object Storage:

    On-Premises

    1. Directory: Select the directory that contains the source dump files.
    2. Import Pattern: Type the import pattern.

    Oracle Cloud Infrastructure Object Storage

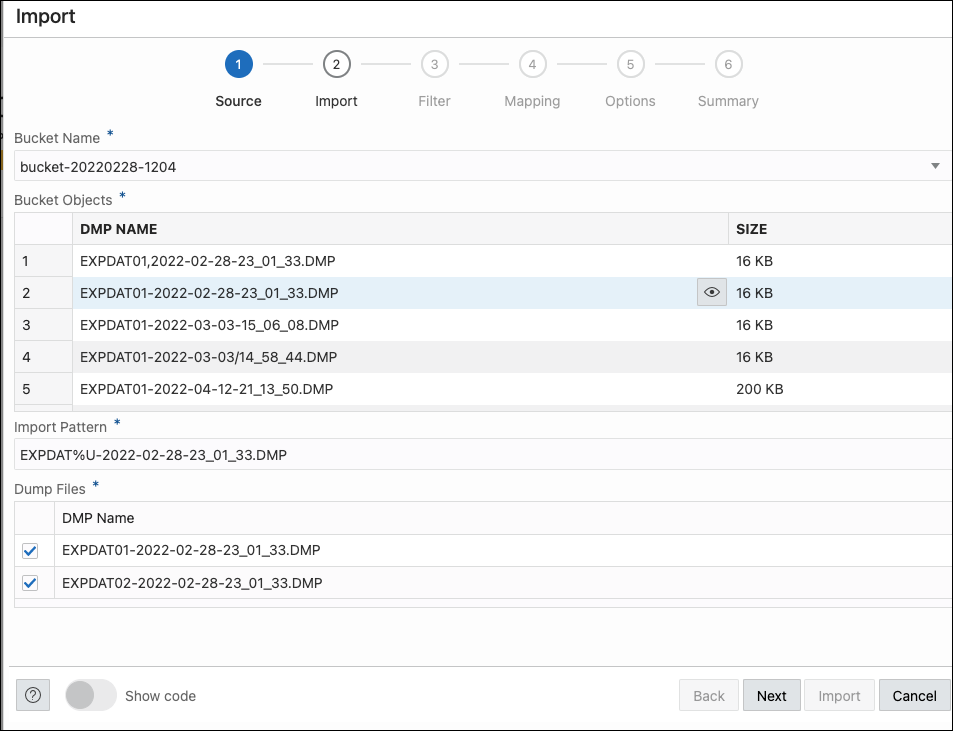
    1. Bucket Name: Select the bucket that contains the dump files from the drop-down list. Selecting a bucket automatically prefills the associated dump files in the Bucket Objects field.
    2. Bucket Objects: Select a dump file from the list.
    3. Import Pattern: When you select a dump file, it is automatically entered in the Import Pattern field. You can modify the pattern, if needed. The dump files that match are displayed in the Dump Files field.
    4. Dump Files: Select the dump files to import.

    Click Next.

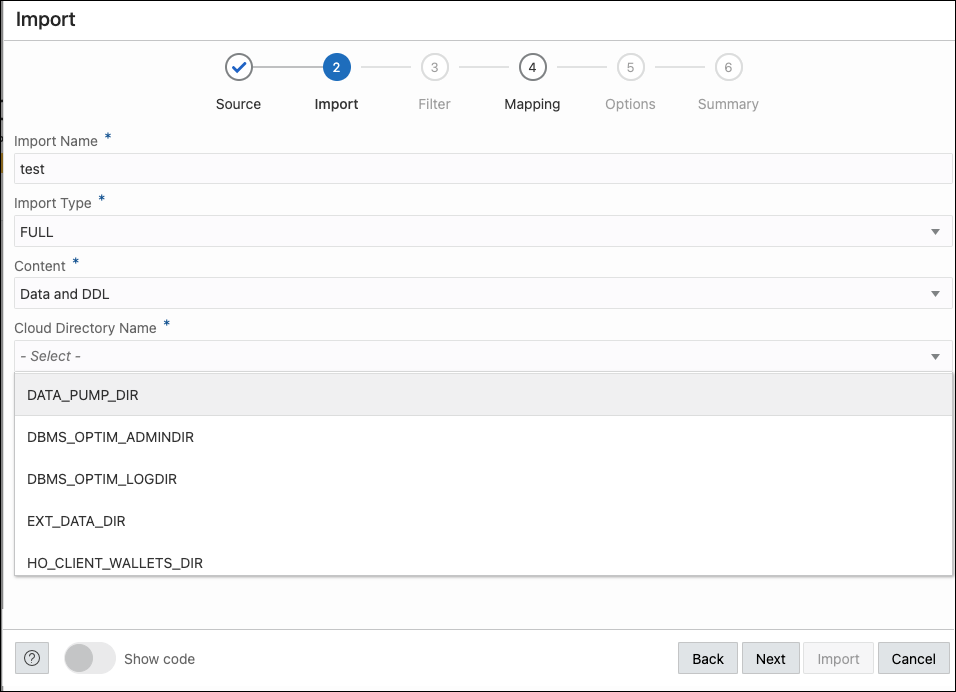
  3. In the Import step, enter the following fields:
    • Import Name: Enter a name for the import job.
    • Import Type: Select the type of import. The options are Full, Tables, Schemas, and Tablespaces.

      Note:

      If you select Full, you skip the Filter step in the wizard and directly go to the Mapping step.
    • Content: Select Data Only, DDL Only, or Data and DDL.
    • Cloud Directory Name (only available for OCI object storage): Select the directory to import to.
    • Encrypt: Select if encrypted and enter an encryption password.

    Click Next.

  4. In the Filter step, depending on the import type, all the schemas, tables, or tablespaces for the import job are listed. Select the ones that apply. Click Next.
  5. In the Mapping step, select the source schema and enter a new name for the target schema. If needed, do the same for tablespaces. Click Next.
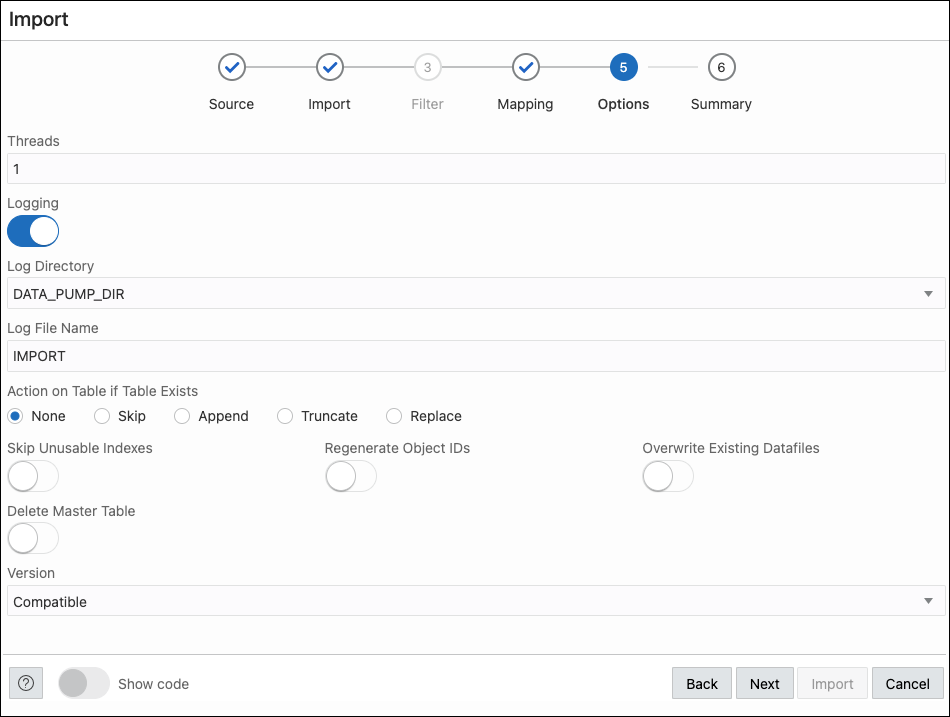
  6. In the Options step, enter the following fields:
    • Threads: Specifiy the maximum number of threads of active execution operating on behalf of the import job. The default is 1.
    • Action on Table if Table Exists: Specify the action needed if that table that import is trying to create already exists.
    • Skip Unusable indexes: Select to specify whether the import skips loading tables that have indexes that were set to the Index Unusable state.
    • Regenerate Object IDs: Select to create new object identifies for the imported database objects.
    • Delete Master Table: Select to indicate whether the Data Pump control job table should be deleted or retained at the end of an Oracle Data Pump job that completes successfully.
    • Overwrite Existing Datafiles: Select to indicate that if a table already exists in the destination schema, overwrite it.
    • Version: Select the version of database objects to import.
    • Logging: Select to create a log file. Enter the log directory and log file name.

    Click Next.

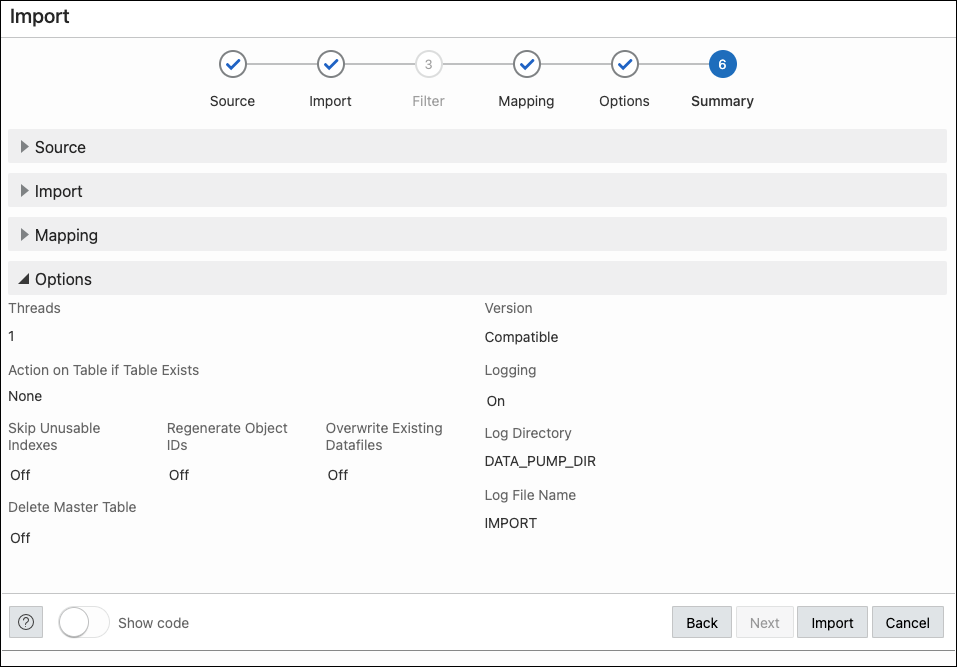
  7. The Summary step displays a summary of all the selections made in the previous steps.

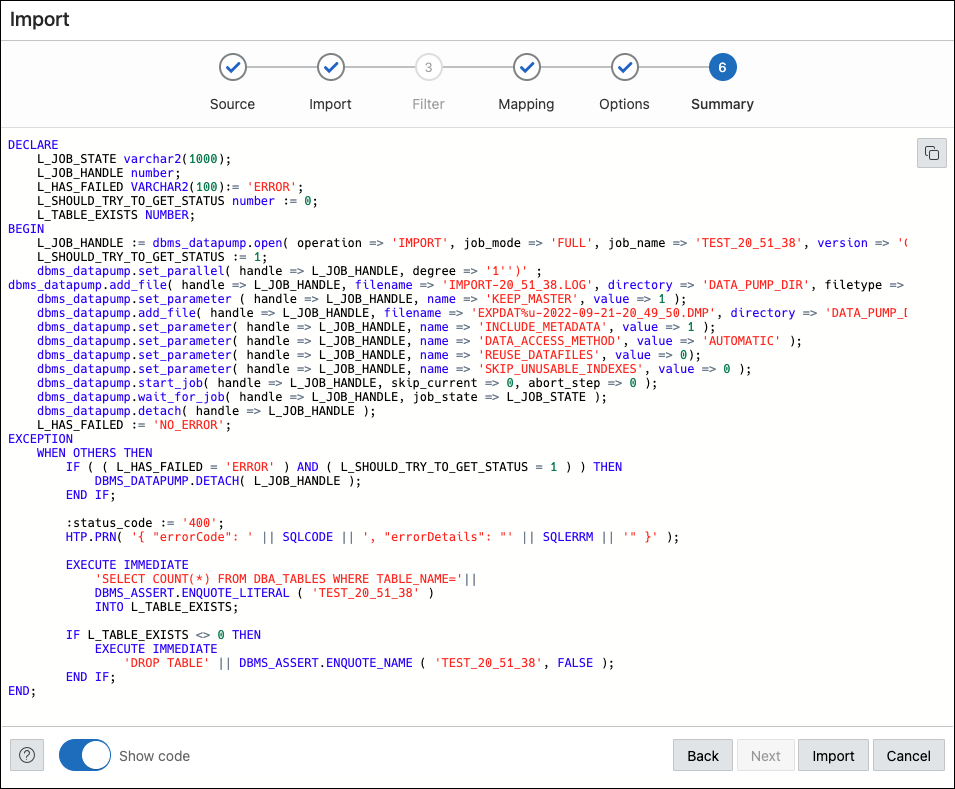
    Select Show Code at the bottom to see the PL/SQL code equivalent of the form.

    Click Import.

    The start of the job execution is displayed on the Data Pump page.