How-To Instructions for Receiving Shares for Versioned Data
You need to perform several basic steps to subscribe to and access the provided versioned data shares.
- Download your share profile.
For the data share you want to receive, download your profile sent from the share provider.
- Open the invitation email you received from the data share provider, when the data share was published.
- Copy the profile URL from the email.
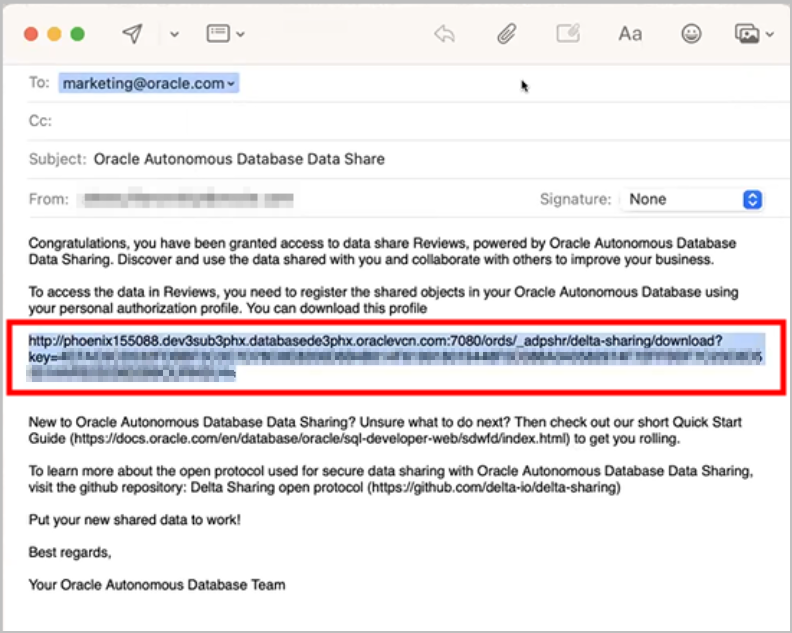
Description of the illustration email_url_v1.png - Paste the URL into your browser and click Get Profile
Information.
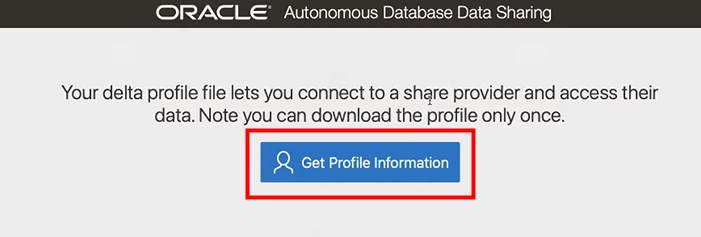
Description of the illustration get_profile_info.png - Your profile has been downloaded to your local machine. The
Profile information downloaded message page is displayed.

Description of the illustration profile_downloaded.png
- Subscribe to the data share provider.
To subscribe, you need to use the information contained in the uploaded JSON profile you received from the share provider. From the Consume Share feature of the Data Share tool, you upload the JSON profile and follow the subscribe wizard.
- Go to the Data Share tool, and click Consume Share.
See How to Access and Enable the Data Share Tool, for instructions.

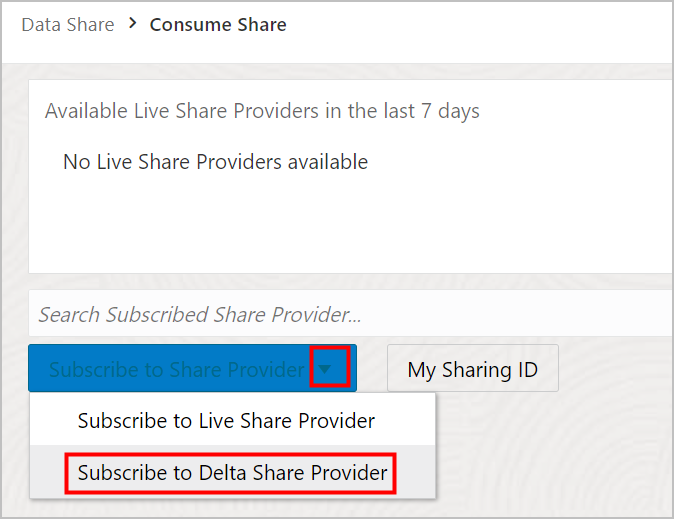
Description of the illustration consume_share.png - Click Subscribe to Share Provider drop down arrow, and select Subscribe to Delta Share Provider menu item.
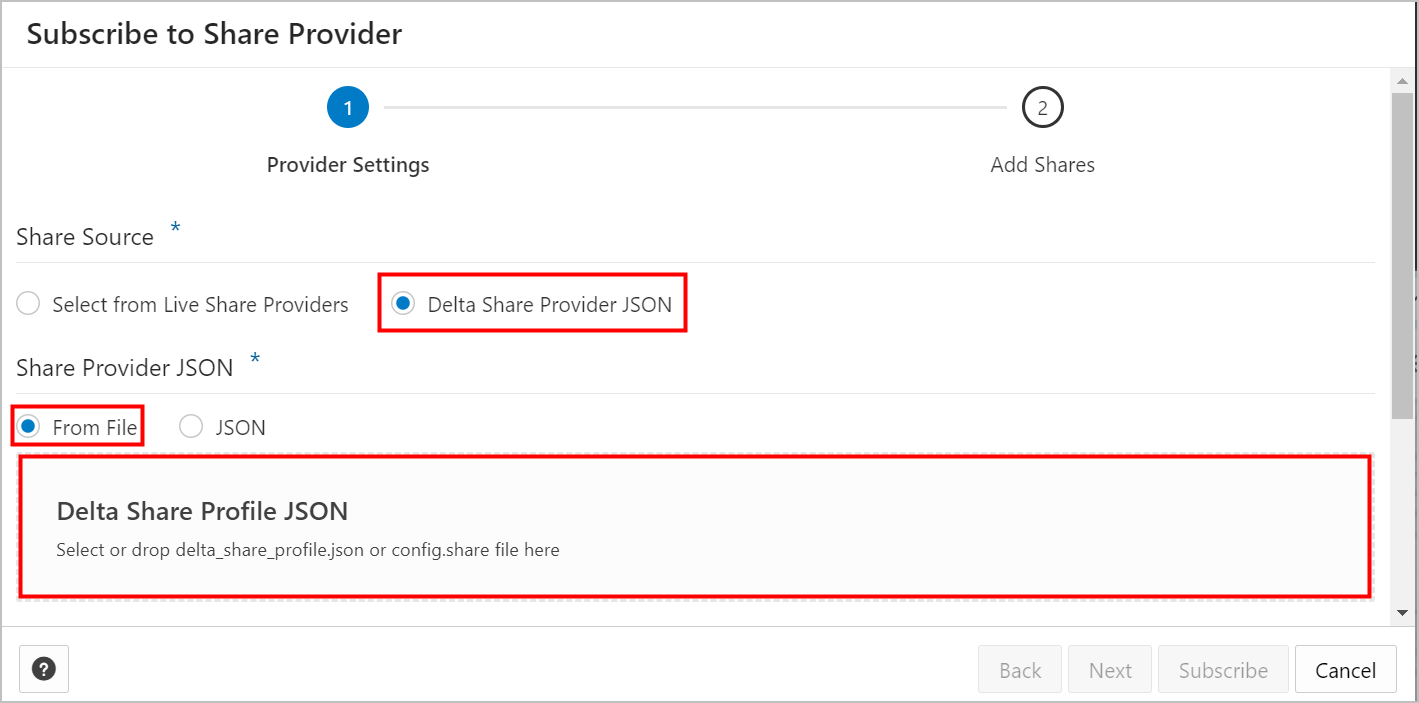
- Select Delta Share Provider JSON, accept the From File default option, and click the Delta Share Profile JSON field.
- Navigate to and select the JSON profile you
downloaded in a previous step. Click OPEN.
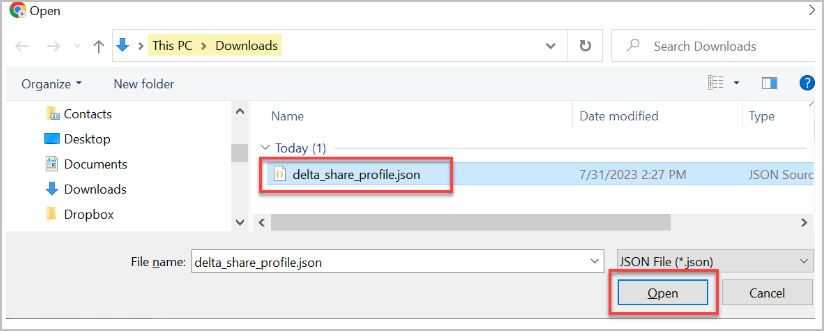
Description of the illustration open_download_json.png - Enter the Provider Name, under Share Provider Details
and click Next.
In this example, Review_provider is entered for the Provider Name.
- Select the level of network access you want to allow from
your database to the host with the Share REST endpoint, and click
Run.
In this example, Allow access to Host Only is selected.
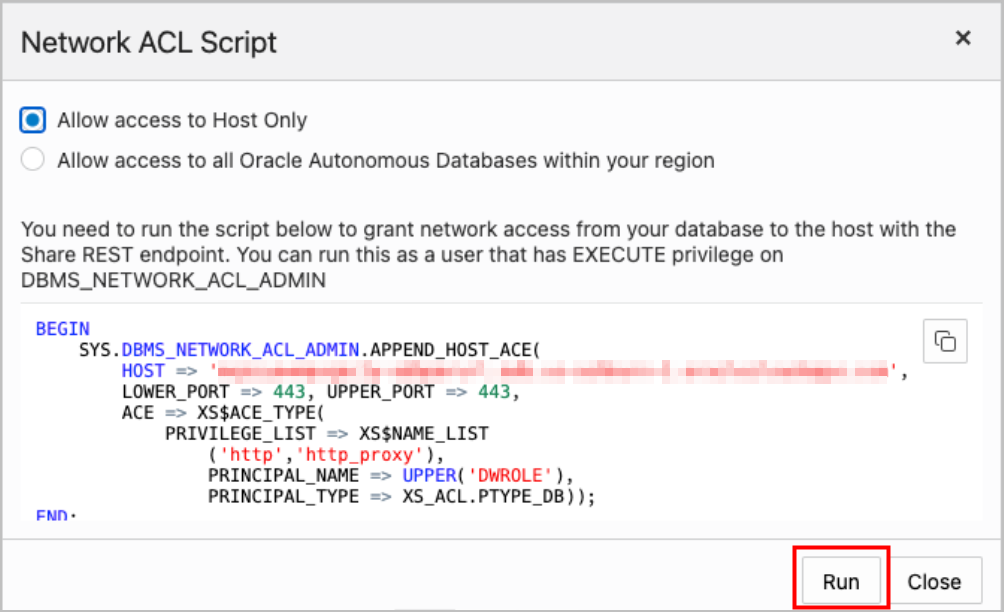
Description of the illustration network_acl_script.png
- Go to the Data Share tool, and click Consume Share.
See How to Access and Enable the Data Share Tool, for instructions.
- Register shares made available to you.
- Move shares from Available Shares to Selected
Shares and click Subscribe.
The screenshot below shows the REVIEWS share moved from Available Shares to Selected Shares before clicking Subscribe.
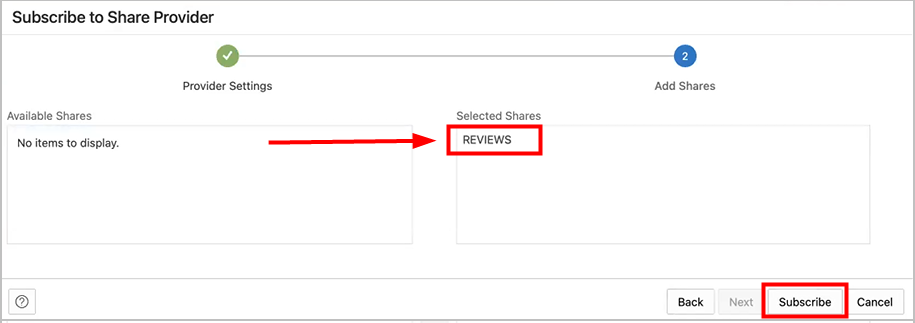
Description of the illustration subscribe_2.pngThe Data Load page is displayed.
- Move shares from Available Shares to Selected
Shares and click Subscribe.
- Create external tables derived from tables selected from the data
share.
- Drag and drop tables from the selected share. You can
optionally click settings to view the table details.
In this example, the only table selected is HOTEL_REVIEWS.

Description of the illustration sel_tbls_v1.png - You can optionally change the name of your table and click
Close.
In this example, the name is changed from HOTEL_REVIEWS to HOTEL_REVIEWS_SHARE.
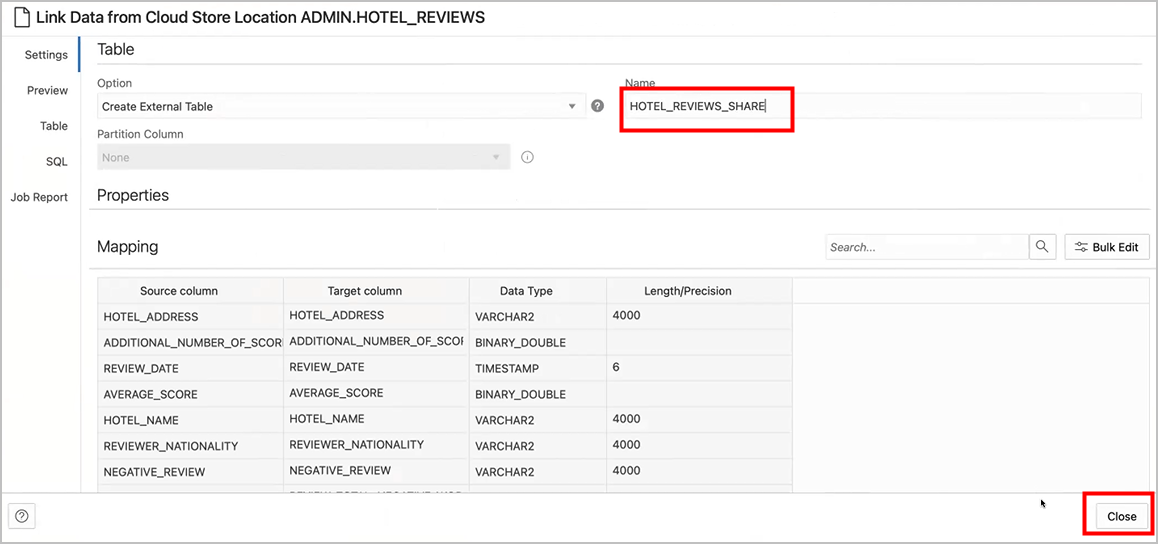
Description of the illustration name_change.png - Create the external table by clicking Start, on the
Select Share page, and then clicking Run on the Run Data Load Job
dialog.

Description of the illustration start_run_v1.png - When the external table creation is complete, click on the
external table name to view the table details.
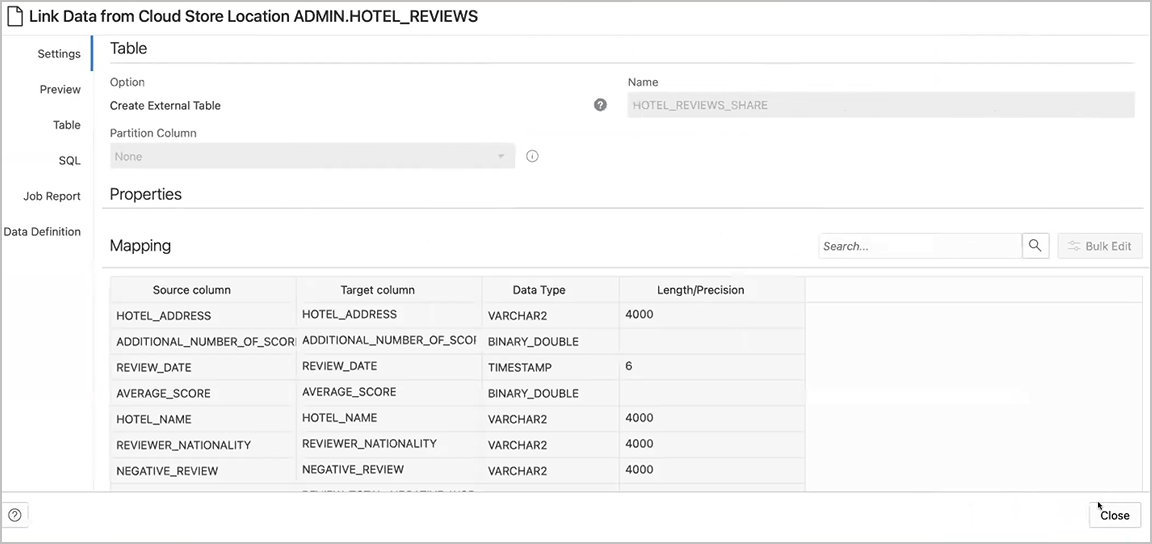
Description of the illustration xt_details.png
- Drag and drop tables from the selected share. You can
optionally click settings to view the table details.
- View the created tables from Database Actions.
- Click on Database Actions, in the breadcrumb.
- Select Development and then click SQL.
- Select the external table, then drag and drop it into the
worksheet.

Description of the illustration xt.pngA dialog displays offering the types of available insertions.
- Choose Select as the type of insertion, and click
Apply.
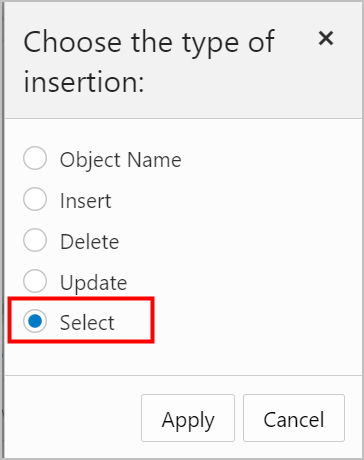
Description of the illustration insertion_type.pngThe SQL Select statement for the table appears in the worksheet.
- Click Run (the arrow icon at the top of the
worksheet).
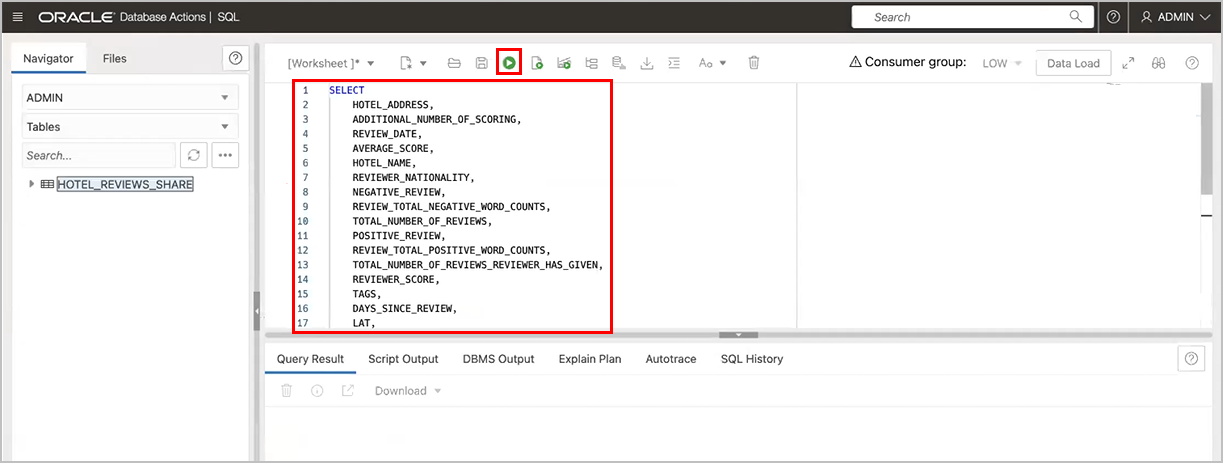
Description of the illustration xt_sql_v1.pngThe returned data displays under Query Results.
