Configure the ODBC Source of Data (Windows)
To make ODBC sources of data work with Essbase on Windows, you use the ODBC Data Source Administrator utility to configure external sources of data.
To configure Essbase on Windows to work with the ODBC drivers, use the following workflow.
- Prerequisites
- Configure the ODBC Source of Data (Oracle Database)
- Configure the ODBC Source of Data (Teradata)
- Configure the ODBC Source of Data (SQL Server)
Prerequisites
Before you begin,
-
Make note of the location of the ODBC driver libraries on the Essbase server domain:
<Essbase Product Home>\modules\oracle.essbase.datadirect.odbc\8.0.2\drivers -
If you are configuring Teradata as a source, do the following:
-
Download the Teradata Tools and Utilities client from https://downloads.teradata.com.
-
Install the Teradata client onto your Essbase server machine.
-
Configure the ODBC Source of Data (Oracle Database)
To configure Essbase on Windows to work with Oracle Database ODBC drivers, use the following workflow.
-
Click Start, click Windows Administrative Tools, and select ODBC Data Sources (64-bit).
-
Click the System DSN tab if you will configure for all users of this instance of Essbase on Windows, or click User DSN to configure only for the current user.
-
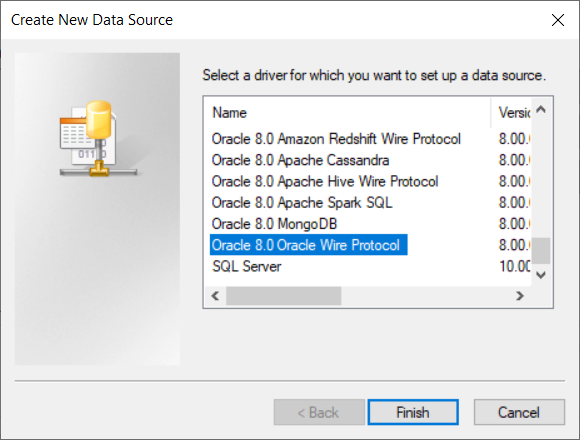
Click Add, and select a driver to configure. For example, to add an ODBC driver for Oracle, select Oracle 8.0 Oracle Wire Protocol.
-
Click Finish.
-
In the driver setup dialog,
-
Enter the Data Source Name (for example, TBC_ORA).
-
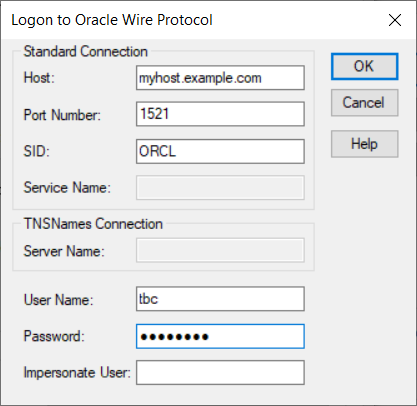
Enter the name of the Oracle Database host machine (for example, myhost.example.com).
-
Enter the port number of the Oracle Database (for example, 1521).
-
Enter either one of the following:
-
the Oracle System ID (SID) that uniquely identifies the database (for example, ORCL)
-
the Oracle Service Name, if the Database is registered with a listener (for example, orcl.esscs.myhost.example.com)

-
-
Click Test Connect.
-
-
In the Logon to <source> dialog, enter the user name and password of an authorized Oracle Database user, and click OK.
-
If the connection to Oracle Database was successful, a Connection established message displays.
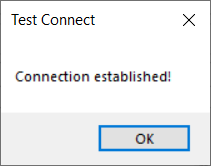
Click OK.
-
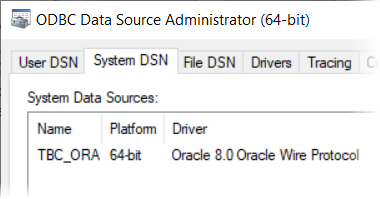
Click Apply, and click OK. The ODBC data source is configured and ready to use.
-
If the data source configuration needs to be modified,
-
Select the data source name in System Data Sources.
-
Click Configure.

-
Make any needed changes, using the General tab.
Note:
If you are using Autonomous AI Database and need to provide Keystore, Truststore, or CryptoProtocolVersion information, these may be located on different tabs.
-
Configure the ODBC Source of Data (Teradata)
The following workflow is for configuring Teradata to work with Essbase as an ODBC data source on Windows.
-
Click Start, click Windows Administrative Tools, and select ODBC Data Sources (64-bit).
-
Click the System DSN tab if you will configure for all users of this instance of Essbase on Windows, or click User DSN to configure only for the current user.
-
Click Add, and select a driver to configure. For example, to add an ODBC driver for Teradata, select Teradata Database ODBC Driver 16.20.
-
Click Finish.
-
In the driver setup dialog,
-
Enter the Data Source Name (for example, TBC_TD).
-
Enter the host name or IP address of the Teradata Database Server (for example, 10.xx.xx.211).
-
Enter the user name and password of an authorized Teradata user.
-
Enter the Default Database name (for example, TBC).
-
Click Test Connect.
-
-
If the connection to Teradata was successful, a success message displays.
Click OK.
-
Click Apply, and click OK. The ODBC data source is configured and ready to use.
-
If the data source configuration needs to be modified,
-
Select the data source name in System Data Sources.
-
Click Configure.
-
Make any needed changes, using only the General tab.
-
Configure the ODBC Source of Data (SQL Server)
To configure Essbase on Windows to work with SQL Server ODBC drivers, use the following workflow.
-
Click Start, click Windows Administrative Tools, and select ODBC Data Sources (64-bit).
-
Click the System DSN tab if you will configure for all users of this instance of Essbase on Windows, or click User DSN to configure only for the current user.
-
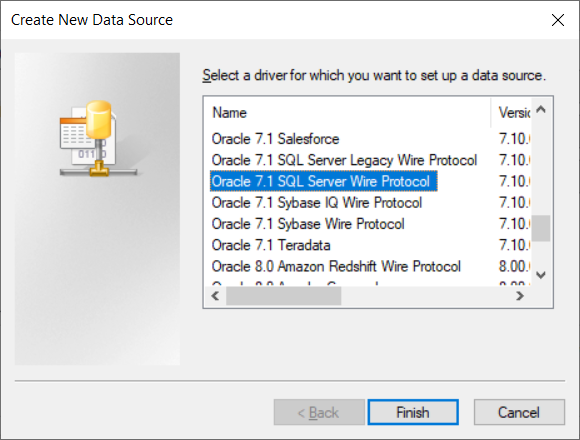
Click Add, and select a driver to configure. For example, select Oracle 8.0 SQL Server Wire Protocol.
-
Click Finish.
-
In the driver setup dialog,
-
Enter the Data Source Name (for example, TBC_SQL).
-
Enter the name of the host machine (for example, myhost.example.com).
-
Enter the port number of the SQL Server (for example, 1433).
-
Enter the Database Name of the SQL Server (for example, TBC).
-
Click the Advanced tab, and check the Enable Quoted Identifiers box.
-
Click Test Connect.
-
-
If the connection to SQL Server was successful, a Connection established message displays.

Click OK.
-
Click Apply, and click OK. The ODBC data source is configured and ready to use.
-
If the data source configuration needs to be modified,
-
Select the data source name in System Data Sources.
-
Click Configure.
-
Make any needed changes, using only the General tab.
-