Integrate WebLogic to Use Microsoft Active Directory
You can integrate Essbase WebLogic with Microsoft Active Directory (MSAD).
Note: If Active Directory is integrated through Identity and Access Management (IAM) or Oracle Identity Cloud Service (IDCS), then configure the Active Directory bridge as described in the links below:
For IAM, see Setting Up a Microsoft Active Directory Bridge
For IDCS, see Manage Microsoft Active Directory (AD) Bridges for Oracle Identity Cloud Service
Add Provider
To add the Microsoft Active Directory provider to your security realm,
-
Log in to the WebLogic Server Administration Console for your Essbase instance.
To get to the console,
-
In a browser, enter
<host_url>:<wl_adminserver_port>/console, where<host_url>is http(s):// + the server name of your Essbase instance, and<wl_adminserver_port>is the Admin Server Port you specified in the WebLogic Server Ports screen during configuration.For example,
http://myhost.example.com:7003/console -
Log in as the WebLogic administrator account you specified in the Domain Details screen during configuration.
-
-
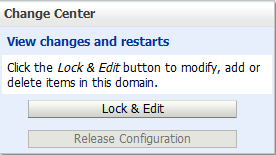
In the Change Center pane, click Lock & Edit.
-
In the Domain Structure tree, under
<your domain name>, click the Security Realms node.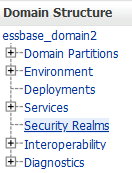
-
Click the name of the security realm so that you can open and configure it. For example, click the link myrealm (not the check box).

-
Modify Security Model Default from DD Only to Advanced, and click the Save button.

-
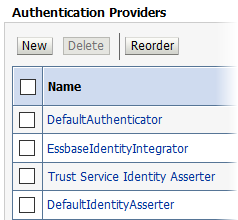
Select the Providers tab and click New to create a new authentication provider.
-
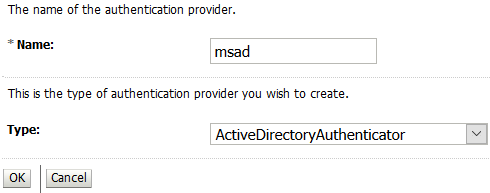
Enter msad as the name of the new authentication provider.
-
Select ActiveDirectoryAuthenticator as the authentication provider type, and click OK.
-
Click Reorder. Move the msad provider up, using the buttons, so that it's the first provider, and click OK.
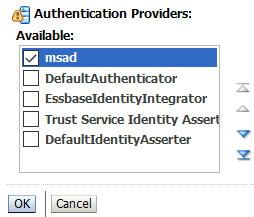
-
From the Authentication Providers list, click the link for the new provider (click the text link msad). In the settings, change the Control Flag from Optional to Sufficient, and click Save.
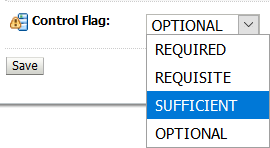
-
On the Provider Specific tab for the added msad provider, enter provider details.
-
In the Connection section, enter your provider details for Host, Port (389), and Principal (you can save entering the credentials for last).
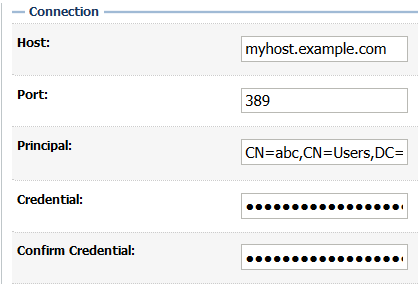
-
In the Users section, enter your provider details for User Base DN.
-
In the Groups section, enter your provider details for Group Base DN.
-
In the Connection section, enter the Credentials twice: in Credential and Confirm Credential.
-
Click Save.
-
-
Click Activate Changes.
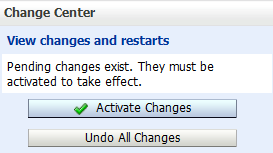
-
Start, Stop and Restart Essbase.
Verify External Users Were Added
Optionally, verify that the external users were added to your security realm.
-
Log in again to the WebLogic Server Administration Console for your Essbase instance.
-
Repeat steps 3 and 4 from the steps above (go to Security Realms > myrealm).
-
Click the Users and Groups tab.
-
Click Customize this table.
-
In the filter, specify Filter by Column as Name, and specify a Criteria by entering the first letter of a known user name in the external provider. Click Apply. The filtered list of users should appear in the table.
Assign Roles
After federation to an external authentication provider, WebLogic Embedded LDAP users can't log into Essbase. Only the WebLogic Administrator user remains.
As the WebLogic Administrator account, use the Service Role Provisioning REST API endpoint, PUT /essbase/rest/v1/permissions/{id}, to assign Essbase service administrator role to at least one federated user. Then, this new service administrator can provision other external users with Essbase roles, using either the Essbase web interface or the REST API.
For example, to provision Active Directory user “sysadmin” with service_administrator role, issue the REST request below, using cURL. Please replace <weblogic_admin_user>, <weblogic_admin_password>, <Essbase_Host>, <Essbase_Managed_Server_Port>, and <sysadmin> with appropriate values for your environment.
curl -k -X PUT -u <weblogic_admin_user>:<weblogic_admin_password> "http://<Essbase_Host>:<Essbase_Managed_Server_Port>/essbase/rest/v1/permissions/sysadmin" -H "accept: application/json" -H "Content-Type: application/json" -d "{\"links\": [ {\"rel\": \"string\", \"href\": \"string\", \"method\": \"string\", \"type\": \"string\" } ], \"id\": \"sysadmin\", \"name\": \"sysadmin\", \"role\": \"service_administrator\", \"group\": false}"