Manual Steps for Essbase Failover Configuration on the Primary Node (Host 1)
Tip: For Release 21.5.2 or higher, skip these instructions and use the instructions in Set up an Essbase Failover Environment Using the Failover Setup Script instead.
Configure the primary Essbase node for failover. You will run the Fusion Middleware configuration wizard, edit script files, add Essbase configuration properties, configure servers in the WebLogic Console, run the TLS tools utility, pack the domain configuration, and copy it to the second node.
Before you begin, review Configure TLS for Essbase Failover to learn how to configure the TLS properties file.
Host 1 is the primary Essbase node and has all services not clustered (such as AdminServer and, optionally, EAS Lite).
-
SSH to Host 1 and stop the Essbase instance:
On Linux:
<Domain Home>/esstools/bin/stop.shOn Windows:
<Domain Home>\esstools\bin\stop.cmd -
Launch the Fusion Middleware (FMW) configuration wizard and update the configuration on Host 1:
On Linux:
<Oracle Home>/oracle_common/common/bin/config.shOn Windows:
<Oracle Home>\oracle_common\common\bin\config.cmd-
On the Create Domain screen, select Update an existing domain. Make sure the correct domain location is specified in the Domain Location field, and click Next.
-
On the Templates screen, accept the defaults and click Next.
-
On the Database Configuration Type screen, change the selection from RCU Data to Manual Configuration and click Next.
-
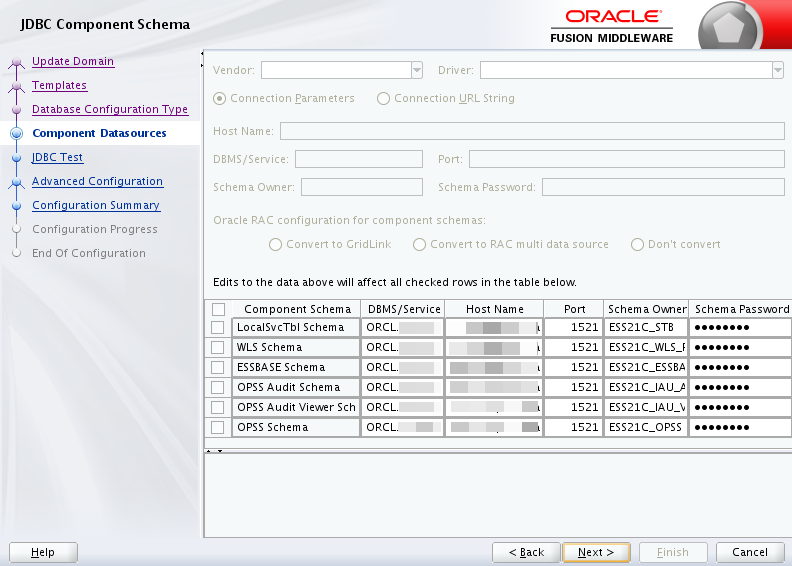
On the Component Datasources screen, accept the defaults and click Next.
-
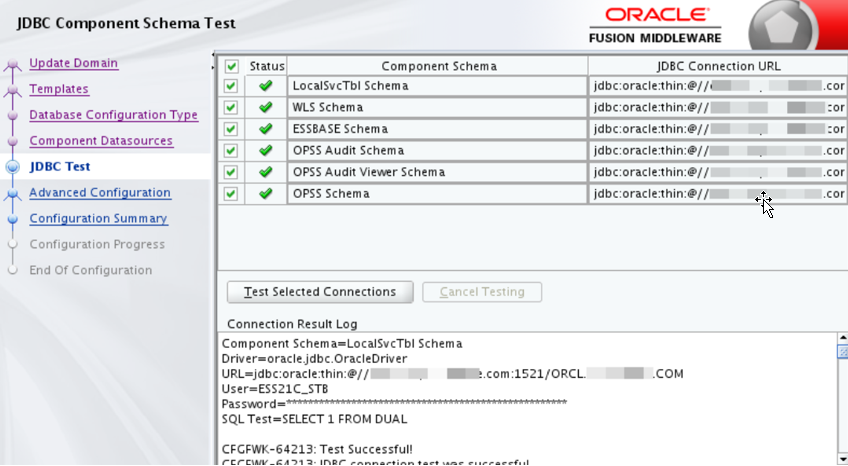
On the JDBC Test screen, accept the defaults and click Next.
-
On the Advanced Configuration screen, select Topology and click Next.
-
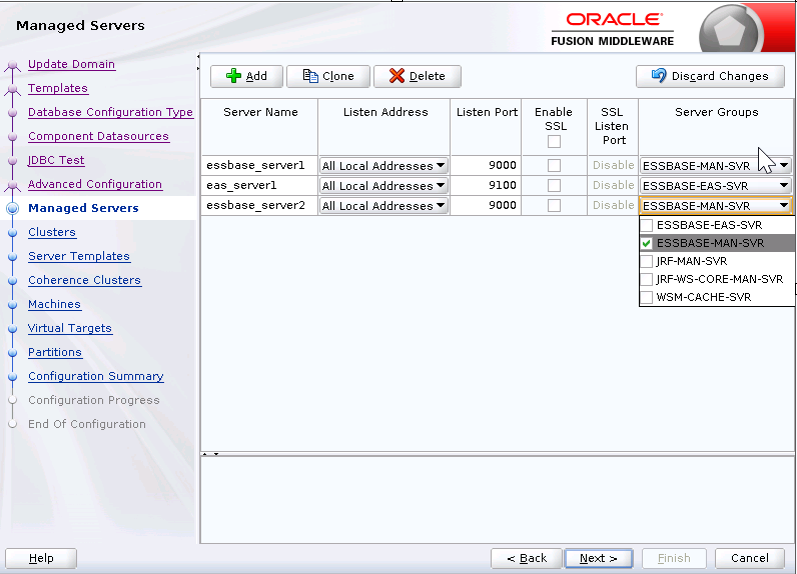
On the Managed Servers screen, click Add and enter the details of Host 2.
-
Enter the managed server ports for essbase_server2.
-
Select the Enable SSL check box if you need to update the SSL Listen Port.
-
To update the SSL Listen Port, click the Listen Port input box. Select the server groups as ESSBASE-MAN-SVR and click Next.
-
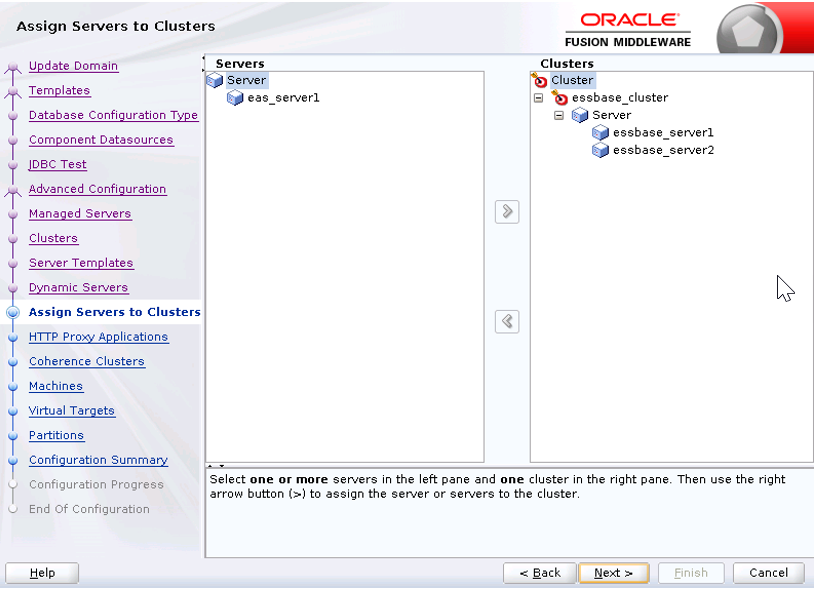
- Accept the defaults and click Next on the following screens:
- Clusters
- Server Templates
- Dynamic Servers
- Assign Servers to Clusters
- HTTP Proxy Applications
- Coherence Clusters
-
On the Machines screen, click Add and add a new machine, m2. Enter the Host 2 hostname and Node Manager port values. You can choose the Node Manager port, 9556. Click Next.
-
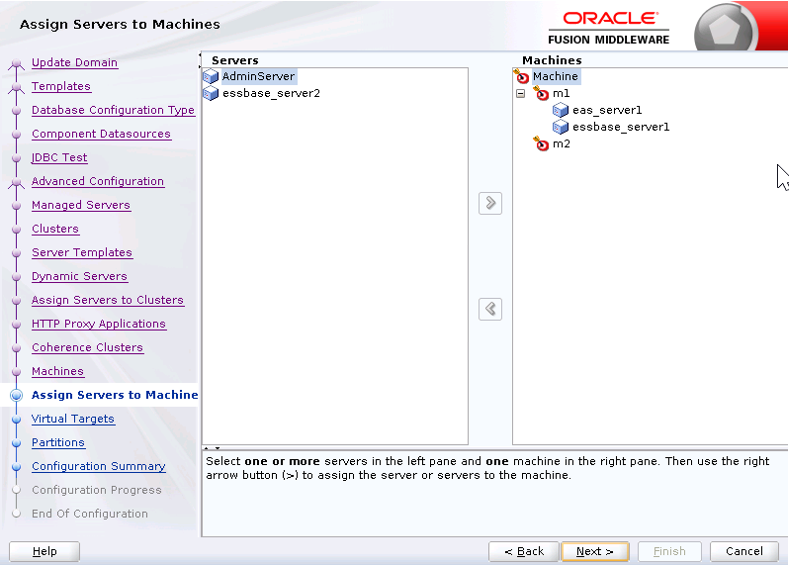
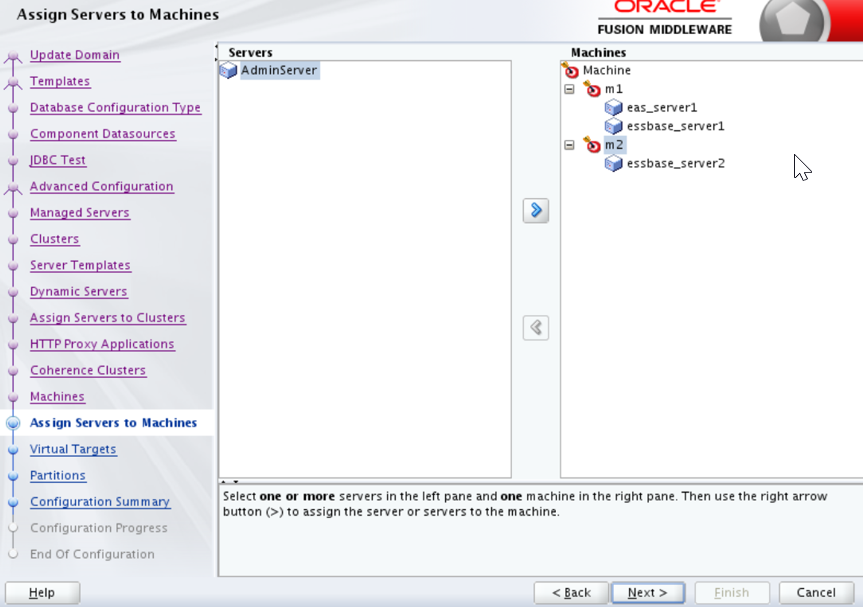
On the Assign Servers to Machines screen, select m2 in the right hand panel. Select the newly created server, essbase_server2 in the left hand panel and add it to m2. After adding it, essbase_server2 is displayed under m2. Click Next.
-
Accept the defaults and click next on the following screens:
- Virtual Targets
- Partitions
-
On the Configuration Summary screen, click Update.
-
When the update is done, click Next, and in the last screen, click Finish to complete the configuration changes.
-
-
On Host 1, edit the file
<Domain Home>/bin/setDomainEnv.sh(on Linux) or<Domain Home>\bin\setDomainEnv.cmd(on Windows).Caution:
The Essbase platform includes scripts in
<DOMAIN HOME>/binthat can customize the environment and behaviors of Essbase functionality. However, making changes to these domain environment or startup scripts can have unintended effects, including startup failure. Oracle recommends making changes in a test environment first. Before editing these scripts, always:-
Stop the Essbase managed servers, using
<DOMAIN HOME>/esstools/bin/stop.sh(on Linux), or<DOMAIN HOME>\esstools\bin\stop.cmd(on Windows). -
In
<DOMAIN HOME>/bin, make a backup copy of the file you want to edit. For example,On Linux
cp setStartupEnv.sh setStartupEnv_bak.shOn Windows
copy setStartupEnv.cmd setStartupEnv_bak.cmd -
Edit carefully, using only Oracle’s documented instructions, or working with Oracle Support.
-
Restart Essbase, using
<DOMAIN HOME>/esstools/bin/start.sh(on Linux), or<DOMAIN HOME>\esstools\bin\start.cmd(on Windows). Check that startup completed normally.
-
Search for the string
EXTRA_JAVA_PROPERTIES.Important: Search for
EXTRA_JAVA_PROPERTIES, notJAVA_PROPERTIES. -
Add the following -D definition after the existing export
EXTRA_JAVA_PROPERTIESline:On Linux:
EXTRA_JAVA_PROPERTIES="${EXTRA_JAVA_PROPERTIES}-Dweblogic.security.SSL.ignoreHostnameVerification=true" export EXTRA_JAVA_PROPERTIESOn Windows:
set EXTRA_JAVA_PROPERTIES=-Dweblogic.security.SSL.ignoreHostnameVerification=true %EXTRA_JAVA_PROPERTIES%Note:
This step is not required if all the TLS certificates are imported properly. In case of self-signed certificates, or if the managed server later fails to start with SSL errors, this step is required.
-
-
Edit the file,
<Domain Home>/config/fmwconfig/essconfig/essbase/essbase.cfg, and add the following lines:FAILOVERMODE true
#Optional
#Optional
-
If Essbase Administration Services (EAS Lite) is also enabled, edit the file
<Domain Home>/bin/setStartupEnv.sh(on Linux) or<Domain Home>\bin\setStartupEnv.cmd(on Windows):-
Search for "DISCOVERY_URL" for ESSBASE-EAS-SVR startup group (not ESSBASE-MAN-SVR).
-
Change DISCOVERY_URL to point to the Oracle HTTP Server URL.
-DDISCOVERY_URL=http(s)://OHS_HOST:OHS_PORT/essbase/agent
-
-
Start AdminServer in Host 1.
On Linux:
<Domain Home>/esstools/bin/start.sh -i AdminServerOn Windows:
<Domain Home>\esstools\bin\start.cmd -i AdminServer -
Find out the public IP of both the Host 1 and Host 2 machines, for example, by using the ping command from the other host. If both the machines are behind the firewall, make sure you know the IPs with which both Host 1 and Host 2 can communicate with each other.
-
Configure the AdminServer and the managed servers using WebLogic Console:
-
Log in to the WebLogic AdminServer console using WebLogic admin credentials. The default AdminServer port is 7001.
Example:
http(s)://host:7001/console -
Click Lock & Edit in the left panel. Navigate to <Domain Name> -> Environment -> Servers -> AdminServer. On the Configuration tab, click General and expand the Advanced section. Enter the public IP address of Host 1 in the External Listen Address property.
Important: Enter Host 1's IP as seen by Host 2.
-
Click Save.
-
Repeat steps a, b, and c directly above to update the External Listen Address for essbase_server1 with the Public IP of Host 1.
-
Remove essbase_cluster from default coherence cluster membership.
-
Navigate to <Domain Name> -> Environment -> Coherence Clusters.
-
Click defaultCoherenceCluster. Click the Members tab. Deselect essbase_cluster.
-
Click Save.
-
-
Navigate to <Domain Name> -> Security tab->Embedded Ldap tab. Select the Master First Option and click Save.
-
Navigate to <Domain Name> -> Environment -> Servers. Click on the newly added server essbase_server2.
-
On the Configuration tab, navigate to the General tab, expand the Advanced section then enter the public IP address of Host 2 in the External Listen Address field. Make sure you obtain this Public IP by pinging Host 2 from Host 1. Click Save.
-
On the Configuration tab, navigate to the General tab, remove the value from Listen Address field and click Save.
-
Navigate to <Domain Name> -> Environment -> Servers. Click essbase_server1. On the Configuration tab, navigate to the General tab and remove the value from Listen Address field. Click Save.
-
In the panel on the left, click Activate Changes.
-
Shut down WebLogic in Host 1 using
stop.sh(on Linux) orstop.cmd(on Windows).On Linux:
<Domain Home>/esstools/bin/stop.shOn Windows:
<Domain Home>\esstools\bin\stop.cmd
-
-
Run
tlsTools.jarto update certificates, as described in Configure TLS for Essbase Failover. -
In Host 1, pack the complete domain configuration by running the following command, and export it as a jar file. This could take few minutes.
On Linux:
<Oracle home>/oracle_common/common/bin/pack.sh -domain=<DOMAIN_HOME> -template=<user specified path>/essbase_ha.jar -template_name=essbase_domain -managed=trueLinux Example:
./Oracle/Middleware/Oracle_Home/oracle_common/common/bin/pack.sh -domain=./Oracle/Middleware/Oracle_Home/user_projects/domains/essbase_domain -template=./essbase_ha.jar -template_name=essbase_domain -managed=trueOn Windows:
<Oracle home>\oracle_common\common\bin\pack.cmd -domain=<DOMAIN_HOME> -template=<user specified path>/essbase_ha.jar -template_name=essbase_domain -managed=trueWindows Example:
c:\>\Oracle_Home\oracle_common\common\bin\pack.cmd -domain=C:\Oracle_Home\user_projects\domains\essbase_domain -template=essbase_ha.jar -template_name=essbase_domain -managed=true -
Transfer the generated jar,
<user specified path>/essbase_ha.jarto a folder in the secondary node.- On Linux, use network copy or ftp:
cp /network path of Host 1/<Host 1 Essbase Installation>/essbase_ha.jar <Host 2>/<some dir>/essbase_ha.jar - On Windows, copy the
essbase_ha.jarto the second node by sharing the folder between the two nodes.
- On Linux, use network copy or ftp: