Creating a Survey
Surveys and Survey Analytics
Surveys allow you to create and deploy targeted, customizable, interactive surveys and polls to collect application user feedback and insights almost anywhere in the host application.
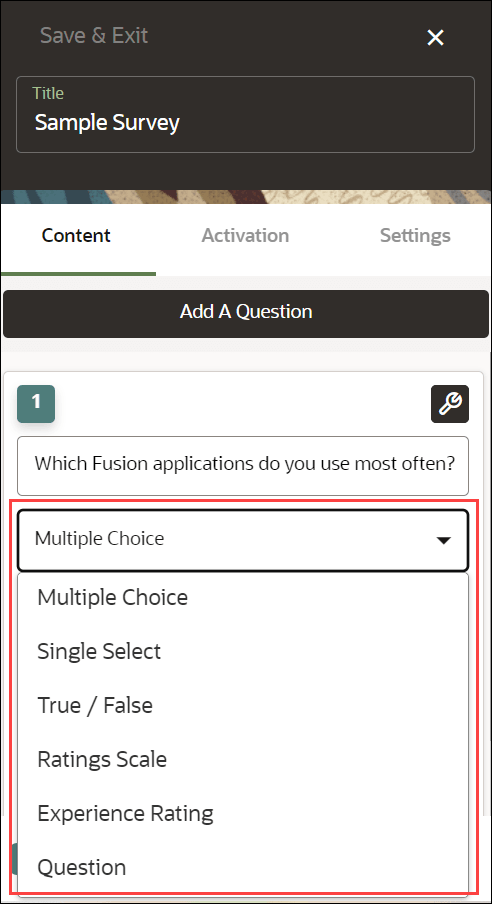
Surveys can be created with the following response types:
- Multiple Choice - Up to 5 answer choices allowing multiple answer selections
- Single Select - Up to 5 answer choices allowing only 1 answer selection
- True or False - Binary answer choice with customizable answers
- Rating Scale - Customizable numeric scale ranging from 1 to 10
- Experience Rating - Preset 3-option rating
- Question - Free text field for responses up to 1,000 characters maximum
Key Features of the Survey
| FEATURE DESCRIPTION | ROLE | ADDITIONAL INFORMATION |
|---|---|---|
| Surveys |
|
|
Creating and Publishing the Survey
To create a Survey:
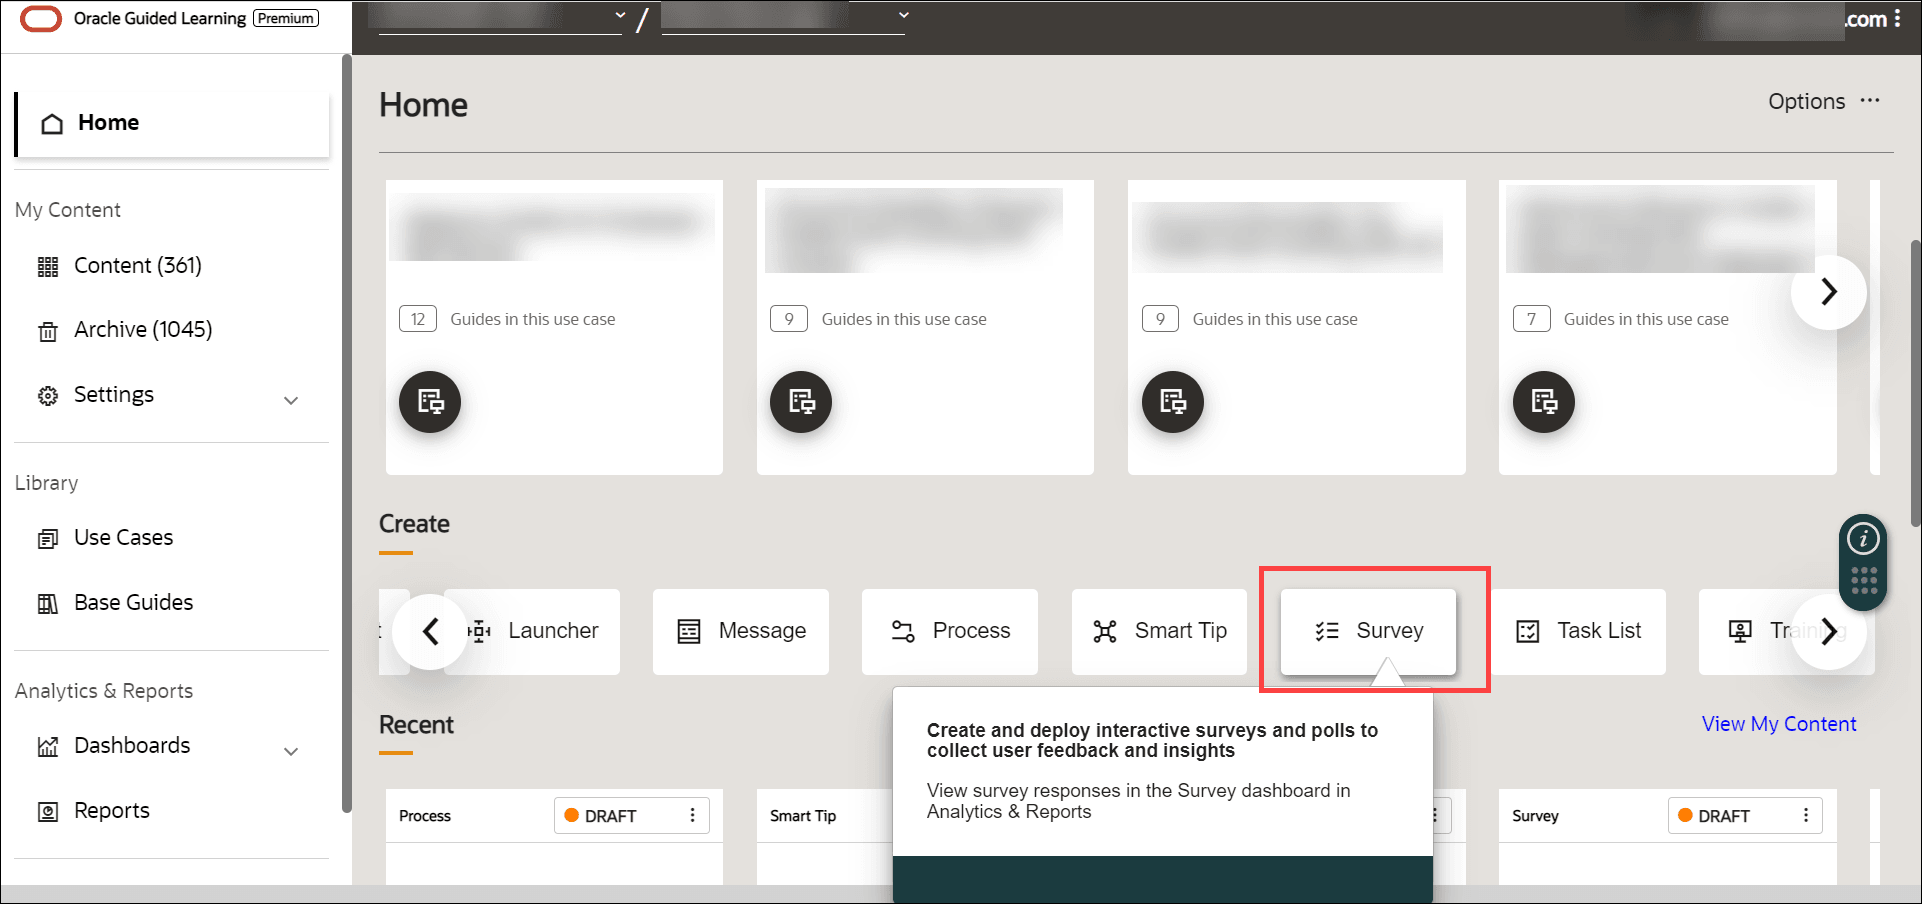
- On the OGL homepage, select Survey.
- Enter the desired Survey name and the Location URL.
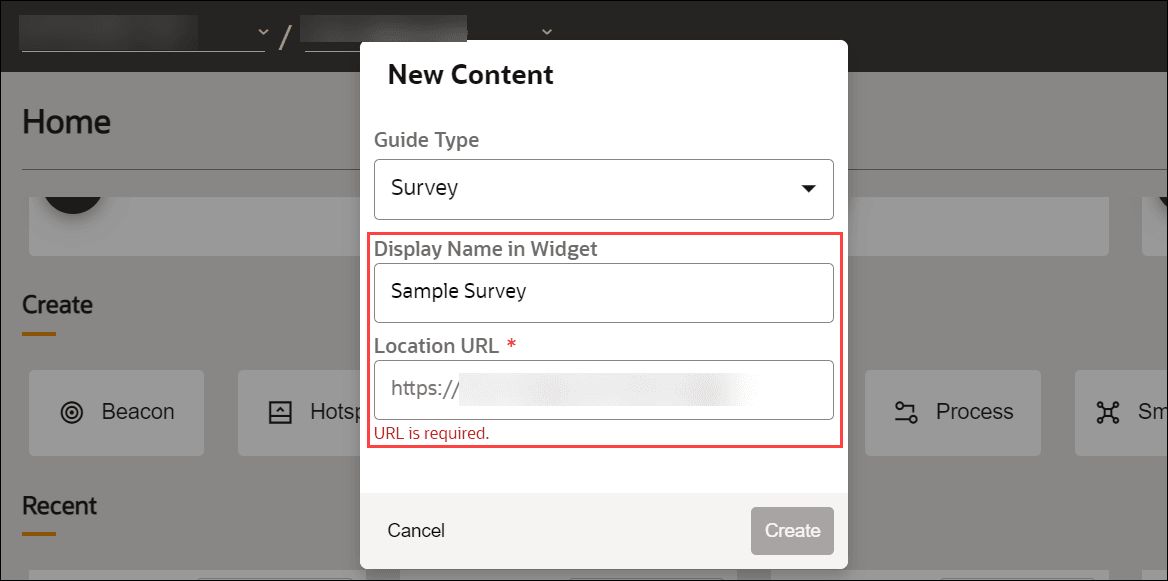
- Select Create.
The Survey editor is displayed.
Note:
The Survey editor opens in a new tab. The editor appears as an overlay on your application.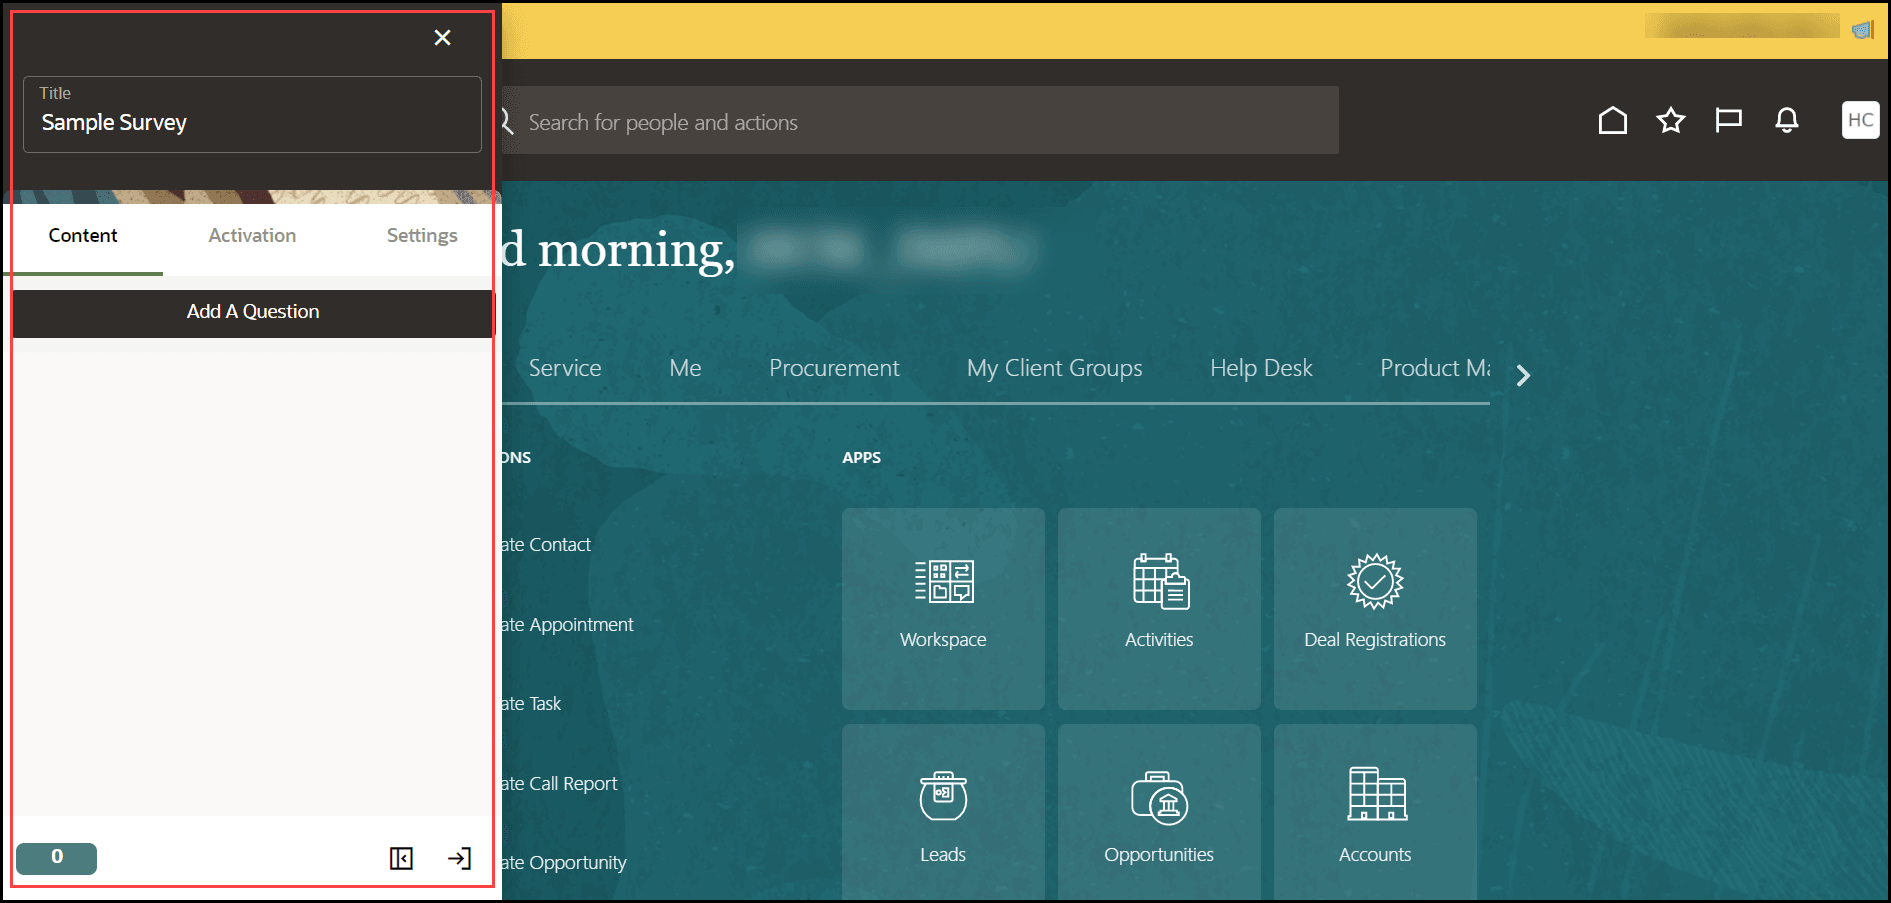
- Select Add A Question.
Tip:
To include more questions in your survey, select Add A Question again to add another one. You can have multiple questions in a single Survey.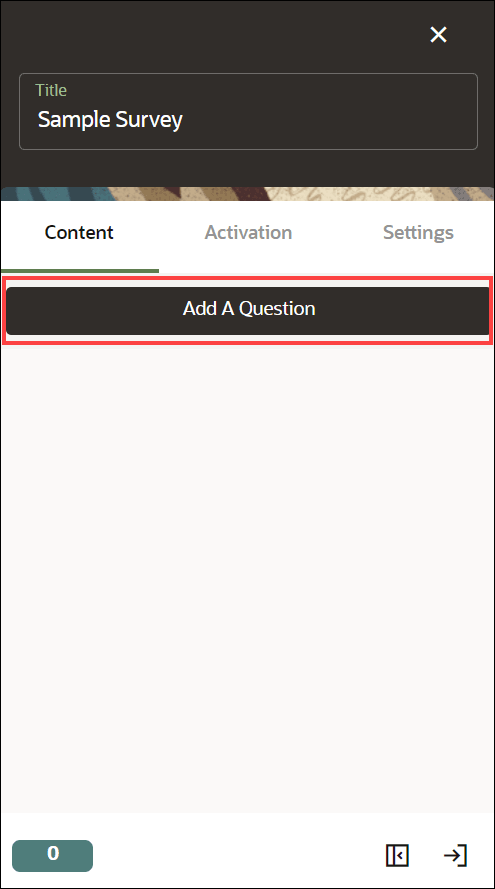
The Survey template appears. You can see the changes you make through the real-time preview.
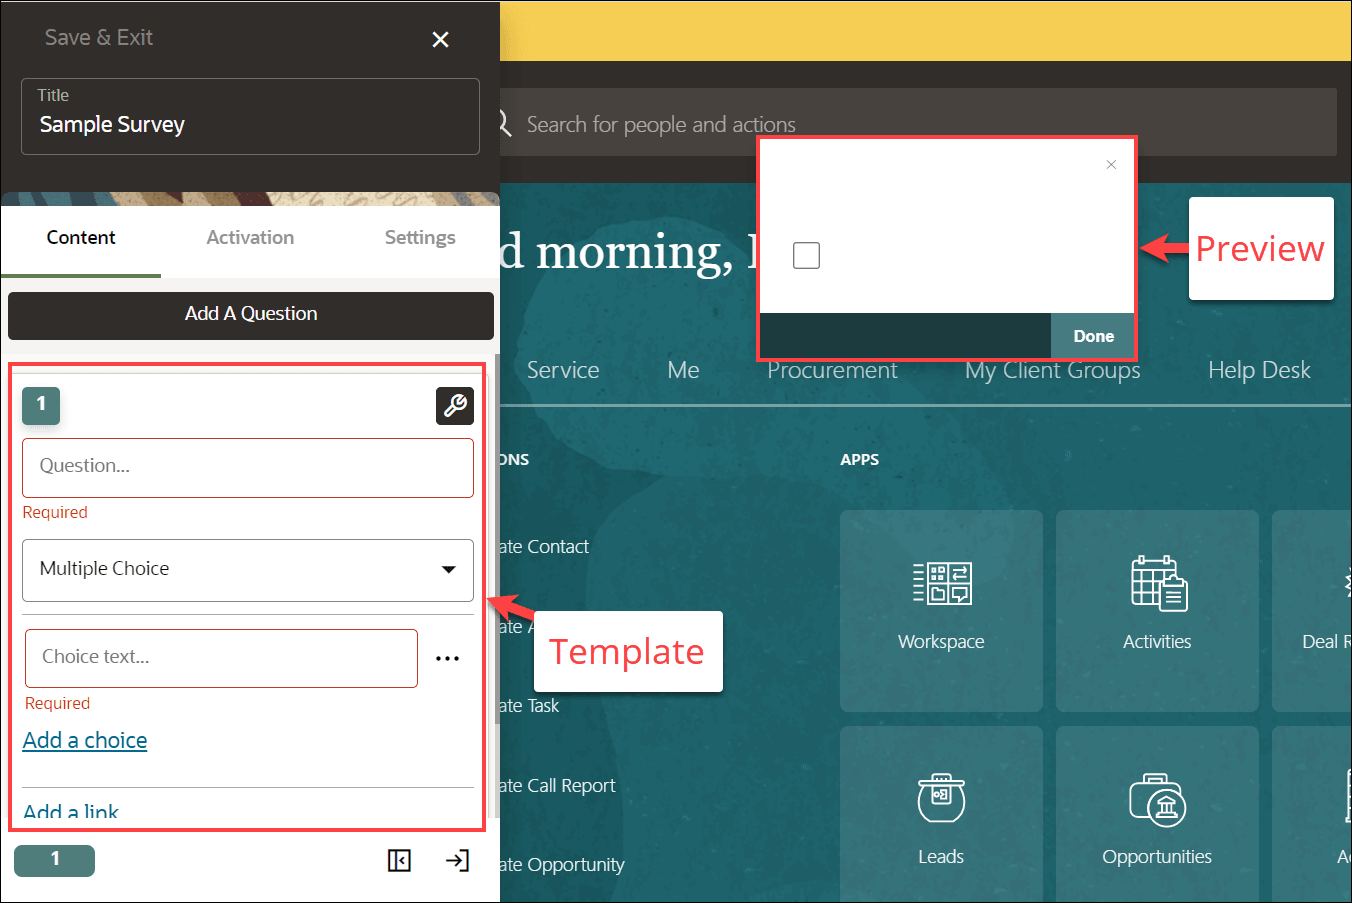
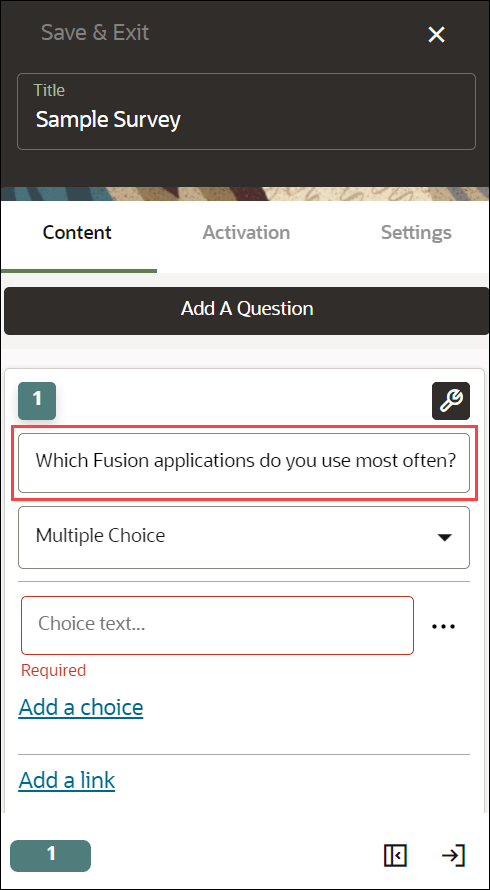
- Enter the question.
- Select the Survey type from the dropdown menu.
(In this example, we have chosen Multiple Choice for the demo.)
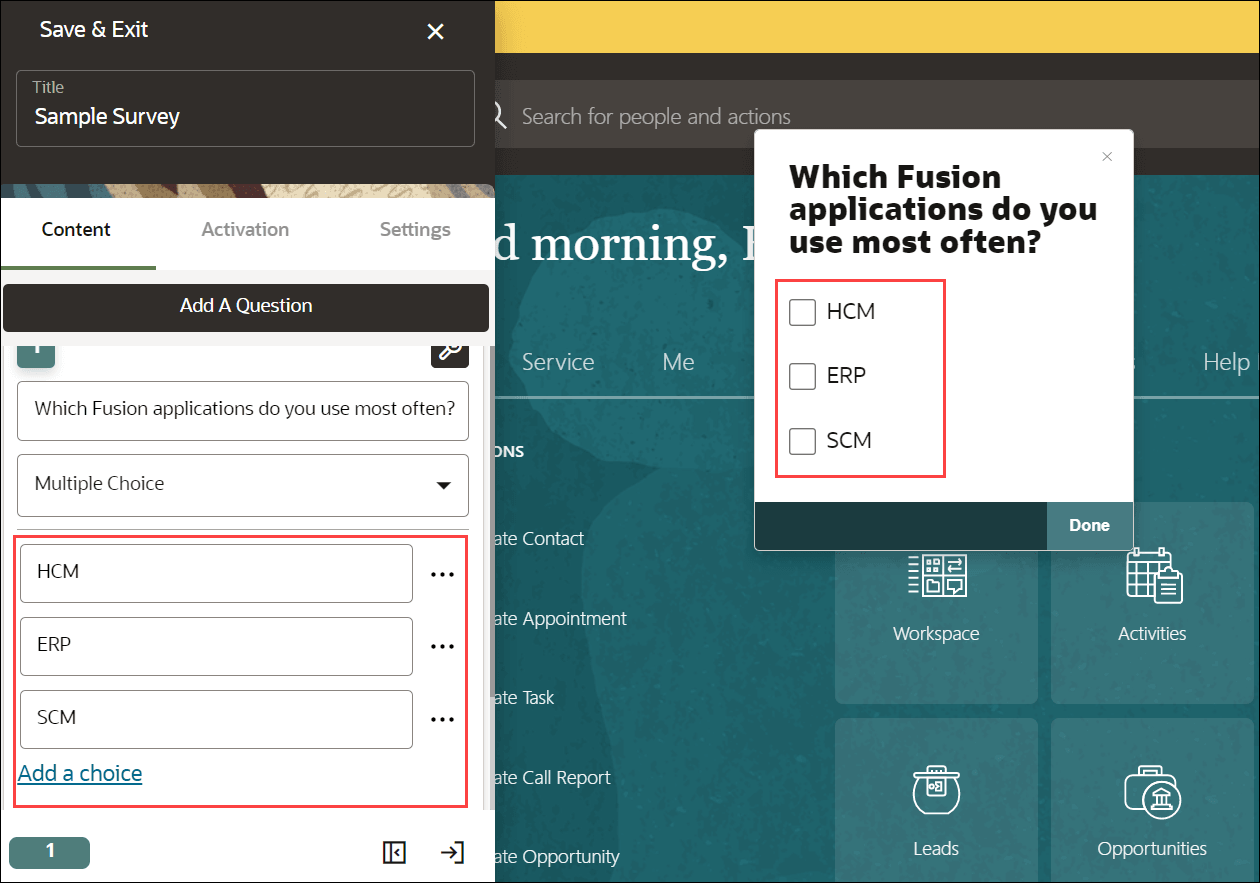
- Enter the Choice text(s).
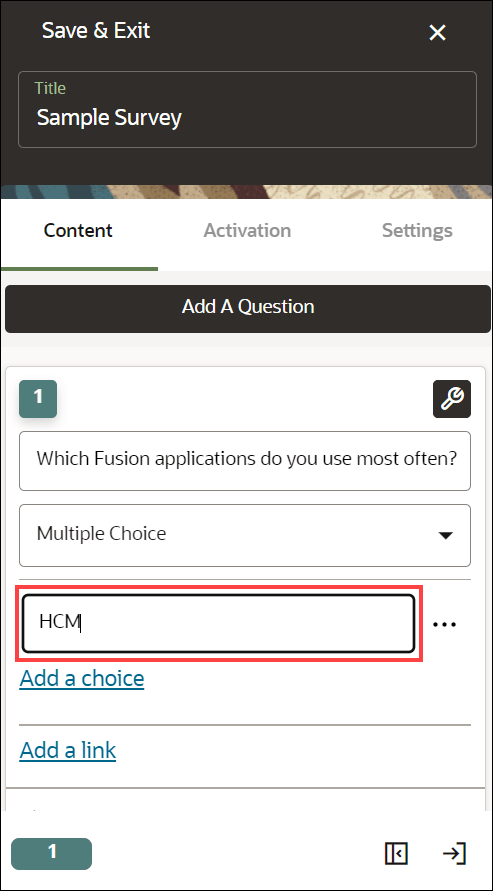
Select Add a choice to add multiple choice.
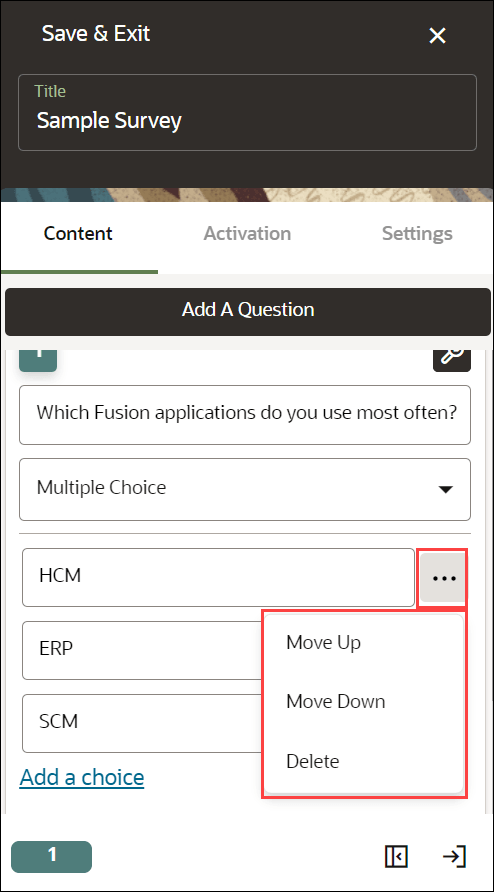
Use the ellipsis icon to explore the choice's menu. You can Move Up, Move Down or Delete the choices.
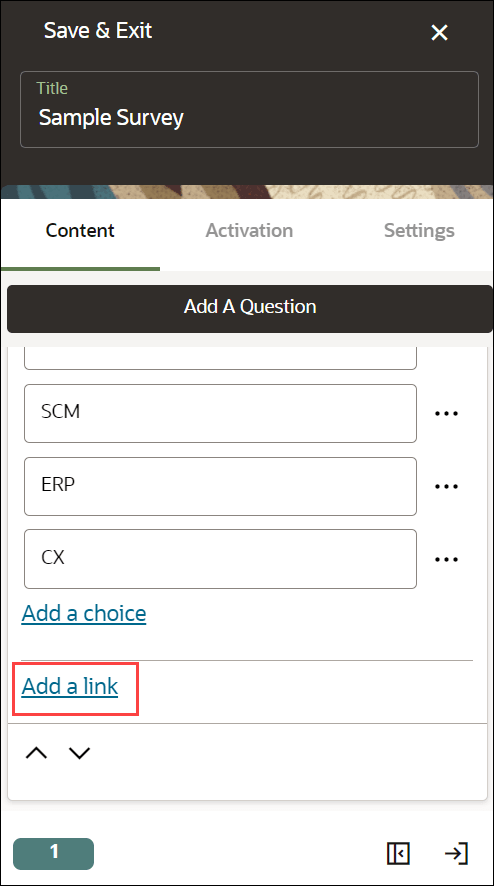
- Select Add a link,if you want to point out to any target page (Optional).
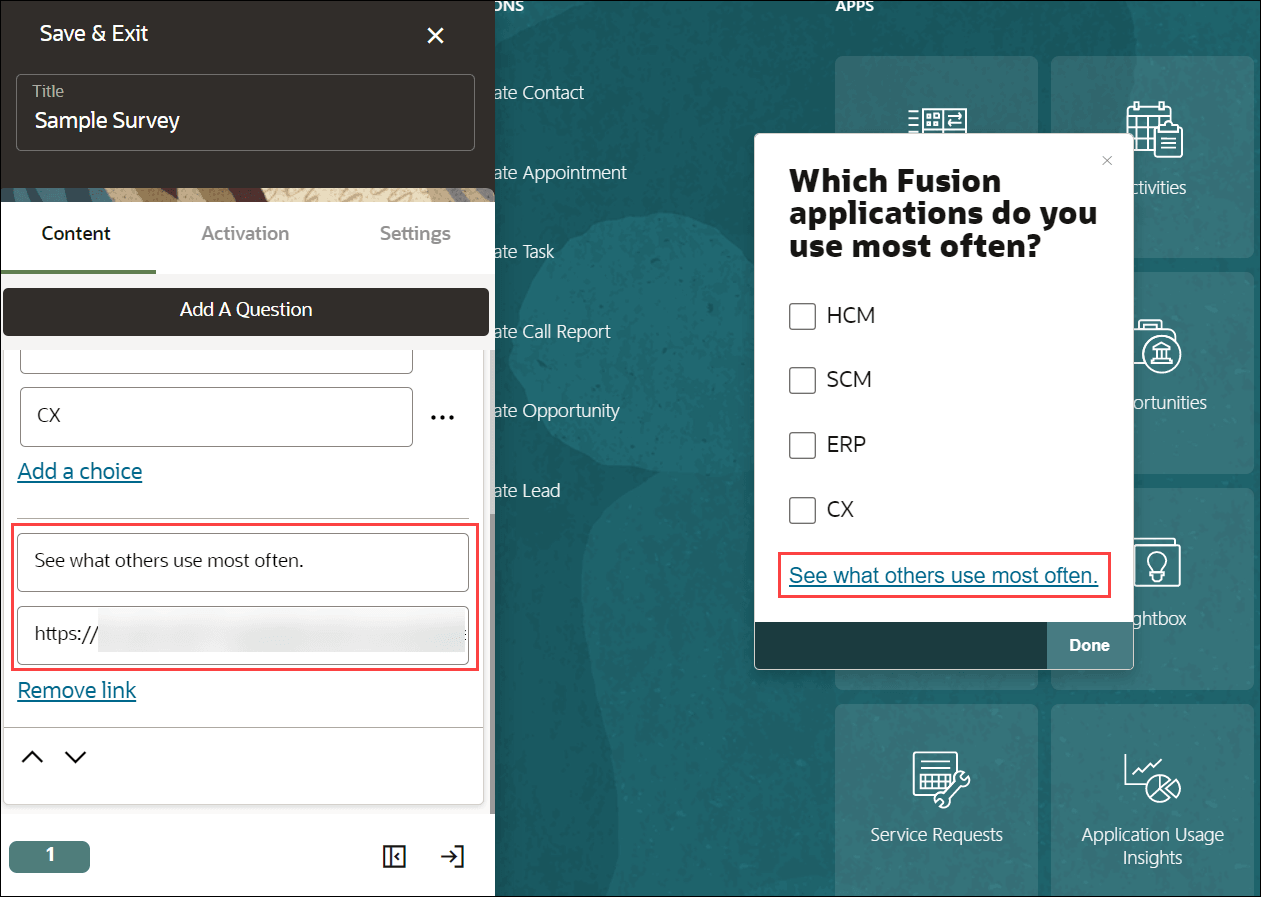
Enter the display name of the link and the link URL.
- For additional settings, select the Settings icon (
 )
)
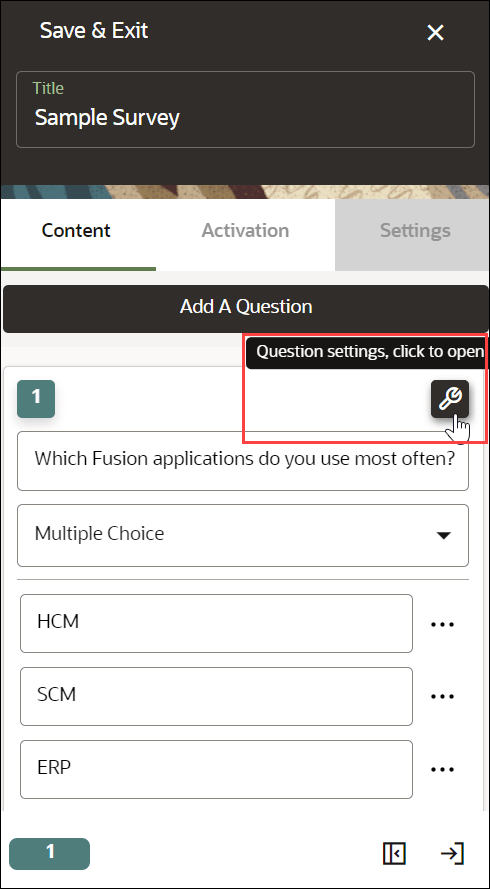
The Settings modal window appears.
- Display Settings
Select the Display Settings tab to view the display settings.
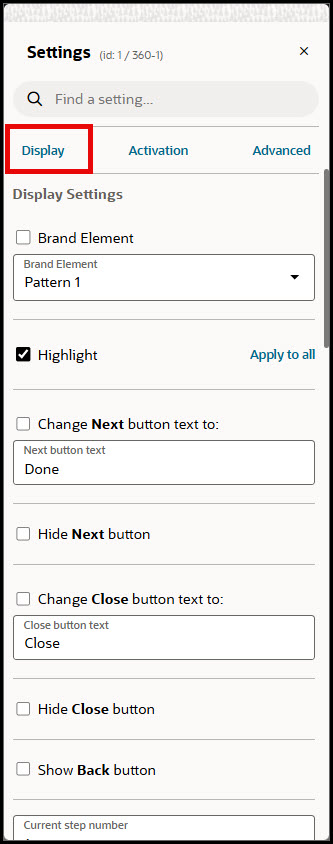
- Check the Brand Element to enable animated graphical icons. Select from the list of available patterns.
- Check the Highlight option to highlight the Survey modal window.
- Check the Change Next button text to option to give an alternative text instead of the default text "Next".
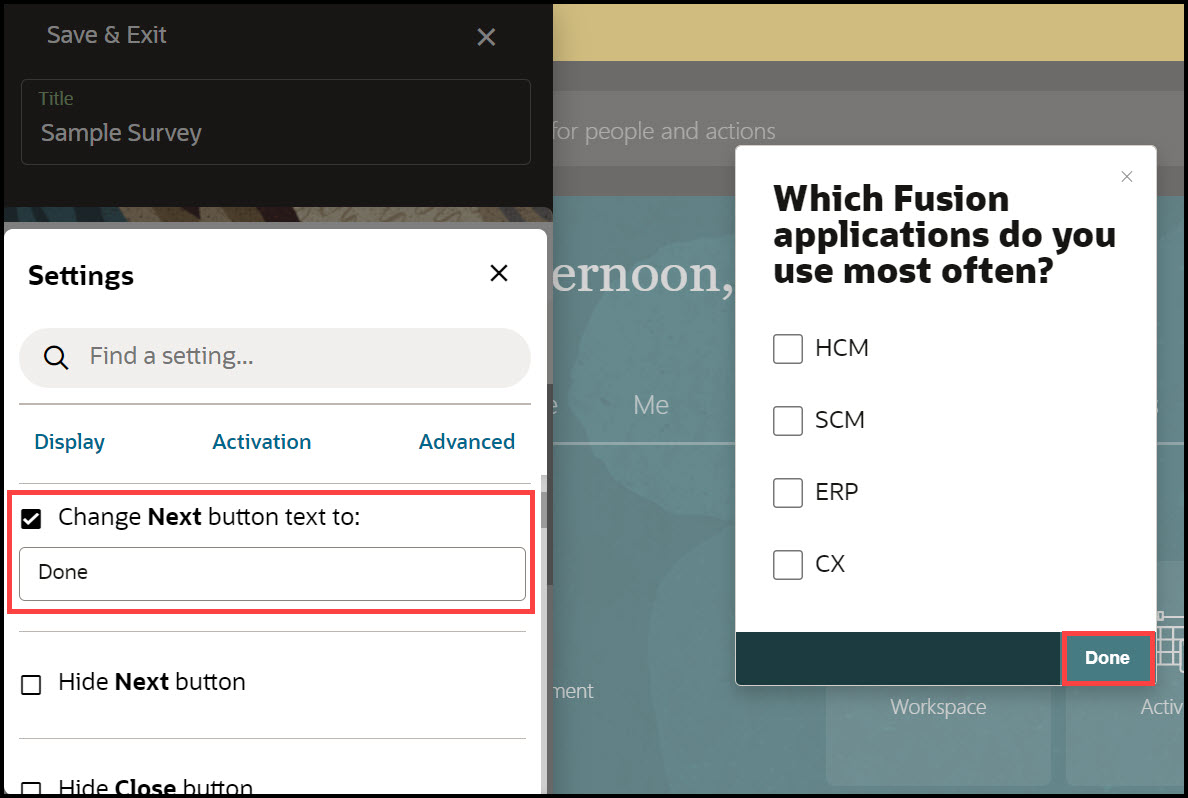
- Check the Hide Next button to hide the Next/Done button.
- Check the Change Close button text to: option to give an alternative text instead of the default text Close.
- Check the Hide Close button to hide the close button.
- Check the Show Back button option to display the Back button. (Does not apply to Step 1).
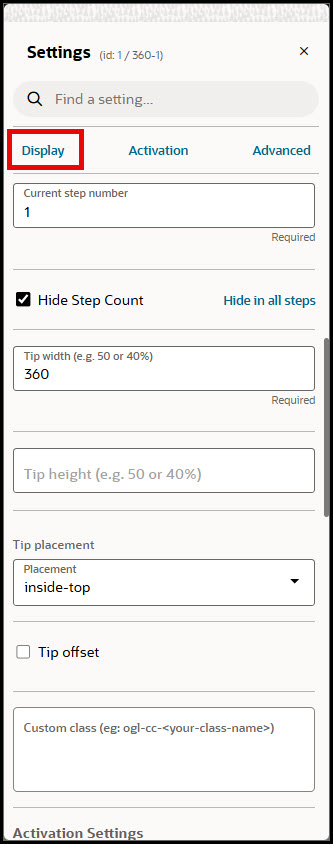
- Change the Current Step Number if you want to change the step number assigned to this tip. (Default is current step number)
- Configure the Tip width and Tip Height, as needed. (Expressed in pixels or percentage of screen width.)
- Select the desired Tip placement (In relation to the screen).
- Set the Tip offset, as needed
- Activation Settings
Select the Activation Settings tab to view the activation settings.
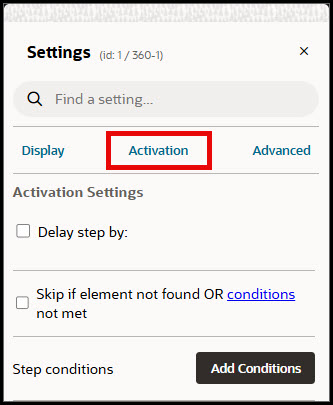
- Check the Delay step by.... option if you wish to time delay for the step to display. (Expressed in Minutes, Seconds, and/or Milliseconds).
- Select Skip if element not found OR conditions not met....
Note:
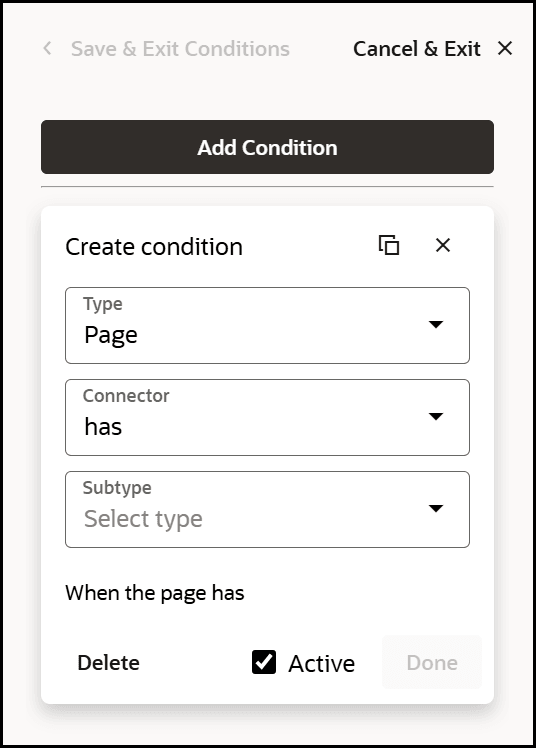
Tips are rendered as soon as their related element becomes visible. Choose this option to not wait for an element and simply skip to the next step in the guide if the element is not found or additional defined conditions are not met. - To add any Step Conditions, click Add Conditions....
- Advanced Settings
Select the Advanced Settings tab to view the Advanced settings.
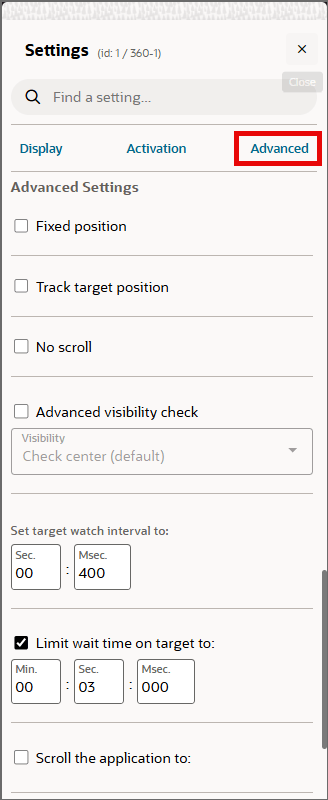
- Check Fixed position to keep the tip visible even if the user scrolls up or down the page.
- Check Track target position to ensure that the tip stays on the target element if the element’s position moves dynamically (fixed positioning).
- Check No scroll to disable the scrolling of the page.
- Check Advanced visibility check if the host application uses multiple layers and an element could be hidden behind another one that was added on top of it. On some applications, OGL might think that an element is visible even when it is not.
- You can use Set target watch interval to set the watchdog interval when the target element disappears, the tip should remain visible for the time set in the editor and then hide. (Default setting is 400ms)
- Check Limit wait time on target to: (msec) to send an error message if the current target element does not appear within "x" ms so that we can notify you and fix the problem.
- Check Scroll the application to: if you want to automatically scroll to the Bottom or the Top of the page.
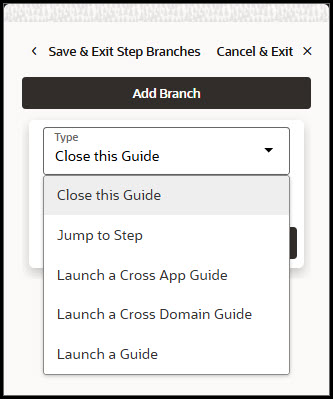
- To add Step Branches, select the Add button and set the desired behavior (i.e., Type) for the step branch. .
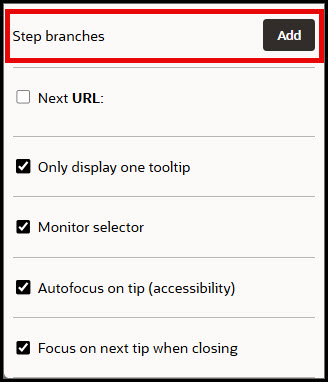
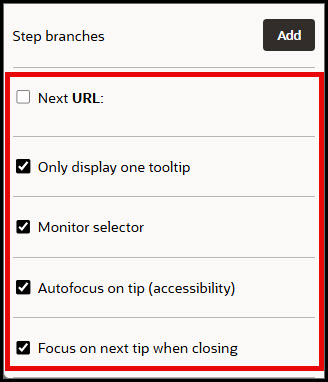
- Check Next URL: to enable navigation to a new page when selecting the Next button.
- Check Only display one tooltip to avoid displaying duplicate tips.
- Check Monitor selector to keep searching for the element on the page even if it has found a match for it. (Default is ON).
- Check Autofocus on tip (accessibility) to automatically set the browser focus on tooltips. If disabled, the focus will be on the target element. (Default is ON)
- Check Focus on next tip when closing to set the browser focus on the next tip when the current tip is closed. (Default is ON)
- Select the Close icon to close the settings window.
- Select Save & Exit.
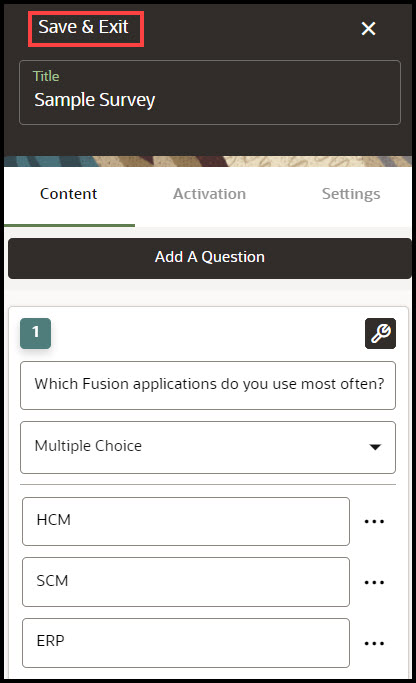
A new Survey has been created and can now be viewed on the homepage. The survey is currently in Draft status.
After creating the Survey:
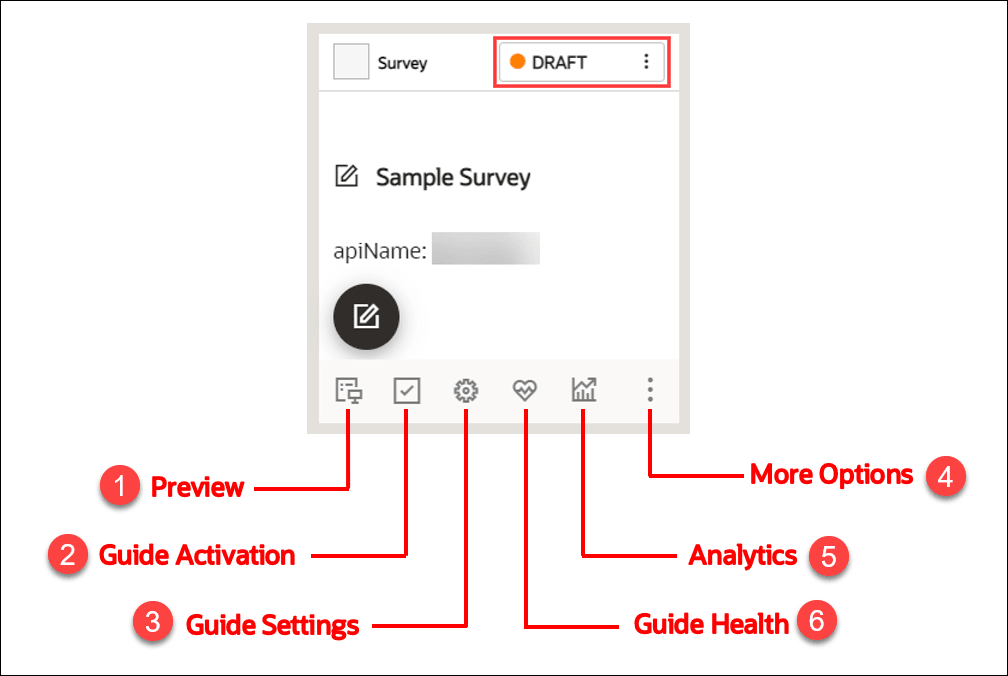
 Select the Preview icon to preview the Survey.
 Select the Guide Activation icon to set the activation conditions.
Learn more about Guide Activation.
 Select the Guide Settings icon to manage settings.
Learn more about Guide Settings.
 Select the More Options icon to Delete/Clone the Survey.
 Select the Analytics icon to view the statistics of your Survey.
 Select the Guide Health icon to view the history of errors reported to your Survey.
To publish the survey:
- On the homepage, select Content.
- Select the status button on the Survey that you want to publish.
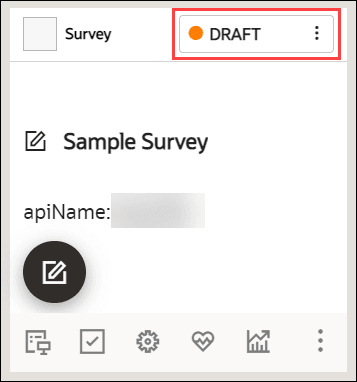
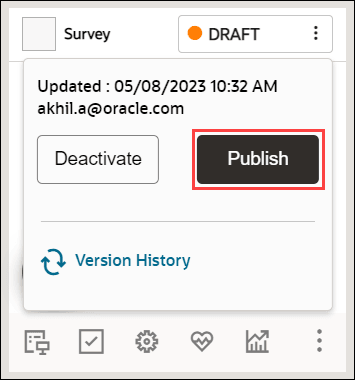
Now select Publish.
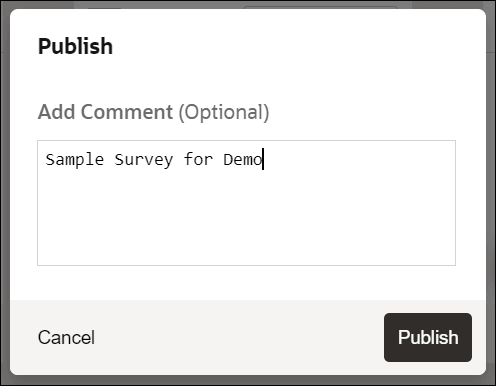
- Add comments (optional) and select Publish.
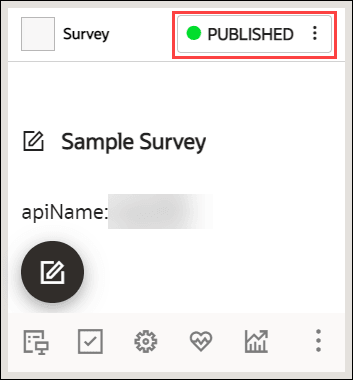
Your Survey is now published, and the status is set to "PUBLISHED".
Editing the Published Survey and Republishing
You can always make changes to the surveys you published.
- Select the Editor icon on the Survey to make changes.
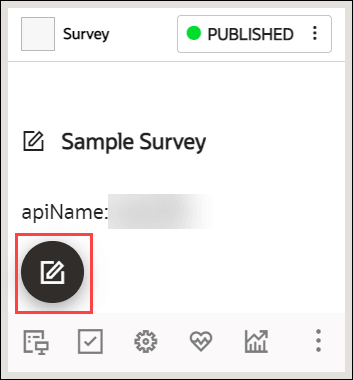
- Publish the Survey.
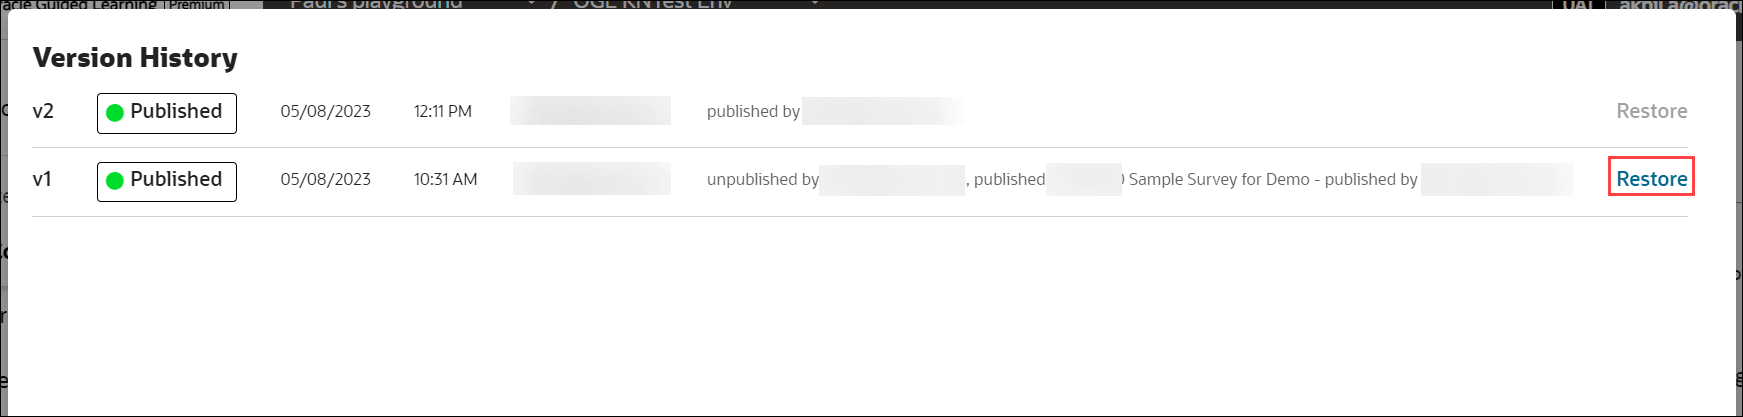
Each republish creates a new Survey version, with easy access to version history. In addition, you can restore to an older version of the Survey if you wish.
- Select the status button to view the version history.
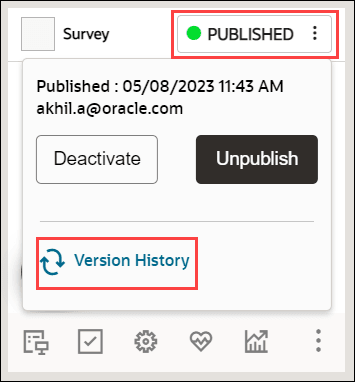
The revision history is now displayed.
- Select the Restore button, if you wish to restore to an older version.
Survey Analytics
Survey Analytics are used to process, store, and visualize survey data. This adds another tool in OGL’s "insight to action" toolchest supporting content management, product management, and analytics. OGL console users with View Analytics security permissions can generate a downloadable report from the Survey Analytics dashboard that will be emailed to them.
| FEATURE DESCRIPTION | ROLE | ADDITIONAL INFORMATION |
|---|---|---|
| Survey Analytics |
|
|
View the Survey Analytics
To view the Survey Analytics:
- On the main navigation menu, select Dashboards > Surveys.
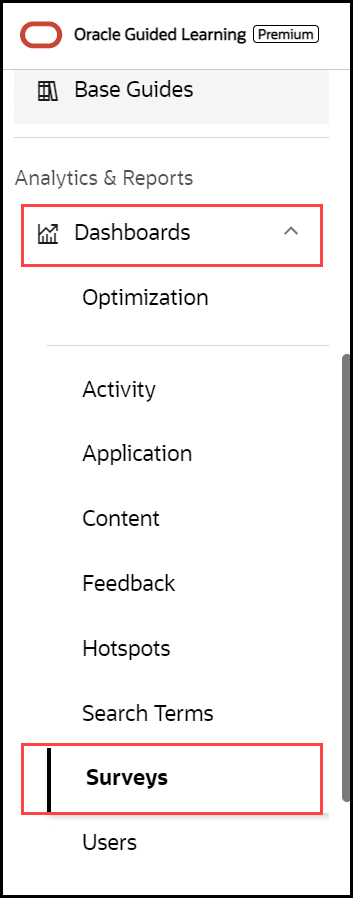
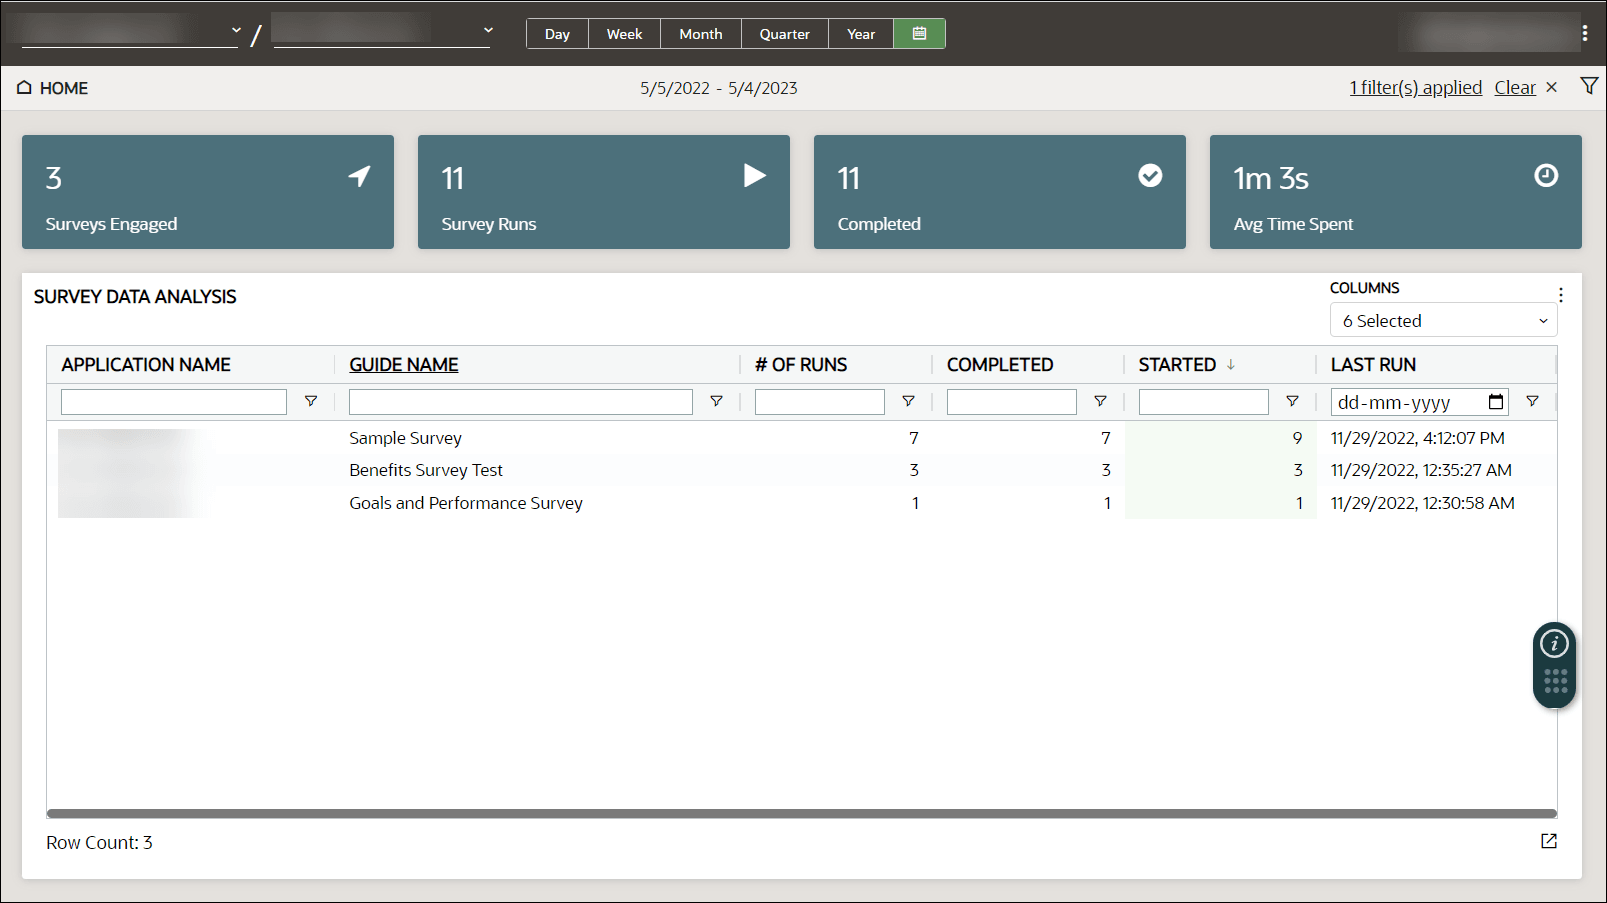
The Survey analytics dashboard is displayed. You can see the statistics like the Number of Runs, surveys Started and Completed, and the Last Run date.
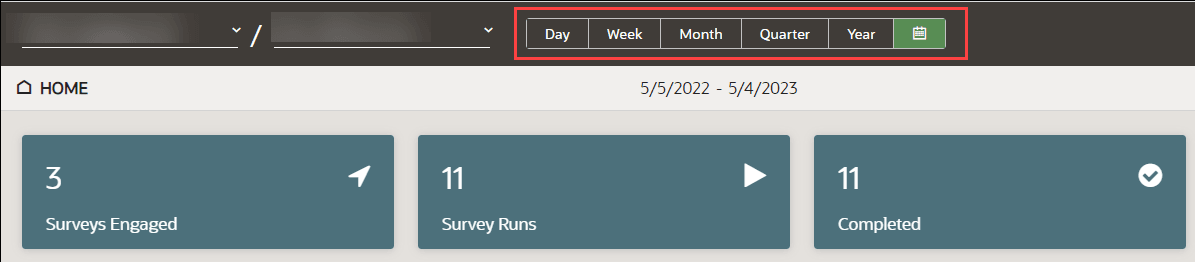
- Select the time frame for which you would like to view the analytics data. You can also select a custom date(s).
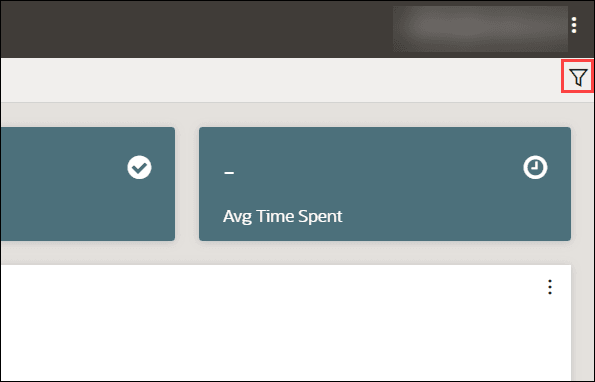
- Select the Filter icon (
 ) to filter the analytics data.
Generate a Survey Analytics Report
Note:
The procedure below will run a report that will be sent to the email address in your OGL user profile. To update or verify your email address, select your username in the top-right corner of the OGL console and select My Profile.
To generate and receive a Survey analytics report via email:
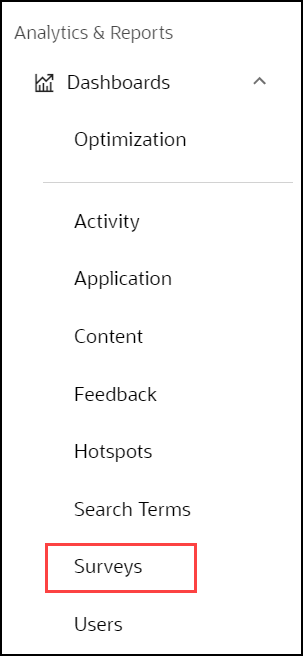
- On the main navigation menu, select Dashboards in the
Analytics & Reports section, then select Surveys.
The Survey Analytics dashboard is now displayed.
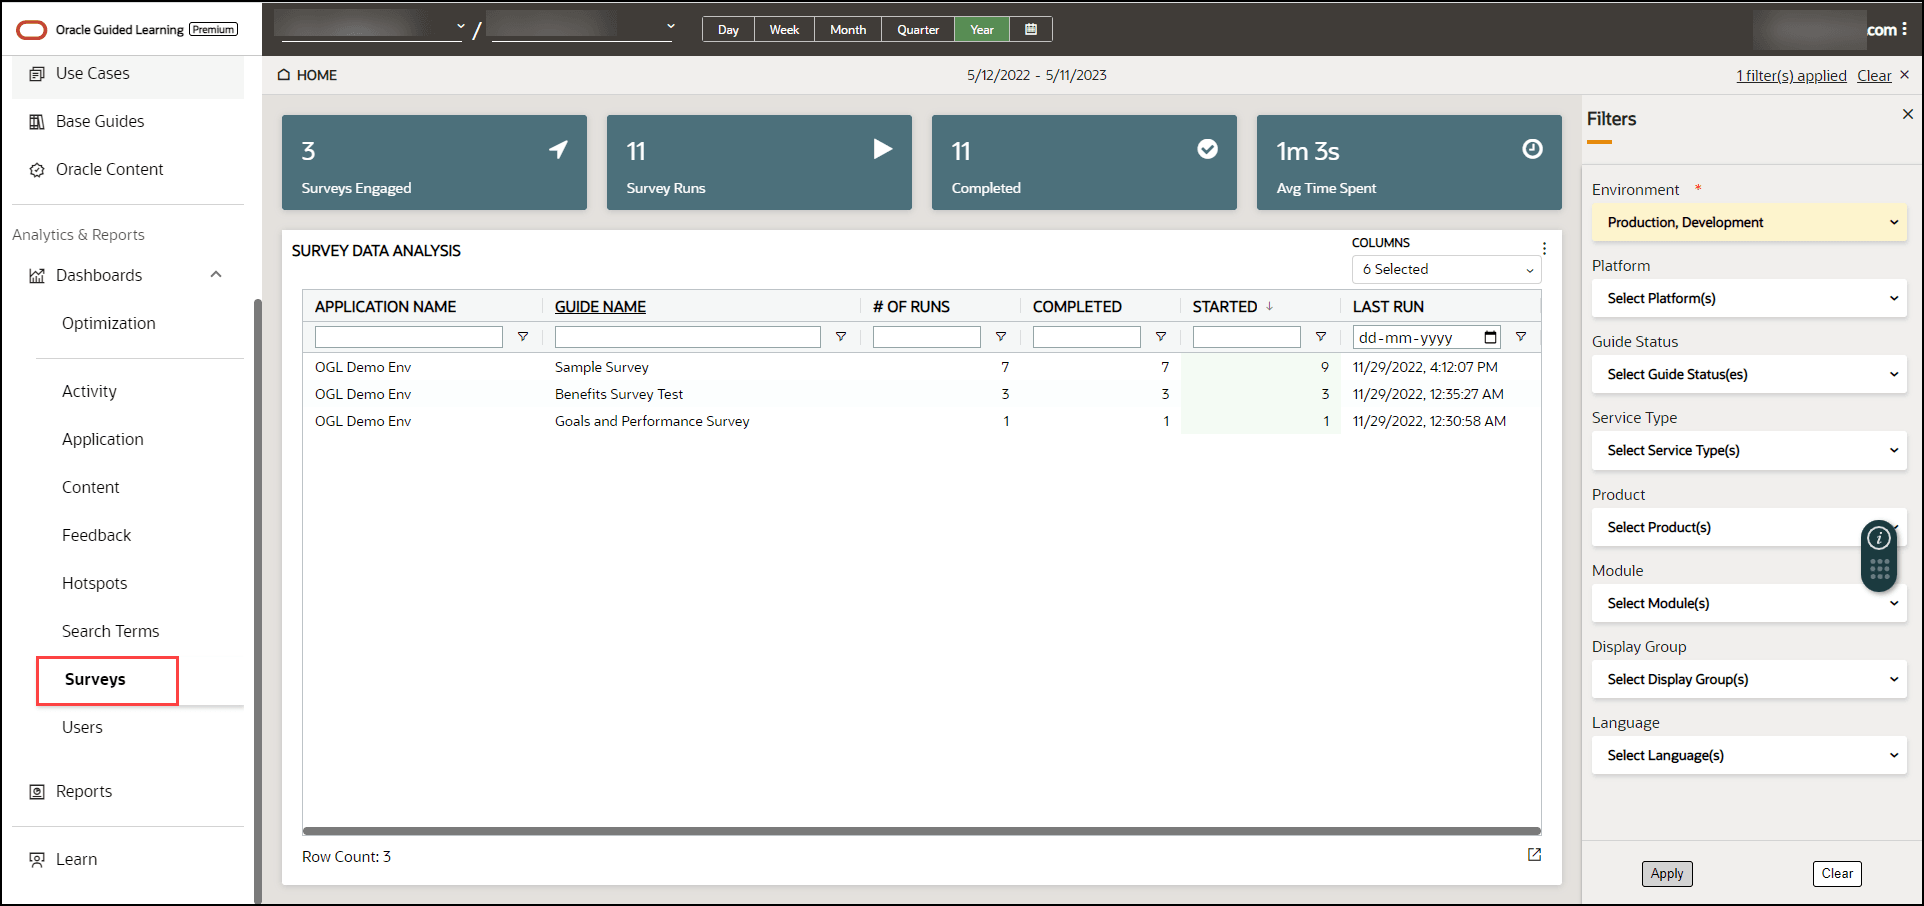
The Filters slider window is displayed on the right side of the Reports screen. Apply filters, as needed.
- Select the Survey guide for which to generate the report.
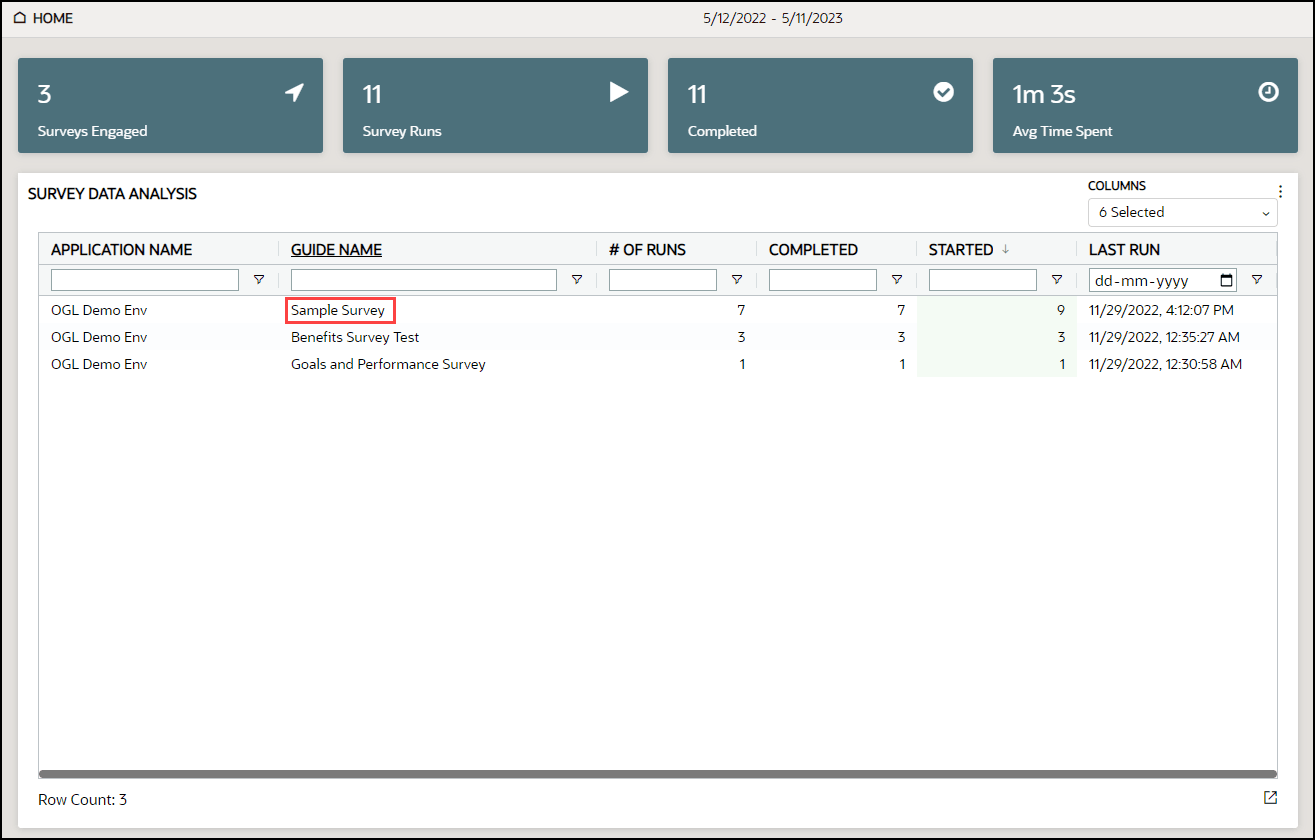
A dashboard of the selected Survey guide is displayed.
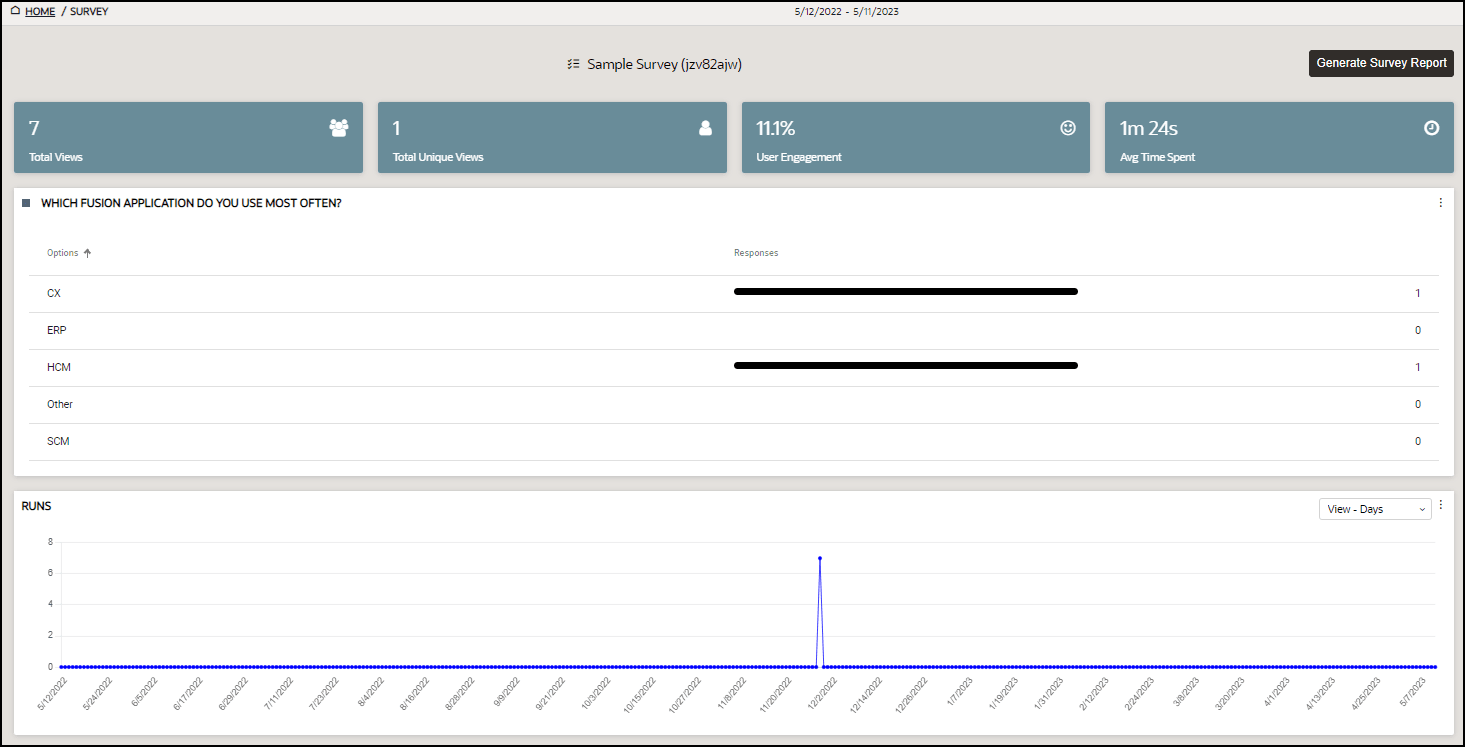
- Select the Generate Survey Report button.
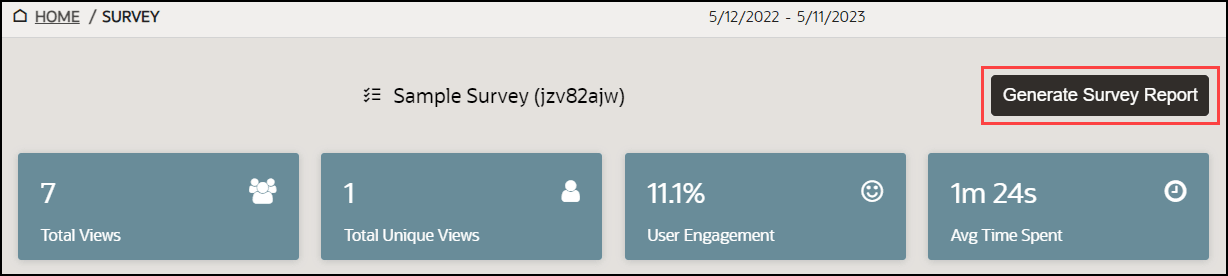
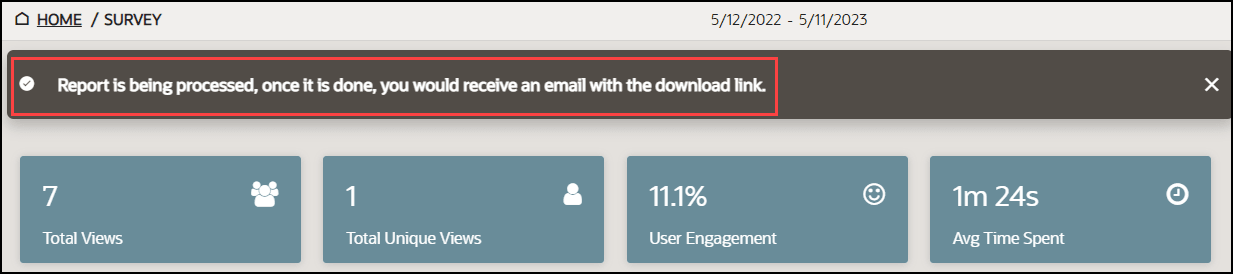
- The following message will appear in the banner to alert you that
your report is being processed and will be sent to you via email when ready.
- Go to your email inbox and check for the new mail with subject
"OGL Survey Report".
The email should look like this.
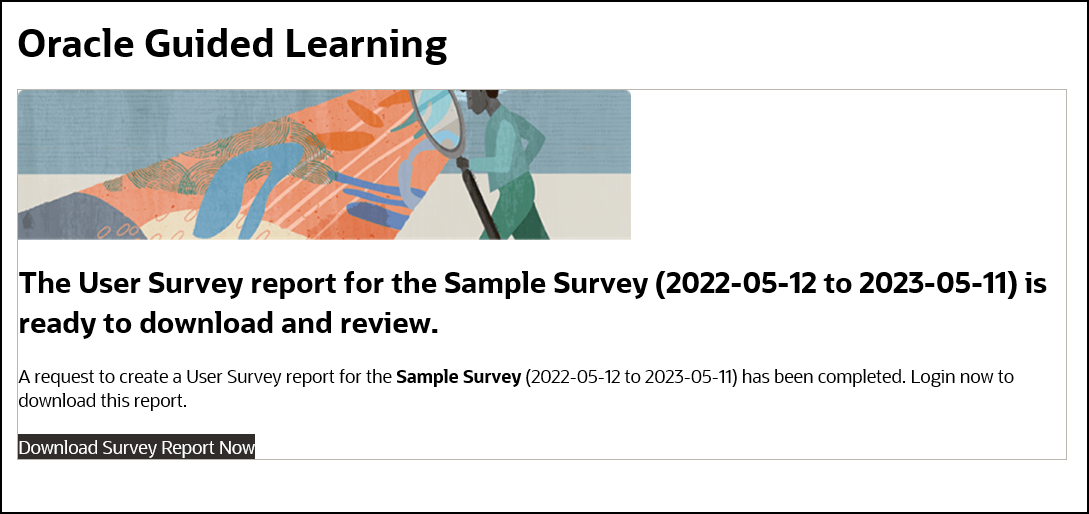
- Select the Download Survey Report Now link provided in the
email.
The browser now downloads the report.
