7 Organizing OGL Content
Overview
OGL offers multiple tools to help you organize and manage your library of OGL content items. These tools include filters that allow you to narrow the list of content items by specific parameters, such as Fusion Products and Modules as well as custom labels. Below is a summary of guide management tools available to help you efficiently organize your content items and reduce time searching for specific items.
Understanding Products
As your content library grows, it can become increasingly difficult to manage a large volume of guides, especially if you have OGL deployed to multiple Fusion products (e.g. HCM, ERP, etc.) and/or modules (e.g., Financials, Procurement, Human Resources, Recruiting, etc.). One way to organize your guides may be to categorize them by the Fusion products and modules to which they are associated. Whether you are using OGL in Fusion or other applications, product and module labels allow you to manage your guides more efficiently, making it easier to find, filter, and organize guides by their respective products and modules. The Products and Modules features enable console users to create, edit, and manage custom labels which can then be tagged to guides for use in filtering in both the Content library as well as Analytics.
Accessing the Interface
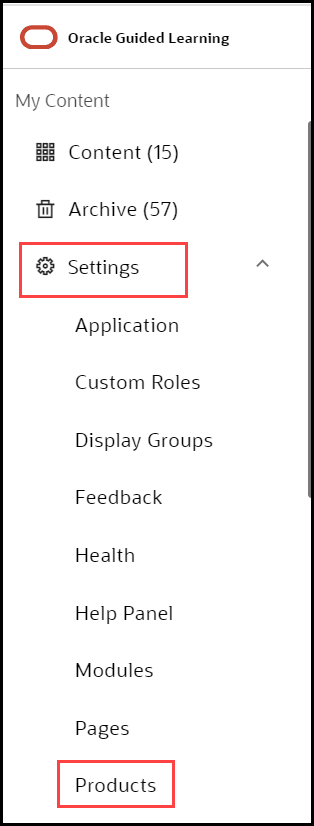
- On the OGL Console homepage, go to the left navigation panel.
You can see the Settings tab on the left navigation panel.
- Select Products from the Settings tab on the left navigation
panel.
Understanding the Interface
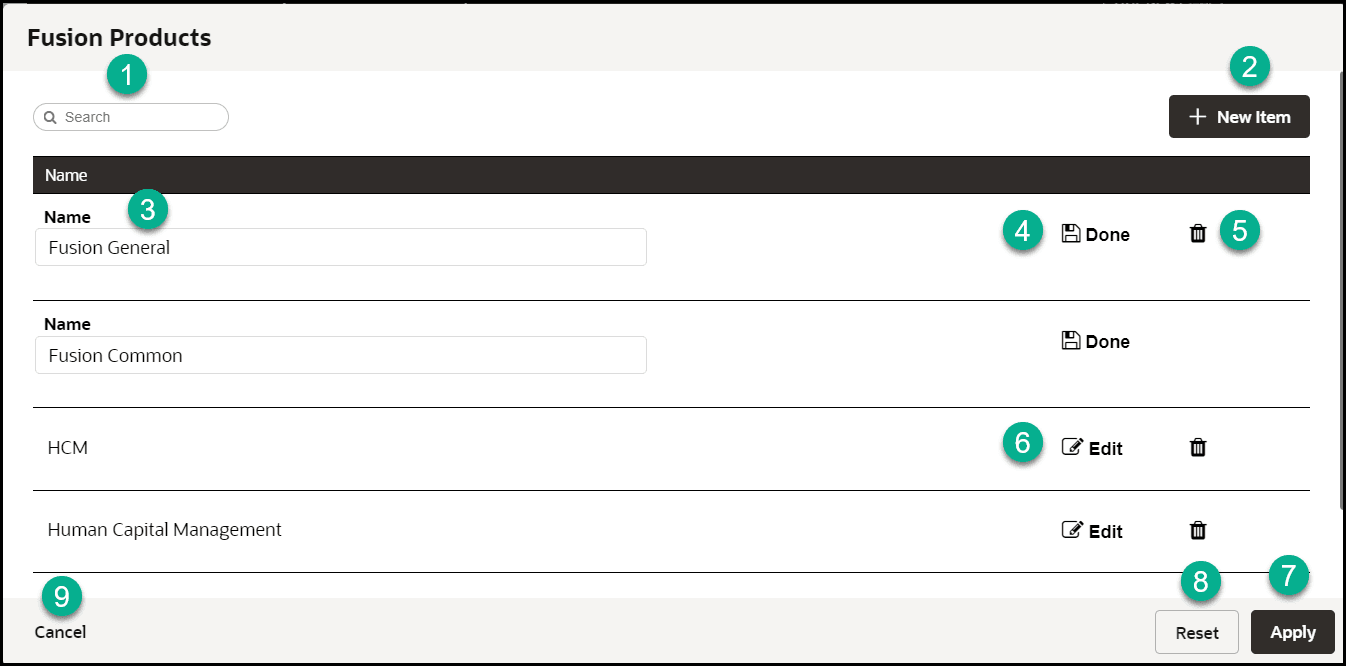
| Legend | Name | Additional information |
|---|---|---|
| 1 | Search box | Provides dynamic search functionality. |
| 2 | New Item | Adds a new line to the list. |
| 3 | Name field | The name field cannot be empty. Duplicate values are not allowed. |
| 4 | Done/Save | Saves the changes made to the field. The button only becomes active when an acceptable value is entered in the field. |
| 5 | Edit | Allows changes to be made to the field. |
| 6 | Delete | Deletes the line item. Action cannot be reversed and all linked content items will be disassociated. |
| 7 | Apply | Saves the changes made. A confirmation is displayed if the operation has either been completed successfully or failed with errors. |
| 8 | Reset | Reset the changes made. A warning will be
displayed if there are unsaved changes.
|
| 9 | Cancel | Discards any changes that were made and closes
the interface. A warning will be displayed if there are unsaved
changes.
|
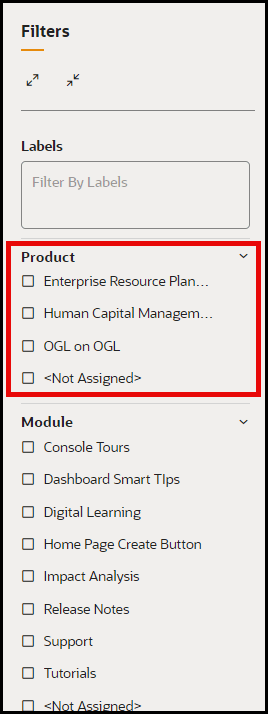
Using Product Filters
You can use the Product labels to filter your guides by their respective products.
Understanding Modules
As your content library grows, it can become increasingly difficult to manage a large volume of guides, especially if you have OGL deployed to multiple Fusion products (e.g. HCM, ERP, etc.) and/or modules (e.g., Financials, Procurement, Human Resources, Recruiting, etc.). One way to organize your guides may be to categorize them by the Fusion products and modules to which they are associated. Whether you are using OGL in Fusion or other applications, product and module labels allow you to manage your guides more efficiently, making it easier to find, filter, and organize guides by their respective products and modules. The Products and Modules features enable console users to create, edit, and manage custom labels which can then be tagged to guides for use in filtering in both the Content library as well as Analytics.
Understanding Products
As your content library grows, it can become increasingly difficult to manage a large volume of guides, especially if you have OGL deployed to multiple Fusion products (e.g. HCM, ERP, etc.) and/or modules (e.g., Financials, Procurement, Human Resources, Recruiting, etc.). One way to organize your guides may be to categorize them by the Fusion products and modules to which they are associated. Whether you are using OGL in Fusion or other applications, product and module labels allow you to manage your guides more efficiently, making it easier to find, filter, and organize guides by their respective products and modules. The Products and Modules features enable console users to create, edit, and manage custom labels which can then be tagged to guides for use in filtering in both the Content library as well as Analytics.
Accessing the Interface
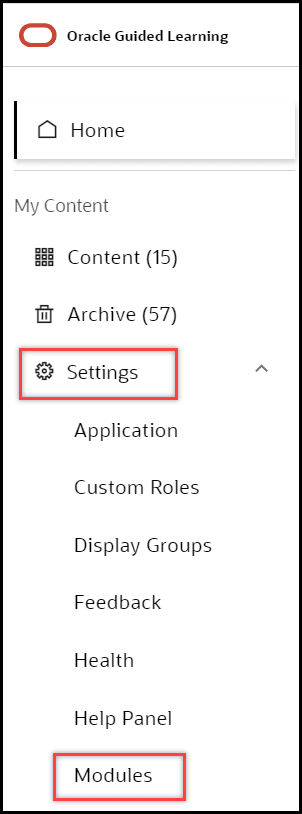
- On the OGL Console homepage, go to the left navigation panel.
You can see the Settings tab on the left navigation panel.
- Select Modules from the Settings tab on the left navigation
panel.
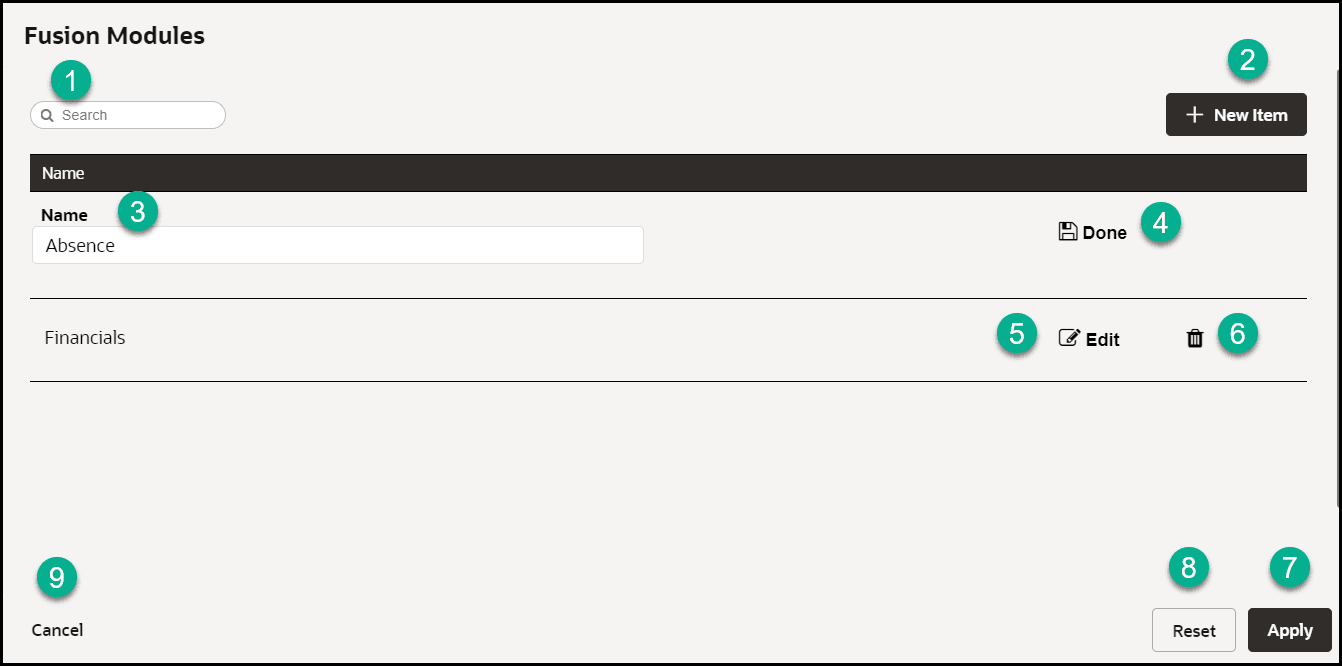
Understanding the Interface
| Legend | Name | Additional information |
|---|---|---|
| 1 | Search box | Provides dynamic search functionality. |
| 2 | New Item | Adds a new line to the list. |
| 3 | Name field | The name field cannot be empty. Duplicate values are not allowed. |
| 4 | Done/Save | Saves the changes made to the field. The button only becomes active when an acceptable value is entered in the field. |
| 5 | Edit | Allows changes to be made to the field. |
| 6 | Delete | Deletes the line item. Action cannot be reversed and all linked content items will be disassociated. |
| 7 | Apply | Saves the changes made. A confirmation is displayed if the operation has either been completed successfully or failed with errors. |
| 8 | Reset | Reset the changes made. A warning will be displayed
if there are unsaved changes.
|
| 9 | Cancel | Discards any changes that were made and closes the
interface. A warning will be displayed if there are unsaved
changes.
|
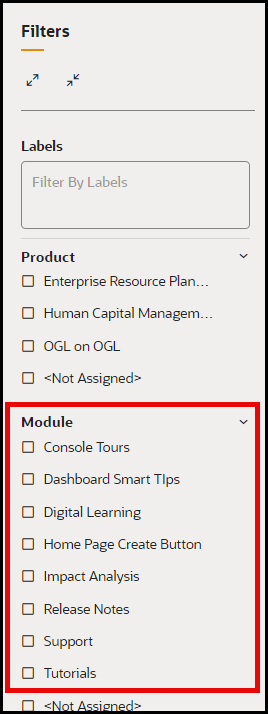
You can use the Module labels to filter your guides by their respective modules.
Guide Lifecycle Management Using Labels
As an OGL content developer or content manager working in collaboration with others, you may need to quickly understand the status of guides throughout the content development cycle, and easily find the guides that you need to work on, so that you can efficiently take action on tasks that are your responsibility.
This enhancement enables administrators and content developers to better manage guides throughout the content lifecycle by employing custom labels that clearly identify the status of your guides accordingly to your own organizational needs.
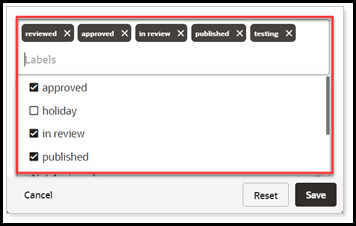
With this enhancement, console users can create, manage, and assign custom labels to guides for use in organizing and filtering guides accordingly to their custom labels. Labels can also be created, assigned, and managed for multiple guides as a bulk action.
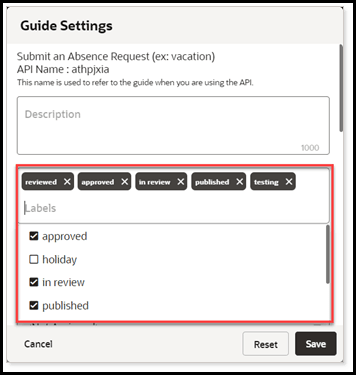
Managing labels for individual guides
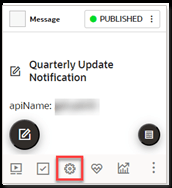
For individual guides, labels can be created, assigned, or removed at the guide level by using the Guide Settings:
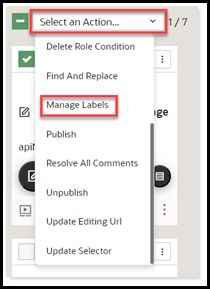
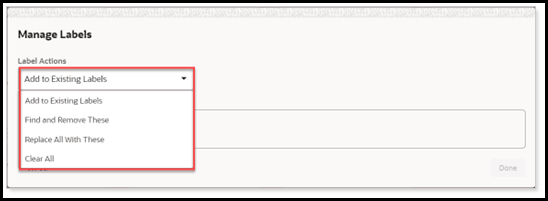
Managing labels for multiple guides (Bulk Action)
For multiple guides, labels can also be created, assigned, edited, or removed in bulk by using the Manage Labels action in the Bulk Actions menu:
Note:
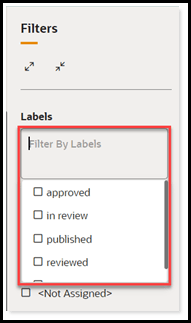
The Mange Labels bulk action requires the Owner role > Batch Update Guides permission:Filtering Guides by Labels
Once labels are assigned to guides, you can filter guides based upon their labels by using the Labels filter in the OGL console located on the right side of the My Content page:
Known Issues/Expected Behavior
- Once labels are created, they will automatically populate in the Labels field in the Guide Settings and Manage Labels modals only for the AppID on which the labels were created.
While you can create, assign, or remove labels for individual guides or multiple guides, you will not be able to delete any labels once they have been created. Look for an enhancement to this feature in a future release.
