8 Server Basic Input/Output System (BIOS)
Learn about the server node BIOS Setup Utility.
The Basic Input/Output System (BIOS) has a Setup Utility stored in the BIOS flash memory. The Setup Utility reports system information and can be used to configure the BIOS settings. The configurable data is provided with context-sensitive help and is stored in the system's battery-backed CMOS RAM. If the configuration stored in the CMOS RAM is invalid, the BIOS settings return to their default optimal values.
Note:
The BIOS menus shown in this chapter are examples. The BIOS version numbers, menu information, and menu selections are subject to change over the life of the product. You should not change the factory settings unless prompted to do so by Oracle Service personnel.
Accessing the BIOS Setup Utility
The BIOS Setup Utility allows you to view product information, and to configure, enable, and disable, or manage system components.
- BIOS Setup Utility Menus
- BIOS Key Mappings
- Access BIOS Setup Utility Menus
- Navigate BIOS Setup Utility Menus
Parent topic: Server Basic Input/Output System (BIOS)
BIOS Setup Utility Menus
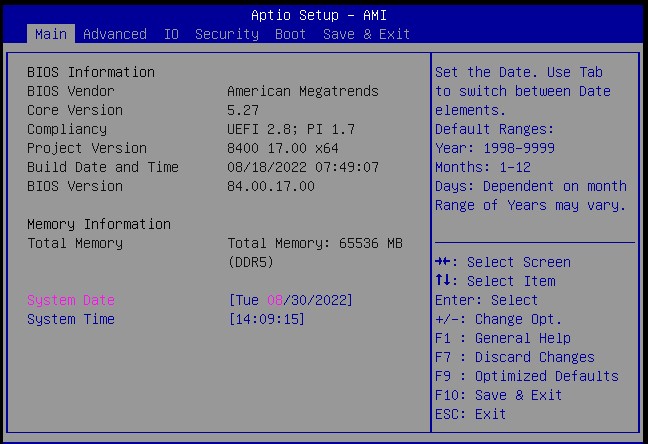
The following table provides descriptions for the top-level BIOS Setup Utility menus.
| Menu | Description |
|---|---|
|
Main |
View general BIOS information, including version, build date and time, memory, and system date and time. |
|
Advanced |
Configure APCB, trusted computing, PSP firmware, AMD CBS, serial port console redirection, PCI subsystem, NVMe, network stack, CPU, and disk freeze lock. |
|
IO |
Configure internal I/O devices, add-in cards, and PCIe connectors. |
|
Security |
Configure secure boot. |
|
Boot |
Configure the retry boot list, network boot retry, persistent boot support, and boot option priorities. |
|
Save & Exit |
Save changes and exit, discard changes and exit, discard changes, or restore the default BIOS settings. |
Parent topic: Accessing the BIOS Setup Utility
BIOS Key Mappings
When viewing the BIOS output from a terminal using the serial console redirection feature, some terminals do not support function keys. BIOS supports the mapping of function keys to Control key sequences when serial redirection is enabled. The following table provides a description of the function key to Control key sequence mappings.
| Function Key | Control Key Sequence | BIOS Setup Function |
|---|---|---|
|
F1 |
Ctrl+Q |
Activate the Setup Utility Help menu. |
|
F2 |
Ctrl+E |
Enter BIOS Setup Utility while the system is performing power-on self-test (POST). |
|
F8 |
Ctrl+P |
Activate the BIOS Boot Menu. |
|
F10 |
Ctrl+S |
Save and Exit changes. |
|
F12 |
Ctrl+N |
Activate Network boot. |
Parent topic: Accessing the BIOS Setup Utility
Access BIOS Setup Utility Menus
You can access the BIOS Setup Utility screens from the following interfaces:
-
Use a terminal (or terminal emulator connected to a computer) through the serial port on the back panel of the server.
-
Connect to the server using the Oracle ILOM Remote System Console Plus application.
Parent topic: Accessing the BIOS Setup Utility
Using UEFI BIOS
The Oracle server has a Unified Extensible Firmware Interface (UEFI)-compatible BIOS, which runs with all operating systems that are supported on the server. The BIOS firmware controls the system from power-on until an operating system is booted and allows you to configure, enable, disable, or manage system components.
- Configuration Utilities for Add-In Cards
- Configure and Manage BIOS Using Oracle ILOM
- UEFI Secure Boot
Parent topic: Server Basic Input/Output System (BIOS)
Configuration Utilities for Add-In Cards
In UEFI BIOS, the configuration screens for the add-in cards appear as menu items in the BIOS Advanced Menu as part of the standard BIOS Setup Utility screens. For example, if the Oracle Storage 12 Gb SAS PCIe RAID HBA, Internal card is installed in the server, the configuration utility for the HBA appears as a menu selection.
Parent topic: Using UEFI BIOS
Configure and Manage BIOS Using Oracle ILOM
Oracle Integrated Lights Out Manager (ILOM) includes BIOS configuration and management tools. You can perform the following BIOS configuration tasks using Oracle ILOM:
-
View the BIOS configuration synchronization status and synchronize the configuration parameters
-
Reset the factory defaults for the service processor (SP) and Oracle ILOM BIOS
-
Back up or restore the BIOS configuration
-
Enable UEFI diagnostics to run at system boot
Parent topic: Using UEFI BIOS
UEFI Secure Boot
The Oracle server UEFI BIOS supports UEFI Secure Boot. UEFI Secure Boot defines how platform firmware can authenticate a digitally signed UEFI image, such as an operating system loader or a UEFI driver.
When enabled, UEFI Secure Boot provides a policy-based invocation of various UEFI executable images, using cryptographic signatures to identify the software publishers. UEFI Secure Boot also requires all third-party UEFI drivers and operating system boot loaders to be signed by Microsoft or with Key Exchange Key (KEK) by using BIOS setup.
UEFI Secure Boot is enabled by default.
Parent topic: Using UEFI BIOS
