Creating a Rack
A rack target serves as a container for other hardware targets that are managed by Enterprise Controller. To create a rack, perform the following steps:
-
Log in to Enterprise Manager.
-
Under Setup, click Add Target, then click Add Targets Manually.
-
In the Overview section, click Add Targets using Guided Process.
-
In the Add Using Guided Process screen, scroll down to Systems Infrastructure Rack, then click Add.
-
In the Systems Infrastructure Rack Discovery screen, enter the required information.
-
In the Target Name field, enter a name for the rack.
-
In the Type field, select the type of rack and additional information if required.
-
(Optional) You can also set additional information, such as Location, in the Global Properties section.
-
-
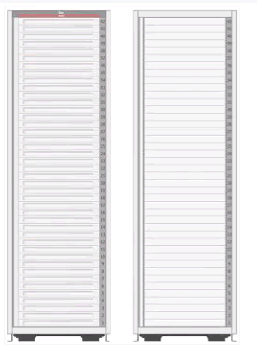
Click Add in the top right corner of the screen. Once the job is successfully run, an empty rack is created. You can now navigate to the rack landing screen and add hardware targets to the rack. The following figure is an image of an empty rack.
Creating a Rack Using Command Line Interface
You can create a rack using the command line interface.
Perform the following steps to create a rack using CLI:
-
Open the command line interface on the host where OMS is running.
-
Log in to emcli using the following command: emcli login –username=<your user name>
-
Type the password when prompted.
-
Execute
emcli sync. -
Add a new rack using the following command:
emcli add_target \-name="Name of your Rack" \-type=oracle_si_rack \-subseparator=properties='=' \-separator=properties=';' \-properties='EngineeredSystemId=SomeID;RackType=SomeType;RackSubtype=SomeSubtype;TotalSlots=42' -
Set the following in the
emcli add_targetcommand:-
Replace Name of your Rack with name of your Rack
-
Set values for properties
-
Properties of Rack
Rack has four properties, namely, EngineeredSystemId, RackType, RackSubtype, and TotalSlots. See Table 36-2 for description of the properties.
Table 36-2 Properties Description
| Property | Description | Allowed Values | Mandatory | Note |
|---|---|---|---|---|
|
EngineeredSystemId |
Unique identifier of an Engineered System |
Arbitrary string |
No |
Does not have to be provided if Rack is standalone not belonging to some Engineered System |
|
RackType |
Rack Type (Generic 42U Cabinet or well-known type e.g. Oracle Exalogic, SPARC SuperCluster, or Oracle Database Appliance) |
|
Yes |
Provide GENERIC if Rack is standalone not belonging to some Engineered System |
|
RackSubtype |
Optional specification of the RackType size according to Rack Type. For example, Full, Quarter etc. This property is applicable only for Engineered Systems racks. |
|
No |
NA |
|
TotalSlots |
Total count of slots in the rack. |
42 |
Yes |
Rack with 42 slots only is supported. |
Following is a sample command to create a generic rack:
emcli add_target \
-name="Name of your Rack" \
-type=oracle_si_rack \
-subseparator=properties='=' \
-separator=properties=';' \
-properties=RackType=GENERIC;TotalSlots=42'
