Registering the Oracle Linux Virtualization Manager
To register the OLV Manager, follow these steps:
-
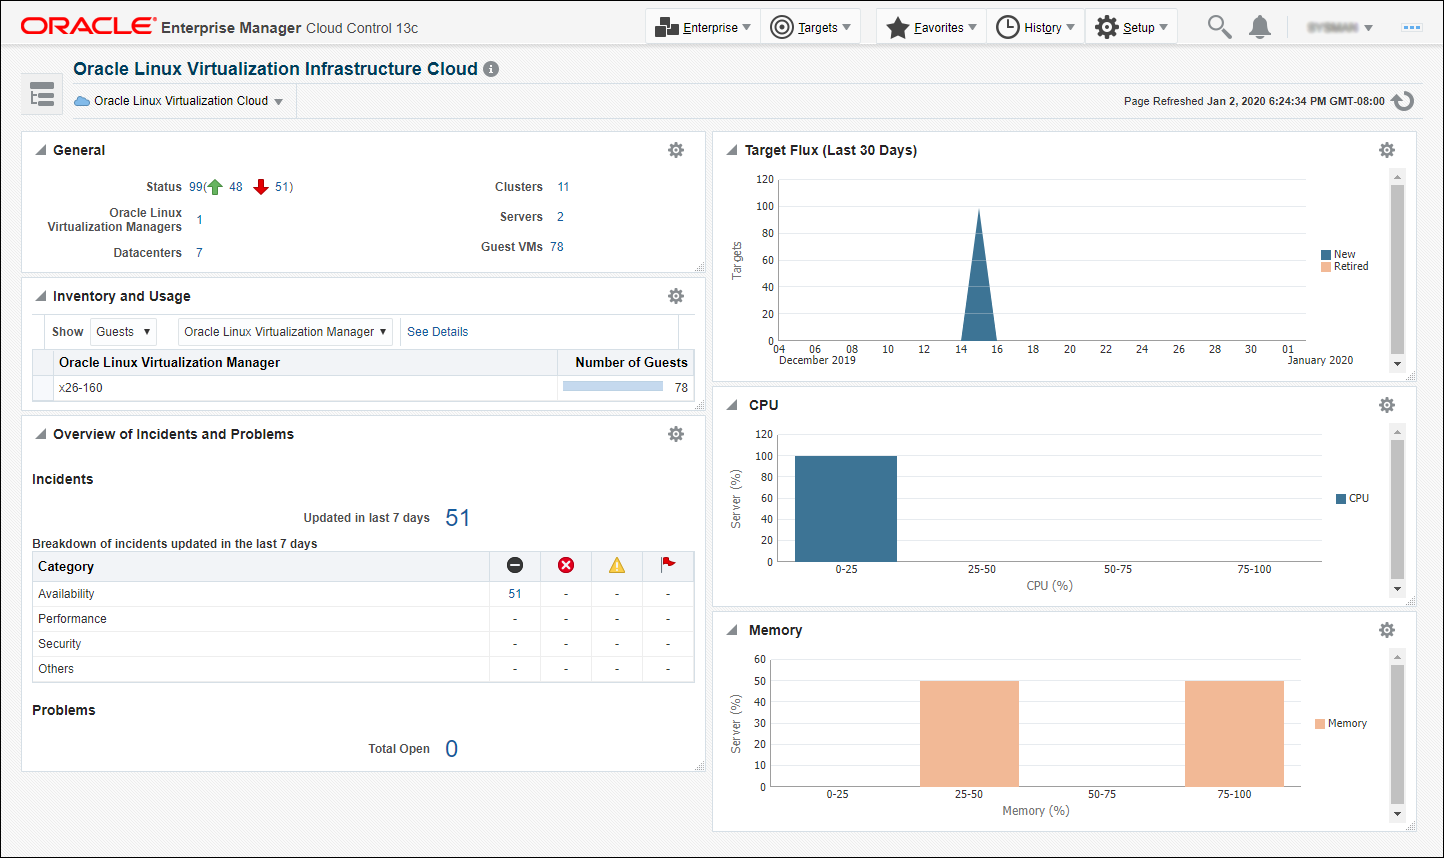
From the Enterprise menu, select Cloud, then select Oracle Linux Virtualization Infrastructure Home. The Oracle Linux Virtualization Infrastructure home page displays.
Figure 6-1 Oracle Linux Virtualization Home Page

-
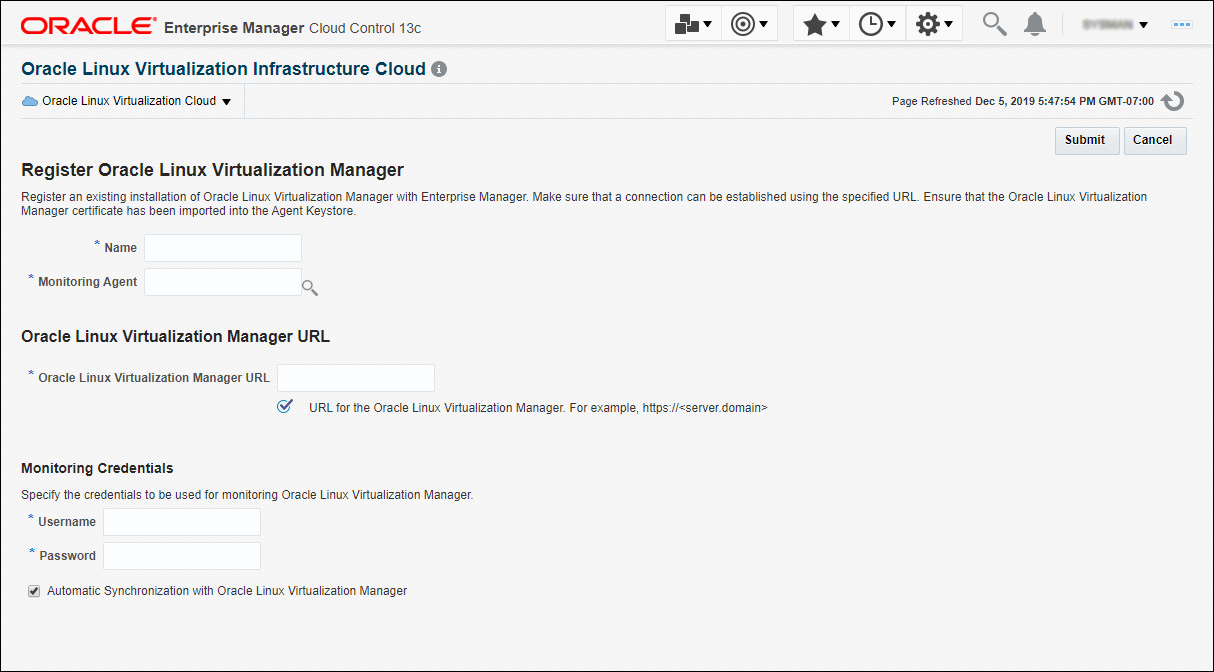
From the Oracle Linux Virtualization Infrastructure Cloud menu, select Register Oracle Linux Virtualization Manager. The Register Oracle Linux Virtualization Manager page appears.

-
Enter a unique target name for the Oracle Linux Virtualization Manager instance to be registered.
-
Select the Management Agent to monitor and manage the Oracle Linux Virtualization Manager instance to be registered. It is recommended that the Management Agent (with Enterprise Manager for Oracle Virtualization plug-in (listed as Oracle Virtualization in Self Update) is present on the same machine where the Oracle Linux Virtualization Manager instance is running.
-
Enter the Oracle Linux Virtualization Manager URL. For example:
https://olvmgr.example.com - Enter the credentials (Username (using the format username@profile) and Password) used to monitor the Oracle Linux Virtualization Manager.
-
By default, data from the Oracle Linux Virtualization Manager is automatically synchronized with Enterprise Manager at fixed intervals of time. If you do not wish to enable this option, you must disable the Automatic Synchronization with Oracle Linux Virtualization Manager checkbox and manually synchronize the data.
-
Click Submit to register the Oracle Linux Virtualization Manager. Once the registration job has completed, you can now use the Oracle Linux Virtualization Manager to monitor and manage the virtualization targets in Enterprise Manager.