5 Startup
- Powering on the Acme Packet 4600
- Creating the first console connection to the Acme Packet 4600
The last section of this chapter explains how to login to your system.
Creating a Console Connection
This section explains how to create a console connection.
Prerequisites
In order to create a console connection to the Acme Packet 4600, you must configure the terminal hardware and software appropriately.
| Serial Connection Parameter | Setting |
|---|---|
| Baud Rate | 115,200 bps |
| Date Bits | 8 |
| Parity | No |
| Stop Bit | 1 |
| Flow Control | None |
Your terminal application and serial port MUST be capable of operating at 115.2 Kbps for creating a console session.
Creating a Console Connection
- Set the terminal application’s parameters to match the Acme Packet 4600 default parameters.
- The Acme Packet 4600 console port is located on the Acme Packet 4600 NIU. You must connect to the console port when initially booting the Acme Packet 4600 .
- If the Acme Packet 4600 is already powered on, press the Enter key a few times to activate the console connection. When ACLI text is displayed on the screen, the console connection has been successfully created.
- If you have created the console connection before powering up the Acme Packet 4600, you can watch the boot process as it displays on your screen.
Powering On the Acme Packet 4600 System
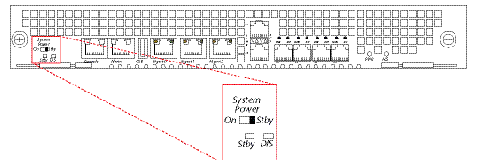
This section explains how to power on your Acme Packet 4600 System.
Prerequisites
The following procedure presumes that you know how to connect your Acme Packet 4600 to either AC or DC power.
Critical Setup Steps for Acme Packet Platforms
For any Acme Packet platform with Digital Signal Processors (DSPs), you must set up specific configurations in a timely manner after power on because failure to do so can lead to a system crash.
- S-Cz8.4.0 and all patches
- S-Cz9.0.0 and all patches
- S-Cz9.1.0 and all patches
- S-Cz9.2.0 to S-Cz9.2.0p9
- S-Cz9.3.0 to S-Cz9.3.0p4
Complete the following steps promptly after platform power on:
- Configure bootparam. Bootparam changes are optional, so the hardware can boot without making a change.
- Set system passwords.
- Set up product.
- Set up entitlements.
Note:
If a system crash occurs, initiate recovery by typing reboot at the shell prompt, or by power cycling the system.
Initial Log On
User Access Verification
Password:
If the Acme Packet 4600 completed booting before you connected to the console port, press the Enter key on the console keyboard a few times to activate the console connection.
If you have any questions about booting or powering on your system, please contact customer support.
