16 Building Your Own Images
Learn how to build your own images of the Oracle Communications Billing and Revenue Management (BRM), Elastic Charging Engine (ECE), Pipeline Configuration Center, Pricing Design Center (PDC), Billing Care, and Business Operations Center applications.
The Podman build commands in this chapter reference Dockerfile and related scripts as is from the oc-cn-docker-files-16.26.0.x.x.tgz package. Ensure you use your own version of Dockerfile and related scripts before running the build command.
Topics in this document:
Sample Dockerfiles included in the BRM cloud native deployment package (oc-cn-docker-files-16.26.0.x.x.tgz) are examples that depict how default images are built for BRM. If you want to build your own images, refer to the sample Dockerfiles shipped with the product as a reference. Create your own Dockerfiles and then build your images.
Caution:
The Dockerfiles and related scripts are provided for reference only. You can refer to them to build or extend your own images. Support is restricted to core product issues only and no support will be provided for custom Dockerfiles and scripts.
Building BRM Server Images
To build images for BRM Server, your staging area ($PIN_HOME) must be available from where the images are built. After you unpack oc-cn-docker-files-16.26.0.x.x.tgz, the BRM Server directory structure will be oc-cn-docker-files/ocbrm.
Note:
If you are using Podman to build your images, pass the --format docker flag with the podman build command.
Building your own BRM Server images involves these high-level steps:
-
You build the BRM Server base image. See "Building Your BRM Server Base Image".
-
You build images for each BRM Server component. See "Building Images of BRM Server Components".
-
You build the Web Services Manager image. See "Building Web Services Manager Images".
-
You build the BRM REST Services Manager image. See "Building BRM REST Services Manager Images".
-
You containerize the Email Data Manager. See "Containerization of Email Data Manager".
-
You containerize the roaming pipeline. See "Containerization of Roaming Pipeline".
-
You build and deploy Vertex Manager. See "Building and Deploying Vertex Manager".
Building Your BRM Server Base Image
To make your directory structure ready for building base images:
-
Edit the $PIN_HOME/bin/orapki binary to replace the staging Java path with ${JAVA_HOME}.
-
Create the $PIN_HOME/installer directory.
-
If you're behind a proxy server, set the $PROXY variable:
export PROXY=ProxyHost:Port
-
Download the Java binary and then copy it to $PIN_HOME. See "BRM Software Compatibility" for the latest supported version of Java.
-
Download the Perl binary and then copy it to $PIN_HOME. See "BRM Software Compatibility" for the latest supported version of Perl.
-
For your database client:
-
Copy oracle_client_response_file.rsp (64 bit), downloadOracleClient.sh, and waitForOracleClientInst.sh from oc-cn-docker-files/ocbrm/base_images to $PIN_HOME.
-
Modify these parameters in the downloadOracleClient.sh file:
-
ORACLE_CLIENT_ZIP: Enter the binary name.
-
REPOSITORY_URL: Enter the location to fetch the database client binary.
-
-
If the db_client binary is already downloaded, copy the binary to the $PIN_HOME/installer directory.
-
After preparing your directory structure, build your BRM Server base image:
-
For database client 12CR2 (64 Bit) + Java + Perl, enter this command:
podman build --format docker --build-arg PROXY=$PROXY --tag db_client_and_java_perl:16.26.0.x.x --file DockerFileLocation/Dockerfile_db_client_and_java_perl .
-
For database client 12CR2 (64 Bit) + Java, enter this command:
podman build --format docker --build-arg PROXY=$PROXY --tag db_client_and_java:16.26.0.x.x --file DockerFileLocation/Dockerfile_db_client_and_java .
-
For Java, enter this command:
podman build --format docker --build-arg PROXY=$PROXY --tag java:16.26.0.x.x --file DockerFileLocation/Dockerfile_java .
-
For Java + Perl, enter this command:
podman build --format docker --build-arg PROXY=$PROXY --tag java_perl:16.26.0.x.x --file DockerFileLocation/Dockerfile_java_perl .
Note:
If you use an existing BRM database with custom-built images, set ocbrm.use_oracle_brm_images to false.
Do not include populated wallets, private keys, sample CA certificates, or default credentials in your custom images or image-build context. Configure TLS wallet material when you deploy BRM. See "Managing Wallet and KeyStore Certificates" for more information.
Building Images of BRM Server Components
The oc-cn-docker-files-16.26.0.x.x.tgz package includes references to all of the Dockerfiles and scripts needed to build images of BRM Server components (except for oraclelinux:8).
To build an image of a BRM Server component:
-
Copy these scripts from the oc-cn-docker-files/ocbrm directory to your staging area at $PIN_HOME:
-
entrypoint.sh
-
cm/preStopHook.sh_cm
-
cm/postStartHook.sh
-
cm/updatePassword.sh
-
eai_js/preStopHook.sh_eai
-
-
Do one of the following:
-
For the batch pipeline, roaming pipeline, and real-time pipeline, copy entrypoint.sh to $PIN_HOME/.., and copy $PIN_HOME/../setup/BRMActions.jar to the $PIN_HOME/jars directory.
-
For all other components, copy the $PIN_HOME/../setup/BRMActions.jar file to $PIN_HOME.
Note:
Do not include populated wallets, private keys, sample CA certificates, or default credentials in your custom images or image-build context. Provide TLS wallet material separately when you deploy BRM.
-
-
Set these environment variables:
-
$PIN_HOME: Set this to your staging area.
-
$PERL_HOME: Set this to the path to Perl. See "BRM Software Compatibility" for the latest supported version of Perl.
-
$JAVA_HOME: Set this to the Java path. See "BRM Software Compatibility" for the latest supported version of Java.
-
-
Build the image for your BRM component.
For example, to build a CM image, enter:
podman build --format docker --tag cm:16.26.0.x.x --build-arg STAGE_PIN_HOME=$PIN_HOME --build-arg STAGE_JAVA_HOME=$JAVA_HOME --build-arg STAGE_PERL_HOME=$PERL_HOME --file DockerfileLocation/Dockerfile .
To build a roaming pipeline image, enter:
podman build --format docker --tag roam_pipeline:$BRM_VERSION --build-arg STAGE_PERL_HOME=StagePerlPath .where StagePerlPath is the path to the Perl files in your staging area at $PIN_HOME.
To build a dm-oracle image, enter:
podman build --format docker --force-rm=true --no-cache=true --tag dm_oracle:16.26.0.x.x --file DockerfileLocation/Dockerfile .
where DockerfileLocation is the path to the Dockerfiles for your BRM component.
Note:
Build batch and realtime pipeline images from the $PIN_HOME/.. directories.
Building Web Services Manager Images
To containerize images for Web Services Manager, your staging area ($PIN_HOME) must be available from where the Docker images are built.
To build and deploy the Web Services Manager image:
-
Copy these files from the oc-cn-docker-files directory to your staging area at $PIN_HOME:
-
brm_wsm_entrypoint.sh
-
Dockerfile
-
mkstore (oc-cn-docker-files/base_images)
-
-
Build the Web Services Manager image by entering this command:
podman build --format docker --tag brm_wsm:$BRM_VERSION . -
Configure your Web services by updating the configmap_brm_wsm_props.yaml file.
-
In your override-values.yaml file for oc-cn-helm-chart, set the ocbrm.wsm.soap.isEnabled key to true.
-
Deploy the BRM Helm chart:
helm install ReleaseName oc-cn-helm-chart --namespace NameSpace --values OverrideValuesFile
where:
-
ReleaseName is the release name, which is used to track this installation instance.
-
NameSpace is the namespace in which to create BRM Kubernetes objects.
-
OverrideValuesFile is the path to the YAML file that overrides the default configurations in the BRM Helm chart's values.yaml file.
-
Containerization of Email Data Manager
The Email Data Manager (DM) enables you to send customer notifications and invoices to your customers through email automatically. The Email DM uses the Sendmail client to forward emails to Postfix, which is the SMTP server. In-turn, Postfix sends the emails to your customers.
The Email DM will have the Sendmail client, and the Kubernetes host will have Postfix running. You must install and configure Postfix on your Kubernetes host.
To configure your cm pod to point to the Email DM, add this key to the oc-cn-helm-chart/values.yaml file:
ocbrm.dm_email.deployment.smtp: EmailHostNamewhere EmailHostName is the hostname of the server on which the Email DM is deployed. For example: em389.us.example.com.
To configure the Kubernetes host or SMTP server to accept data from the Email DM, do this:
-
Log in as the root user to the Kubernetes host.
-
Add the IP address for the Kubernetes host to the /etc/postfix/main.cf file:
inet_interfaces=localhost, HostIPAddress
For example, if the Kubernetes host is 10.242.155.149.
inet_interfaces=localhost, 10.242.155.149
-
Retrieve the container network configuration by running this command on the Kubernetes host:
/sbin/ifconfig cni0 | grep netmask | awk '{print$2"\n"$4}'The output will be similar to this:
10.244.0.1 ← The Kubernetes host IP, which is in the container network.
255.255.255.0
-
Edit the mynetworks field in the /etc/postfix/main.cf file to include the Kubernetes network in the list of trusted SMTP clients. If the Kubernetes host IP and Email DM container IP are in different networks, add both networks to the mynetworks field:
mynetworks = TrustedNetworks
where TrustedNetworks is the IP addresses for the SMTP clients that are allowed to relay mail through Postfix.
For example:
mynetworks = 168.100.189.0/28, 127.0.0.0/8, 10.244.0.0/24
-
Do one of these:
-
If Postfix is already running in the host, run this command:
systemctl restart postfix.service -
If Postfix isn't running in the host, run this command:
systemctl start postfix.service
-
Note:
In case of a multi-node environment, you can configure Postfix on the primary node (or any one node).
Containerization of Roaming Pipeline
Note:
Do not run multiple replicas of the roampipe pod against the same file system. It is a single-replica pod. To provide high availability with multiple roampipe pods, deploy the pods separately without sharing the same file system, and route incoming CDR files so that each pod processes a separate set of files.
Roaming allows a wireless network operator to provide services to mobile customers from another wireless network. For example, when a mobile customer makes a phone call from outside the home network, roaming allows the customer to access the same wireless services that he has with his home network provider through a visited wireless network operator.
You feed the input files for the roaming pipeline through a Kubernetes PersistentVolumeClaim (PVC). The EDR output files will be available in a PVC for consumption of the rel-daemon pod. When building the roaming pipeline image, pass the Perl path in these files as part of build-arg.
To containerize the roaming pipeline, update the configmap_infranet_properties_rel_daemon.yaml file to specify how to load your rated CDR output files. For example:
batch.random.events TEL, ROAM
ROAM.max.at.highload.time 4
ROAM.max.at.lowload.time  2
ROAM.file.location /oms/ifw/data/roamout
ROAM.file.pattern test*.out
ROAM.file.type STANDARD
Note:
The input file to the splitter pipeline must start with Roam_.
Building and Deploying Vertex Manager
To deploy Vertex Manager (dm-vertex), you layer the dm-vertex image with the libraries for Vertex Communications Tax Q Series (CTQ) or Vertex Sales Tax Q Series (STQ). For the list of supported library versions, see BRM Compatibility Matrix.
Deploying with Vertex Communications Tax Q Series
You deploy Vertex Manager with Vertex CTQ by doing the following:
-
Building the new Vertex Manager image by layering it with Vertex CTQ libraries.
-
Copy the entire Vertex CTQ installation directory to the $PIN_HOME directory, where $PIN_HOME is set to the path of your staging area.
-
Update the paths in the 64bit/bin/ctqcfg.xml, 64bit/cfg/ctqcfg.xml, and other Vertex CTQ files present in the Vertex CTQ installation directory. For example:
<configuration name="CTQ Test">
<fileControl>
  <updatePath>/oms/vertex/64bit/dat</updatePath>
  <archivePath>/oms/vertex/64bit/dat</archivePath>
  <callFilePath>/oms/vertex/64bit/dat</callFilePath>
  <reportPath>/oms/vertex/64bit/rpt</reportPath>
  <logPath>/oms/vertex/64bit/log</logPath>
</fileControl>
-
In your copied Vertex CTQ installation directory, update the 64bit/bin/odbc/odbc.ini file. For example:
Note:
Set the Driver and TNSNamesFile entries to the file system path inside the pod.
[CtqTestOracle]
Description=Vertex, Inc. 8.0 Oracle Wire Protocol
Driver=/oms/vertex/64bit/bin/odbc/lib/VXor827.so
…
HostName=DBhostname
LogonID=DBuser
PortNumber=1521
Password=DBpassword
ServerName=//IPaddress:1521/DBalias
SID=DBalias
TNSNamesFile=/oms/ora_k8/tnsnames.ora
where:
-
DBhostname is the host name of the machine on which the Vertex tax calculation database is installed.
-
DBuser is the Vertex database schema user name.
-
DBpassword is the password for the Vertex database schema user.
-
IPaddress is the IP address of the machine on which the Vertex tax calculation database is installed.
-
DBalias is the Vertex database alias name, which is defined in your tnsnames.ora file.
-
-
Layer the default images provided by Oracle.
For example, to layer dm-vertex with Vertex CTQ, you could add these sample commands to its Dockerfile. In this example, $PIN_HOME is set to /oms inside the pod.
FROM dm_vertex:16.26.0.x.x

USER root
RUN mkdir -p /oms/vertex/64bit/cfg
RUN chown -R omsuser:root /oms/vertex/64bit/cfg
COPY ./Vertex_CTQ_30206/ /oms/vertex
COPY Vertex_CTQ_30206/64bit/lib/libctq.so /oms/lib/
COPY Vertex_CTQ_30206/64bit/bin/odbc/lib/libodbc.so /oms/lib/libodbc.so

RUN chown -R omsuser:root /oms/vertex
RUN chown -R omsuser:root /oms/lib/libctq.so
RUN chown -R omsuser:root /oms/lib/libodbc.so
USER omsuser
-
Build your new Vertex Manager image. For example:
podman build --format docker --tag dm_vertex_ctq:16.26.0.x.x --file Dockerfile_vertex_ctq .
-
-
Enabling and configuring Vertex Manager in your BRM cloud native deployment.
-
Set these environment variables in your oc-cn-helm-chart/templates/dm_vertex.yaml file:
- name: LD_LIBRARY_PATH
  value: "/oms/vertex/64bit/bin/odbc:/oms/lib:/oms/sys/dm_vertex:/oms/vertex/64bit/lib"
- name: CTQ_CFG_HOME
  value: "/oms/vertex/64bit/bin"
- name: ODBCINI
  value: "/oms/vertex/64bit/bin/odbc/odbc.ini"
-
Uncomment these entries in your oc-cn-helm-chart/templates/configmap_pin_conf_dm_vertex.yaml file:
- dm_vertex commtax_sm_obj ${DM_VERTEX_CTQ_SM} - dm_vertex commtax_config_name ${DM_VERTEX_CTQ_CFG_NAME} - dm_vertex commtax_config_path ${DM_VERTEX_CTQ_CFG_PATH} -
Update these key in your override-values.yaml file for oc-cn-helm-chart:
dm_vertex: isEnabled: true deployment: replicaCount: 1 imageName: dm_vertex_ctq imageTag: 16.26.0.x.x quantum_db_password: Base64EncodedPassword ctqCfg: /oms/vertex/64bit/cfg ctqCfgName: CTQ Test ctqSmObj: ./dm_vertex_ctq30206.so -
Run the helm upgrade command to update your BRM Helm release:
helm upgrade BrmReleaseName oc-cn-helm-chart --values OverrideValuesFile --namespace BrmNameSpace
where:
-
BrmReleaseName is the release name for oc-cn-helm-chart and is used to track this installation instance.
-
BrmNameSpace is the namespace in which to create BRM Kubernetes objects for the BRM Helm chart.
-
OverrideValuesFile is the path to a YAML file that overrides the default configurations in the values.yaml file for oc-cn-helm-chart.
-
-
Deploying with Vertex Sales Tax Q Series
You deploy Vertex Manager with Vertex STQ by doing the following:
-
Copying the required libraries from the Vertex STQ installation directory to your $PIN_HOME/req_libs directory.
-
Layer the default images provided by Oracle. For example, to layer dm-vertex with Vertex STQ, you could add these sample commands to its Dockerfile:
FROM dm_vertex:16.26.0.x.x

USER root
COPY ["req_libs/libvst*.so", "req_libs/libqutil*.so", "req_libs/libloc*.so", "/oms/lib/"]
RUN chown omsuser:root -R /oms/lib/ /lib64
USER omsuser
-
Build your new Vertex Manager image. For example:
podman build --format docker --tag dm_vertex_stq:16.26.0.x.x --file Dockerfile_vertex_stq .
-
Update these key in your override-values.yaml file for oc-cn-helm-chart:
dm_vertex: isEnabled: true deployment: replicaCount: 1 imageName: dm_vertex imageTag: 16.26.0.x.x quantum_db_password: Base64EncodedPassword -
Update these entries in your oc-cn-helm-chart/templates/configmap_env_dm_vertex.yaml file:
SERVICE_FQDN: dm-vertex
QUANTUM_DB_SOURCE: quantum
QUANTUM_DB_SERVER: qsu122a
QUANTUM_DB_USER: quantum
-
Update these entries in your oc-cn-helm-chart/templates/configmap_odbc_ini_dm_vertex.yaml file:
data:
  odbc.ini: |
    [ODBC Data Sources]
    Server = Oracle Server v12.2
    [Server]
    Description = Oracle Server v12.2
    Driver = /usr/lib/oracle/19.20/client64/lib/libsqora.so.19.1
    Servername = PINDB
    UserID = DBuser
    Password = DBpassword
    Port = 1521
    Trace = yes
    TraceFile = /oms_logs/odbc.log
    Database = //DBhostname:DBport
where:
-
Server is the name of the server on which the Vertex database is installed.
-
DBuser is the Vertex database schema user name.
-
DBpassword is the password for the Vertex database schema user.
-
DBhostname is the host name of the machine on which the Vertex tax calculation database is installed.
-
DBport is the port number of the Vertex tax calculation database.
-
-
Set these entries in your oc-cn-helm-chart/templates/configmap_pin_conf_dm_vertex.yaml file:
- dm_vertex quantum_sm_obj ./dm_vertex_stq111.so - dm_vertex quantumdb_source ${QUANTUM_DB_SOURCE} - dm_vertex quantumdb_server ${QUANTUM_DB_SERVER} - dm_vertex quantumdb_user ${QUANTUM_DB_USER} -
Run the helm upgrade command to update the BRM Helm release:
helm upgrade BrmReleaseName oc-cn-helm-chart --values OverrideValuesFile --namespace BrmNameSpace
where:
-
BrmReleaseName is the release name for oc-cn-helm-chart and is used to track this installation instance.
-
BrmNameSpace is the namespace in which to create BRM Kubernetes objects for the BRM Helm chart.
-
OverrideValuesFile is the path to a YAML file that overrides the default configurations in the values.yaml file for oc-cn-helm-chart.
-
Building BRM REST Services Manager Images
In a production deployment, containers for BRM REST Services Manager will run in their own pods on a Kubernetes node. Figure 16-1 shows how to stack images for BRM REST Services Manager.
Figure 16-1 Image Stack for BRM REST Services Manager
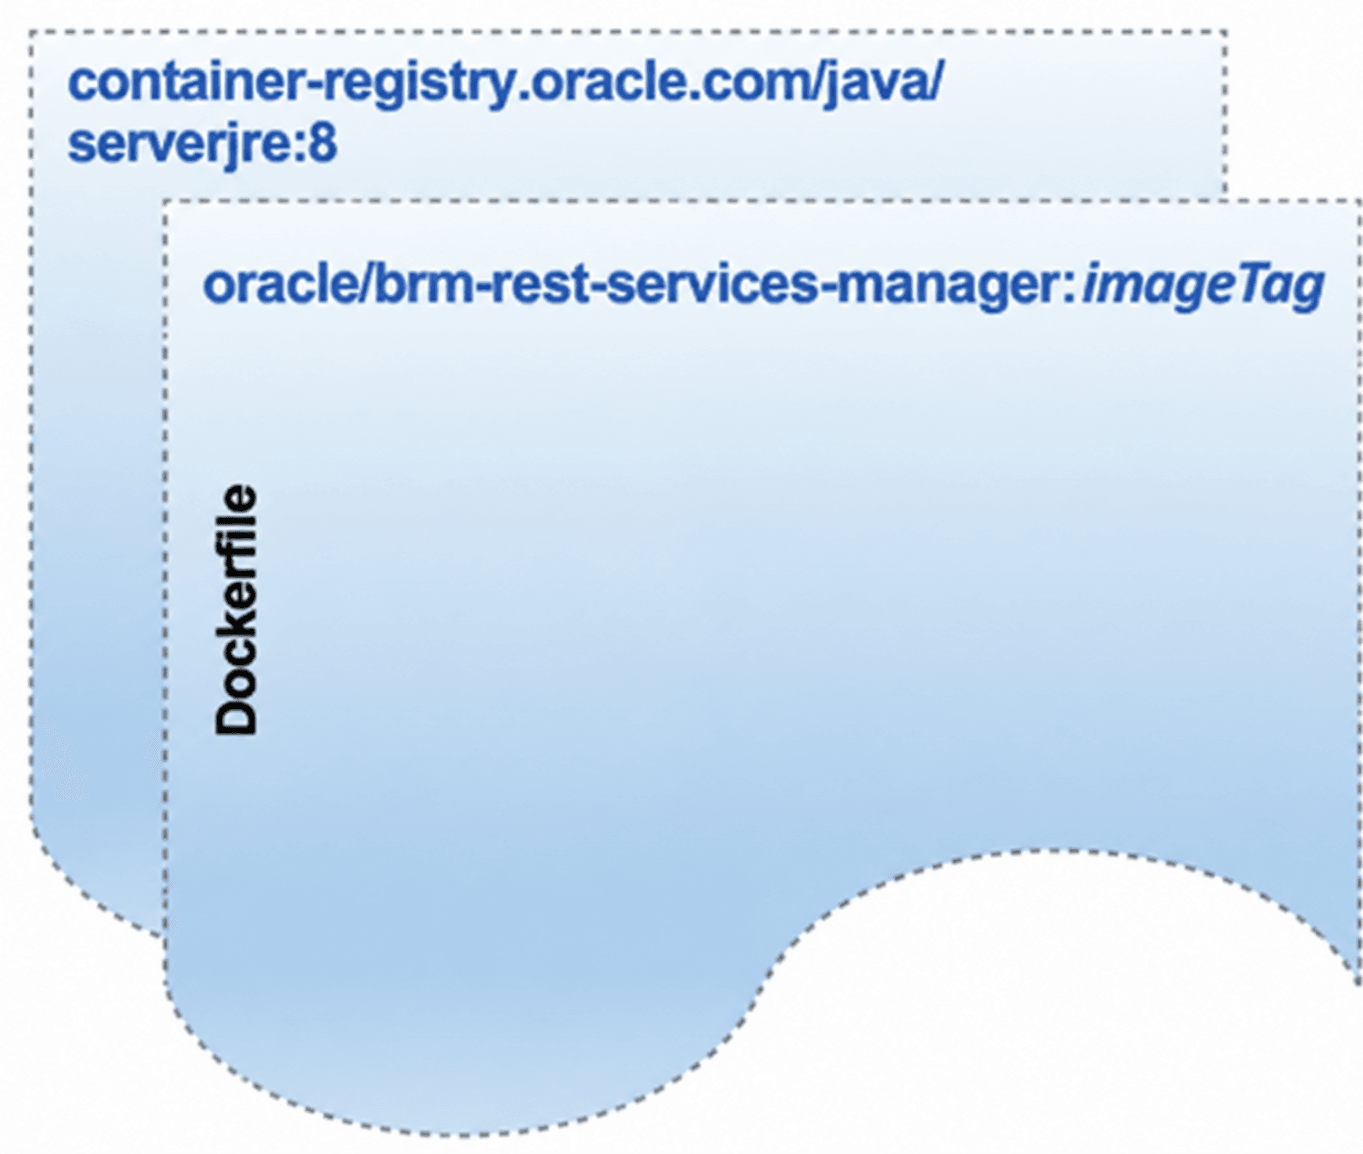
In this figure:
-
container-registry.oracle.com/java/serverjre:8: The base image on which BRM REST Services Manager will be deployed. The official image is available at https://container-registry.oracle.com/.
-
oracle/brm-rest-services-manager:16.26.0.x.x: The sample Dockerfile and related scripts used for creating the BRM REST Services Manager image (oracle/brm-rest-services-manager:16.26.0.x.x).
The oc-cn-docker-files/ocrsm/brm_rest_services_manager directory in the oc-cn-docker-files-16.26.0.x.x.tgz package contains a Dockerfile, container scripts, and an API JAR file.
You can load or build the BRM REST Services Manager image in the following ways:
-
The oc-cn-brm-rest-services-manager-16.26.0.x.x.tar image is included in the package. Apply the image in your machine by running this command:
podman load < oc-cn-brm-rest-services-manager-16.26.0.x.x.tar
-
If the image needs customization, modify the Dockerfile and then deploy it using this command:
podman build --format docker --tag oracle/brm-rest-services-manager:16.26.0.x.x .
Building PDC REST Services Manager Images
In a production deployment, containers for PDC REST Services Manager will run in their own pods on a Kubernetes node. You create PDC REST Services Manager images by stacking these Dockerfiles in the following order:
-
container-registry.oracle.com/java/serverjre:8: The base image on which PDC REST Services Manager will be deployed. The official image is available at https://container-registry.oracle.com/.
-
oracle/pdcrsm:16.26.0.x.x.x: The sample Dockerfile and related scripts used for creating the PDC REST Services Manager image (oracle/pdcrsm:16.26.0.x.x.x).
To build PDC REST Services Manager images:
-
Copy the Dockerfile and the oc-cn-pdc-rsm-jars-16.26.0.x.x.x file into the current working directory.
-
Run the following commands:
tar xvf oc-cn-pdc-rsm-jars-16.26.0.x.x.x.tar
podman build --format docker --tag oracle/pdcrsm:16.26.0.x.x.x .
Building PDC Images
To build the PDC image:
-
Download PricingDesignCenter-16.26.0.x.x.x.zip to the ParentFolder/Docker_files/PDCImage/other-files directory.
-
Pull the Java Image from the Oracle Container Registry (https://container-registry.oracle.com). This image is regularly updated with the latest security fixes. You can pull this image to your local system, where you will build other images, with the name container-registry.oracle.com/java/serverjre:JavaVersion.
where JavaVersion is the Oracle Java version number. See BRM Compatibility Matrix for supported versions.
-
Set the following environment variables:
-
HTTP_PROXY: Set this to the host name or IP address of your proxy server
-
JAVA_VERSION: Set this to container-registry.oracle.com/java/serverjre:JavaVersion
-
BRM_VERSION: Set this to 16.26.0.x.x.x
-
-
Build your Oracle PDC BRM integration image by entering this command from the ParentFolder/Docker_files/PDCImage directory:
podman build --format docker --force-rm=true --no-cache=true --build-arg HTTP_PROXY=$HTTP_PROXY --build-arg JAVA_VERSION=$JAVA_VERSION --tag $IMAGE_NAME --file Dockerfile . -
(Optional) To use custom fields in your PDC RUM expressions:
-
Create a custom_flds.h file that contains your custom fields.
For information about the syntax to use in a header file, view the BRM_home/include/pin_flds.h file in the brm-sdk pod.
-
Parse the custom_flds.h file and generate a custom_flds.bat file.
-
Layer the BRM_home/lib/custom_flds.bat file in the following images: brm-apps, pdc, and cm.
For example, to layer the file in the pdc image:
FROM pdc:16.26.0.x.x.x

USER root
COPY custom_flds.bat ${PIN_HOME}/lib/custom_flds.bat
RUN chown=oracle:root ${PIN_HOME}/lib/custom_flds.bat
-
In your brm-apps-2 ConfigMap (configmap_pin_conf_brm_apps_2.yaml), add the following entry under the load_config.conf section:
load_config.conf: |
# Making custom fields entry
   - - ops_fields_extension_file ${PIN_HOME}/lib/custom_flds.h
-
In your CM ConfigMap (configmap_pin_conf_cm.yaml), add the following entry under the pin.conf section:
data:
   pin.conf:
   # Making custom fields entry
   - - ops_fields_extension_file ${PIN_HOME}/lib/custom_flds.h
-
In your testnap ConfigMap (configmap_pin_conf_testnap), add the following entry under the pin.conf section:
data:
   pin.conf:  |
   # Making custom fields entry
   - - ops_fields_extension_file ${PIN_HOME}/lib/custom_flds.h
-
In your override-values.yaml file for oc-cn-helm-chart, update the imageTag keys to point to the new cm, brm-apps and pdc images.
Note:
Skip this step if your override-values.yaml file does not already contain imageTag keys for the cm, brm-apps, and pdc images.
-
Run the helm upgrade command to update your Helm release:
helm upgrade BrmReleaseName oc-cn-helm-chart --values OverrideValuesFile --namespace BrmNameSpace
-
Building Pipeline Configuration Center Images
The Pipeline Configuration Center image extends the Fusion Middleware Infrastructure image by packaging its own installer PipelineConfigurationCenter_16.26.0.x.x.x_generic.jar file along with scripts and configurations.
To build your own image of Pipeline Configuration Center, you must have these base images ready. The oc-cn-docker-files-16.26.0.x.x.x.tgz package includes references to all Dockerfiles and scripts that are needed to build images of Pipeline Configuration Center. You can refer to them when building a Pipeline Configuration Center image in your own environment.
Pulling the Fusion Middleware Infrastructure Image
The Fusion Middleware Infrastructure Image is available on the Oracle Container Registry (https://container-registry.oracle.com/). This image is regularly updated with the latest security fixes. You can pull this image to your local system, where you will build other images, with the name container-registry.oracle.com/middleware/fmw-infrastructure_cpu:12.2.1.4-jdk8-ol7.
Building the Pipeline Configuration Center Image
To build the Pipeline Configuration Center image, do this:
-
Go to the oc-cn-docker-files/ocpcc/pcc directory.
-
Download the Oracle Communications Pipeline Configuration Center installation JAR file.
-
Copy PipelineConfigurationCenter_16.26.0.x.x.x_generic.jar to the current working directory (oc-cn-docker-files/ocpcc/pcc).
-
Build the Pipeline Configuration Center image by entering this command:
podman build --format docker --tag oracle/pcc:16.26.0.x.x.x .
Building Billing Care Images
The Billing Care image extends the Linux image by packaging the application archive along with scripts and configurations.
To build your own image of Billing Care, you need the Linux and JRE images, available on the Oracle Container Registry (https://container-registry.oracle.com). These images are regularly updated with the latest security fixes. You can pull these images to your local system, where you will build other images, with the names:
- container-registry.oracle.com/os/oraclelinux:8
- container-registry.oracle.com/java/serverjre:8-oraclelinux8
The oc-cn-docker-files-16.26.0.x.x.x.tgz package includes references to all Dockerfiles and scripts that are needed to build images of Billing Care. You can refer to them when building a Billing Care image in your own environment.
Pulling the Fusion Middleware Infrastructure Image
The Fusion Middleware Infrastructure Image is available on the Oracle Container Registry (https://container-registry.oracle.com). This image is regularly updated with the latest security fixes. You can pull this image to your local system, where you will build other images, with the name container-registry.oracle.com/middleware/fmw-infrastructure_cpu:14.1.2.0-jdk21-ol9.
Building the Billing Care Image
To build the Billing Care image, do this:
-
Go to the oc-cn-docker-files/ocbc/billing_care directory.
-
Download the Oracle Communications Billing Care installation JAR file.
-
Copy BillingCare_generic.jar to the current working directory (oc-cn-docker-files/ocbc/billing_care).
-
Build the Billing Care image by entering this command:
podman build --format docker --tag oracle/billingcare:16.26.0.x.x.x .
Building Business Operations Center Images
The Business Operations Center image extends the Linux image by packaging the application archive along with scripts and configurations.
To build your own image of Business Operations Center, you need the Linux and JRE images, available on the Oracle Container Registry (https://container-registry.oracle.com). These images are regularly updated with the latest security fixes. You can pull these images to your local system, where you will build other images, with the names:
- container-registry.oracle.com/os/oraclelinux:8
- container-registry.oracle.com/java/serverjre:8-oraclelinux8
The oc-cn-docker-files-16.26.0.x.x.x.tgz package includes references to all of the Dockerfiles and scripts needed to build images of Business Operations Center. You can refer to them when building a Business Operations Center image in your own environment.
To build the Business Operations Center image, do this:
-
Go to the oc-cn-docker-files/ocboc/boc directory.
-
Download the Oracle Communications Business Operations Center installation JAR file.
-
Copy BusinessOperationsCenter_generic.jar to the current working directory (oc-cn-docker-files/ocboc/boc).
-
Build the Business Operations Center image by entering this command:
podman build --format docker --tag oracle/boc:16.26.0.x.x.x .
Building Collections Configuration Center Images
The Collections Configuration Center image extends the Linux image by packaging the application archive along with scripts and configurations.
To build your own image of Collections Configuration Center, you need the Linux and JRE images, available on the Oracle Container Registry (https://container-registry.oracle.com). These images are regularly updated with the latest security fixes. You can pull these images to your local system, where you will build other images, with the names:
- container-registry.oracle.com/os/oraclelinux:8
- container-registry.oracle.com/java/serverjre:8-oraclelinux8
The oc-cn-docker-files-16.26.0.x.x.x.tgz package includes references to all of the Dockerfiles and scripts needed to build images of Collections Configuration Center. You can refer to them when building a Collections Configuration Center image in your own environment.
To build the Collections Configuration Center image, do this:
-
Go to the occcc/brm-collections-configuration-center/ccc directory.
-
Download the Oracle Communications Collections Configuration Center installation JAR file.
-
Copy collections-configuration-center.jar to the current working directory (oc-cn-docker-files/occcc/brm-collections-configuration-center/ccc).
-
Build the Collections Configuration Center image by entering this command:
podman build --format docker --tag oracle/ccc:16.26.0.x.x.x .