3 Using Unified Data Repository (UDR) Console
In this chapter, you will learn to login to CNC Console application and configure global and service parameters on UDR. The service configuration includes data repository service, notify service and NRF client service. The CNC Console also allows you to perform provisioning operations for profile-data, PCF, SLF, UDM and schema management.
Logging into CNC Console
A user can use UDR integrated with CNC Console only after logging successfully into the CNC Console application. In order to login successfully to the CNC Console, the user needs to make the following updates to the hosts file available at the C:\Windows\System32\drivers\etc location.
In the Windows system, user needs to open the hosts file in the notepad as an Administrator and append the following set of lines at the end:
         10.75.224.18 cncc-iam-ingress-gateway.cncc.svc.cluster.local
         10.75.224.18 cncc-core-ingress-gateway.cncc.svc.cluster.local
Note:
The IP Address in the above lines may change when deloyment cluster changes.Save and close the notepad.
- Type
http://cncc-core-ingress-gateway.cncc.svc.cluster.local:<PortNumber>/
in the web browser and press Enter. Following screen appears:
Figure 3-1 CNC Console Login Screen

- Enter the Username and Password and click Log
In. Following screen appears:
Figure 3-2 CNC Console Home Page
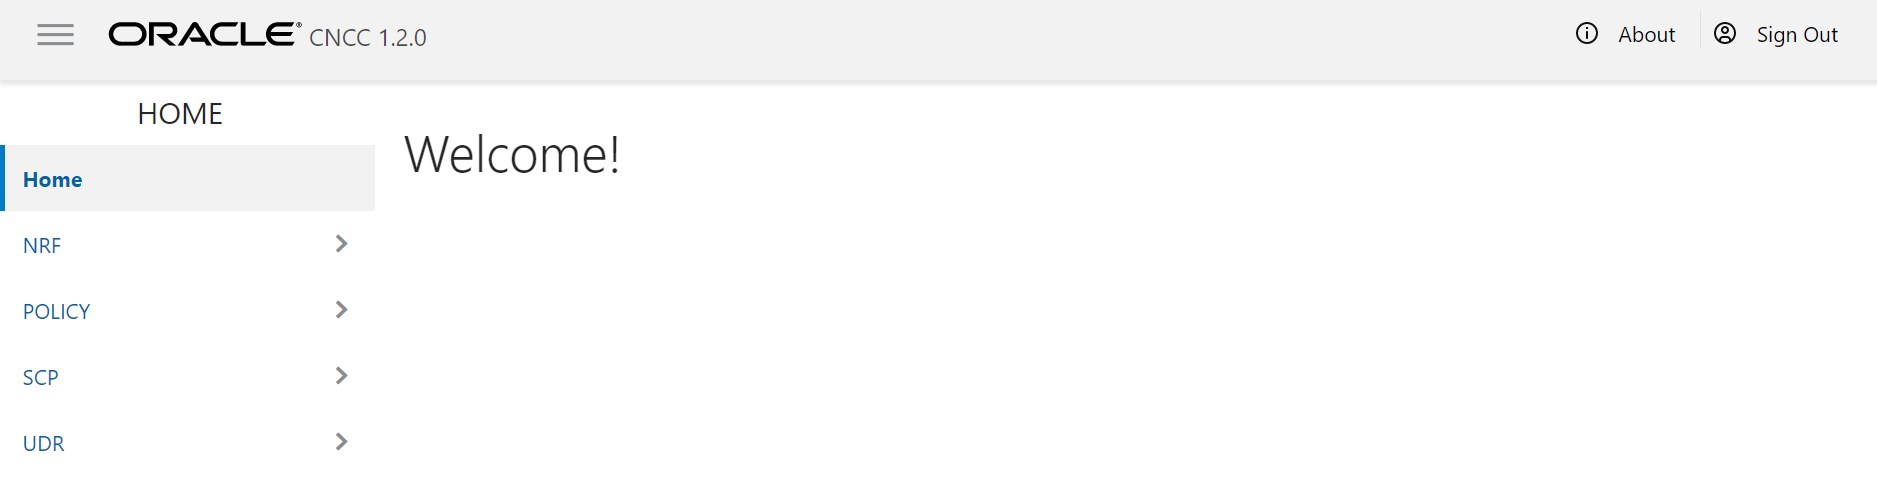
This is the CNC Console Home Page from where a user can navigate to different NF services. To use UDR services integrated with CNC Console, click UDR in the left navigation pane.
Global Configurations
To access the Global Configurations screen, click UDR → Global Configurations in the left navigation pane of the CNC Console application. The following screen appears:
Figure 3-3 Global Configurations

- DB Service Name: displays the name of the DB Service
- UDR Services: displays 'All' when all the UDR services are engaged
- Egress Gw Enabled: displays 'true' when egress gateway is enabled and 'false' when egress gateway is not enabled.
- UDSF Enabled: displays 'true' when UDSF is enabled and 'false' when UDSF is not enabled.
These values are extracted from the database and on every Helm upgrade, users need to click the Refresh icon to view the latest values.
Service Configurations
To configure UDR services using CNC Console, you can use Service Configurations. In the left navigation pane of the CNC Console application, click UDR → Service Configurations.
Data Repository Service
Figure 3-4 Data Repository Service Configurations

| Field Name | Default Value | Attribute | Description |
|---|---|---|---|
| Log Level | WARN | Editable | This field shows the log level of the data repository service.
Its possible values are:
|
| Hikari Pool Size | 25 | Read-only | The hikari pool connection size to be created at start uP |
| Auto Create Subscriber | True | Editable | This field enables auto creation of a subscriber when creating data for a non existent subscriber. |
| VSA Level | smpolicy | Read-only | This field displays the VSA level. It is a read-only value. |
| Tracing Enabled | False | Read-only | By default, tracing is not enabled. |
Editing Data Repository Service Configurations
- Click Edit. The Edit Datarepository Service
Configurations screen appears.
Figure 3-5 Edit Datarepository Service Configurations
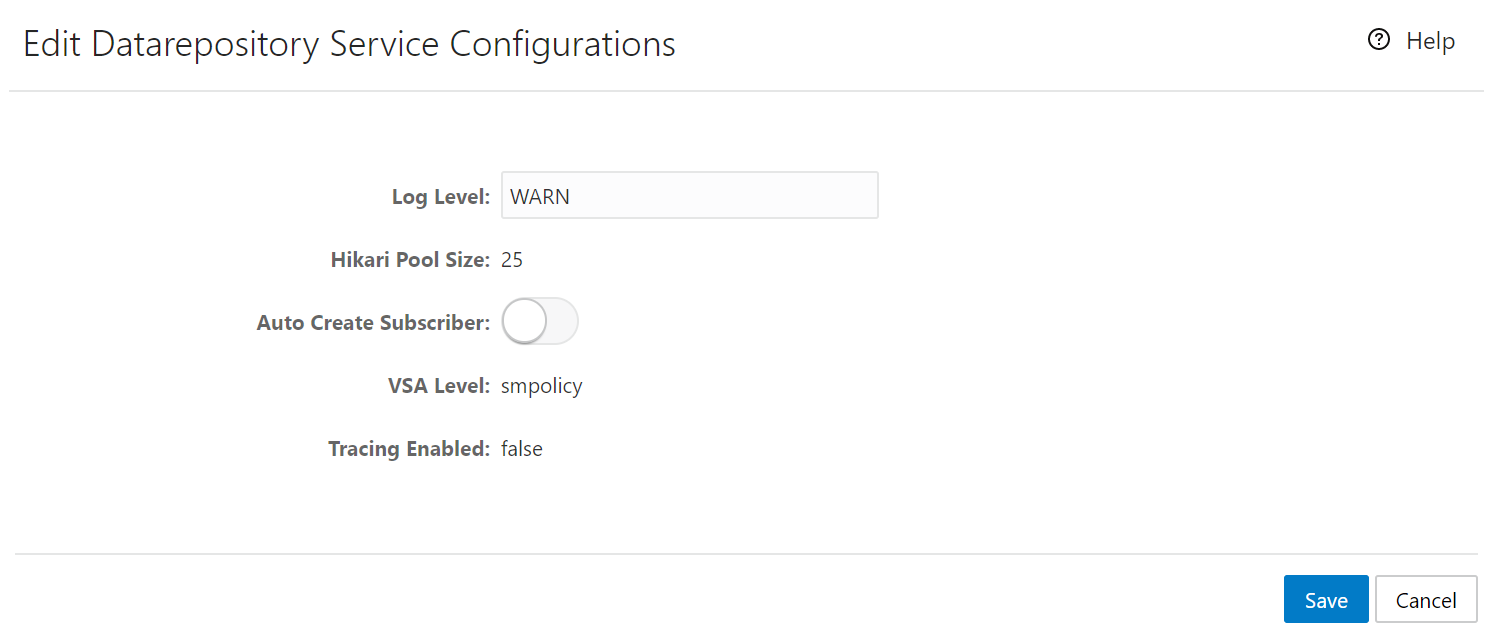
- Update the configuration details as required and click Save. A confirmation message, "Save successfully." appears.
- If you do not want to modify any configuration, click Cancel. You navigate back to the Data Repository Service Configurations screen.
- Click Refresh to reload the Data Repository Service Configurations screen.
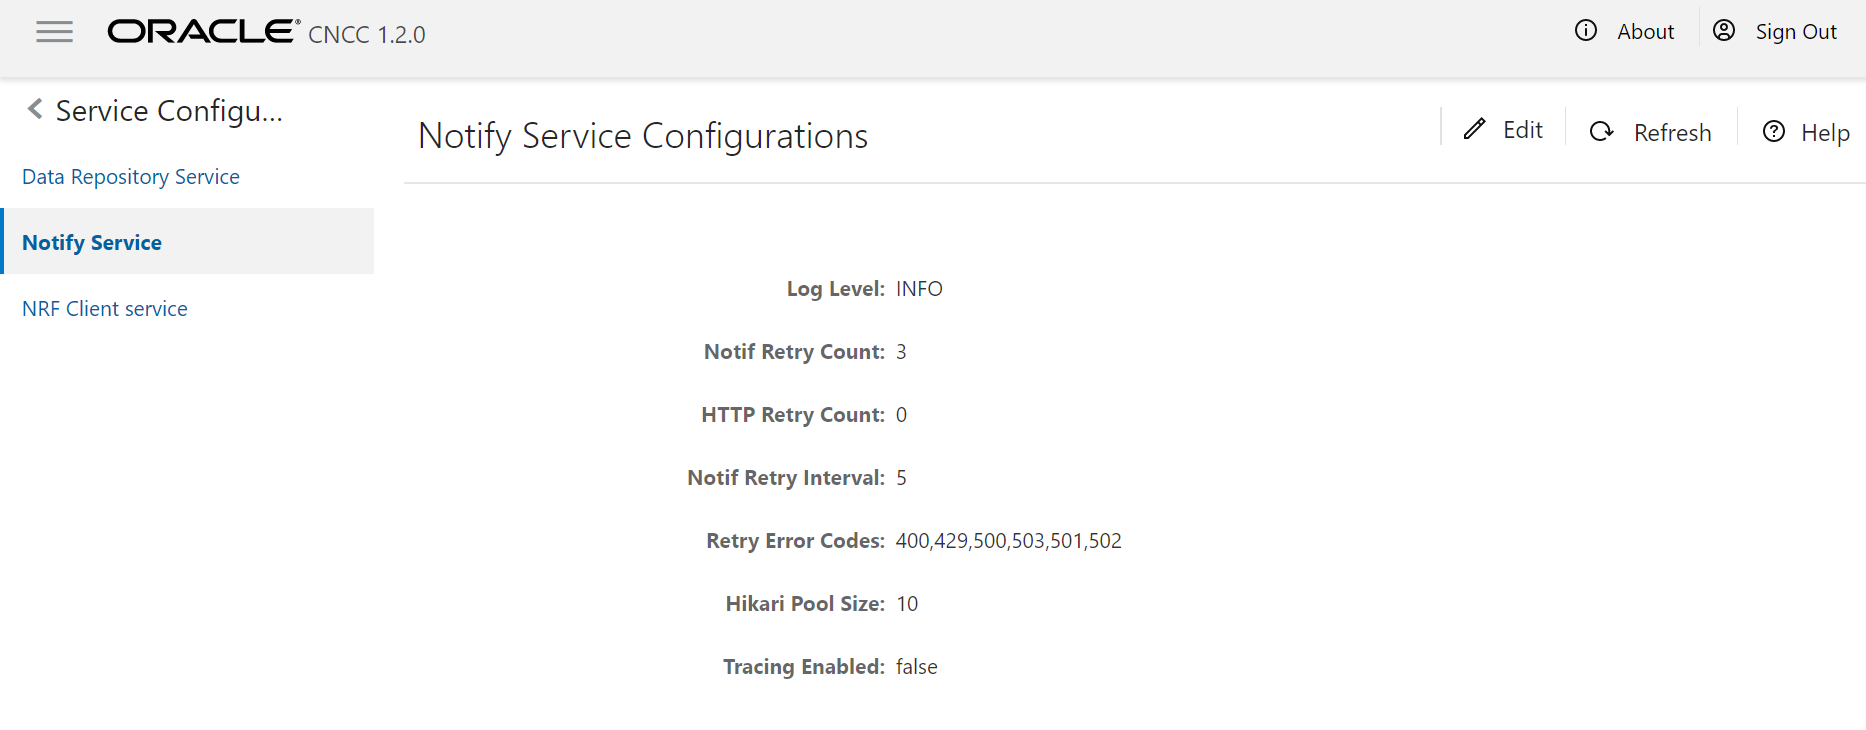
Notify Service
Figure 3-6 Notify Service Configurations
| Field Name | Default Value | Attribute | Description |
|---|---|---|---|
| Log Level | WARN | Editable | This field shows the log level of the data repository
service. Its possible values are:
|
| Notif Retry Count | 3 | Editable | Number of notification attempts to be done in case
of notification failures.
Retries are based on notification.retryerrorcodes configuration. |
| HTTP Retry Count | 2 | Editable | Number of retries when there is failure of connection to other services. |
| Notif Retry Interval | 5 | Editable | The retry interval for notifications in case of
failure. It is measured in seconds.
Retries are based on notification.retryerrorcodes configuration. |
| Retry Error Codes | 400,429,500,503 | Editable | This field displays comma separated error codes. These error codes are eligible for retry notifications in case of failures. |
| Hikari Pool Size | 25 | Read-only | The hikari pool connection size to be created at start up. |
| Tracing Enabled | False | Read-only | By default, tracing is not enabled. |
Editing Notify Service Configurations
- Click Edit. The Edit Datarepository Service
Configurations screen appears.
Figure 3-7 Edit Notify Service Configurations
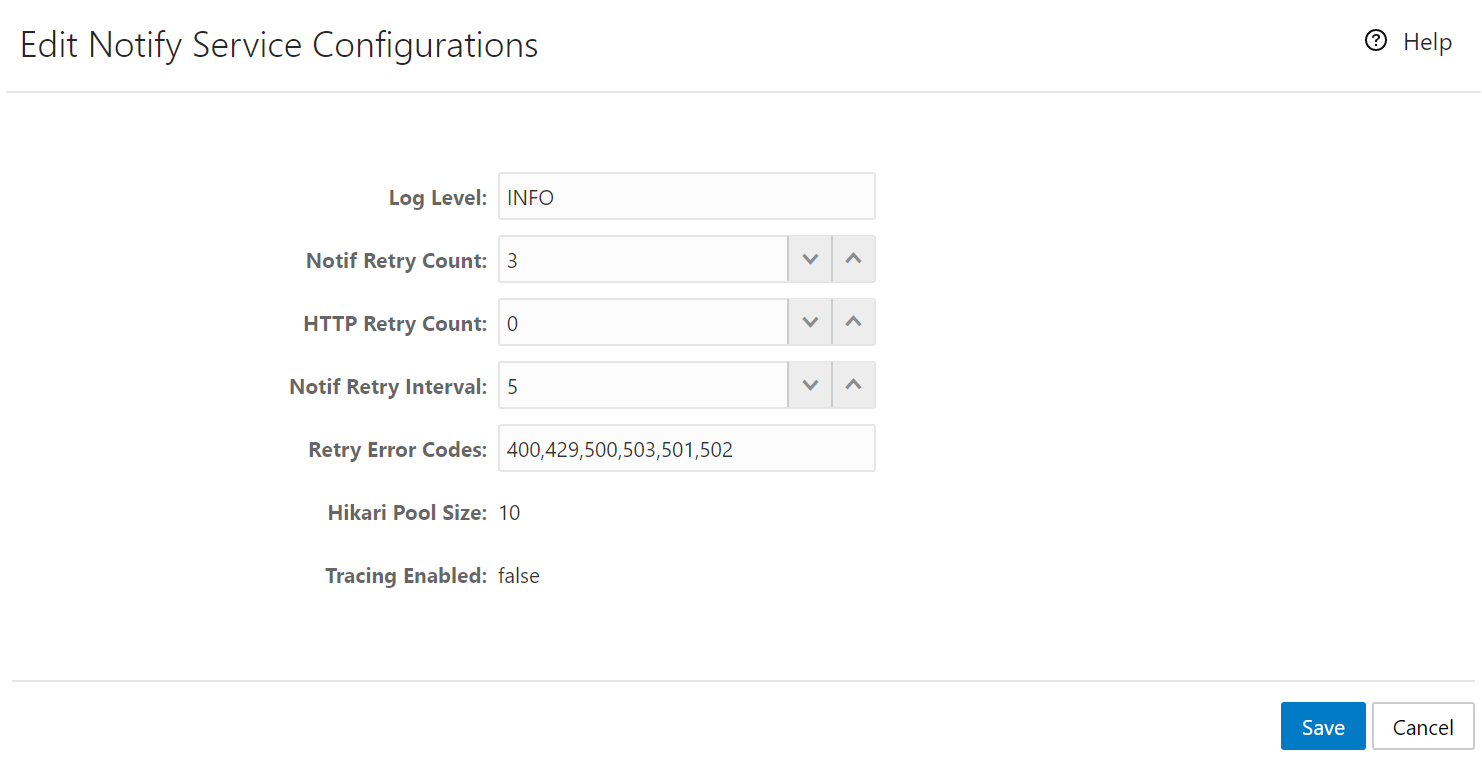
- Update the configuration details as required and click Save. A confirmation message, "Save successfully." appears.
- If you do not want to modify any configuration, click Cancel. You are navigated back to the Notify Service Configurations screen.
- Click Refresh to reload the Notify Service Configurations screen.
NRF Client Service
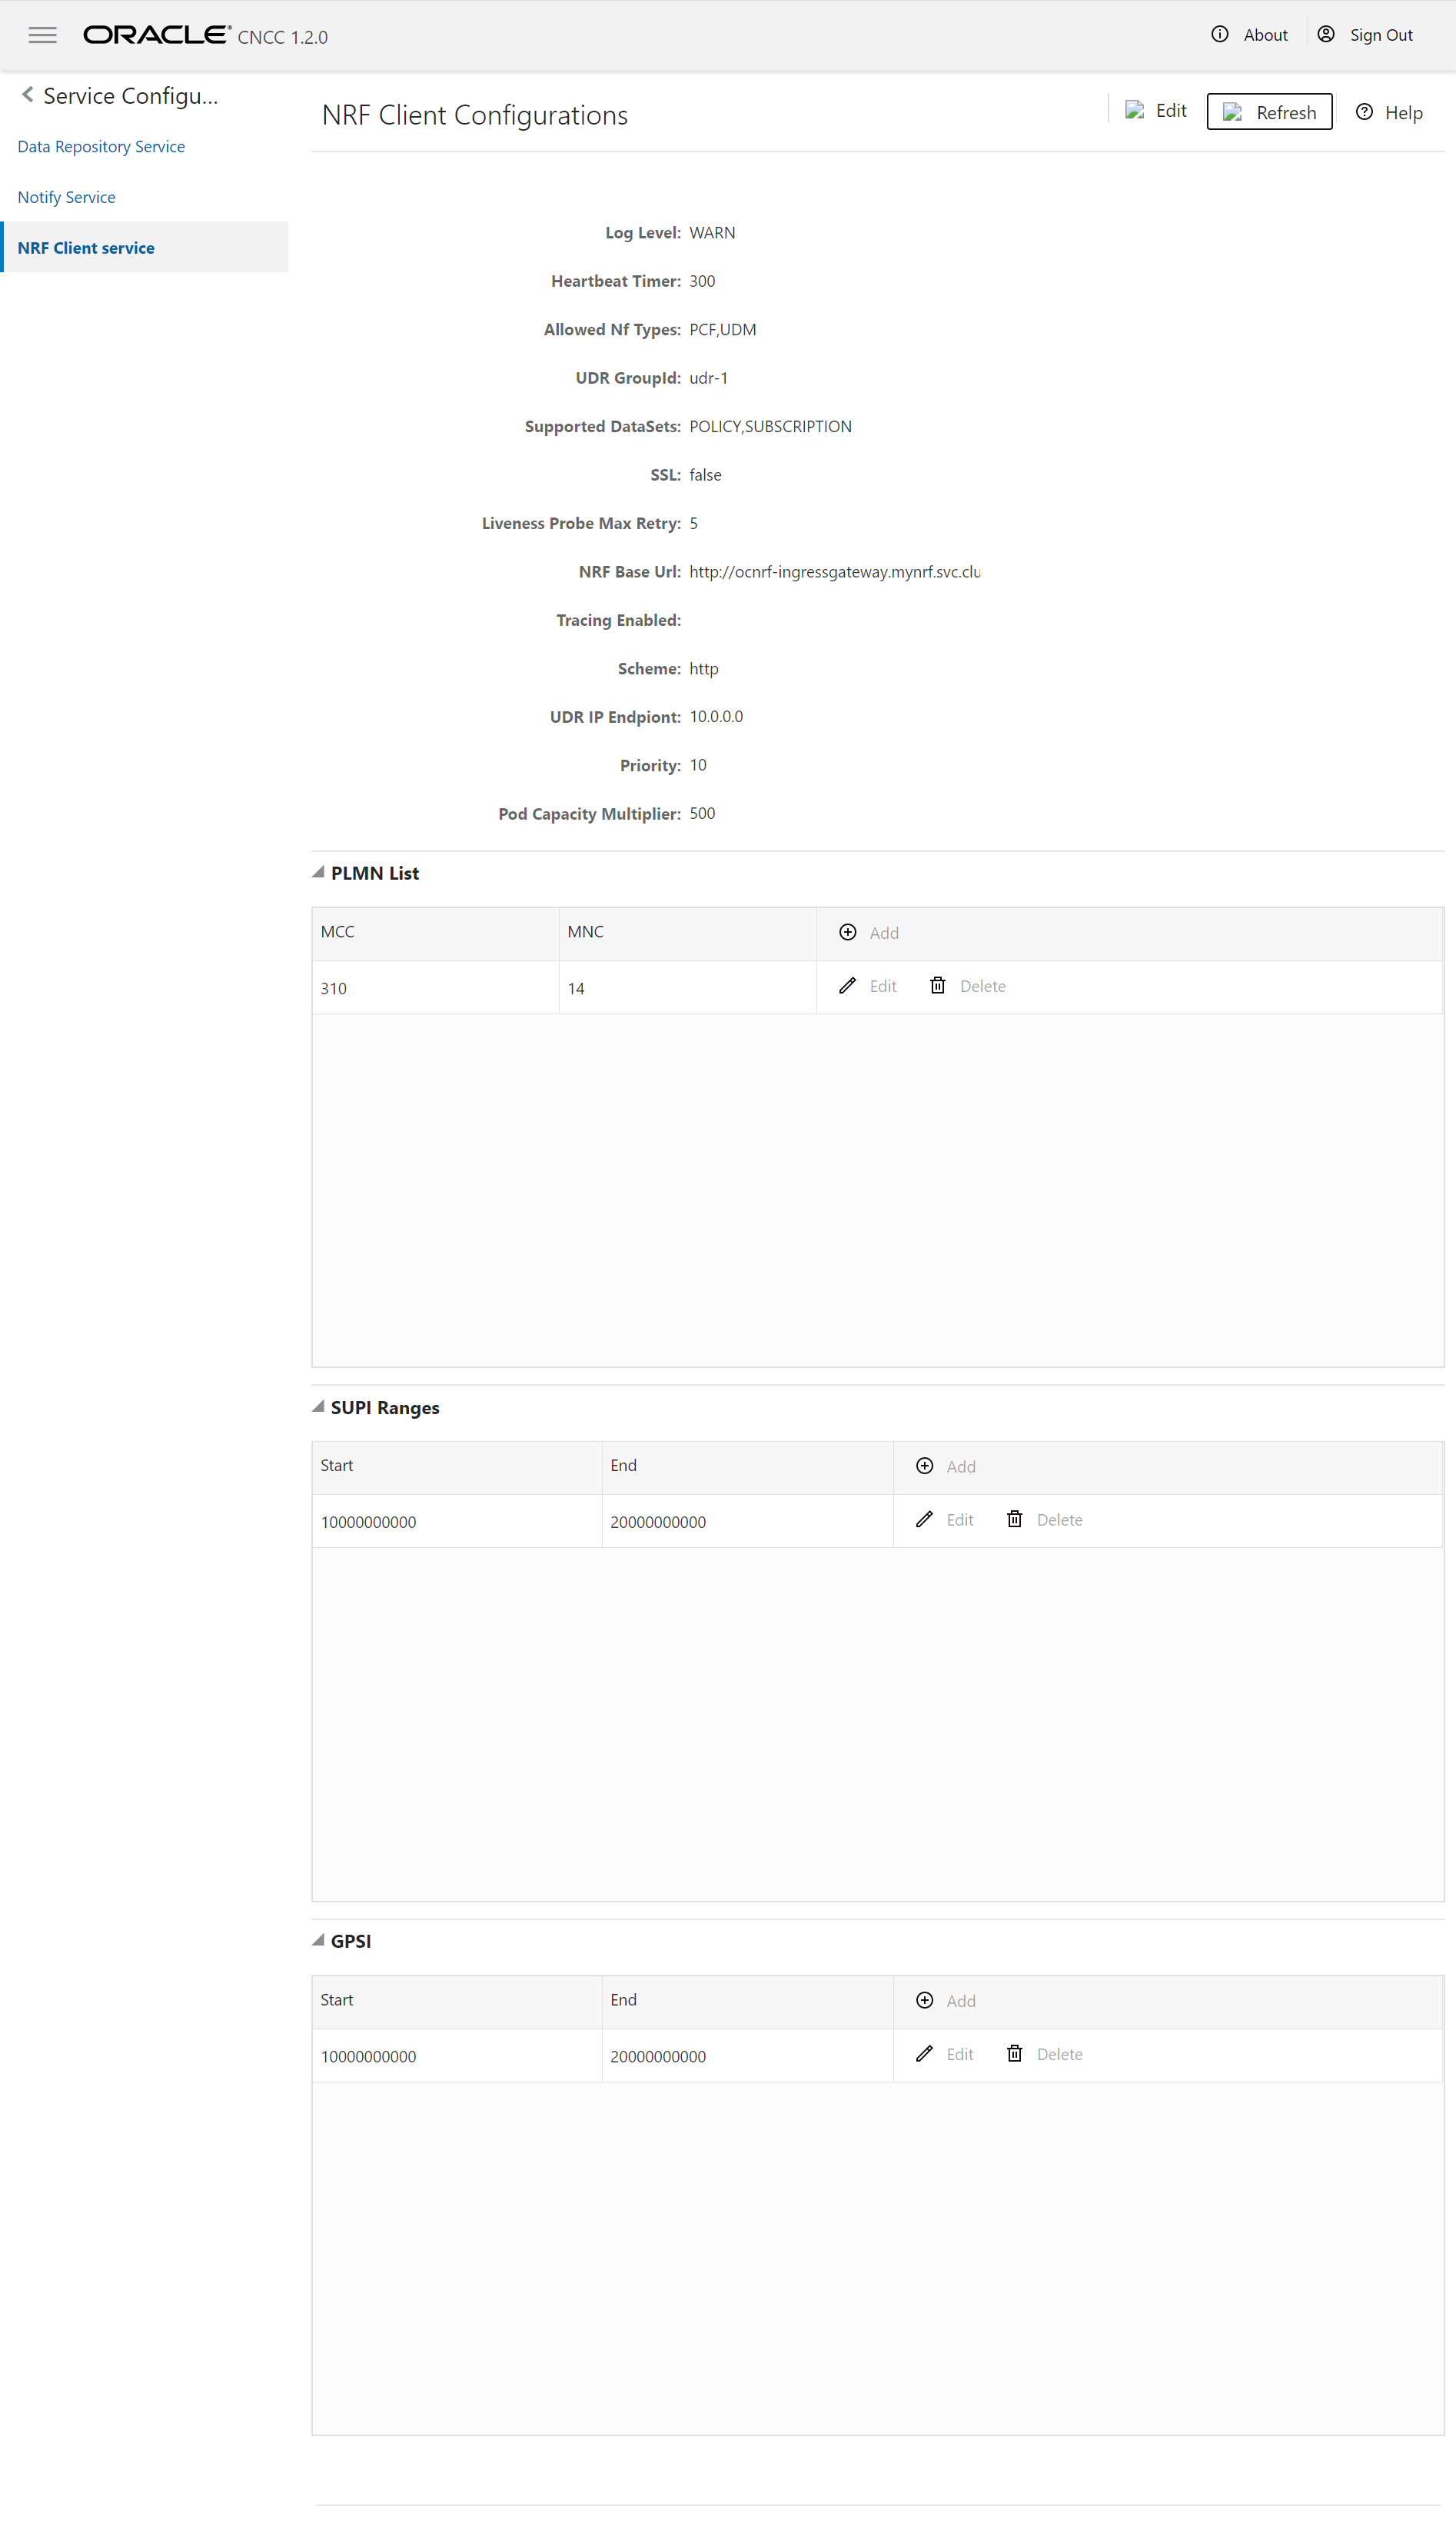
Figure 3-8 NRF Client Configurations
| Field Name | Default Value | Attribute | Description |
|---|---|---|---|
| Log Level | WARN | Editable | This field shows the log level of the data repository
service. Its possible values are:
|
| Heartbeat Timer | 90 | Editable | |
| Allowed Nf Types | PCF,UDM | Read-only | The types of NF that are allowed to use this NRF client service. |
| UDR GroupId | udr-1 | Editable | Group ID of UDR |
| Supported DataSets | POLICY,SUBSCRIPTION | Read-only | The types of datasets that are allowed. |
| SSL | False | Read-only | SSL flag to enable SSL with udr nrf client pod |
| Liveness Probe Max Retry | 5 | Editable | The maximum number of times to retry liveness probe of NRF client service. |
| NRF Base Url | "http://ocnrf-ingressgateway.mynrf.svc.cluster.local/nnrf-nfm/v1/nf-instances" | Read-only | NRF URL for registration |
| Tracing Enabled | False | Read-only | By default, tracing is not enabled. |
| Scheme | Http | Read-only | scheme in which udr supports |
| UDR IP Endpoint | udr-1 | Editable | IP alotted to ocudr-endpoint pod |
| Priority | 10 | Editable | Priority to be sent in registration request |
| Pod Capacity Multiplier | 500 | Editable | Capacity multiplier of UDR based on number of UDR pods running |
| PLMN List | "[{mnc": "14", "mcc": "310"}]" | Editable | Plmn values range that it supports. Plmn values are sent to nrf during regisration from UDR. |
| SUPI Ranges | [{"start": "10000000000", "end": "20000000000"}]" | Editable | SUPI range supported with UDR |
| GPSI | "[{"start": "10000000000", "end": "20000000000"}]" | Editable | Gpsi Range supported with UDR |
Editing NRF Client Configurations
- Click Edit. The Edit NRF Client Configurations
screen appears.
Figure 3-9 Edit NRF Client Configurations
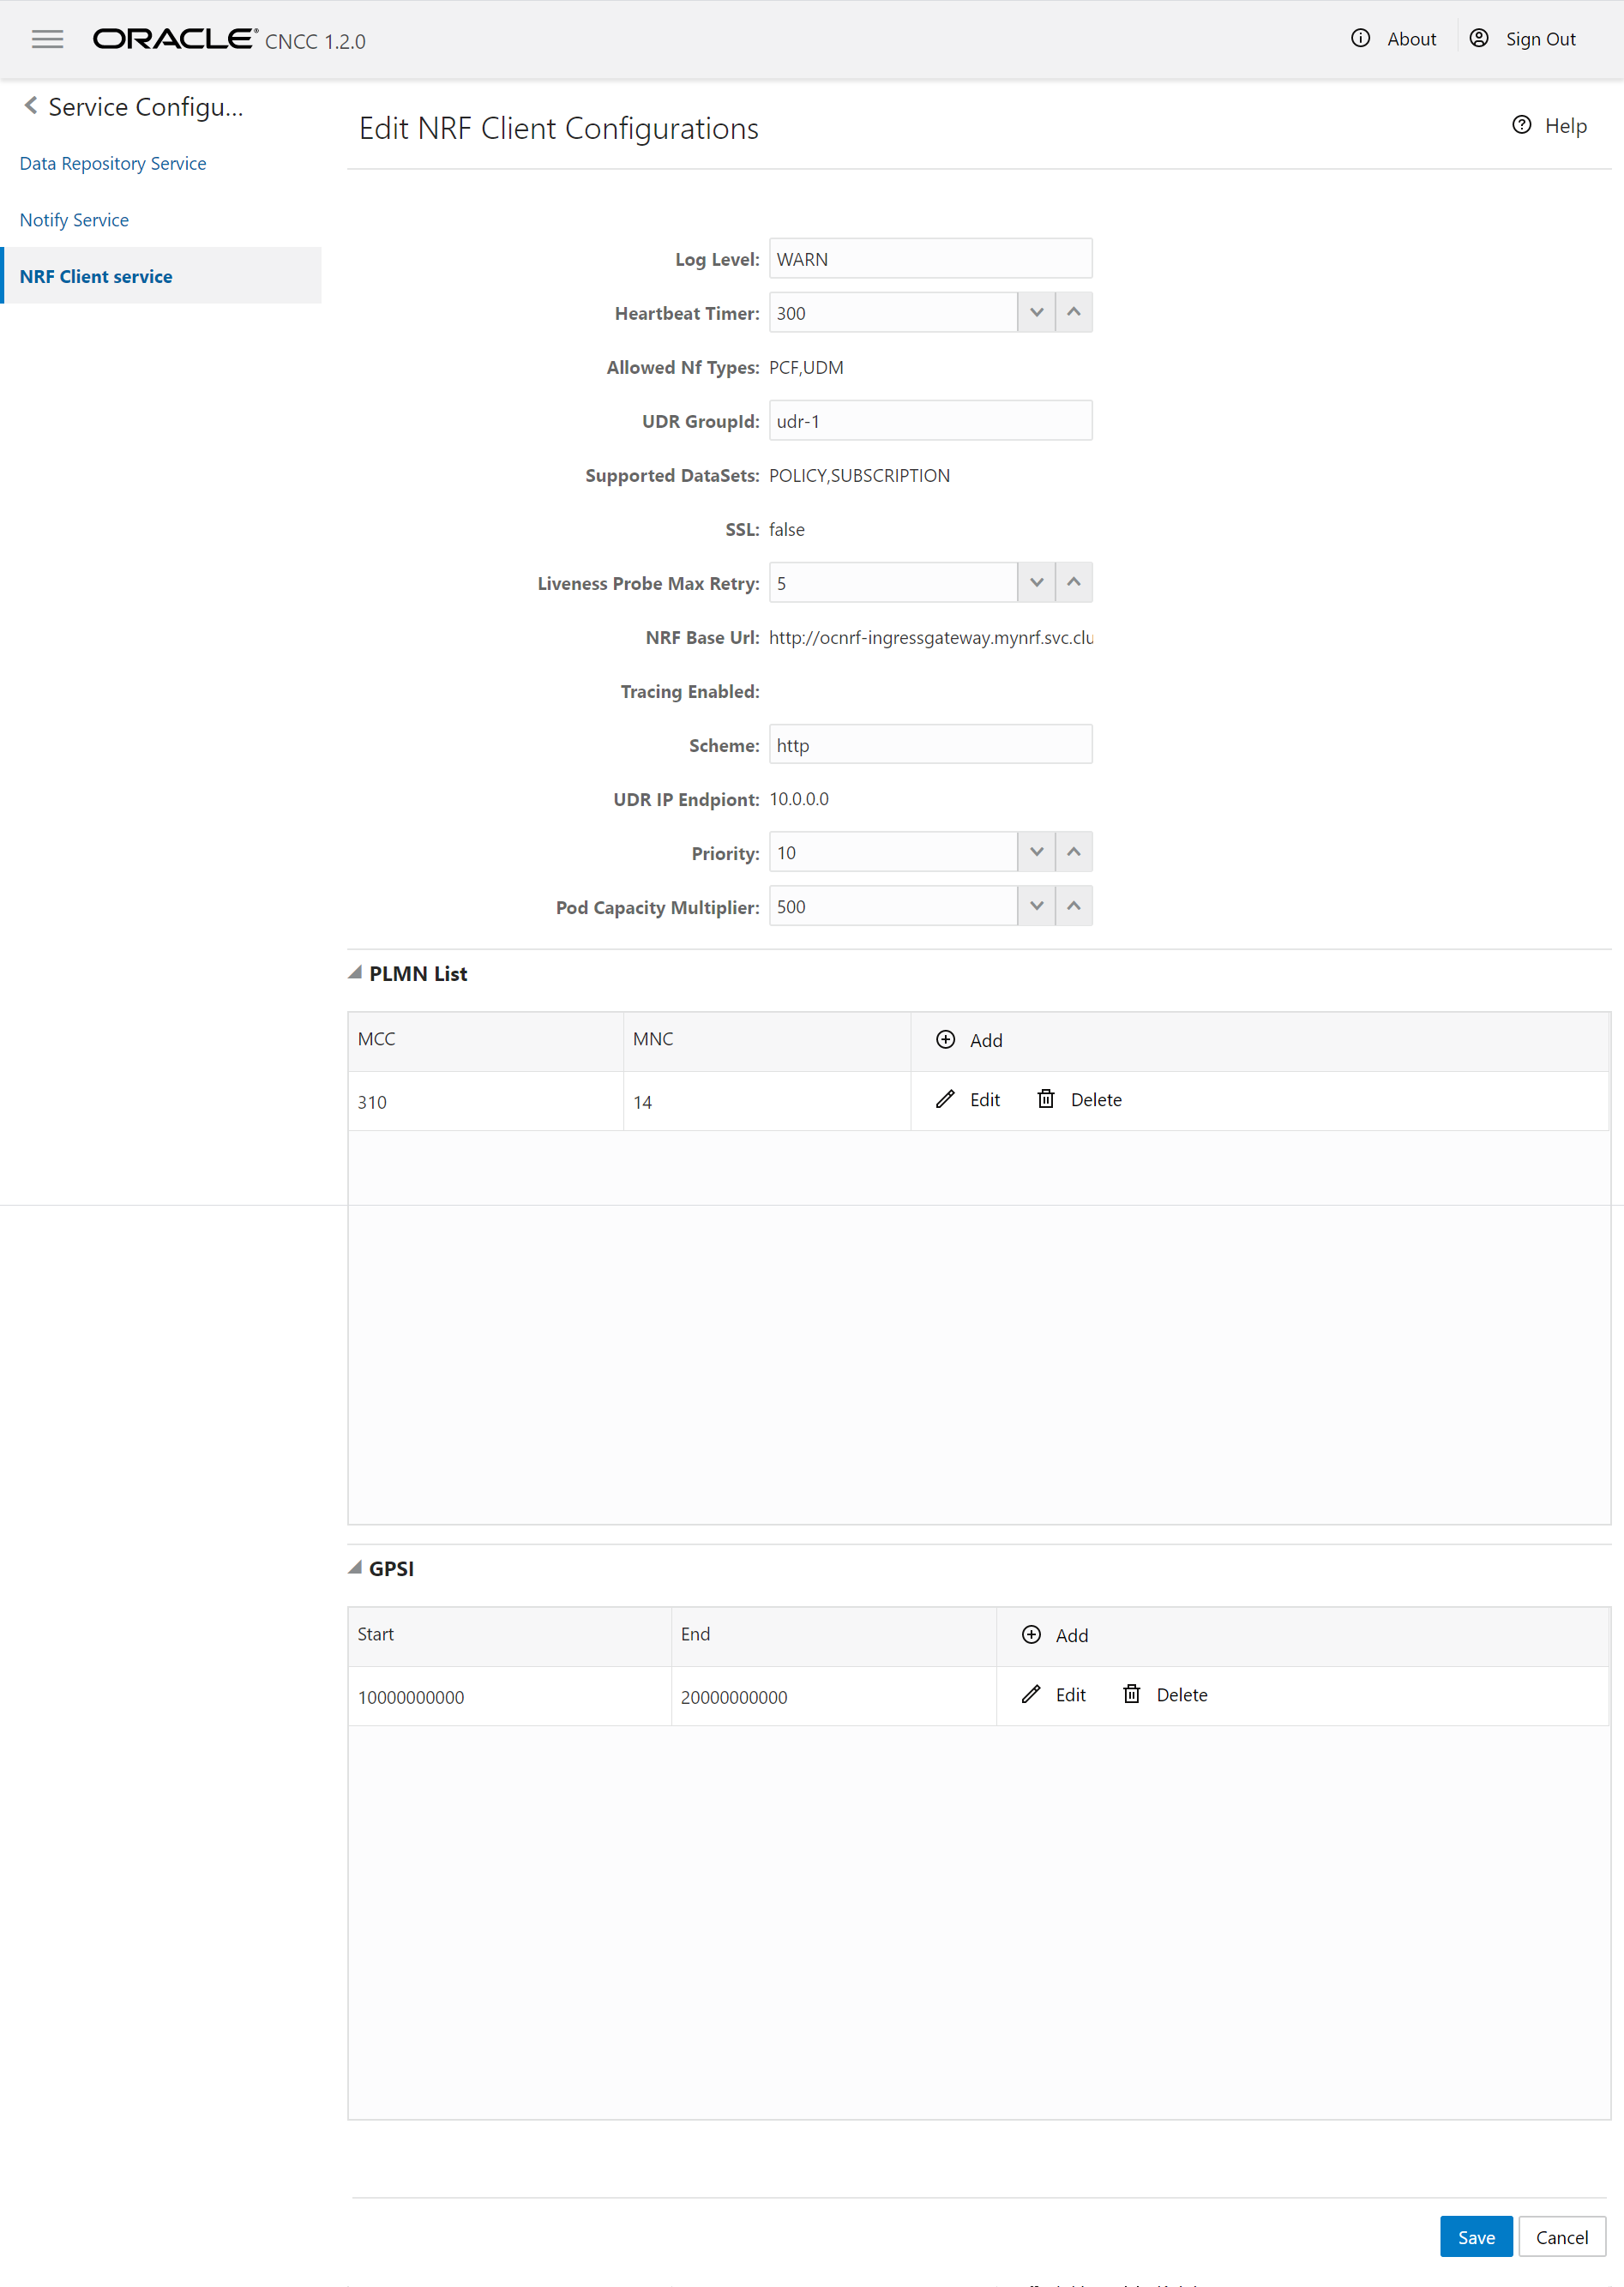
- Update the configuration details as required and click Save. A confirmation message, "Save successfully." appears.
- If you do not want to modify any configuration, click Cancel. You navigate back to the NRF Client Configurations screen.
- Click Refresh to reload the NRF Client Configurations screen.
Provisioning - Profile Data
In this section, you will learn to operate provisioning operations for Profile Data.
Figure 3-10 Provisioning - Profile Data
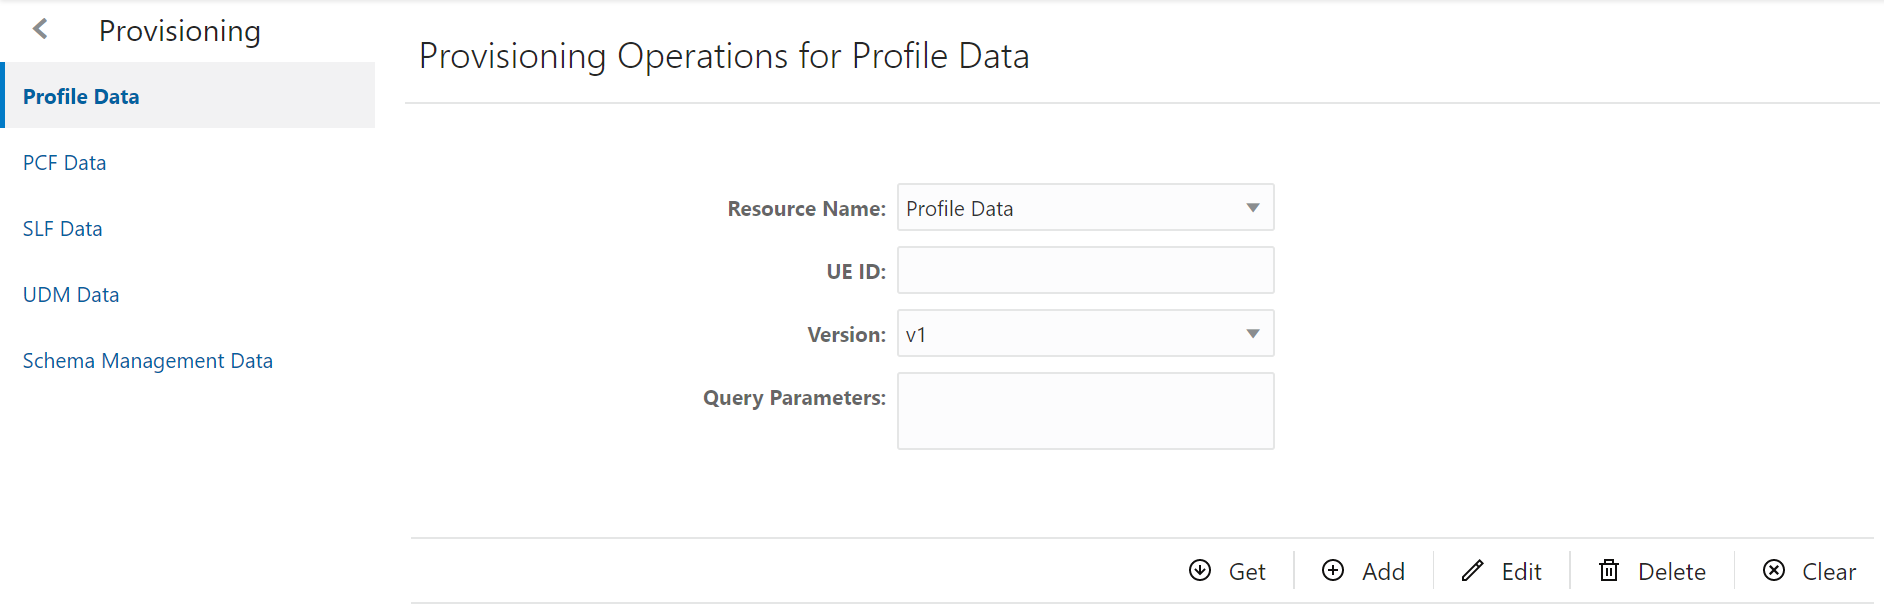
- Extract profile data from UDR database on the basis of UE ID entered
- Add new profile data to the UDR database
- Modify an existing profile data on the basis of UE ID
- Delete an existing profile data that is no more needed in the UDR database
Extracting Profile Data
- Ensure Resource Name is set to 'Profile Data'.
- Type an appropriate UE ID. For example: msisdn-1111111114
- Click Get. A confirmation message, 'Fetched Successfully'
appears for a second and the result appears in the Response text area
as follows:
Figure 3-11 Sample Screen: Get - Profile Data - Response

- An Error message summary appears in case of incorrect UE ID entered.
Adding a Profile Data
- Ensure Resource Name is set to 'Profile Data'.
- Type an appropriate UE ID. For example: msisdn-1111111114
- Click Add. The Request text area appears.
- Type-in the profile data that you want to add to the UDR database.
- Click Submit. The 'Saved Successfully.' message
appears.
Note:
If a user enters any incorrect input, an Error message summary appears.
Editing a Profile Data
- Ensure Resource Name is set to 'Profile Data'.
- Type an appropriate UE ID. For example: msisdn-1111111114
- Click Edit. The Request text area displays an existing profile data.
- Type-in the updated profile data.
- Click Submit. The 'Saved Successfully.' message
appears.
Note:
If a user enters any incorrect input, an Error message summary appears.
Deleting a Profile Data
- Ensure Resource Name is set to 'Profile Data'.
- Type an appropriate UE ID. For example: msisdn-1111111114
- Click Delete.
- The 'Deleted Successfully' message appears.
Note:
If a user enters any incorrect input, an Error message summary appears.
Clearing a Profile Data
Click the Clear option to clear all the text fields and text areas of the Provisioning Operations for Profile Data.
Provisioning - PCF Data
In this section, you will learn to operate provisioning operations for PCF (Policy Control Function) Data.
Figure 3-12 Provisioning Operations for PCF Data
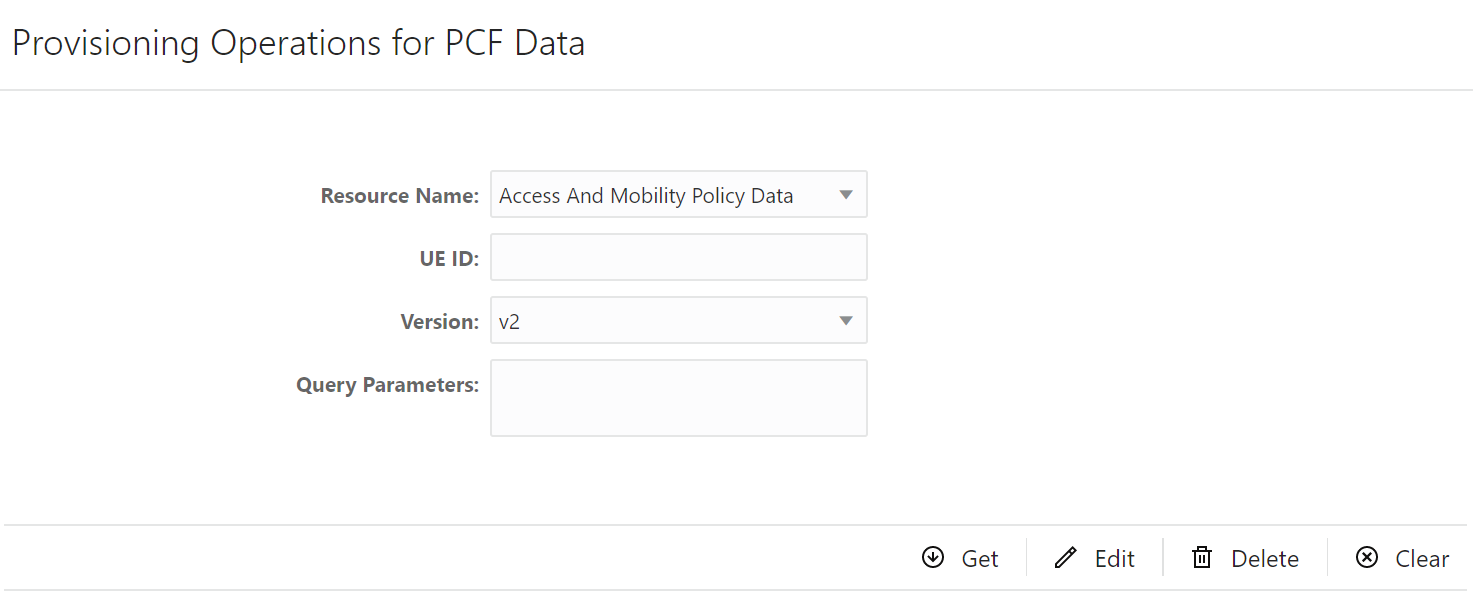
- Select Resource Name as either Access And Mobility Policy Data, Session Management Policy Data or UE Policy Set.
- Extract PCF data from UDR database on the basis of UE ID entered
- Modify an existing PCF data on the basis of UE ID
- Delete an existing PCF data that is no more needed in the UDR database
Extracting PCF Data
- Select Resource Name as either Access And Mobility Policy Data, Session Management Policy Data or UE Policy Set.
- Type an appropriate UE ID. For example: msisdn-9111111112.
- Enter Query Parameters.
- Click Get. A confirmation message, 'Fetched Successfully.'
appears and the result appears in the Response text area as
follows:
Figure 3-13 Provisioning PCF Get Response

- An Error message summary appears in case of incorrect UE ID entered.
Adding or Editing a PCF Data
- Select the Resource Name as either Access And Mobility Policy Data, Session Management Policy Data or UE Policy Set.
- Type an appropriate UE ID. For example: msisdn-9111111112.
- Enter the Query Parameters.
- Click Edit. The Request text area displays an existing PCF data.
- Type-in the updated profile data.
- Click Submit. The 'Saved Successfully.' message
appears.
Note:
If a user enters any incorrect input, an Error message summary appears.
Deleting a PCF Data
- Select the Resource Name as either Access And Mobility Policy Data, Session Management Policy Data or UE Policy Set.
- Type an appropriate UE ID. For example: msisdn-9111111112.
- Enter the Query Parameters.
- Click Delete.
- The 'Deleted Successfully.' message appears.
Note:
If a user enters any incorrect input, an Error message summary appears.
Clearing a Profile Data
Click the Clear option to clear the text fields and text areas of the Provisioning Operations for PCF screen.
Provisioning - SLF Data
In this section, you will learn to operate provisioning operations for SLF (Subscriber Location Function) Data.
Figure 3-14 Provisioning - SLF Data
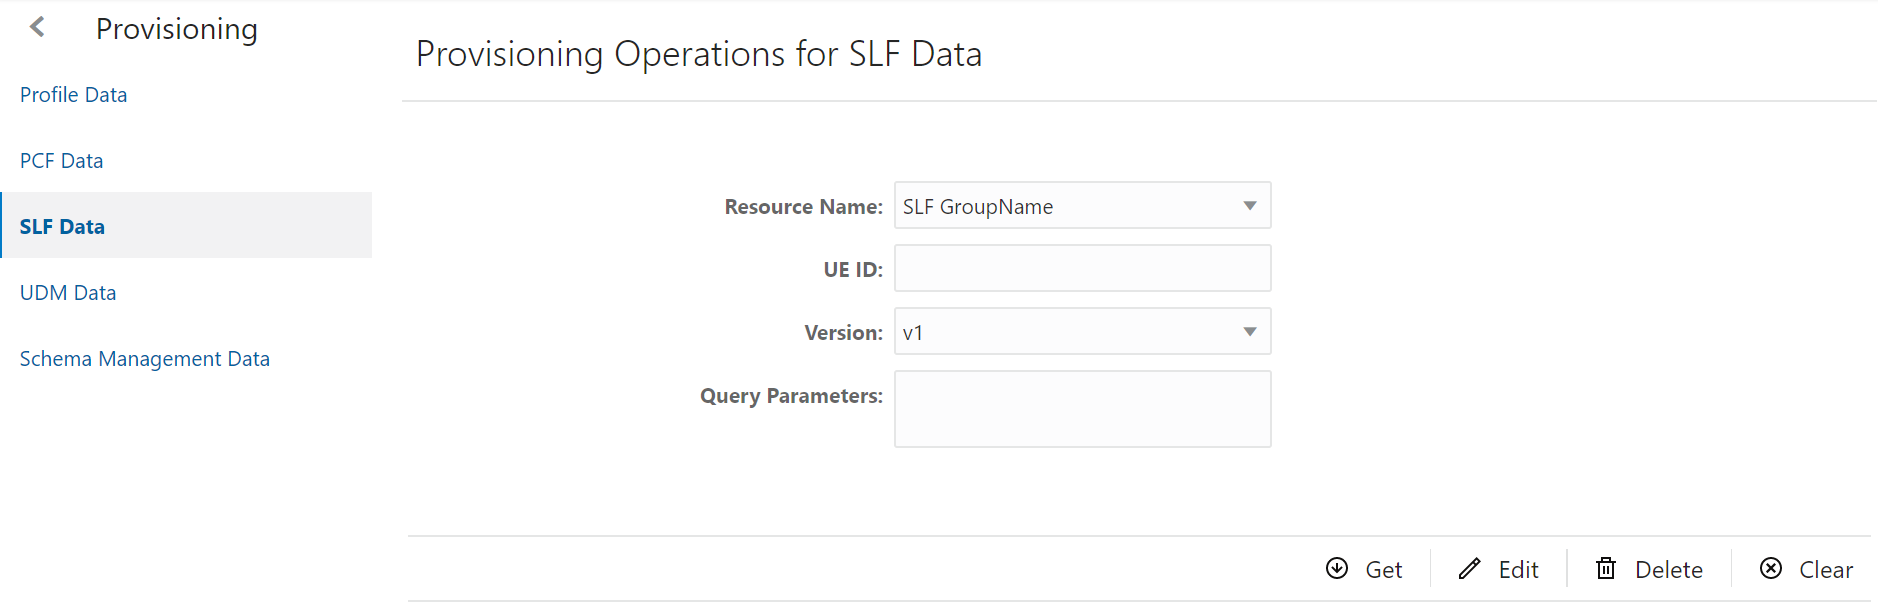
- Extract SLF data from UDR database on the basis of UE ID entered.
- Modify an existing SLF data on the basis of UE ID.
- Delete an existing SLF data that is no more needed in the UDR database.
Extracting SLF Data
- Select the Resource Name as either SLF GroupName or NFGroupID Map.
- Type an appropriate UE ID. For example: msisdn-1111111112
- Enter the Query Parameters.
- Click Get. A confirmation message, 'Fetched Successfully.'
appears and the result appears in the Response text area as
follows:
Figure 3-15 Provisioning - SLF - Get Response

- An Error message summary appears in case of incorrect UE ID entered.
Adding or Editing a SLF Data
- Select the Resource Name as either SLF GroupName or NFGroupID Map.
- Type an appropriate UE ID. For example: msisdn-1111111112
- Click Edit. The Request text area displays an existing SLF data.
- Type-in the updated SLF data.
- Click Submit. The 'Saved Successfully.' message
appears.
Note:
If a user enters any incorrect input, an Error message summary appears.
Deleting a SLF Data
- Select the Resource Name as either SLF GroupName or NFGroupID Map.
- Type an appropriate UE ID. For example: msisdn-1111111112
- Click Delete.
- The 'Deleted Successfully.' message appears.
Note:
If a user enters any incorrect input, an Error message summary appears.
Clearing a Profile Data
Click the Clear option to clear the text fields and text areas of the Provisioning Operations for SLF screen.
Provisioning - UDM Data
In this section, you will learn to operate provisioning operations for UDM (Unified Data Management) Data.
Figure 3-16 Provisioning Operations for UDM Data

In the Provisioning Operations for UDM Data screen, user can extract, modify and delete UDM data on the basis of Resource Name, UE ID, PDU Session ID, Serving PLMN ID, Version and Query Parameters entered.
Extracting UDM Data
- Select the Resource Name from the drop-down list.
- Type an appropriate UE ID, PDU Session ID and Serving PLMN ID in their respective fields.
- Select an appropriate Version and enter Query Parameters.
- Click Get. A confirmation message, 'Fetched Successfully.' appears and the result appears in the Response text area.
- An Error message summary appears in case of incorrect UE ID entered.
Adding or Editing a UDM Data
- Select the Resource Name.
- Type an appropriate UE ID, PDU Session ID and Serving PLMN ID in their respective fields.
- Select an appropriate Version and enter Query Parameters.
- Click Edit. The Request text area displays an existing UDM data.
- Edit as required and click Submit. The 'Saved
Successfully.' message appears.
Note:
If a user enters any incorrect input, an Error message summary appears.
Deleting a UDM Data
- Enter the Resource Name.
- Type an appropriate UE ID, PDU Session ID and Serving PLMN ID in their respective fields.
- Select an appropriate Version and enter Query Parameters.
- Click Delete.
- The 'Deleted Successfully.' message appears.
Note:
If a user enters any incorrect input, an Error message summary appears.
Clearing a Profile Data
Click the Clear option to clear the text fields and text areas of the Provisioning Operations for UDM screen.
Provisioning - Schema Management Data
In this section, you will learn to operate provisioning operations for schemas.
Figure 3-17 Provisioning for Schema Management
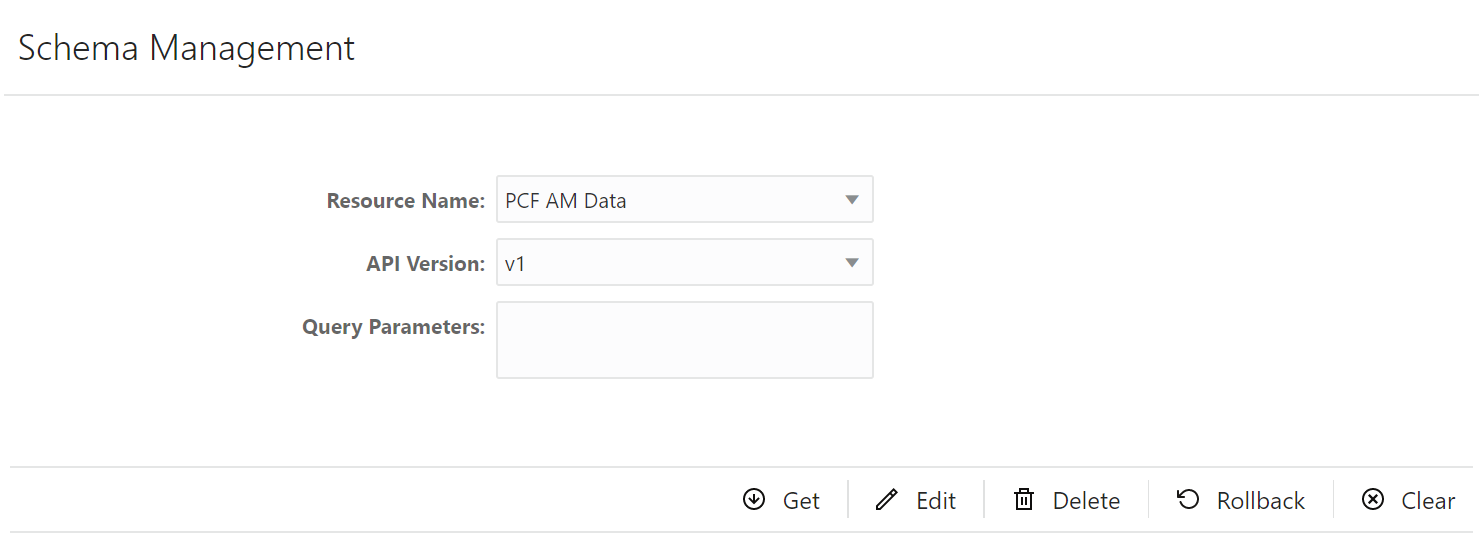
In the Schema Management screen, user can extract, modify and delete a schema on the basis of Resource Name and Query Parameters. This resource name can be either PCF AM Data, PCF SM Data or PCF UE Policy Set.
Extracting a Schema
- Select the Resource Name. It can be either PCF AM Data, PCF SM Data or PCF UE Policy Set.
- Enter the Query Parameters.
- Click Get. A confirmation message, 'Fetched Successfully.'
appears and the result appears in the Response text area as
follows:
Figure 3-18 Schema - Get - PCF AM Data

- An Error message summary appears in case of incorrect UE ID entered.
Adding or Editing a Schema
- Select the Resource Name.
- Enter the Query Parameters.
- Click Edit. The Request text area displays the selected schema.
- Edit as required and click Submit. The 'Saved
Successfully.' message appears.
Note:
If a user edits the schema inappropriately, an Error message summary appears.
Deleting a Schema
- Select the Resource Name.
- Enter the Query Parameters.
- Click Delete.
- The 'Deleted Successfully.' message appears.
Note:
If a user selects a schema that does not exists, an Error message summary appears.
Clearing a Profile Data
Click the Clear option to clear the text fields and text areas of the Schema Management screen.
