2 Installing CNC Console
This chapter provides information about installing Oracle Communications Cloud Native Configuration Console (CNC Console) in a cloud native environment.
Note:
CNC Console supports fresh installation. For more information on how to upgrade CNC Console, see Upgrading CNC Console section.
2.1 Prerequisites
Before installing Oracle Communications CNC Console, make sure that the following requirements are met:
2.1.1 Software Requirements
This section lists the software that must be installed before installing CNC Console:
Install the following software before installing CNC Console:
Table 2-1 Preinstalled Software
| Software | Version |
|---|---|
| Kubernetes | 1.27.x, 1.26.x, 1.25.x |
| Helm | 3.12.3 |
| Podman | 4.4.1 |
kubectl version helm version podman versionhelm ls -ATable 2-2 Additional Software
| Software | Version | Required For |
|---|---|---|
| Opensearch | 2.3.0 | Logging |
| OpenSearch Dashboard | 2.3.0 | Logging |
| Kyverno | 1.9 | Logging |
| FluentBit | 1.9.4 | Logging |
| Grafana | 9.1.7 | KPIs |
| Prometheus | 2.44.0 | Metrics |
| MetalLB | 0.13.7 | External IP |
| Jaeger | 1.45.0 | Tracing |
| snmp-notifier | 1.2.1 | Alerts |
2.1.2 Environment Setup Requirements
This section provides information on environment setup requirements for installing CNC Console.
Client Machine Requirement
This section describes the requirements for client machine, that is, the machine used by the user to run deployment commands.
- Helm repository configured.
- network access to the Helm repository and Docker image repository.
- network access to the Kubernetes cluster.
- required environment settings to run the
kubectl,docker, andpodmancommands. The environment must have privileges to create a namespace in the Kubernetes cluster. - Helm client installed with the push plugin.
Configure the environment in such a manner that the
helm installcommand deploys the software in the Kubernetes cluster.
Network Access Requirement
The Kubernetes cluster hosts must have network access to the following repositories:
- Local helm repository,
where the CNC Console helm charts are available.
To check if the Kubernetes cluster hosts have network access to the local helm repository, run the following command:
helm repo update - Local docker image
repository: It contains the CNC Console Docker images.
To check if the Kubernetes cluster hosts can access the the local Docker image repository, try to retrieve any image with tag name to check connectivity by running the following command:
docker pull <docker-repo>/<image-name>:<image-tag>
where:podman pull <Podman-repo>/<image-name>:<image-tag><docker-repo>is the IP address or host name of the repository.<Podman-repo>is the IP address or host name of the Podman repository.<image-name>is the docker image name.<image-tag>is the tag the image used for the CNC Console pod.
Note:
Run the kubectl and helm
commands on a system based on the deployment infrastructure.
For instance, they can be run on a client machine such as
VM, server, local desktop, and so on.
Server or Space Requirement
For information about the server or space requirements, see the Oracle Communications Cloud Native Core, Cloud Native Environment Installation, Upgrade, and Fault Recovery Guide.
CNE Requirement
This section is applicable only if you are installing CNC Console on Cloud Native Environment (CNE).
echo $OCCNE_VERSIONFor more information about CNE, see Oracle Communications Cloud Native Core, Cloud Native Environment Installation, Upgrade, and Fault Recovery Guide.
cnDBTier Requirement
CNC Console supports cnDBTier . cnDBTier must be configured and running before installing CNC Console. For more information about installation procedure, see Oracle Communications cnDBTier Installation, Upgrade, and Fault Recovery Guide.
OSO Requirement
CNC Console supports OSO for common operation services (Prometheus and components such as alertmanager, pushgateway) for Kubernetes cluster which does not have these common services. For more information on installation procedure, see Oracle Communications OSO Installation Guide.
2.1.3 CNC Console Resource Requirement
This section lists the resource requirements to install and run CNC Console.
CNC Console and cnDBTier Resource Usage Guidelines
This section explains the guidelines for CNC Console and cnDBTier resource usage guidelines.
Note:
In case of deployment using shared DBTier between NF and Console, you must include Console DB Profile sizing in NF DB Profile sizing.Note:
- DBProfile replica count to be updated as per GR setup.
- Depending on GR setup of two, three, or four site choose replica count two, four, or six for SQL (ndbmysqld).
Table 2-3 CNC Console and cnDBTier Resource Usage
| Deployment Model | cnDBTier Usage | DBTier Resource Profile | Console Resources |
|---|---|---|---|
| Model 1 - Single Cluster, Single Instance (dedicated Console for each NF in a cluster) |
Console and NF have a single shared DBTier
|
|
|
| Model 2 - Single Cluster, Multiple Instances (One Console for many NFs/Instances in a cluster) |
Dedicated DBTier for Console
|
For the details, see cnDBTier Profiles |
|
| Model 3 - Multiple Clusters, Single Instance. (Multiple clusters with single NF/Instance in each cluster, M-CNCC/A-CNCC sitting in same/different clusters) |
Console and NF have a single shared DBTier
|
For the details, see cnDBTier Profiles |
|
| Model 4 - Multiple Clusters, Multiple Instances (Multiple clusters with multiple NF/Instance in each cluster, M-CNCC/A-CNCC sitting in same/different clusters) |
Dedicated DBTier for Console per Kubernetes cluster
|
For the details, see cnDBTier profiles |
|
Note:
- Time synchronization is required between Kubernetes nodes across cluster for functioning of CNC Console security procedures.
- Ensure NTP sync before proceeding with M-CNCC IAM, M-CNCC Core, and A-CNCC Core installation.
Resource usage for CNC Console Single Cluster and Multicluster deployment is listed in the following tables.
Resource Usage for CNC Console Single Cluster DeploymentSingle Cluster Deployment includes M-CNCC IAM, M-CNCC Core and A-CNCC Core components. It also includes common resource needed for manager or agent deployment.
Table 2-4 Resource Usage for CNC Console Single Cluster Deployment
| Component | Limits | Requests | ||
| CPU | Memory (Gi) | CPU | Memory (Gi) | |
| M-CNCC IAM | 4.5 | 4.5 | 4.5 | 4.5 |
| M-CNCC Core | 4 | 4 | 4 | 4 |
| A-CNCC Core | 2 | 2 | 2 | 2 |
| CNCC Common Resource | 2 | 2 | 2 | 2 |
| Total | 12.5 | 12.5 | 12.5 | 12.5 |
Formula
Total Resource = M-CNCC IAM Resource + M-CNCC Core Resource + A-CNCC Core Resource + CNCC Common Resource
Resource Usage for CNC Console Multicluster DeploymentMulticluster Deployment will include M-CNCC IAM and M-CNCC Core components in Manager cluster. A-CNCC Core component shall be deployed in Manager cluster if there is a local NF.
A-CNCC Core is needed in each Agent cluster for managing local NF. CNC Console Common Resource is a common resource needed for manager or agent deployment.
Table 2-5 Resource Usage for CNC Console Multicluster Deployment
| Component | Limits | Requests | ||
| CPU | Memory (Gi) | CPU | Memory (Gi) | |
| M-CNCC IAM | 4.5 | 4.5 | 4.5 | 4.5 |
| M-CNCC Core | 4 | 4 | 4 | 4 |
| A-CNCC Core | 2 | 2 | 2 | 2 |
| CNCC Common Resource | 2 | 2 | 2 | 2 |
| *No Of Agents In Other Clusters | 2 | |||
| Total | 18.5 | 18.5 | 18.5 | 18.5 |
* Assumed number of Agents (A-CNCC Core deployments) for the calculation
Formula to calculate total resource usage:
Total Resource = M-CNCC IAM Resource + M-CNCC Core Resource + Common Resources + (No Of Agents In Other Clusters x (CNCC Common Resource + A-CNCC Core Resource))
CNC Console Manager Only DeploymentThe following table shows resource requirement for manager only deployment. In this case, agent will be deployed in separate cluster.
Table 2-6 CNC Console Manager Only Deployment
| Component | Limits | Requests | ||
| CPU | Memory (Gi) | CPU | Memory (Gi) | |
| M-CNCC IAM | 4.5 | 4.5 | 4.5 | 4.5 |
| M-CNCC Core | 4 | 4 | 4 | 4 |
| A-CNCC Core | 0 | 0 | 0 | 0 |
| CNCC Common Resource | 2 | 2 | 2 | 2 |
| Total | 10.5 | 10.5 | 10.5 | 10.5 |
The following table shows resource requirement for agent only deployment, in this case manager will be deployed in separate cluster.
Table 2-7 CNC Console Agent Only Deployment
| Component | Limits | Requests | ||
| CPU | Memory (Gi) | CPU | Memory (Gi) | |
| M-CNCC IAM | 0 | 0 | 0 | 0 |
| M-CNCC Core | 0 | 0 | 0 | 0 |
| A-CNCC Core | 2 | 2 | 2 | 2 |
| CNCC Common Resource | 2 | 2 | 2 | 2 |
| Total | 4 | 4 | 4 | 4 |
The following table shows resource requirement for manager with agent deployment, in this case agent will be deployed along with manager to manage local NF.
This manager can manage agents deployed in other clusters.
Table 2-8 CNC Console Manager with Agent Deployment
| Component | Limits | Requests | ||
| CPU | Memory (Gi) | CPU | Memory (Gi) | |
| M-CNCC IAM | 4.5 | 4.5 | 4.5 | 4.5 |
| M-CNCC Core | 4 | 4 | 4 | 4 |
| A-CNCC Core | 2 | 2 | 2 | 2 |
| CNCC Common Resource | 2 | 2 | 2 | 2 |
| Total | 12.5 | 12.5 | 12.5 | 12.5 |
Table 2-9 CNCC Common Resource Usage
| Microservice Name | Containers | Limits | Requests | Comments | ||
|---|---|---|---|---|---|---|
| CPU | Memory | CPU | Memory | |||
| hookJobResources | NA | 2 | 2 | 2 | 2 | Common Hook Resource |
| helm test | cncc-test | 0 | 0 | 0 | 0 | Uses hookJobResources |
| Total | 2 | 2 | 2 | 2 | ||
Note:
- Debug tool resources are not considered in the calculation. Debug tool resources usage is per pod, if debug tool is enabled for more than one pod then max 1vCPU and 2Gi Memory per pod is needed.
- Service Mesh (ASM) sidecar resources are not considered in the calculation. Service Mesh sidecar resources usage is per pod, that is, if Service Mesh is enabled and sidecar is injected, then max 1vCPU and 1Gi Memory per pod is needed.
Table 2-10 M-CNCC IAM Resource Usage
| Microservice Name | Containers | Limits | Requests | Comments | ||
|---|---|---|---|---|---|---|
| CPU | Memory | CPU | Memory | |||
| cncc-iam-ingress-gateway | ingress-gateway | 2 | 2 | 2 | 2 | |
| init-service* | 0 | 0 | 0 | 0 | Applicable when HTTPS is enabled. *Init-service container's resources are not counted because the container gets terminated after initialization completes. | |
| common_config_hook | 0 | 0 | 0 | 0 | common_config_hook not used in IAM | |
| cncc-iam-kc-http | kc | 2 | 2 | 2 | 2 | |
| init-service* | 0 | 0 | 0 | 0 | Optional, used for enabling LDAPS. *Init-service container's resources are not counted because the container gets terminated after initialization completes. | |
| healthcheck | 0.5 | 0.5 | 0.3 | 0.3 | ||
| cnnc-iam--pre-install | 0 | 0 | 0 | 0 | Uses hookJobResources | |
| cnnc-iam-pre-upgrade | 0 | 0 | 0 | 0 | Uses hookJobResources | |
| cnnc-iam-post-install | 0 | 0 | 0 | 0 | Uses hookJobResources | |
| cnnc-iam-post-upgrade | 0 | 0 | 0 | 0 | Uses hookJobResources | |
| Total | 4.5 | 4.5 | 4.5 | 4.5 | ||
Table 2-11 M-CNCC Core Resource Usage
| Microservice Name | Containers | Limits | Requests | Comments | ||
|---|---|---|---|---|---|---|
| CPU | Memory | CPU | Memory | |||
| cncc-mcore-ingress-gateway | ingress-gateway | 2 | 2 | 2 | 2 | |
| init-service* | 0 | 0 | 0 | 9 | Applicable when HTTPS is enabled. *Init-service container's resources are not counted because the container gets terminated after initialization completes. | |
| common_config_hook* | 0 | 0 | 0 | 0 | Common Configuration Hook container creates databases which are used by Common Configuration Client. *common_config_hook container's resources are not counted because the container gets terminated after initialization completes. | |
| cncc-mcore-cmservice | cmservice | 2 | 2 | 2 | 2 | |
| validation-hook | 0 | 0 | 0 | 0 | Uses common hookJobResources | |
| Total | 4 | 4 | 4 | 4 | ||
Table 2-12 A-CNCC Core Resource Usage
| Microservice Name | Containers | Limits | Requests | Comments | ||
|---|---|---|---|---|---|---|
| CPU | Memory | CPU | Memory | |||
| cncc-acore-ingress-gateway | ingress-gateway | 2 | 2 | 2 | 2 | |
| init-service* | 0 | 0 | 0 | 0 | Applicable when HTTPS is enabled. *Init-service container's resources are not counted because the container gets terminated after initialization completes. | |
| common_config_hook* | 0 | 0 | 0 | 0 | Common Configuration Hook container creates databases which are used by Common Configuration Client. *Init-service container's resources are not counted because the container gets terminated after initialization completes. | |
| validation-hook | 0 | 0 | 0 | 0 | Uses common hookJobResources | |
| Total | 2 | 2 | 2 | 2 | ||
2.2 Installation Sequence
This section describes the CNC Console preinstallation, installation, and postinstallation tasks.
2.2.1 Preinstallation Tasks
Before installing CNC Console, perform the tasks described in this section.
Note:
For IPv4 or IPv6 configurations, see Support for IPv4 or IPV6 Configuration for CNC Console.2.2.1.1 Downloading CNC Console Package
To download the CNCC package from My Oracle Support My Oracle Support (MOS), perform the following steps
- Log in to My Oracle Support using your login credentials.
- Click the Patches & Updates tab to locate the patch.
- In the Patch Search console, click the Product or Family (Advanced) option.
- Enter Oracle Communications Cloud Native Core - 5G in Product field and select the product from the Product drop-down list.
- From the Release drop-down list, select "Oracle Communications Cloud Native
Configuration Console <release_number>".
Where, <release_number> indicates the required release number of CNCC.
- Click Search.
The Patch Advanced Search Results list appears.
- Select the required patch from the list.
The Patch Details window appears.
- Click on Download.
The File Download window appears.
- Click on the <p********_<release_number>_Tekelec>.zip file.
- Extract the release package zip file to download the network function patch to the system where network function must be installed.
- Extract the release package zip file.
Package is named as follows:
occncc_csar_<marketing-release-number>.zipExample:
occncc_csar_23_4_4_0_0.zipNote:
The user must have their own repository for storing the CNC Console images and repository which must be accessible from the Kubernetes cluster.
2.2.1.2 Library of text variables
This library includes text variables. Each text variable is defined by means of a <ph> element in a separate paragraph. The <ph> attribute 'varid' should hold a unique name for the variable.
Cloud Native Configuration Console
23.4.4
23_4_4
2.2.1.3 Pushing the Images to Customer Docker Registry
CNC Console deployment package includes ready-to-use images and Helm charts to help orchestrate containers in Kubernetes. The communication between Pods of services of CNC Console products are preconfigured in the Helm charts.
To push the images to the registry, perform the following steps:
- Unzip the CNC Console package file: Unzip the CNC Console package
file to the specific repository:
unzip
                        occncc_csar_<marketing-release-number>.zip
The package consists of following files and folders:
- Files: CNC Console Docker images file and CNC Console Helm Charts
- Scripts: Custom values and alert files:
- CNC Console custom values file :
occncc_custom_values_<version>.yaml - CNC Console cnDBTier custom values file :
occncc_dbtier_<cndbtier_version>_custom_values_<version>.yaml - CNC Console network policy custom values file :
occncc_network_policy_custom_values_<version>.yaml - CNC Console IAM Schema file for rollback to previous
version :
occncc_rollback_iam_schema_<version>.sql - CNC Console Metric Dashboard file :
occncc_metric_dashboard_<version>.json - CNC Console Metric Dashboard file for CNE
supporting Prometheus HA (CNE 1.9.x onwards):
occncc_metric_dashboard_promha_<version>.json - CNC Console Alert Rules file:
occncc_alertrules_<version>.yaml - CNC Console Alert Rules file for CNE supporting
Prometheus HA (CNE 1.9.x onwards):
occncc_metric_dashboard_promha_<version>.json - CNC Console MIB files:
occncc_mib_<version>.mib, occncc_mib_tc_<version>.mib - CNC Top level mib file:
toplevel.mib
- CNC Console custom values file :
- Definitions: Definitions folder contains the CNE
Compatibility and definition files.
occncc_cne_compatibility.yamloccncc.yaml
- TOSCA-Metadata:
TOSCA.meta - The package folder structure is as
follows:
Definitions
       occncc_cne_compatibility.yaml
       occncc.yaml
Files
    apigw-common-config-hook-23.4.10.tar
    apigw-configurationinit-23.4.10.tar
    ChangeLog.txt
    cncc-apigateway-23.4.10.tar
    cncc-core-validationhook-23.4.4.tar
    cncc-iam-23.4.4.tar
    cncc-iam-healthcheck-23.4.4.tar
    cncc-iam-hook-23.4.4.tar
    Helm
        occncc-23.4.4.tgz
        occncc-network-policy-23.4.4.tgz
    Licenses
    nf_test-23.4.3.tar
    ocdebug-tools--23.4.3.tar
    Oracle.cert
    Tests
occncc.mf
Scripts
    occncc_alerting_rules_promha_23.4.4.yaml
    occncc_alertrules_23.4.4.yaml
    occncc_custom_values_23.4.4.yaml
    occncc_dbtier_23.4.0_custom_values_23.4.4.yaml
    occncc_metric_dashboard_23.4.4.json
    occncc_metric_dashboard_promha_23.4.4.json
    occncc_mib_23.4.4.mib
    occncc_mib_tc_23.4.4.mib
    occncc_network_policy_custom_values_23.4.4.yaml
    occncc_rollback_iam_schema_23.4.4.sql
    toplevel.mib
TOSCA-Metadata
    TOSCA.meta
For example,Example: unzip occncc_csar_23_4_4_0_0.zip Archive: occncc_csar_23_4_4_0_0.zip inflating: Definitions/occncc_cne_compatibility.yaml inflating: Definitions/occncc.yaml creating: Files/ creating: Files/Tests/ creating: Files/Helm/ inflating: Files/Helm/occncc-23.4.4.tgz extracting: Files/Helm/occncc-network-policy-23.4.4.tgz creating: Files/Licenses/ inflating: Files/apigw-configurationinit-23.4.10.tar inflating: Files/apigw-common-config-hook-23.4.10.tar inflating: Files/ocdebug-tools-23.4.3.tar inflating: Files/cncc-apigateway-23.4.10.tar inflating: Files/cncc-iam-23.4.4.tar inflating: Files/cncc-iam-hook-23.4.4.tar inflating: Files/cncc-iam-healthcheck-23.4.4.tar inflating: Files/nf_test-23.4.3.tar inflating: Files/cncc-core-validationhook-23.4.4.tar inflating: Files/cncc-cmservice-23.4.4.tar inflating: Files/ChangeLog.txt extracting: Files/Oracle.cert creating: Scripts/ inflating: Scripts/occncc_custom_values_23.4.4.yaml inflating: Scripts/occncc_network_policy_custom_values_23.4.4.yaml inflating: Scripts/occncc_mib_tc_23.4.4.mib inflating: Scripts/occncc_mib_23.4.4.mib inflating: Scripts/toplevel.mib inflating: Scripts/occncc_metric_dashboard_23.4.4.json inflating: Scripts/occncc_metric_dashboard_promha_23.4.4.json inflating: Scripts/occncc_alertrules_23.4.4.yaml inflating: Scripts/occncc_alerting_rules_promha_23.4.4.yaml inflating: Scripts/occncc_rollback_iam_schema_23.4.4.sql inflating: Scripts/ occncc_dbtier_23.4.0_custom_values_23.4.4.yaml creating: TOSCA-Metadata/ inflating: TOSCA-Metadata/TOSCA.meta inflating: occncc.mf - Run the following command to move to Files Folder To load docker image :
cd Files - Run the following command to load the Docker images to docker
registry:
Example:docker load --input <image-name>:<image-tag>.tar docker tag <image-name>:<image-tag> <docker-repo>/<image-name>:<image-tag> docker push <docker_repo>/<image_name>:<image-tag>docker load --input apigw-common-config-hook-23.4.10.tar docker tag occncc/apigw-common-config-hook:23.4.10 <docker-repo>/occncc/apigw-common-config-hook:23.4.4 docker push <docker-repo>/occncc/apigw-common-config-hook:23.4.10 docker load --input cncc-core-validationhook-23.4.4.tar docker tag occncc/cncc-core-validationhook:23.4.4 <docker-repo>/occncc/cncc-core-validationhook:23.4.4 docker push <docker-repo>/occncc/cncc-core-validationhook:23.4.4 docker load --input nf_test-23.4.3.tar docker tag occncc/nf_test:23.4.3 <docker-repo>/occncc/nf_test:23.4.3 docker push <docker-repo>/occncc/nf_test:23.4.3 docker load --input apigw-configurationinit-23.4.10.tar docker tag occncc/apigw-configurationinit:23.4.10 <docker-repo>/occncc/apigw-configurationinit:23.4.10 docker push <docker-repo>/occncc/apigw-configurationinit:23.4.10 docker load --input cncc-iam-23.4.4.tar docker tag occncc/cncc-iam:23.4.4 <docker-repo>/occncc/cncc-iam:23.4.4 docker push <docker-repo>/occncc/cncc-iam:23.4.4 docker load --input ocdebug-tools-23.4.3.tar docker tag occncc/ocdebug-tools:23.4.3 <docker-repo>/occncc/ocdebug-tools:23.4.3 docker push <docker-repo>/occncc/ocdebug-tools:23.4.3 docker load --input cncc-iam-healthcheck-23.4.4.tar docker tag occncc/cncc-iam-healthcheck:23.4.4 <docker-repo>/occncc/cncc-iam-healthcheck:23.4.4 docker push <docker-repo>/occncc/cncc-iam-healthcheck:23.4.4 docker load --input cncc-iam-hook-23.4.4.tar docker tag occncc/cncc-iam-hook:23.4.4 <docker-repo>/occncc/cncc-iam-hook:23.4.4 docker push <docker-repo>/occncc/cncc-iam-hook:23.4.4 docker load --input cncc-apigateway-23.4.10.tar docker tag occncc/cncc-apigateway:23.4.10 <docker-repo>/occncc/cncc-apigateway:23.4.10 docker push <docker-repo>/occncc/cncc-apigateway:23.4.10 docker load --input cncc-cmservice-23.4.4.tar docker tag occncc/cncc-cmservice:23.4.4<docker-repo>/occncc/cncc-cmservice:23.4.4 docker push <docker-repo>/occncc/cncc-cmservice:23.4.4 - Run the following command to check whether all the images are
loaded:
docker images - Run the following command to move to the Helm Directory
Example:cd Helmhelm cm-push --force occncc-23.4.4.tgz ocspf-helm-repo - Run the following command to push helm charts to Helm
Repository:
helm cm-push --force <chart name>.tgz <helm repo>For example:helm cm-push --force occncc-23.4.4.tgz ocspf-helm-repo
2.2.1.4 Verifying and Creating CNC Console Namespace
This section explains how to verify or create new namespace in the system.
Note:
This is a mandatory procedure, run this before proceeding further with the installation. The namespace created or verified in this procedure is an input for the next procedures.
To verify and create a namespace:
Note:
To install CNC Console in NF specific namespace, replace cncc namespace with custom namespace.- Run the following command to verify if the required namespace already exists in
system:
kubectl get namespaces - If the namespace exists, you may continue with the next steps of installation.
If the required namespace is not available, create a namespace using the
following
command:
kubectl create namespace <required namespace> - For
Example:
kubectl create namespace cncc
Sample output: namespace/cncc created
Naming Convention for Namespaces
The namespace should:
- start and end with an alphanumeric character
- contain 63 characters or less.
- contain only alphanumeric characters or '-'.
Note:
It is recommended to avoid using prefixkube- when creating namespace. The prefix is reserved for
Kubernetes system namespaces.
Note:
For the information about extra privileges required to enable Debug tools, see the steps mentioned in the section CNC Console Debug Tools.2.2.1.5 Creating Service Account, Role, and Rolebinding
2.2.1.5.1 Global Service Account Configuration
This section is optional and it describes how to manually create a service account, role, and rolebinding.
Note:
The secrets should exist in the same namespace where CNC Console is getting deployed. This helps to bind the Kubernetes role with the given service account.
- Run the following command to create an CNC Console resource
file:
vi <occncc-resource-file>Example:
vi occncc-resource-template.yaml - Update the
occncc-resource-template.yamlfile with release specific informationNote:
Update<helm-release>and<namespace>with its respective CNC Console namespace and CNC Console Helm release name.A sample CNC Console service account yaml file is as follows:
## Service account yaml file for cncc-sa apiVersion: v1 kind: ServiceAccount metadata: name: cncc-sa namespace: cncc annotations: {} --- apiVersion: rbac.authorization.k8s.io/v1 kind: Role metadata: name: cncc-role namespace: cncc rules: - apiGroups: - "" # "" indicates the core API group resources: - services - configmaps - pods - secrets - endpoints - persistentvolumeclaims verbs: - get - watch - list --- apiVersion: rbac.authorization.k8s.io/v1 kind: RoleBinding metadata: name: cncc-rolebinding namespace: cncc roleRef: apiGroup: rbac.authorization.k8s.io kind: Role name: cncc-role subjects: - kind: ServiceAccount name: cncc-sa namespace: cncc - Run the following command to create service account, role, and role
binding:
kubectl -n <occncc-namespace> create -f occncc-resource-template.yaml - Update the
serviceAccountNameparameter in theoccncc_custom_values_<version>.yamlfile with the value updated in thenamefield for ingress-gateway and keycloak.For Ingress Gateway and Keycloak provide custom service account under global.serviceAccountName. as follows:
global:

  serviceAccountName: &serviceAccountName cncc-sa

cncc-iam:
  kc:
    keycloak:
      serviceAccount:
        # The name of the service account to use.
        name: *serviceAccountName
2.2.1.5.2 Helm Test Service Account Configuration
This section is optional and it describes how to manually create a service account, role, and rolebinding for helm test.
Custom service account can be provided for helm test in
global.helmTestServiceAccountName:
global:

  # ********    Sub-Section Start: Common Global Parameters        ********
  # ***********************************************************************

helmTestServiceAccountName: cncc-helmtest-serviceaccount- Run the following command to create an CNC Console resource
file:
vi <occncc-resource-file>Example:
vi occncc-resource-template.yaml - Update the
occncc-resource-template.yamlfile with release specific informationNote:
Update<helm-release>and<namespace>with its respective CNC Console namespace and CNC Console Helm release name.A sample CNC Console service account yaml file is as follows:
Sample helm test service account : cncc-helmtest-serviceaccount.yamlapiVersion: v1 kind: ServiceAccount metadata: name: cncc-helmtest-serviceaccount namespace: cncc annotations: {} --- apiVersion: rbac.authorization.k8s.io/v1 kind: Role metadata: name: cncc-helmtest-role namespace: cncc rules: - apiGroups: - "" # "" indicates the core API group resources: - services - configmaps - pods - secrets - endpoints - persistentvolumeclaims - serviceaccounts verbs: - get - watch - list - apiGroups: - policy resources: - poddisruptionbudgets verbs: - get - watch - list - update - apiGroups: - apps resources: - deployments - statefulsets verbs: - get - watch - list - update - apiGroups: - autoscaling resources: - horizontalpodautoscalers verbs: - get - watch - list - update - apiGroups: - rbac.authorization.k8s.io resources: - roles - rolebindings verbs: - get - watch - list - update - apiGroups: - monitoring.coreos.com resources: - prometheusrules verbs: - get - watch - list - update --- apiVersion: rbac.authorization.k8s.io/v1 kind: RoleBinding metadata: name: cncc-helmtest-rolebinding namespace: cncc roleRef: apiGroup: rbac.authorization.k8s.io kind: Role name: cncc-helmtest-role subjects: - kind: ServiceAccount name: cncc-helmtest-serviceaccount namespace: cncc - Run the following command to create service account, role, and role
binding:
kubectl -n <occncc-namespace> create -f occncc-resource-template.yaml - Update the
global.helmTestServiceAccountNameparameter in theoccncc_custom_values_<version>.yamlfile with the value updated in thenamefield for ingress-gateway and keycloak.
Note:
If user doesn't want to create the separate service account for helm test, then logging of resources and complaint check could also be done using global service account. For that, required resources should be added to the global service account. For more details on helmTestserviceAccount, see Helm Test section.2.2.1.6 Configuring Database
This section explains how database administrators can create users and database in a single and multisite deployment.
Note:
- Before running the procedure for georedundant sites, ensure that the DBTier for georedundant sites is up and replication channels are enabled.
- While performing a fresh installation, if CNCC release is already deployed, purge the deployment, and remove the database and users that were used for the previous deployment. For uninstallation procedure, see Uninstalling CNC Console.
- If cnDBTier 23.3.0 is used during installation, set the ndb_allow_copying_alter_table parameter to 'ON' in the occncc_dbtier_23.3.0_custom_values_23.3.0.yaml file before installing CNC Console. After CNC Console installation, the parameter value can be set to its default value 'OFF'.
Caution:
Verify the value of the following parameters, before deploying CNC Console in a three site georedundency setup:
ndb:
MaxNoOfOrderedIndexes: 1024
MaxNoOfTables: 1024
NoOfFragmentLogFiles: 512
Naming Convention for CNCC Database
As the CNCC instances cannot share the same database, user must provide a unique name to the CNCC DB in the cnDBTier either limited to a site or spanning across sites.
<database-name>_<site-name>_<cluster> cnccdb_site1_cluster1- starts and ends with an alphanumeric character
- contains a maximum of 63 characters
- contains only alphanumeric characters or '-'
2.2.1.6.1 Configuring the Database User
This section explains how to create or verify the existing cncc user.
- Log in to the server or machine which has permission to access the SQL nodes of the NDB cluster.
- Connect to the SQL node of the NDB cluster or connect to the
cnDbTier.
Run the following command to connect to cnDbTier:
Example:$ kubectl -n <cndbtier_namespace> exec -it <cndbtier_sql_pod_name> -c <cndbtier_sql_container_name> -- bash$ kubectl -n cndbtier exec -it ndbappmysqld-0 -c mysqlndbcluster -- bash - Log in to the MySQL prompt using root permission or user, which has
permission to create users with
permissions.
mysql -h 127.0.0.1 -u root -pNote:
Provide MySQL password, when prompted. - Check if CNCC user already exists by running the following
command:
$ SELECT User FROM mysql.user; - If the user does not exist, create a cncc-user by running the
following
command:
$ CREATE USER '<CNCC User Name>'@'%' IDENTIFIED BY '<CNCC Password>';Note:
You must use a strong non-predictable password consisting of complex strings of more than 10 mixed characters. - Run the following command to grant NDB_STORED_USER permission to the
cncc-user:
Example:$ GRANT NDB_STORED_USER ON *.* TO '<username>'@'%' WITH GRANT OPTION;$ GRANT NDB_STORED_USER ON *.* TO 'cnccusr'@'%' WITH GRANT OPTION;
2.2.1.6.2 Configuring M-CNCC IAM Database
This section explains how to create M-CNCC IAM Database and grant permissions to the CNC Console user for relevant operations on the Database.
Note:
In this guide, the commands use "cnccdb" as sample database name. If a custom database name is used, user must use it in place of cnccdb.- Log in to the server or machine with permission to access the SQL nodes of NDB cluster.
- Run the following command to connect to the
cnDBTier:
$ kubectl -n <cndbtier_namespace> exec -it <cndbtier_sql_pod_name> -c <cndbtier_sql_container_name> -- bashExample:$ kubectl -n cndbtier exec -it ndbappmysqld-0 -c mysqlndbcluster -- bash - Run the following command to log in to the MySQL prompt as a user
with root permissions, which has permission to create users with permissions:
mysql -h 127.0.0.1 -u root -pNote:
Enter the above command, and use the MYSQL password. - Check if M-CNCC IAM database already exists:
- Run the following command to check if database exists:
show databases;- If any of the previously configured databases are already
present, remove them. Otherwise skip this step.
Run the following command to drop the existing cnccdb database:Example:
DROP DATABASE <CNCC IAM Database>DROP DATABASE cnccdb;
- If any of the previously configured databases are already
present, remove them. Otherwise skip this step.
- Run the following command to create the
Database:
Example:$ CREATE DATABASE IF NOT EXISTS <CNCC IAM Database>;$ CREATE DATABASE IF NOT EXISTS cnccdb; - Run the following command to grant permission to
cncc-user:
Example:$ GRANT SELECT, INSERT, CREATE, ALTER, DROP, LOCK TABLES, REFERENCES, INDEX, CREATE TEMPORARY TABLES, DELETE, UPDATE, EXECUTE ON <M-CNCC IAM Database>.* TO'<CNCC IAM DB User Name>'@'%';$ GRANT SELECT, INSERT, CREATE, ALTER, DROP, LOCK TABLES, REFERENCES, INDEX, CREATE TEMPORARY TABLES, DELETE, UPDATE, EXECUTE ON cnccdb .* TO'cnccusr'@'%';
- Run the following command to check if database exists:
2.2.1.6.3 Configuring M-CNCC Core Database
This section explains how to create M-CNCC Core database (mcncccommonconfig) and grant permissions to the M-CNCC Core database user for relevant operations on the mcncccommonconfig Database.
Note:
In this installation guide, the commands use "mcncccommonconfig" as sample db name. The sample db name "mcncccommonconfig" must be replaced to the name chosen as per naming conventions defined by this note.- Log in to the server or machine which has permission to access the SQL nodes of the NDB cluster.
- Connect to the SQL node of the NDB cluster or connect to the
cnDBTier.
Run the following command to connect to the cnDBTier:
Example:$ kubectl -n <cndbtier_namespace> exec -it <cndbtier_sql_pod_name> -c <cndbtier_sql_container_name> -- bash$ kubectl -n occne-cndbtier exec -it ndbappmysqld-0 -c mysqlndbcluster -- bash - Log in to the MySQL prompt using root permission or as a user with
permission to create new users (with permissions).
$ mysql -h 127.0.0.1 -u root -pNote:
After running the command mentioned above, user must enter MySQL password. - Run the following command to check if Database
mcncccommonconfig exists:
$ show databases; - Run the following command to create a mcncccommonconfig, if the
mcncccommonconfig does not
exist:
$ CREATE DATABASE IF NOT EXISTS <M-CNCC Common Config Database>; - Run the following command to grant permission to cncc-user:
$ GRANT SELECT, INSERT, CREATE, ALTER, DROP, LOCK TABLES, CREATE TEMPORARY TABLES, DELETE, UPDATE,
EXECUTE ON <M-CNCC Core Common Config Database>.* TO'<CNCC User Name>'@'%';
# Command to check if database exists:
$ show databases;
# Database creation for CNCC mcncccommonconfig if do not exists
$ CREATE DATABASE IF NOT EXISTS mcncccommonconfig;
# Granting permission to user:
$ GRANT SELECT, INSERT, CREATE, ALTER, DROP, LOCK TABLES, CREATE TEMPORARY TABLES, DELETE, UPDATE, EXECUTE ON mcncccommonconfig .* TO'cnccusr'@'%';
2.2.1.7 Configuring Kubernetes Secret
This section explains how to configure Kubernetes secrets for accessing the database and the M-CNCC IAM default user.
2.2.1.7.1 Configuring Kubernetes Secret for Accessing Database
This section explains how to configure Kubernetes secrets for accessing the database.
- Run the following command to create the kubernetes
secret:
kubectl create secret generic <database secret name> --from-literal=dbUserNameKey=<CNCC MySQL database username> --from-literal=dbPasswordKey='<CNCC MySQL database passsword>' -n <Namespace of MySQL secret>Note:
You must use a strong non-predictable password consisting of complex strings of more than 10 mixed characters. - Verify the secret created using following
command:
Example:kubectl describe secret <database secret name> -n <Namespace of MYSQL secret>$ kubectl create secret generic cncc-db-secret --from-literal=dbUserNameKey=cnccusr --from-literal=dbPasswordKey='<db password>' -n cncc $ kubectl describe secret cncc-db-secret -n cncc
2.2.1.7.2 Configuring Secret for the Admin User in M-CNCC IAM
To create and update Kubernetes secret for default (admin) user:
- Run the following command to create the Kubernetes secret for admin
user:
$ kubectl create secret generic <secret-name> --from-literal=iamAdminPasswordKey='<password>'--namespace <namespace>Example:$ kubectl create secret generic cncc-iam-secret --from-literal=iamAdminPasswordKey='password' --namespace cnccNote:
This Command is just for reference. You must use a strong non-predictable password consisting of complex strings of more than 10 mixed characters. - Run the following command to verify the secret creation:
$ kubectl describe secret <secret name> -n <namespace>Example:$ kubectl describe secret cncc-iam-secret -n cncc
2.2.1.8 Configuring Secrets for Enabling HTTPS
This section explains the steps to configure HTTPS at Ingress Gateway.
This step is optional. It is required only when SSL settings need to be enabled on Ingress Gateway microservices of CNC Console.
- ECDSA private key and CA signed certificate of CNC Console, if initialAlgorithm is ES256
- RSA private key and CA signed certificate of CNC Console, if initialAlgorithm is RS256
- TrustStore password file
- KeyStore password file
- CA certificate/ CA Bundle
CA Bundle creation
When combining multiple CA certificates into a single certificate, add a delimiter after each certificate.
Delimiter: "--------"
Sample CA Bundle-----BEGIN CERTIFICATE----- MIID4TCC... ... ...jtUl/zQ== -----END CERTIFICATE----- -------- -----BEGIN CERTIFICATE----- MIID4TCC... ... ...jtUl/zQ== -----END CERTIFICATE----- -------- -----BEGIN CERTIFICATE----- MIID4TCC... ... ...jtUl/zQ== -----END CERTIFICATE-----
Note:
Creation process for private keys, certificates and passwords is at the discretion of the user or operator.Note:
For more information on how to enable HTTPS, see CNC Console Instances Configuration Examples2.2.1.8.1 Configuring Secret to Enable HTTPS in M-CNCC IAM
This section describes how create and configure secrets to enable HTTPS. This section must be executed before Configuring Secret to Enable HTTPS CNCC Core Ingress Gateway.
- Run the following command to create
secret:
$ kubectl create secret generic <secret-name> --from-file=<ssl_ecdsa_private_key.pem> --from-file=<rsa_private_key_pkcs1.pem> --from-file=<ssl_truststore.txt> --from-file=<ssl_keystore.txt> --from-file=<caroot.cer> --from-file=<ssl_rsa_certificate.crt> --from-file=<ssl_ecdsa_certificate.crt> -n <Namespace of CNCC IAM Ingress Gateway secret>Note:
Note down the command used during the creation of Kubernetes secret as this command is used for future updates.Example:
$ kubectl create secret generic cncc-iam-ingress-secret --from-file=ssl_ecdsa_private_key.pem --from-file=rsa_private_key_pkcs1.pem --from-file=ssl_truststore.txt --from-file=ssl_keystore.txt --from-file=caroot.cer --from-file=ssl_rsa_certificate.crt --from-file=ssl_ecdsa_certificate.crt -n cnccNote:
The names used in the above command must be as same as the names provided in the custom_values.yaml in CNC Console deployment. - On successfully running the above command, the following message is
displayed:
secret/cncc-iam-ingress-secret created
- Run the following command to verify the secret creation:
$ kubectl describe secret cncc-iam-ingress-secret -n cncc
Perform the following procedure to update existing secrets to enable HTTPS, if they already exist:
- Run the following command to create
secret:
$ kubectl create secret generic <secret-name> --from-file=<ssl_ecdsa_private_key.pem> --from-file=<rsa_private_key_pkcs1.pem> --from-file=<ssl_truststore.txt> --from-file=<ssl_keystore.txt> --from-file=<caroot.cer> --from-file=<ssl_rsa_certificate.crt> --from-file=<ssl_ecdsa_certificate.crt> --dry-run -o yaml -n <Namespace of CNCC IAM Ingress Gateway secret> | kubectl replace -f --n <Namespace of CNCC IAM Ingress Gateway secret>Example:
$ kubectl create secret generic cncc-iam-ingress-secret --from-file=ssl_ecdsa_private_key.pem --from-file=rsa_private_key_pkcs1.pem --from-file=ssl_truststore.txt --from-file=ssl_keystore.txt --from-file=caroot.cer --from-file=ssl_rsa_certificate.crt --from-file=ssl_ecdsa_certificate.crt --dry-run -o yaml -n cncc | kubectl replace -f --n cncc - On successfully running the above command, the following message is
displayed:
secret/cncc-iam-ingress-secret replaced
Dynamic Reloading of Certificates of M-CNCC IAM
Perform the following procedure for configuring CNC Console IAM to Support Dynamic Reloading of Certificates of M-CNCC IAM:
CNC Console supports Dynamic Reload of Certificates that are used to establish both TLS and mTLS connections.
To enable dynamic reloading of certificates, the following flags must be enabled in the occncc_custom_values_<version>.yaml file.
cncc-iam:
  global:
    ingressGwCertReloadEnabled: &iamIGwCertReloadEnabled true
Note:
The new certificate must be created with the existing secret and certificate name.- Delete the existing certificates with which existing secure connections were established.
- Create the new certificate as per the requirement. The certificate must be created with the same name as the existing certificate.
- The Ingress Gateway pods automatically pick up the new certificates and the changes will be reflected in the browser.
Note:
Naming Update of Certificates and Secrets
If the name of the secret or the certificate is changed then the corresponding changes must be made in the occncc_custom_values_<version>.yaml file and either a reinstall or a helm upgrade must be done.
2.2.1.8.2 Configuring Secret to Enable HTTPS in M-CNCC Core
This section describes how to create secret configuration for enabling HTTPS. This section must be run before enabling HTTPS in CNCC Core Ingress Gateway.
- Run the following command to create
secret:
$ kubectl create secret generic <secret-name> --from-file=<ssl_ecdsa_private_key.pem> --from-file=<rsa_private_key_pkcs1.pem> --from-file=<ssl_truststore.txt> --from-file=<ssl_keystore.txt> --from-file=<caroot.cer> --from-file=<ssl_rsa_certificate.crt> --from-file=<ssl_ecdsa_certificate.crt> -n <Namespace of CNCC Core Ingress Gateway secret>Note:
Note down the command used during the creation of kubernetes secret, this command is used for updates in future.Example:
On successfully running the above command, the following message will be displayed:kubectl create secret generic cncc-core-ingress-secret --from-file=ssl_ecdsa_private_key.pem --from-file=rsa_private_key_pkcs1.pem --from-file=ssl_truststore.txt --from-file=ssl_keystore.txt --from-file=caroot.cer --from-file=ssl_rsa_certificate.crt --from-file=ssl_ecdsa_certificate.crt -n cnccsecret/cncc-core-ingress-secret created
- Run the following command to verify the secret creation:
$ kubectl describe secret cncc-core-ingress-secret -n cncc
Perform the following procedure to update existing secrets to enable HTTPS:
- Run the following command to create
secret:
$ kubectl create secret generic <secret-name> --from-file=<ssl_ecdsa_private_key.pem> --from-file=<rsa_private_key_pkcs1.pem> --from-file=<ssl_truststore.txt> --from-file=<ssl_keystore.txt> --from-file=<caroot.cer> --from-file=<ssl_rsa_certificate.crt> --from-file=<ssl_ecdsa_certificate.crt> --dry-run -o yaml -n <Namespace of M-CNCC Core Ingress Gateway secret> | kubectl replace -f - -n <Namespace of CNCC Core Ingress Gateway secret>Example:
$ kubectl create secret generic cncc-core-ingress-secret --from-file=ssl_ecdsa_private_key.pem --from-file=rsa_private_key_pkcs1.pem --from-file=ssl_truststore.txt --from-file=ssl_keystore.txt --from-file=caroot.cer --from-file=ssl_rsa_certificate.crt --from-file=ssl_ecdsa_certificate.crt --dry-run -o yaml -n cncc | kubectl replace -f - -n cncc - On successfully running the above command, the following message
will be displayed:
secret/cncc-core-ingress-secret replaced
Dynamic Reloading of Certificates of M-CNCC Core
CNC Console supports dynamic reloading of certificates that are used to establish both TLS and mTLS connections. To enable dynamic reloading of certificates, the following flags must be enabled in the occncc_custom_values_<version>.yaml file.
mcncc-core:
  global:

       ingressGwCertReloadEnabled: & mcoreIGwCertReloadEnabled true
Note:
Here, the new certificate must be created with the existing secret and certificate name.- Delete the existing certificates with which existing secure connections were established.
- Create the new certificate as per the requirement. The certificate must be created with the same name as the existing certificate.
- The IGW pods automatically pick up the new certificates and the changes will be reflected in the browser.
Note:
Naming update of Certificates and Secrets
If the name of the secret or the certificate is changed then the corresponding changes must be made in the occncc_custom_values_<version>.yaml file and either a reinstall or a helm upgrade must be done.
2.2.1.8.3 Configuring Secret to Enable HTTPS in A-CNCC Core
This section describes how create and configure secrets to enable HTTPS. This section must be executed before Configuring Secret to Enable HTTPS CNCC Core Ingress Gateway.
- Run the following command to create
secret:
$ kubectl create secret generic <secret-name> --from-file=<ssl_ecdsa_private_key.pem> --from-file=<rsa_private_key_pkcs1.pem> --from-file=<ssl_truststore.txt> --from-file=<ssl_keystore.txt> --from-file=<caroot.cer> --from-file=<ssl_rsa_certificate.crt> --from-file=<ssl_ecdsa_certificate.crt> -n <Namespace of CNCC Core Ingress Gateway secret>Note:
Note down the command used during the creation of Kubernetes secret, this command is used for updating the secrets in future.Example:
On successfully running the above command, the following message will be displayed:kubectl create secret generic cncc-core-ingress-secret --from-file=ssl_ecdsa_private_key.pem --from-file=rsa_private_key_pkcs1.pem --from-file=ssl_truststore.txt --from-file=ssl_keystore.txt --from-file=caroot.cer --from-file=ssl_rsa_certificate.crt --from-file=ssl_ecdsa_certificate.crt -n cnccsecret/cncc-core-ingress-secret created
- Run the following command to verify the secret creation:
$ kubectl describe secret cncc-core-ingress-secret -n
                    cncc
Perform the following procedure to update existing secrets to enable HTTPS:
- Run the following command to create
secret:
$ kubectl create secret generic <secret-name> --from-file=<ssl_ecdsa_private_key.pem> --from-file=<rsa_private_key_pkcs1.pem> --from-file=<ssl_truststore.txt> --from-file=<ssl_keystore.txt> --from-file=<caroot.cer> --from-file=<ssl_rsa_certificate.crt> --from-file=<ssl_ecdsa_certificate.crt> --dry-run -o yaml -n <Namespace of CNCC Core Ingress Gateway secret> | kubectl replace -f - -n <Namespace of CNCC Core Ingress Gateway secret>Example:
$ kubectl create secret generic cncc-core-ingress-secret --from-file=ssl_ecdsa_private_key.pem --from-file=rsa_private_key_pkcs1.pem --from-file=ssl_truststore.txt --from-file=ssl_keystore.txt --from-file=caroot.cer --from-fileS=ssl_rsa_certificate.crt --from-file=ssl_ecdsa_certificate.crt --dry-run -o yaml -n cncc | kubectl replace -f - -n cncc - On successfully running the above command, the following message
will be displayed:
secret/cncc-core-ingress-secret replaced
Dynamic Reloading of Certificates of A-CNCC Core
CNC Console supports dynamic reloading of certificates that are used to establish both TLS and mTLS connections. To enable dynamic reloading of certificates, the following flags must be enabled in the occncc_custom_values_<version>.yaml file.
acncc-core:
  global:
     ingressGwCertReloadEnabled: &acoreIGwCertReloadEnabled true
Note:
Here the new certificate must be created with the existing secret and certificate name.- Delete the existing certificates with which existing secure connections were established.
- Create the new certificate as per the requirement. The certificate must be created with the same name as the existing certificate.
- The IGW pods automatically pick up the new certificates and the changes will be reflected in the browser.
Note:
Naming update of Certificates and Secrets
If the name of the secret or the certificate is changed then the corresponding changes must be made in the occncc_custom_values_<version>.yaml file and either a reinstall or a helm upgrade must be done.
2.2.1.9 Configuring CNC Console to support Aspen Service Mesh
2.2.1.9.1 Introduction
CNCC leverages the Platform Service Mesh (for example, Aspen Service Mesh (ASM)) for all internal and external TLS communication by deploying a special sidecar proxy in each pod to intercept all the network communications. The service mesh integration provides inter-NF communication and allows API gateway to co-work with service mesh. The service mesh integration supports the services by deploying a special sidecar proxy in each pods to intercept all the network communications between microservices.
Supported ASM version: 1.14.x
For ASM installation and configuration, see official Aspen Service Mesh website for details.
Aspen Service Mesh (ASM) configurations are categorized as follows:
- Control Plane: It involves adding labels or annotations to inject sidecar. The control plane configurations are part of the NF Helm chart.
- Data Plane: It helps in traffic management, such as handling NF call flows by adding Service Entries (SE), Destination Rules (DR), Envoy Filters (EF), and other resource changes such as apiVersion change between different versions. This configuration is done manually by considering each NF requirement and ASM deployment.
Data Plane Configuration
Data Plane configuration consists of following Custom Resource Definitions (CRDs):
- Service Entry (SE)
- Destination Rule (DR)
- Envoy Filter (EF)
Note:
Use Helm charts to add or remove CRDs that you may require due to ASM upgrades to configure features across different releases.The data plane configuration is applicable in the following scenarios:
- NF to NF Communication: During NF to NF communication, where sidecar is
injected on both the NFs, SE and DR must communicate with the corresponding SE and
DR of the other NF. Otherwise, the sidecar rejects the communication. All egress
communications of NFs must have a configured entry for SE and DR.
Note:
Configure the core DNS with the producer NF endpoint to enable the sidecar access for establishing communication between cluster. - Kube-api-server: For Kube-api-server, there are a few NFs that require access to the Kubernetes API server. The ASM proxy (mTLS enabled) may block this. As per F5 recommendation, the NF must add SE for the Kubernetes API server for its own namespace.
- Envoy Filters: Sidecars rewrite the header with its own default value. Therefore, the headers from back-end services are lost. So, you need Envoy Filters to help in passing the headers from back-end services to use it as it is.
Note:
For ASM installation and configuration, refer Official Aspen Service Mesh website for details.2.2.1.9.2 Predeployment Configuration
Following are the prerequisites to install CNCC with support for ASM:
Enabling Auto sidecar Injection for Namespace
This section explains how to enable auto sidecar injection for namespace.
- Run the following command to enable auto sidecar injection to
automatically add the sidecars in all of the pods spawned in CNCC
namespace:
$ kubectl label ns <cncc-namespace> istio-injection=enabledExample:
$ kubectl label ns cncc istio-injection=enabled
Update Default Kyverno Policy Restriction to add CNC Console Namespace
Note:
You need admin privileges to edit/patch the clusterpolicies that are mentioned in following steps.$ kubectl patch clusterpolicy disallow-capabilities --type=json \
-p='[{"op": "add", "path": "/spec/rules/0/exclude/any/0/resources/namespaces/-", "value": "<cncc_namespace>" }]'$ kubectl patch clusterpolicy disallow-capabilities --type=json \
-p='[{"op": "add", "path": "/spec/rules/0/exclude/any/0/resources/namespaces/-", "value": "cncc" }]'Establish connectivity to services that are not part of Service Mesh Registry
Note:
This is an optional step. Depending on the underlying Service Mesh deployment, Service Entry and Destination Rule may be required for CNC Console to connect to other kubernetes microservices that are not a part of Service Mesh Registry. The kubernetes microservices may be DB service, NF services, or Common services.apiVersion: networking.istio.io/v1alpha3
kind: ServiceEntry
metadata:
name: <Unique ServiceEntry Name for Service>
namespace: <CNCC-NAMESPACE>
spec:
exportTo:
- "."
hosts:
- <Service-public-FQDN>
ports:
- number: <Service-public-PORT>
name: <Service-PORTNAME>
protocol: <Service-PROTOCOL>
location: MESH_EXTERNAL
---
apiVersion: networking.istio.io/v1alpha3
kind: DestinationRule
metadata:
name: <Unique DestinationRule Name for Service>
namespace: <CNCC-NAMESPACE>
spec:
exportTo:
- "."
host: <Service-public-FQDN>
trafficPolicy:
tls:
mode: DISABLEapiVersion: v1
kind: Endpoints
metadata:
name: <Unique Endpoint Name for Service>
namespace: <CNCC_NAMESPACE>
subsets:
- addresses:
- ip: <Service-public-IP>
ports:
- port: <Service-public-PORT>
protocol: <Service-PROTOCOL>
---
apiVersion: v1
kind: Service
metadata:
name: <Unique Endpoint Name for Service>-headless
namespace: <CNCC_NAMESPACE>
spec:
clusterIP: None
ports:
- port: <Service-public-PORT>
protocol: <Service-PROTOCOL>
targetPort: <Service-public-PORT>
sessionAffinity: None
type: ClusterIPSet the mTLS Connection from Client Browser to ASM
PrerequisitesEnable certificateCustomFields in ASM values.yaml
Note:
Ensure that ASM is deployed with certificateCustomFields enabled.
global:
certificateCustomFields: true- ASM creates istio-ca secrets (ca-certs, ca-key) in
istio-namespace which contains CA public and private key.
- Run the following command to verify if the certificate is
created :
$ kubectl get secrets -n istio-system -o yaml istio-ca-secretNote:
Export the ca-cert.pem, ca-key.pem from the secret istio-ca-secret to your local machine where browser is installed.ca-cert.pem → Istio CA public
ca-key.pem → CA private key
- Run the following commands to get ASM Istio CA certificate with base64 decoded and copy the output to a file in you local machine:
kubectl get secret istio-ca-secret -n istio-system -o go-template='{{ index .data "ca-cert.pem" | base64decode}}' kubectl get secret istio-ca-secret -n istio-system -o go-template='{{ index .data "ca-key.pem" | base64decode}}' - Run the following command to verify if the certificate is
created :
- Create client certificate using Openssl commands using ca-cert.pem and ca-key.pem obtained in Step1 and import it to the browser. Refer to your browser specific documentation on how to import certificate and key.
- Update the browser configuration to trust the CA certificate (ca-cert.pem) obtained from Step 1. Refer to your browser specific documentation on how to trust the CA certificate.
- Create client certificate using Openssl commands using Organization CA public and private key and import it to the browser. Refer to your browser specific documentation on how to import certificate and key.
- Update the browser configuration to trust the Organization CA. Refer to your browser specific documentation on how to trust the CA certificate.
Create Service Account, Role and Role bindings with ASM annotations
While creating service account for M-CNCC IAM, M-CNCC Core and A-CNCC Core you need to provide following ASM annotations in the given format:
certificate.aspenmesh.io/customFields:'{"SAN":{"DNS":["<helm-release-name>-ingress-gateway.<cncc_namespace>.svc.<cluster_domain>"]}}'
apiVersion: v1
kind: ServiceAccount
metadata:
  annotations:
certificate.aspenmesh.io/customFields: '{ "SAN": { "DNS": [ "cncc-iam-ingress-gateway.cncc.svc.cluster.local", "cncc-acore-ingress-gateway.cncc.svc.cluster.local", "cncc-mcore-ingress-gateway.cncc.svc.cluster.local"] } }'For Single cluster deployment, where M-CNCC IAM, M-CNCC Core and A-CNCC Core are deployed in same cluster or site can share same service account, role, and rolebinding.
kubectl apply -n cncc -f - <<EOF
apiVersion: v1
kind: ServiceAccount
metadata:
  name: cncc-serviceaccount
  labels:
    app.kubernetes.io/component: internal
  annotations:
    sidecar.istio.io/inject: "false"
    "certificate.aspenmesh.io/customFields": '{ "SAN": { "DNS": [ "cncc-iam-ingress-gateway.cncc.svc.cluster.local", "cncc-acore-ingress-gateway.cncc.svc.cluster.local", "cncc-mcore-ingress-gateway.cncc.svc.cluster.local"] } }'
---
apiVersion: rbac.authorization.k8s.io/v1
kind: Role
metadata:
  name: cncc-role
  labels:
    app.kubernetes.io/component: internal
  annotations:
    sidecar.istio.io/inject: "false"
rules:
- apiGroups:
  - "" # "" indicates the core API group
  resources:
  - services
  - configmaps
  - pods
  - secrets
  - endpoints
  - persistentvolumeclaims
  verbs:
  - get
  - watch
  - list
---
apiVersion: rbac.authorization.k8s.io/v1
kind: RoleBinding
metadata:
  name: cncc-rolebinding
  labels:
    app.kubernetes.io/component: internal
  annotations:
    sidecar.istio.io/inject: "false"
roleRef:
  apiGroup: rbac.authorization.k8s.io
  kind: Role
  name: cncc-role
subjects:
- kind: ServiceAccount
  name: cncc-serviceaccount
---
EOF For Multi cluster deployment,
- Where M-CNCC IAM, M-CNCC Core and A-CNCC Core are deployed in same
site/cluster can share same service account, role and rolebinding.
See the
above single cluster service account example.
Note:
In multi cluster deployment A-CNCC Core is an optional component in manager cluster, make sure to take out "cncc-ccore-ingress-gateway.cncc.svc.cluster.local" from "certificate.aspenmesh.io/customFields" in case A-CNCC Core is not deployed in manager cluster - Where M-CNCC IAM and M-CNCC Core which are in same cluster can still
share same service account, role and rolebinding and A-CNCC deployed in different cluster,
a separate service account, role and rolebinding needs to be created.
Example for M-CNCC IAM, M-CNCC Core | cncc-sa-role-rolebinding.yaml:
kubectl apply -n cncc -f - <<EOF
apiVersion: v1
kind: ServiceAccount
metadata:
  name: cncc-serviceaccount
  labels:
    app.kubernetes.io/component: internal
  annotations:
    sidecar.istio.io/inject: "false"
    "certificate.aspenmesh.io/customFields": '{ "SAN": { "DNS": [ "cncc-iam-ingress-gateway.cncc.svc.cluster.local", "cncc-mcore-ingress-gateway.cncc.svc.cluster.local"] } }'
---
apiVersion: rbac.authorization.k8s.io/v1
kind: Role
metadata:
  name: cncc-role
  labels:
    app.kubernetes.io/component: internal
  annotations:
    sidecar.istio.io/inject: "false"
rules:
- apiGroups:
  - "" # "" indicates the core API group
  resources:
  - services
  - configmaps
  - pods
  - secrets
  - endpoints
  - persistentvolumeclaims
  verbs:
  - get
  - watch
  - list
---
apiVersion: rbac.authorization.k8s.io/v1
kind: RoleBinding
metadata:
  name: cncc-rolebinding
  labels:
    app.kubernetes.io/component: internal
  annotations:
    sidecar.istio.io/inject: "false"
roleRef:
  apiGroup: rbac.authorization.k8s.io
  kind: Role
  name: cncc-role
subjects:
- kind: ServiceAccount
  name: cncc-serviceaccount
---
EOF
Example for A-CNCC Core | cncc-sa-role-rolebinding.yamlkubectl apply -n cncc -f - <<EOF apiVersion: v1 kind: ServiceAccount metadata: name: cncc-serviceaccount labels: app.kubernetes.io/component: internal annotations: sidecar.istio.io/inject: "false" "certificate.aspenmesh.io/customFields": '{ "SAN": { "DNS": [ "cncc-acore-ingress-gateway.cncc.svc.cluster.local"] } }' --- apiVersion: rbac.authorization.k8s.io/v1 kind: Role metadata: name: cncc-role labels: app.kubernetes.io/component: internal annotations: sidecar.istio.io/inject: "false" rules: - apiGroups: - "" # "" indicates the core API group resources: - services - configmaps - pods - secrets - endpoints - persistentvolumeclaims verbs: - get - watch - list --- apiVersion: rbac.authorization.k8s.io/v1 kind: RoleBinding metadata: name: cncc-rolebinding labels: app.kubernetes.io/component: internal annotations: sidecar.istio.io/inject: "false" roleRef: apiGroup: rbac.authorization.k8s.io kind: Role name: cncc-role subjects: - kind: ServiceAccount name: cncc-serviceaccount --- EOF
2.2.1.9.3 M-CNCC IAM, M-CNCC Core and A-CNCC Core configuration for ASM
This section explains about the CNCC IAM deployment configuration for ASM.
Update occncc_custom_values_<version>.yaml as follows:
- Add the following sidecar resource configuration
annotations:
global: # ******** Sub-Section Start: Common Global Parameters ************* # ******************************************************************* customExtension: allResources: labels: {} annotations: sidecar.istio.io/proxyMemory: "1Gi" sidecar.istio.io/proxyMemoryLimit: "1Gi" sidecar.istio.io/proxyCPU: "1" sidecar.istio.io/proxyCPULimit: "1" # ******** Sub-Section End: Common Global Parameters ******************* # *********************************************************************** - Add rewriteAppHTTPProbers annotation to make health checks on services with mTLS
enforcement on
work:
global: # ******** Sub-Section Start: Common Global Parameters ************* # ******************************************************************* nonlbStatefulSets: labels: {} annotations: sidecar.istio.io/rewriteAppHTTPProbers: "true" # ******** Sub-Section End: Common Global Parameters ******************* # *********************************************************************** - Provide the service account
name:
global: # ***** Sub-Section Start: Ingress Gateway Global Parameters ***** serviceAccountName: &serviceAccountName <cncc-serviceaccount-name> - Enable Service Mesh Flag
:
global: # Mandatory: This flag needs to set it "true" if Service Mesh would be present where CNCC will be deployed serviceMeshCheck: true - If ASM is deployed with mTLS disabled, then set
serviceMeshHttpsEnabled flag to
false:
global:
  serviceMeshHttpsEnabled: false
2.2.1.9.4 M-CNCC IAM, M-CNCC Core, and A-CNCC Core Configuration for OSO
Add Annotation oracle.com/cnc: "true" under global.customExtention.lbDeployments.annotations section in occncc_custom_values_<version>.yaml file to indicate OSO to scrape metrics from ingress pod.
global:
  # ****  Sub-Section Start: Common Global Parameters *****


  customExtension:
    lbDeployments:
      labels: {}
      annotations:
        oracle.com/cnc: "true"

  # ****  Sub-Section End: Common Global Parameters *******
2.2.1.10 Configuring Network Policies for CNC Console
Overview
Kubernetes network policies allow you to define ingress or egress rules based on Kubernetes resources such as Pod, Namespace, IP, and Port. These rules are selected based on Kubernetes labels in the application. These network policies enforce access restrictions for all the applicable data flows except communication from Kubernetes node to pod for invoking container probe.
Note:
Configuring network policies is an optional step. Based on the security requirements, network policies may or may not be configured.
For more information on network policies, see https://kubernetes.io/docs/concepts/services-networking/network-policies/.
Note:
- If the traffic is blocked or unblocked between the pods even after applying network policies, check if any existing policy is impacting the same pod or set of pods that might alter the overall cumulative behavior.
- If changing default ports of services such as Prometheus, Database, Jaegar, or if Ingress or Egress Gateway names are overridden, update them in the corresponding network policies.
Configuring Network Policies
Following are the various operations that can be performed for network policies:
Installing Network Policies
Prerequisite
Network Policies are implemented by using the network plug-in. To use network policies, you must be using a networking solution that supports Network Policy.
Note:
For a fresh installation, it is recommended to install Network Policies before installing CNC Console. However, if CNC Console is already installed, you can still install the Network Policies.
- Open the occncc_network_policy_custom_values_<version>.yaml file provided in the release package zip file. For downloading the file, see Downloading CNC Console Package and Pushing the Images to Customer Docker Registry.
- Update the occncc_network_policy_custom_values_<version>.yaml file as per the requirement. For more information on the parameters, see the Configuration Parameters for network policy parameter table.
-
Run the following command to install the network policies:
helm install <release_name> -f <occncc_network_policy_custom_values_<version>.yaml> --namespace <namespace> <chartpath>./<chart>.tgzFor Example:
Where,helm install occncc-network-policy -f occncc_network_policy_custom_values_23.4.4.yaml --namespace cncc occncc-network-policy-23.4.4.tgzhelm-release-name:occncc-network-policy helm release name.custom-value-file:occncc-network-policy custom value file.namespace:CNC Console namespace.network-policy:network-policy package.
Note:
- Connections that were created before installing network policy and still persist are not impacted by the new network policy. Only the new connections would be impacted.
- If you are using ATS suite along with network policies, it is required to install the <NF acronym> and ATS in the same namespace.
Upgrading Network Policies
- Modify the occncc_network_policy_custom_values_<version>.yaml file to update/add/delete the network policy.
- Run the following command to upgrade the network
policies:
helm upgrade <release_name> -f occncc_network_policy_custom_values_<version>.yaml --namespace <namespace> <chartpath>./<chart>.tgzFor Example:
helm upgrade occncc-network-policy -f occncc_network_policy_custom_values_23.4.4.yaml --namespace cncc occncc-network-policy-23.4.4.tgz
Verifying Network Policies
Run the following command to verify that the network policies have been applied successfully:
kubectl get networkpolicy -n <namespace>
For Example:
kubectl get networkpolicy -n cnccUninstalling Network Policies
Run the following command to uninstall the network policies:
$ helm uninstall <release_name> --namespace <namespace>
For Example:
$ helm uninstall occncc-network-policy --namespace cnccNote:
Uninstall removes all the network policies.Configuration Parameters for Network Policies
Table 2-13 Supported Kubernetes Resource for Configuring Network Policies
| Parameter | Description | Default Value | Value Range | Mandatory (M)/Optional (O)/Conditional (C) | Notes |
|---|---|---|---|---|---|
| apiVersion | This indicates the Kubernetes version for access control. | networking.k8s.io/v1 | NA | M | This is the supported api version for network policy. This is a read-only parameter. |
| kind | This represents the REST resource this object represents. | NetworkPolicy | NA | M | This is a read-only parameter. |
Configuration Parameters for Network Policies
Table 2-14 Configuration Parameters for Network Policies
| Parameter | Description | Default Value | Value Range | Mandatory (M)/Optional (O)/Conditional (C) |
|---|---|---|---|---|
| metadata.name | This indicates a unique name for the network policy. | {{ .metadata.name }} | NA | M |
| spec.{} | This consists of all the information needed to define a particular network policy in the given namespace. | NA | NA | M |
For more information about this functionality, see Network Policies in the Oracle Communications Cloud Native Configuration Console User Guide
2.2.1.11 Global Configurations
CNC Console Deployment Configurations
Table 2-15 CNC Console Deployment Configurations
| Deployment | isMultiClusterDeployment enabled | cncc-iam enabled | mcncc-core enabled | acncc-core enabled |
|---|---|---|---|---|
| Single Cluster | false | true | true | true |
| Multi Cluster(manager only) | true | true | true | false |
| Multi Cluster(managing local NF’s) | true | true | true | true |
| Multi cluster(agent only) | true | false | false | true |
In case of single cluster deployment (global.isMultiClusterDeployment: false) the user must configure cncc-iam, mcncc-core and acncc-core flag to true.
global:

  isMultiClusterDeployment: false

  cncc-iam:
    enabled: true
  mcncc-core:
    enabled: true
  acncc-core:
    enabled: true
2.2.1.11.1 M-CNCC IAM Predeployment Configuration
The following are the predeployment configuration procedures of M-CNCC IAM:
2.2.1.11.1.1 Configuring LDAPS in M-CNCC IAM
This section explains the procedure to enable LDAPS in M-CNCC IAM.
When you configure a secured connection URL to your LDAP store (Example:
`ldaps://myhost.com:636'), CNCC IAM uses SSL for communication with
the LDAP server. The truststore must be properly configured on the CNCC IAM server side;
otherwise CNCC IAM cannot trust the SSL connection to LDAP.
For enabling LDAPS update kc section of occncc_custom_values_<version>.yaml as below:
cncc-iam
  kc:
    ldaps:
      enabled: true
M-CNCC IAM Secret configuration for enabling LDAPS
Note:
The passwords for TrustStore and KeyStore are stored in respective password files.To create Kubernetes secret for LDAPS, following files are required:
- TrustStore password file
- CA certificate or CA Bundle
Creating CA Bundle
When combining multiple CA certificates into a single certificate, add a delimiter after each certificate.
Delimiter: "--------"
-----BEGIN CERTIFICATE-----
MIID4TCC...
...
...jtUl/zQ==
-----END CERTIFICATE-----
--------
-----BEGIN CERTIFICATE-----
MIID4TCC...
...
...jtUl/zQ==
-----END CERTIFICATE-----
Note:
Creation process for private keys, certificates and passwords is on discretion of user.Perform the following procedure to create the secrets to enable LDAPS after required certificates and password files are generated and update details in kc section:
Note:
The value of ssl_truststore.txt and ssl_truststore-password-key value must be same.- Run the following command to create secret:
kubectl create secret generic <secret-name> --from-file=<caroot.cer> --from-file=ssl_truststore.txt --from-literal=ssl_truststore-password-key=<password> --namespace cnccNote:
Note down the command used during the creation of Kubernetes secret as this command is used for future updates.Example:
$ kubectl create secret generic cncc-iam-kc-root-ca --from-file=caroot.cer --from-file=ssl_truststore.txt --from-literal=ssl_truststore-password-key=<password> --namespace cnccRun the following to display the sample ssl_truststore.txt:echo <password> > ssl_truststore.txt - On successfully running the above command, the following message is
displayed:
secret/cncc-iam-kc-root-ca created
- Run the following command to verify the secret creation:
$ kubectl describe secret cncc-iam-kc-root-ca -n cncc
M-CNCC IAM Service Account configuration for enabling LDAPS
This section describes the customizations that you should make in custom-value.yaml file to configure Kubernetes service account. M-CNCC IAM provides option to configure custom service account.
Note:
Skip this section if service account is already configured as part of HTTPS or ASM configuration.Configure service account for ingress-gateway and keycloak in custom-cncc_values_<version>.yaml as follows:
- For ingress-gateway provide custom service account under
global.serviceAccountName.
global:

  serviceAccountName: &serviceAccountName cncc-sa

cncc-iam:
  kc:
    keycloak:
      serviceAccount:
        # The name of the service account to use.
        name: *serviceAccountName
For CNCC IAM LDAP related configurations, see Integrating CNC Console LDAP Server with CNC Console IAM section in Oracle Communications Cloud Native Core Console User Guide.
## Service account yaml file for cncc-sa
apiVersion: v1
kind: ServiceAccount
metadata:
  name: cncc-sa
  namespace: cncc
  annotations: {}
---
apiVersion: rbac.authorization.k8s.io/v1
kind: Role
metadata:
  name: cncc-role
  namespace: cncc
rules:
- apiGroups:
  - "" # "" indicates the core API group
  resources:
  - services
  - configmaps
  - pods
  - secrets
  - endpoints
  - persistentvolumeclaims
  verbs:
  - get
  - watch
  - list
---
apiVersion: rbac.authorization.k8s.io/v1
kind: RoleBinding
metadata:
  name: cncc-rolebinding
  namespace: cncc
roleRef:
  apiGroup: rbac.authorization.k8s.io
  kind: Role
  name: cncc-role
subjects:
- kind: ServiceAccount
  name: cncc-sa
  namespace: cncc
2.2.1.11.2 A-CNCC Core Predeployment Configuration
Following are the predeployment configuration procedures:
2.2.1.11.2.1 Configuring A-CNCC Core mTLS
This section describes the A-CNCC Core Configuration for enabling mTLS.
mTLS Configuration at A-CNCC Core
mTLS must be enabled at the ingress-gateway SSL configuration section of the A-CNCC Core occncc_custom_values_<version>.yaml file. The parameter scheme must be set to https in the occncc_custom_values_<version>.yaml file.
Sample TLS Configuration section of A-CNCC Core:
acncc-core:
  global
    # CNCC https enabled
    httpsEnabled: &httpsEnabled true
    # Server Configuration for http and https support
    enableIncomingHttp: &enableIncomingHttp false
    enableIncomingHttps: &enableIncomingHttps true
    # Enables server with MTLS
    needClientAuth: &needClientAuth true
Note:
While enabling mTLS, needClientAuth must be set to true in A-CNCC Core.
Configuring M-CNCC IAM to Enable Additional Settings
CNC Console provides an option to enable additional settings in M-CNCC IAM by setting below mentioned flag to true in occncc_custom_values_<version>.yaml file.
The additional settings include some of the configuration settings such as authentication settings to configure password policies.
cncc-iam:
  global:
    iamSettingEnabled: false
2.2.2 Installation Tasks
This section explains how to install CNC Console. To install CNC Console using CDCS, see Oracle Communications Cloud Native Core CD Control Server User Guide.
Note:
- Before installing CNC Console, you must complete the Prerequisites and Preinstallation Tasks
- In a georedundant deployment, perform the steps explained in this section on all georedundant sites.
This section describes the prerequisites and installation procedure for the CNC Console.
CNC Console helm chart is a common helm chart to be used for deploying Manager CNCC IAM (M-CNCC IAM), Manager CNCC Core (M-CNCC Core), and Agent CNCC Core (A-CNCC Core).
The scripts directory present in the
occncc_csar_<marketing-release-number>.zip consists of
occncc_custom_values_<version>.yaml file and can be used for
deployment of M-CNCC IAM, M-CNCC Core and A-CNCC Core.
This section covers installation instructions for M-CNCC IAM, M-CNCC Core and A-CNCC Core deployment.
Note:
- For a single cluster deployment, both manager (M-CNCC IAM, M-CNCC Core) and agent (A-CNCC Core) to be deployed on the same cluster.
- For a multicluster deployment, if manager cluster has a local NF deployment then both manager (M-CNCC IAM, M-CNCC Core) and agent (A-CNCC Core) to be deployed on the same cluster. In case manager cluster do not have a local NF deployment then only manager (M-CNCC IAM, M-CNCC Core) to be deployed and agent (A-CNCC Core) to be deployed on a cluster where NFs are present on the cluster.
- Manager manages CNE or OSO common services if present in a
cluster.
- Manager in a cluster is preferred over Agent in the same cluster to manage the CNE common services.
- Agent in a cluster can manage CNE common services in absence of a Manager in the same cluster.
- Agent is needed only when NFs are present on the cluster.
2.2.2.1 Installing CNC Console Package
This section provides the installation procedure to install CNC Console using Command Line Interface (CLI). To install CNC Console using CDCS, see Oracle Communications Cloud Native Core CD Control Server User Guide.
- Run the following command to check the version of the helm chart
installation:
Example:helm search repo <release_name> -lhelm search repo cncc -lNAME CHART VERSION APP VERSION DESCRIPTION ocspf-helm-repo/cncc 23.4.4 23.4.4 A Helm chart for CNC Console - Customize the
occncc_custom_values_<version>.yamlfile with the required deployment parameters. For customizing custom-cncc_values.yaml file, see CNC Console Configuration Parameters section.Note:
For IPv4 or IPv6 configurations, see Support for IPv4 or IPV6 Configuration for CNC Console.Note:
The annotation metallb.universe.tf/address-pool: signaling/oam is required in global section if MetalLB in CNE 1.8.x onwards is used.customExtension: lbServices: labels: {} annotations: # The annotation metallb.universe.tf/address-pool: signaling/oam is required if MetalLB in CNE 1.8.x is used metallb.universe.tf/address-pool: oam service.beta.kubernetes.io/oci-load-balancer-internal: "true"Note:
The annotationoracle.com.cnc/app-protocols: '{"http-tls":"TCP"}'is required in global section of occncc_custom_values_<version>.yaml file when CNC Console is deployed with HTTPs enabled in CNE.customExtension: lbServices: labels: {} annotations: oracle.com.cnc/app-protocols: '{"http-tls":"TCP"}'Note:
The annotationoracle.com.cnc/egress-network:oam is required under global section if Ldap/Ldaps is integrated with console.nonlbStatefulSets: labels: {} annotations: oracle.com.cnc/egress-network: oamNote:
The annotationoracle.com.cnc/egress-network:oam is required under global section if isMultiClusterDeployment flag is enabled for console.customExtension: lbDeployments: labels: {} annotations: oracle.com.cnc/egress-network: oamNote:
CNC Console IAM deployment has following Pod Security context and Container Security Context:Pod Security context:
PSC: map[fsGroup:1000]Container Security Context:
runAsUser:1000 runAsNonRoot:trueFollowing configurations are needed in occncc_custom_values_<version>.yaml file. This includes configuring the following based on the deployment:
- Update unique CNC Console ID per cluster (global.self.cnccId )
- Provide the details of M-CNCC IAMs (mCnccIams)
- Provide the details of A-CNCC (aCnccs)
- Provide the details of Agent Instances (instances)
- In case of M-CNCC Core, additionally provide the details of M-CNCC Cores and M-CNCC Instances (instances)
Note:
-
For instances configuration details see, CNC Console Instances Configurations section and section CNC Console Instances Configuration Options section.
- There are multiple M-CNCC, A-CNCC, NF Instances, and OCCNE Instances. You must be cautious while updating occncc_custom_values_<version>.yaml file.
-
In case of M-CNCC Core,
cmservice.envSystemName in occncc_custom_values_<version>.yaml
file can be used to display cluster name.
Example: envSystemName: CNCC - Site Name
- Routes creation happens automatically, there is no need to provide routes in the ingress-gateway section; only instances details have to be provided in global section. A-CNCC and M-CNCC Core uses same cncc helm chart, only deployment configurations may differ.
- See CNC Console Deployment Configuration Workflow section for details on deployment specific configuration updates CNC Console Deployment Configuration Workflow.
- The following are the Sample configuration section for CNCC:
- Single Cluster Deployment
Sample configuration section for CNCC in case of single cluster deployment
global:

  cncc-iam:
    enabled: true
  mcncc-core:
    enabled: true
  acncc-core:
    enabled: true

  isMultiClusterDeployment: false
  # Automatic route generation for CNCC Manager Deployment
  self:
    cnccId: Cluster1
  mCnccIams:
    - id: Cluster1
      ip: 10.xx.xx.xx
  mCnccCores:
    - id: Cluster1
  aCnccs:
    - id: Cluster1
      role: Cluster1
      fqdn: cncc-acore-ingress-gateway.cncc.svc.bumblebee
      port: 80
  instances:
    - id: Cluster1-grafana
      type: CS
      owner: Cluster1
      fqdn: occne-kube-prom-stack-grafana.occne-infra.svc.bumblebee
      apiPrefix: /bumblebee/grafana
    - id: Cluster1-kibana
      type: CS
      owner: Cluster1
      fqdn: occne-kibana.occne-infra.svc.bumblebee
      apiPrefix: /bumblebee/kibana
    - id: Cluster1-scp-instance1
      type: SCP
      owner: Cluster1
      fqdn: ocscp-scpc-configuration.scp.svc.bumblebee
      port: 80
Note:
CNC Console only supports prometheus apiprefix and not promxy. - Multicluster Deployment
Sample configuration section for manager only deployment set cncc-iam, mcncc-core to "true" and acncc-core to "false".
global:

  cncc-iam:
    enabled: true
  mcncc-core:
    enabled: true
  acncc-core:
    enabled: false

  isMultiClusterDeployment: true
  # Automatic route generation for CNCC Manager Deployment
  self:
    cnccId: Cluster1
  mCnccIams:
    - id: Cluster1
      ip: 10.xx.xx.xx
  mCnccCores:
    - id: Cluster1
  aCnccs:
    - id: Cluster2
      role: Cluster2
      ip: 10.xx.xx.xx
      port: 80
  instances:
    - id: Cluster1-grafana
      type: CS
      owner: Cluster1
      fqdn: occne-kube-prom-stack-grafana.occne-infra.svc.bumblebee
      apiPrefix: /bumblebee/grafana
    - id: Cluster1-kibana
      type: CS
      owner: Cluster1
      fqdn: occne-kibana.occne-infra.svc.bumblebee
      apiPrefix: /bumblebee/kibana
    - id: Cluster2-kibana
      type: CS
      owner: Cluster2
      fqdn: occne-kibana.occne-infra.svc.jazz
      apiPrefix: /jazz/kibana
    - id: Cluster2-scp-instance2
      type: SCP
      owner: Cluster2
      fqdn: ocscp-scpc-configuration.scp.svc.jazz
      port: 80
Sample configuration section for manager managing local NFs. User must configure cncc-iam, mcncc-core and acncc-core flag to "true".global: cncc-iam: enabled: true mcncc-core: enabled: true acncc-core: enabled: true isMultiClusterDeployment: true # Automatic route generation for CNCC Manager Deployment self: cnccId: Cluster1 mCnccIams: - id: Cluster1 ip: 10.xx.xx.xx mCnccCores: - id: Cluster1 aCnccs: - id: Cluster1 role: Cluster1 fqdn: cncc-acore-ingress-gateway.cncc.svc.bumblebee port: 80 - id: Cluster2 role: Cluster2 ip: 10.xx.xx.xx port: 80 instances: - id: Cluster1-grafana type: CS owner: Cluster1 fqdn: occne-kube-prom-stack-grafana.occne-infra.svc.bumblebee apiPrefix: /bumblebee/grafana - id: Cluster1-kibana type: CS owner: Cluster1 fqdn: occne-kibana.occne-infra.svc.bumblebee apiPrefix: /bumblebee/kibana - id: Cluster1-scp-instance1 type: SCP owner: Cluster1 fqdn: ocscp-scpc-configuration.scp.svc.bumblebee port: 80 - id: Cluster2-scp-instance2 type: SCP owner: Cluster2 fqdn: ocscp-scpc-configuration.scp.svc.jazz port: 80Sample configuration section for agent only deployment. User must configure cncc-iam and mcncc-core to "false" and acncc-core to "true".
global:

  cncc-iam:
    enabled: false
  mcncc-core:
    enabled: false
  acncc-core:
    enabled: true

  isMultiClusterDeployment: true
  # Automatic route generation for CNCC Manager Deployment
  self:
    cnccId: Cluster2
  mCnccIams:
    - id: Cluster1
      ip: 10.xx.xx.xx
  mCnccCores:
    - id: Cluster1
  aCnccs:
    - id: Cluster2
      role: Cluster2
  instances:
    - id: Cluster2-kibana
      type: CS
      owner: Cluster2
      fqdn: occne-kibana.occne-infra.svc.jazz
      apiPrefix: /jazz/kibana
    - id: Cluster2-scp-instance2
      type: SCP
      owner: Cluster2
      fqdn: ocscp-scpc-configuration.scp.svc.jazz
      port: 80
Note:
- In the above examples, mCnccIams port is assumed as "80". The mCnccIams port configuration must be added only if port value is other than "80".
- Instance id must be globally unique as it will be used for routing, here is the recommendation for id naming
id: <owner>-<instance name>Example:
id: Cluster2-scp-instance2aCnccs.id:- is mandatory as its needed for site authorization
aCnccs.idvalue must be same asself.cnccIdaCnccs.roleandmCnccCores.roleare optional, which can be used for overriding site role name.
- For HTTPS enabled deployment scheme and port has to be updated to
"https" and "https port value" in
mCnccIamsandaCnccs. For sample configuration, see CNCC Core InstancesConfiguration examples listed in appendix.
- Single Cluster Deployment
- Deploy M-CNCC IAM using repository and helm tar.
Caution:
CNCC helm install command appears hung for a while because Kubernetes job run by Install helm hook. Helm deployment status is shown as DONE after the applicable hook is run.
Caution:
Pod restarts maybe observed at M-CNCC Core ingress-gateway during fresh installation, upgrade, or rollback. This is because M-CNCC Core ingress-gateway internally check if CNCC IAM KC pod is up or not via CNCC IAM ingress-gateway. Once CNCC IAM KC pod is up then you should see M-CNCC Core ingress-gateway in running state.
To verify the deployment status, open a new terminal and run the following command:
Example:kubectl get pods -n <namespace_name> -wkubectl get pods -n cncc -wThe pod status gets updated on a regular interval. When helm install command is run and exits with the status, you may stop watching the status of Kubernetes pods.
Update DB details in occncc_custom_values_<version>.yaml file.Note:
If helm purge do not clean the deployment and Kubernetes objects completely, then follow CNC Console IAM Clean up section.dbVendor: mysql dbName: cnccdb dbHost: mysql-sds.default.svc.cluster.local dbPort: 3306Note:
Database must be created first and that Database name must be mentioned as dbName.- Run the following command for installing using helm repository:
helm install <release_name> <helm-repo> -f <occncc_custom_values_<version>.yaml> --namespace
      <namespace_name> --version <helm_version>
Where:
helm-repo: repository name where the helm images, charts are stored
values: helm configuration file which needs to be updated based on the docker registry
release_name and namespace_name: depends on user configuration
Example:
helm install cncc ocscp-helm-repo/cncc -f occncc_custom_values_23.4.4.yaml --namespace cncc --version 23.4.4 - Run the following command for Installing using helm tar:
helm install <release_name> -f <occncc_custom_values_<version>.yaml> --namespace <namespace>
      <chartpath>./<chart>.tgz
Example:
helm install cncc -f occncc_custom_values_23.4.4.yaml --namespace cncc occncc-23.4.4.tgz - Run the following command for installing using helm repository:
- Run the following commands to upgrade the CNCC Configuration:
To upgrade:
Note:
For details about CNC Console Deployment Configuration workflow, see CNC Console Deployment Configuration Workflow section.- Prepare the occncc_custom_values_<version>.yaml file for upgrade
- Upgrade CNCC
- Run the following command for upgrading using helm
repository:
Example:$ helm upgrade <release_name> <helm_chart> -f <occncc_custom_values_<version>.yaml> --namespace <namespace-name>$ helm upgrade cncc ocspf-helm-repo/cncc -f occncc_custom_values_23.4.4.yaml --namespace cncc - Run the following command for upgrading using helm
tar:
Example:helm upgrade <release_name> -f occncc_custom_values_<version>.yaml --namespace <namespace> <chartpath>./<chart>.tgzhelm upgrade cncc -f occncc_custom_values_23.4.4.yaml --namespace cncc occncc-23.4.4.tgz
- Run the following command to check the deployment status:
helm status <release_name> - Run the following command to check if all the services are deployed and
running:
kubectl -n <namespace_name> get servicesExample:
Example:$ kubectl -n cncc get servicesNAME TYPE CLUSTER-IP EXTERNAL-IP PORT(S) AGE cncc-acore-igw-cache ClusterIP None <none> 8000/TCP 24h cncc-acore-ingress-gateway ClusterIP 10.233.47.246 <none> 80/TCP 24h cncc-iam-igw-cache ClusterIP None <none> 8000/TCP 24h cncc-iam-ingress-gateway LoadBalancer 10.233.3.123 10.75.224.188 80:30185/TCP 24h cncc-iam-kc-headless ClusterIP None <none> 8285/TCP 24h cncc-iam-kc-http ClusterIP 10.233.42.16 <none> 8285/TCP,8443/TCP,9990/TCP 24h cncc-mcore-cmservice ClusterIP 10.233.9.144 <none> 8442/TCP 24h cncc-mcore-igw-cache ClusterIP None <none> 8000/TCP 24h cncc-mcore-ingress-gateway LoadBalancer 10.233.44.167 10.75.224.189 80:30175/TCP 24h - Run the following command to check if all the pods are up and
running:
kubectl -n <namespace_name> get podsExample:
$ kubectl -n cncc get podsExample:NAME READY STATUS RESTARTS AGE cncc-acore-ingress-gateway-c685bf678-bgmdf 1/1 Running 0 24h cncc-iam-ingress-gateway-6776df55cd-xzx2m 1/1 Running 0 24h cncc-iam-kc-0 2/2 Running 0 24h cncc-mcore-cmservice-587749d58d-8lnd7 1/1 Running 0 24h cncc-mcore-ingress-gateway-59758876b-zc7d7 1/1 Running 0 24h
Caution:
Do not exit from helm install command manually. After running the helm install command, it will take a while to install all the services. Do not press "ctrl+c" to exit from helm install command. It may lead to anomalous behavior.Note:
timeout duration (optional): If not specified, the default value will be 5m (5 minutes) in helm. Specifies the time to wait for any individual Kubernetes operation (like Jobs for hooks). The default value is 5m0s. If the helm install command fails at any point to create a Kubernetes object, it will internally call the purge to delete after timeout value (default: 300s). Here timeout value is not for overall install, but it is for automatic purge on installation failure.2.2.3 Postinstallation Tasks
This section explains the postinstallation tasks for CNC Console.
Note:
For IPv4 or IPv6 configurations, see Support for IPv4 or IPV6 Configuration for CNC Console.2.2.3.1 Verifying CNC Console Installation
This section describes how to verify if CNC Console is installed successfully.
- Run the following command to verify the installation
status:
For example:<helm-release> -n <namespace>occncc -n cnccStatus should be
deployed - Run the following command to verify if the pods are up and
active:
For example:kubectl get jobs,pods -n release_namespacekubectl get pod -n cnccIf the deployment is successful, the status for all pods changes to Running and Ready.
- Run the following command to verify if the services are deployed and
active:
For example:
kubectl get services -n release_namespacekubectl get services -n cncc
Note:
Take a backup of the following files, which are required during fault recovery:
- Current custom-values.yaml file from which you are upgrading.
- Updated occncc_custom_values_<version>.yaml file
- Updated Helm charts
- Secrets, certificates, and keys that are used during installation
Note:
- If the installation is not successful or you do not see the status as Running for all the pods, perform the troubleshooting steps provided in Oracle Communications Cloud Native Configuration ConsoleTroubleshooting Guide.
- For information on validation-hook errors, see CNC Console Validation-hook Error Codes.
2.2.3.2 Performing Helm Test
Helm Test is a feature which validates the successful installation of CNCC along with readiness (Readiness probe URL configured will be checked for success) of all the pods. The pods to be checked will be based on the namespace and label selector configured for the helm test configurations.
Note:
Helm Test can be performed only on Helm3.- Configure the helm test configurations which are under global sections in
occncc_custom_values_<version>.yaml file. Refer the following
configurations :
CNCC Helm Test
global: # Helm test related configurations test: nfName: cncc image: name: occncc/nf_test tag: 23.4.4 imagePullPolicy: IfNotPresent config: logLevel: WARN timeout: 240 - Run the following command to perform the Helm
test:
Where,helm test <helm_release_name> -n <namespace><release_name>is the release name.
Example:<namspace>is the deployment namespace where CNCC is installed.E.g. [root@master cncc]# helm test cncc -n cncc Pod cncc-test pending Pod cncc-test pending Pod cncc-test pending Pod cncc-test pending Pod cncc-test running Pod cncc-test succeeded NAME: cncc LAST DEPLOYED: Tue Jun 7 06:47:14 2022 NAMESPACE: cncc STATUS: deployed REVISION: 1 TEST SUITE: cncc-test Last Started: Wed Jun 8 06:01:10 2022 Last Completed: Wed Jun 8 06:01:44 2022 Phase: Succeeded NOTES: # Copyright 2020 (C), Oracle and/or its affiliates. All rights reserved. Thank you for installing cncc. Your release is named cncc , Release Revision: 1. To learn more about the release, try: $ helm status cncc $ helm get cncc - Wait for the helm test to complete. Check for the output to see if the test job is successful.
If the Helm test fails, see the Oracle Communications Cloud Native Configuration Console Troubleshooting Guide.
2.2.3.2.1 Helm Test Kubernetes Resources Logging
The Helm test logging enhancement for Kubernetes resources lists the following details of Kubernetes resources:
- Versions of Kubernetes resource available in OCCNE.
- Preferred version for that Kubernetes resource on the OCCNE.
- For each micro service, it list the version of Kubernetes resource used.
This information can be used in the following cases:
- In case of CNE upgrade for customer, helm test shall list the Kubernetes resource versions used by NFs. The operator can use this information to run a pre-upgrade compatibility test to see if the Kubernetes resource versions are available on target CNE.
- After CNE upgrade, there might be certain resources for which a newer version is available on CNE which is also supported by Console charts. If the output of helm test indicates failure of compliance for certain resource, then upgrade the Console to use the latest version of Kubernetes resource for which failure was indicated.
- List all available versions on CNE. Console can use this detail as an input for apiVersion to be used in latest NF charts to which upgrade will be performed.
Note that this feature is tested and compatible with CNE version 1.10 and above.
To use this feature, set global.test.complianceEnable flag as true.
Separate helm test service account can be created and set at global.helmTestserviceAccountName, see Helm Test Service Account Configuration section.
Note:
For helm test execution preference goes to global.helmTestserviceAccountName first, if this is not available then global.serviceAccountName will be referred. If both of these are missing then default service account will be created and used. # Custom service account for Helm test execution
helmTestserviceAccountName: ""
# Helm test related configurations
test:
nfName: cncc
image:
name: occncc/nf_test
tag: 23.4.4
imagePullPolicy: IfNotPresent
config:
logLevel: WARN
timeout: 240 #Beyond this duration helm test will be considered failure
resources:
- horizontalpodautoscalers/v1
- deployments/v1
- configmaps/v1
- prometheusrules/v1
- serviceaccounts/v1
- poddisruptionbudgets/v1
- roles/v1
- statefulsets/v1
- persistentvolumeclaims/v1
- services/v1
- rolebindings/v1
complianceEnable: true
helm test <releaseName> --logs -n <namespace>Example:
helm test cncc --logs -n cnccThe output lists:
- The versions of the Kubernetes resources used by Console, which helps in running pre upgrade compatibility test before CNE upgrade.
- Compliance check for each Kubernetes resource, if compliance check is false we need to upgrade the Console charts as latest version is supported both by charts and available in new CNE.
- Available Kubernetes resource versions on CNE.
{
  "horizontalpodautoscalers" : {
    "availableVersionOnCne" : [ "v1", "v2beta1", "v2beta2" ],
    "avaliableOnDeployment" : [ ],
    "compliant" : true,
    "prefferedVersionOnCne" : "v1",
    "maxNFVersion" : "v1"
  },
  "deployments" : {
    "availableVersionOnCne" : [ "v1" ],
    "avaliableOnDeployment" : [ ],
    "compliant" : true,
    "prefferedVersionOnCne" : "v1",
    "maxNFVersion" : "v1"
  },
  "configmaps" : {
    "availableVersionOnCne" : [ "v1" ],
    "avaliableOnDeployment" : [ ],
    "compliant" : true,
    "prefferedVersionOnCne" : "v1",
    "maxNFVersion" : "v1"
  },
  "serviceaccounts" : {
    "availableVersionOnCne" : [ "v1" ],
    "avaliableOnDeployment" : [ ],
    "compliant" : true,
    "prefferedVersionOnCne" : "v1",
    "maxNFVersion" : "v1"
  },
  "poddisruptionbudgets" : {
    "availableVersionOnCne" : [ "v1beta1" ],
    "avaliableOnDeployment" : [ ],
    "compliant" : true,
    "prefferedVersionOnCne" : "v1beta1",
    "maxNFVersion" : "v1"
  },
  "roles" : {
    "availableVersionOnCne" : [ "v1", "v1beta1" ],
    "avaliableOnDeployment" : [ ],
    "compliant" : true,
    "prefferedVersionOnCne" : "v1",
    "maxNFVersion" : "v1"
  },
  "statefulsets" : {
    "availableVersionOnCne" : [ "v1" ],
    "avaliableOnDeployment" : [ ],
    "compliant" : true,
    "prefferedVersionOnCne" : "v1",
    "maxNFVersion" : "v1"
  },
  "persistentvolumeclaims" : {
    "availableVersionOnCne" : [ "v1" ],
    "avaliableOnDeployment" : [ ],
    "compliant" : true,
    "prefferedVersionOnCne" : "v1",
    "maxNFVersion" : "v1"
  },
  "services" : {
    "availableVersionOnCne" : [ "v1" ],
    "avaliableOnDeployment" : [ ],
    "compliant" : true,
    "prefferedVersionOnCne" : "v1",
    "maxNFVersion" : "v1"
  },
  "rolebindings" : {
    "availableVersionOnCne" : [ "v1", "v1beta1" ],
    "avaliableOnDeployment" : [ ],
    "compliant" : true,
    "prefferedVersionOnCne" : "v1",
    "maxNFVersion" : "v1"
  }
}2.2.3.3 CNC Console IAM Postinstallation Steps
Note:
CNC Console multi cluster deployment supports cluster specific role. The user can create cluster roles in CNCC IAM and assign cluster specific role to the user similar to NF roles.
Operators must ensure that the cluster role name must matches with the role name given in helm configuration.
- For M-CNCC cluster role creation in M-CNCC IAM value of global.mCnccCores.id or global.mCnccCores.role name must be used
- For A-CNCC cluster role creation in M-CNCC IAM value of
global.aCnccs.id or global.aCnccs.role name must be used.
Note:
Cluster role names are case sensitive.
Prerequisites
The CNC Console IAM and CNC Console Core must be deployed.
Admin must perform following tasks once CNCC IAM is deployed:
- Set the cncc redirection URL.
- Create the user and assign roles (applicable if not integrated with LDAP) .
Steps for configuring CNC Console redirection URL, create user, and assign the roles:
- Log in to CNC Console IAM Console using admin credentials provided during
installation of CNCC IAM.
Format:
<scheme>://<cncc-iam-ingress IP/FQDN>:<cncc-iam-ingress Port>
http://10.75.xx.xx:30085/*http://cncc-iam-ingress-gateway.cncc.svc.cluster.local:30085/*http://10.75.xx.xx:8080/*http://cncc-iam-ingress-gateway.cncc.svc.cluster.local:8080/*Figure 2-1 Login
Note:
You must select CNCC from the Realm drop down on the left pane after logging in to CNC Console IAM.- Go to Clients option and click cncc.
Figure 2-2 Clients Tab
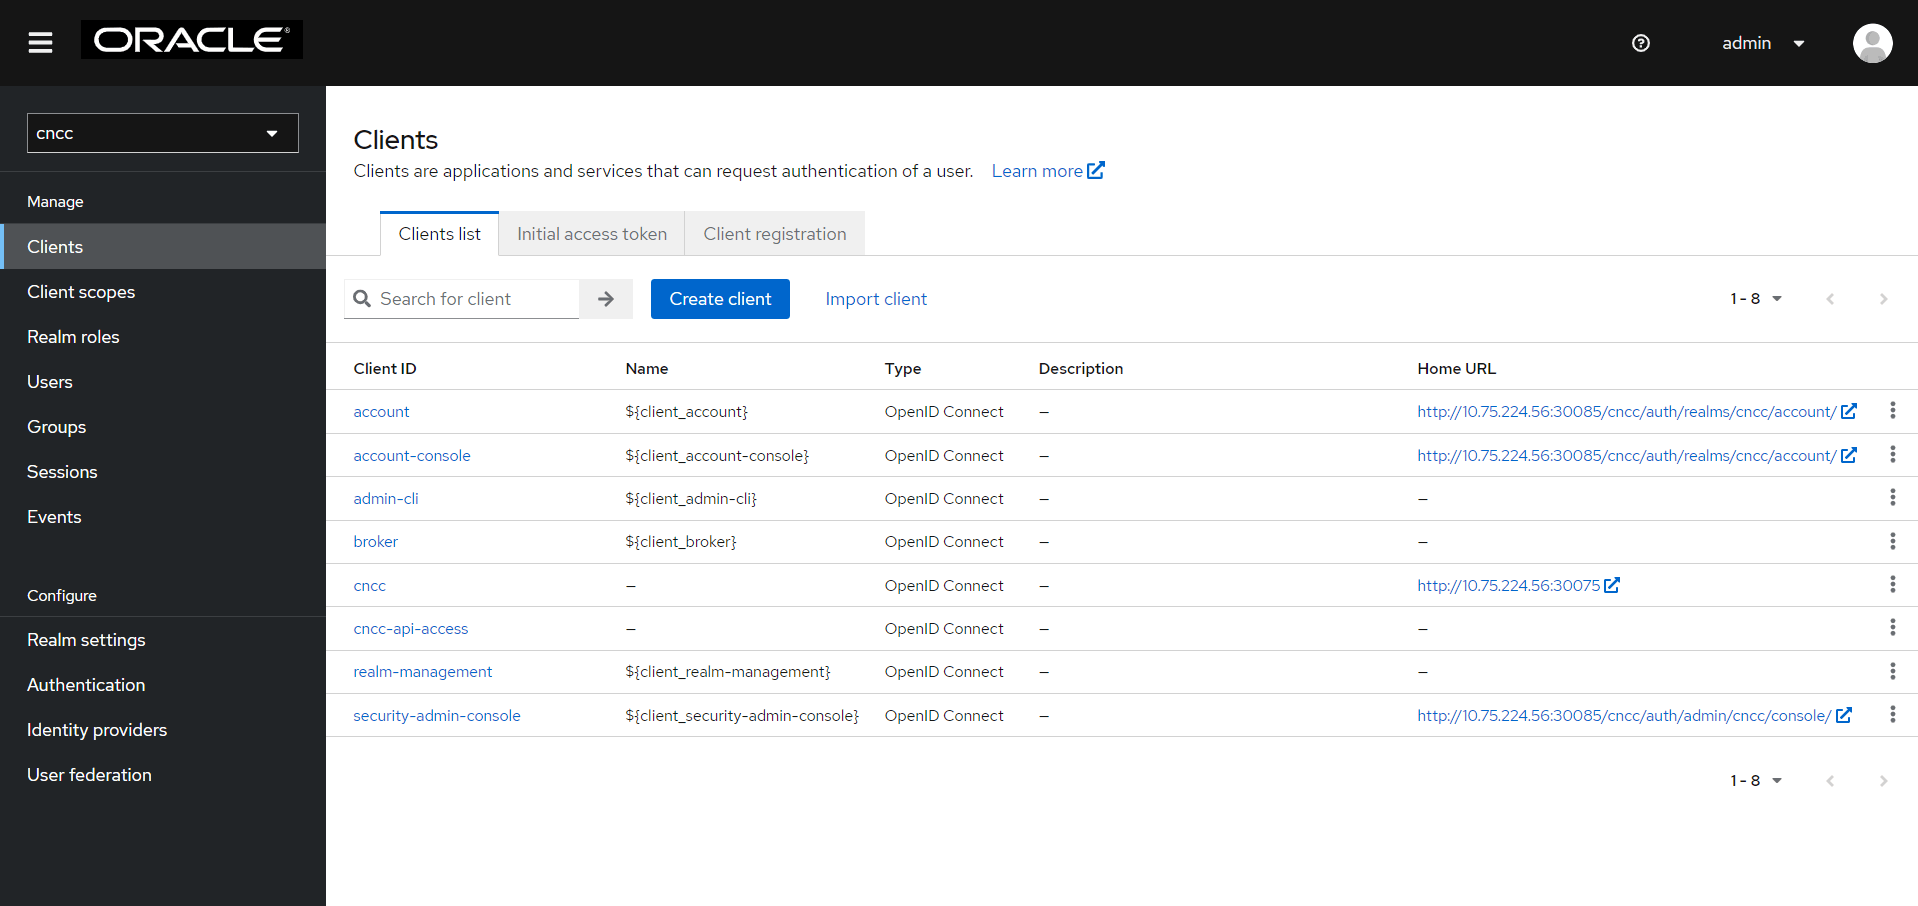
- Enter CNCC Core Ingress URI in the Root URIs field and
Save.
<scheme>://<cncc-mcore-ingress IP/FQDN>:<cncc-mcore-ingress Port>Note:
Redirection URL is pre-populated, only root url needs to be configured as part of postinstallation procedureFigure 2-3 General Settings
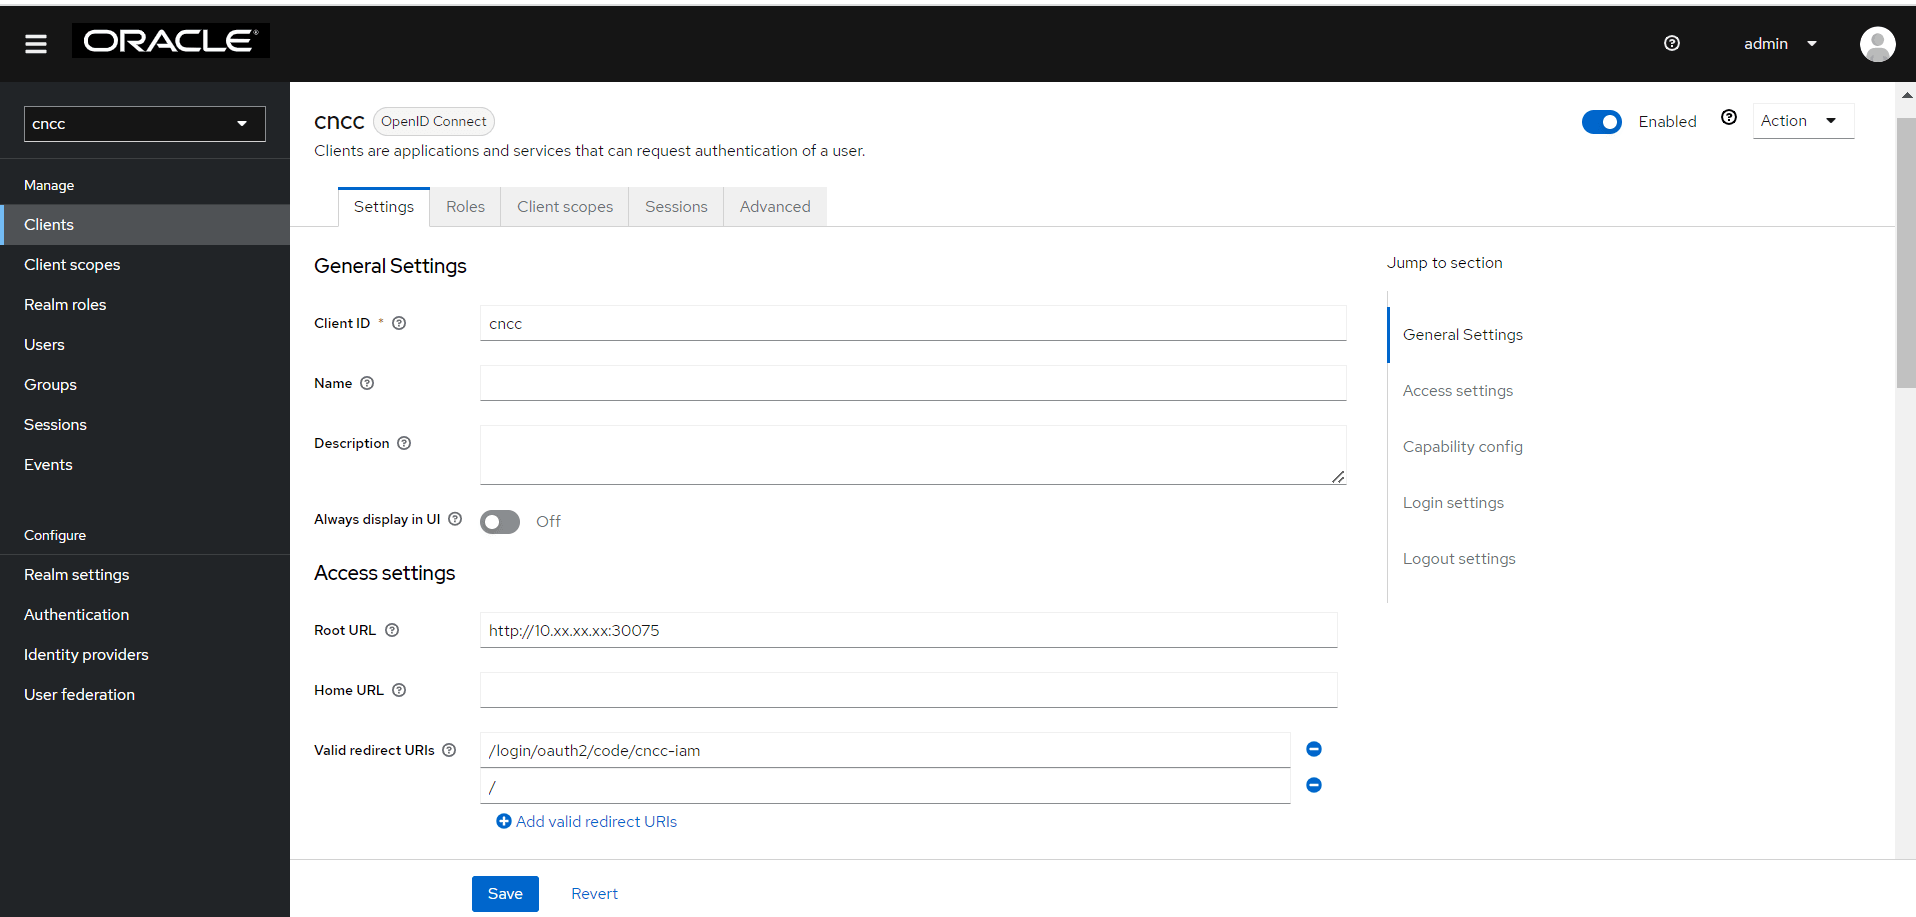
- Click Manage, click Users, and click Add user on the
right pane.
Figure 2-4 Add User
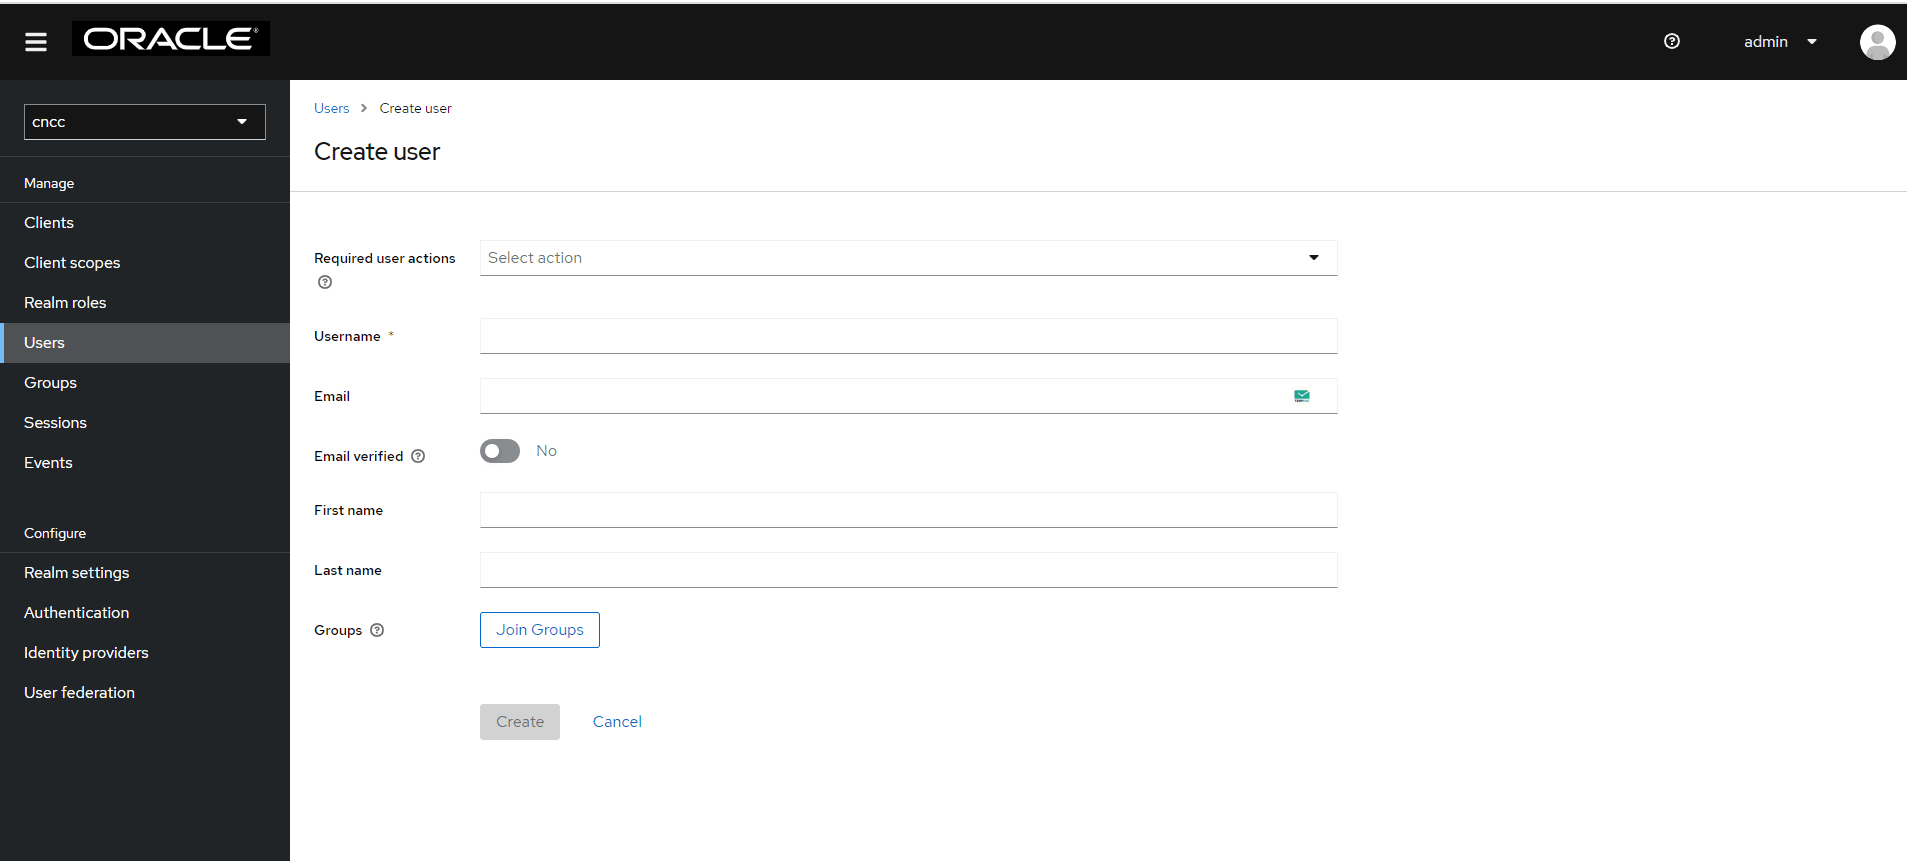
-
Add user screen appears. Add the user details and click
Save.
Figure 2-5 Save User
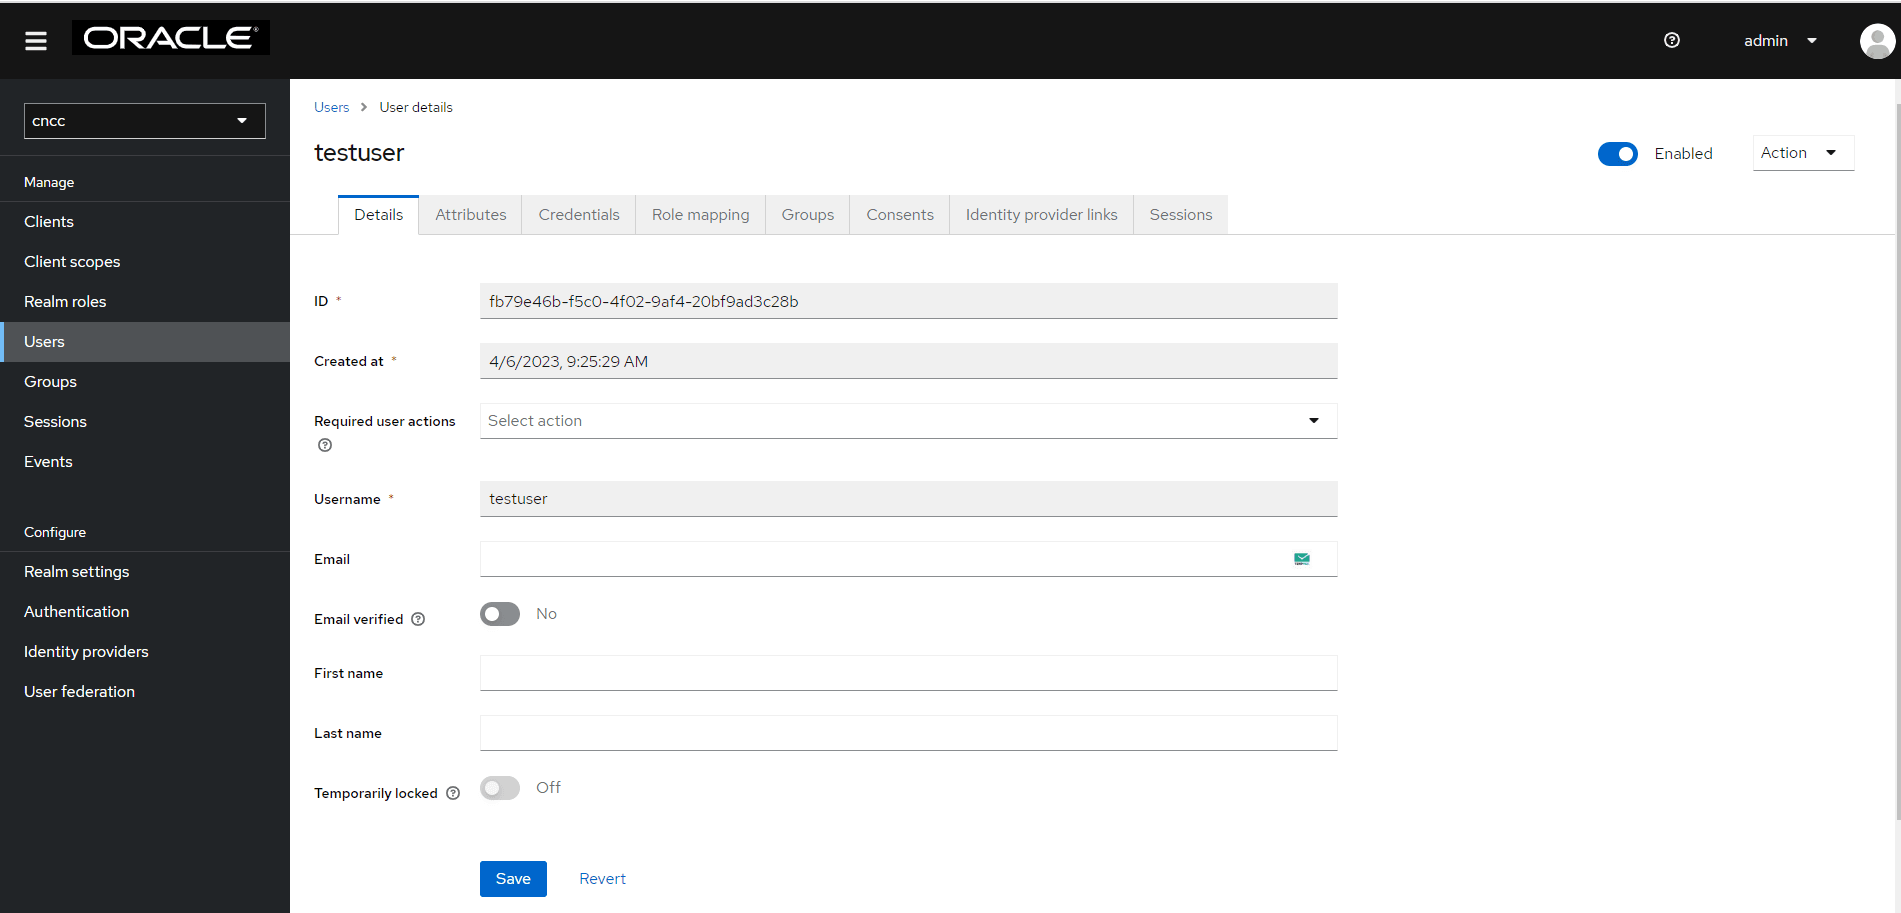
- The user has been created and the user details screen appears.
Figure 2-6 User Details
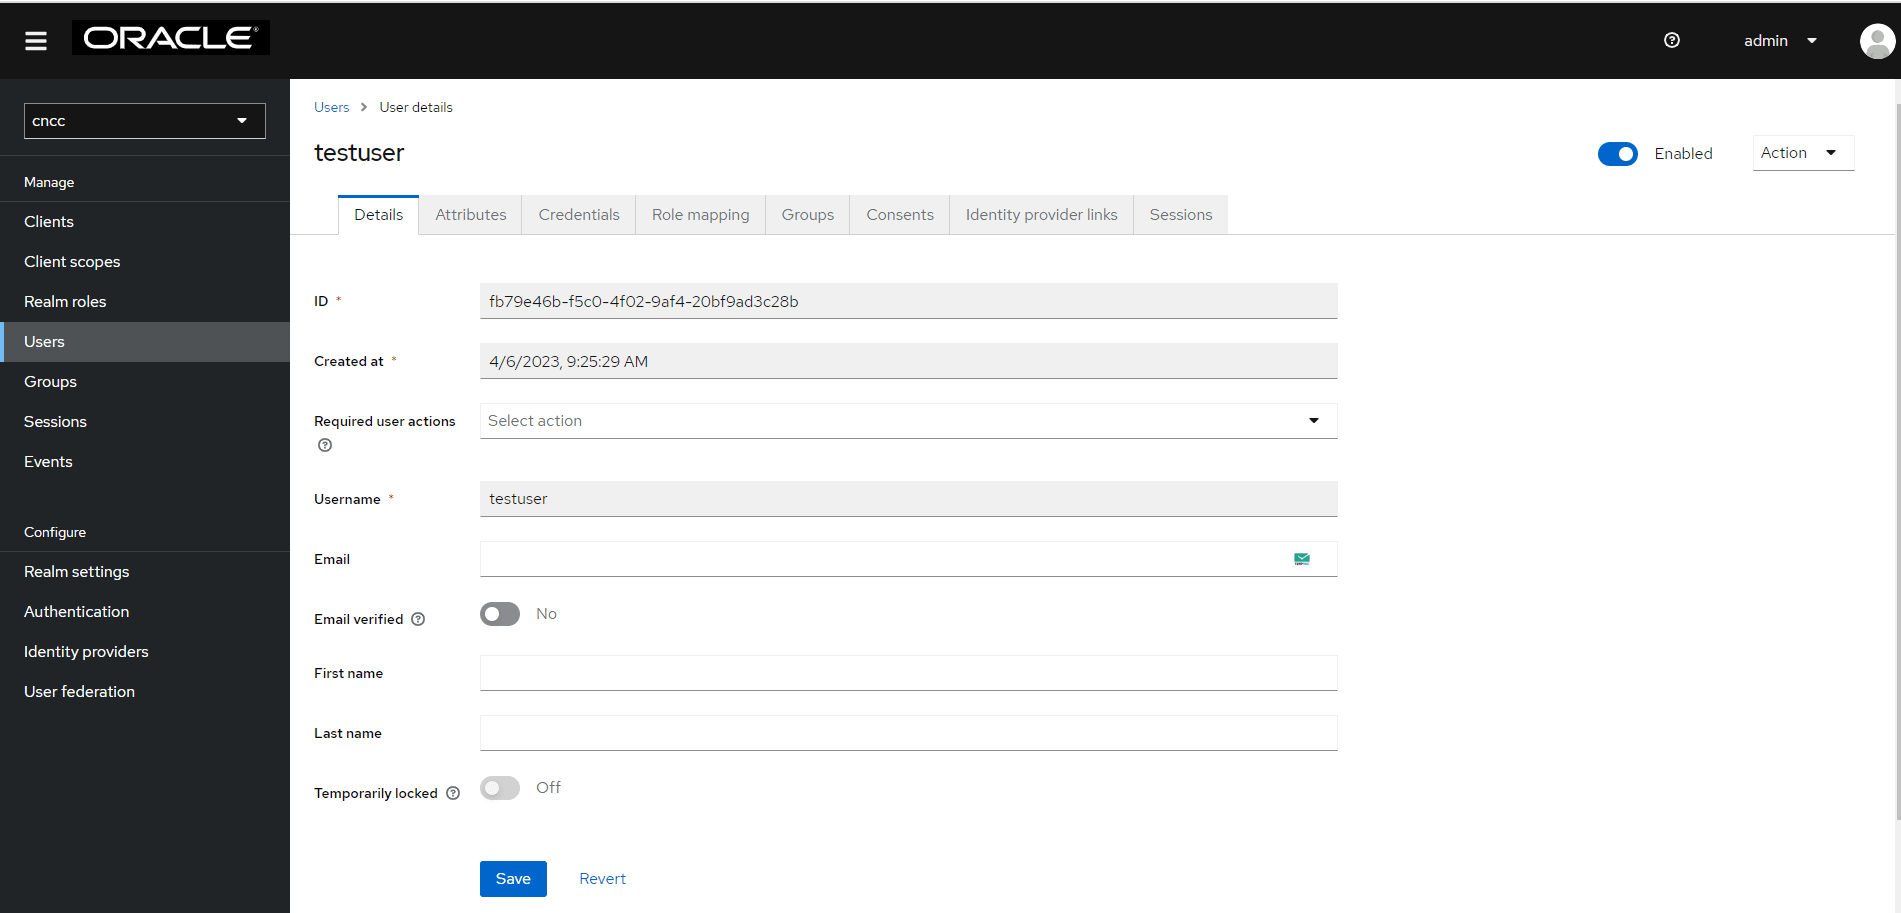
- For setting the password for the user, click Credentials tab and set
the password for that user.
Note:
Setting Temporary flag as ON prompts the user to change the password when logging in to the CNCC Core GUI for the first time.Figure 2-7 Set Password
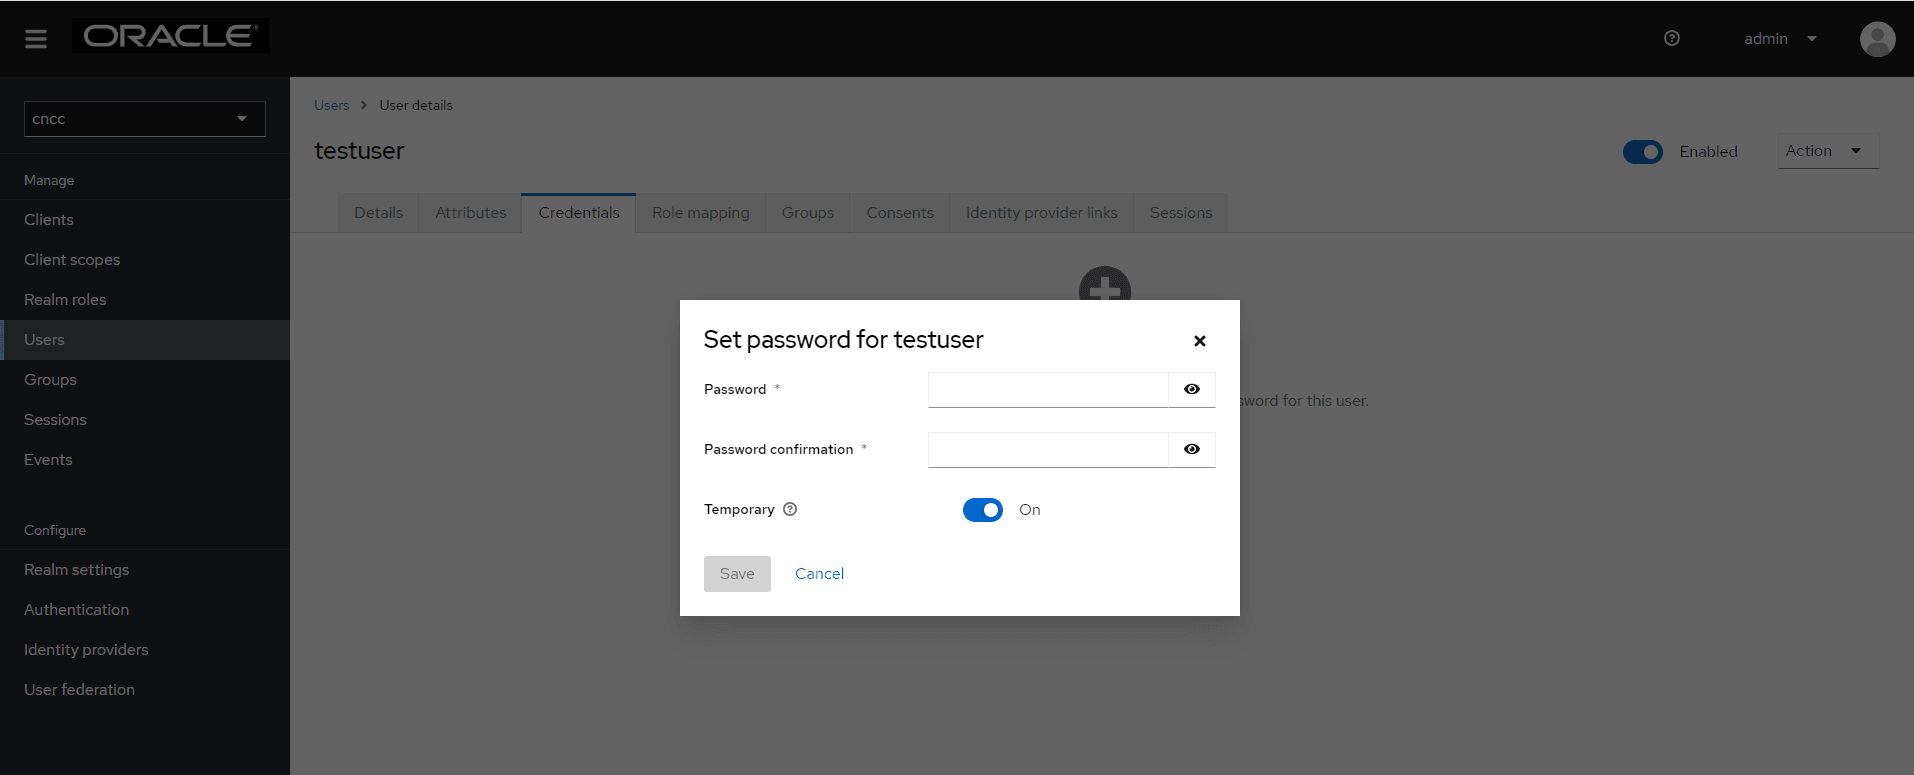
- Navigate to the Role Mappings tab and assign roles to the user.
Figure 2-8 Role Mappings
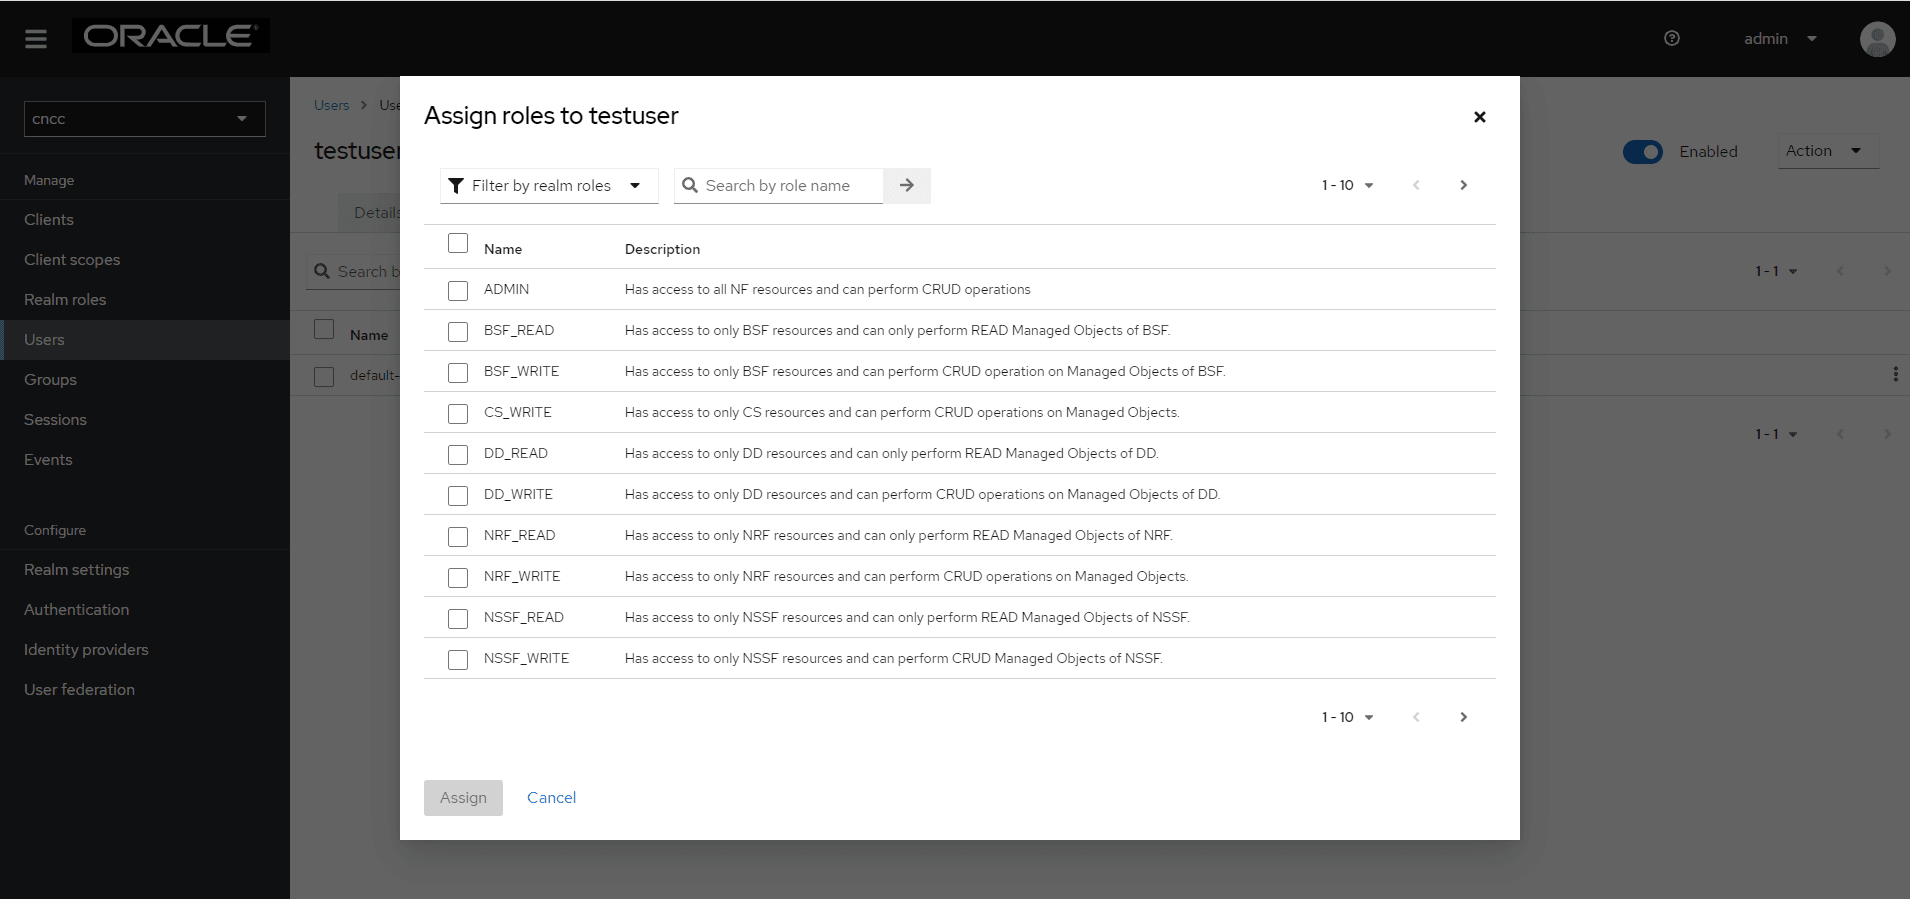
- Select Master Realm from the Realm drop down list.
Figure 2-9 Master Realm
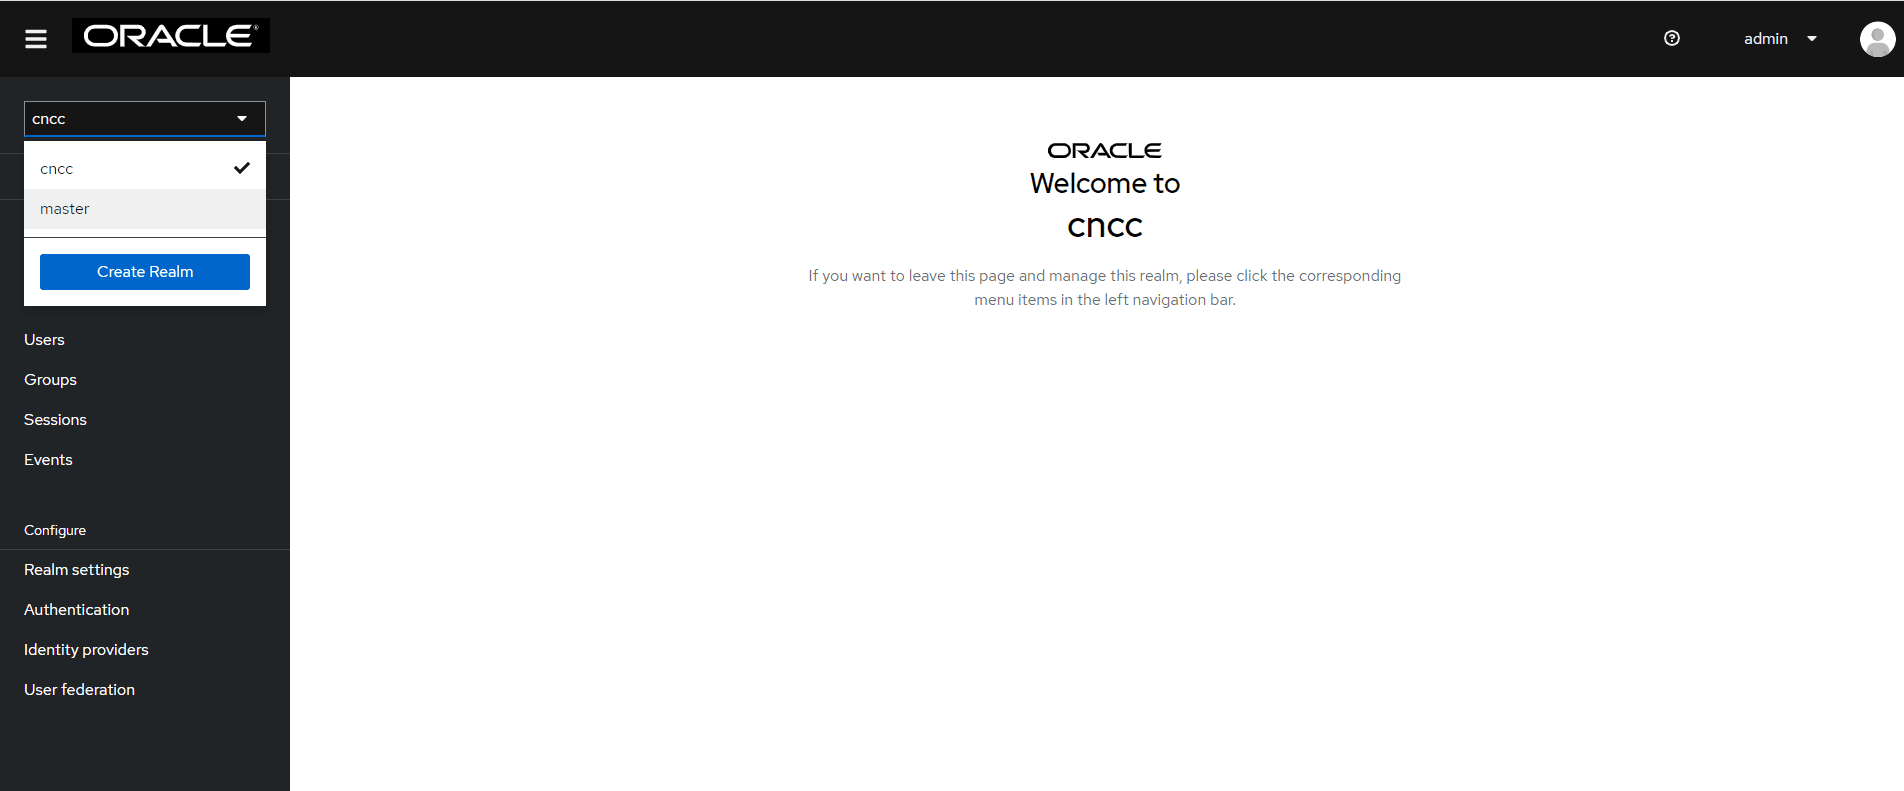
- From the Realm Settings tab navigate to the General tab. Set
Require SSL to All Requests and click Save.
Figure 2-10 Realm Settings
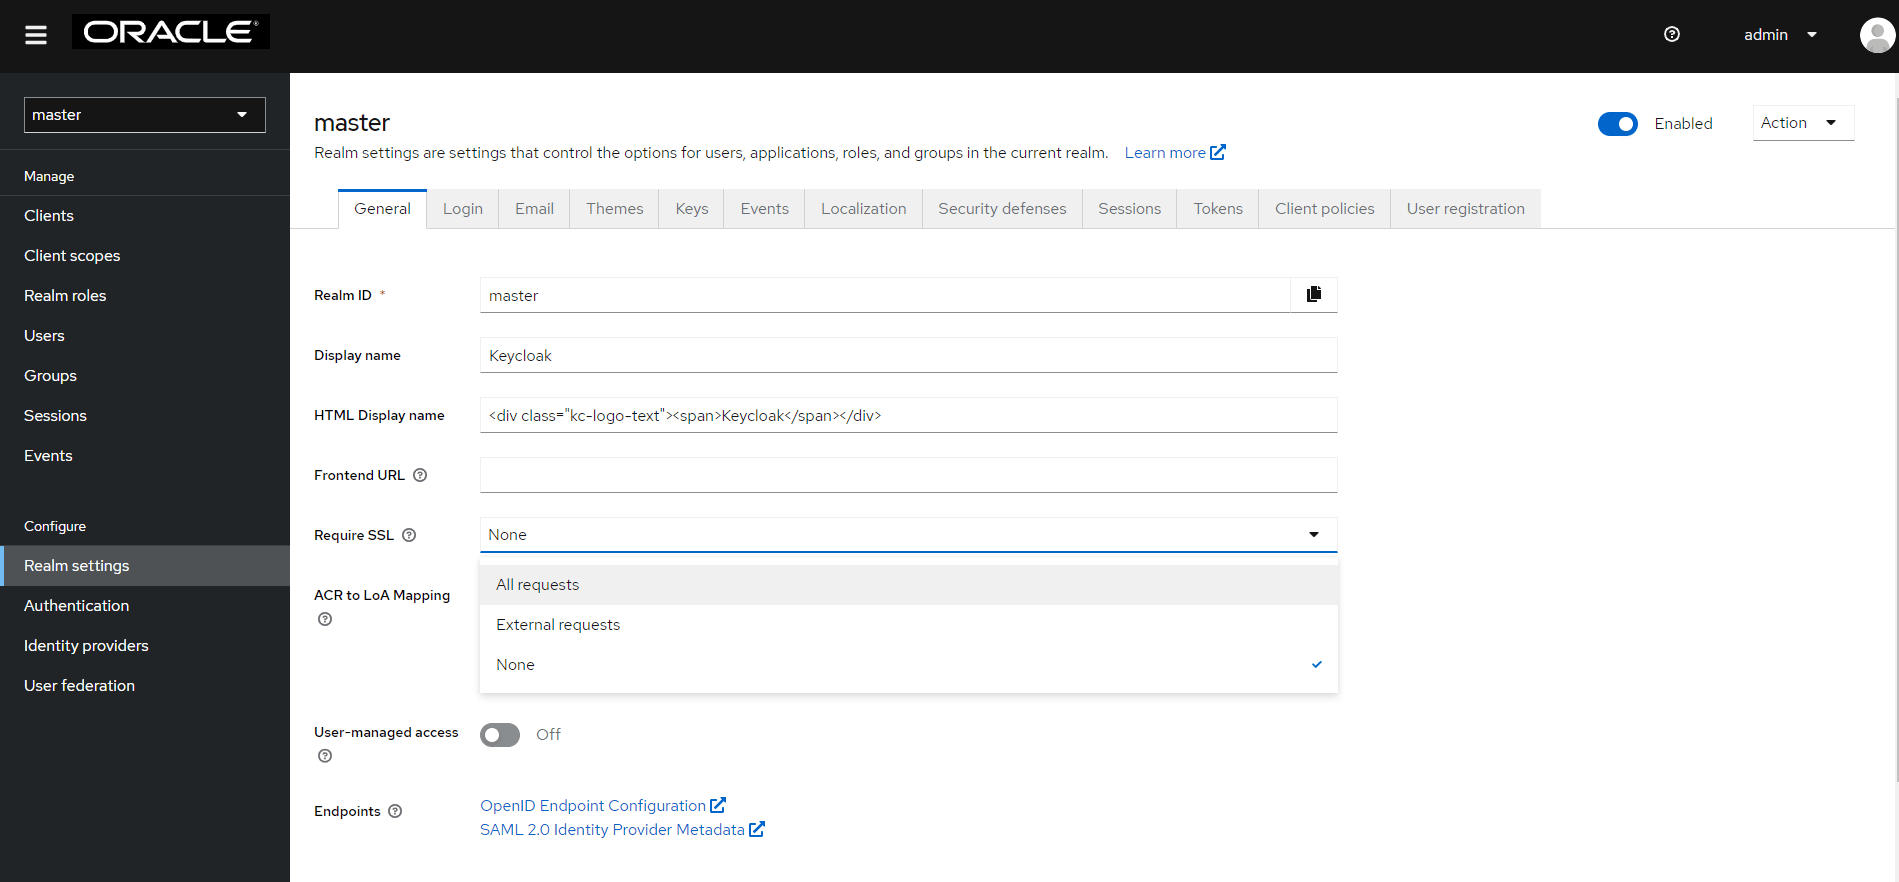
- Log in to CNCC Core using the credentials of the user created earlier.
Figure 2-11 CNC Console Core login
2.2.3.3.1 CNC Console Multicluster Deployment Roles
CNC Console Multicluster feature needs additional cluster specific roles to be created in M-CNCC IAM.
This section explains the steps to create the Roles.
- Log in to M-CNCC IAM and click Realm Roles present on the left
pane. The roles defined in the realm is displayed on the right pane.
Figure 2-12 Realm Roles
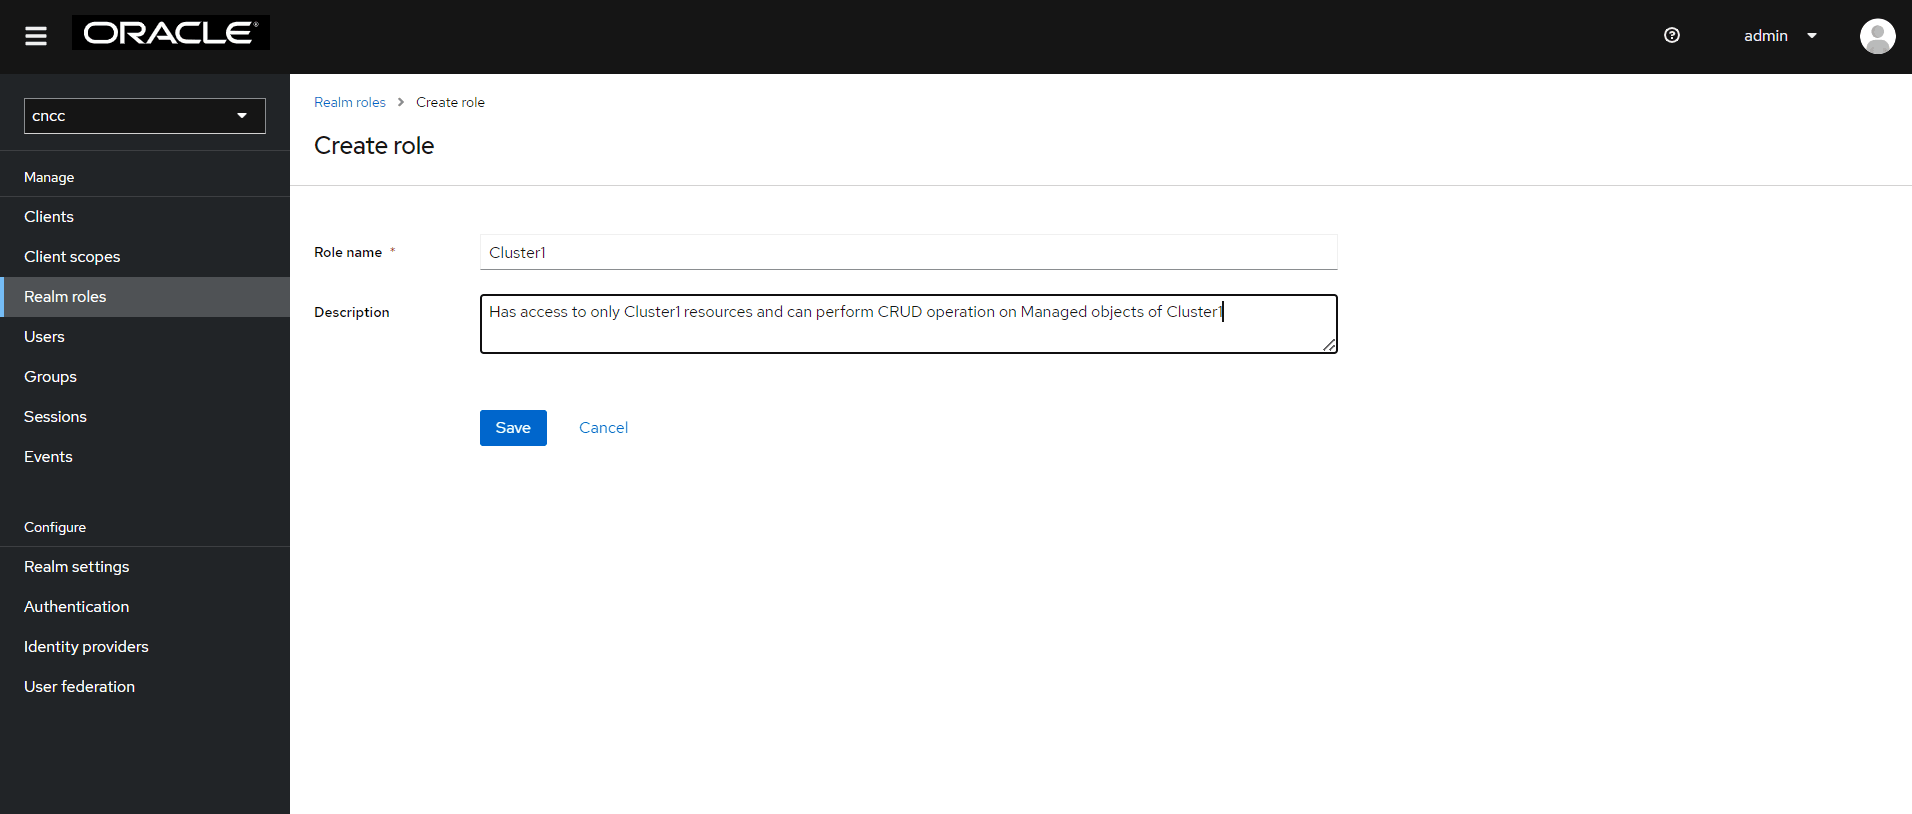
- Click Create Role, the Create Role screen appears. Add the
Role Name and click Save.
Figure 2-13 Create Role
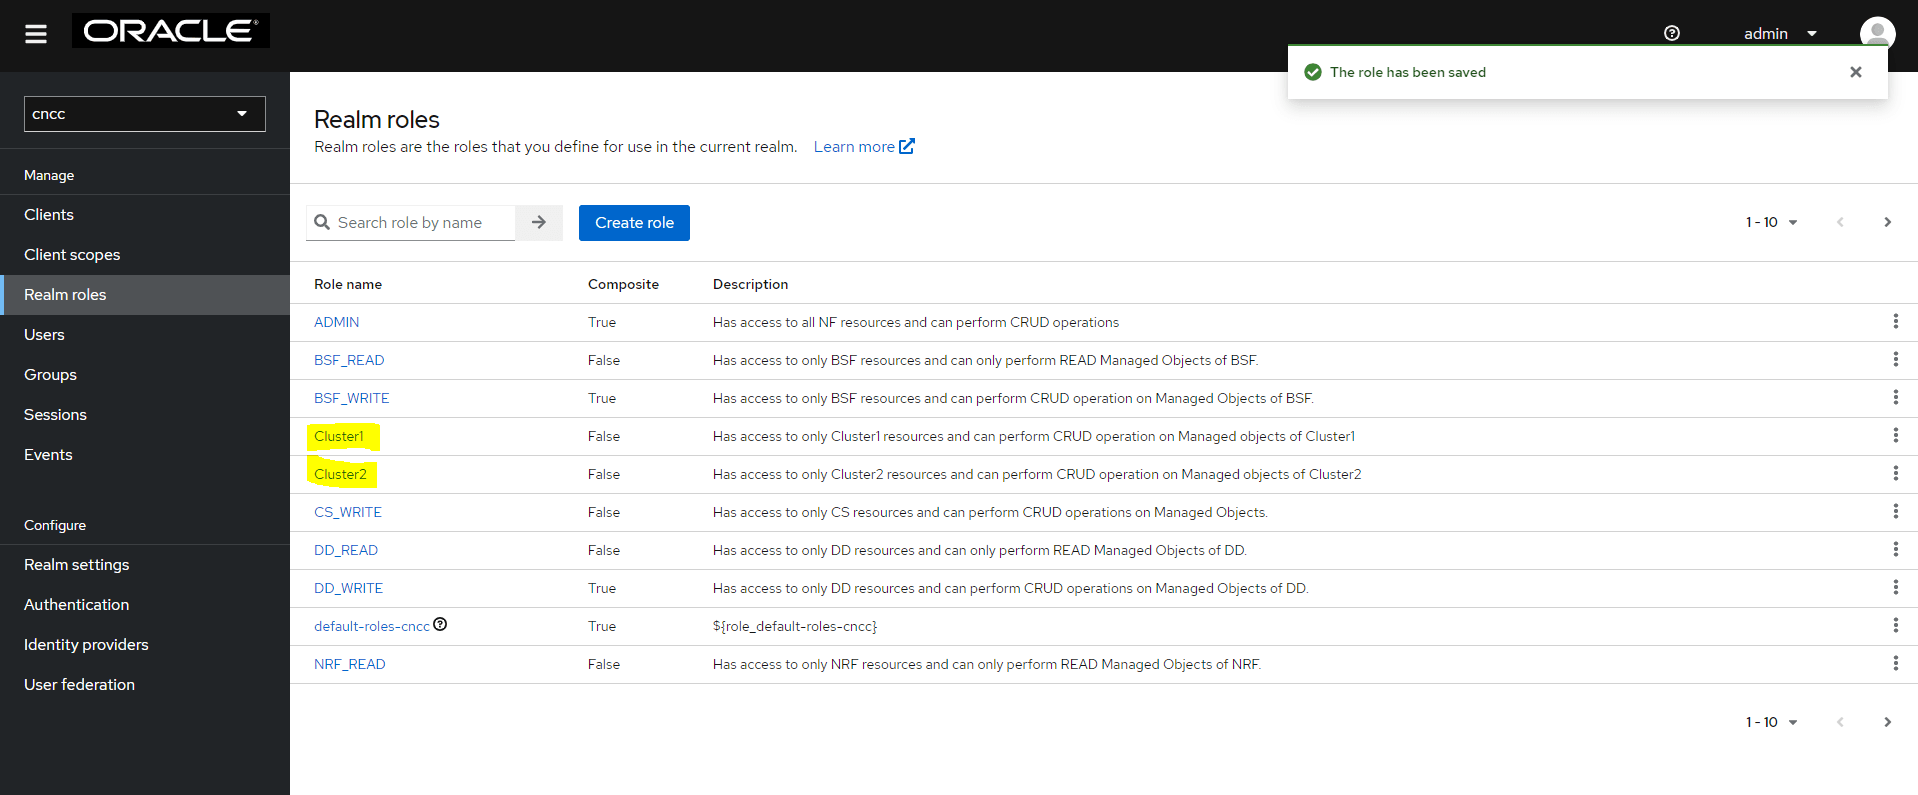
Note:
The user must ensure that the cluster role name must match with role name given in helm configuration.
- For M-CNCC cluster role creation in M-CNCC IAM, the value of
global.mCnccCores.idorglobal.mCnccCores.role namemust be used - For A-CNCC cluster role creation in M-CNCC IAM, value of
global.aCnccs.idorglobal.aCnccs.role namemust be used. - Cluster roles are case sensitive.
Composite Role Creation
- Click Create Role, the Create Role screen
appears. Add the Role Name and click Save.
Figure 2-14 Add Role Name
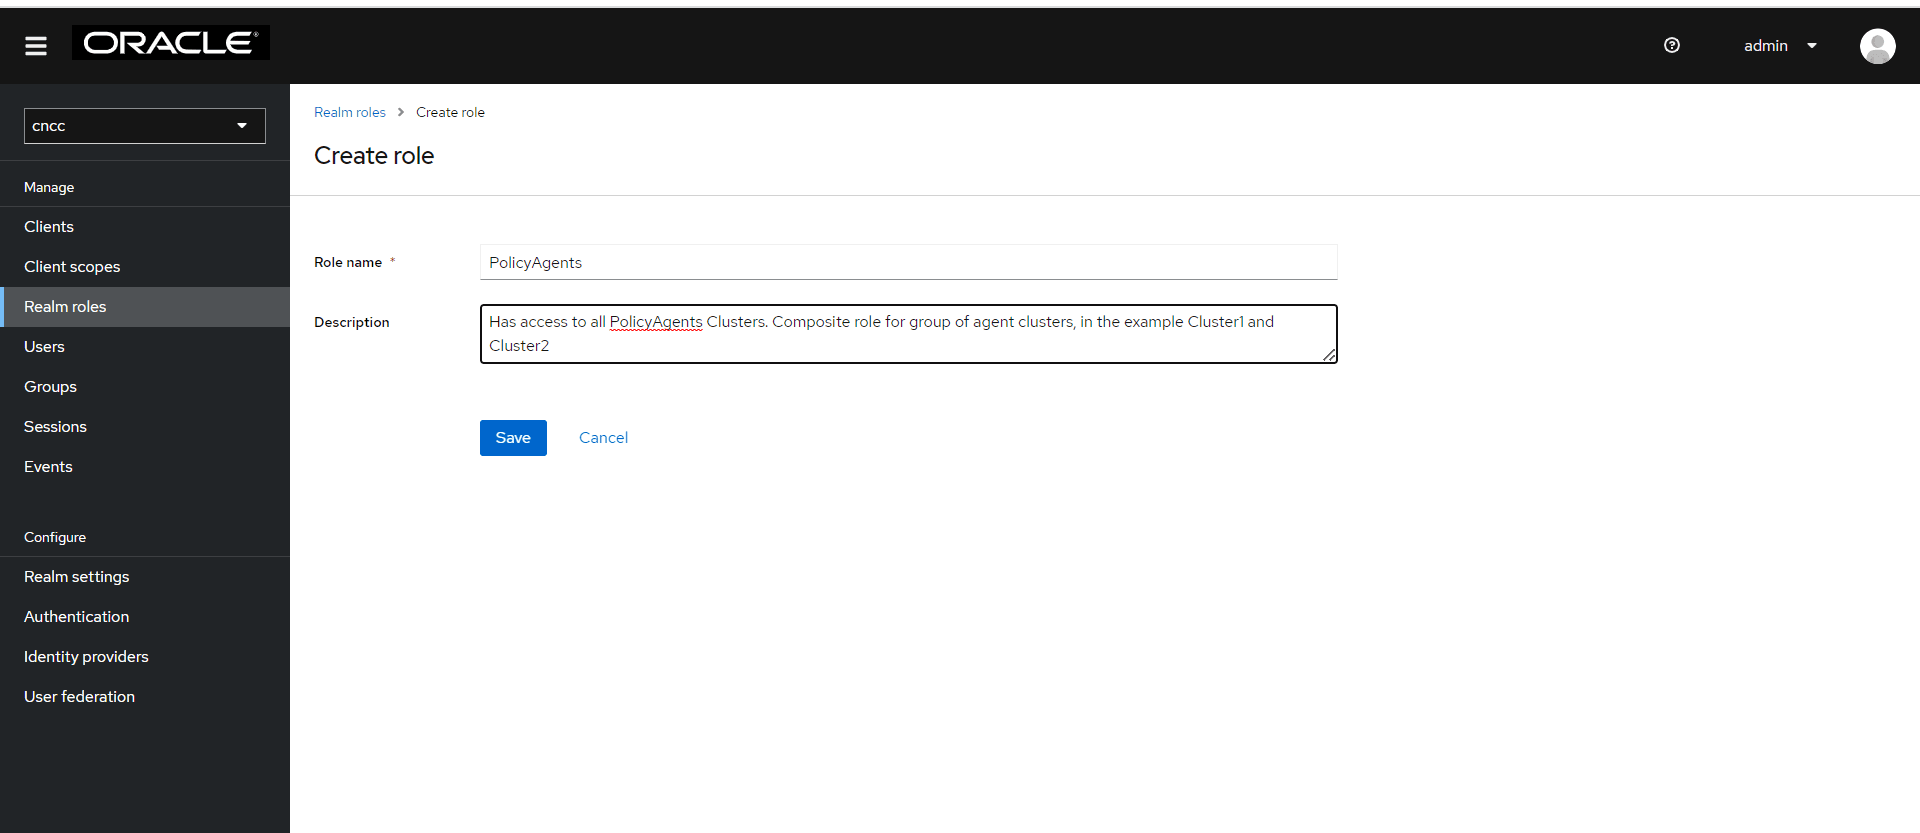
- From the Action drop down, select Add associated
roles.
Figure 2-15 Assign Role
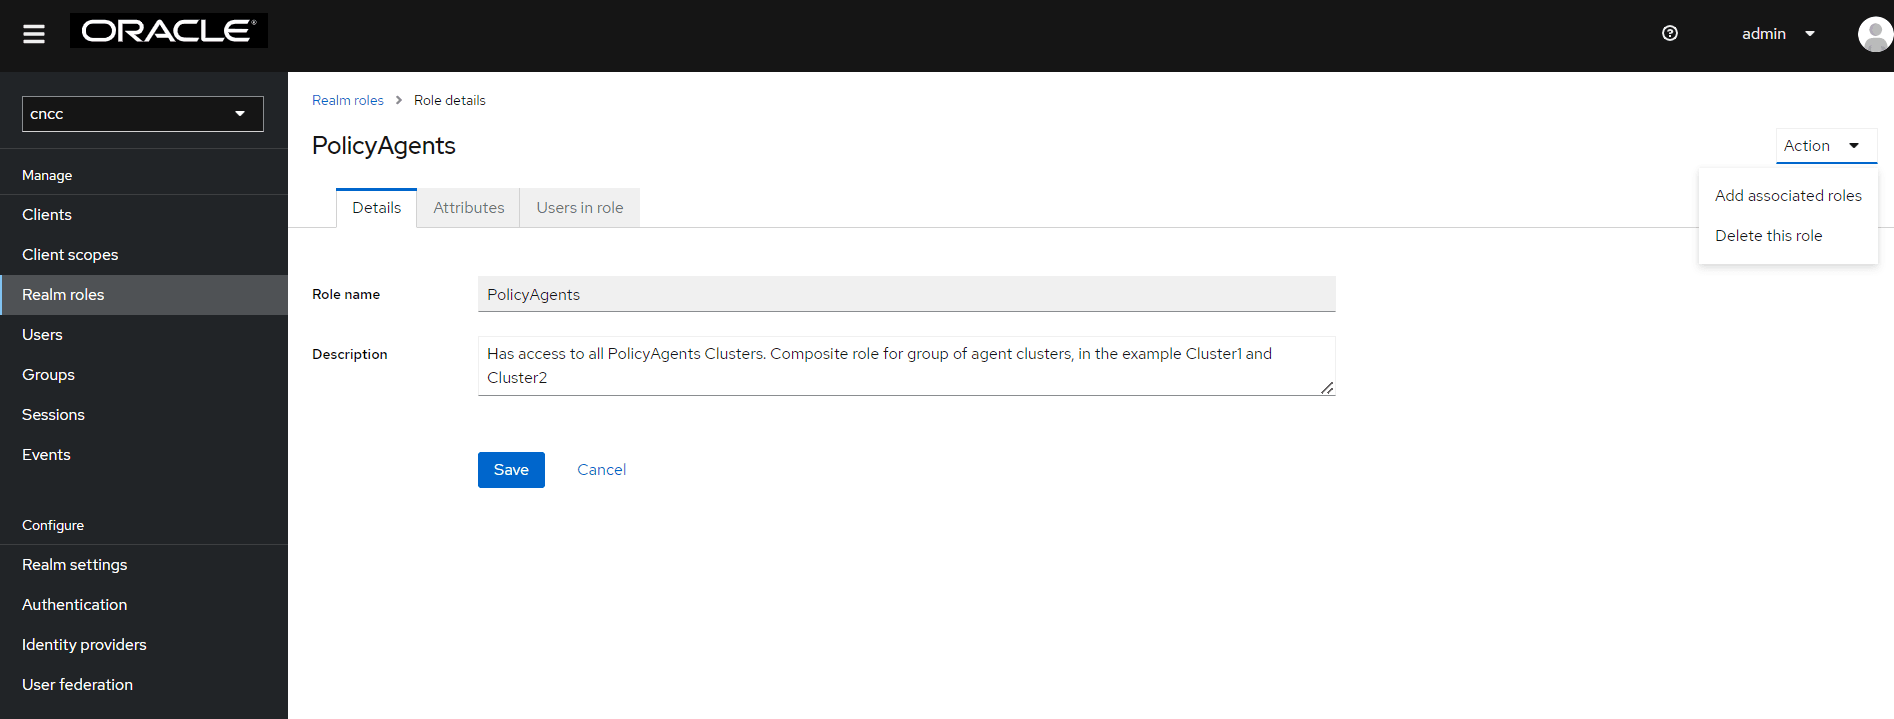
- This enables the Composite Roles functionality and the Assign roles screen appears.
- Select the required roles from Realm Roles and click
Assign.
Figure 2-16 Assign Roles
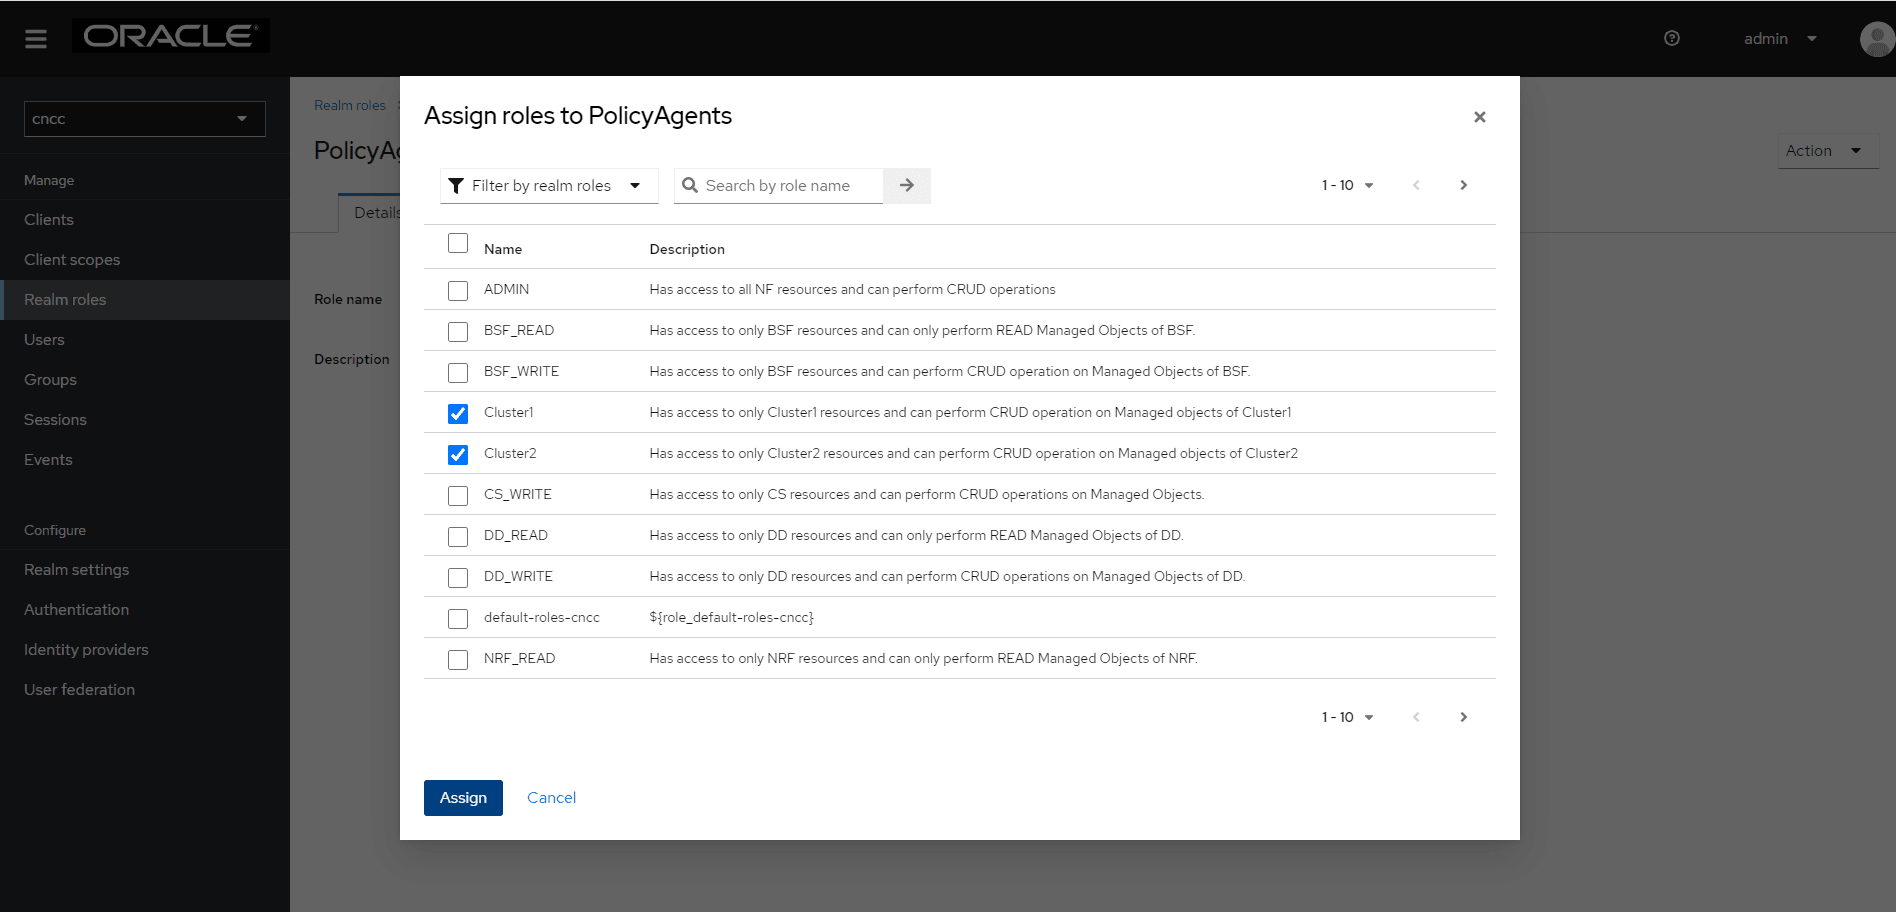
- The Associated roles tab appears in the Role
details screen.
Figure 2-17 Associates Roles
Note:
Here, the name "PolicyAgents" is used for composite role, that can be read as "PolicyAgentCnccs".Note:
For more information about the Roles, see the Role Based Access Control in CNC Console section in Oracle Communications Cloud Native Configuration Console User Guide.