3 Configuring Unified Data Repository using CNC Console
This section describes how to configure global and service parameters on UDR using CNC Console. The service configuration includes data repository service, notify service, NRF client service and diameter service. Through CNC Console, you can view the bulk import status and logging level details, perform provisioning operations for profile data, PCF data, SLF data, UDM data and schema management and validate the access token.
3.1 Logging into CNC Console
After logging successfully into the CNC Console application, you can use UDR integrated with CNC Console. To log in successfully into the CNC Console, edit the hosts file available at the C:\Windows\System32\drivers\etc location.
In the Windows system, open the hosts file in the notepad as an Administrator and append the following set of lines at the end:
Example:
10.75.212.88
                cncc-iam-ingress-gateway.cncc.svc.cluster.local
10.75.212.88
                cncc-core-ingress-gateway.cncc.svc.cluster.local
Note:
The IP Address in the above lines may change when deployment cluster changes.Save and close the notepad.
Note:
Before logging to CNC Console, it is important to create a CNC user. Using this user details, you can log in to the CNC Console application. For information on creating a CNC Console user, you can refer to its user guide.- Type
http://cncc-core-ingress-gateway.cncc.svc.cluster.local:<PortNumber>/
in the web browser and press Enter. The login page appears:
Figure 3-1 CNC Console Login Page

- Enter the Username and Password and click Log
In. The CNC Console Home page appears from where a user can select
different instances in the drop down, for example, the EIR, SLF, or the UDR
instance.
Figure 3-2 CNC Console Home Page
 The following NF services appear in the left navigation pane for the selected instance:
- Access Token Validation
- Bulk Import Status
- Configuration Export & Import
- Global Configurations
- Logging Level
- Provisioning
- Service Configurations
- NF Scoring
- Migration Tool Status
- Select the service to be used from the left navigation pane:
Figure 3-3 CNC Console Home Page with Services
Note:
The NF services appear in the left navigation pane for the EIR and SLF instance.
3.2 cnDBTier
- From the left navigation pane, click the UDR tab, and then click the cnDBTier tab. The cnDBTier page is displayed.
- Click cnDBTier Health to view the health
status of the databases and their services.
The cnDBTier Health page is displayed.
-
Click the Backup Manager Health Status to view the health status of the backup manager.
The Backup Manager Health Status page is displayed.
Table 3-1 Backup Manager Health Status
Fields Description Service Name This attribute displays the name of the service. Service Status This attribute displays the status of the service. Possible values are UP, DOWN. DB Connection Status This attribute displays the database connection status. Possible values are UP, DOWN. Overall Backup Manager Service Health This attribute displays the overall health status of the backup manager service. Possible values are UP, DOWN. Backup Executor Health Status This attribute displays the details of the backup executor. Node Id This attribute displays the id of the node. DB Connection Status This attribute displays the database connection status with the nodes. Possible values are UP, DOWN. - Click the Monitor Health Status to
view the health status of the services.
The Monitor Health Status page is displayed.
Table 3-2 Monitor Health Status details
Attribute Description Service Name This attribute displays the database service name. DB Connection Status This attribute displays the database connection status. Possible values are UP, DOWN. Metric Scrape Status This attribute displays the status of the metric scrape, that is if the metrics are fetched or not. If the metrics are fetched then the service is up and vice versa. Possible values are UP, DOWN. Overall Monitor Service Health This attribute displays the overall health status of the monitor service. Possible values are UP, DOWN. - Click the NDB Health Status to view
the health status of the network database.
The NDB Health Status page is displayed.
Table 3-3 NDB Health Status details
Attribute Description Local Site Name This attribute displays the name of the local site. NDB Health Status Details This attribute displays the health status of the network database. Service Name This attribute displays the name of the service. Service Status This attribute displays the status of the service. Possible values are UP, DOWN. PVC Health Status This attribute displays the health status of the PVC. Possible values are UP, DOWN, and NA. Note: This attribute is set to NA when some of the database pods are not connected to the PVC.
- Click the Replication Health Status
to view the health status of the replication sites.
The Replication Health Status page is displayed.
Table 3-4 Replication Health Status details
Attribute Description Local Site Name This attribute displays the name of the local site. Health Status Details This attribute displays the health status details. The number of rows in this table varies depending on the type of deployment (for example, two-site, three-site deployments). Service Name This attribute displays the name of the available service. Service Status This attribute displays the status of the available service. Possible values are UP, DOWN. DB Connection Status This attribute displays the database connection status. Possible values are UP, DOWN. Overall Replication Service Health This attribute displays the overall health status of the replication service. Possible values are UP, DOWN.
-
- Click the Backup List to create and check the
status of on-demand backups in the cnDBTier.
Table 3-5 Backup List
Fields Description Site Name This field displays the name of the current site to which UDR is connected. Backup Details This attribute displays the following information such as backup id, backup size, and backup creation timestamp. Backup Id This field displays the ID of the stored backup. Backup Size (bytes) This field displays the size of the stored backup. Creation TimeStamp This field displays the time recorded when the backup was stored. - Click the cnDBTier Version to view the
version.
Table 3-6 cnDBTier Version Attributes
Fields Description cnDBTier Version This field displays the cnDBTier version. NDB Version This field displays the network database (NDB) version. - Click the Database Statistics Report to view
the available database.
Table 3-7 Database Statistics Report
Fields Description Database Count This field displays the number of available database. Database Tables Count This field displays the available database names and their table count. Database Name This field displays the database name. Table Count This field displays the table count for each database. Database Table Rows Count This field displays the table rows present in each table. Database Name This field displays the database name. - Click on the View. The View Database Table Rows Count page is displayed.
Table 3-8 View Database Table Rows Count
Fields Description Database Name This field displays the database name. Tables This field displays the table names and the corresponding rows in each table. Database Name This field displays the database name. Table Name This field displays the table name. Row Count This field displays the table rows present in each table. - Click the Geo Replication Status to view the
local site and remote site name to which UDR is connected.
Table 3-9 GeoReplication Status
Fields Description Local Site Name This field displays the local site name to which UDR is connected. Remote Site Name This field displays the remote site name. Replication Status This field displays the replication status with corresponding sites. Seconds Behind Remote Site This field displays the number of seconds that the last record read by the local site is behind the latest record written by the remote site for all the replication groups. - Click the View icon in the
Actions menu to view the View Geo
Replication Status screen.
Table 3-10 Geo Replication Status
Fields Description Replication Group Delay This field displays the number of seconds that the last record read by the local site is behind the latest record written by the remote site for individual replication groups. Replication Channel Group Id This field displays the ID of the replication channel group. - Click the View icon to view the
Replication Group Delay attributes:
Table 3-11 View Replication Group Delay
Fields Description Channel Details This field displays the channel details such as Remote Replication IP and Role. Remote Replication IP This field displays the IP of the remote replication channel. Role This field displays the role of the replication channel IP. - Click the HeartBeat Status to view the
connectivity between local site and remote site name to which UDR is
connected.
Table 3-12 HeartBeat Status Details
Fields Description Site Name This field displays the name of the current site to which NRF is connected. HeartBeat Details This field displays the following information like remote site name, heart beat status, heart beat lag, and replication channel group id. Remote Site Name This field displays the remote site name. Heartbeat Status This field displays the connectivity status with corresponding sites. Heartbeat Lag This field displays the lag or latency in seconds it took to synchronize between sites. Replication channel Group Id This field displays the ID of the replication channel group. - Click the Local Cluster Status to view the
local cluster status for the current site:
Table 3-13 Local Cluster Status
Fields Description Site Name This field displays the name of the current site to which UDR is connected. Cluster Status This field displays the local cluster status for the current site. - Click the On Demand Backup to view the
initiated on-demand backups to store data.
Table 3-14 On Demand Backup Details
Fields Description Site Name This field displays the name of the current site to which UDR is connected. DR Status This field displays the status of DR. Backup Id This field displays the ID of the stored backup. Backup Status This field displays the status of backup. Remote Transfer Status The field displays the status of remote transfer. Initiate Backup The field displays whether the backup is initiated or not. - Click Edit. The Edit On
Demand Backup page appears.
Note:
The Edit mode is available only for Initiate Backup. - Use the toggle option to Initiate Backup and click Save. A confirmation message, "Save successfully" appears.
- Click Cancel to navigate back to the On Demand Backup page.
- Click Refresh to reload the On Demand Backup page.
- Click Edit. The Edit On
Demand Backup page appears.
3.3 Access Token Validation
To validate an access token, go to UDR then, Access Token Validation in the left navigation pane of the CNC Console application, and then Signaling or Provisioning. Based on the selected option, the Access Token Validation page for either Signaling or Provisioning appears, respectively.
This page when loads for the first time shows empty value with labels.
To edit this configuration, you are required to set the Oauth validation flag as true at the time of NF installation. Otherwise, it sends a Bad Request Response. For more information, see Oauth2.0.
Editing the Access Token Validation Details
To edit the access token details:
- Click Edit. The Edit Access Token Validation page appears.
- To add the instance ID, click Add.
- The Add Instance ID List dialog box appears.
Figure 3-4 Add Instance ID List

- Fill in the required details and click Save to add the instance ID.
- Click Cancel to exit the Add Instance ID List dialog box.
Note:
Similarly, you can add the Key ID List details. - The Add Instance ID List dialog box appears.
- To edit any Instance ID or Key ID detail, click Edit
corresponding to that particular record under relevant section.
- The Edit Instance ID List or Edit Key ID List dialog box appears.
- Update the configuration details as required and click Save. A confirmation message, "Save successfully." appears.
- Click Cancel to access the Edit Access Token Validation page.
- To delete any Instance ID or Key ID detail, click Delete
corresponding to that particular record.
- A confirmation message appears. Click OK to confirm the deletion of record.
- Click Cancel to exit the delete dialog box and access the Edit Access Token Validation page.
- Update the Access Token Validation Mode if required.
- Click Save to update the changes [OR] click Cancel to exit the Edit Access Token Validation page.
- Click Refresh to reload the Access Token Validation page.
3.4 Subscriber Bulk Import Status
The Subscriber Bulk Import Status page is a monitoring page, which is read-only. This page allows the operator to monitor the Subscriber Bulk Import status, which initiates on running the Subscriber Bulk Import tool. For more information, see bulk import tool.
To access the Subscriber Bulk Import Status page, click UDR and then, Subscriber Bulk Import Status in the left navigation pane of the CNC Console application. The following page appears:
Figure 3-5 Subscriber Bulk Import Status Page

- Import File: shows the csv file name that has bulk import data.
- Time Queued: shows the time when bulk import transaction was initiated.
- Time Started: shows the time when bulk import transaction begins.
- Time Completed: shows the time when bulk import transaction completes.
- Progress (%): shows the percentage completion of bulk import.
- Pass Count: shows the number of records that have been successfully imported.
- Fail Count: shows the number of records that failed to import.
- Total Count: shows the total number of records in the import file.
- Status: shows the overall status of the bulk import transaction.
- Failed Keys: shows information about those transactions, which are not provisioned (by bulk import tool) due to any failure. CNC Console displays failed keys only if the failed key count is less than 100.
Note:
Using Filter option, you can filter the records you are interested in and using Refresh option, you can refresh the Subscriber Bulk Import Status page.3.5 Configuration Export & Import
This section describes how to perform bulk export and bulk import of the UDR configuration data using CNC Console.
Figure 3-6 Configuration Export & Import

- Export the configuration data.
- Download the exported data.
- Import the data (zip file) that you have exported earlier.
- Generate report to view details of successful and failed configurations.
Exporting Configuration Data
- Click the Bulk Export button in the Export tab.
The Objects to be Exported dialog box
appears.
Figure 3-7 Objects to be Exported Dialog Box

- Select the objects that you want to export. Click the Selection button to either 'Select All' or 'Deselect All' the objects.
- Click Export to export the selected objects data. The data in the Configuration Export & Import page is updated.
- Click Cancel to exit the dialog box.
Downloading Exported Configuration Data
- Click the Export Configuration Download icon available under the Actions column of the Export tab.
- The "Export Data downloaded Successfully" message appears and the zip file of the exported data is saved to your system. For example: exportedFiles_1.12.41_20210807133529.zip
Downloading Exported Configuration Data Report
- Click the Export Report Download icon available under the Actions column of the Export tab.
- The "Export status report downloaded successfully" message appears and the export report in the .txt file format is saved to your system. For example: exportReport_1.12.41_20210807134056.txt
Importing Configuration Data
- Navigate to the Import tab. The
Configuration Export & Import page
appears as follows:
Figure 3-8 Importing Configuration Data

- Click the Import button. The Import Data
dialog box appears.
Figure 3-9 Import Data Dialog Box

- Select the file that has configuration data
and click Import.
Note:
You can only import the configuration data that you had exported earlier. - The data in the Configuration Export & Import page is updated.
- Click Cancel to exit the dialog box.
Downloading Imported Configuration Data Report
- Click the Import Report Download icon available under Actions column of the Import tab.
- The "Import status report downloaded successfully" message appears and the import report in the .txt file format is saved to your system. For example: importReport_1.12.41_20210807134056.txt
Using REST APIs for Export & Import
UDR provides REST APIs to bulk export and bulk import its configuration data. For more information about REST APIs, see the Configuration APIs for Import and Export section of the Oracle Communications Cloud Native Core, Unified Data Repository REST Specification Guide.
3.6 Subscriber Export Tool Status
The Subscriber Export Tool Status page is a monitoring page, which is read-only. This page allows the operator to monitor the Subscriber Export Tool Status, which initiates on running the Subscriber Export tool. For more information, see Subscriber Export Tool.
To access the Subscriber Export Tool Status page, click UDR and then, Subscriber Export Tool Status in the left navigation pane of the CNC Console application. The following page appears:
Figure 3-10 Subscriber Export Tool Status

- Job Id: Generates unique ID for export.
- Subscriber Count: Total subscriber count present in the database
- Exported Subscriber Count: Total subscriber count exported from the database.
- Job Progress: Shows the progress of dump in percentage.
- Status: Shows the overall status of the export transaction. For example, RUNNING, COMPLETED, SKIPPED, or FAILED.
- Export State: This field indicates number of completed stages. For example, export from database is successful (1/1) and transfer of data from path to remote is successful (2/2).
Note:
Using Filter option, you can filter the records you are interested in and using Refresh option, you can refresh the Subscriber Export Tool Status page.3.7 Global Configurations
Figure 3-11 Global Configurations

Table 3-15 Global Configurations Parameters
| Field Name | Default Value | Attribute | Description |
|---|---|---|---|
| DB Service Name | mysql-connectivity-service.occne-db | Read-only | Displays the name of the DB Service. |
| UDR Services | All | Read-only | Displays 'All' when all the UDR services are engaged. |
| UDSF Enabled | false | Read-only | Displays 'true' when UDSF is enabled and 'false' when UDSF is not enabled. |
| Ingress HTTTP Port | 80 | Read-only | Defines the Ingress Gateway signaling port for HTTP. |
| Ingress HTTPS Port | 443 | Read-only | Defines the Ingress Gateway signaling port for HTTPS. |
| SNSSAI | 2-FFFFFF | Read-only | Single – Network Slice Selection Assistance Information (SNSSAI) is used to uniquely identify a Network Slice. The S-NSSAI contains Slice/Service Type (SST) and an optional Slice Differentiators (SD) components. |
| DNN | dnn1 | Read-only | Used to identify 5G Data Networks. The DNN is typically in the form of an Access Point Name (APN). |
| Consumer NF | PCF,UDM,NEF | Read-only | Displays the Consumer network functions for UDR |
| Auto Create Subscriber | true | Editable | Indicates the flag to enable or disable the auto creation of subscriber when the PUT operation is performed on a new UEID. |
| SBI Correlation Info Header Enable | false | Editable | If the flag is enabled, the 3gpp-Sbi-Correlation-Info header is added in the dr-services responses and notifications requests in Egress GW. |
| NF InstanceId | 5a7bd676-ceeb-44bb-95e0-f6a55a328b03 | Read-only | Indicates the NF Instance ID for UDR. The same is registered with NRF. |
| VSA Default Billing Day | 1 | Read-only | Indicates the billing day value. |
| Subscriber Activity Enabled | false | Editable | Enables or disables the subscriber activity |
| Add Default Billing Day | true | Editable | Indicates the flag to enable or disable the add default billing day. |
| Auto Enroll On Signalling | true | Editable |
Indicates the flag to enable or disable the auto enroll of subscriber data. Note: This flag is applicable only for sm-data. It is not applicable for am-data and UE policyset. |
| E-tag Enabled | false | Editable | Indicates the flag to enable or disable the ETag |
| Enable Controlled Shutdown | false | Editable | Indicates the flag to enable or disable the operational state. |
| OnDemandMigration Key Type | "msisdn" | Editable | Indicates the type of the key for the keyRange for On-demand. The keyType can either be "msisdn" or "imsi". |
| OnDemandMigration Key Range | "000000-000000" | Editable | This defines the range of subscribers for On-demand. Multiple key ranges are not allowed. |
| Enable Suppress Notification | true | Editable | Indicates the flag to enable or disable the suppress notification. |
| Subscriber Identifiers | NA | NA | Configure different subscriber identifiers for each keys. |
| NAI | NA | Editable | Subscriber identifier can be configure up to 100 keys. |
| IMSI | NA | Editable | Subscriber identifier can be configure up to 100 keys. |
| EXTID | NA | Editable | Subscriber identifier can be configure up to 100 keys. |
| MSISDN | NA | Editable | Subscriber identifier can be configure up to 100 keys. |
Note:
These values are extracted from the database and on every Helm upgrade, users need to click the Refresh icon to see the latest values.3.8 Logging Level Configuration
The Logging Level Configuration page allows its operators to view and edit the log level details at the application log level and package log level for each service. To access the Logging Level Configuration page, click UDR and then Logging Level in the left navigation pane of the CNC Console application.
- Service: UDR microservice name
- Application Log Level: This field shows the log level of the
microservice. Its possible values are:
- WARN
- INFO
- DEBUG
- View: Click View corresponding to each microservice to
View Log Level List detail.
Figure 3-12 Sample: View Log Level List - egress-gateway

Editing Log Level Details
- Click Edit on the Logging Level Configuration page. The Edit Log Level page appears.
- Update the log level details as required. To add the Package
Log Level details:
- Click the Add button available in the Package
Log Level section. The Add Package Log Level dialog
box appears:
Figure 3-13 Add Package Log Level
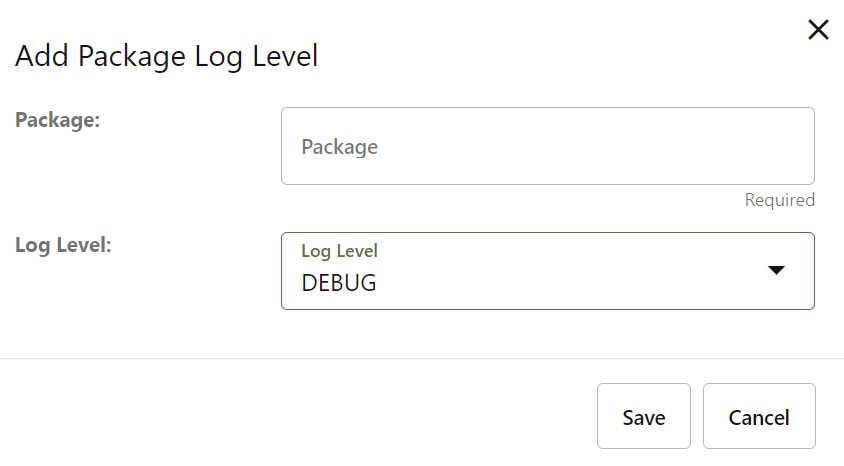
- Enter the Package name and select the Log
Level from the list. The Log Level options are:
- DEBUG
- ERROR
- INFO
- TRACE
- WARN
- Click Save to add the package log level details. [OR] Click Cancel to exit the Add Package Log Level dialog box.
- Click the Add button available in the Package
Log Level section. The Add Package Log Level dialog
box appears:
- Click Save. A confirmation message, "Save successfully." appears.
- If you do not want to modify any log level detail, click Cancel. The Logging Level Configuration page appears.
- Click Refresh to reload the Logging Level Configuration page.
3.9 Controlled Shutdown Configurations
This section describes how to perform Controlled Shutdown configurations.
3.9.1 Operational State
- In the CNC Console application, under UDR,
click Controlled Shutdown, and then select
Operational State.
This opens the page displaying the two groups, Switch Operational State and Operational State History:
Figure 3-14 Operational State

- Switch Operational State
displays the following operational states:
- NORMAL: NF instance is discoverable and services all requests.
- COMPLETE SHUTDOWN: NF instance is non discoverable and no new session creation requests accepted.
Note:
The current state of any site can be identified with a tick mark.You can switch to a different operational state by clicking the NORMAL or COMPLETE SHUTDOWN button.
- Operational State History: It displays the history of the operational states along with the timestamp.
- Switch Operational State
displays the following operational states:
3.10 Provisioning
To configure UDR services using CNC Console, you can use Provisioning. In the left navigation pane of the CNC Console application, click UDR and then Provisioning.
3.10.1 Provisioning - NEF Data
This section describes how to provision operations for NEF Data.
In the CNC Console application, click UDR and then Provisioning. From the Provisioning menu, select NEF Data in the left navigation pane. The Provisioning Operations for NEF Data page appears:
Figure 3-15 Provisioning Operations for NEF Data

- Extract NEF data from UDR database based on the UE ID entered
- Add new NEF data to the UDR database
- Modify an existing NEF data on the based on a UE ID
- Delete existing NEF data that is not needed in the UDR database
Extracting Profile Data
- Ensure Resource Name is set to 'NEF Data'
- Type an appropriate UE ID. For example: msisdn-1111111114
- Click Get. A confirmation message, 'Fetched
Successfully' appears for a second, and the result appears in the
Response text area as follows:
Figure 3-16 Sample Page: Get - NEF Data - Response

- An Error message summary appears in case of incorrect UE ID entered.
Adding NEF Data
- Ensure Resource Name is set to 'NEF Data'.
- Type an appropriate UE ID. For example: msisdn-1111111114
- Click Add. The Request text area appears.
- Enter the NEF data that you want to add to the UDR database.
- Click Submit. The 'Saved Successfully.' message
appears.
Note:
If you enter an incorrect input, an Error message summary appears.
Editing Profile Data
- Ensure Resource Name is set to 'NEF Data'.
- Type an appropriate UE ID. For example: msisdn-1111111114
- Click Edit. The Request text area displays existing NEF data.
- Enter the updated NEF data.
- Click Submit. The 'Saved Successfully.' message
appears.
Note:
If you enter an incorrect input, an Error message summary appears.
Deleting NEF Data
- Ensure Resource Name is set to 'NEF Data'.
- Type an appropriate UE ID. For example: msisdn-1111111114
- Click Delete.
- The 'Deleted Successfully' message appears.
Note:
If you enter an incorrect input, an Error message summary appears.
Clearing NEF Data
Click the Clear option to clear all the text fields and text areas of the Provisioning Operations for NEF Data.
3.10.2 Provisioning - Profile Data
This section describes how to operate provisioning operations for Profile Data.
In the CNC Console application, click UDR and then Provisioning. From the Provisioning menu, select Profile Data in the left navigation pane. The Provisioning Operations for Profile Data page appears:
Figure 3-17 Provisioning Operations for Profile Data

- Extract profile data from UDR database on the basis of UE ID entered
- Add new profile data to the UDR database
- Modify an existing profile data on the basis of UE ID
- Delete an existing profile data that is no more needed in the UDR database
Extracting Profile Data
- Ensure Resource Name is set to 'Profile Data'.
- Type an appropriate UE ID. For example: msisdn-1111111114
- Click Get. A confirmation message, 'Fetched Successfully'
appears for a second and the result appears in the Response text area
as follows:
Figure 3-18 Sample Page: Get - Profile Data - Response

- An Error message summary appears in case of incorrect UE ID entered.
Adding a Profile Data
- Ensure Resource Name is set to 'Profile Data'.
- Type an appropriate UE ID. For example: msisdn-1111111114
- Click Add. The Request text area appears.
- Type-in the profile data that you want to add to the UDR database.
- Click Submit. The 'Saved Successfully.' message
appears.
Note:
If a user enters any incorrect input, an Error message summary appears.
Editing a Profile Data
- Ensure Resource Name is set to 'Profile Data'.
- Type an appropriate UE ID. For example: msisdn-1111111114
- Click Edit. The Request text area displays an existing profile data.
- Type-in the updated profile data.
- Click Submit. The 'Saved Successfully.' message
appears.
Note:
If a user enters any incorrect input, an Error message summary appears.
Deleting a Profile Data
- Ensure Resource Name is set to 'Profile Data'.
- Type an appropriate UE ID. For example: msisdn-1111111114
- Click Delete.
- The 'Deleted Successfully' message appears.
Note:
If a user enters any incorrect input, an Error message summary appears.
Clearing a Profile Data
Click the Clear option to clear all the text fields and text areas of the Provisioning Operations for Profile Data.
3.10.3 Provisioning - EIR Data
This section describes provisioning operations for EIR Data.
In the CNC Console application, click UDR and then Provisioning. From the Provisioning menu, select EIR Data in the left navigation pane. The Provisioning Operations for EIR Data page appears:
Figure 3-19 Provisioning GUI for EIR Data

- Extract EIR data from UDR database based on the UE ID entered
- Add new EIR data to the UDR database
- Modify an existing EIR data on the based on a UE ID
- Delete existing EIR data that is not needed in the UDR database
Extracting Profile Data
- Ensure Resource Name is set to 'EIR Data'
- Type an appropriate UE ID. For example: UE ID - imei-1111111111
- Click Get. A confirmation message, 'Fetched
Successfully' appears for a second, and the result appears in the
Response text area as follows:
Figure 3-20 Sample Page: Get - EIR Data - Response

- An Error message summary appears in case of incorrect UE ID entered.
Adding EIR Data
- Ensure Resource Name is set to 'EIR Data'.
- Type an appropriate UE ID. For example: msisdn-1111111112
- Click Add. The Request text area appears.
- Enter the EIR data that you want to add to the UDR database.
- Click Submit. The 'Saved Successfully.' message
appears.
Note:
If you enter an incorrect input, an Error message summary appears.
Editing Profile Data
- Ensure Resource Name is set to 'EIR Data'.
- Type an appropriate UE ID. For example: msisdn-1111111112
- Click Edit. The Request text area displays existing NEF data.
- Enter the updated EIR data.
- Click Submit. The 'Saved Successfully.' message
appears.
Note:
If you enter an incorrect input, an Error message summary appears.
Deleting EIR Data
- Ensure Resource Name is set to 'EIR Data'.
- Type an appropriate UE ID. For example: msisdn-1111111112
- Click Delete.
- The 'Deleted Successfully' message appears.
Note:
If you enter an incorrect input, an Error message summary appears.
Clearing EIR Data
Click the Clear option to clear all the text fields and text areas of the Provisioning Operations for EIR Data.
3.10.4 Provisioning - PCF Data
This section describes how to operate provisioning operations for PCF (Policy Control Function) Data.
In the CNC Console application, click UDR and then Provisioning. From the Provisioning menu, select PCF Data in the left navigation pane. The Provisioning Operations for PCF Data page appears:
Figure 3-21 Provisioning Operations for PCF Data
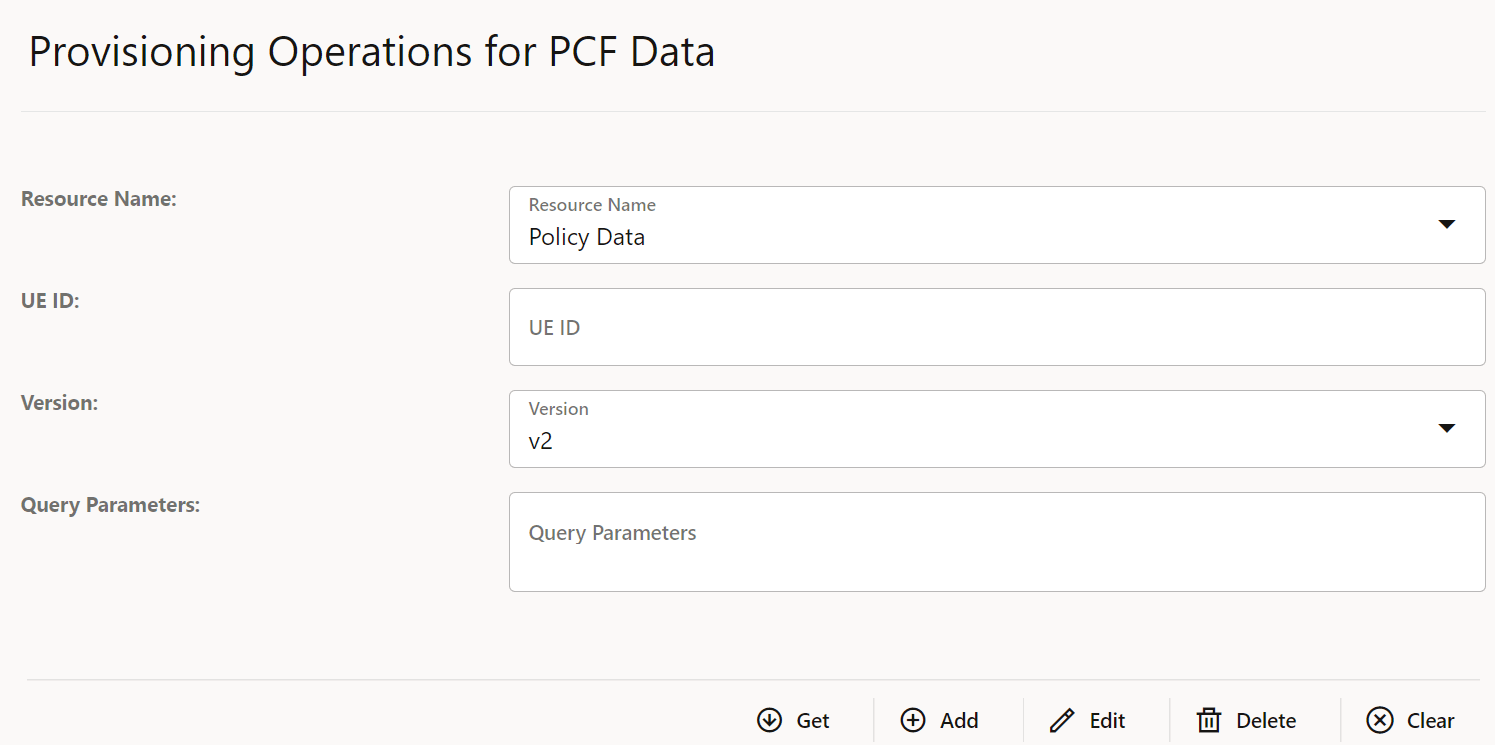
- Select the Resource Name from the drop-down list.
- Extract PCF data from UDR database on the basis of UE ID entered.
- Add PCF Data on the basis of payload.
- Modify the existing PCF data on the basis of UE ID.
- Delete the existing PCF data that is no more needed in the UDR database.
Extracting PCF Data
- Select the Resource Name from the drop-down list.
- Type an appropriate UE ID. For example: msisdn-9111111112.
- Click Get. A confirmation message, 'Fetched Successfully.'
appears and the result appears in the Response text area as
follows:
Figure 3-22 Provisioning PCF Get Response

- An Error message summary appears in case of incorrect UE ID entered.
Adding a PCF Data
- Select the Resource Name from the drop-down list.
- Type an appropriate UE ID. For example: msisdn-9111111112.
- Click Add. The Request text area displays an existing PCF data.
- Type-in the updated profile data.
- Click Submit. The 'Saved Successfully.' message
appears.
Note:
If a user enters any incorrect input, an Error message summary appears.
Editing a PCF Data
- Select the Resource Name from the drop-down list.
- Type an appropriate UE ID. For example: msisdn-9111111112.
- Click Edit. The Request text area displays an existing PCF data.
- Type-in the updated profile data.
- Click Submit. The 'Saved Successfully.' message
appears.
Note:
If a user enters any incorrect input, an Error message summary appears.
Deleting a PCF Data
- Select the Resource Name.
- Type an appropriate UE ID. For example: msisdn-9111111112.
- Click Delete.
- The 'Deleted Successfully.' message appears.
Note:
If a user enters any incorrect input, an Error message summary appears.
Clearing a PCF Data
Click the Clear option to clear the text fields and text areas of the Provisioning Operations for PCF Data page.
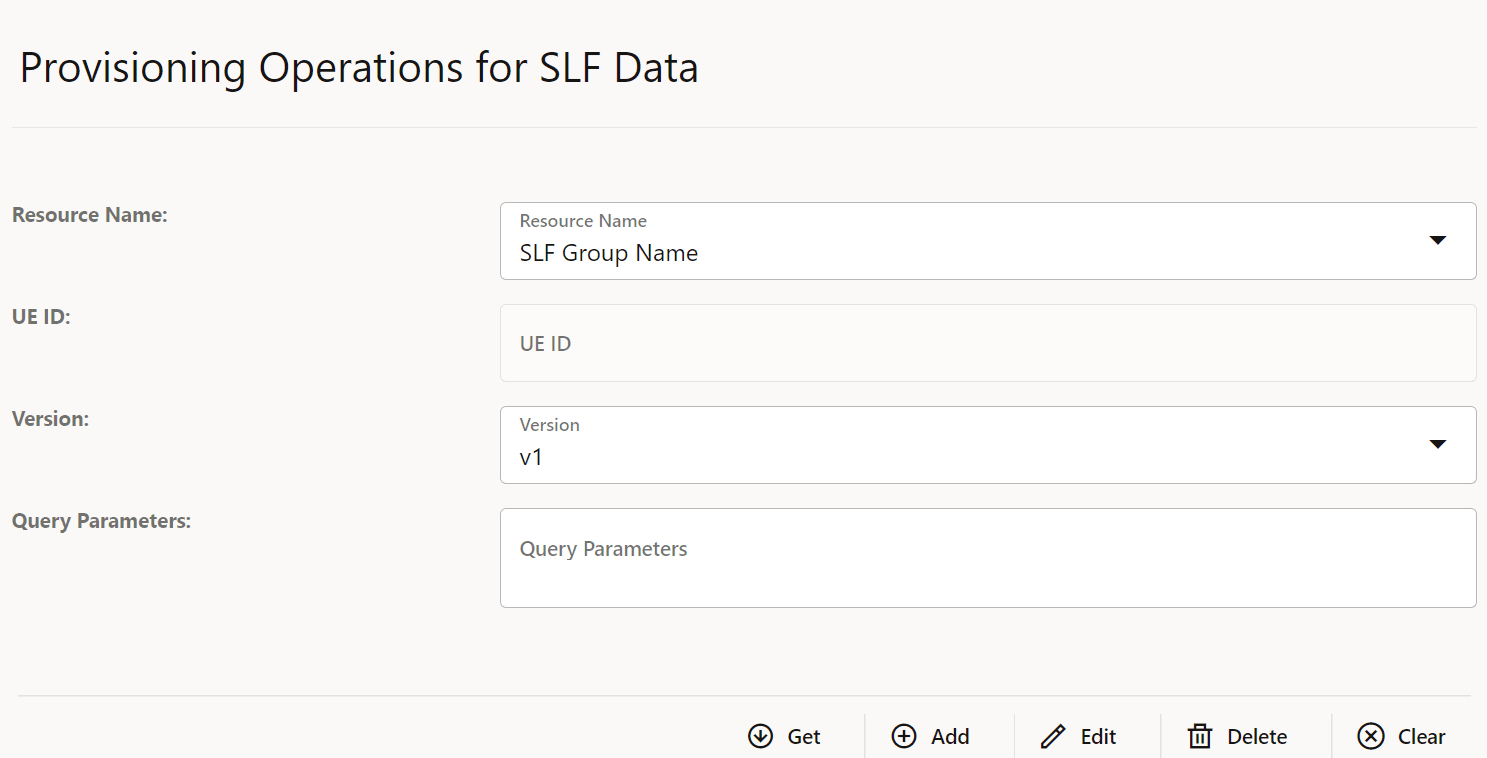
3.10.5 Provisioning - SLF Data
In this section, you will learn to operate provisioning operations for SLF (Subscriber Location Function) Data.
In the CNC Console application, click UDR and then Provisioning. From the Provisioning menu, select SLF Data in the left navigation pane. The Provisioning Operations for SLF Data page appears:
Figure 3-23 Provisioning Operations for SLF Data
Note:
SLF Group Name must be provisioned before SLF Subscriber is provisioned.- Extract SLF data from UDR database on the basis SLF Group Name (Query Parameter) or SLF Subscriber (UEID).
- Add or edit an existing SLF data on basis of SLF Group Name (Query Parameter) or SLF Subscriber (UEID).
- Delete an existing SLF data that is no more needed in the UDR database.
Extracting SLF Data on the basis of SLF Group Name
- Select the Resource Name as SLF Group Name.
- Enter the Query Parameters.
- Click Get. A confirmation message, 'Fetched
Successfully.' appears and the result appears in the Response
text area as follows:
Figure 3-24 Provisioning SLF Get Response

Extracting SLF Data on the basis of SLF Subscriber
- Select the Resource Name as SLF Subscriber.
- Type an appropriate UE ID. For example: msisdn-1111111112
- Click Get. A confirmation message, 'Fetched
Successfully.' appears and the result appears in the Response
text area as follows:
Figure 3-25 Provisioning SLF Get Response
- An Error message summary appears in case you enter an incorrect UE ID.
Adding SLF Data on the basis of SLF Group Name or SLF Subscriber
- Select the Resource Name as either SLF Group Name or SLF Subscriber.
- If you have selected the Resource Name as SLF Group Name
then,
- Enter the Query Parameters.
- Click Add. The Request text area appears.
- Type the SLF data.
- Click Submit. The 'Saved Successfully.' message appears.
- If you have selected the Resource Name as SLF Subscriber
then,
- Type an appropriate UE ID. For example: msisdn-1111111112.
- Click Add. The Request text area appears.
- Type-in the SLF data.
- Click Submit. The 'Saved Successfully.' message appears.
Note:
If a user enters any incorrect input, an Error message summary appears.Editing SLF Data
- Select the Resource Name as either SLF Group Name or SLF Subscriber.
- If you have selected the Resource Name as SLF Group Name
then,
- Type in the Query Parameters and click Get. The result appears in the Response text area.
- Click Edit. The Request text area displays an existing SLF data. Modify the relevant details.
- Click Submit. The 'Saved Successfully.' message appears.
- If you have selected the Resource Name as SLF Subscriber
then,
- Type in the UE ID and click Get. The result appears in the Response text area.
- Click Edit and modify the required details. The Request text area displays an existing SLF data. Modify the relevant details.
- Click Submit. The 'Saved Successfully.' message appears.
Note:
If a user enters any incorrect input, an Error message summary appears.Deleting a SLF Data
- Select the Resource Name as either SLF Group Name or SLF Subscriber.
- If you have selected the Resource Name as SLF Group Name then enter the 'Query Parameters' and if you have selected the Resource Name as SLF Subscriber then enter the 'UE ID'. For example: msisdn-1111111112
- Click Delete.
- The 'Deleted Successfully.' message appears.
Note:
If a user enters any incorrect input, an Error message summary appears.
Clearing a SLF Data
Click the Clear option to clear the text fields and text areas of the Provisioning Operations for SLF Data page.
3.10.6 Provisioning - UDM Data
This section describes how to operate provisioning operations for UDM (Unified Data Management) Data.
In the CNC Console application, click UDR and then Provisioning. From the Provisioning menu, select UDM Data in the left navigation pane. The Provisioning Operations for UDM Data page appears:
Figure 3-26 Provisioning Operations for UDM Data
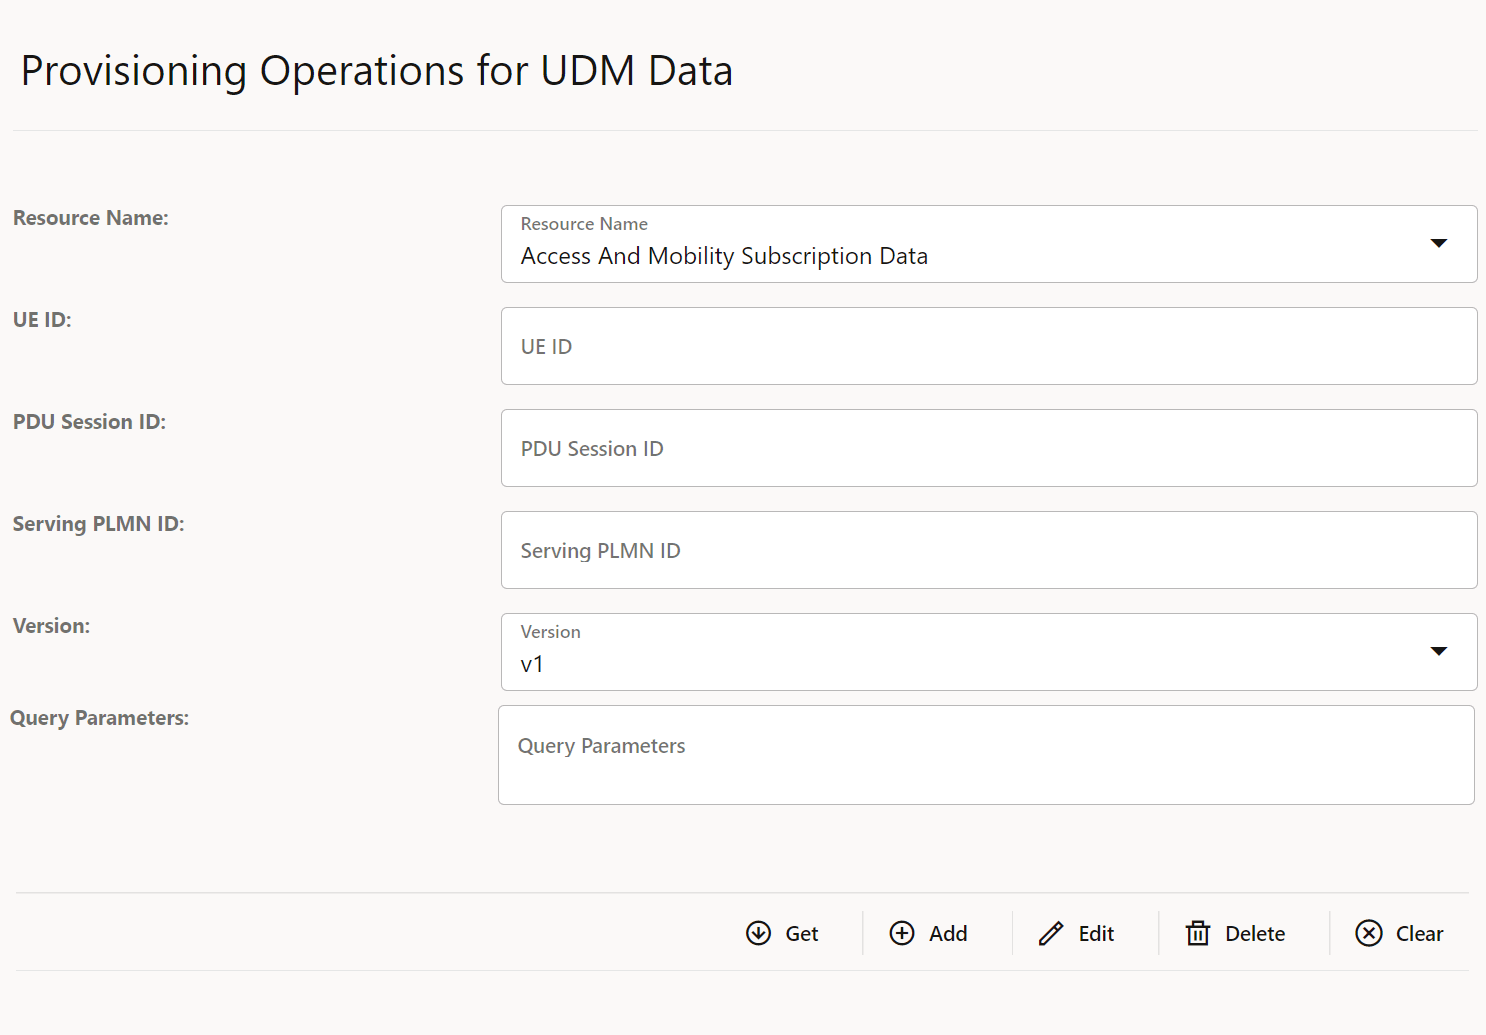
In the Provisioning Operations for UDM Data page, user can extract, modify and delete UDM data on the basis of Resource Name, UE ID, PDU Session ID, Serving PLMN ID, Version and Query Parameters entered.
Extracting UDM Data
- Select the Resource Name from the drop-down list.
- Type an appropriate UE ID, PDU Session ID and Serving PLMN ID in their respective fields.
- Select an appropriate Version and enter Query Parameters.
- Click Get. A confirmation message, 'Fetched Successfully.' appears and the result appears in the Response text area.
- An Error message summary appears in case of incorrect UE ID entered.
Adding a UDM Data
- Select the Resource Name.
- Type an appropriate UE ID, PDU Session ID and Serving PLMN ID in their respective fields.
- Select an appropriate Version and enter Query Parameters.
- Click Edit. The Request text area appears.
- Enter details and click Submit. The 'Saved
Successfully.' message appears.
Note:
If a user enters any incorrect input, an Error message summary appears.
Editing a UDM Data
- Select the Resource Name.
- Type an appropriate UE ID, PDU Session ID and Serving PLMN ID in their respective fields.
- Select an appropriate Version and enter Query Parameters.
- Click Edit. The Request text area displays an existing UDM data.
- Edit as required and click Submit. The 'Saved
Successfully.' message appears.
Note:
If a user enters any incorrect input, an Error message summary appears.
Deleting a UDM Data
- Enter the Resource Name.
- Type an appropriate UE ID, PDU Session ID and Serving PLMN ID in their respective fields.
- Select an appropriate Version and enter Query Parameters.
- Click Delete.
- The 'Deleted Successfully.' message appears.
Note:
If a user enters any incorrect input, an Error message summary appears.
Clearing a UDM Data
Click the Clear option to clear the text fields and text areas of the Provisioning Operations for UDM Data page.
3.10.7 Provisioning - Schema Management Data
This section describes how to operate provisioning operations for schema.
In the CNC Console application, click UDR and then Provisioning. From the Provisioning menu, select Schema Management Data in the left navigation pane. The Schema Management page appears:
Figure 3-27 Schema Management

In the Schema Management page, user can extract, modify, and delete a schema on the basis of Resource Name and Query Parameters.
Extracting a Schema
- Select the Resource Name.
- Enter the Query Parameters.
- Click Get. A confirmation message, 'Fetched Successfully.'
appears and the result appears in the Response text area as
follows:
Figure 3-28 Schema - Get - PCF AM Data

- An Error message summary appears in case of incorrect UE ID entered.
Adding or Editing a Schema
- Select the Resource Name.
- Enter the Query Parameters.
- Click Edit. The Request text area displays the selected schema.
- Edit as required and click Submit. The 'Saved
Successfully.' message appears.
Note:
If a user edits the schema inappropriately, an Error message summary appears.
Deleting a Schema
- Select the Resource Name.
- Enter the Query Parameters.
- Click Delete.
- The 'Deleted Successfully.' message appears.
Note:
If a user selects a schema that does not exists, an Error message summary appears.
Clearing a Schema Management Data
Click the Clear option to clear the text fields and text areas of the Schema Management page.
3.11 Service Configurations
To configure UDR services using CNC Console, you can use Service Configurations. In the left navigation pane of the CNC Console application, click UDR and then Service Configurations.
3.11.1 Subscriber Bulk Import Configurations
Click UDR and then Service Configurations. From the Service Configurations menu, select Subscriber Bulk Import Configurations. The Subscriber Bulk Import Configurations page appears:
Figure 3-29 Subscriber Bulk Import Configurations

Table 3-16 Subscriber Bulk Import Configurations Parameters
| Field Name | Default Value | Attribute | Description |
|---|---|---|---|
| Polling Time Interval | 5000 ms | Read-only | It is a time interval after which the PDBI file is pulled from the file path. |
| Last Modified Time Interval | 30s | Read-only | The last modified time interval in seconds. |
| PDBI File Path | Path/home/udruser/pdbi | Read-only | The path where the PDBI file is to be placed. |
| PDBI Log File Path | /home/udruser/pdbi/logs | Read-only | The path where the result log file is available. |
| PDBI File Expiry Time | 7d | Editable | Expiry time for all the PDBI files including the result log files. |
| Remote Host | 10.75.229.127 | Editable | Host IP Address |
| Remote Host Port: | 22 | Editable | Port number of the remote host |
| Remote Directory Path | /home/cloud-user/ocudr/ | Editable | Remote host path |
| Remote Host User Name | cloud-user | Editable | User name of the remote host. |
| File Extension | .pdbi | Editable | Shows the file type |
| Delete File From PVC | false | Editable | Flag to enable or disable the delete file from PVC feature |
| SFTP Enabled | false | Read-only | Flag to enable or disable SFTP |
| Periodic Poll For Transfer-In | 10000 | Read-only | Frequency of periodic import |
| Periodic Poll For Transfer-Out | 10000 | Read-only | Frequency of periodic export |
Editing Subscriber Bulk Import Configurations
- Click Edit. The Edit Subscriber Bulk Import Configurations page appears.
- Update the configuration details as required and click Save. A confirmation message, "Save successfully." appears.
- If you do not want to modify any configuration, click Cancel. You can navigate back to the Bulk Import Configurations page.
- Click Refresh to reload the Subscriber Bulk Import Configurations page.
3.11.2 Data Repository Service
Click UDR and then Service Configurations. From the Service Configurations menu, select Data Repository Service. The Data Repository Service Configurations page appears:
Figure 3-30 Data Repository Service Configurations

Table 3-17 Data Repository Service Configuration Parameters
| Field Name | Default Value | Attribute | Description |
|---|---|---|---|
| Hikari Pool Size | 25 | Read-only | Hikari pool connection size to be created at start up |
| Tracing Enabled | False | Read-only | Flag to enable tracing |
| defaultGroupIdEnabled | False | Editable | Flag to enable or disable the Default Group ID feature |
| defaultSLFGroupName | DefaultGrp | Editable | The default group name is provisioned. If there are any changes done to this through CNC console, then the default group must be reprovisioned with the modified group name. But if the change is done through helm values and helm upgrade is performed, then the default group will be created with the updated name. |
| Subscription Data Subscriptions Only | False | Read-only | Flag to enable subscription data |
| On Demand Migration Enabled | False | Editable | Flag to enable on demand migration |
| Access Log Enabled | True | Editable | Flag to enable or disable the Access Log feature |
| Default EIR Response | EQUIPMENT_UNKNOWN | Editable | Flag to set the default EIR response |
| Default EIR Response when IMEI not present | EQUIPMENT_UNKNOWN | Editable | Flag to set the default EIR response |
Editing Data Repository Service Configurations
- Click Edit. The Edit Data Repository Service Configurations page appears.
- Update the configuration details as required and click Save. A confirmation message, "Save successfully." appears.
- If you do not want to modify any configuration, click Cancel. You can navigate back to the Data Repository Service Configurations page.
- Click Refresh to reload the Data Repository Service Configurations page.
3.11.3 Diameter Gateway Service
Click UDR and then Service Configurations. From the Service Configurations menu, select Diameter Gateway. The Diameter Gateway Configurations page appears:
Figure 3-31 Diameter Gateway Configurations

The following table explains the parameters in the Diameter Gateway Configurations page in detail:
Table 3-18 Diameter Gateway Configurable Parameters
| Field Name | Default Value | Attribute | Description |
|---|---|---|---|
| Realm | oracle.com | Read-only | UDR Diameter Gateway server realm. |
| Identity | nudr.oracle.com | Read-only | UDR Diameter Gateway identity or FQDN. |
| Reconnect Delay | 4 | Editable | Waiting time for reconnecting server peer in seconds. |
| Response Timeout | 4 | Editable | Time period to get the response from server peer in seconds. |
| Connection Timeout | 7 | Editable | Time period in which both client and server should establish the connection. |
| Watchdog Interval | 7 | Editable | Interval of time to send Diameter watchdog message periodically. |
| Reconnect Limit | 70 | Editable | Number of attempts allowed to reconnect with diameter server peer if server is unreachable or down. |
| On Demand Migration Enabled | False | Editable | Flag to indicate whether on demand migration is enabled or disabled. |
| Allowed Client Nodes For Diameter SH Ingress |
|
Editable | If responseOnly parameter is present and the value is
"true", then mandatory fields are:
If responseOnly parameter is not present or the value is false, then mandatory fields are:
|
| Type | NA | Editable | Type of peer node |
| Response only | NA | Editable | Flag to initiate connection to the peer node. |
| Host | NA | Editable | Peer node IP address or FQDN |
| Identity | seagull1a.seagull1.com | Editable | Identity of Peer node |
| Realm | seagull1.com | Editable | Realm of peer node |
| Port | NA | Editable | Peer node port used by diameter gateway when initiating connection. |
Editing Diameter Gateway Configurations
- Click Edit. The Edit Diameter Gateway Configurations page appears:
- Update the configuration details as required and click Save. A confirmation message, "Save successfully." appears.
- If you do not want to modify any configuration, click Cancel. The Diameter Gateway Configurations page appears.
- Click Refresh to reload the Diameter Gateway Configurations page.
3.11.4 Diameter Gateway Congestion
Click UDR and then Service Configurations. From the Service Configurations menu, select Diameter Gateway Congestion. The Diameter Gateway Congestion Configurations page appears:
Figure 3-32 Diameter Gateway Congestion

The following table explains the parameters in the Diameter Gateway Congestion Configurations page in detail:
Table 3-19 Diameter Gateway Congestion Configurable Parameters
| Field Name | Default Value | Attribute | Description |
|---|---|---|---|
| enabled | true | Read-only | Flag to enable or disable the Diameter Gateway Pod Congestion feature |
| defaultMessagePriority | 2 | Editable | Default diameter message priority which is not specifically assigned any priority |
| sampleCount | 10 | Editable | Sample request count for deciding pod state |
| calculationInterval | 100 | Editable | Congestion state calculation every configured time (in ms) |
| loadSheddingRulesMap | NA
|
Editable |
Indicates the decision for the pod in a particular state |
| loadSheddingRulesMap.<CONGESTED/DOC> | NA | Editable | Indicates the pod congestion state. |
| loadSheddingRulesMap.<CONGESTED/DOC>.state | NA | Editable | Indicates the name of the state. |
| loadSheddingRulesMap.<CONGESTED/DOC>.discardPriority | NA | Editable | Indicates the diameter message discard priority. |
| loadSheddingRulesMap.<CONGESTED/DOC>.ansWithResultCode | NA | Editable | Indicates the diameter return string result code when the message get discarded. |
| priorityRules | NA |
Editable | NA |
| Priority Rules.Rule Name | NA | Editable | Specifies the unique name of the message priority rule. |
| Priority Rules.Message Priority | NA | Editable | Specifies the priority assigned to the message. It can be a number from 0 to 15. |
| PriorityRules.Conditions.Request Type | NA | enum | Specifies the type of message for the selected
application. The supported request values for the application type are
as follow:
|
| Priority Rules.Conditions.Application | NA | enum |
Specifies the type of application. Users can select any
of the following values from the drop-down list:
|
| Thresholds | NA |
Editable | NA |
| Thresholds.Congested State.Memory | NA | Editable | Memory percentage of pod state |
| Thresholds.Congested State.CPU | NA | Editable | CPU percentage of pod state |
| Thresholds.Congested State.Queue | NA | Editable | Queue percentage of pod state |
| Thresholds.Danger of Congested State.Memory | NA | Editable | Memory percentage of pod state |
| Thresholds.Danger of Congested State.CPU | NA | Editable | CPU percentage of pod state |
| Thresholds.Danger of Congested State.Queue | NA | Editable | Queue percentage of pod state |
| Discard Policy.Congested State.Discard Priority | NA | Editable | Specifies the discard priority for the load shedding rule. The discard priority value can be a number from 0 to 15. Any request message with equal or lower priority is rejected. |
| Discard Policy.Congested State.Return ResultCode | NA | enum | Specifies the result code, returned in the answer response, when request message is rejected as part of congestion control. Users can select any of the following values from the drop-down list: DIAMETER_UNABLE_TO_COMPLY, DIAMETER_TOO_BUSY |
| Discard Policy.Danger of Congested State.Discard Priority | NA | Editable | Specifies the discard priority for the load shedding rule. The discard priority value can be a number from 0 to 15. Any request message with equal or lower priority is rejected. |
| Discard Policy.Danger of Congested State.Return ResultCode | NA | enum | Specifies the result code, returned in the answer response, when request message is rejected as part of congestion control. Users can select any of the following values from the drop-down list: DIAMETER_UNABLE_TO_COMPLY, DIAMETER_TOO_BUSY |
Editing Diameter Gateway Congestion Configurations
- Click Edit. The Edit Diameter Gateway Congestion Configurations page appears:
- Update the configuration details as required and click Save. A confirmation message, "Save successfully." appears.
- If you do not want to modify any configuration, click Cancel. The Diameter Gateway Congestion Configurations page appears.
- Click Refresh to reload the Diameter Gateway Congestion Configurations page.
3.11.5 Provisioning Data Repository Service
Click UDR and then Service Configurations. From the Service Configurations menu, select Provisioning Data Repository Service. The Provisioning Data Repository Service Configurations page appears:
Figure 3-33 Provisioning Data Repository Service Configurations

Table 3-20 Provisioning Data Repository Service Configurations Parameters
| Field Name | Default Value | Attribute | Description |
|---|---|---|---|
| Hikari Pool Size | 25 | Read-only | The Hikari pool connection size to be created at start up. |
| Tracing Enabled | False | Read-only | By default, tracing is not enabled. |
| On Demand Migration Enabled | False | Editable | By default, on demand migration is not enabled. |
| Prov Logs Enabled | False | Editable | Flag to enable or disable the provisioning logs. |
| Prov Logs API Names Supported | nudr-dr-prov | Editable | Supported API for provisioning logs. The supported
provisioning APIs are as follows:
|
Editing Provisioning Data Repository Service Configurations
- Click Edit. The Edit Provisioning Data Repository Service Configurations page appears.
- Update the configuration details as required and click Save. A confirmation message, "Save successfully." appears.
- If you do not want to modify any configuration, click Cancel. The Provisioning Data Repository Service Configurations page appears.
- Click Refresh to reload the Provisioning Data Repository Service Configurations page.
3.11.6 Notify Service
Click UDR and then Service Configurations. From the Service Configurations menu, select Notify Service. The Notify Service Configurations page appears:
Figure 3-34 Notify Service Configurations

Table 3-21 Notify Service Configurations Parameters
| Field Name | Default Value | Attribute | Description |
|---|---|---|---|
| Notif Retry Count | 3 | Editable | Number of notification attempts to be done in case
of notification failures.
Retries are based on notification.retryerrorcodes configuration. |
| Notif Retry Interval | 5 | Editable | The retry interval for notifications in case of
failure. It is measured in seconds.
Retries are based on notification.retryerrorcodes configuration. |
| Retry Error Codes | 400,429,500,503 | Editable | This field displays comma separated error codes. These error codes are eligible for retry notifications in case of failures. |
| Hikari Pool Size | 25 | Read-only | The Hikari pool connection size to be created at start up. |
| Tracing Enabled | False | Read-only | By default, tracing is not enabled. |
Editing Notify Service Configurations
- Click Edit. The Edit Notify Service Configurations page appears.
- Update the configuration details as required and click Save. A confirmation message, "Save successfully." appears.
- If you do not want to modify any configuration, click Cancel. The Notify Service Configurations page appears.
- Click Refresh to reload the Notify Service Configurations page.
3.11.7 On Demand Migration
Click UDR and then Service Configurations. From the Service Configurations menu, select On Demand Migration. The On Demand Migration page appears:
Figure 3-35 On Demand Migration Configurations

Table 3-22 On Demand Migration Configuration Parameters
| Field Name | Default Value | Attribute | Description |
|---|---|---|---|
| On Demand Enabled | false | Read-only | Flag to enable on-demand migration for migrating subscriber from 4G UDR |
| Delete Subscriber on Source UDR | False | Editable | Flag to delete subscriber data when it is successfully migrated from target UDR to 5G UDR |
| Realm | NA | Editable | Diameter realm of the target UDR |
| Identity | ondemand-migration.udr.oracle.com | Read-only | Diameter client identity in ondemand-migration tool |
| Source UDR Configuration: REST Endpoint |
NA | Editable | Target UDR rest endpoint for deleting subscriber when the deleteSubcriber flag is enabled |
| Realm | udr.oracle.com | Read-only | Diameter client realm in ondemand-migration tool |
| Identity | ondemand-migration.udr.oracle.com | Read-only | Diameter client identity in ondemand-migration tool |
| Host Port | NA | Editable | Port number of target UDR where diameter service is running |
| Host IP | NA | Editable | IP address of target UDR |
Editing On Demand Migration Configurations
- Click Edit. The On Demand Migration Configurations page appears.
- Update the configuration details as required and click Save. A confirmation message, "Save successfully." appears.
- If you do not want to modify any configuration, click Cancel. You navigate back to the On Demand Migration Configurations page.
- Click Refresh to reload the On Demand Migration Configurations page.
3.11.8 Subscriber Export Tool Configurations
Click UDR and then Service Configurations. From the Service Configurations menu, select Subscriber Export Tool Configurations. The Subscriber Export Tool Configurations page appears:
Figure 3-36 Subscriber Export Tool Configurations

Table 3-23 Subscriber Export Tool Configurations Parameters
| Field Name | Default Value | Attribute | Description |
|---|---|---|---|
| Frequency Of Periodic Export | DAILY | Editable | It is the frequency of periodic export of subscriber data. This is configurable as ONE_TIME/DAILY/WEEKLY/MONTHLY |
| Export Start Time | 14/09/2022 17:32:10 | Editable | Time at which periodic export starts. 24 hours format is used. |
| Maximum Number of Export Dumps | 5 | Editable | Maximum number of export |
| Export File Name Suffix | SLFTestSegment | Editable | The prefix name of the exported file |
| Multi Valued Field Delimiter | | | Editable | This separator is used to differentiate multiple values for a single key type. |
| Field Delimiter | , | Editable | Delimiter for fields |
| File Extension | .csv | Editable | Extension for file. This can be .csv/.txt |
| IMSI Count | 5 | Editable | Number of IMSI for EIR export.
If 5 IMSIs are not provisioned for a given IMEI, then 0 value is supplied for remaining IMSI . |
| MSISDN Count | 5 | Editable | Number of MSISDN for EIR export.
If 5 MSISDNs are not provisioned for a given IMEI, then 0 value is supplied for remaining MSISDN. |
| Export Mode | EIR_EXPORT | Read-only | Mode of the export file. The values of export can be CSV_EXPORT(SLF Mode)/PDBI_EXPORT(EIR Mode) |
| Remote Path | /home/cloud-user/ | Editable | Path in remote server where the exported files is stored. |
| Remote Server Host | 10.75.229.18 | Editable | IP address of remote host. |
| Remote Server Port | 22 | Editable | Port number of remote host. |
| Remote User Name | cloud-user | Editable | User name of the remote host. |
| Remote Transfer Enabled | false | Read-only | Flag to enable or disable the remote transfer. |
| Polling Interval of Remote Path (Mins) | 60 minutes | Read-only | Polling interval for SFTP functionality in minutes. |
| Delete Local Copy | true | Editable | Flag to enable or disable deletion of files from SFTP. |
| Subscriber Range Enabled | false | Editable | Flag to enable or disable the range based subscriber export. Default is set to false for full range of 4G policy subscriber data export. |
| New File Per Subscriber Range Enabled | False | Editable | When enabled creates a separate EXML file for each range. Default is set to false. |
| Key Type | IMSI | Editable | To export the range based subscriber data with keys. The two key type are IMSI and MSISDN. |
| Subscriber Ranges | NA | Editable | Configures the start and end ranges that is given to
export the data. This works only if
subscriberRangeEnabled parameter is
enabled.
|
Editing Subscriber Export Tool Configurations
- Click Edit. The Edit Subscriber Export Tool Configurations page appears.
- Update the configuration details as required and click Save. A confirmation message, "Save successfully" appears.
- If you do not want to modify any configuration, click Cancel. You can navigate back to the Subscriber Export Tool Configurations page.
- Click Refresh to reload the Subscriber Export Tool Configurations page.
3.11.9 Migration Tool Configurations
Figure 3-37 Migration Tool Configurations

Table 3-24 Migration Tool Configurations Parameters
| Field Name | Description |
|---|---|
| Enable Migration Pause | If it is set to true the migration process is
temporarily paused.
Default Value: false Attribute: Editable |
| Key Type | Specifies the type of key used in the migration
process. The two key types are IMSI and MSISDN.
Default Value: MSISDN Attribute: Read-only |
| Delete 4G subscriber | Boolean field that determines whether 4G data should
be deleted.
Default Value: false Attribute: Read-only |
| Migration Realm | Represents the migration tool realm.
Default Value: oracle.com Attribute: Read-only |
| Migration Identity | Represents the migration tool identity.
Default Value: migration.oracle.com Attribute: Read-only |
| Migration Node Port | Represents the port number used for the migration
node.
Default Value: 3868 Attribute: Read-only |
| Migration Node Host | Specifies the host name or network address of the
migration node.
Default Value: ocudr-nudr-migration-service Attribute: Read-only |
Editing Migration Tool Configurations
- Click Edit. The Edit Migration Tool Configurations page appears.
- Update the configuration details as required and click Save. A confirmation message, "Save successfully." appears.
- If you do not want to modify any configuration, click Cancel. You can navigate back to the Migration Tool Configurations page.
- Click Refresh to reload the Migration Tool Configurations page.
3.12 NF Scoring Configurations
- Settings
- Calculated Score
Settings:

Table 3-25 NF Scoring Settings for SLF
| Field Name | Description |
|---|---|
| Enable NF Scoring | Specifies whether to enable or disable the NF
Scoring. This is a mandatory parameter.
Data Type: Boolean Default Value: false Range: true or false |
| TPS | Specifies the Transaction Per Second. |
| Enable | Enables the TPS.
Data Type: Boolean Default Value: false Range: true or false |
| Max Score | Specifies the maximum score of the TPS. If
enable is set to true then this is a mandatory parameter.
Data Type: Integer Default Value: 20 Range: 1 to 100. |
| Max TPS | Specifies the maximum TPS. If enable is set to
true then this is a mandatory parameter.
Data Type: Integer Range: 1 to 1000000 |
| Service Health | Specifies the Service Health of a site. |
| Enable | Enables the Service Health. This is a mandatory
parameter.
Data Type: Boolean Default Value: false Range: true or false |
| Max Score | Specifies the maximum score of the Service
Health. If enable is set to true then this is a mandatory
parameter.
Data Type: Integer Default Value: 30 Range: 1 to 100 |
| Signaling Connections | Specifies the Signaling Connections of a site. |
| Enable | Enables the Signaling Connections. This is a
mandatory parameter.
Data Type: Boolean Default Value: false Range: true or false |
| Max Score | Specifies the maximum score of the Signaling
Connections. If enable is set to true then this is a mandatory
parameter.
Data Type: Integer Default Value: 20 Range: 1 to 100 |
| Max Connections | Specifies the maximum connections. If enable is
set to true then this is a mandatory parameter.
Data Type: Integer Range: 1 to 10000 |
| Replication Health | Specifies the Replication Health of a site. |
| Enable | Enables the Replication Health.
Data Type: Boolean Default Value: false Range: true or false |
| Max Score | Specifies the maximum score of the Replication
Health. If enable is set to true then this is a mandatory
parameter.
Data Type: Integer Default Value: 30 Range: 1 to 100 |
| Locality or Site preference | Specifies the Locality or Site Preference. |
| Enable | Enables the Locality or Site Preference.
Data Type: Boolean Default Value: false Range: true or false |
| Score | Specifies the score of the Locality or Site
Preference. If enable is set to true then this is a mandatory
parameter.
Data Type: Integer Default Value: 5 Range: 1 to 100 |
| Active Alert | Specifies the Active Alerts of a site. |
| Enable | Enables the Active Alert.
Data Type: Boolean Default Value: false Range: true or false |
| Critical Alert Weightage | The site with more critical alerts is unhealthy.
If enable is set to true then this is a mandatory parameter.
Data Type: Integer Default Value: 2 Range: 0 to 100 |
| Major Alert Weightage | The site with more major alerts is unhealthy. If
enable is set to true then this is a mandatory parameter.
Data Type: Integer Default Value: 1 Range: 0 to 100 |
| Minor Alert Weightage | The site with more minor alerts is unhealthy. If
enable is set to true then this is a mandatory parameter.
Data Type: Integer Default Value: 0 Range: 0 to 100 |
| Custom Criteria | Specifies the Custom Criteria of a site. |
| Enable | Specifies whether to enable or disable the
Custom Criteria.
Data Type: Boolean Default Value: false Range: true or false |
| Name | Name of the Custom Criteria. The two applicable
criteria are Subscriber Bulk Import tool and Subscriber Export
tool.
Data Type: String |
| Metric Name | Specifies the name of the Metric.
Data Type: String |
| Scoring Type | Specifies the scoring type. The two scoring
types are ratio and weightage.
Data Type: String |
| Max Score | Specifies the maximum score.
Data Type: Integer Default Value: 30 Range: 1 to 100 |
| Max Value | Specifies the maximum value.
Data Type: Integer Range: 0 to 10000 |
| Weightage | Specifies the weightage of the alert.
Data Type: Integer Default Value: 1 Range: 1 to 100 |
- Click Edit. The Edit Settings page appears.
- To add the Custom Criteria, click Add.
- The Add Custom Criteria dialog box appears.


-
Fill in the required details and click Save to add the custom criteria.
Note:
If the scoring type is selected as weightage then maximum score and minimum score fields are disabled. - Click Cancel to exit the Add Custom Criteria dialog box.
- The Add Custom Criteria dialog box appears.
- Update the configuration details as required in the settings page and click Save. A confirmation message, "Save successfully." appears.
- If you do not want to modify any configuration, click Cancel.
- Click Refresh to reload the Settings page.
Calculated Score:
From the NF Scoring menu, select Calculated Score. If the NF Scoring feature is enabled. The Calculated Score page appears as below:
Figure 3-38 Calculated Score

Note:
If app-info pod is down, you will not be getting the NF Score. You will get an error message that "Data can't be fetched due to internal server error".Calculated Score shows the total score along with the Instance ID. The total score is shown in either Green or Orange color. If the NF Score is shown in green color then there are no failed factors. And, if the NF Score is shown in Orange color there are one or more failed factors.
You can click on Detailed information to view different criteria and their Max Score, Evaluated Score, and More Info. The criteria in the detailed information tab show the evaluated score. The failed factors are shown with a warning symbol under the evaluated score. On the top-right of the screen, the Last Refresh Time information is available and a Refresh button is given to refresh the NF Score of a site.
3.13 Migration Tool Status
The Migration Tool Status page is a monitoring page, which is read-only. This page allows the operator to monitor the Migration Tool Status, which initiates on running the Migration Tool. For more information, see Migration Tool.
Figure 3-39 Migration Tool Status Page

- Total Subscribers: The total number of subscribers included in the migration process.
- Total Source UDR Success: The total number of records successfully migrated from 4G UDR.
- Total Source UDR Failure: The total number of records failed during the migration from 4G UDR.
- Total Source Subscriber Not Found: The total number of subscribers not found for migration from 4G UDR.
- Total Target UDR Success: The total number of records successfully migrated to 5G UDR.
- Total Target UDR Failure: The total number of record failed during the migration in 5G UDR
- Total Key Already Exists in the Target UDR: The total number of keys that already exist in 5G UDR.
- Progress: Shows migration progress completion in percentage.
- Status: The overall status of the migration process. For example, STARTED, IN PROGRESS, PAUSED, or COMPLETED.
- Time Started: Shows the migration process start time.
- Time Completed: Shows the migration process completion time.
Note:
Using Filter option, you can filter the records you are interested in and using Refresh option, you can refresh the Subscriber Bulk Import Status page.