4 Configuring CNC Console IAM
Note:
Not applicable for OCI deployment.This section provides details on how to configure CNC Console IAM.
Restricted Actions on CNC Console IAM
Figure 4-1 Restricted Actions Error Message
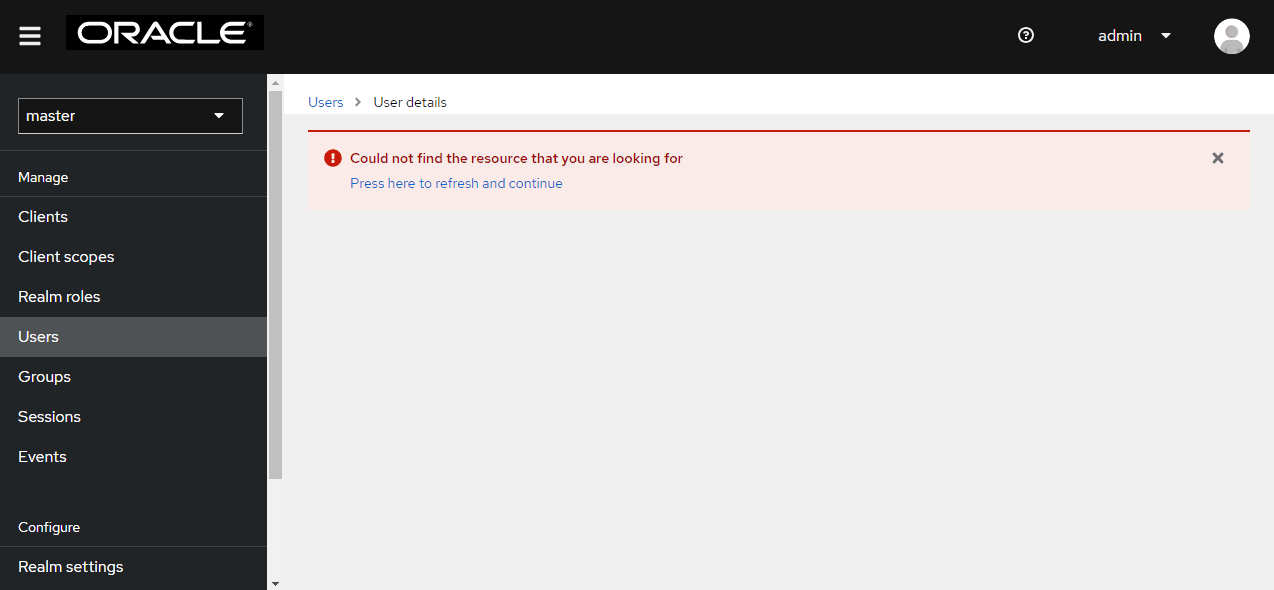
Click the Press here to refresh and continue link to reload CNC Console IAM.
4.1 Role Based Acess Control in CNC Console IAM
Role-Based Access Control (RBAC) is one of the main methods for advanced access control.
It enables you to restrict network access to authorized users based on their assigned roles.
Role
A Role is a collection of permissions that you can apply to users. Roles are defined according to the authority and responsibility of the users within the organization. Using roles makes it easier to add, remove, and update permissions to the users.
Composite Role
A Composite Role is a collection of one or more additional roles grouped together.
4.1.1 Types of Roles in CNC Console
Role Based Access Control (RBAC) is controlled by Identity and Access Management (IAM) functionality provided by CNC Console IAM.
The following roles are predefined in the CNC Console IAM:
- NF RolesThe user assigned with this role can perform read and write operations for the assigned NFs. NF level roles are classified into:
- <NF>_READ: With this permission, the
assigned user can perform the read operation for NFs.
For example, If user has POLICY_READ role, then the user can only read configurations of any MOs configurations within the Policy and cannot write or update or delete any record.
- <NF>_WRITE: With this permission, the assigned user can perform create, read, update, and delete operations for NFs. For example, if user has POLICY_WRITE then the user can read or write or update or delete any MOs configurations within the NF.
Note:
CNCC_READ/WRITE roles are also included under NF roles. - <NF>_READ: With this permission, the
assigned user can perform the read operation for NFs.
- Common Services Roles
Role: CS_WRITE
The user assigned with this role has access to all the common services and can perform create, read, update, and delete (CRUD) operations.The user can read, add, update, or delete MOs configurations for all common services such as Grafana, Kibana, Jaeger, Prometheus, Alertmanager, Promxy, OpenSearch, and Jaeger-ES supported by CNC Console application. For example, if user has CS_WRITE then, the user can read or write or update or delete any MOS configurations in common services.
- Admin Roles
Role: ADMIN
The user assigned this role has access to all resources (NF resources and CS resources) within CNC Console application.
The user can create, read, updatem and delete MOs configurations for all NFs and CSa supported by CNC Console. For example, if the user has ADMIN then they can read, create, updare, or delete any MO configurations of any NFs and CSs supported by CNC Console.
In case of multicluster deployments, in addition to ADMIN, <NF>_READ , <NF>_WRITE, or CS_WRITE roles, the user must be assigned a cluster role which corresponds to the cluster in which they are accessing a particular NF or CS. the nam eof the Cluster role must match with role name given in Helm configuration in global.mCnccCores.role/global.mCnccCores.id or global.aCnccs.role/global.aCnccs.id for M-CNCC and A-CNCC respectively. From 24.2.0 onwards, Cluster roles will be automatically created by Helm hooks.
The user can access all NFs or CS in that cluster. For example, if a user has Cluster1 role, and ADMIN, <NF>_READ, <NF>_WRITE, or CS_WRITE then they can access all the NFs or VS in Cluster1.
Instance Role
The operator can enable or disable this feature using the global.instanceLevelAuthorizationEnabled flag in Helm configuration. By default, this flag is set as false. Instance Level roles allow users to have access to specific NF instances. A user can be associated with single or multiple instance roles. Instance Role name must match with the instance ID of that particular instance given in Helm configuration in global.instances[i].id. Instance roles are automatically created by Helm hooks.
The user can only acess one NF or CS. For example, if the user has Cluster1-SCP-instance1 role, ADMIN, SCP_READ, or SCP_WRITE role, and Cluster1 role in case it is a multicluster deployment, then they can access only Cluster1-SCP-instance1.
Role: INSTANCE_ALL
INSTANCE_ALL is a catch all role for all instance level roles. A user with INSTANCE_ALL role can access all instances, provided they have ADMIN, <NF>_READ, or <NF>_WRITE role, and Cluster level role in case it is a multicluster deployment. This role is automatically assigned to all local users during the first upgrade when this feature is enabled. If operator wants to restrict a user to a particular instance, then they have to unassign INSTANCE_ALL role and assign any of the instance level roles to the user.
The user can access all NFs and CS instances. For example, if a user has INSTANCE_ALL role, then they can access all NF or CS instances, provided they have ADMIN, <NF>_READ, or <NF>_WRITE role and Cluster level role in case it is a multicluster deployment.
The following table describes the roles that must be assigned to a user to grant them access to NF or CS configurations:
Table 4-1 Accessing NF or CS Configurations
| Multicluster Flag (global.isMultiClusterDeployment) | Instance Role Flag (global.instanceLevelAuthorizationEnabled) | Roles Required |
|---|---|---|
| Enabled | Enabled | Cluster Level role, Instance Level role, and NF Level role |
| Enabled | Disabled | Cluster Level role and NF Level role |
| Disabled | Enabled | Instance Level role and NF Level role |
| Disabled | Disabled | NF Level role |
Note:
For more information on how to assign roles to a user, see Oracle Communications Cloud Native Configuration Console Installation, Upgrade, and Fault Recovery Guide.4.1.2 Accessing Roles in CNC Console Applications
- Log into CNC Console IAM using Admin credentials and
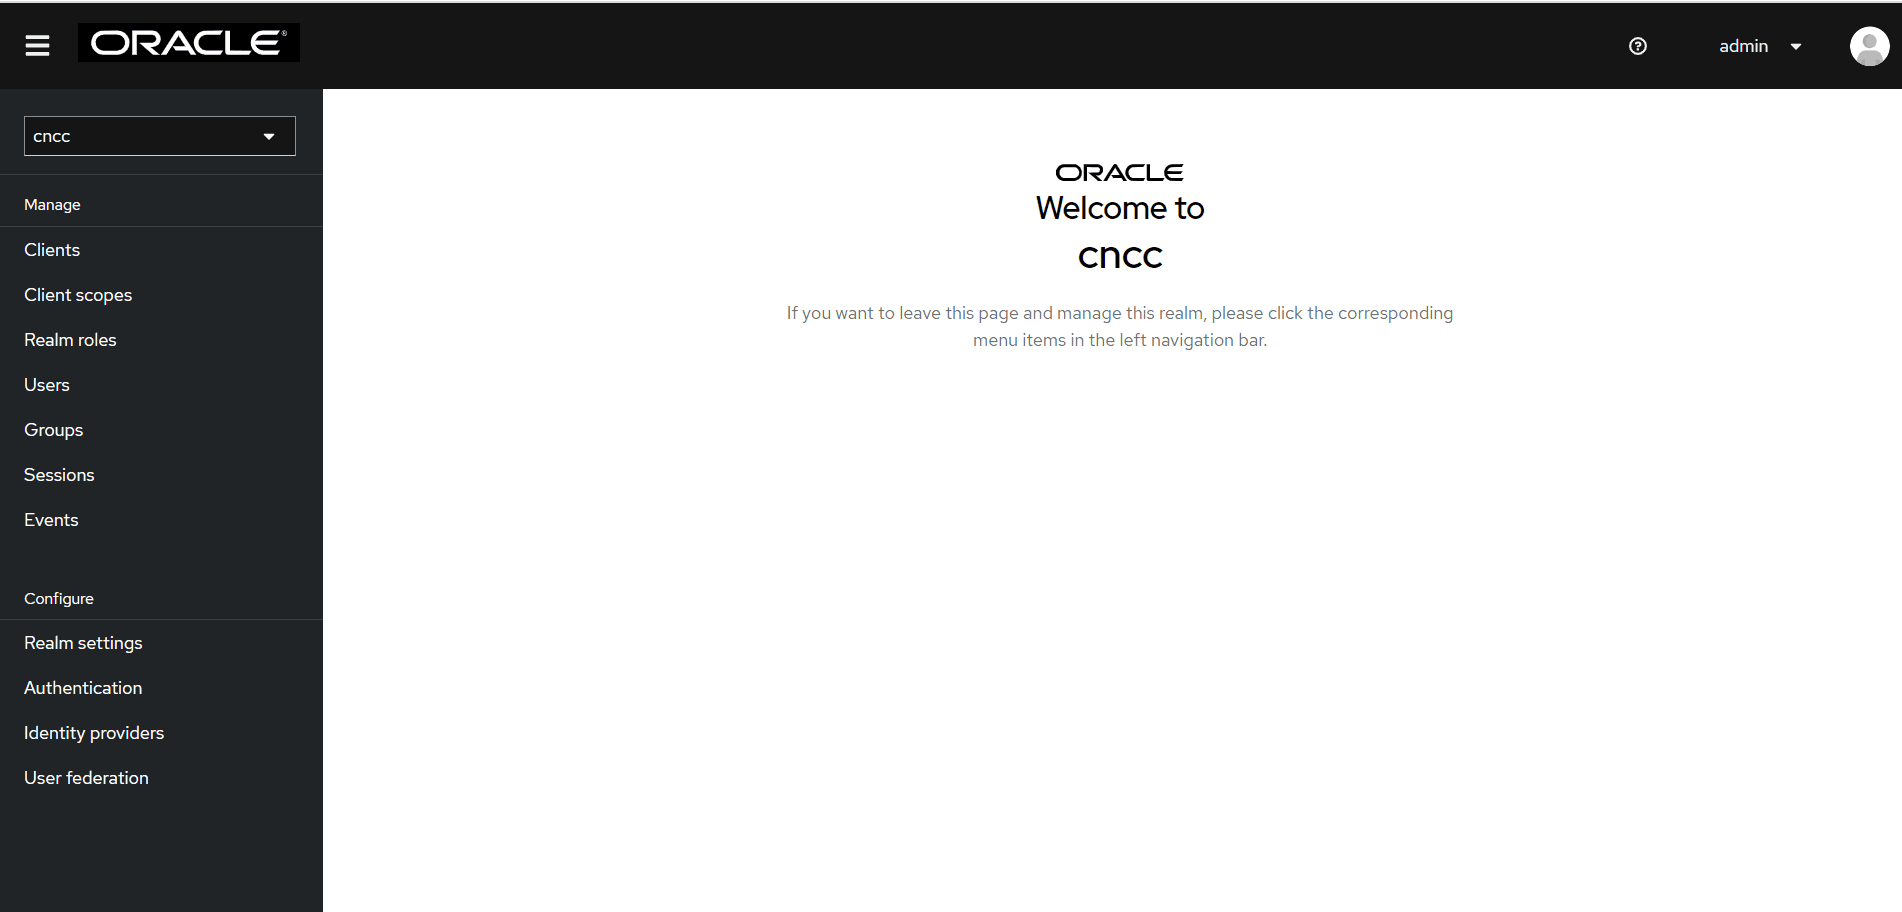
select the CNCC Realm. The following screen appears:
Figure 4-2 Realm Settings
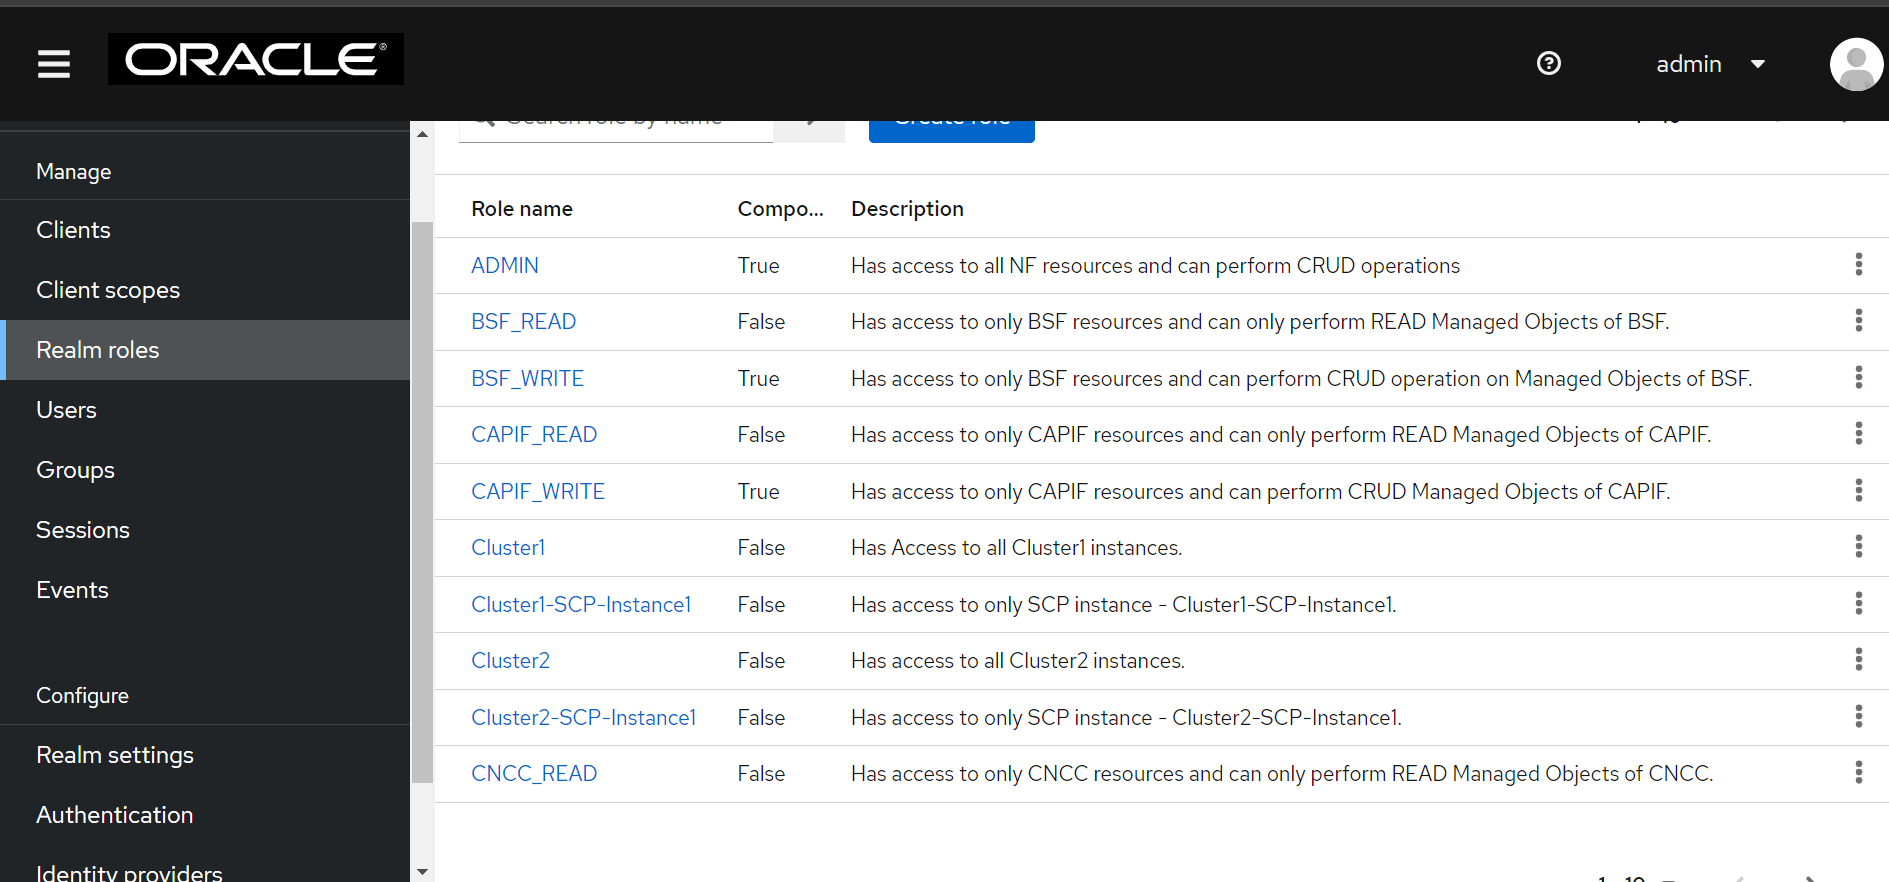
- To access or view the available roles, click
Realm Roles on the left pane. The defined roles are available on the
right pane.
Figure 4-3 Realm Role
Note:
For information on multicluster roles, see CNC Console Multicluster Deployment Roles under CNC Console IAM Post Installation Steps section in Oracle Communication Cloud Native Configuration Console Installation and Upgrade Guide.
4.1.3 Updating Admin Password in CNC Console IAM
This section describes about updating the admin password in CNC Console IAM.
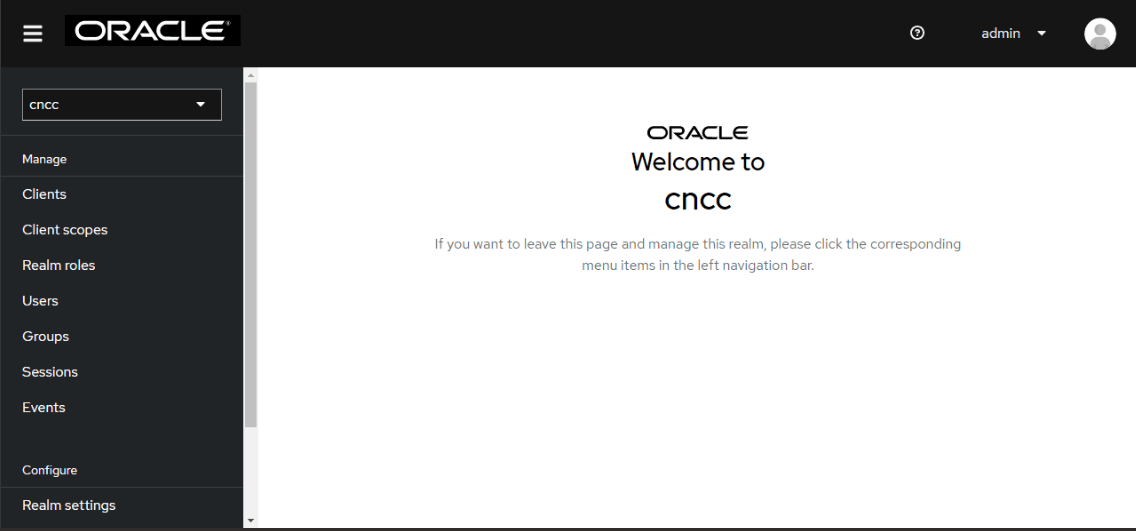
- Login to CNC Console IAM and click admin.
Figure 4-4 Log in to CNC Console IAM
- Click Manage account from the admin list.
Figure 4-5 Manage Account

- Click the Account security card.
Figure 4-6 Account Security

- Click Update.
Figure 4-7 Update Password

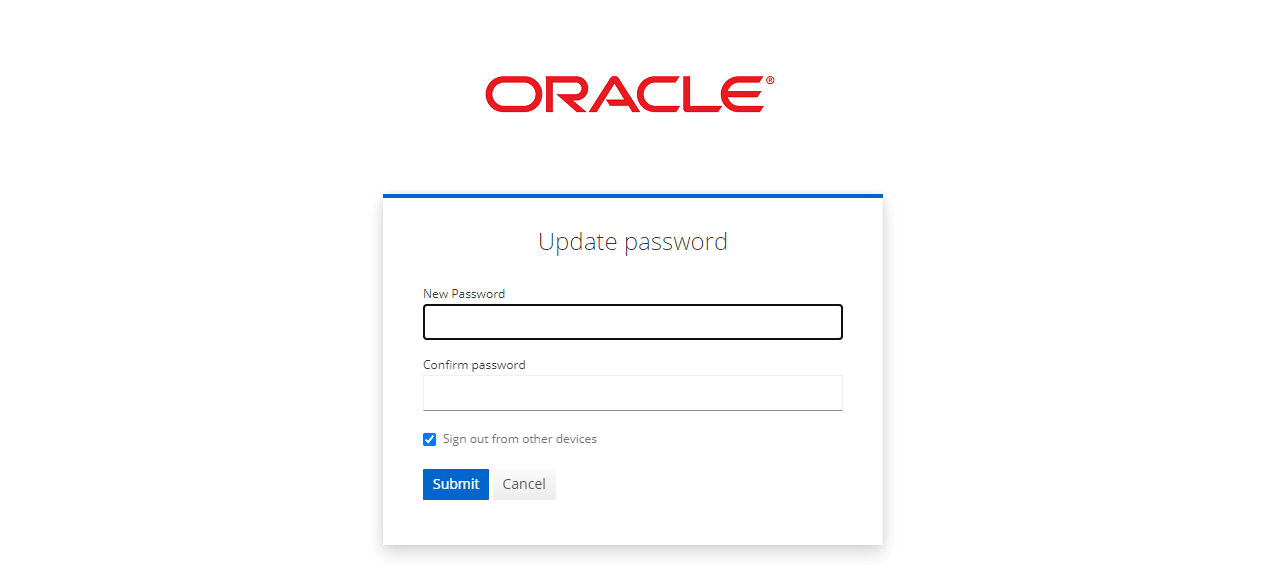
- Update your password on the update password screen, and click
Submit.
Figure 4-8 Update Password Screen
4.1.4 Creating or Updating User Password in CNC Console IAM
This section describes about creating or updating the user password in CNC Console IAM.
Perform the following steps to create or update the user password:
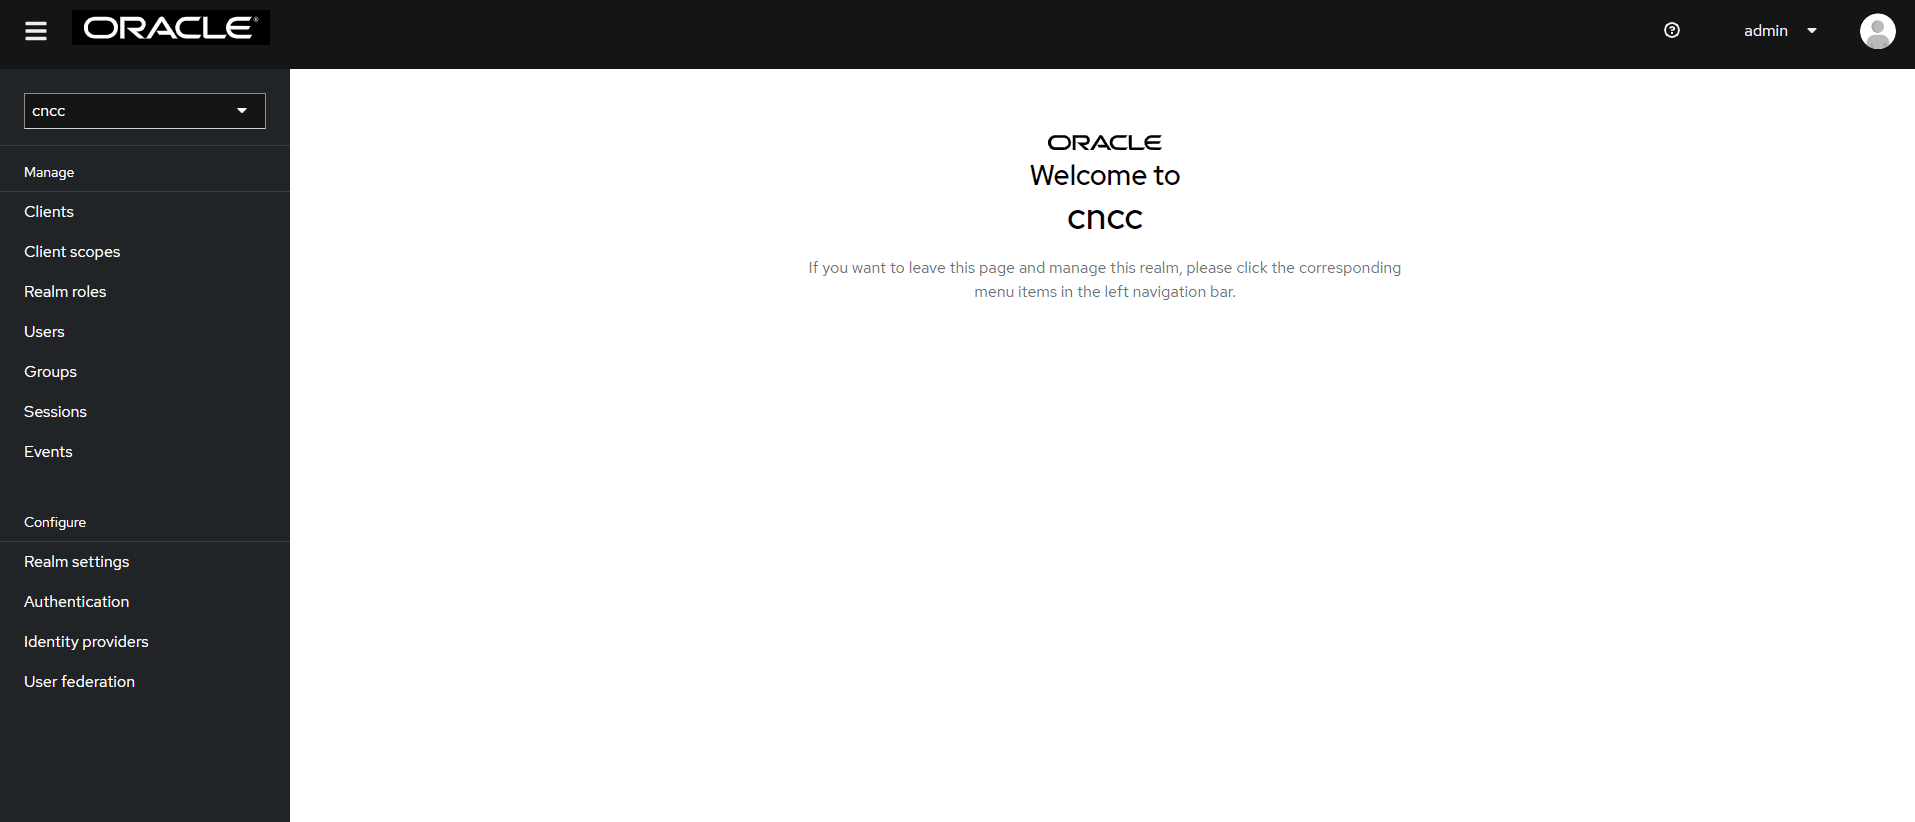
- Select the cncc Realm
Figure 4-9 Realm Settings
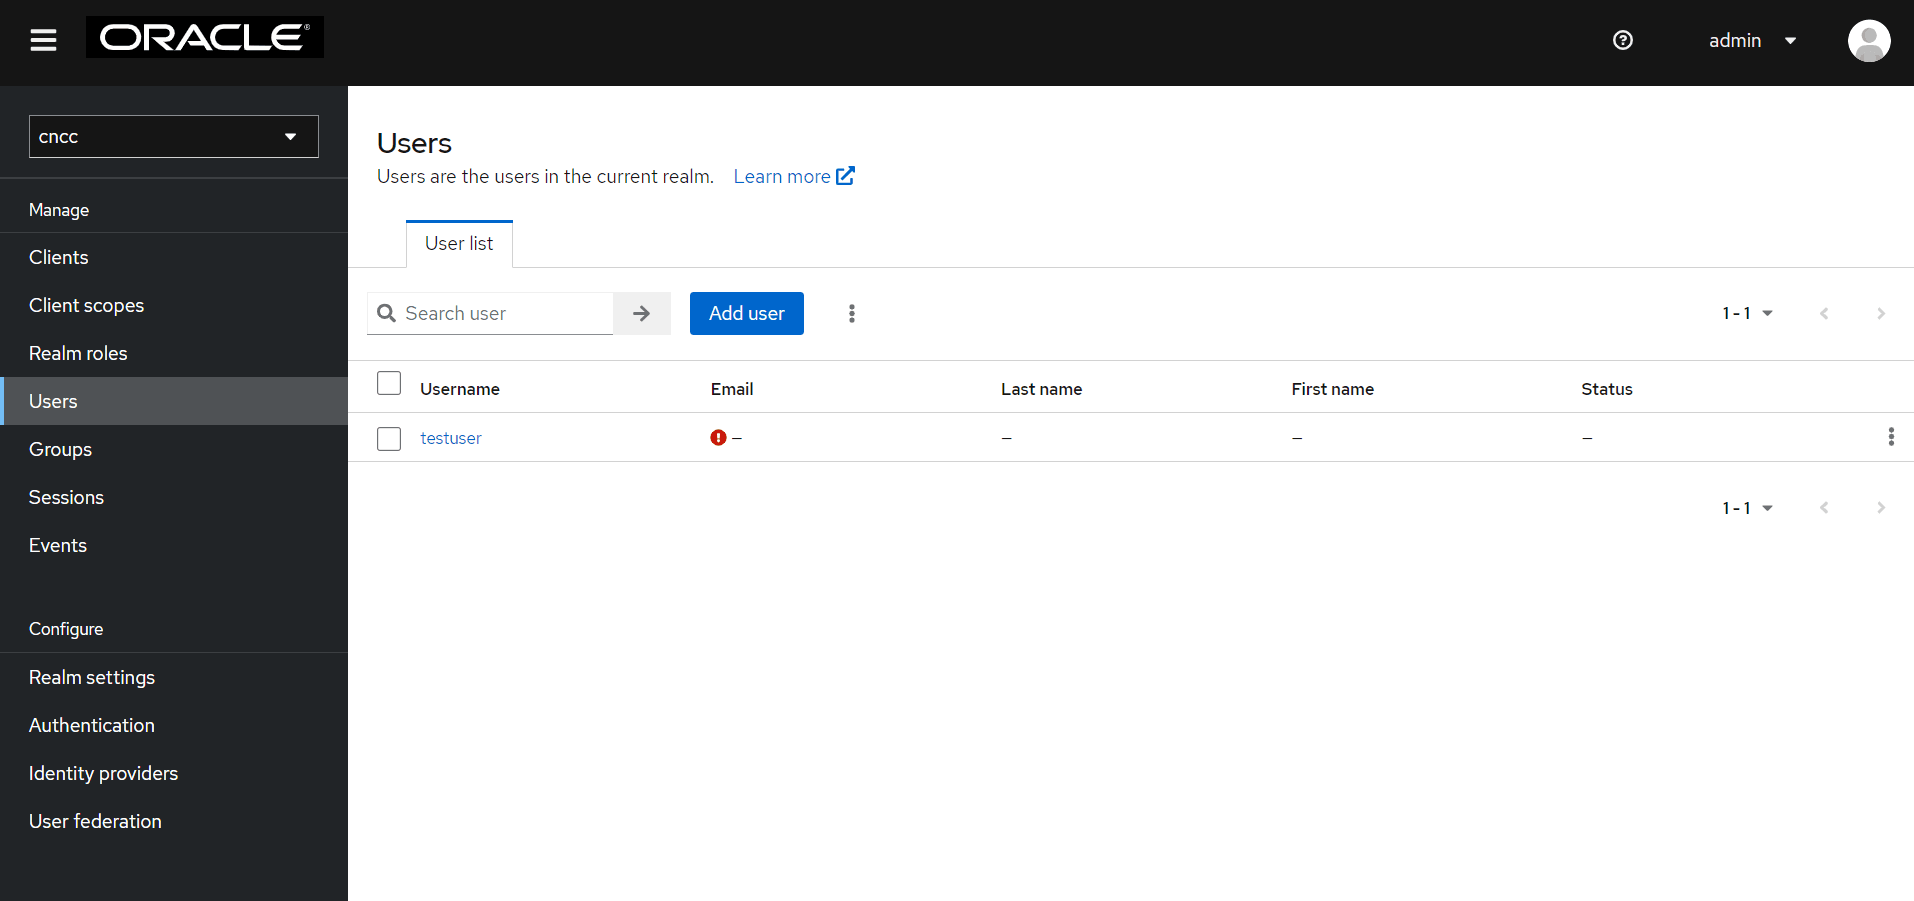
- Click Users on the left pane to view all users.
Figure 4-10 Users
- Click the Username of the User to update the credentials. The following screen appears.
- Under Credentials tab, click Set Password, set
Temporary to OFF, and update the Password.
Figure 4-11 Credentials

4.1.5 Password Policies for CNC Console Users
The following password policies have been enabled for all CNC Comsole users:
| Policy | Description | Value |
|---|---|---|
| Expire Password | The number of days the password is valid before a new password is required. | 30 |
| Special Characters | The minimum number of special characters required in the password string. | 1 |
| Uppercase Characters | The minimum number of uppercase characters required in the password string. | 1 |
| Lowercase Characters | The minimum number of lowercase characters required in the password string. | 1 |
| Digits | The minimum number of numerical digits required in the password string. | 1 |
| Not Recently Used | Prevents a recently used password from being reused. | 5 |
| Not Username | The password cannot match the username. | ON |
4.2 Configuring the CNC Console Redirection URL
After a successful deployment of CNC Console IAM, the administrator must perform the following steps to configure the CNC Console redirection URL:
- Log into CNC Console IAM using admin credentials provided during installation.
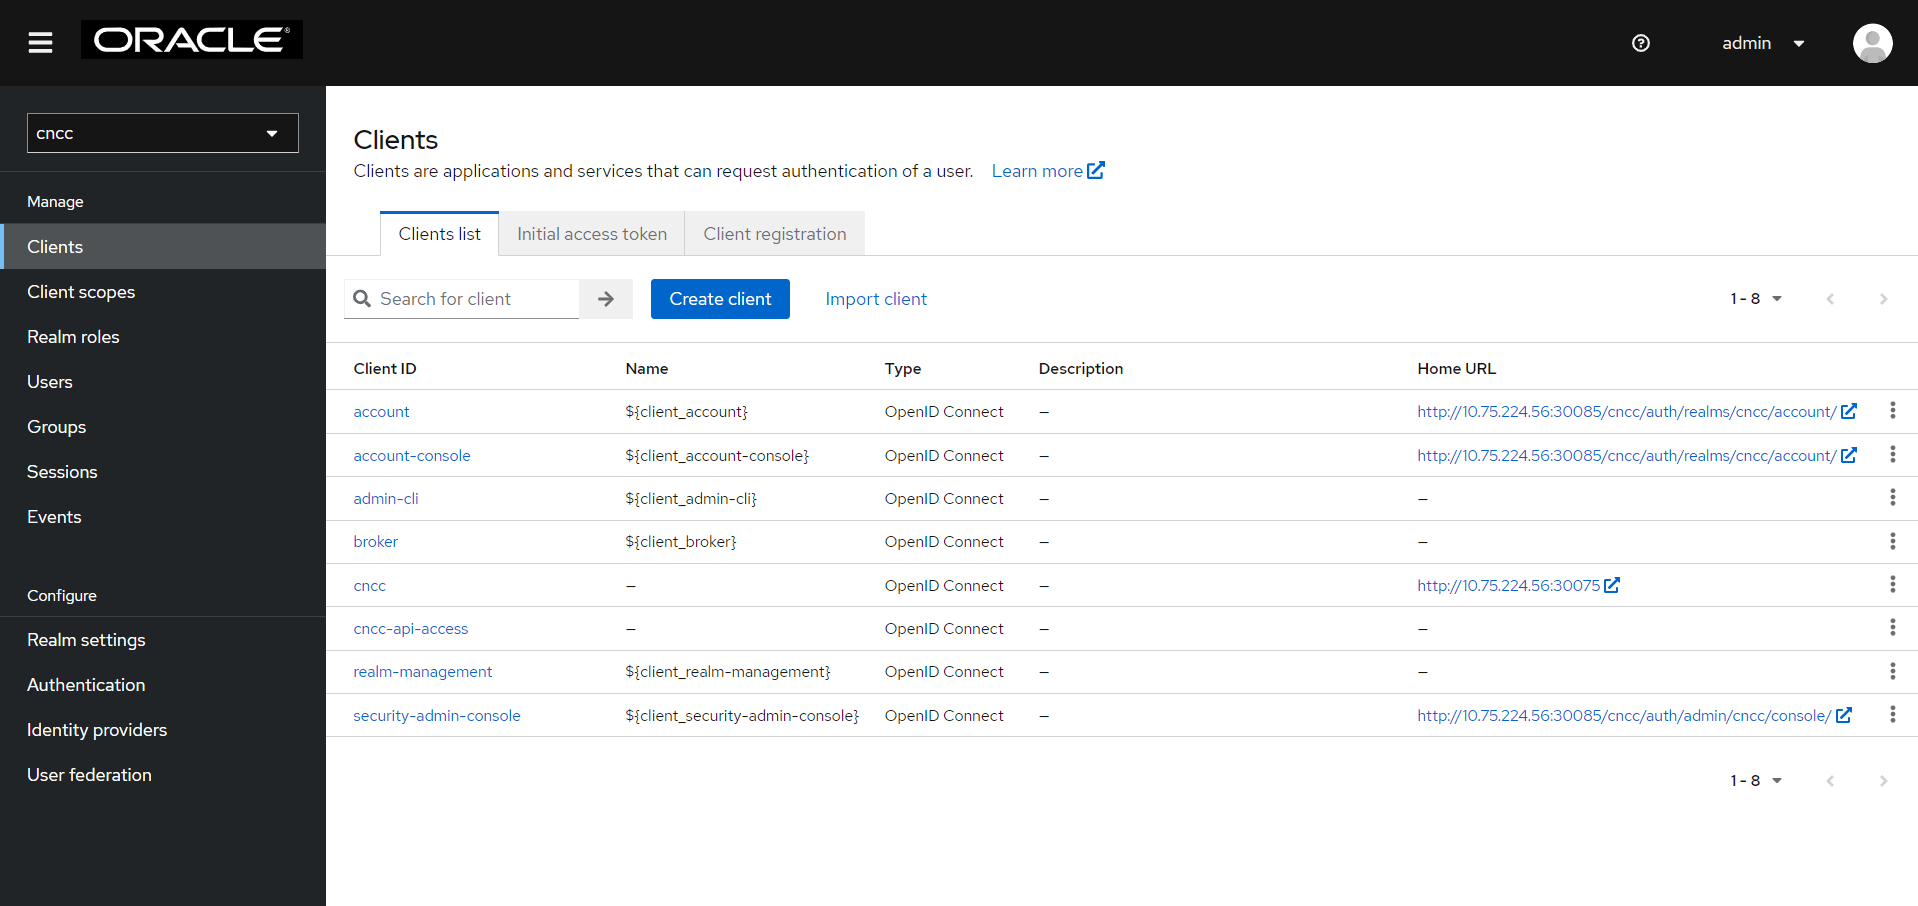
- On the left pane, select Clients and on the right pane
select the cncc Client ID.
Figure 4-12 Clients Screen
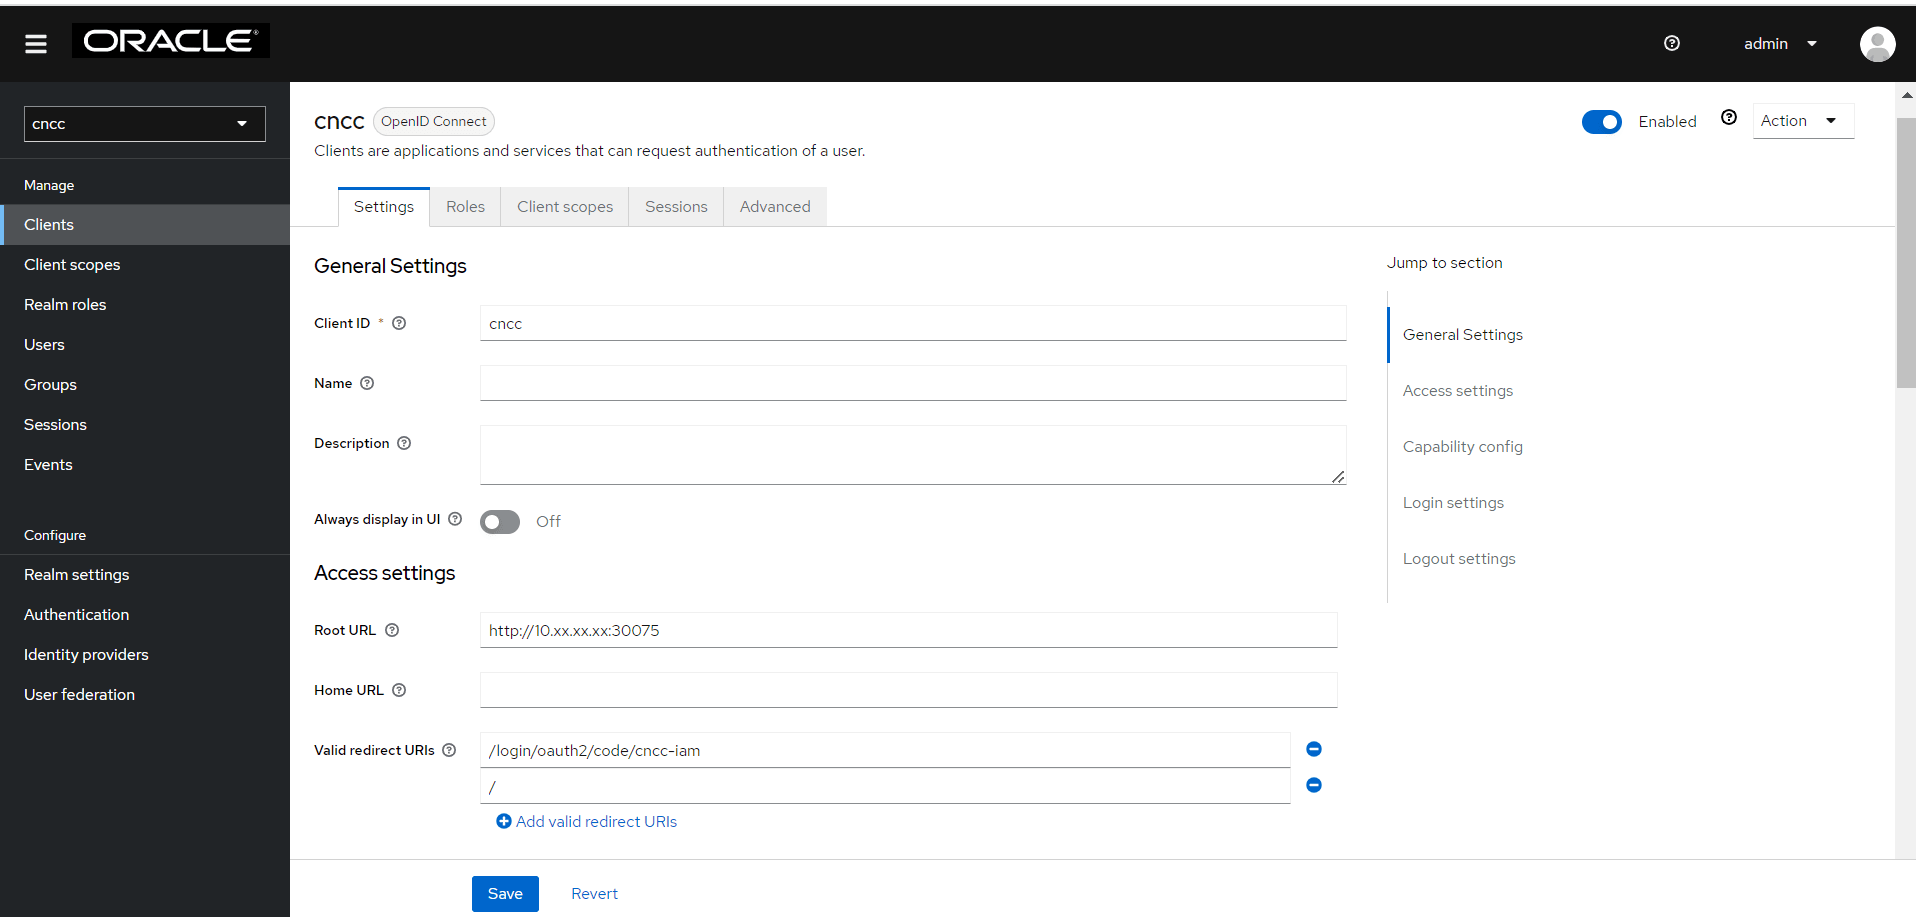
- Enter CNCC Core Ingress URI in the Root URL field and
Save.
<scheme>://<cncc-mcore-ingress IP/FQDN>:<cncc-core-ingress Port>Note:
Valid Redirect URIs is prepopulated, only root url needs to be configured as part of post Installation procedure.Figure 4-13 Redirection URL
4.3 Users in CNC Console IAM
This section includes:
Note:
For the details on setting or updating the admin password, see Updating Admin Password in CNC Console IAM.Note:
For the details about setting or updating the user password, see Creating or Updating User Password in CNC Console IAM.4.3.1 Creating the Users
- Select the CNCC Realm
Figure 4-14 CNCC Realm

- Click Users under
Manage on the left pane and click Add user on the right
pane.
Figure 4-15 Add User

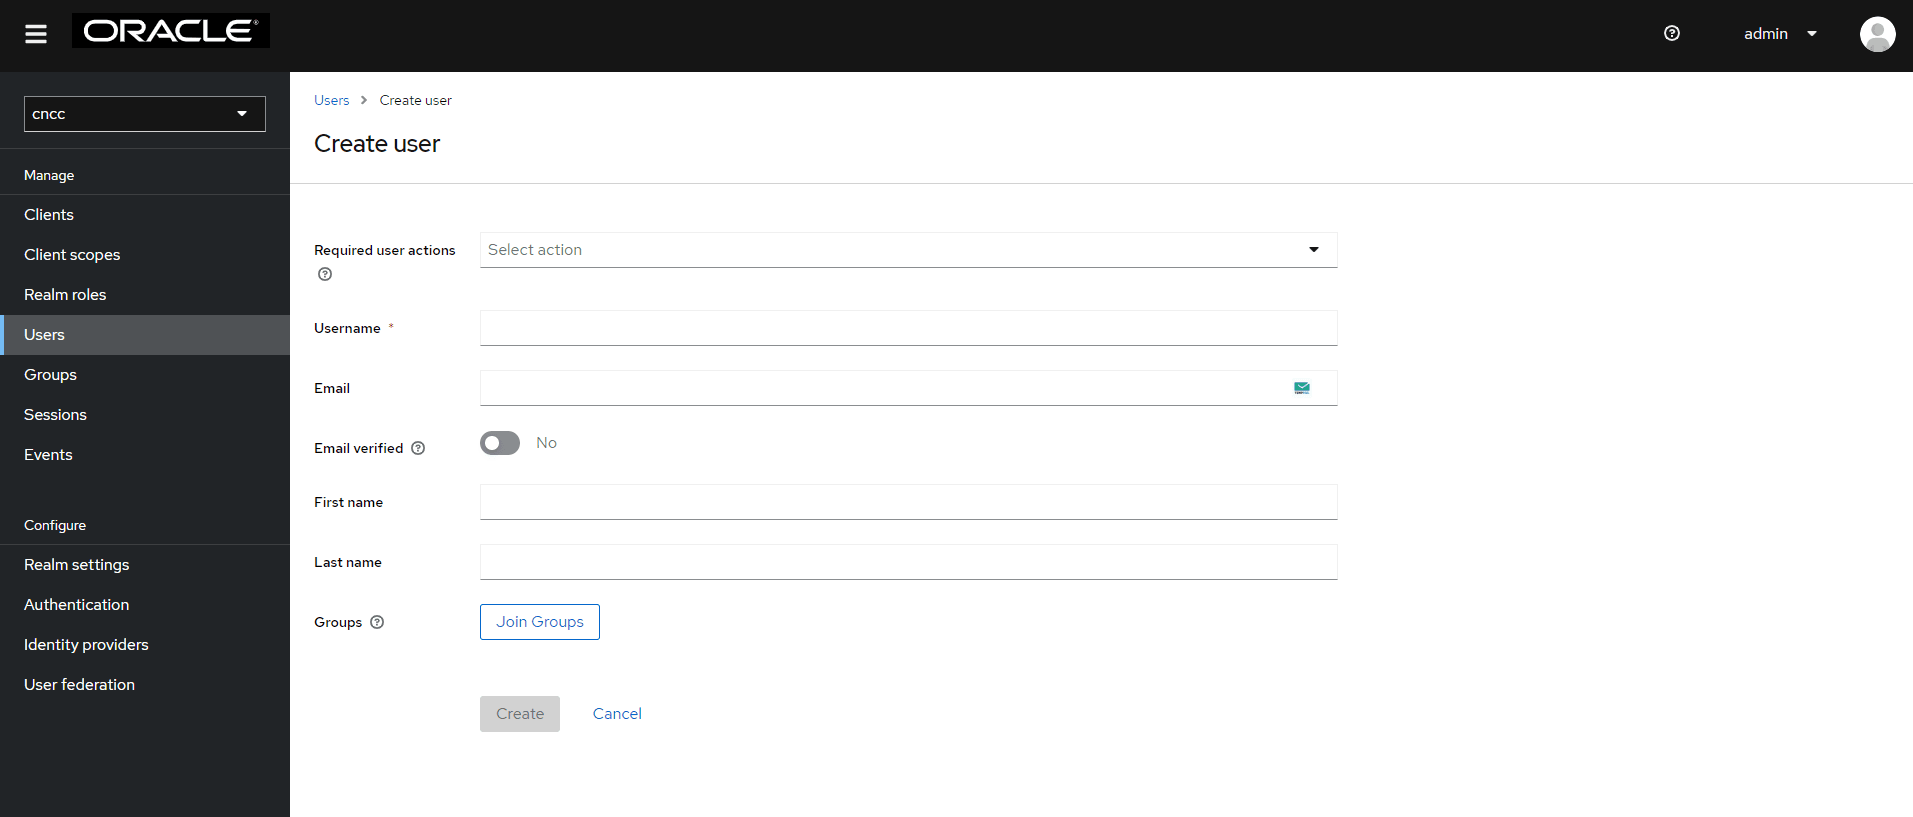
- The Add user screen
appears. Add the user details and click Create.
Figure 4-16 User Details
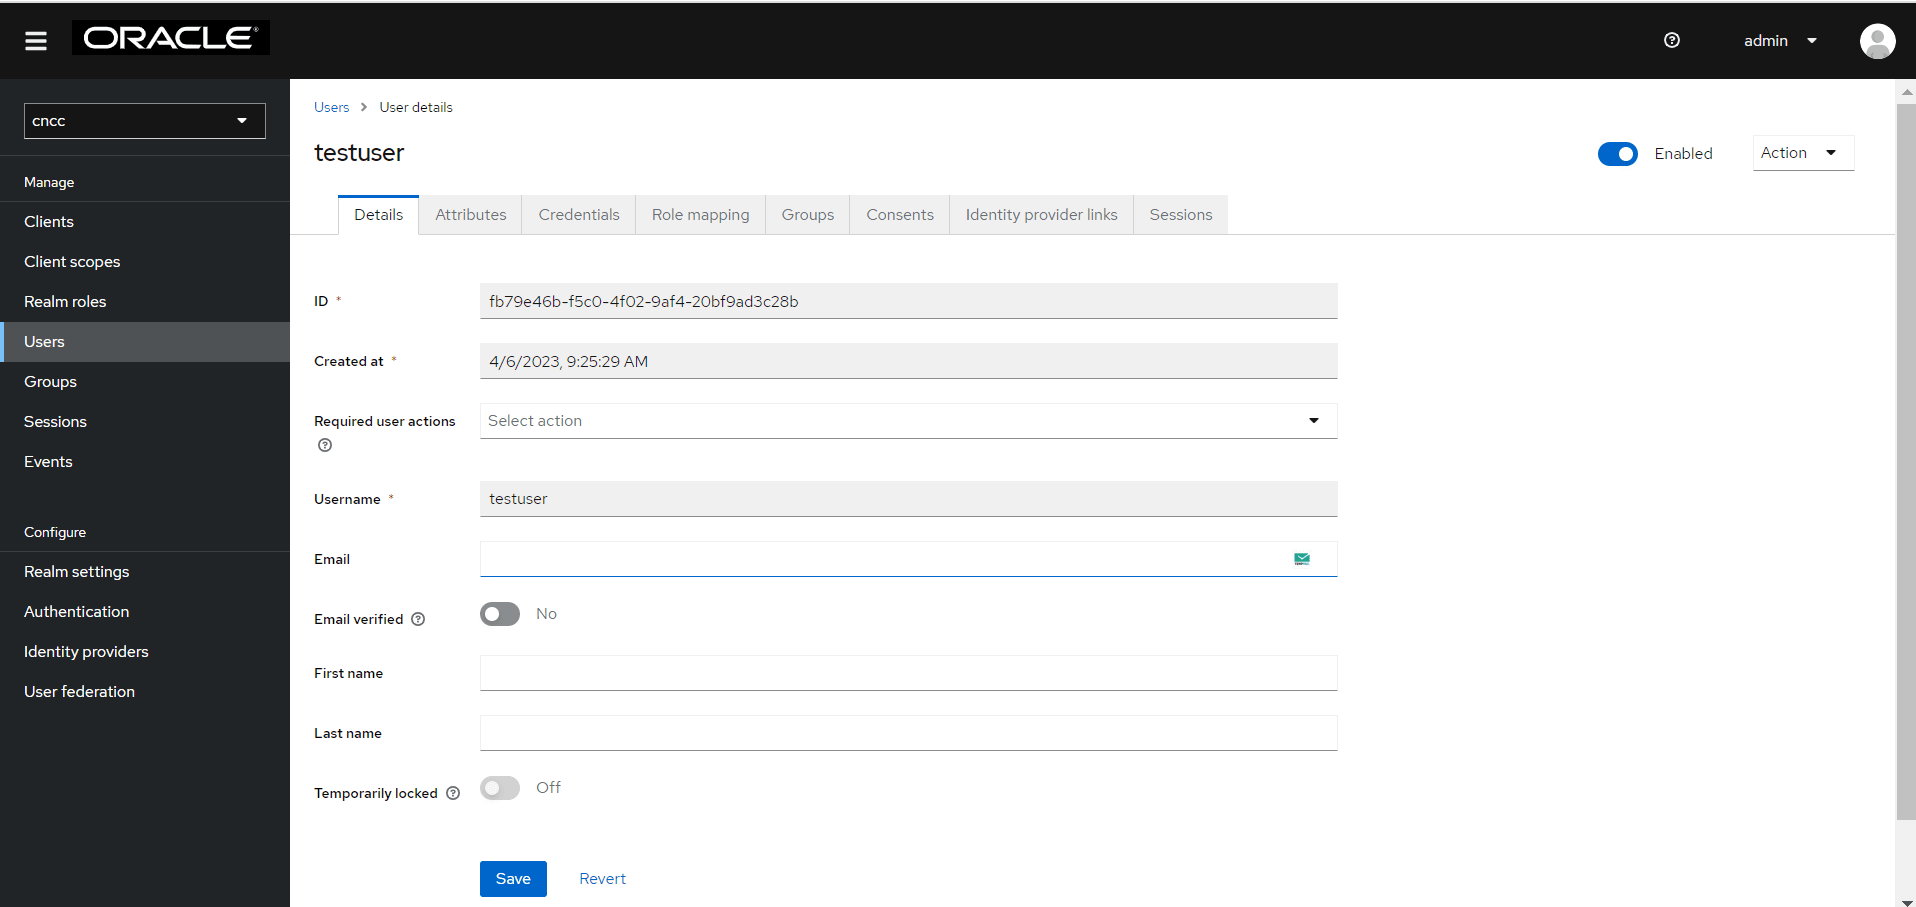
- The user has been created and the user details screen appears.
Figure 4-17 New User Created
- Go to the Credentials tab and click on Set Password and set the
password for that user. Enable the Temporary flag to prompt the user to
change their password when they login for the first time to CNCC GUI.
Note:
You are recommended to enable the Temporary flag for security.Figure 4-18 Set Password

Note:
Setting the Temporary flag ON prompts the user change the password when logging in to the CNC Console for the first time.4.3.2 Viewing the Users
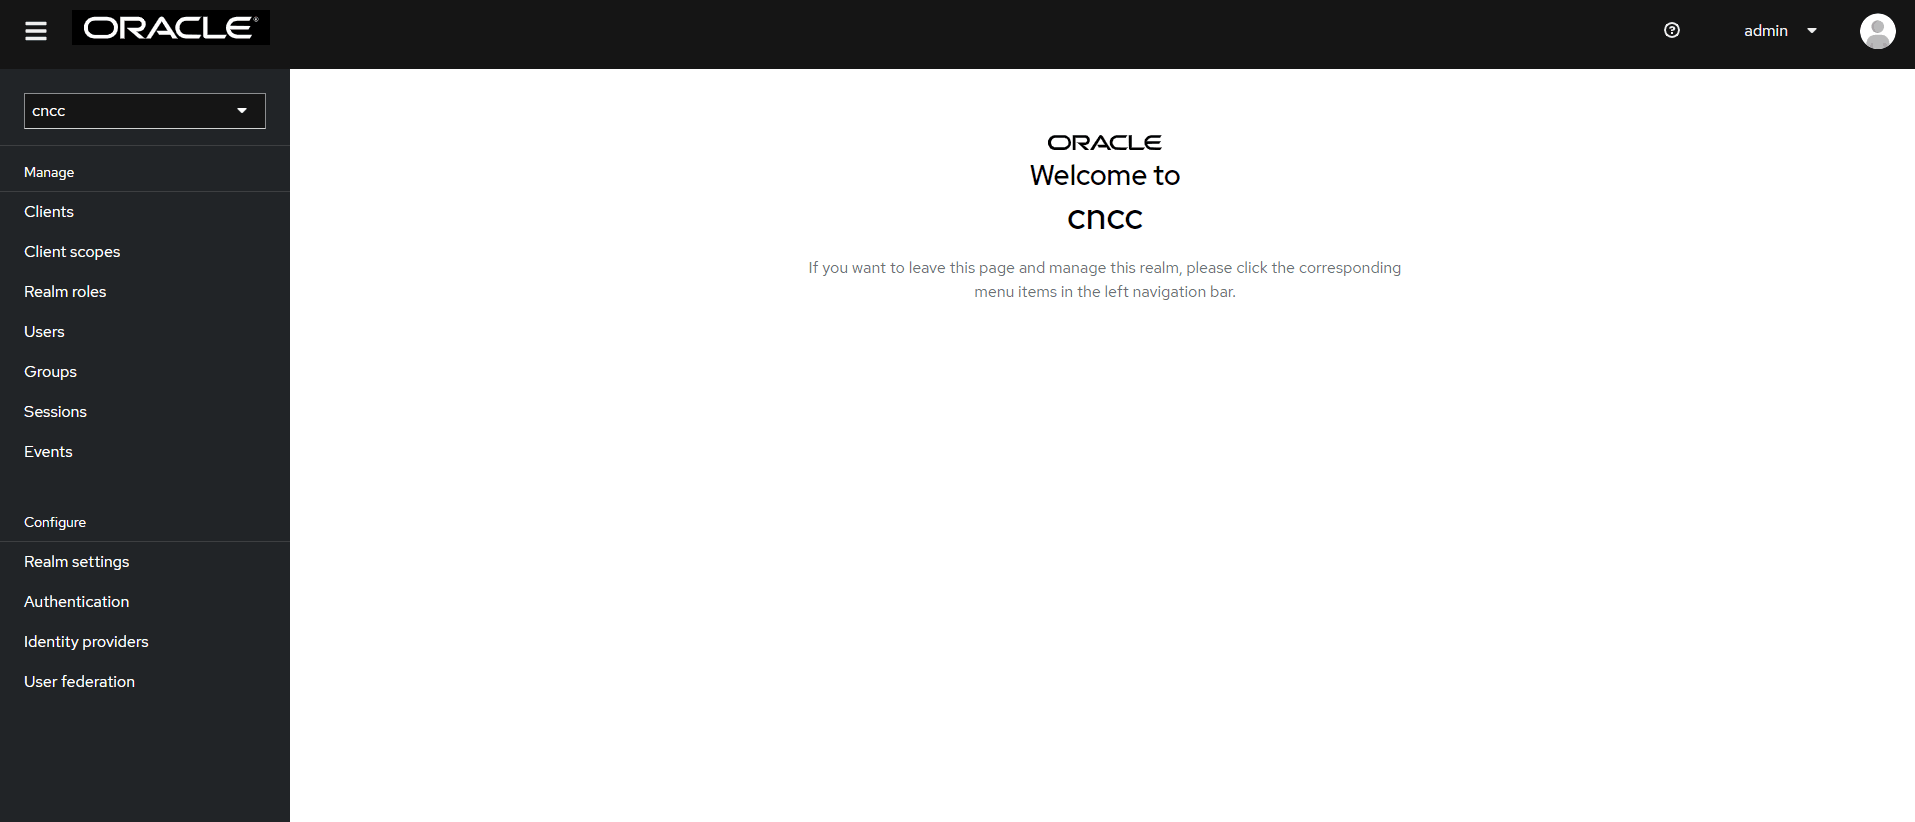
- Select the CNCC Realm.
Figure 4-19 CNCC Realm
- Select Users under
Manage in the left pane to view all users.
Figure 4-20 View All Users
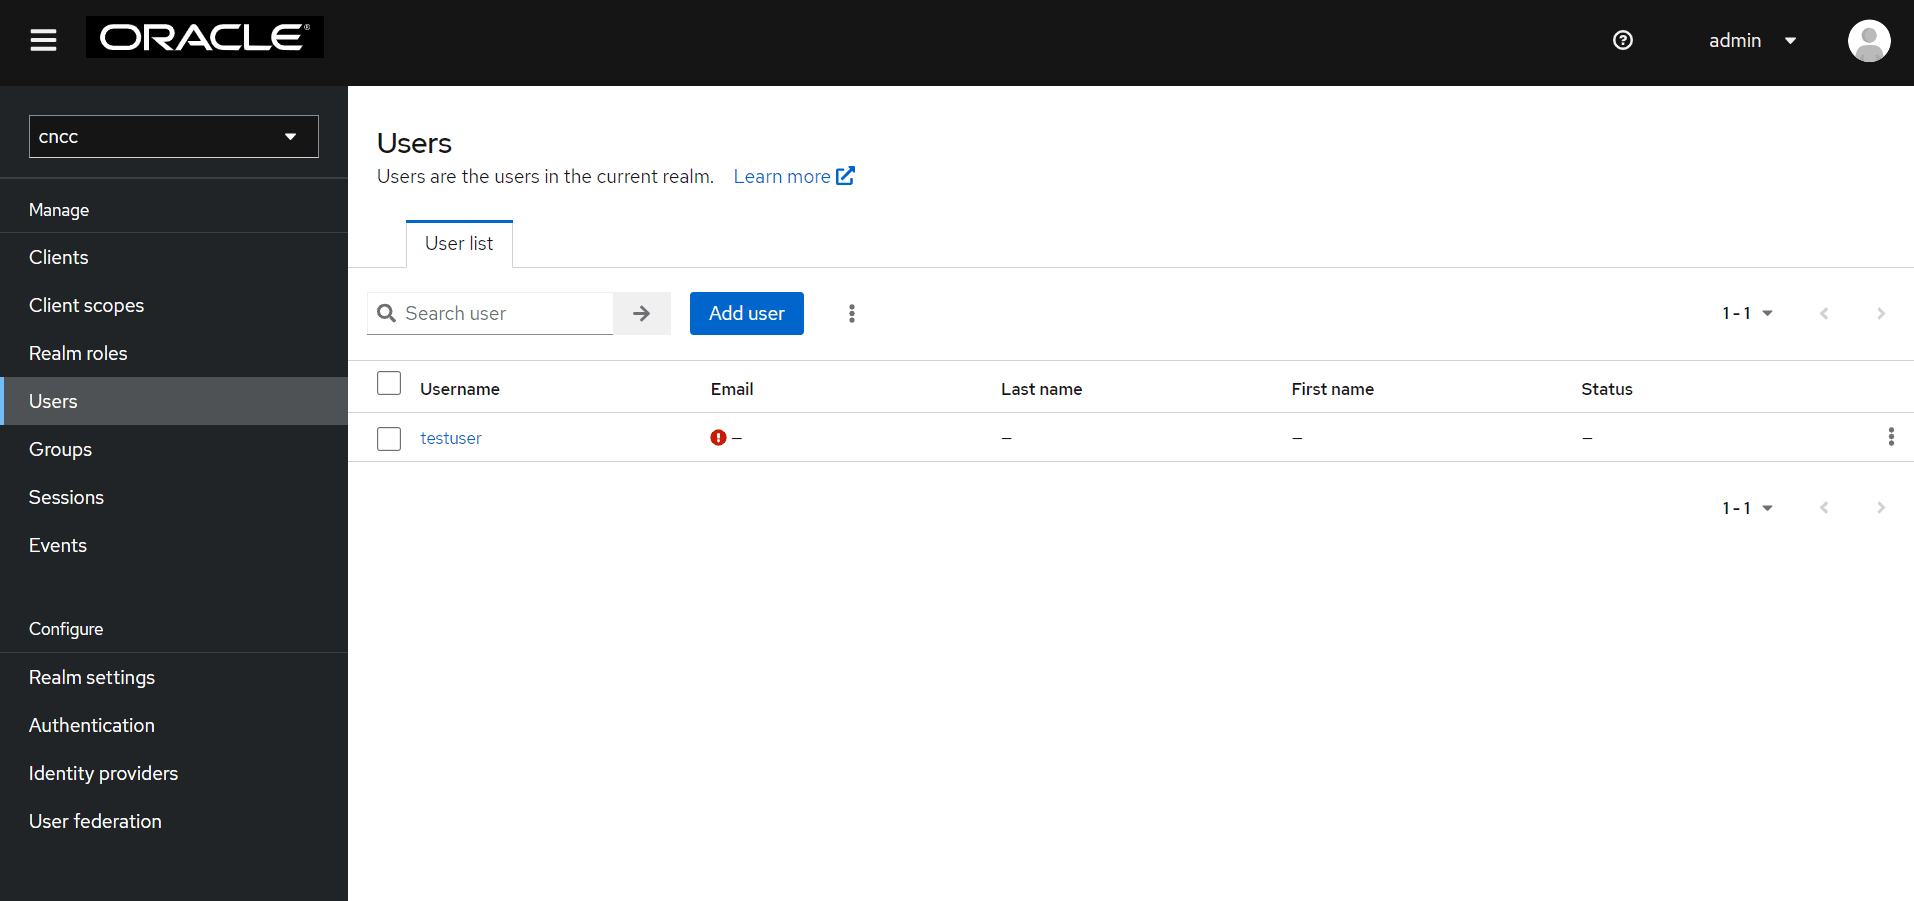
The list of users and their details appears in the right pane.
4.3.3 Assigning Roles to the User
- Select a user. Navigate to the Role Mappings tab and click Assign
Role to assign the user role.
Figure 4-21 Assign Roles

Note:
You must change number of entries displayed per page from the pagination dropdown to 100 per page to view all the entries.Figure 4-22 Display 100 Entries per Page

The selected roles will be assigned to the user.
4.4 CNC Console SAML SSO Integration
4.4.1 Integrating SAML SSO with CNC Console IAM
Overview
Security Assertion Markup Language (SAML) is an open standard that allows identity providers (IdP) to pass authorization credentials to service providers (SP). The identity provider authenticates the user and returns the assertion information about the authenticated user and the authentication event to the application. Using SSO, if the user tries to access any other application that uses the same identity provider for user authentication, the userdoes not need to login again. This is the principle of SSO (Single Sign On).
Note:
CNC Console supports SAML 2.0.Configuring SAML Identity Provider in CNC Console IAM
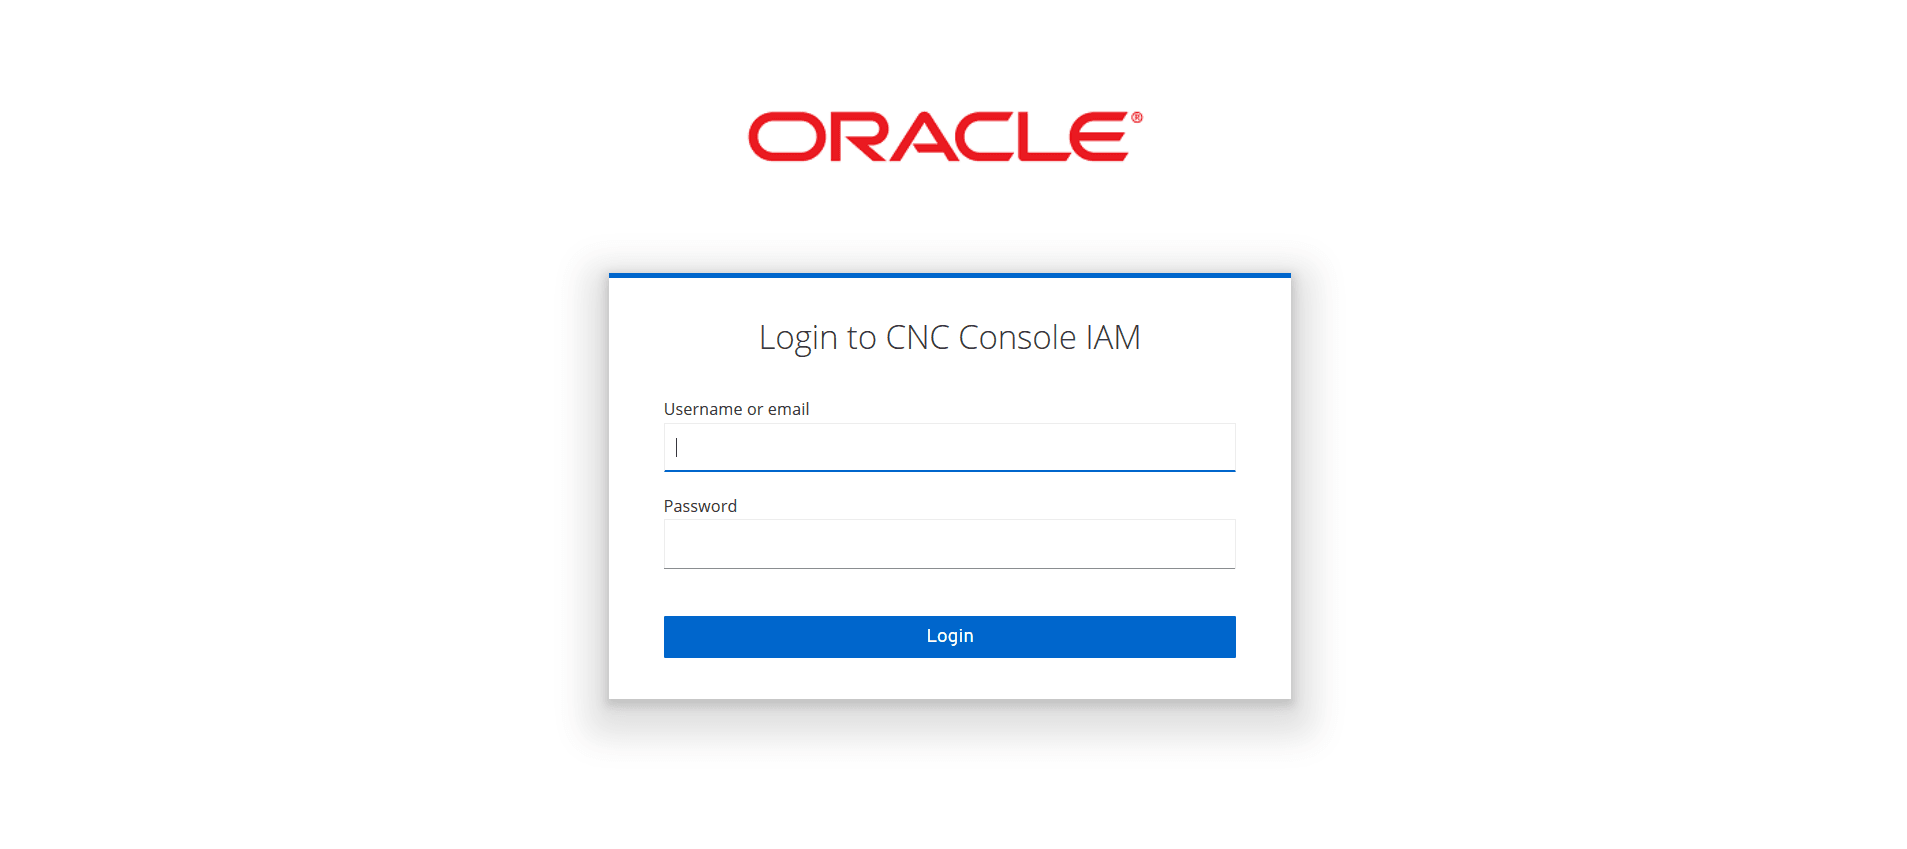
- Log in to CNC Console IAM Console using admin credentials
provided during CNC Console IAM installation.
http://<cncc-iam-ingress-extrenal-ip>:<cncc-iam-ingress-service-port>
Example: http://cncc-iam-ingress-gateway.cncc.svc.cluster.local:30085/
Figure 4-23 Login screen
- Click the cncc realm and click Identity providers
tab on the left pane. Identity providers screen appears on the right
pane.
Figure 4-24 Identity Provider Screen
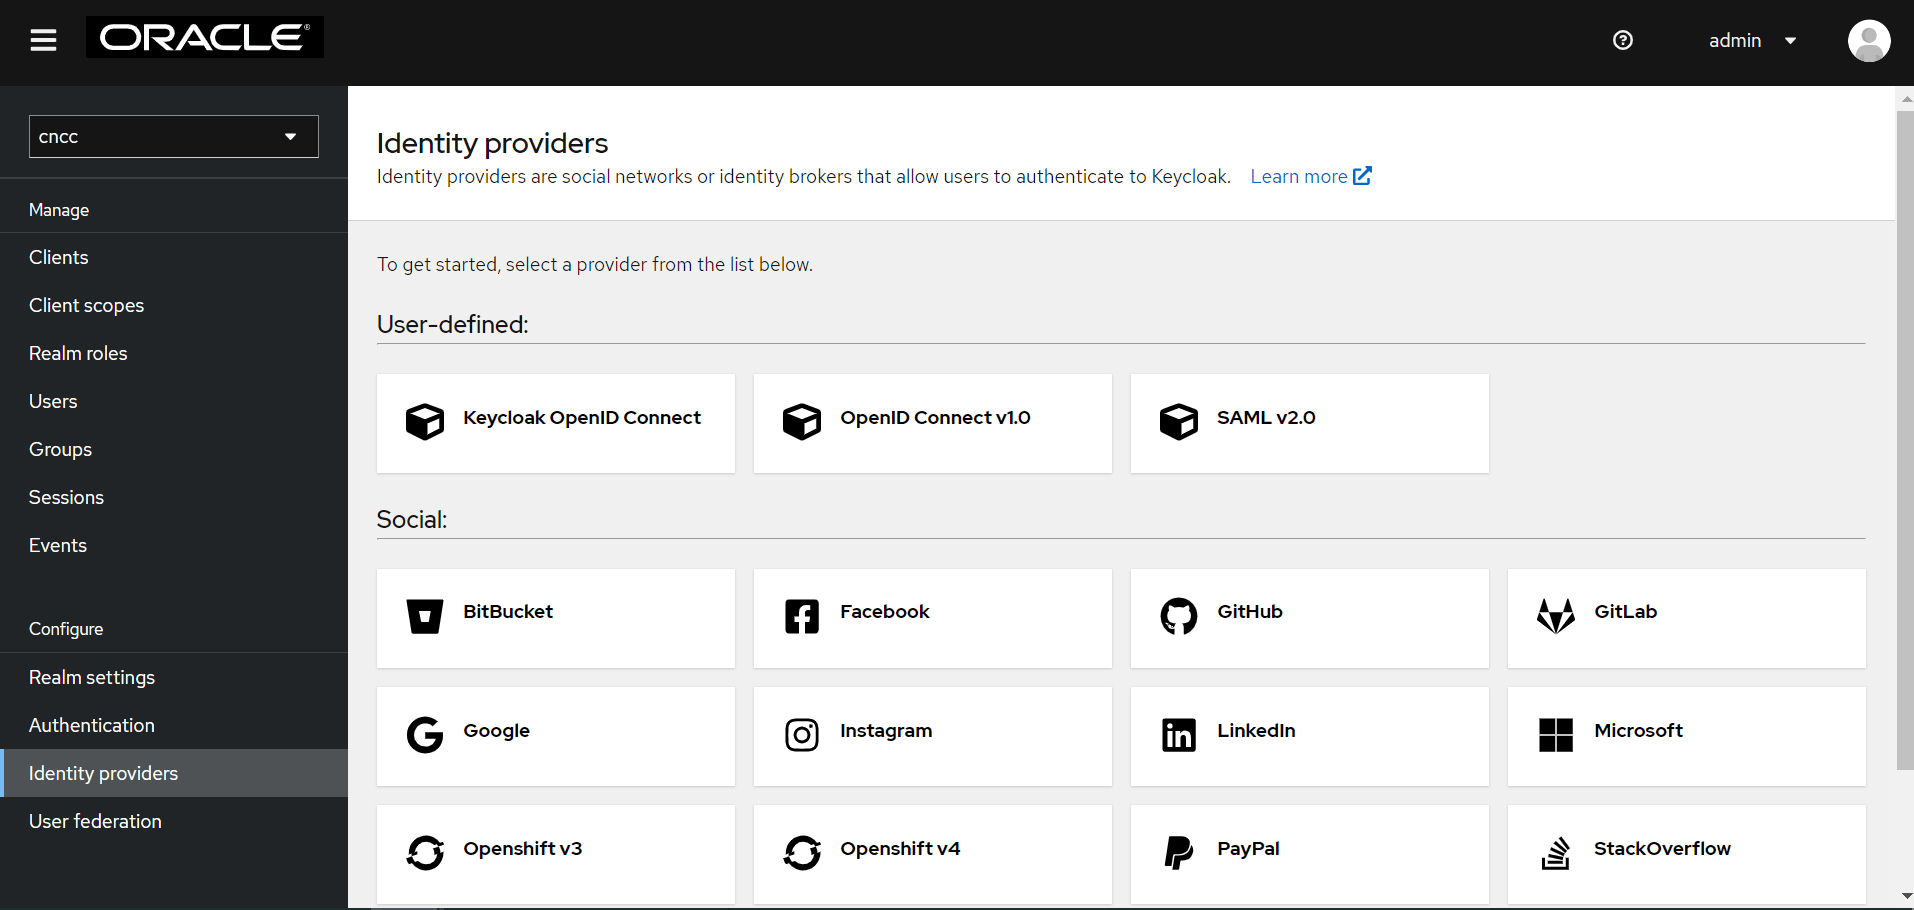
- Click the SAML v2.0 button under User-defined.
The Add SAML Provider screen appears.
Figure 4-25 SAML Settings
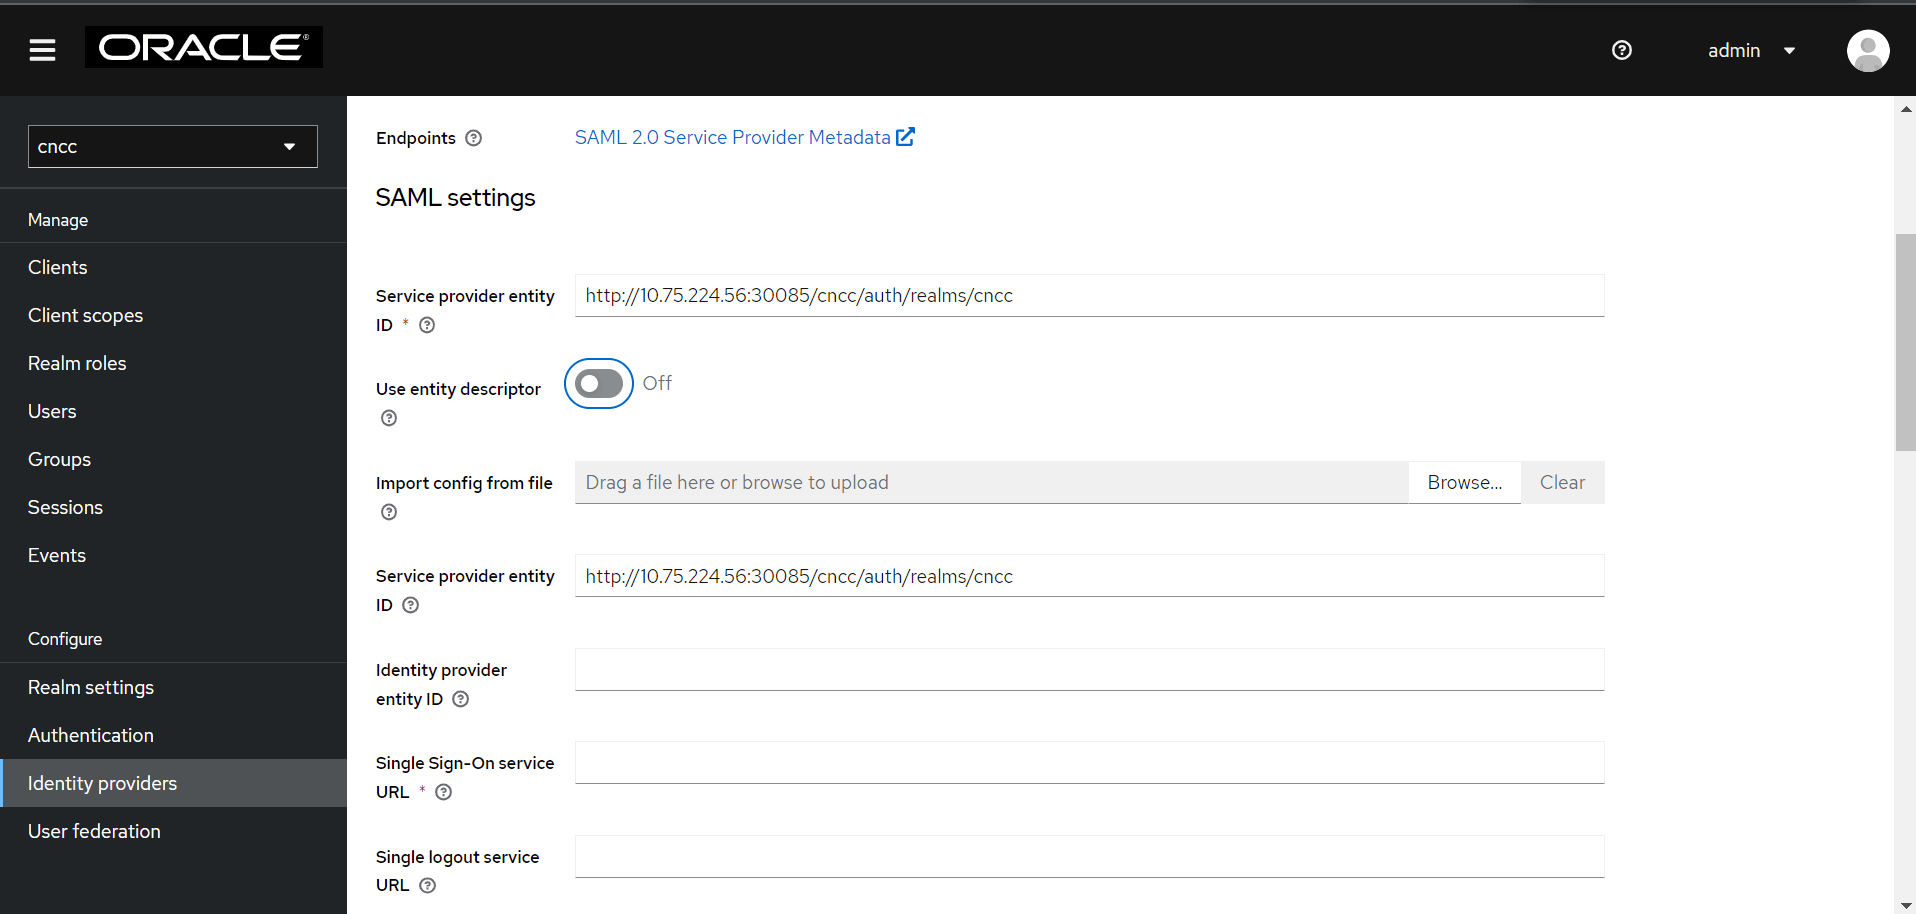
Note:
- Give an appropriate name for the Display Name field.
- To import the metadata file exported from SAML client in the IdP, disable the Use Entity descriptor flag, and upload the file from the Browse button of "Import from config file".
Click Import and Save. The other required fields populate automatically.
Perform the following procedure to configure the IdP manually, if you are facing difficulty in importing the metadata file from the IdP Client:
- Navigate to the Identity providers screen and click SAML v2.0.
- Set the value of Single Sign-On Service URL to
the URL of the preferred IdP.
Example:
<IP/FQDN>:<PORT>/auth/realms/master/protocol/saml(URI for their preferred IdP where SAML AuthnRequest will be sent). - Set the value of Single Logout Service URL.
Example:
<IP/FQDN>:<PORT>/auth/realms/master/protocol/saml(URI for their preferred IdP where logout requests must be sent). - If the IdP supports HTTP POSTbinding methods, enable HTTP-POST Binding Response, HTTP-POST Binding Logout and HTTP-POST Binding for AuthnRequest flags. By default, HTTP-Redirect will be used.
- If the IdP is sending signed Assertions, set Want Assertions Signed to ON.
- Set Validate Signature to ON.
- Provide value for Validating X509 Certificates (If you are using Keycloak as an IdP, use the certificate from master realm -> Realm Settings -> Keys).
- Click Add.
IdP is now configured manually.
- To create custom First Login Flow, click
Authentication tab on the left pane. The Authentication
screen appears.
Figure 4-26 Authentication

- Click Create Flow on the right pane. The Create
Flow screen appears.
Figure 4-27 Create Flow
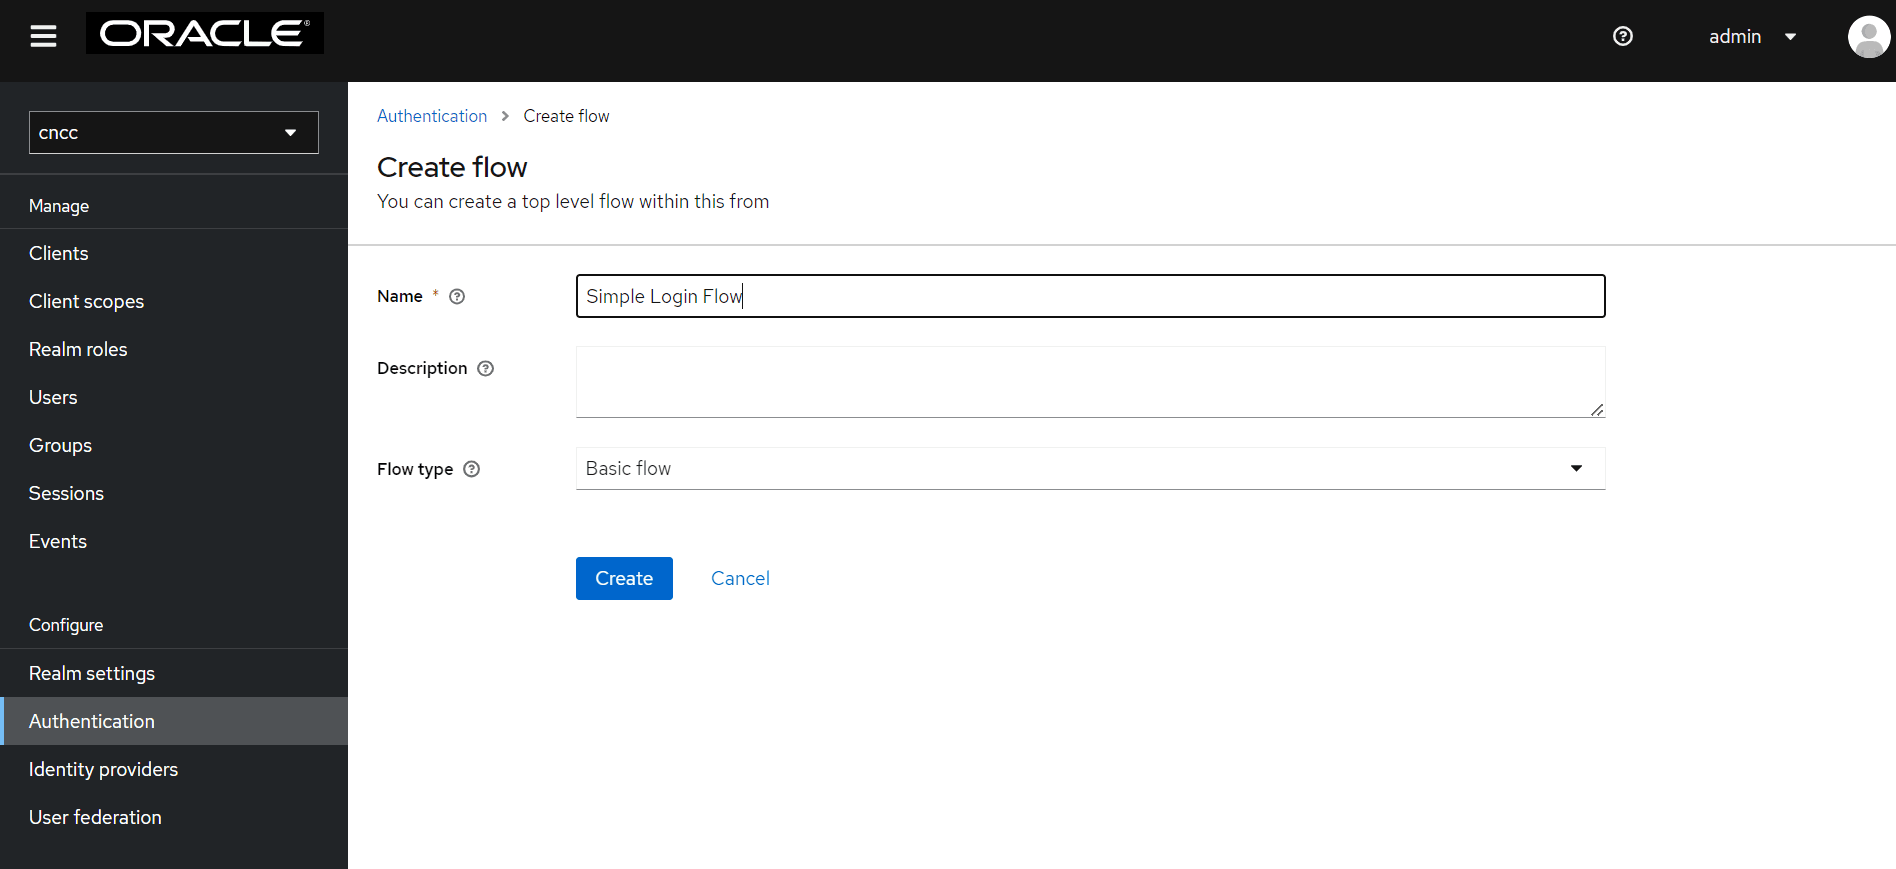
Enter the appropriate name and click Create.
- The Simple Login Flow screen appears. Click Add
execution on the right pane.
Figure 4-28 Simple Login Flow
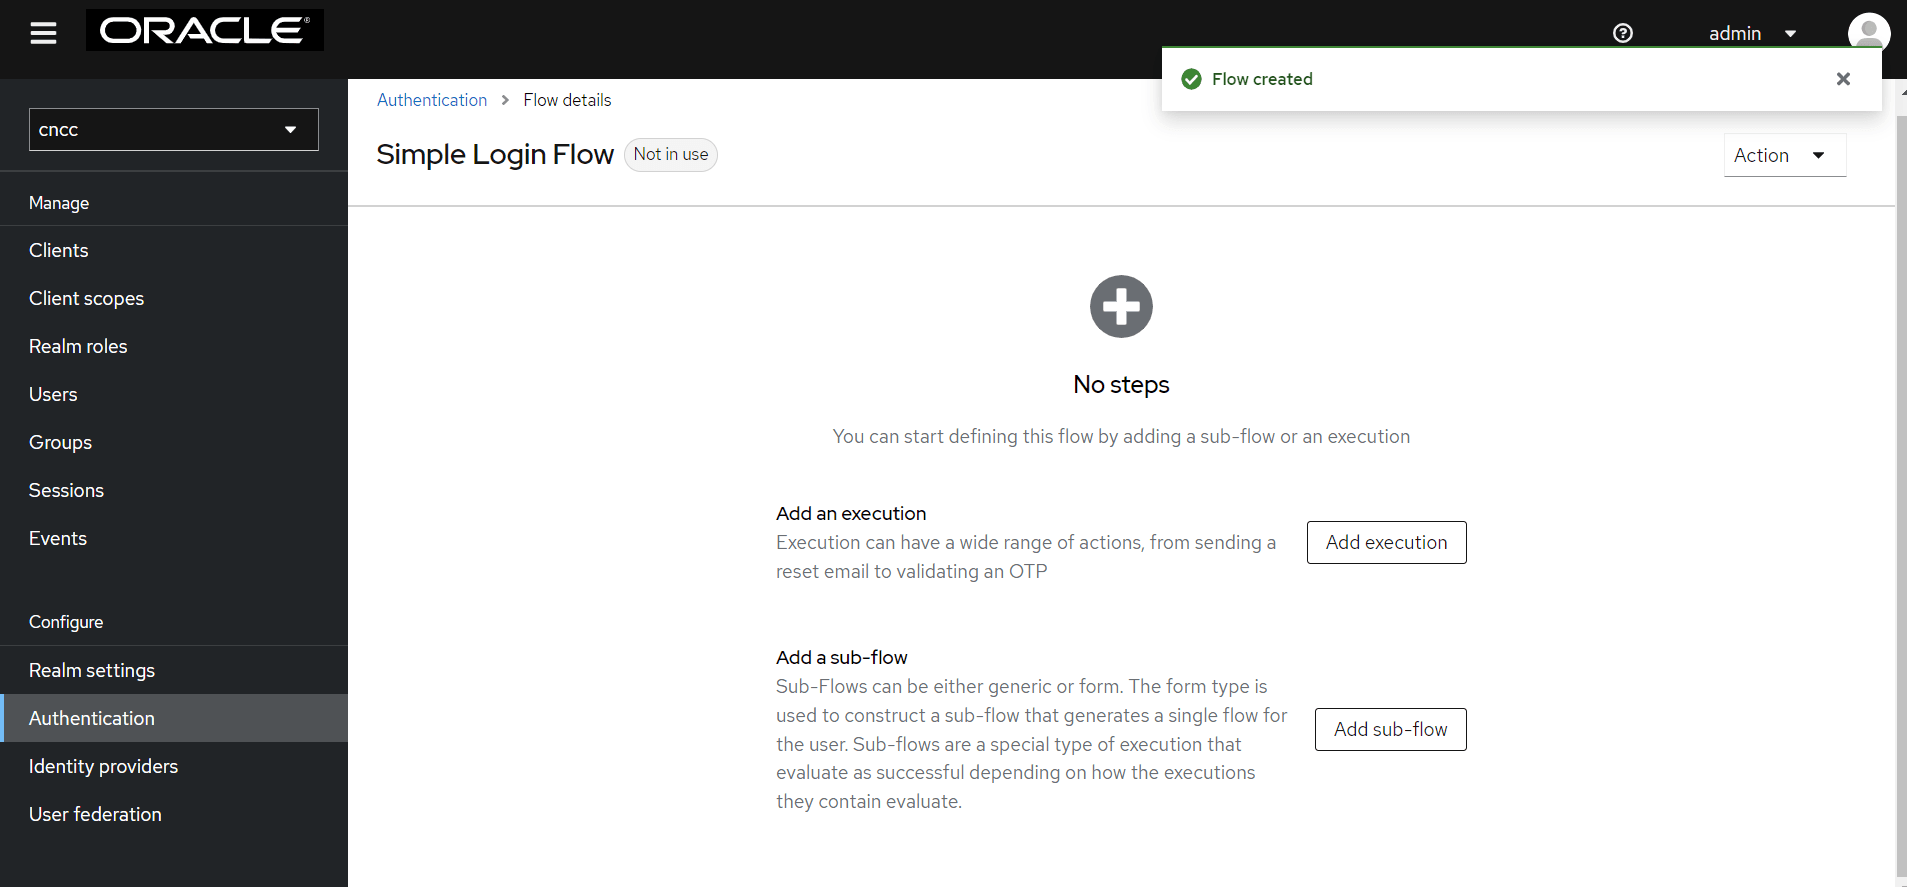
- Select Create User If Unique, and click Add.
Figure 4-29 Add Step to Simple Login Flow
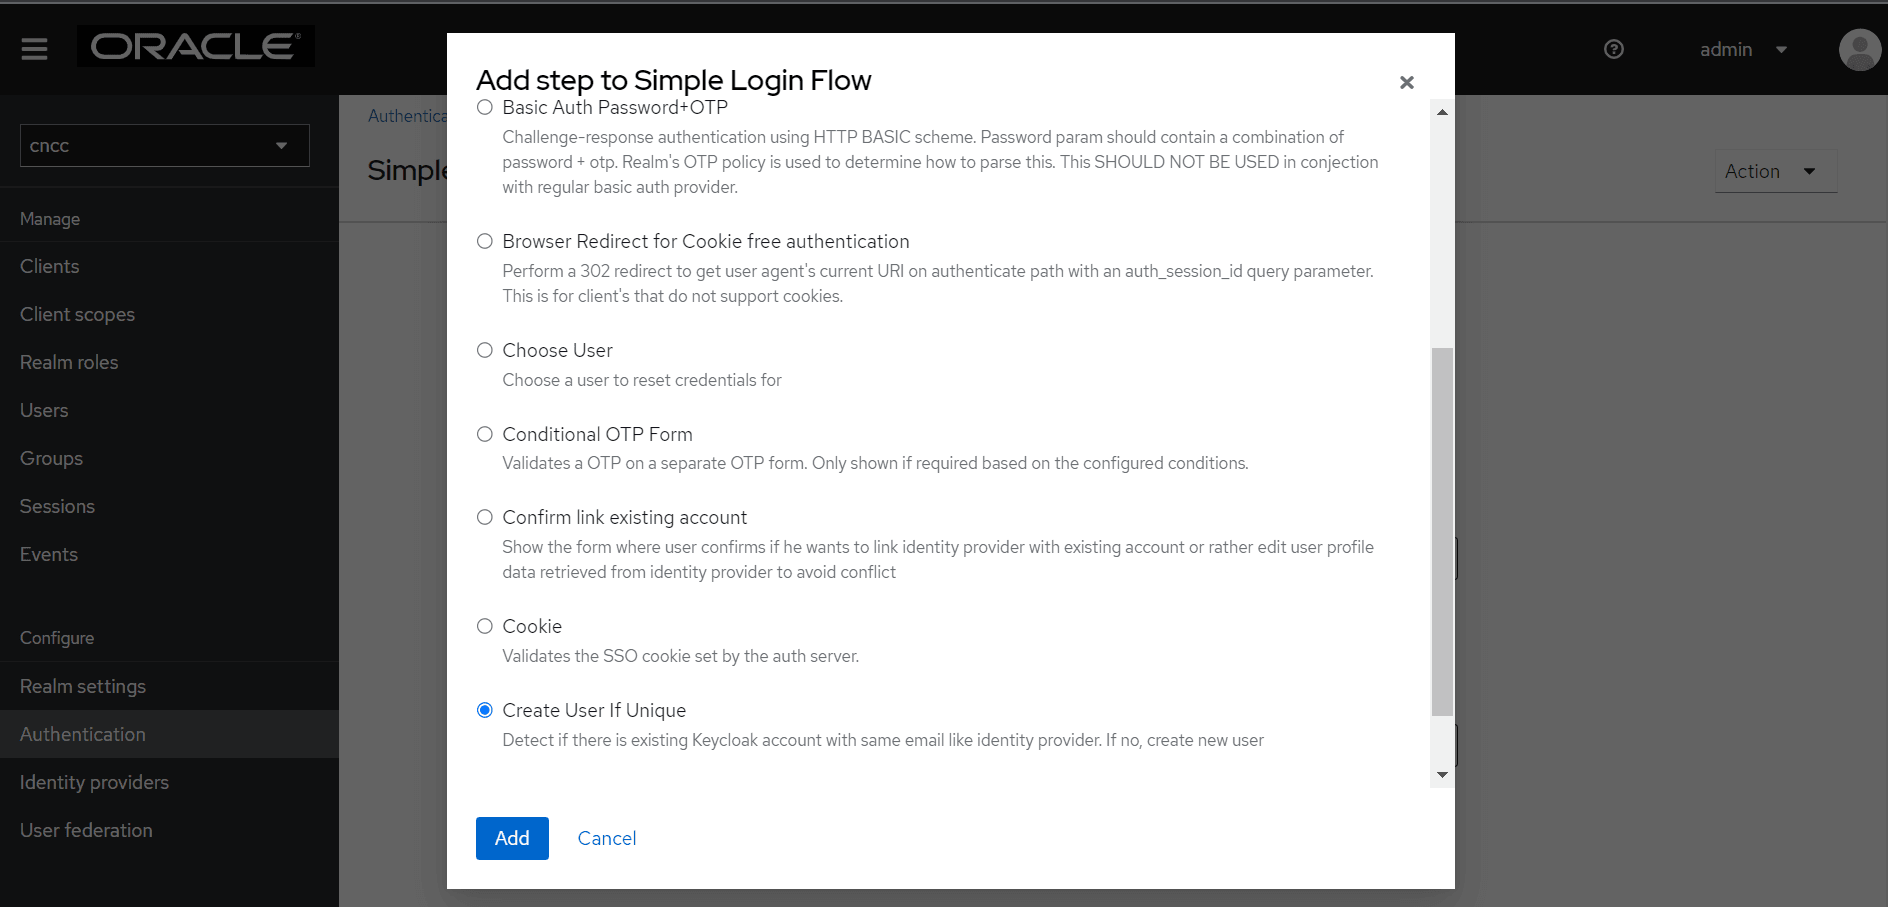
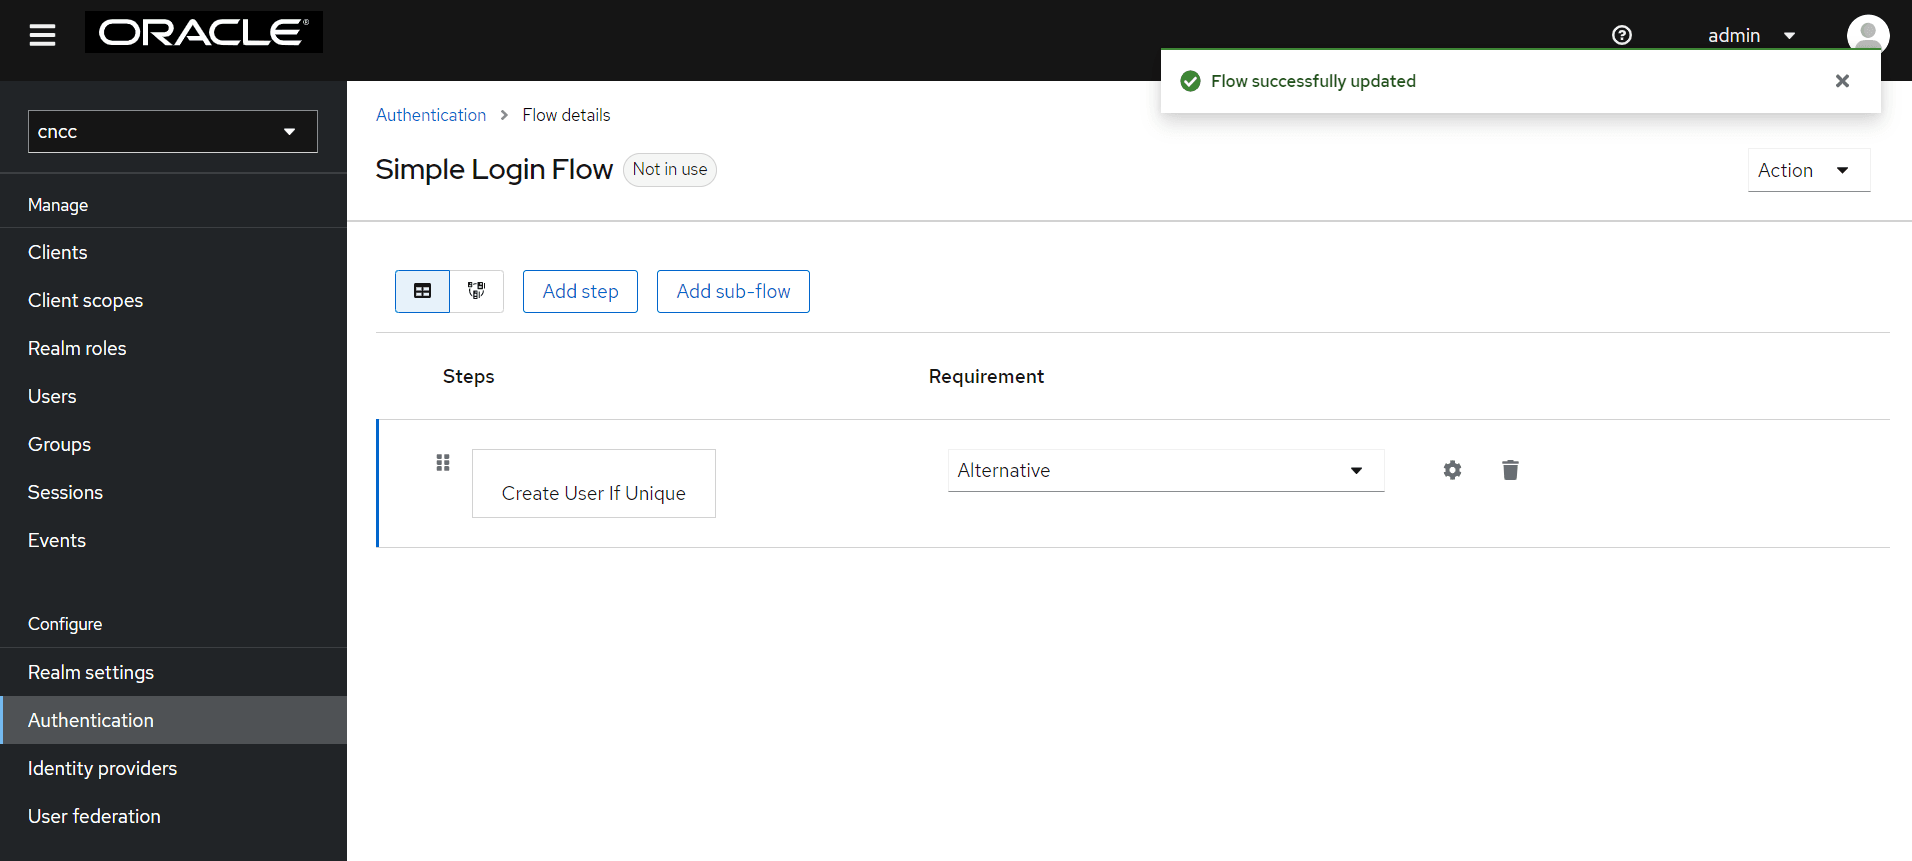
- You will be redirected to Authentication page. From
Requirement section, select Alternative.
Figure 4-30 Authentication
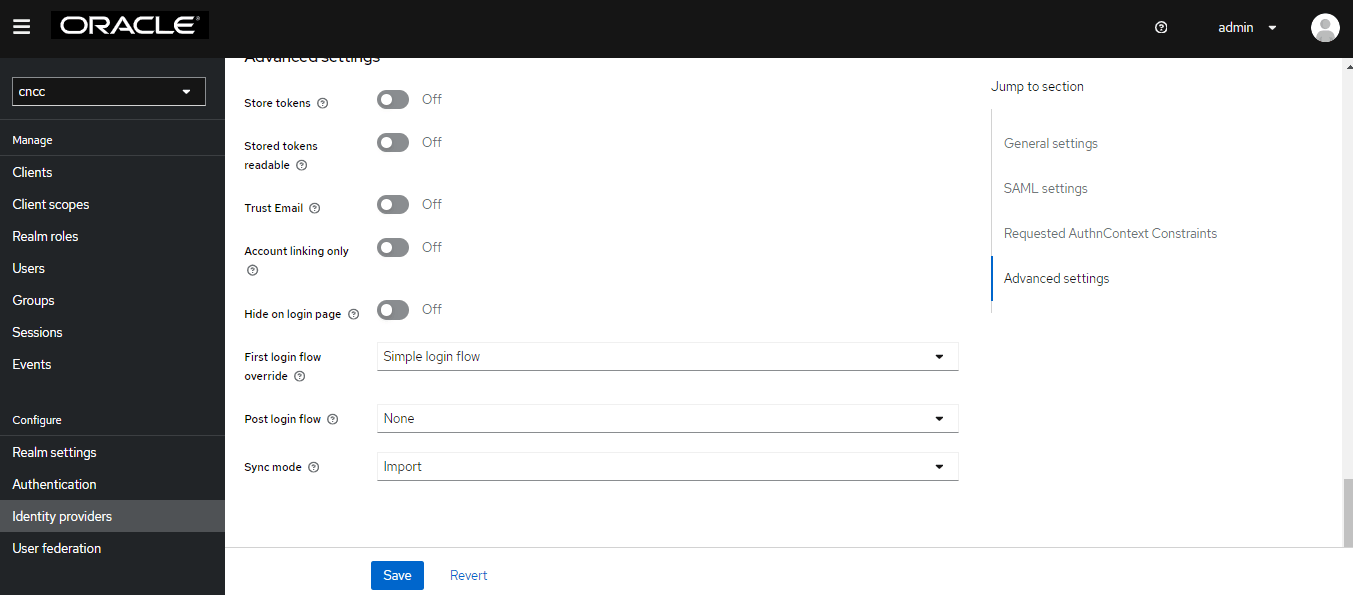
- Click Identity providers in the left pane. Click the name
of the Identity provide created in the previous steps, and scroll down to
Advanced Settings. Select the custom flow from First Login
Flow drop-down list.
Figure 4-31 Advanced Settings Page
- Click Save.
The above screen appears. Now the SAML Idp roles must be mapped with CNC Console IAM API roles.
Note:
CNC Console IAM(SP) Configuration in IdP
In a SAML based SSO Implementation, the IdP needs to send SAML assertions towards a Service Provider (CNC Console IAM in this case) endpoint.
http://<IP/FQDN>:<PORT>/cncc/auth/realms/cncc/broker/saml/endpointhttp://cncc-iam-ingress-gateway.cncc.svc.cluster.local:30085/cncc/auth/realms/cncc/broker/saml/endpointMapping SAML IdP roles with CNC Console IAM API roles
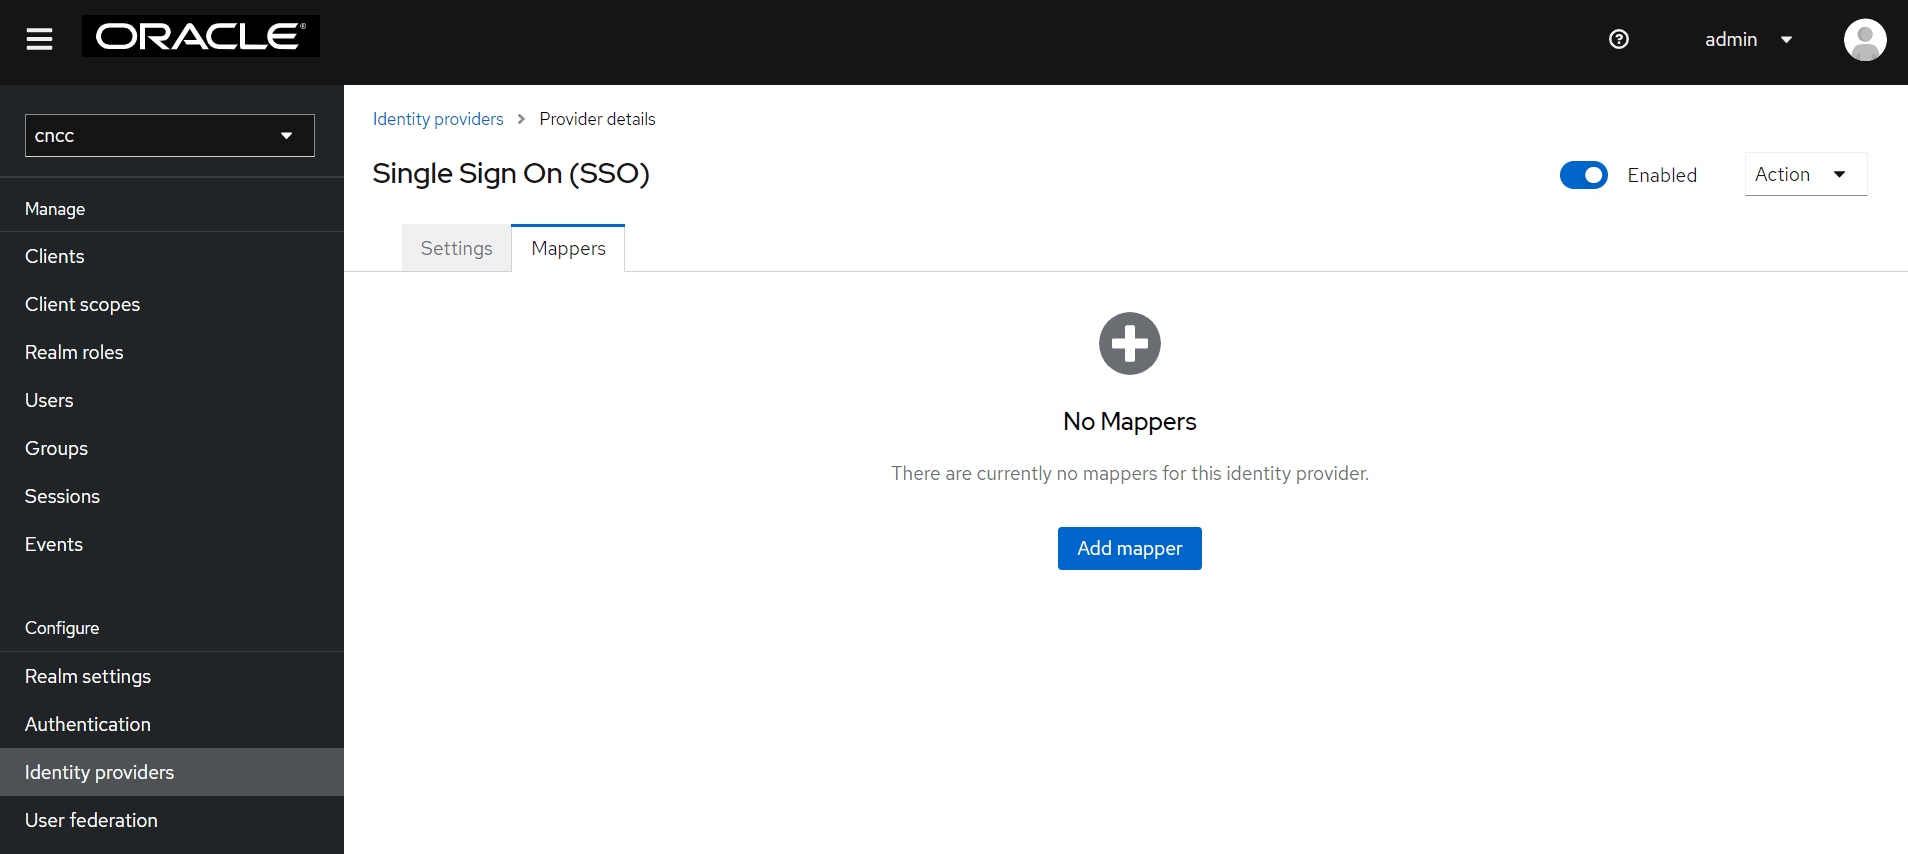
- After saving SAML IdP configurations in CNC Console IAM, select
Identity providers on the left pane and click the name of your
identity provider. Click Mappers tab on the right pane. Click Add
Mapper.
Figure 4-32 Single Sign On
- The Add Identity Provider Mapper screen appears.
Figure 4-33 Add Identity Provider Mapper

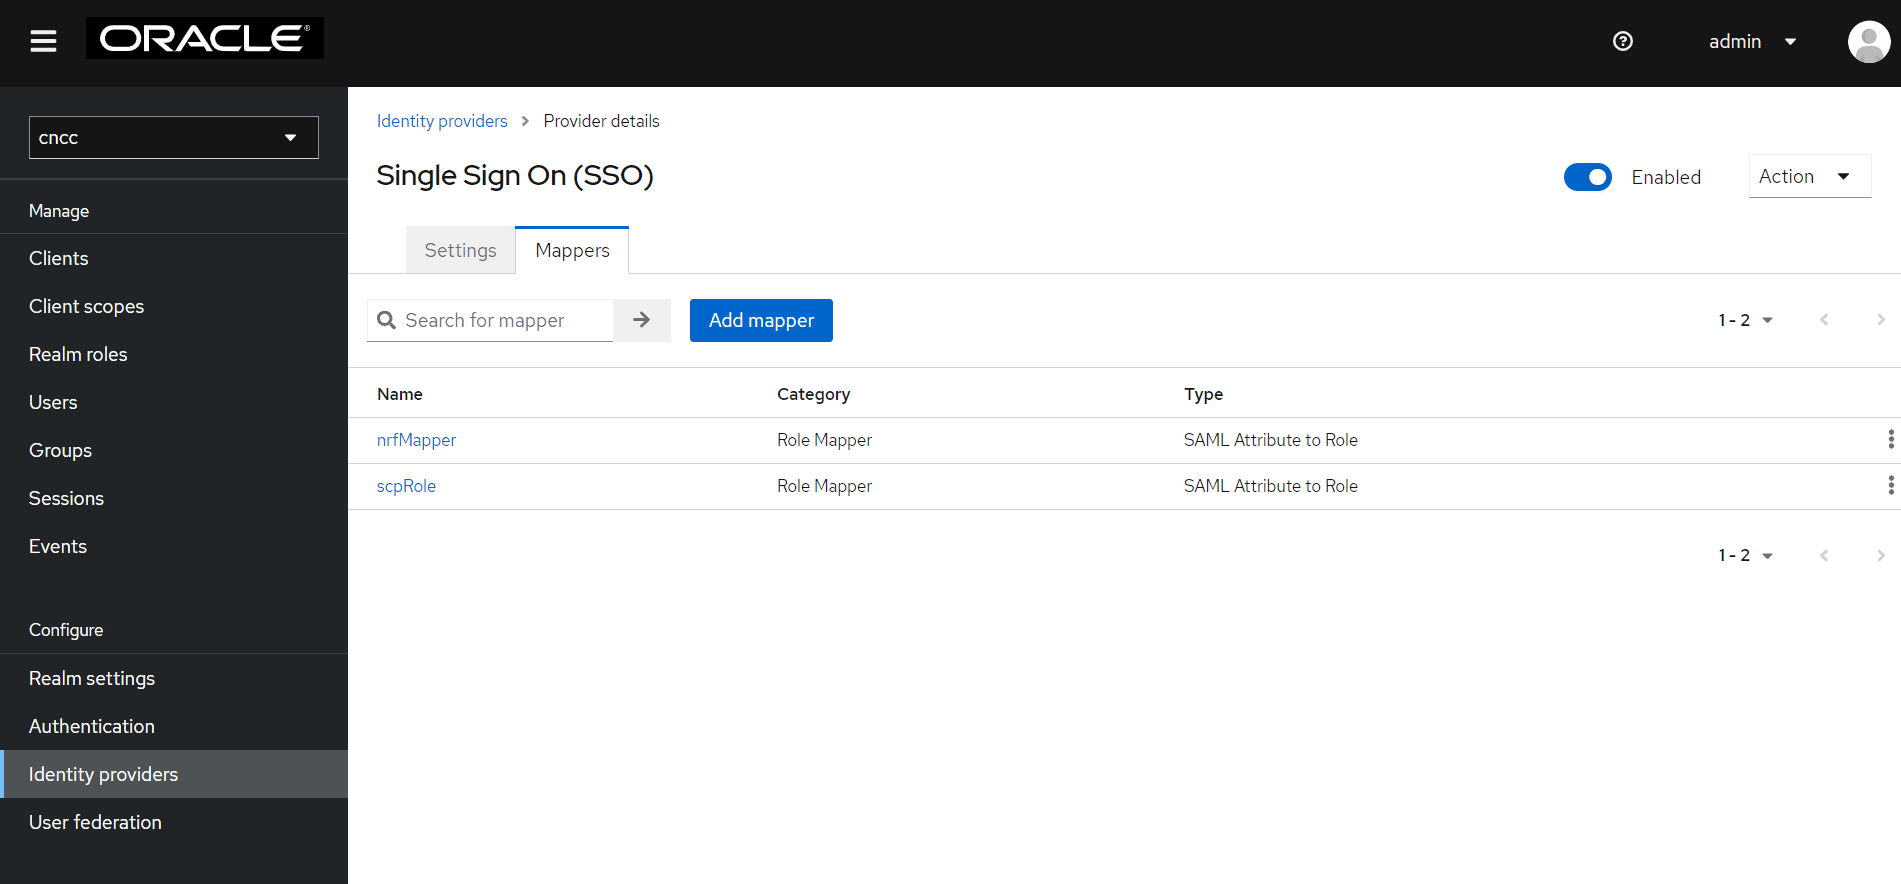
- Give an appropriate name for the Identity Provider Mapper in the Name field.
- Select 'SAML Attribute to Role' from Mapper Type drop-down.
- Enter the Attribute Value as the one of the roles added in SAML IdP. For example: 'NRF', 'SCP', etc.
- Click Select Role to select the API roles to be enabled for this mapping.
- Click Assign. Then click Save
Figure 4-34 Single Sign On
Accessing CNC Console Core Application
- Log in to CNC Console Core, and browse to the application using
hostname and port. The user is redirected to CNC Console IAM (broker).
http://<cncc-core-ingress-extrenal-ip>:<cncc-iam-ingress-service-port>
Example: http://cncc-core-ingress-gateway.cncc.svc.cluster.local:30075/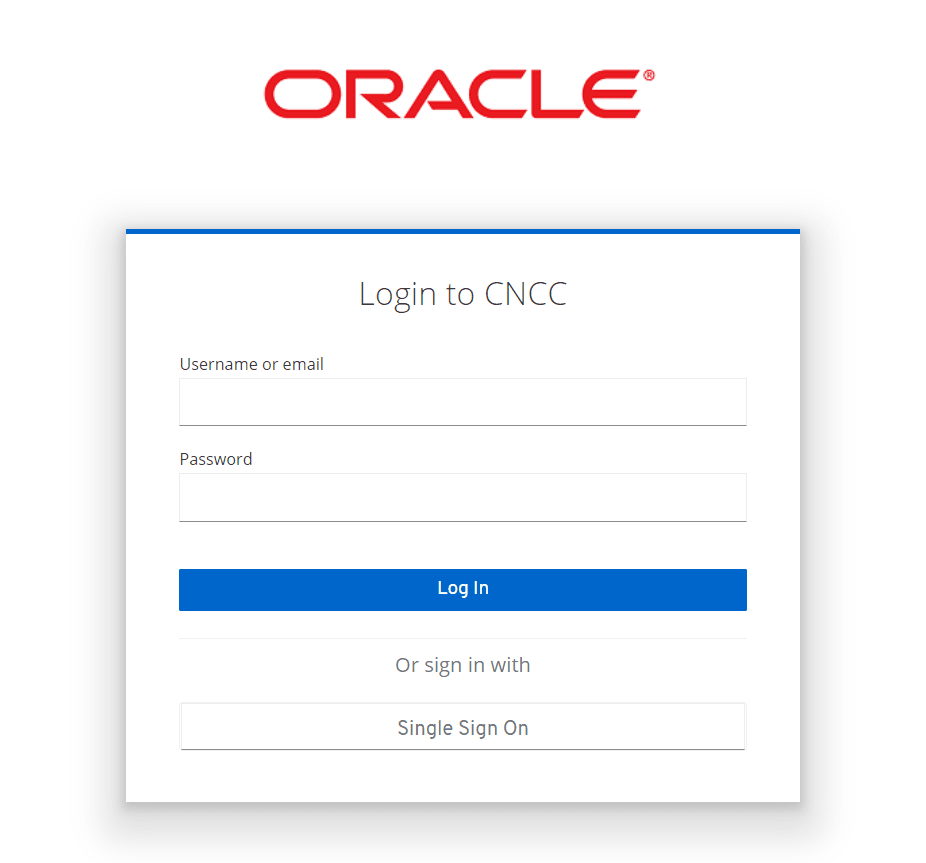
- Click Single Sign On to authenticate using SAML SSO. The user is redirected to SAML IdP log in. Enter user details to access CNC Console Core application.
4.5 Integrating CNC Console LDAP Server with CNC Console IAM
Overview
The CNC Console IAM can be used as an integration platform to connect it into existing LDAP and Active Directory servers.
User Federation in CNC Console-IAM let the user to sync users and groups from LDAP and Active Directory servers and assign roles respectively.
CNCC IAM provides an option to configure a secured connection URL to your LDAP store.
example: `ldaps://myhost.com:636'
CNCC IAM uses SSL for communication with the LDAP server. The truststore must be properly configured on the CNCC IAM server side, otherwise CNCC IAM cannot trust the SSL connection to LDAP.
Sample LDAP ldif Filedn: dc=oracle,dc=org
objectclass: top
objectclass: domain
objectclass: extensibleObject
dc: oracle
dn: ou=groups,dc=oracle,dc=org
objectclass: top
objectclass: organizationalUnit
ou: groups
dn: ou=people,dc=oracle,dc=org
objectclass: top
objectclass: organizationalUnit
ou: people
dn: uid=ben,ou=people,dc=oracle,dc=org
objectclass: top
objectclass: person
objectclass: organizationalPerson
objectclass: inetOrgPerson
cn: Ben Alex
sn: Alex
uid: ben
userPassword: benspass
dn: uid=bob,ou=people,dc=oracle,dc=org
objectclass: top
objectclass: person
objectclass: organizationalPerson
objectclass: inetOrgPerson
cn: Bob Hamilton
sn: Hamilton
uid: bob
userPassword: bobspass
dn: uid=joe,ou=people,dc=oracle,dc=org
objectclass: top
objectclass: person
objectclass: organizationalPerson
objectclass: inetOrgPerson
cn: Joe Smeth
sn: Smeth
uid: joe
userPassword: joespass
dn: cn=admin,ou=groups,dc=oracle,dc=org
objectclass: top
objectclass: groupOfUniqueNames
cn: admin
uniqueMember: uid=ben,ou=people,dc=oracle,dc=org
ou: admins
dn: cn=scp,ou=groups,dc=oracle,dc=org
objectclass: top
objectclass: groupOfUniqueNames
cn: scp
uniqueMember: uid=ben,ou=people,dc=oracle,dc=org
uniqueMember: uid=joe,ou=people,dc=oracle,dc=org
ou: scpusers
dn: cn=nrf,ou=groups,dc=oracle,dc=org
objectclass: top
objectclass: groupOfUniqueNames
cn: nrf
uniqueMember: uid=ben,ou=people,dc=oracle,dc=org
uniqueMember: uid=bob,ou=people,dc=oracle,dc=org
ou: nrfusers4.5.1 Grouping the LDAP Mapper and Assigning the Roles
Group Mapper
The Group Mapper allows you to configure group mappings from LDAP into cncc-iam group mappings. Group mapper can be used to map LDAP groups from a particular branch of an LDAP tree into groups in cncc-iam. It also propagates user-group mappings from LDAP into user-group mappings in cncc-iam.
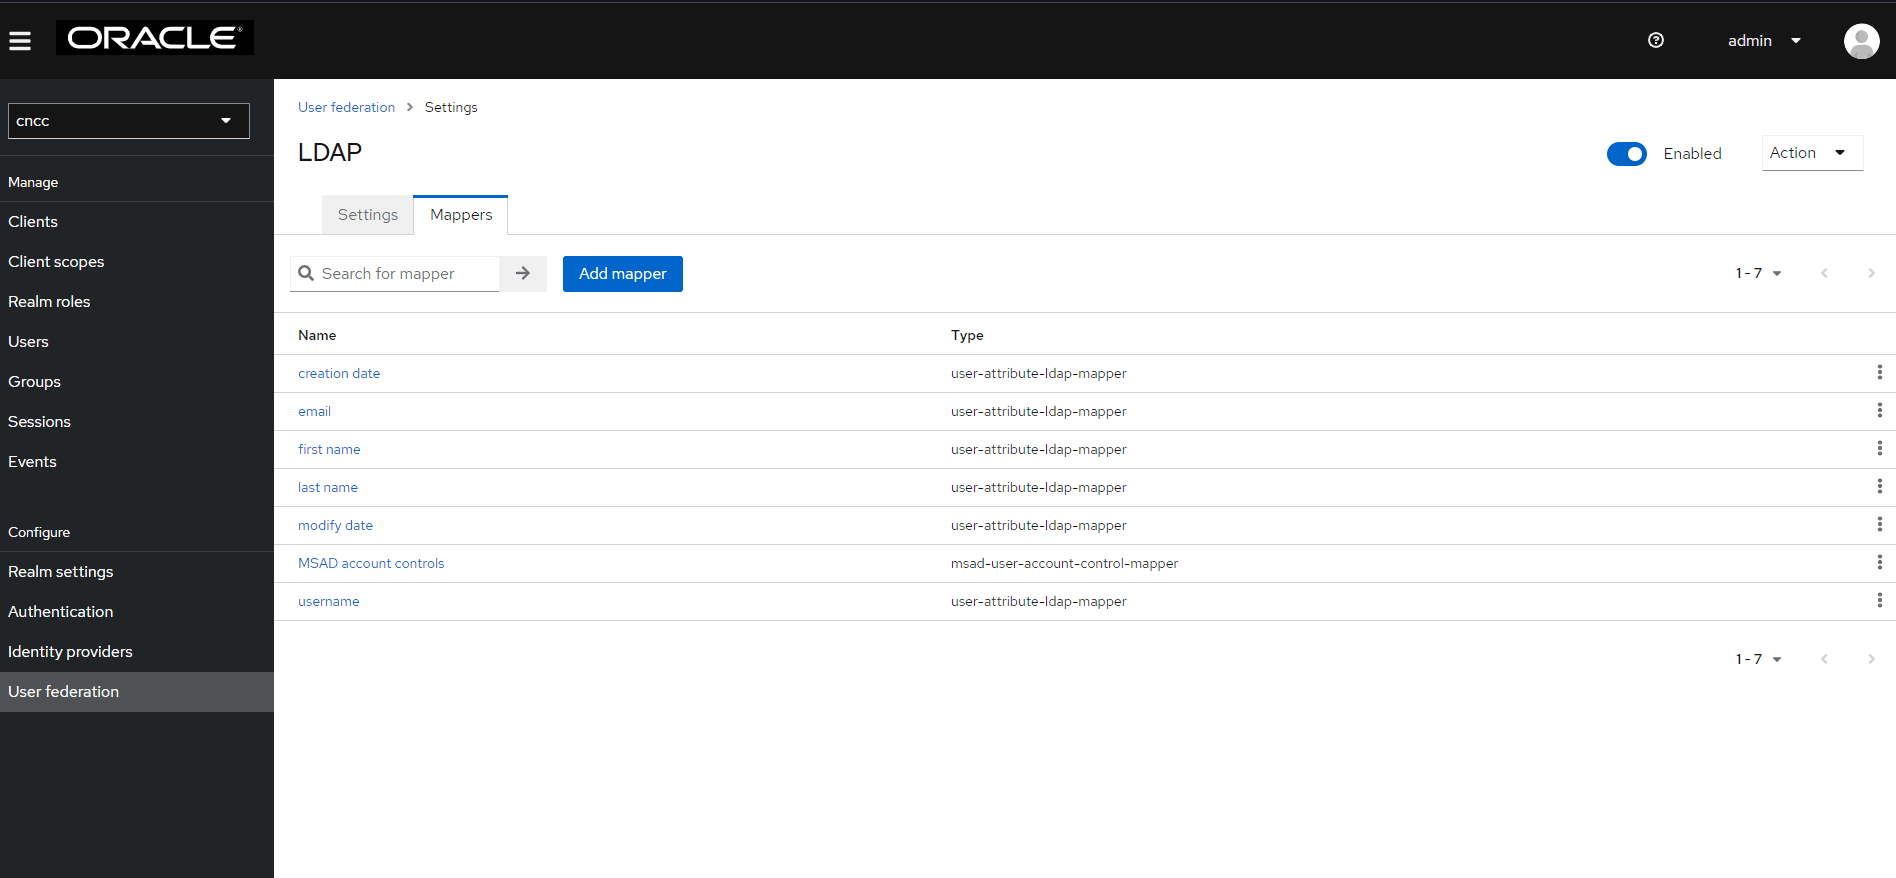
- Unser Configure in the left pane, click User Federation. Click
ldap and select the Mappers tab, and click Add
Mapper.
Figure 4-35 LDAP Mapper Page
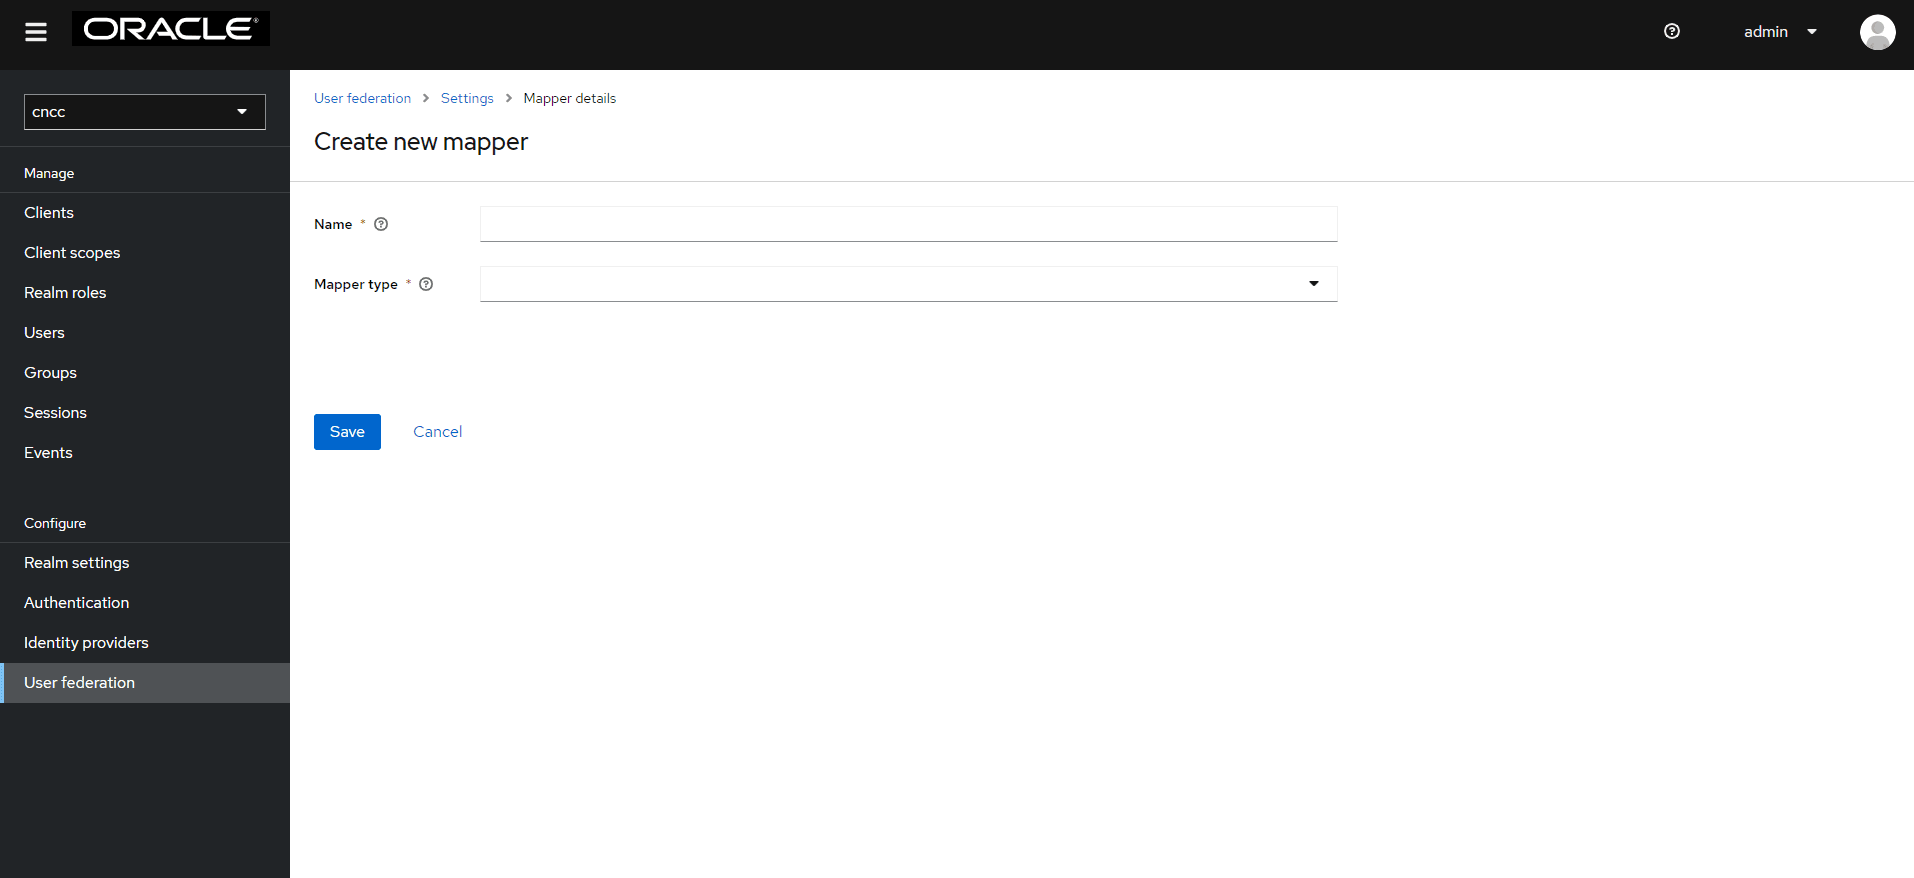
- The Create New Mapper
page appears. Give an appropriate name for the field Name. Select
group-ldap-mapper as Mapper Type drop down menu. Click Save.
Figure 4-36 User Federation Mapper Page
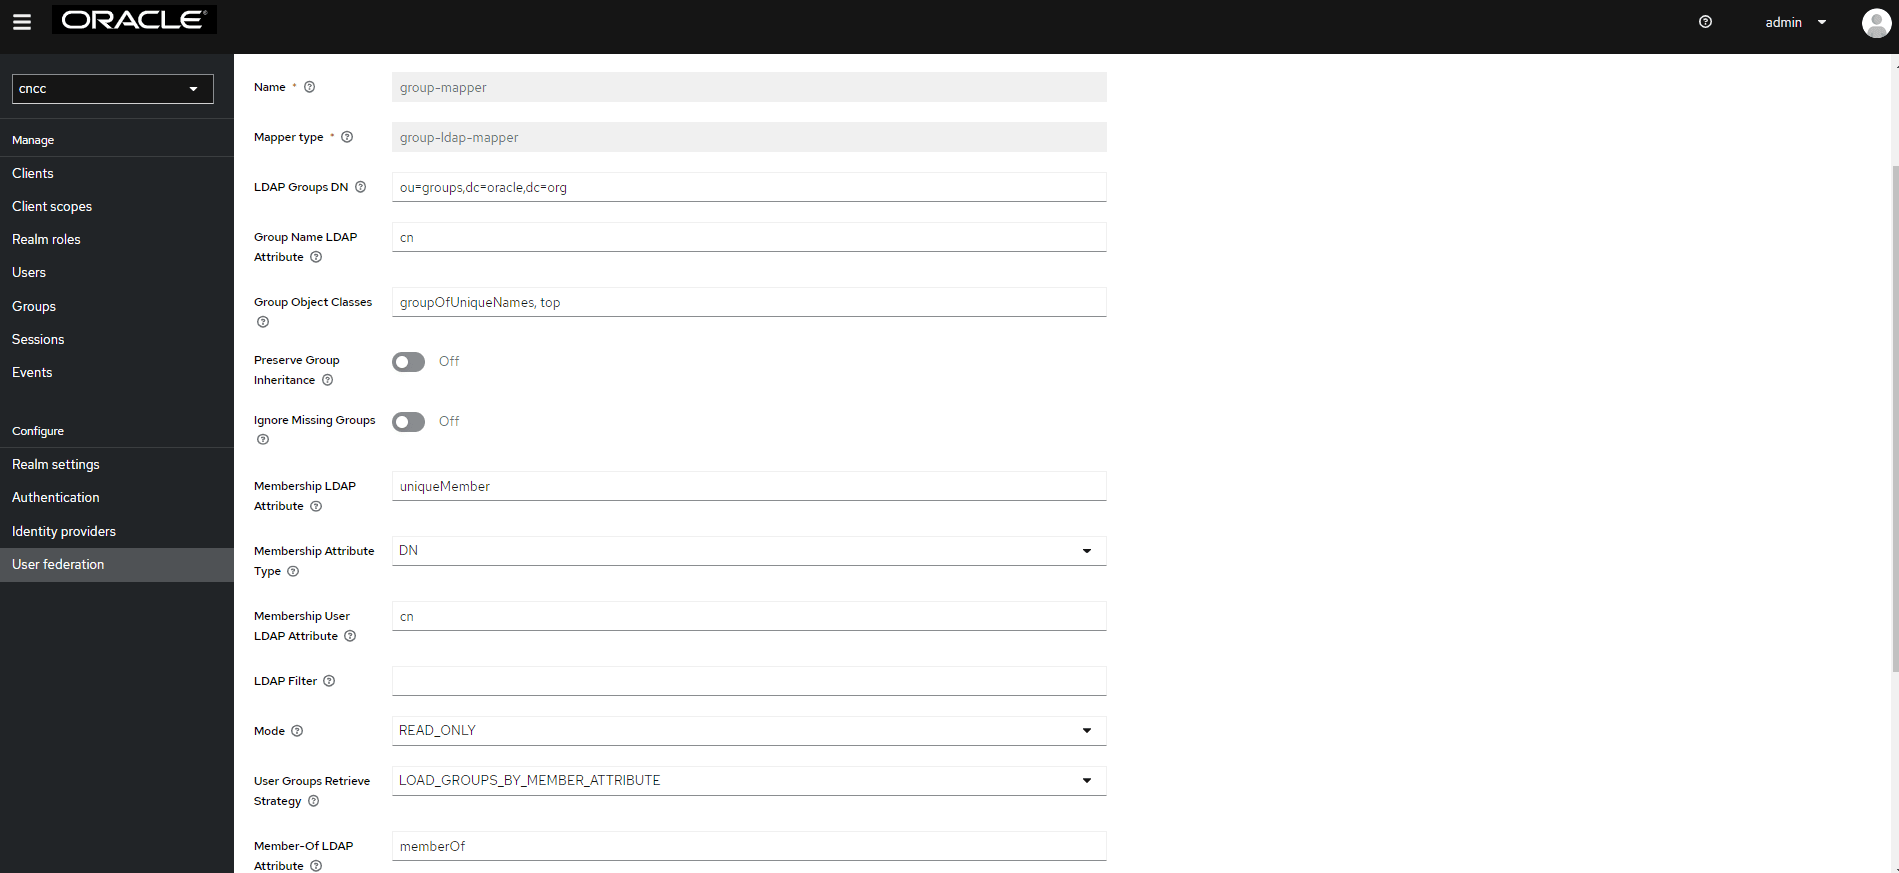
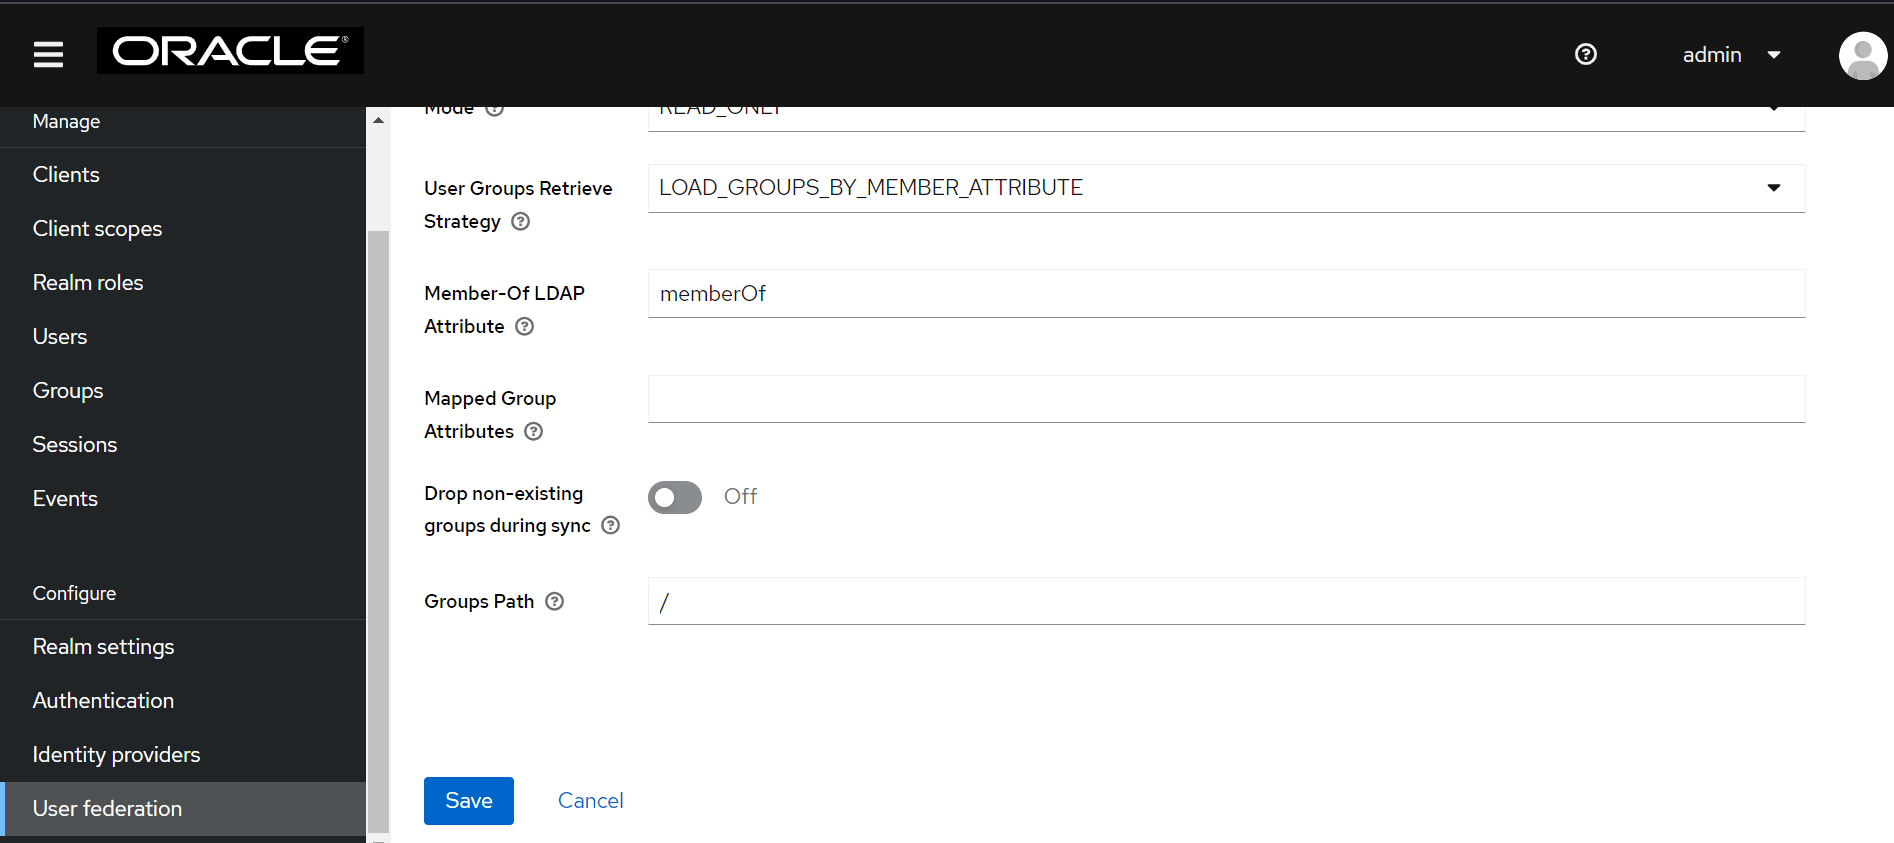
The following screen appears.
Figure 4-37 LDAP Mapper Filled Form
Note:
When selected, default values will be set by cncc-iam. But you need change some values based on your ldap records. - Click Save.
Figure 4-38 Save
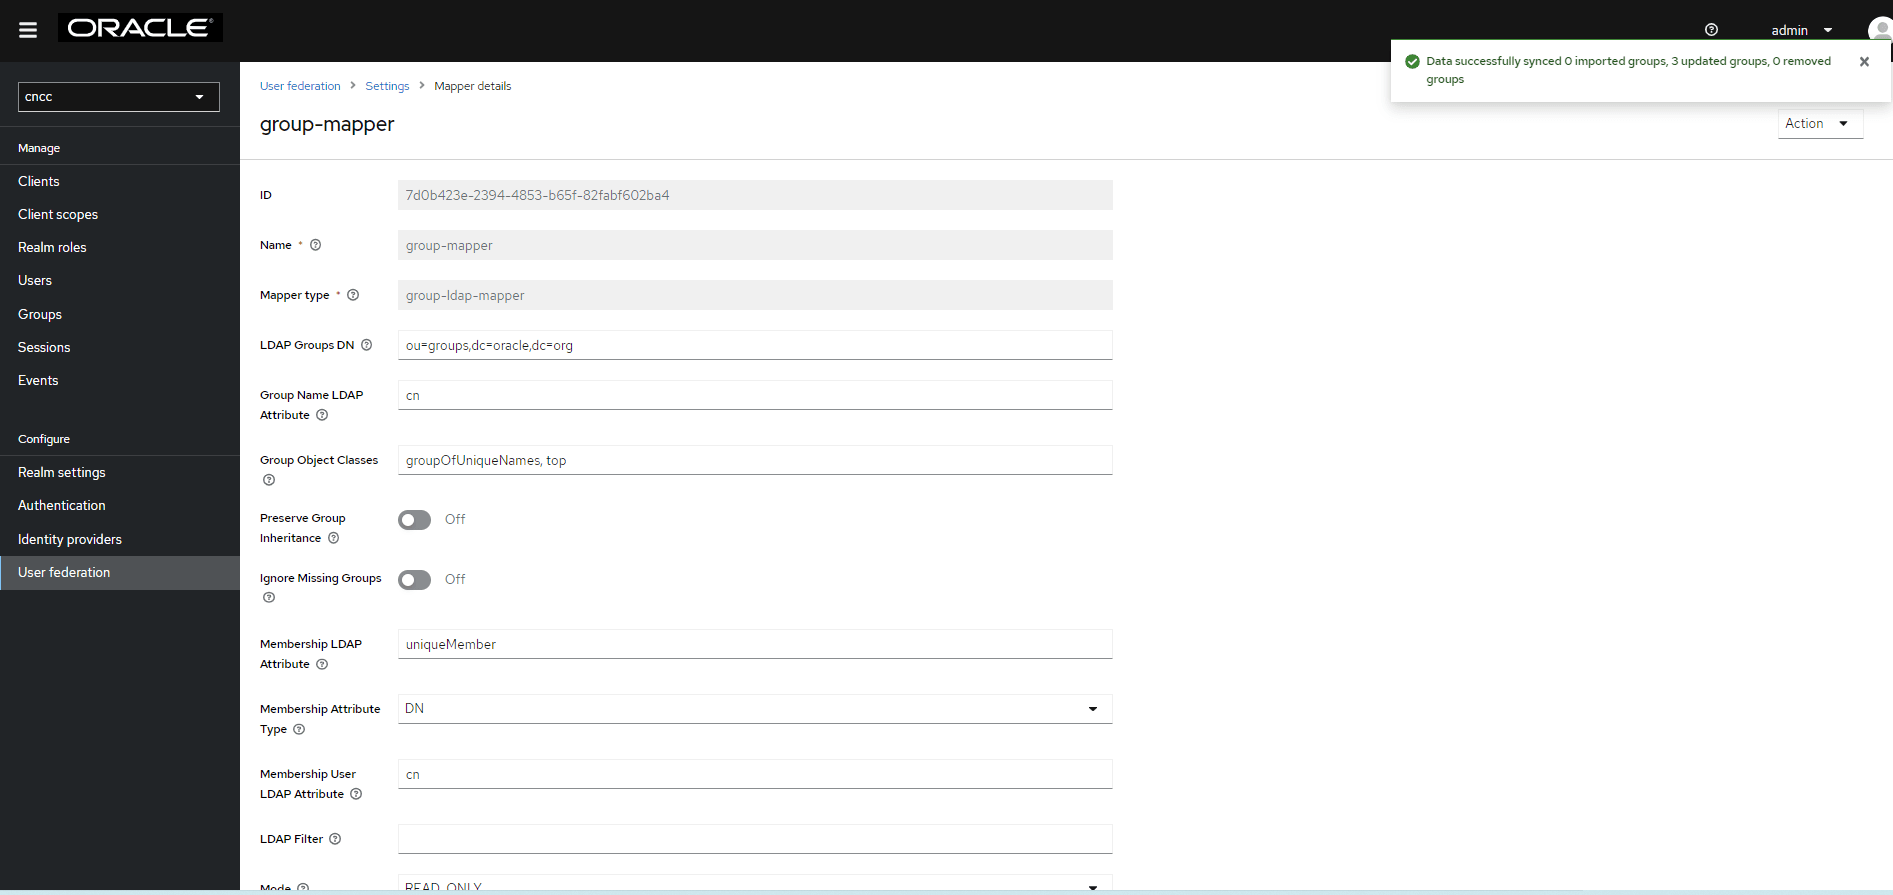
- click the name of your mapper. Under Action menu,
click Sync LDAP Groups to
Keyclaok. The success message appears with the number of groups
imported and so on.
Figure 4-39 Group Mapper
Note:
If this step fails then you might need to check to the trouble shooting section and look at cncc-iam logs in debug mode. See the Oracle Communication Cloud Native Configuration Console Troubleshooting Guide and see CNC Console Logs for further details. - Select the Groups in the
left pane to view all groups.
Figure 4-40 Groups

- Click any group and click Edit. The following tabs appear: Child groups, Attributes,
Role Mappings, and Members.
Figure 4-41 Role mapping to LDAP Group
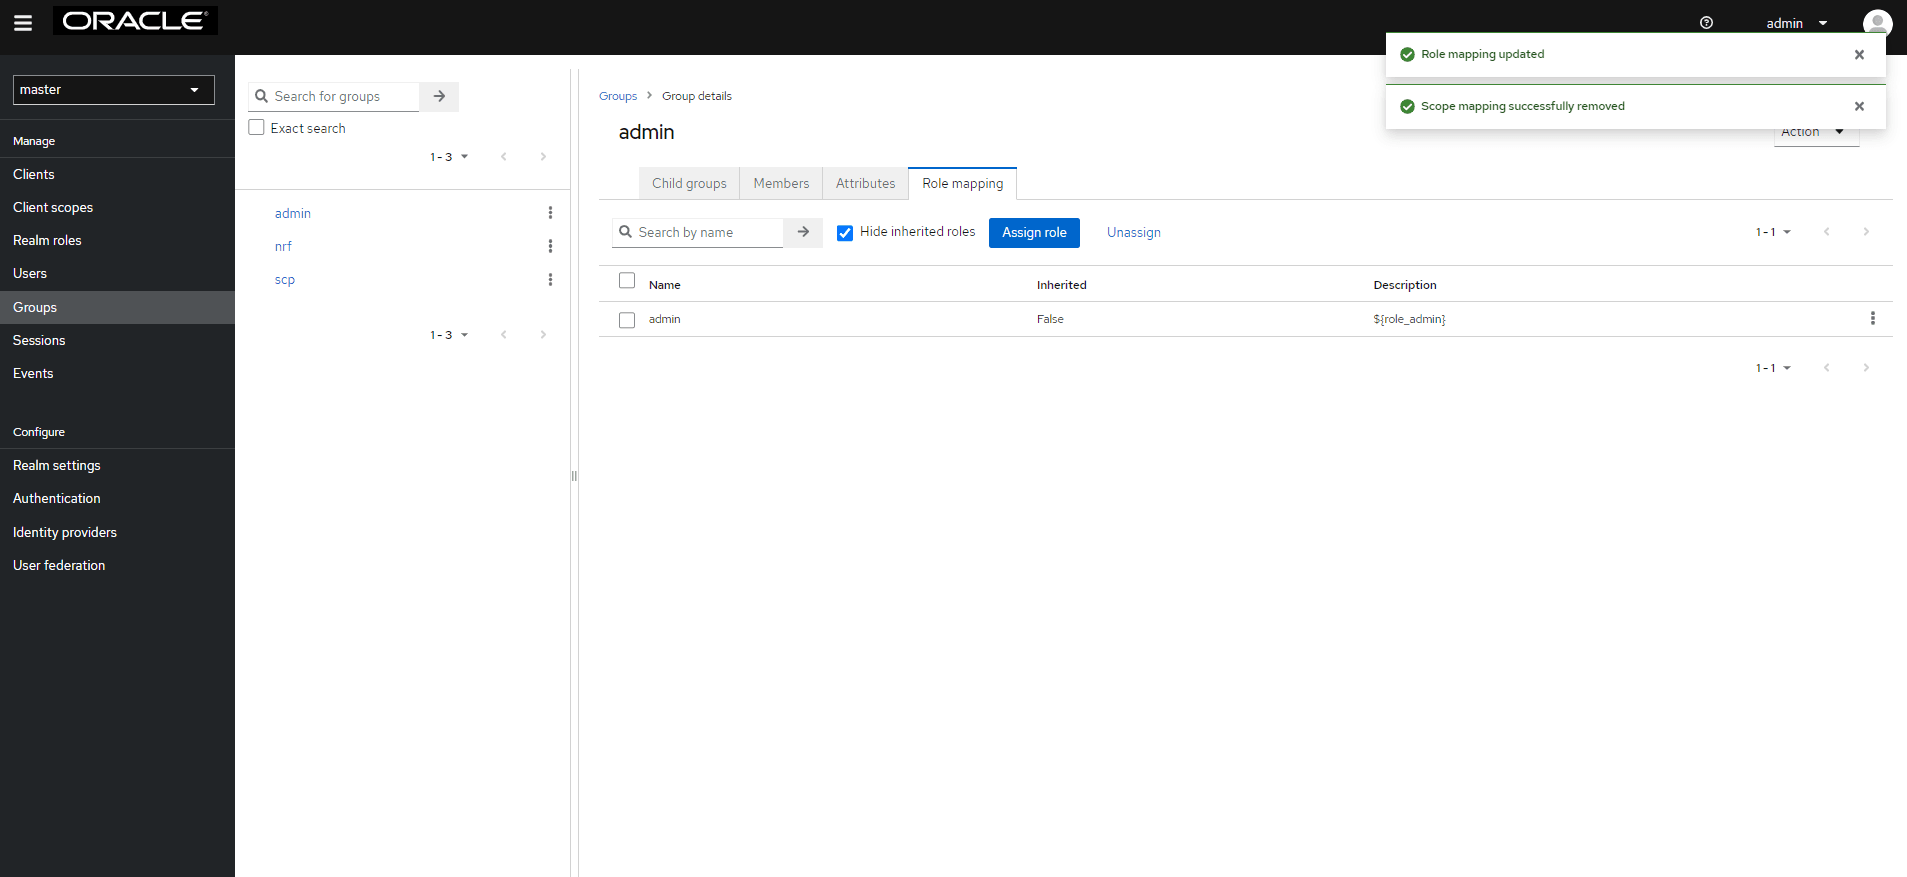
- Select Role Mapping tab to see a list of roles that are pre-defined in cncc-iam.
- Select one or more roles from Available Roles and assign it to the group. For example, If group "admin" is assigned with role "ADMIN", it means that any user which belongs to the admin group will be automatically assigned the admin role which allows him to access all the NF resource of CNC console that it supports.
- Once done you can test authentication and authorization by logging into CNC Console GUI.
Note:
- When the password of user is updated from CNCC-IAM and sent to LDAP, it is always sent in plain-text. This is different from updating the password to built-in CNCC-IAM database, when the hashing and salting is applied to the password before it is sent to DB. In the case of LDAP, the CNCC-IAM relies on the LDAP server to provide hashing and salting of passwords.
- Most of LDAP servers (Microsoft Active Directory, RHDS, FreeIPA) provide this by default. Some others (OpenLDAP, ApacheDS) may store the passwords in plain text by default and user need to explicitly enable password hashing for them.
4.5.2 Configuring User Federation with CNC Console IAM
This section provides information about configuring user federation with CNC Console IAM (LDAP Server integration).
- Login to CNC Console IAM console
http://<cncc-iam-ingress-ip>:<cncc-iam-ingress-port>
using admin credentials provided during CNC Console IAM installation.
Figure 4-42 Login Screen

- Click Realm
Settings and click Add
realm under Cncc. Click User Federationon the
left pane. The User
Federation screen appears in the right pane.
Figure 4-43 User Federation
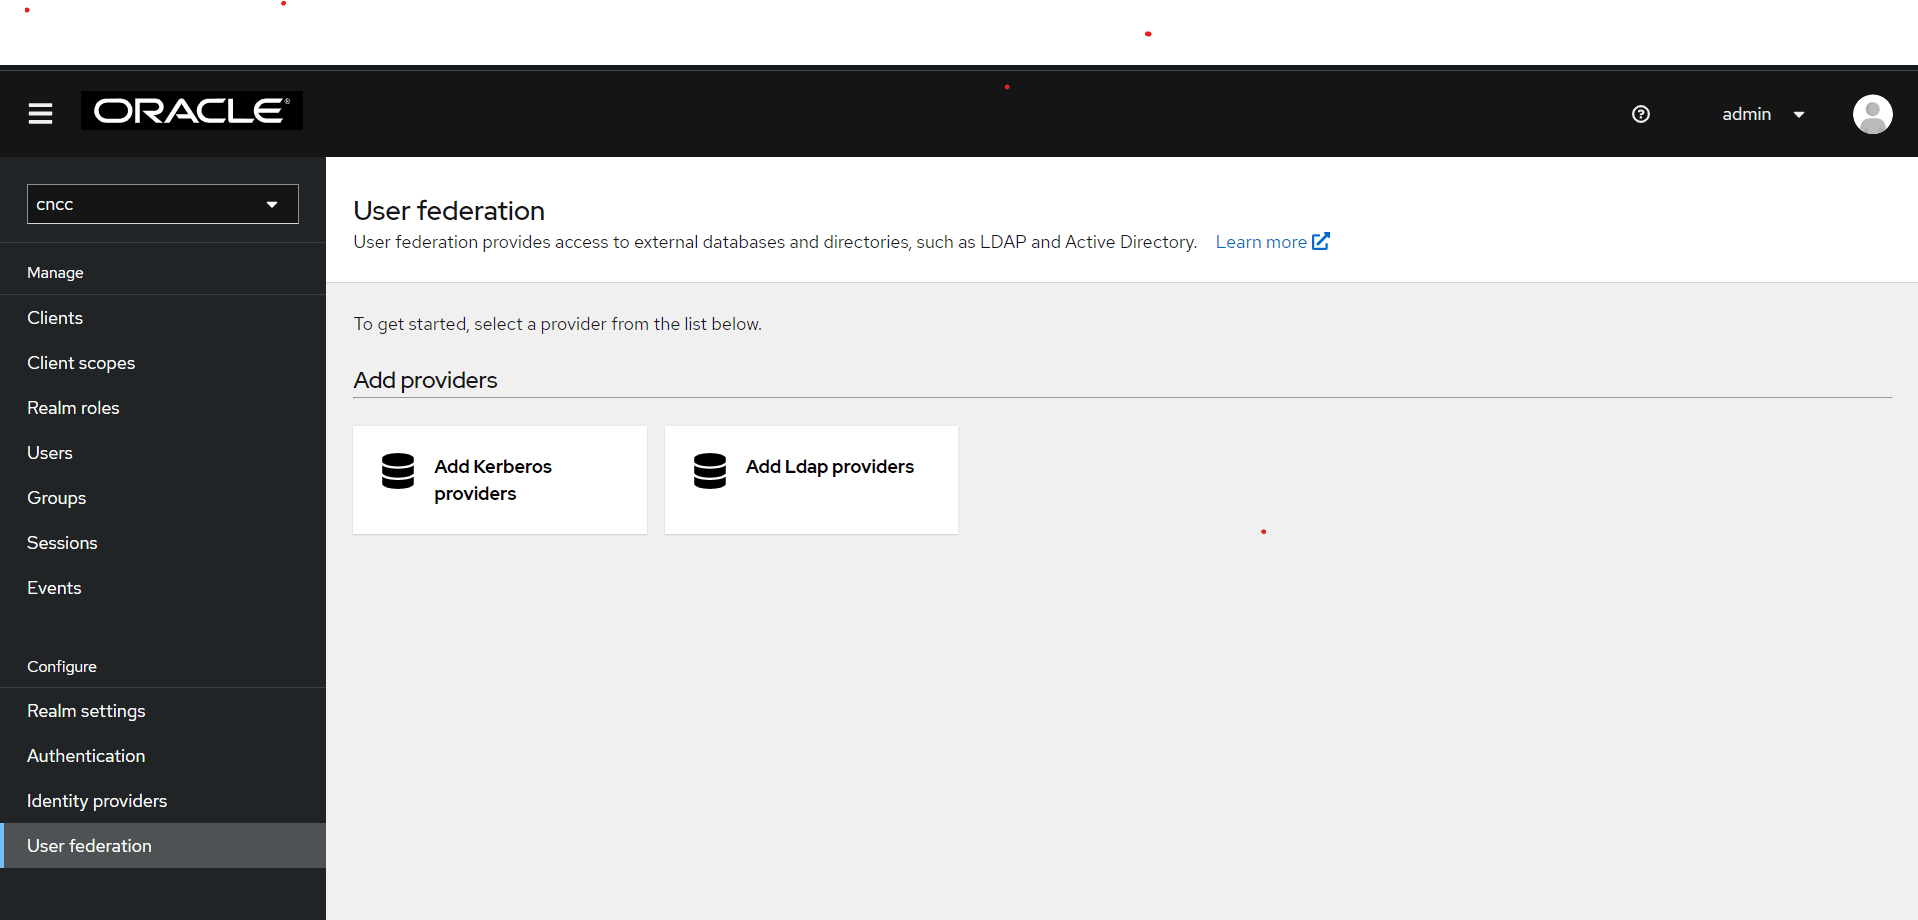
- Click Add LDAP providers. The following page will
automatically open a form to fill in your LDAP connection parameters. The form
will be initially empty as shown below:
Figure 4-44 Add LDAP providers
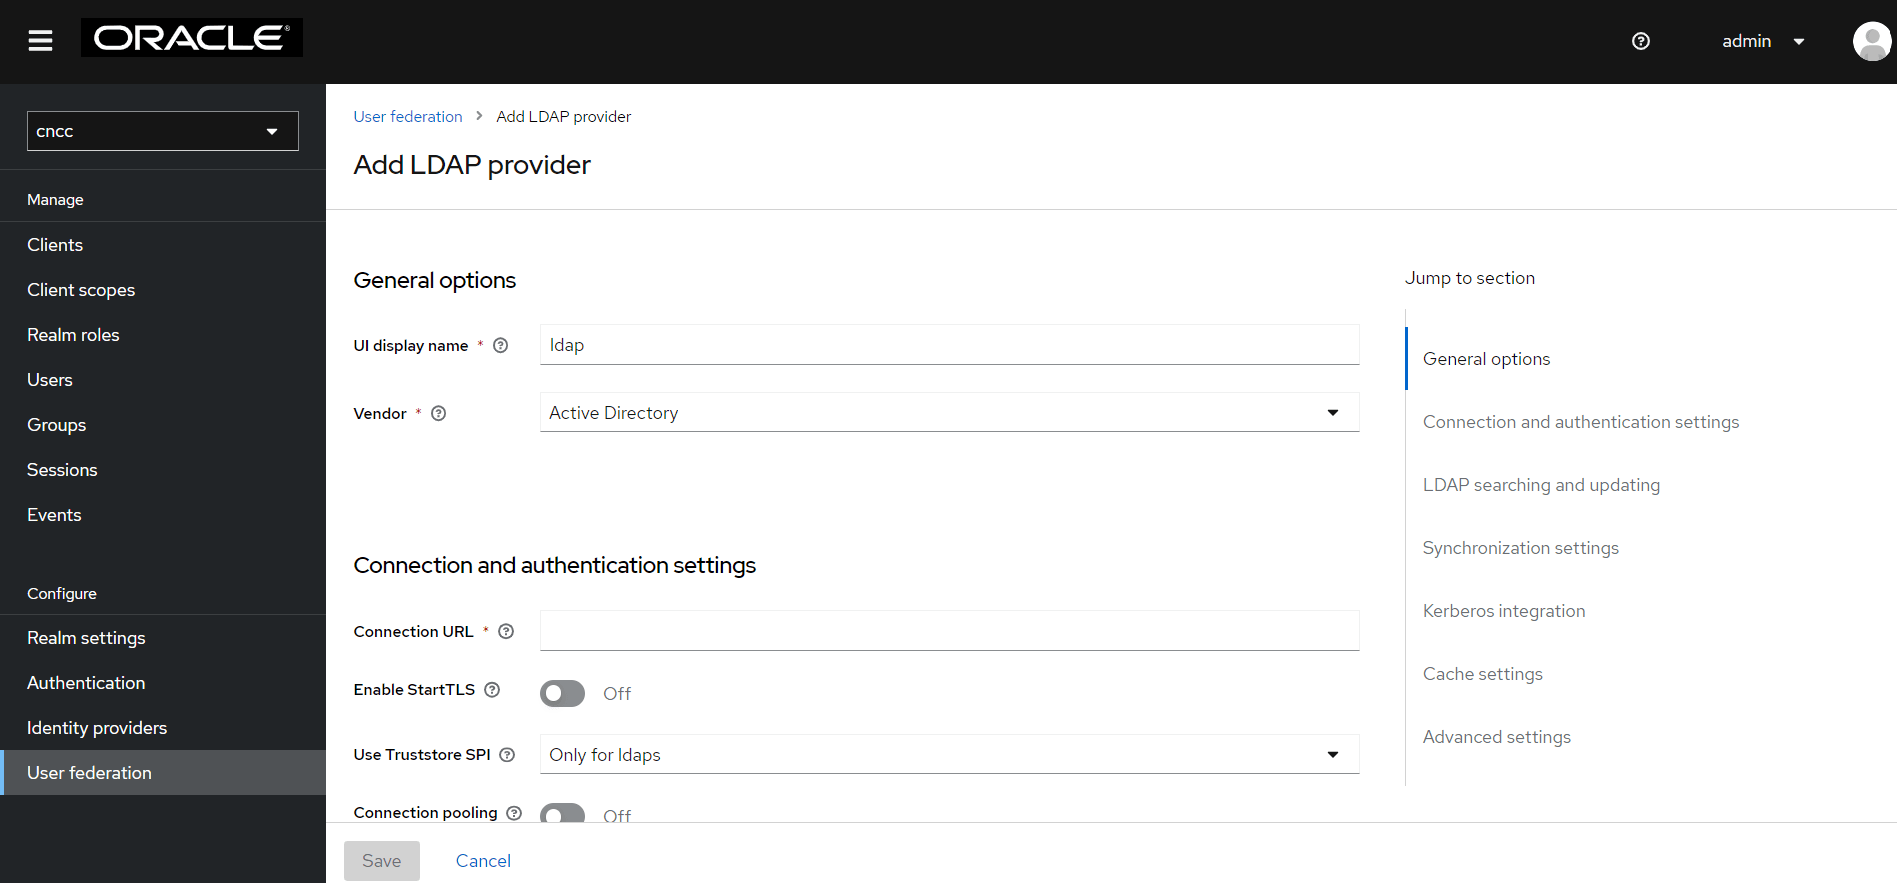
- Enter the values for the following fields:
- UI Display Name: Enter the display name.
- Vendor: Enter the LDAP server provider name for the company.
Note:
This usually populates the defaults for many fields. However, in case the user has a different setup than the defaults, the correct values must be provided. Current setup is Spring embedded LDAP, so select the last option 'Other' from the drop-down list.- Provide your company LDAP server details in the
Connection URL field, in the same way as you provided for
ldap-ldif file alread. That is, the connection URL (hostname
prefixed with ldap:// OR when LDAP Secure connection enabled (LDAPS)
hostname prefix should be ldaps://), and the port.
Figure 4-45 General Options
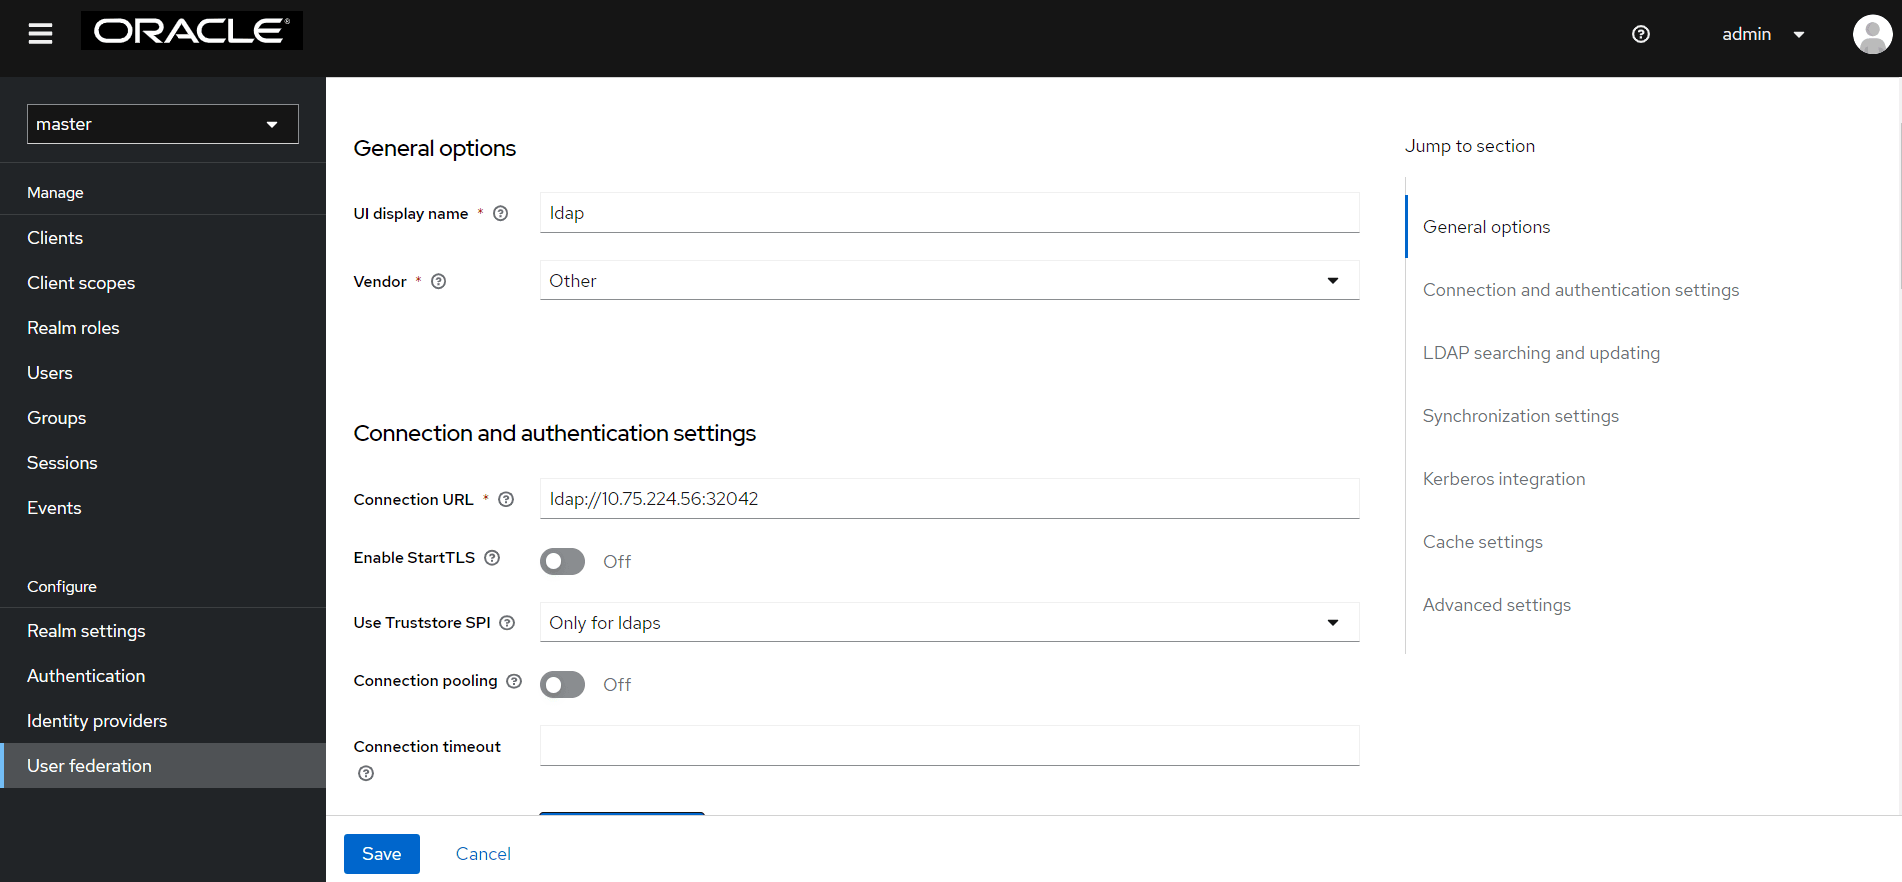
- If your LDAP is secured then select simple from the Bind Type drop-down, and add the admin bind username and password, or select Bind-type as none. Sample data for the field Bind DN: "cn=admin,dc=oracle,dc=org"
- Click Test Connection and Test Authentication. Both these tests will be successful.
- Proceed to the Edit Mode drop-down list. Select READ_ONLY.
- In most cases, the UUID LDAP attribute value is set as entry UUID. If you do not have a suitable value, use an alternate unique identifier.
- Click Test Connection and Test Authentication.
Figure 4-46 User Federation

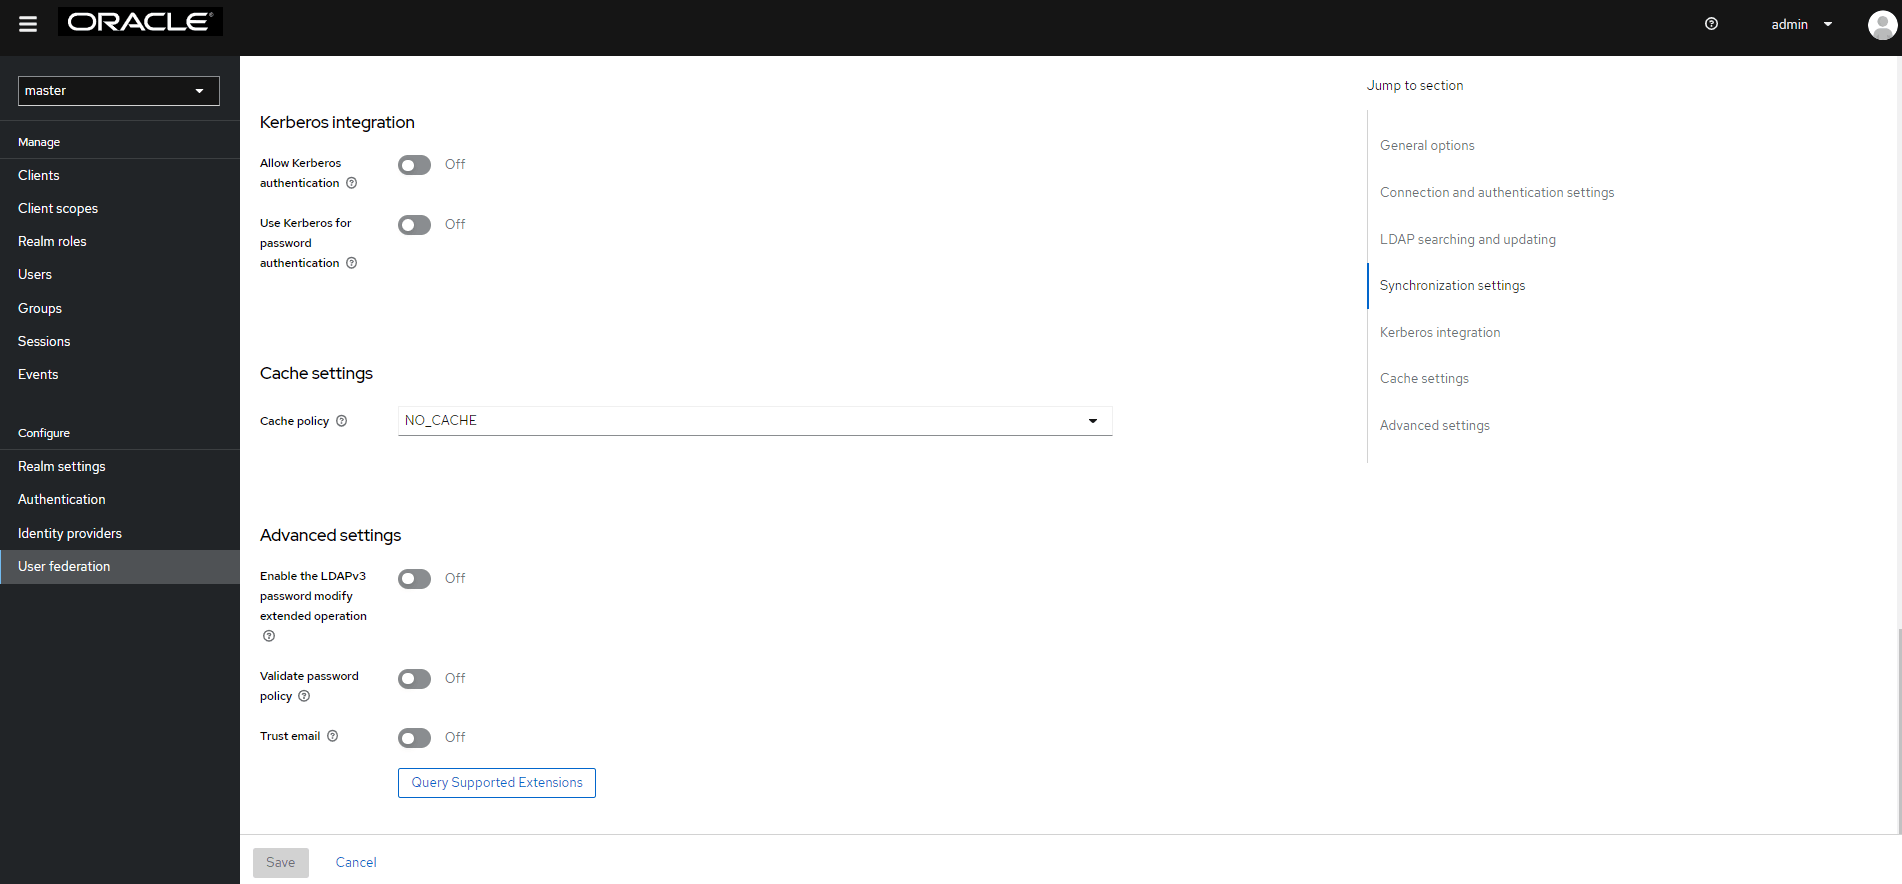
- The default setting for Import Users is ON. Change it to OFF to disable user sync.
- Set Cache policy as NO_CACHE.
- After populating the required fields, the following screen appears:
Figure 4-47 User Federation

- Click Save.
Figure 4-48 User Federation
Note:
Enabling and Disabling the Manage DSA IT Control in LDAP Requests:CNC Console IAM allows the user to enable or disable Manage DSA IT Control in the LDAP Requests sent from CNC Console IAM pods towards LDAP Server.
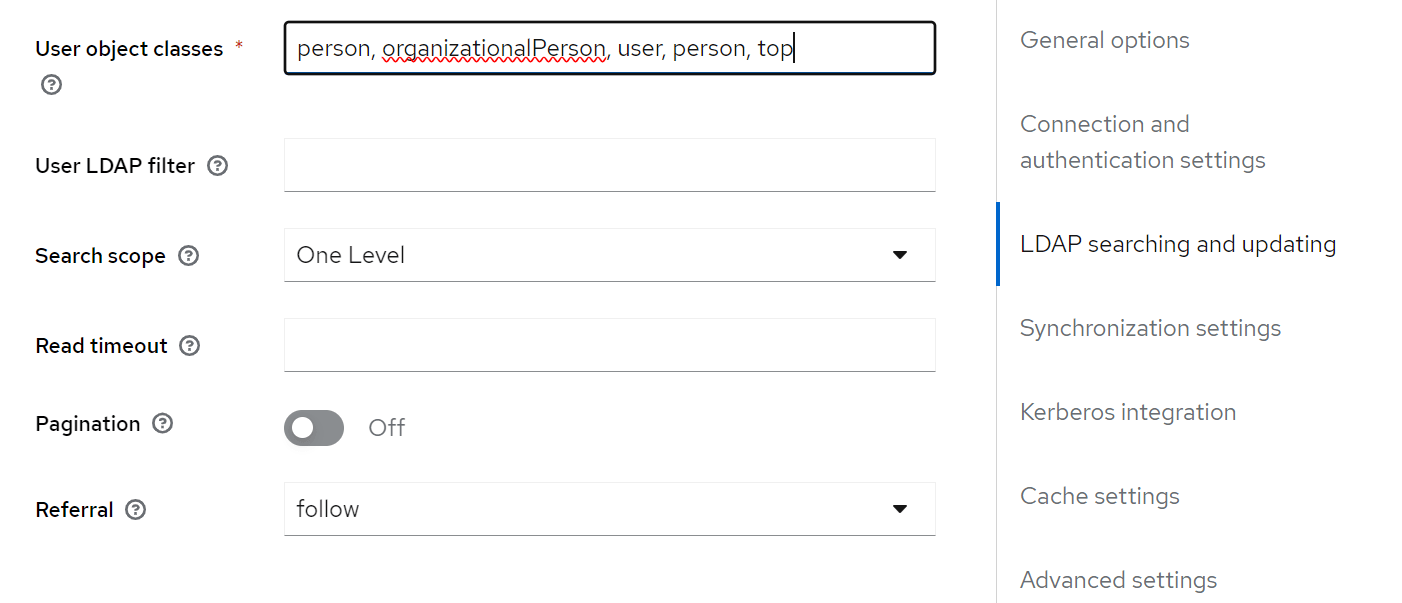
Manage DSA IT Control is enabled by default as Refferal is set to Ignore in the User Federation Setup.
This can be disabled by setting Referral to Follow.Figure 4-49 Enabling and Disabling the Manage DSA IT Control in LDAP Requests
