8 Maintenance Procedures
This chapter provides detailed instructions about how to maintain the CNE platform.
8.1 Accessing the CNE
This section describes the procedures to access an CNE for maintenance purposes.
8.1.1 Accessing the Bastion Host
This section provides information about how to access a CNE Bastion Host.
Prerequisites
- SSH private key must be available on the server or VM that is used to access the Bastion Host.
- The SSH private keys generated or provided during the installation must match the authorized key (public) present in the Bastion Hosts. For more information about the keys, see the installation prerequisites in Oracle Communications Cloud Native Core, Cloud Native Environment Installation, Upgrade, and Fault Recovery Guide.
Procedure
All commands must be run from a server or VM that has network access to the CNE Bastion Hosts. To access the Bastion Host, perform the following tasks.
8.1.1.1 Logging in to the Bastion Host
This section describes the procedure to log in to the Bastion Host.
- Determine the Bastion Host IP address.
Contact your system administrator to obtain the IP addresses of the CNE Bastion Hosts. The system administrator can obtain the IP addresses from the OpenStack Dashboard, VMware Cloud Director, or by other means such as from the BareMetal Hosts.
- To log in to the Bastion Host, run the following command:
Note:
The default value for<user_name>iscloud-user(for vCNE) oradmusr(for Baremetal).$ ssh -i /<ssh_key_dir>/<ssh_key_name>.key <user_name>@<bastion_host_ip_address>
8.1.1.2 Copying Files to the Bastion Host
This section describes the procedure to copy the files to the Bastion Host.
- Determine the Bastion Host IP address.
Contact your system administrator to obtain the IP addresses of the CNE Bastion Hosts. The system administrator can obtain the IP addresses from the Openstack Dashboard, VMware Cloud Director, or by other means such as from the BareMetal Hosts.
- To copy files to the Bastion Host, run the following
command:
$ scp -i /<ssh_key_dir>/<ssh_key_name>.key <source_file> <user_name>@<bastion_host_ip_address>:/<path>/<dest_file>
8.1.1.3 Managing Bastion Host
The Bastion Host comes with the following built-in scripts to manage the Bastion Hosts. These scripts are available in the /var/occne/cluster/$OCCNE_CLUSTER/artifacts/ directory:
- is_active_bastion
- get_active_bastion
- get_other_bastions
- update_active_bastion.sh
You don't have to change the directory to run these scripts. You can run these scripts from anywhere within a Bastion Host like a system command as the directory containing the scripts is a part of $PATH.
All the scripts interact with the bastion-controller pod and its database directly by querying it or updating it through Kubectl. Therefore, the commands will not run if the Kubernetes API is not reachable.
Subsequent sections provide the description for each of the commands.
For more information about the possible errors and troubleshooting, seeTroubleshooting Bastion Host.
8.1.1.3.1 Verifying if the Current Bastion Host is the Active One
This section describes the procedure to verify if the current Bastion
Host is the active one using the is_active_bastion script.
8.1.1.3.2 Getting the Host IP or Hostname of the Current Bastion Host
This section provides details about getting the Host IP or Hostname of
the current Bastion Host using the get_active_bastion script.
8.1.1.4 Troubleshooting Bastion Host
This section describes the issues that you may encounter while using Bastion Host and their troubleshooting guidelines.
Permission Denied Error While Running Kubernetes Command
Users may encounter "Permission Denied" error while running Kubernetes commands if there is no proper access.
error: error loading config file "/var/occne/cluster/occne1-rainbow/artifacts/admin.conf": open /var/occne/cluster/occne1-rainbow/artifacts/admin.conf: permission deniedVerify permission access to
admin.conf. The user running the command must be able to
run basic kubectl commands to use the Bastion
scripts.
Commands Take Too Long to Respond and Fail to Return Output
A command may take too long to display any output. For example,
running the is_active_bastion command may take too long to
respond leading to the timed out error.
error: timed out waiting for the condition- Verify the status of the bastion-controller. This error can occur if the pods are not running or in a crash state due to various reasons such as lack of resources at the cluster.
- Print the bastion controller logs to check the issue. For example, print the
logs and check if a loop crash error is caused due to lack of
resources.
$ kubectl logs -n ${OCCNE_NAMESPACE} deploy/occne-bastion-controllerSample output:Error from server (BadRequest): container "bastion-controller" in pod "occne-bastion-controller-797db5f845-hqlm6" is waiting to start: ContainerCreating
Command Not Found Error
User may encounter command not found error while
running a script.
-bash: is_active_bastion: command not found$PATH variable is set properly and contains the artifacts directory.
Note:
By default, CNE sets up the path automatically during the installation.$ echo $PATH$PATH:/home/cloud-user/.local/bin:/home/cloud-user/bin:/usr/local/bin:/usr/bin:/usr/local/sbin:/usr/sbin:/var/occne/cluster/occne1-rainbow/artifacts/var/occne/cluster/occne1-rainbow/artifacts8.2 General Configuration
This section describes the general configuration tasks for CNE.
8.2.1 Configuring SNMP Trap Destinations
This section describes the procedure to set up SNMP notifiers within CNE, such that the AlertManager can send alerts as SNMP traps to one or more SNMP receivers.
- Perform the following steps to verify the cluster condition before setting up
multiple trap receivers:
- Run the following command and verify that the
alertmanagerandsnmp-notifierservices are running:$ kubectl get services --all-namespaces | grep -E 'snmp-notifier|alertmanager'Sample output:NAMESPACE NAME TYPE CLUSTER-IP EXTERNAL-IP PORT(S) AGE occne-infra occne-kube-prom-stack-kube-alertmanager LoadBalancer 10.233.16.156 10.75.151.178 80:31100/TCP 11m occne-infra occne-alertmanager-snmp-notifier ClusterIP 10.233.41.30 <none> 9464/TC 11m - Run the following command and verify that the
alertmanagerandsnmp-notifierpods are running:$ kubectl get pods --all-namespaces | grep -E 'snmp-notifier|alertmanager'Sample output:occne-infra alertmanager-occne-kube-prom-stack-kube-alertmanager-0 2/2 Running 0 18m occne-infra alertmanager-occne-kube-prom-stack-kube-alertmanager-1 2/2 Running 0 18m occne-infra occne-alertmanager-snmp-notifier-744b755f96-m8vbx 1/1 Running 0 18m
- Run the following command and verify that the
- Perform the following steps to edit the default
snmp-destinationand add a newsnmp-destination:- Run the following command from Bastion Host to get the current
snmp-notifierresources:$ kubectl get all -n occne-infra | grep snmpSample output:pod/occne-alertmanager-snmp-notifier-75656cf4b7-gw55w 1/1 Running 0 37m service/occne-alertmanager-snmp-notifier ClusterIP 10.233.29.86 <none> 9464/TCP 10h deployment.apps/occne-alertmanager-snmp-notifier 1/1 1 1 10h replicaset.apps/occne-alertmanager-snmp-notifier-75656cf4b7 1 1 1 37m - The
snmp-destinationis the interface IP address of the trap receiver to get the traps. Edit the deployment to modifysnmp-destinationand add a newsnmp-destinationwhen needed:- Run the following command to edit the
deployment:
$ kubectl edit -n occne-infra deployment occne-alertmanager-snmp-notifier - From the vi editor, move down to the
snmp-destinationsection. The default configuration is as follows:- --snmp.destination=127.0.0.1:162 - Add a new destination to receive the traps.
For example:
- --snmp.destination=192.168.200.236:162 - If want to add multiple trap receivers, add them in multiple new
lines.
For example:
- --snmp.destination=192.168.200.236:162 - --snmp.destination=10.75.135.11:162 - --snmp.destination=10.33.64.50:162 - After editing, use the
:xor:wqcommand to save the exit.Sample output:deployment.apps/occne-alertmanager-snmp-notifier edited
- Run the following command to edit the
deployment:
- Perform the following steps to verify the new replicaset and delete the old
replicaset:
- Run the following command to get the resource and check the restart
time to verify that the pod and replicaset are
regenerated:
$ kubectl get all -n occne-infra | grep snmpSample output:pod/occne-alertmanager-snmp-notifier-88976f7cc-xs8mv 1/1 Running 0 90s service/occne-alertmanager-snmp-notifier ClusterIP 10.233.29.86 <none> 9464/TCP 10h deployment.apps/occne-alertmanager-snmp-notifier 1/1 1 1 10h replicaset.apps/occne-alertmanager-snmp-notifier-75656cf4b7 0 0 0 65m replicaset.apps/occne-alertmanager-snmp-notifier-88976f7cc 1 1 1 90s - Identify the old replicaset from the previous step and delete it.
For example, the restart time of the
replicaset.apps/occne-alertmanager-snmp-notifier-75656cf4b7in the previous step output is 65m. This indicates that it is the old replica set. Use the following command to delete the old replicaset:$ kubectl delete -n occne-infra replicaset.apps/occne-alertmanager-snmp-notifier-75656cf4b7
- Run the following command to get the resource and check the restart
time to verify that the pod and replicaset are
regenerated:
- Port 162 of the server must be open and have some application to catch the
traps to test if the new trap receiver receives the SNMP traps. This step
may vary depending on the type of server. The following codeblock provides
an example for Linux
server:
$ sudo iptables -A INPUT -p udp -m udp --dport 162 -j ACCEPT
$ sudo dnf install -y tcpdump
$ sudo tcpdump -n -i <interface of the ip address set in snmp-destination> port 162
- Run the following command from Bastion Host to get the current
8.2.2 Changing Network MTU
This section describes the procedure to modify the Maximum Transmission Unit (MTU) of the Kubernetes internal network after the initial CNE installation.
Prerequisites:
- Ensure that the cluster runs in a healthy state.
- The commands in this procedure must be primarily run from the active CNE Bastion Host unless specified otherwise.
Note:
Ensure that thesecrets.ini file is present and is rightly
configured. Refer to the "Configuring secrets.ini and occne.ini Files" section
in Oracle Communications Cloud Native Core, Cloud Native Environment
Installation, Upgrade, and Fault Recovery Guide.
Changing MTU on Internal Interface for vCNE (OpenStack or VMware)
Note:
- The MTU value on the VM host depends on the ToR switch configuration:
- cisco Nexus9000 93180YC-EX has
"system jumbomtu"up to 9216. - If you're using
port-channel/vlan-interface/uplnk-interface-to-customer-switch, then run the"system jumbomtu <mtu>"command and configure"mtu <value>"up to the value obtained from the command. - If you're using other types of ToR switches, you can configure the MTU value of VM host up to the maximum MTU value of the switch. Therefore, check the switches for the maximum MTU value and configure the MTU value accordingly.
- cisco Nexus9000 93180YC-EX has
- The following steps are for a standard setup with bastion-1 or master-1 on host-1, bastion-2 or master-2 on host-2, and master-3 on host-3. If you have a different setup, then modify the commands accordingly. Each step in this procedure is performed to change MTU for the VM host and the Bastion on the VM host.
- SSH to k8s-host-2 from
bastion-1:
$ ssh k8s-host-2 - Run the following command to show all the
connections:
$ nmcli con show - Run the following commands to modify the MTU value on all the
connections:
Note:
Modify the connection names in the following commands according to the connection names obtained from step 2.$ sudo nmcli con mod bond0 802-3-ethernet.mtu <MTU value> $ sudo nmcli con mod bondbr0 802-3-ethernet.mtu <MTU value> $ sudo nmcli con mod "vlan<mgmt vlan id>-br" 802-3-ethernet.mtu <MTU value> - Run the following commands if there is
vlan<ilo_vlan_id>-bron this host:$ sudo nmcli con mod "vlan<ilo vlan id>-br" 802-3-ethernet.mtu <MTU value> $ sudo nmcli con up "vlan<ilo vlan id>-br"Note:
- The following
sudo nmcli con upcommands takes effect on the MTU values modified in the previous step. Ensure that you perform the following steps in the given in the given order. Not following the correct order can make the host-2 and bastion-2 unreachable. - The base interface has higher MTU during the sequence. For the
bond0interface,bond0 MTUis greater than or equal to thebondbr0 MTUandvlan bridgeinterface. Thebond0.<vlan id>interface MTU is modified whenvlan<vlan id>-brinterface is modified and restarted.
- The following
- Run the following commands if the <MTU value> is lower
than the old
value:
$ sudo nmcli con up "vlan<mgmt vlan id>-br" $ sudo nmcli con up bond0br0 $ sudo nmcli con up bond0 - Run the following commands if the <MTU value> is higher than the old
value:
$ sudo nmcli con up bond0 $ sudo nmcli con up bond0br0$ $ sudo nmcli con up "vlan<mgmt vlan id>-br" - After the values are updated on VM host, run the following
commands to shut down all the VM
guests:
$ sudo virsh list --all
$ sudo virsh shutdown <VM guest>
where,
<VM guest>is the VM guest name obtained from the$ sudo virsh list --allcommand. - Run the
virsh listcommand until the status of the VM guest is changed to"shut off":$ sudo virsh list --all - Run the following command to start the VM
guest:
$ sudo virsh start <VM guest>where,
<VM guest>is the name of the VM guest. - Exit from host-2 and return to bastion-1. Wait until bastion-2
is reachable and run the following command to SSH to
bastion-2:
$ ssh bastion-2 - Run the following command to list all connections in
bastion-2:
$ nmcli con show - Run the following commands to modify the MTU value on all the
connections in bastion-2:
Note:
Modify the connection names in the following commands according to the connection names obtained in step 2.$ sudo nmcli con mod "System enp1s0" 802-3-ethernet.mtu <MTU value> $ sudo nmcli con mod "System enp2s0" 802-3-ethernet.mtu <MTU value> $ sudo nmcli con mod "System enp3s0" 802-3-ethernet.mtu <MTU value> $ sudo nmcli con up "System enp1s0" $ sudo nmcli con up "System enp2s0" $ sudo nmcli con up "System enp3s0" - Wait until bastion-2 is reachable and run the following command
to SSH to bastion-2:
$ ssh bastion-2 - Repeat steps 9 and 10 to change the MTU value on k8s-host-1 and bastion-1.
- Repeat steps 1 to 10 to change the MTU values on k8s-host-3 and
restart all VM guests on it. You can use bastion-1 or bastion-2 for
performing this step.
Note:
For the VM guests that are controller nodes, perform only thevirsh shutdownandvirsh startcommands to restart the VM guests. The MTU values of these controller nodes are updated in the following section.
Changing MTU on enp1s0 or bond0 Interface for BareMetal Controller or Worker Nodes
- Run the following command to launch the provision
container:
$ podman run -it --rm --network host -v /var/occne/cluster/${OCCNE_CLUSTER}:/host winterfell:5000/occne/provision:<release> /bin/bashWhere, <release> is the currently installed release.
This creates a Bash shell session running within the provision container.
- Run the following commands to change enp1s0 interfaces for controller nodes and
validate MTU value of the interface:
- Change enp1s0 interfaces for controller nodes:
Replace <MTU value> in the command with a real integer value.
$ ansible -i /host/hosts.ini kube-master -m shell -a 'sudo nmcli con mod "System enp1s0" 802-3-ethernet.mtu <MTU value>; sudo nmcli con up "System enp1s0"' - Validate the MTU value of the
interface:
$ ansible -i /host/hosts.ini kube-master -m shell -a 'ip link show enp1s0'
- Change enp1s0 interfaces for controller nodes:
- Run the following commands to change bond0 interfaces for worker nodes and validate
the MTU value of the interface:
- Change bond0 interfaces for controller nodes:
Replace <MTU value> in the command with a real integer value.
$ ansible -i /host/hosts.ini kube-node -m shell -a 'sudo nmcli con mod bond0 802-3-ethernet.mtu <MTU value>; sudo nmcli con up bond0' - Validate the MTU value of the
interface:
$ ansible -i /host/hosts.ini kube-node -m shell -a 'ip link show bond0'
$ exit
- Change bond0 interfaces for controller nodes:
- Log in to the Bastion host and run the following
command:
$ kubectl edit daemonset calico-node -n kube-system - Locate the line with FELIX_VXLANMTU and replace the current
<MTU value>with the new integer value:Note:
vxlan.calicohas an extra header in the packet. The modified MTU value must be at least 50 lower than the MTU set in previous steps to work.- name: FELIX_VXLANMTU value: "<MTU value>" - Use
:xto save and exit the vi editor and run the following command to perform a rollout restart:$ kubectl rollout restart daemonset calico-node -n kube-system - Run the following command to provision
container:
$ podman run -it --rm --network host -v /var/occne/cluster/${OCCNE_CLUSTER}:/host winterfell:5000/occne/provision:${OCCNE_VERSION} /bin/bash - Validate the MTU value of the interface on the controller nodes
and worker nodes:
- For BareMetal, run the following command to validate
the MTU
value:
$ ansible -i /host/hosts.ini k8s-cluster -m shell -a 'ip link show vxlan.calico' - For vCNE (OpenStack or VMware), run the following
command to validate the MTU
value:
$ ansible -i /host/hosts k8s-cluster -m shell -a 'ip link show vxlan.calico'Note:
It takes some time for all the nodes to change to the new MTU. If the MTU value isn't updated, run the command several times to see the changes in the values.
- For BareMetal, run the following command to validate
the MTU
value:
- Run the following command from the Bastion Host to edit
configmap calico-config:$ kubectl edit configmap calico-config -n kube-system "mtu": 1500, → "mtu": <MTU value>, - Run the following command to restart daemonset:
$ kubectl rollout restart daemonset calico-node -n kube-system - The change in Calico interface MTU takes effect when a new pod on the node
is started. The following codeblock provides an example to restart
occne-kube-prom-stack-grafanadeployment. Verify that the deployment is READY 1/1 before you delete and reapply:$ kubectl rollout restart deployment occne-kube-prom-stack-grafana -n occne-infra - Run the following commands to verify the MTU change on worker
nodes:
- Verify which node has the new
pod:
$ kubectl get pod -A -o wide | grep occne-kube-prom-stack-grafanaSample output:occne-infra occne-kube-prom-stack-grafana-79f9b5b488-cl76b 3/3 Running 0 60s 10.233.120.22 k8s-node-2 <none> <none>
- Use SSH to log in to the node and check the calico
interface change. Only the last interface MTU changes due to new pod
for the services. Other Calico interface MTU changes when other
services are
changed.
$ ssh k8s-node-2

$ ip link
Sample output:... 35: calia44682149a1@if4: <BROADCAST,MULTICAST,UP,LOWER_UP> mtu 1480 qdisc noqueue state UP mode DEFAULT group default link/ether ee:ee:ee:ee:ee:ee brd ff:ff:ff:ff:ff:ff link-netns cni-7f1a8116-5acf-b7df-5d6a-eb4f56330cf1 115: calif0adcd64a1c@if4: <BROADCAST,MULTICAST,UP,LOWER_UP> mtu <MTU value> qdisc noqueue state UP mode DEFAULT group default link/ether ee:ee:ee:ee:ee:ee brd ff:ff:ff:ff:ff:ff link-netns cni-7b99dc36-3b3b-75c6-e27c-9045eeb8242d
- Verify which node has the new
pod:
- Reboot all worker nodes if possible. In this case, all pods get restarted
and all cali* interfaces have the new
MTU:
$ ssh <worker node>$ sudo reboot
8.2.3 Changing Metrics Storage Allocation
The following procedure describes how to increase the amount of persistent storage allocated to Prometheus for metrics storage.
Prerequisites
Note:
When you increase the storage size for Prometheus, the retention size must also be increased to maintain the purging cycle of Prometheus. The default retention is set to 6.8 GB. If the storage is increased to a higher value and retention remains at 6.8 GB, the amount of data that is stored inside the storage is still 6.8 GB. Therefore, follow the Changing Retention Size of Prometheus procedure to calculate the retention size and update the retention size in Prometheus. These steps are applied while performing Step 3.Procedure
8.2.4 Changing OpenSearch Storage Allocation
This section describes the procedure to increase the amount of persistent storage allocated to OpenSearch for data storage.
Prerequisites
- Calculate the revised amount of persistent storage required by
OpenSearch. Rerun the OpenSearch storage calculations as provided in the
"Preinstallation Taks" section of Oracle Communications Cloud Native Core, Cloud Native Environment
Installation, Upgrade, and Fault Recovery Guide, and record the calculated
log_trace_active_storageandlog_trace_inactive_storagevalues.
Procedure
log_trace_active_storage for opensearch-data PV size and
log_trace_inactive_storage for opensearch-master PV size. The
following table displays the sample PV sizes considered in this procedure:
| OpenSearch Component | Current PV Size | Desired PV Size |
|---|---|---|
| occne-opensearch-master | 500Mi | 500Mi |
| occne-opensearch-data | 10Gi | 200Gi (log_trace_active_storage) |
| opensearch-data-replicas-count | 5 | 7 |
- Store the output of the current configuration values for the
os-master-helm-values.yamlfile.$ helm -n occne-infra get values occne-opensearch-master > os-master-helm-values.yaml - Update the PVC size block in the
os-master-helm-values.yamlfile. The PVC size must be updated to the newly required PVC size (in this case, 50Gi as per the sample value considered). Theos-master-helm-values.yamlfile is required in Step 8 to recreateoccne-opensearch-masterStatefulset.$ vi os-master-helm-values.yaml persistence: enabled: true image: occne-repo-host:5000/docker.io/busybox imageTag: 1.31.0 size: <desired size>Gi storageClass: occne-esmaster-sc - Delete the statefulset of
occne-opensearch-cluster-masterby running the following command:$ kubectl -n occne-infra delete sts --cascade=orphan occne-opensearch-cluster-master - Delete the
occne-opensearch-cluster-master-2pod by running the following command:$ kubectl -n occne-infra delete pod occne-opensearch-cluster-master-2 - Update the PVC storage size in the PVC of
occne-opensearch-cluster-master-2by running the following command:$ kubectl -n occne-infra patch -p '{ "spec": { "resources": { "requests": { "storage": "40Gi" }}}}' pvc occne-opensearch-cluster-master-occne-opensearch-cluster-master-2 - Get the PV volume ID from the PVC of
opensearch-master-2:$ kubectl get pvc -n occne-infra | grep master-2Sample output:occne-opensearch-cluster-master-occne-opensearch-cluster-master-2 Bound pvc-9d9897c1-b7b9-43a3-bf78-f03b91ea4d72 30Gi RWO occne-esmaster-sc 17h
In this case, the PV volume ID in the sample output is pvc-9d9897c1-b7b9-43a3-bf78-f03b91ea4d72.
- Hold on to the PV attached to
occne-opensearch-cluster-master-2PVC using the volume ID until the newly updated size gets reflected. Verify the updated PVC value by running the following command:$ kubectl get pv -w | grep pvc-9d9897c1-b7b9-43a3-bf78-f03b91ea4d72Sample output:pvc-9d9897c1-b7b9-43a3-bf78-f03b91ea4d72 30Gi RWO Delete Bound occne-infra/occne-opensearch-cluster-master-occne-opensearch-cluster-master-2 occne-esmaster-sc 17h pvc-9d9897c1-b7b9-43a3-bf78-f03b91ea4d72 40Gi RWO Delete Bound occne-infra/occne-opensearch-cluster-master-occne-opensearch-cluster-master-2 occne-esmaster-sc 17h - Run Helm upgrade to recreate the
occne-opensearch-masterstatefulset:$ helm upgrade -f os-master-helm-values.yaml occne-opensearch-master opensearch-project/opensearch -n occne-infra - Once the deleted pod (master-2) and its statefulset are up and
running, check the pod's PVC status and verify if it reflects the updated
size.
$ kubectl get pvc -n occne-infra | grep master-2Sample output:occne-opensearch-cluster-master-occne-opensearch-cluster-master-2 Bound pvc-9d9897c1-b7b9-43a3-bf78-f03b91ea4d72 40Gi RWO occne-esmaster-sc 17h e.g id: pvc-9d9897c1-b7b9-43a3-bf78-f03b91ea4d72 - Repeat steps 3 through 9 for each of the remaining pods, one after the other (in order master-1, master-0).
- Store the output of the current configuration values for
os-master-helm-values.yamlfile.$ helm -n occne-infra get values occne-opensearch-data > os-data-helm-values.yaml - Update the PVC size block in the
os-master-helm-values.yamlfile. The PVC size must be updated to the newly required PVC size (in this case, 200Gi as per the sample value considered). Theos-master-helm-values.yamlfile is required in Step 8 of this procedure to recreate theoccne-opensearch-datastatefulset.$ vi os-data-helm-values.yamlSample output:persistence: enabled: true image: occne-repo-host:5000/docker.io/busybox imageTag: 1.31.0 size: <desired size>Gi storageClass: occne-esdata-sc
- Delete the statefulset of
occne-opensearch-opensearch-databy the running the following command:$ kubectl -n occne-infra delete sts --cascade=orphan occne-opensearch-cluster-data - Delete the
occne-opensearch-cluster-data-2.$ kubectl -n occne-infra delete pod occne-opensearch-cluster-data-2 - Update the PVC storage size in the PVC of
occne-opensearch-cluster-data-2.$ kubectl -n occne-infra patch -p '{ "spec": { "resources": { "requests": { "storage": "20Gi" }}}}' pvc occne-opensearch-cluster-data-occne-opensearch-cluster-data-2 - Get the PV volume ID from the PVC of
opensearch-data-2.$ kubectl get pvc -n occne-infra | grep data-2Sample output:occne-opensearch-cluster-data-occne-opensearch-cluster-data-2 Bound pvc-80a56d73-d7b7-417f-a7a7-c8484bc8171d 10Gi RWO occne-esdata-sc 17h - Hold on to the PV attached to opensearch-data-2 PVC using the
volume ID until the newly updated size gets reflected. Verify the updated
PVC value by running the following command:
$ kubectl get pv -w | grep pvc-80a56d73-d7b7-417f-a7a7-c8484bc8171dSample output:pvc-80a56d73-d7b7-417f-a7a7-c8484bc8171d 10Gi RWO Delete Bound occne-infra/occne-opensearch-cluster-data-occne-opensearch-cluster-data-2 occne-esdata-sc 17h pvc-80a56d73-d7b7-417f-a7a7-c8484bc8171d 20Gi RWO Delete Bound occne-infra/occne-opensearch-cluster-data-occne-opensearch-cluster-data-2 occne-esdata-sc 17h - Run helm upgrade to recreate the
occne-opensearch-datastatefulset$ helm upgrade -f os-data-helm-values.yaml occne-opensearch-data opensearch-project/opensearch -n occne-infra - Once the deleted pod (data-2) and its statefulset are up and
running, check the pod's PVC status and verify if it reflects the updated
size.
$ kubectl get pvc -n occne-infra | grep data-2Sample output:occne-opensearch-cluster-data-occne-opensearch-cluster-data-2 Bound pvc-80a56d73-d7b7-417f-a7a7-c8484bc8171d 20Gi RWO occne-esdata-sc 17h - Repeat steps 3 through 9 for each of the remaining pods, one after the other (in the order, data-1, data-0,..).
8.2.5 Changing the RAM and CPU Resources for Common Services
This section describes the procedure to change the RAM and CPU resources for CNE common services.
Prerequisites
- The cluster must be in a healthy state. This can verified by
checking if all the common services are up and running.
Note:
- When changing the CPU and RAM resources for any component, the limit value must always be greater than or equal to the requested value.
- Run all the commands in this section from the Bastion Host.
8.2.5.1 Changing the Resources for Prometheus
This section describes the procedure to change the RAM or CPU resources for Prometheus.
Procedure
- Run the following command to edit the Prometheus
resource:
kubectl edit prometheus occne-kube-prom-stack-kube-prometheus -n occne-infraThe system opens a
vieditor session that contains all the configuration for the CNE Prometheus instances. - Scroll to the resources section and change the CPU and Memory resources to the
desired values. This updates the resources for both the prometheus pods.
For example:
resources: limits: cpu: 2000m memory: 4Gi requests: cpu: 2000m memory: 4Gi - Type
:wqto exit the editor session and save the changes. - Verify if both the Prometheus pods are
restarted:
kubectl get pods -n occne-infra |grep kube-prom-stack-kube-prometheusSample output:prometheus-occne-kube-prom-stack-kube-prometheus-0 2/2 Running 0 85s prometheus-occne-kube-prom-stack-kube-prometheus-1 2/2 Running 0 104s
8.2.5.2 Changing the Resources for Alertmanager
This section describes the procedure to change the RAM or CPU resources for Alertmanager.
Procedure
- Run the following command to edit the Alertmanager
resource:
kubectl edit alertmanager occne-kube-prom-stack-kube-alertmanager -n occne-infraThe system opens a
vieditor session that contains all the configuration for the CNE Alertmanager instances. - Scroll to the resources section and change the CPU and Memory resources to the
desired values. This updates the resources for the Alertmanager pods.
For example:
resources: limits: cpu: 20m memory: 64Mi requests: cpu: 20m memory: 64Mi - Type
:wqto exit the editor session and save the changes. - Verify if the Alertmanager pods are
restarted:
kubectl get pods -n occne-infra |grep alertmanagerSample output:alertmanager-occne-kube-prom-stack-kube-alertmanager-0 2/2 Running 0 16s alertmanager-occne-kube-prom-stack-kube-alertmanager-1 2/2 Running 0 35s
8.2.5.3 Changing the Resources for Grafana
This section describes the procedure to change the RAM or CPU resources for Grafana.
Procedure
- Run the following command to edit the Grafana
resource:
kubectl edit deploy occne-kube-prom-stack-grafana -n occne-infraThe system opens a
vieditor session that contains all the configuration for the CNE Grafana instances. - Scroll to the resources section and change the CPU and Memory resources to the
desired values. This updates the resources for the Grafana pod.
For example:
resources: limits: cpu: 100m memory: 128Mi requests: cpu: 100m memory: 128Mi - Type
:wqto exit the editor session and save the changes. - Verify if the Grafana pod is
restarted:
kubectl get pods -n occne-infra |grep grafanaSample output:occne-kube-prom-stack-grafana-84898d89b4-nzkr4 3/3 Running 0 54s
8.2.5.4 Changing the Resources for Kube State Metrics
This section describes the procedure to change the RAM or CPU resources for kube-state-metrics.
Procedure
- Run the following command to edit the kube-state-metrics
resource:
kubectl edit deploy occne-kube-prom-stack-kube-state-metrics -n occne-infraThe system opens a
vieditor session that contains all the configuration for the CNE kube-state-metrics instances. - Scroll to the resources section and change the CPU and Memory resources to the
desired values. This updates the resources for the kube-state-metrics pod.
For example:
resources: limits: cpu: 20m memory: 100Mi requests: cpu: 20m memory: 32Mi - Type
:wqto exit the editor session and save the changes. - Verify if the kube-state-metrics pod is
restarted:
kubectl get pods -n occne-infra |grep kube-state-metricsSample output:occne-kube-prom-stack-kube-state-metrics-cff54c76c-t5k7p 1/1 Running 0 20s
8.2.5.5 Changing the Resources for OpenSearch
This section describes the procedure to change the RAM or CPU resources for OpenSearch.
Procedure
- Run the following command to edit the opensearch-master
resource:
kubectl edit sts occne-opensearch-cluster-master -n occne-infraThe system opens a
vieditor session that contains all the configuration for the CNE opensearch-master instances. - Scroll to the resources section and change the CPU and Memory resources to the
desired values. This updates the resources for the opensearch-master pod.
For example:
resources: limits: cpu: "1" memory: 2Gi requests: cpu: "1" memory: 2Gi - Type
:wqto exit the editor session and save the changes. - Verify if the opensearch-master pods are
restarted:
kubectl get pods -n occne-infra |grep opensearch-cluster-masterSample output:occne-opensearch-cluster-master-0 1/1 Running 0 3m34s occne-opensearch-cluster-master-1 1/1 Running 0 4m8s occne-opensearch-cluster-master-2 1/1 Running 0 4m19s
Note:
Repeat this procedure for opensearch-data and opensearch-client pods if required.
8.2.5.6 Changing the Resources for OpenSearch Dashboard
This section describes the procedure to change the RAM or CPU resources for OpenSearch Dashboard.
Procedure
- Run the following command to edit the opensearch-dashboard
resource:
kubectl edit deploy occne-opensearch-dashboards -n occne-infraThe system opens a
vieditor session that contains all the configuration for the CNE opensearch-dashboard instances. - Scroll to the resources section and change the CPU and Memory resources to the
desired values. This updates the resources for the opensearch-dashboard
pod.
For example:
resources: limits: cpu: 100m memory: 512Mi requests: cpu: 100m memory: 512Mi - Type
:wqto exit the editor session and save the changes. - Verify if the opensearch-dashboard pod is
restarted:
kubectl get pods -n occne-infra |grep dashboardSample output:occne-opensearch-dashboards-7b7749c5f7-jcs7d 1/1 Running 0 20s
8.2.5.7 Changing the Resources for Fluentd OpenSearch
This section describes the procedure to change the RAM or CPU resources for Fluentd OpenSearch.
Procedure
- Run the following command to edit the
occne-fluentd-opensearchresource:kubectl edit ds occne-fluentd-opensearch -n occne-infraThe system opens a
vieditor session that contains all the configuration for the CNE Fluentd OpenSearch instances. - Scroll to the resources section and change the CPU and memory
resources to the desired values. This updates the resources for the Fluentd
OpenSearch pods.
For example:
resources: limits: cpu: 100m memory: 128Mi requests: cpu: 100m memory: 128Mi - Type
:wqto exit the editor session and save the changes. - Verify if the Fluentd OpenSearch pods are
restarted:
kubectl get pods -n occne-infra |grep fluentd-opensearchSample output:occne-fluentd-opensearch-kcx87 1/1 Running 0 19s occne-fluentd-opensearch-m9zhz 1/1 Running 0 9s occne-fluentd-opensearch-pbbrw 1/1 Running 0 14s occne-fluentd-opensearch-rstqf 1/1 Running 0 4s
8.2.5.8 Changing the Resources for Jaeger Agent
This section describes the procedure to change the RAM or CPU resources for Jaeger Agent.
Procedure
- Run the following command to edit the jaeger-agent
resource:
kubectl edit ds occne-tracer-jaeger-agent -n occne-infraThe system opens a
vieditor session that contains all the configuration for the CNE jaeger-agent instances. - Scroll to the resources section and change the CPU and Memory resources to the
desired values. This updates the resources for the jaeger-agent pods.
For example:
resources: limits: cpu: 500m memory: 512Mi requests: cpu: 256m memory: 128Mi - Type
:wqto exit the editor session and save the changes. - Verify if the jaeger-agent pods are
restarted:
kubectl get pods -n occne-infra |grep jaeger-agentSample output:occne-tracer-jaeger-agent-dpn4v 1/1 Running 0 58s occne-tracer-jaeger-agent-dvpnv 1/1 Running 0 62s occne-tracer-jaeger-agent-h4t67 1/1 Running 0 55s occne-tracer-jaeger-agent-q92ld 1/1 Running 0 51s
8.2.5.9 Changing the Resources for Jaeger Query
This section describes the procedure to change the RAM or CPU resources for Jaeger Query.
Procedure
- Run the following command to edit the jaeger-query
resource:
kubectl edit deploy occne-tracer-jaeger-query -n occne-infraThe system opens a
vieditor session that contains all the configuration for the CNE jaeger-query instances. - Scroll to the resources section and change the CPU and Memory resources to the
desired values. This updates the resources for the jaeger-query pod.
For example:
resources: limits: cpu: 500m memory: 512Mi requests: cpu: 256m memory: 128Mi - Type
:wqto exit the editor session and save the changes. - Verify if the jaeger-query pod is
restarted:
kubectl get pods -n occne-infra |grep jaeger-querySample output:occne-tracer-jaeger-query-67bdd85fcb-hw67q 2/2 Running 0 19s
Note:
Repeat this procedure for the jaeger-collector pod if required.
8.2.6 Activating and Configuring Local DNS
This section provides information about activating and configuring local DNS.
8.2.6.1 Activating Local DNS
Note:
Before activating Local DNS, ensure that you are aware about the following conditions:- Local DNS does not handle backups of any added record.
- You must run this procedure to activate local DNS only after installing or upgrading to release 25.1.20x.
- Once you activate Local DNS, you cannot rollback or deactivate the feature.
8.2.6.1.1 Prerequisites
- Ensure that the cluster is running in a healthy state.
- Ensure that the CNE cluster is
running with version 25.1.20x. You can validate the CNE version by echoing the
OCCNE_VERSIONenvironment variable on Bastion Host:echo $OCCNE_VERSION - Ensure that the cluster is running with the Bastion DNS configuration.
8.2.6.1.2 Preactivation Checks
This section provides information about the checks that are performed before activating local DNS.
Determining the Active Bastion Host
- Log in to the Active Bastion Host
(for example, Bastion 1). Verify if the current Bastion is
active:
$ is_active_bastionThe system displays the following output if the Bastion Host is active:IS active-bastion
- If the current Bastion is not
active, then log in to the mate Bastion Host and verify if it is
active:
$ is_active_bastionThe system displays the following output if the Bastion Host is active:IS active-bastion
Determining the current state of the bastion_http_server service API
Note:
By default, after the post-installation procedure thebastion_http_server service is disabled and shut down.
- Verify the current status of the
bastion_http_serverAPI by running the following command:$ systemctl status bastion_http_server.serviceThe following sample output displays the service as inactive and disabled:
bastion_http_server.service - Bastion http server
     Loaded: loaded (/etc/systemd/system/bastion_http_server.service; disabled; preset: disabled)
     Active: inactive (dead)

May 06 23:01:39 occne-test-bastion-1.novalocal systemd[1]: Stopping Bastion http server...
May 06 23:01:40 occne-test-bastion-1.novalocal gunicorn[82034]: [2025-05-06 23:01:39 +0000] [82034] [INFO] Handling signal: term
May 06 23:01:40 occne-test-bastion-1.novalocal gunicorn[82057]: [2025-05-06 23:01:39 +0000] [82057] [INFO] Worker exiting (pid: 82057)
May 06 23:01:40 occne-test-bastion-1.novalocal gunicorn[82056]: [2025-05-06 23:01:39 +0000] [82056] [INFO] Worker exiting (pid: 82056)
May 06 23:01:40 occne-test-bastion-1.novalocal gunicorn[82055]: [2025-05-06 23:01:39 +0000] [82055] [INFO] Worker exiting (pid: 82055)
May 06 23:01:41 occne-test-bastion-1.novalocal gunicorn[82034]: [2025-05-06 23:01:41 +0000] [82034] [INFO] Shutting down: Master
May 06 23:01:42 occne-test-bastion-1.novalocal systemd[1]: bastion_http_server.service: Deactivated successfully.
May 06 23:01:42 occne-test-bastion-1.novalocal systemd[1]: Stopped Bastion http server.
May 06 23:01:42 occne-test-bastion-1.novalocal systemd[1]: bastion_http_server.service: Consumed 3min 37.802s CPU time.
Verifying if Local DNS is Already Activated
- Navigate to the cluster
directory:
$ cd /var/occne/cluster/${OCCNE_CLUSTER} - Open the
occne.inifile (for vCNE) orhosts.inifile (for Bare Metal) and verify if the local_dns_enabled variable under theoccne:varsheader is set to False.Example for vCNE:$ cat occne.iniSample output:[occne:vars] . local_dns_enabled=False .
Example for Bare Metal:$ cat hosts.iniSample output:[occne:vars] . local_dns_enabled=False .
Iflocal_dns_enabledis set to True, then it indicates that local DNS feature is already enabled in the CNE cluster. If the variable is present, it should be included under theoccne:varsheader. If the variable setting is otherwise, then Local DNS is disabled.Note:
Ensure that the first character of the variable value (True or False) is capitalized and there is no space before and after the equal to sign.
8.2.6.1.3 Enabling Local DNS
- Log in to the active Bastion Host and run the
following command to navigate to the cluster
directory:
$ cd /var/occne/cluster/${OCCNE_CLUSTER} - Open the
occne.inifile (for vCNE) orhosts.inifile (for Bare metal) in edit mode:Example for vCNE:
$ vi occne.iniExample for Bare Metal:$ vi hosts.ini - Set the
local_dns_enabledvariable under theoccne:varsheader to True. If thelocal_dns_enabledvariable is not present under theoccne:varsheader, then add the variable.Note:
Ensure that the first character of the variable value (True or False) is capitalized and there is no space before and after the equal to sign.For example,[occne:vars] . local_dns_enabled=True .
- For vCNE (OpenStack or VMware) deployments,
additionally add the
provider_domain_nameandprovider_ip_addressvariables under theoccne:varssection of theoccne.inifile. You can obtain the provider domain name and IP address from the provider administrator and set the variable values accordingly.The following block shows the sampleoccne.inifile with the additional variables:[occne:vars] . local_dns_enabled=True provider_domain_name=<cloud provider domain name> provider_ip_address=<cloud provider IP address> .
- Run the following commands on Bastion Host to enable and start the
bastion_http_serverservice:$ sudo systemctl enable bastion_http_server.service $ sudo systemctl start bastion_http_server.service - Update the cluster with the new settings in the
ini
file:
$ OCCNE_CONTAINERS=(K8S) OCCNE_STAGES=(DEPLOY) OCCNE_ARGS='--tags=coredns' pipeline.sh
8.2.6.1.4 Validating Local DNS
This section provides the steps to validate if you have successfully enabled local DNS.
validateLocalDns.py
script to validate if you have successfully enabled Local DNS. The
validateLocalDns.py script is located in the
/var/occne/cluster/${OCCNE_CLUSTER}/artifacts/maintenance/validateLocalDns.py
folder. This automated script validates Local DNS by performing the following actions:
- Creating a test record
- Reloading local DNS
- Querying the test record from within a pod
- Getting the response (Success status)
- Deleting the test record
validateLocalDns.py script:
- Log in to the active Bastion Host and navigate to the cluster
directory:
$ cd /var/occne/cluster/${OCCNE_CLUSTER} - Run the
validateLocalDns.pyscript:$ ./artifacts/maintenance/validateLocalDns.pySample output:Beginning local DNS validation - Validating local DNS configuration in occne.ini - Adding DNS A record. - Adding DNS SRV record. - Reloading local coredns. - Verifying local DNS A record. - DNS A entry has not been propagated, retrying in 10 seconds (retry 1/5) - Verifying local DNS SRV record. - Deleting DNS SRV record. - Deleting DNS A record. - Reloading local coredns. Validation successful
Note:
If the script encounters an error, it returns an error message indicating which part of the process failed. For more information about troubleshooting local DNS errors, see Troubleshooting Local DNS. - Once you successfully enable Local DNS, add the external hostname records using the Local DNS API to resolve external domain names using CoreDNS. For more information, see Adding and Removing DNS Records.
8.2.6.2 Deactivating Local DNS
This section provides the procedure to deactivate Local DNS in a CNE cluster.
- Log in to Bastion Host (for example, Bastion 1) and determine if that
Bastion Host is active or not. If the current Bastion is not active, then log in to
the mate Bastion and verify if the mate Bastion is active or not.
Run the following command to check if Bastion Host is active or not:
$ is_active_bastion IS active-bastion - Deactivating local DNS:
- On the active Bastion Host, change to the cluster directory from the
existing
directory.
$ cd /var/occne/cluster/${OCCNE_CLUSTER} - Edit the
occne.ini(vCNE) orhosts.ini(Bare metal) file.Example for vCNE:
$ vi occne.iniExample for Bare Metal:
$ vi hosts.ini - Set the
local_dns_enabledvariable under theoccne:varsheader to False. If thelocal_dns_enabledvariable is not present under theoccne:varsheader, then add the variable.Note:
Ensure that the first character of the variable value (True or False) is capitalized and there is no space before and after the equal to sign.For example,
[occne:vars] . local_dns_enabled=False . - Delete the CoreDNS configmap using the following
command:
Note:
Running the following command will delete all the records added using the API as part of Local DNS.$ kubectl delete cm coredns -n kube-system - Run the following commands on the bastion host to stop and
disable the bastion_http_server
service:
$ sudo systemctl stop bastion_http_server.service $ sudo systemctl disable bastion_http_server.service - Update the cluster with the new settings in the ini
file:
$ OCCNE_CONTAINERS=(K8S) OCCNE_STAGES=(DEPLOY) OCCNE_ARGS='--tags=coredns' pipeline.sh
- On the active Bastion Host, change to the cluster directory from the
existing
directory.
8.2.6.3 Adding and Removing DNS Records
This section provides the procedures to add and remove DNS records ("A" records and SRV records) using Local DNS API to the core DNS configuration.
Each Bastion Host runs a version of the Local DNS API as a service on port 8000. The system doesn't require any authentication from inside a Bastion Host and runs the API requests locally.
8.2.6.3.1 Prerequisites
- The Local DNS feature must be enabled on the cluster. For more information about enabling Local DNS, see Activating Local DNS.
- The CNE cluster version must be 23.2.x or above.
8.2.6.3.2 Adding an A Record
This section provides information on how to use the Local DNS API to create or add an A record in the CNE cluster.
Note:
- You cannot create and maintain identical A records.
- You cannot create two A records with the same name.
The following table provides details on how to use the Local DNS API to add an "A" record:
Table 8-1 Adding an A Record
| Request URL | HTTP Method | Content Type | Request Body | Response Code | Sample Response |
|---|---|---|---|---|---|
http://localhost:8000/occne/dns/a |
POST | application/json |
Note: Define each field in the request body within double quotes (" "). Sample
request:
|
|
200: DNS A record
added in coredns file for occne.lab.oracle.com 175.80.200.20 3600, msg SUCCESS: Zone
info and A record updated for domain name |
The following table provides details about the request body parameters:
Table 8-2 Request Body Parameters
| Parameter | Required or Optional | Type | Description |
|---|---|---|---|
| name | Required | string | Fully-Qualified Domain Name
(FQDN) to be include in the core DNS.
This parameter can contain
multiple subdomains where each subdomain can range between 1 and 63 characters and
contain the following characters: This parameter cannot start or end with For example, |
| ip-address | Required | string | The IP address to locate a
service. For example, xxx.xxx.xxx.xxx.
The API supports IPv4 protocol only. |
| ttl | Required | integer |
The Time To Live (TTL) in seconds. This is the amount of time the record is allowed to be cached by a resolver. The minimum and the maximum value that can be set are 300 and 3600 respectively. |
8.2.6.3.3 Deleting an A Record
This section provides information on how to use the Local DNS API to delete an A record in the CNE cluster.
Note:
- When the last A record in a zone is deleted, the system deletes the zone as well.
- You cannot delete an A record that is linked to an existing SRV record. You much first delete the linked SRV record to delete the A record.
The following table provides details on how to use the Local DNS API to delete an "A" record:
Table 8-3 Deleting an A Record
| Request URL | HTTP Method | Content Type | Request Body | Response Code | Sample Response |
|---|---|---|---|---|---|
http://localhost:8000/occne/dns/a |
DELETE | application/json |
Note: Define each field in the request body within double quotes (" "). Sample
request:
|
|
200: DNS A record
added in coredns file for occne.lab.oracle.com 175.80.200.20 3600, msg SUCCESS: Zone
info and A record updated for domain name |
The following table provides details about the request body parameters:
Table 8-4 Request Body Parameters
| Parameter | Required or Optional | Type | Description |
|---|---|---|---|
| name | Required | string | Fully-Qualified Domain Name
(FQDN).
This parameter can contain multiple subdomains where each
subdomain can range between 1 and 63 characters and contain the following
characters: This parameter cannot
start or end with For example,
|
| ip-address | Required | string | The IP address to locate a service. For example,
xxx.xxx.xxx.xxx.
|
8.2.6.3.4 Adding an SRV Record
This section provides information on how to use the Local DNS API to create or add an SRV record in the CNE cluster.
Note:
- You cannot create and maintain identical SRV records. However, you can have a different protocol for the same combo service and target A record.
- Currently, there is no provision to edit an existing SRV record. If you want to edit an SRV record, then delete the existing SRV record and then re-add the record with the updated parameters (weight, priority, or TTL).
The following table provides details on how to use the Local DNS API to create an SRV record:
Table 8-5 Adding an SRV Record
| Request URL | HTTP Method | Content Type | Request Body | Response Code | Sample Response |
|---|---|---|---|---|---|
https://localhost:8000/occne/dns/srv |
POST | application/json |
Note: Define each field in the request body within double quotes (" "). Sample
request:
|
|
200: SUCCESS: SRV
record successfully added to config map coredns. |
The following table provides details about the request body parameters:
Table 8-6 Request Body Parameters
| Parameter | Required or Optional | Type | Description |
|---|---|---|---|
| service | Required | string | The symbolic name for the
service, such as "sip", and "my_sql".
The value of this parameter can
range between 1 and 63 characters and contain the following characters:
[a-zA-Z0-9_-]. The parameter cannot start or end with |
| protocol | Required | string | The protocol supported by the
service. The allowed values are:
|
| dn | Required | string | The domain name that the SRV record is applicable to. This parameter
can contain multiple subdomains where each subdomain can range between 1 and 63
characters and contain the following characters: [a-zA-Z0-9_-]. For
example: lab.oracle.com.If the SRV record is
applicable to the entire domain, then provide only the domain name without
subdomains. For example, The length
of the Top Level Domains (TLD) must be between 1 and 6 characters and must only
contain the following characters: |
| ttl | Required | integer |
The Time To Live (TTL) in seconds. This is the amount of time the record is allowed to be cached by a resolver. This value can range between 300 and 3600. |
| priority | Required | integer | The priority of the current SRV record in comparison to the other SRV
records.
The values can range from 0 to n. |
| weight | Required | integer | The weight of the current SRV record in comparison to the other SRV
records with the same priority.
The values can range from 0 to n. |
| port | Required | integer | The port on which the target service is found.
The values can range from 1 to 65535. |
| server | Required | string | The name of the machine providing the service without including the
domain name (value provided in the dn field).
The
value can range between 1 and 63 characters and contain the following characters:
|
| a_record | Required | string | The "A" record name to which the SRV is added.
The "A" record mentioned here must be already added. Otherwise the request fails. |
8.2.6.3.5 Deleting an SRV Record
This section provides information on how to use the Local DNS API to delete an SRV record in the CNE cluster.
Note:
To delete an SRV record, the details in the request payload must exactly match the details, such as weight, priority, and ttl, of an existing SRV record.The following table provides details on how to use the Local DNS API to delete an SRV record:
Table 8-7 Deleting an SRV Record
| Request URL | HTTP Method | Content Type | Request Body | Response Code | Sample Response |
|---|---|---|---|---|---|
https://localhost:8000/occne/dns/srv |
DELETE | application/json |
Note: Define each field in the request body within double quotes (" "). Sample
request:
|
|
200: SUCCESS: SRV
record successfully deleted from config map coredns |
The following table provides details about the request body parameters:
Table 8-8 Request Body Parameters
| Parameter | Required or Optional | Type | Description |
|---|---|---|---|
| service | Required | string | The symbolic name for the
service, such as "sip", and "my_sql".
The value of this parameter can
range between 1 and 63 characters and contain the following characters:
[a-zA-Z0-9_-]. The parameter cannot start or end with |
| protocol | Required | string | The protocol supported by the
service. The allowed values are:
|
| dn | Required | string | The domain name that the SRV record is applicable to. This parameter
can contain multiple subdomains where each subdomain can range between 1 and 63
characters and contain the following characters: [a-zA-Z0-9_-].
The length of the Top Level Domains (TLD) must be between 1 and 6
characters and must only contain the following characters: |
| ttl | Required | integer |
The Time To Live (TTL) in seconds. This is the amount of time the record is allowed to be cached by a resolver. This value can range between 300 and 3600. |
| priority | Required | integer | The priority of the current SRV record in comparison to the other SRV
records.
The values can range from 0 to n. |
| weight | Required | integer | The weight of the current SRV record in comparison to the other SRV
records with the same priority.
The values can range from 0 to n. |
| port | Required | integer | The port on which the target service is found.
The values can range from 1 to 65535. |
| server | Required | string | The name of the machine providing the service minus the domain name
(the value in the dn field).
The value can range from 1 and 63 characters and
contain the following characters: |
| a_record | Required | string | The "A" record name from which the SRV is deleted.
The "A" record mentioned here must be already added. Otherwise the request fails. |
8.2.6.4 Adding and Removing Forwarding Nameservers
The forward section added in the coreDNS forwards the queries to the
nameservers if they are not resolved by coreDNS. This section provides information about
adding or removing forwarding nameservers using the forward endpoint
provided by Local DNS API.
8.2.6.4.1 Adding Forwarding Nameservers
This section provides information about adding forward section in coreDNS
using the forward endpoint provided by Local DNS API.
Note:
- Add forward section in coreDNS by using the payload data.
- Ensure that the forward section is not added already.
The following table provides details on how to use the Local DNS API endpoint to add forward section:
Table 8-9 Adding Forwarding Nameserver
| Request URL | HTTP Method | Content Type | Request Body | Response Code | Sample Response |
|---|---|---|---|---|---|
https://localhost:8000/occne/dns/forward |
POST | application/json |
Note: Define each field in the request body within double quotes (" "). Sample request to add forward
section:
|
|
200: SUCCESS: Forwarding nameserver list added
to coredns successfully |
The following table provides details about the request body parameters:
Table 8-10 Request Body Parameters
| Parameter | Required or Optional | Type | Description |
|---|---|---|---|
| ip-address | Required | string | The IP addresses to forward the requests. You can define up to 15 IP addresses. The IP addresses must be valid IPv4 addresses and they must be defined as a comma separated list without extra space. |
8.2.6.4.2 Removing Forwarding Nameservers
This section provides information about deleting forward section in
coreDNS using the forward endpoint provided by Local DNS API.
Note:
- CNE doesn't support updating the forward section. If you want to update the forward nameservers, then remove the existing forward section and add a new one with the updated data.
- Before removing the forward section, ensure that there is already a forward section to delete.
The following table provides details on how to use the Local DNS API endpoint to remove forward section:
Table 8-11 Removing Forwarding Nameserver
| Request URL | HTTP Method | Content Type | Request Body | Response Code | Sample Response |
|---|---|---|---|---|---|
https://localhost:8000/occne/dns/forward |
DELETE | NA |
Sample request to delete forward
section:
|
|
200: SUCCESS: Forwarding nameserver list deleted
from coredns successfully |
8.2.6.5 Reloading Local or Core DNS Configurations
This section provides information about reloading core DNS configuration
using the reload endpoint provided by Local DNS API.
Note:
You must reload the core DNS configuration to commit the last configuration update, whenever you:- add or remove multiple records in the same zone
- update a single or multiple DNS records
The following table provides details on how to use the Local DNS API endpoint to reload the core DNS configuration:
Table 8-12 Reloading Local or Core DNS Configurations
| Request URL | HTTP Method | Content Type | Request Body | Response Code | Sample Response |
|---|---|---|---|---|---|
http://localhost:8000/occne/coredns/reload |
POST | application/json |
Note:
Sample request to reload the core DNS without payload
(using the default
values):
Sample request to reload the core DNS using the
payload:
|
|
200: Deployment reloaded, msg SUCCESS: Reloaded
coredns deployment in ns kube-system |
The following table provides details about the request body parameters:
Table 8-13 Request Body Parameters
| Parameter | Required or Optional | Type | Description |
|---|---|---|---|
| deployment-name | Required | string | The deployment Name to be reloaded. The value must be a
valid Kubernetes deployment name.
The default value is coredns. |
| namespace | Required | string | The namespace where the deployment exists. The value must
be a valid Kubernetes namespace name.
The default value is kube-system. |
8.2.6.6 Other Local DNS API Endpoints
This section provides information about the additional endpoints provided by Local DNS API.
Get Data
The Local DNS API provides an endpoint to get the current configuration, zones and records of local DNS or core DNS.
The following table provides details on how to use the Local DNS API endpoint to get the Local DNS or core DNS configuration details:
Table 8-14 Get Local DNS or Core DNS Configurations
| Request URL | HTTP Method | Content Type | Request Body | Response Code | Sample Response |
|---|---|---|---|---|---|
http://localhost:8000/occne/dns/data |
GET | NA | Sample
request: |
|
200:
[True, {'api_version': 'v1',
 'binary_data': None,
 'data': {'Corefile': '.:53 {\n'
...
# Output Omitted
...
        'db.oracle.com': ';oracle.com db file\n'
                         'oracle.com.                  300                  '
                         'IN      SOA     ns1.oracle.com  andrei.oracle.com '
                         '201307231 3600 10800 86400 3600\n'
                         'occne1.us.oracle.com.                  '
                         '3600                  IN      A       '
                         '10.65.200.182\n'
                         '_sip._tcp.lab.oracle.com 30 IN SRV 10 102 32061 '
                         'occne.lab.oracle.com.\n'
                         'occne.lab.oracle.com.                  '
                         '3600                  IN      A       '
                         '175.80.200.20\n',
...
# Output Omitted
... |
8.2.6.7 Troubleshooting Local DNS
This section describes the issues that you may encounter while configuring Local DNS and their troubleshooting guidelines.
By design, the Local DNS functionality is built on top of the core DNS (CoreDNS). Therefore, all the troubleshooting, logging, and configuration management are performed directly on the core DNS. Each cluster runs a CoreDNS deployment (2 pods), with the rolling update strategy. Therefore, any change in the configuration is applied to both the pods one by one. This process can take some time (approximately, 30 to 60 seconds to reload both pods).
A NodeLocalDNS daemonset is a cache implementation of core DNS. The NodeLocalDNS runs as a pod on each node and is used for quick DNS resolution. When a pod requires a certain domain name resolution, it first checks its NodeLocalDNS pod, the one running in the same node, for resolution. If the pod doesn't get the required resolution, then it forwards the request to the core DNS.
Note:
Use the active Bastion to run all the troubleshooting procedures in this section.8.2.6.7.1 Troubleshooting Local DNS API
This section provides the troubleshooting guidelines for the common scenarios that you may encounter while using Local DNS API.
Validating Local DNS API
$ systemctl status bastion_http_server● bastion_http_server.service - Bastion http server Loaded: loaded (/etc/systemd/system/bastion_http_server.service; enabled; vendor preset: disabled) Active: active (running) since Wed 2023-04-12 00:12:51 UTC; 1 day 19h ago Main PID: 283470 (gunicorn) Tasks: 4 (limit: 23553) Memory: 102.6M CGroup: /system.slice/bastion_http_server.service ├─283470 /usr/bin/python3.6 /usr/local/bin/gunicorn --workers=3 --bind 0.0.0.0:8000 --chdir /bin/bastion_http_setup wsgi:app --max-requests 0 --timeout 5 --keep> ├─283474 /usr/bin/python3.6 /usr/local/bin/gunicorn --workers=3 --bind 0.0.0.0:8000 --chdir /bin/bastion_http_setup wsgi:app --max-requests 0 --timeout 5 --keep> ├─283476 /usr/bin/python3.6 /usr/local/bin/gunicorn --workers=3 --bind 0.0.0.0:8000 --chdir /bin/bastion_http_setup wsgi:app --max-requests 0 --timeout 5 --keep> └─641094 /usr/bin/python3.6 /usr/local/bin/gunicorn --workers=3 --bind 0.0.0.0:8000 --chdir /bin/bastion_http_setup wsgi:app --max-requests 0 --timeout 5 --keep>
The sample output shows the status of the
Bastion http server service as active (running) and
enabled. All Bastion servers have their own independent version of this service.
Therefore, it is recommended to check the status of all Bastion servers.
Starting or Restarting Local DNS API
If Local DNS API is not running, run the following command to start or restart it:
$ sudo systemctl start bastion_http_server$ sudo systemctl restart bastion_http_serverThe start and restart commands don’t display any output on completion. To check the status of Local DNS API, perform the Validating Local DNS API procedure.
If bastion_http_server doesn't run even after starting or restarting it, refer to the following section to check its log.
Generating and Checking Local DNS Logs
This section provides details about generating and checking Local DNS logs.
You can use journalctl to get the logs of Local DNS API that runs as a
service (bastion_http_server) on each bastion server.
$ journalctl -u bastion_http_serverjournalctl -u bastion_http_server --no-pager -n 20Note:
In the interactive mode, you can use the keyboard shortcuts to scroll through the logs. The system displays the latest logs at the end.-- Logs begin at Tue 2023-04-11 22:36:02 UTC. -- Apr 12 16:33:27 test-bastion-1.novalocal gunicorn[283474]: 2023-04-12 16:33:27,357 BHHTTP:INFO: Request payload: Record name occne.lab.oracle.com record ip 175.80.200.20 [/bin/bastion_http_setup/bastionApp.py:125] Apr 12 16:33:27 test-bastion-1.novalocal gunicorn[283474]: 2023-04-12 16:33:27,357 BHHTTP:INFO: Domain name oracle.com db name db.oracle.com for record entry [/bin/bastion_http_setup/coreDnsData.py:362] Apr 12 16:33:27 test-bastion-1.novalocal gunicorn[283474]: 2023-04-12 16:33:27,369 BHHTTP:INFO: SUCCESS: Validate coredns common config msg data oracle.com [/bin/bastion_http_setup/commons.py:36] Apr 12 16:33:27 test-bastion-1.novalocal gunicorn[283474]: 2023-04-12 16:33:27,380 BHHTTP:INFO: SUCCESS: A Record deleted msg data occne.lab.oracle.com [/bin/bastion_http_setup/commons.py:36] Apr 12 16:33:27 test-bastion-1.novalocal gunicorn[283474]: 2023-04-12 16:33:27,380 BHHTTP:INFO: SUCCESS: A Record deleted msg data occne.lab.oracle.com [/bin/bastion_http_setup/commons.py:36] Apr 12 16:33:27 test-bastion-1.novalocal gunicorn[283474]: 2023-04-12 16:33:27,380 BHHTTP:INFO: Domain name oracle.com db name db.oracle.com for record entry [/bin/bastion_http_setup/coreDnsData.py:362] Apr 12 16:33:27 test-bastion-1.novalocal gunicorn[283474]: 2023-04-12 16:33:27,388 BHHTTP:INFO: SUCCESS: Validate coredns common config msg data oracle.com [/bin/bastion_http_setup/commons.py:36] Apr 12 16:33:27 test-bastion-1.novalocal gunicorn[283474]: 2023-04-12 16:33:27,388 BHHTTP:INFO: DNS A record deleted in coredns file for occne.lab.oracle.com 175.80.200.20, msg SUCCESS: SUCCESS: A Record deleted [/bin/bastion_http_setup/commons.py:47] Apr 12 16:34:13 test-bastion-1.novalocal gunicorn[283474]: 2023-04-12 16:34:13,487 BHHTTP:INFO: Deployment reloaded, msg SUCCESS: Reloaded coredns deployment in ns kube-system [/bin/bastion_http_setup/commons.py:47]
Table 8-15 Local DNS Log Messages
| Message | Type/ Level | Description |
|---|---|---|
| Deployment reloaded, msg SUCCESS: Reloaded coredns deployment in ns kube-system | INFO | Success message indicating that the core DNS deployment reloaded successfully. |
| Validate coredns common config msg data oracle.com | INFO | Indicates that the module was able to process core DNS configuration data for a specific domain name. |
| Request payload incomplete. Request requires name and ip-address, error missing param 'ip-address' | ERROR | Indicates an invalid payload. The API sends this type of messages when the payload used for a given record is not valid or not complete. |
| FAILED: A record occne.lab.oracle.com does not exists in Zone db.oracle.com | ERROR | This message is used by an API module to trigger a creation of a new zone. This error message does not require any intervention. |
| Already exists: DNS A record in coredns file for occne.lab.oracle.com 175.80.200.20 3600, msg SUCCESS: A record occne.lab.oracle.com already exists in Zone db.oracle.com, msg: Record occne.lab.oracle.com cannot be duplicated. | ERROR | Same domain name error. Records in the same zone cannot have the same name. This message is displayed if either of these conditions is true. |
| DNS A record deleted in coredns file for occne.lab.oracle.com 175.80.200.20, msg SUCCESS: A Record deleted | INFO | Success message indicating that an A record was deleted successfully. |
| DNS A record added in coredns file for occne.lab.oracle.com 175.80.200.20 3600, msg SUCCESS: Zone info and A record updated for domain name | INFO | Success message indicating that the API has successfully added a new A record and updated the zone information. |
| ERROR in app: Exception on /occne/dns/a [POST] ... Traceback Omitted | ERROR | Fatal error indicating that an exception has occurred while processing a request. You can get more information by performing a traceback. This type of error is not common and must be reported as a bug. |
| Zone already present with domain name oracle.com | DEBUG | This type of debug messages are not enabled by default. They are usually used to print a high amount of information while troubleshooting. |
| FAILED: Unable to add SRV record: _sip._tcp.lab.oracle.com. 3600 IN SRV 10 100 35061 occne.lab.oracle.com. - record already exists - data: ... Data Omitted | ERROR | Error message indicating that the record already exists and cannot be duplicated. |
8.2.6.7.2 Troubleshooting Core DNS
This section provides information about troubleshooting Core DNS using the core DNS logs.
Local DNS records are added to CoreDNS configuration. Therefore, the logs are generated and reported by the core DNS pods. As per the default configuration, CoreDNS reports information logs only on start up (for example, after a reload) and on running into an error.
- Run the following command to print all logs from both core DNS pods to the terminal,
separated by
name:
$ for pod in $(kubectl -n kube-system get pods | grep coredns | awk '{print $1}'); do echo "----- $pod -----"; kubectl -n kube-system logs $pod; doneSample output:----- coredns-8ddb9dc5d-5nvrv ----- [INFO] plugin/ready: Still waiting on: "kubernetes" [INFO] plugin/auto: Inserting zone `occne.lab.oracle.com.' from: /etc/coredns/..2023_04_12_16_34_13.510777403/db.occne.lab.oracle.com .:53 [INFO] plugin/reload: Running configuration SHA512 = 2bc9e13e66182e6e829fe1a954359de92746468f433b8748589dfe16e1afd0e790e1ff75415ad40ad17711abfc7a8348fdda2770af99962db01247526afbe24a CoreDNS-1.9.3 linux/amd64, go1.18.2, 45b0a11 ----- coredns-8ddb9dc5d-6lf5s ----- [INFO] plugin/auto: Inserting zone `occne.lab.oracle.com.' from: /etc/coredns/..2023_04_12_16_34_15.930764941/db.occne.lab.oracle.com .:53 [INFO] plugin/reload: Running configuration SHA512 = 2bc9e13e66182e6e829fe1a954359de92746468f433b8748589dfe16e1afd0e790e1ff75415ad40ad17711abfc7a8348fdda2770af99962db01247526afbe24a CoreDNS-1.9.3 linux/amd64, go1.18.2, 45b0a11
- Additionally, you can pipe the above command to a file for better readability and
sharing:
$ for pod in $(kubectl -n kube-system get pods | grep coredns | awk '{print $1}'); do echo "----- $pod -----"; kubectl -n kube-system logs $pod; done > coredns.logs $ vi coredns.logs - Run the following command to get the latest logs from any of the CoreDNS
pods:
$ kubectl -n kube-system --tail 20 logs $(kubectl -n kube-system get pods | grep coredns | awk '{print $1 }' | head -n 1)This command prints the latest 20 log entries. You can modify the
--tailvalue as per your requirement.Sample output:[INFO] plugin/auto: Inserting zone `occne.lab.oracle.com.' from: /etc/coredns/..2023_04_13_19_29_29.1646737834/db.occne.lab.oracle.com .:53 [INFO] plugin/reload: Running configuration SHA512 = 2bc9e13e66182e6e829fe1a954359de92746468f433b8748589dfe16e1afd0e790e1ff75415ad40ad17711abfc7a8348fdda2770af99962db01247526afbe24a CoreDNS-1.9.3 linux/amd64, go1.18.2, 45b0a11
8.2.6.7.3 Troubleshooting DNS Records
This section provides information about validating, and querying internal and external records.
Note:
Use the internal cluster network to resolve the records added to core DNS through local DNS API. The system does not respond if you query for a DNS record from outside the cluster (for example, querying from a Bastion server).Validating Records
You can use any pod to access and query a DNS record in core DNS. However, most of the pods do not have the network utilities to directly query a record. In such cases, you can include the network utilities, such as bind-utils, bundled with the pods to allow them to access and query records.
Note:
After adding multiple records, use the API to reload the CoreDNS configuration so that the changes are applied.- Run the following command from a Bastion server to query an A record. In this example, the A record for occne1.us.oracle.com was previously added using the API.
$ kubectl -n occne-demo exec -it test-app -- nslookup occne1.us.oracle.comSample output:.oracle.com Server: 169.254.25.10 Address: 169.254.25.10:53 Name: occne1.us.oracle.com Address: 10.65.200.182
- Run the following command from a Bastion server to query an SRV record:
$ kubectl -n occne-infra exec -i -t $(kubectl -n occne-infra get pod | grep metallb-cont | awk '{print $1}') -- nslookup -type=srv _sip._tcp.lab.oracle.comSample output:Server: 169.254.25.10 Address: 169.254.25.10:53 _sip._tcp.lab.oracle.com service = 10 100 35061 occne.lab.oracle.com
Note:
Reload the core DNS configuration after adding multiple records to ensure that your changes are applied.
Note:
This example considers that an A record is already loaded to occne1.us.oracle.com using the API.$ kubectl -n occne-demo exec -it test-app -- nslookup occne1.us.oracle.com.oracle.com
Server: 169.254.25.10
Address: 169.254.25.10:53
Name: occne1.us.oracle.com
Address: 10.65.200.182Querying Non Existing or External Records
You cannot access or query an external record or a record that is not added using the API. The system terminates such queries with an error code.
- the following codeblock shows a case where a non existing A record is queried:
$ kubectl -n occne-infra exec -i -t $(kubectl -n occne-infra get pod | grep test-app-pod | awk '{print $1}') -- nslookup not-in.oracle.comSample output:Server: 169.254.25.10 Address: 169.254.25.10:53 Name: kubernetes.default.svc.test Address: 10.233.0.1 ** server can't find kubernetes.svc.test: NXDOMAIN ** server can't find kubernetes.svc.test: NXDOMAIN ** server can't find kubernetes.test: NXDOMAIN ** server can't find kubernetes.test: NXDOMAIN ** server can't find kubernetes.occne-infra.svc.test: NXDOMAIN ** server can't find kubernetes.occne-infra.svc.test: NXDOMAIN
The query resolves successfully through kubernetes.default.svc.test because the kubernetes service exists only in the default namespace.
- the following codeblock shows a case where a non existing SRV record is queried:
$ kubectl -n occne-infra exec -i -t $(kubectl -n occne-infra get pod | grep test-app-pod | awk '{print $1}') -- nslookup -type=srv kubernetes.default.svc.testSample output:Server: 169.254.25.10 Address: 169.254.25.10:53 ** server can't find _sip._tcp.not-in.oracle.com: NXDOMAIN command terminated with exit code 1
Querying Internal Services
Core DNS is configured to resolve internal services by default. Therefore, you can query any internal Kubernetes services as usual.
- The following codeblock shows a case where an A record is queried from an internal Kubernetes service:
$ kubectl -n occne-infra exec -i -t $(kubectl -n occne-infra get pod | grep test-app-pod | awk '{print $1}') -- nslookup kubernetesSample output:erver: 169.254.25.10 Address: 169.254.25.10:53 Name: kubernetes.default.svc.test Address: 10.233.0.1 ** server can't find kubernetes.svc.test: NXDOMAIN ** server can't find kubernetes.svc.test: NXDOMAIN ** server can't find kubernetes.test: NXDOMAIN ** server can't find kubernetes.test: NXDOMAIN ** server can't find kubernetes.occne-infra.svc.test: NXDOMAIN ** server can't find kubernetes.occne-infra.svc.test: NXDOMAIN
The sample output displays the response from
default.svc.testas "Kubernetes", as a service, exists only in the default namespace. - the following codeblock shows a case where an SRV record is queried from an internal Kubernetes service:
$ kubectl -n occne-infra exec -i -t $(kubectl -n occne-infra get pod | grep test-app-pod | awk '{print $1}') -- nslookup -type=srv kubernetes.default.svc.testSample output:Server: 169.254.25.10 Address: 169.254.25.10:53 kubernetes.default.svc.occne3-toby-edwards service = 0 100 443 kubernetes.default.svc.test ** server can't find kubernetes.svc.test: NXDOMAIN ** server can't find kubernetes.occne-infra.svc.test: NXDOMAIN ** server can't find kubernetes.test: NXDOMAIN
The sample output displays the response from
default.svc.testas "Kubernetes", as a service, exists only in the default namespace.
8.2.6.7.4 Accessing Configuration Files
This section provides information about accessing configuration files for troubleshooting.
Note:
Local DNS API takes care of configurations and modifications by default. Therefore, it is not recommended to access or update the configmaps as manual intervention to these files can potentially break the entire CoreDNS functionality.If there is absolute necessity to access configmap for troubleshooting, then use the data endpoint to access records of all zones along with the CoreDNS configuration.
Sample configuration:
# The following line, starting with "db.DOMAIN-NAME" represents a Zone file
'db.oracle.com': ';oracle.com db file\n'
'oracle.com. 300 ' # All zone files contain a default SOA entry auto generated
'IN SOA ns1.oracle.com andrei.oracle.com '
'201307231 3600 10800 86400 3600\n'
'occne.lab.oracle.com. ' # User added A record
'3600 IN A 175.80.200.20\n'
'_sip._tcp.lab.oracle.com 30 IN SRV 10 102 32061 ' # User added SRV record
'occne.lab.oracle.com.\n'
'occne1.us.oracle.com. ' # User added A record
'3600 IN A '
'10.65.200.182\n'},8.2.6.7.5 Troubleshooting Validation Script Errors
The local DNS feature provides the validateLocalDns.py
script to validate if the Local DNS feature is activated successfully. This section provides
information about troubleshooting some of the common issues that occur while using the
validateLocalDns.py script.
Local DNS variable is not set properly
Note:
Refer to the procedure in Activating Local DNS that explains how to enable local DNS and provides thevalidateLocalDns.py validation script.
Beginning local DNS validation - Getting the occne-metallb-controller pod's name. - Validating occne.ini. Unable to continue - err: Cannot continue - local_dns_enabled variable is set to False, which is not valid to continue..In such cases, ensure that:
- the
local_dns_enabledvariable is set to True:local_dns_enabled=True - there are no black spaces before and after the "=" sign
- the variable is typed correctly as it is case sensitive
Note:
To successfully enable Local DNS, you must follow the entire activation procedure. Otherwise, the system doesn't enable the feature successfully even after you set theocal_dns_enabled variable to the correct value.
Unable to add a test record
Beginning local DNS validation - Validating local DNS configuration in occne.ini - Adding DNS A record. Unable to continue - err: Failed to add DNS entry.
Table 8-16 Validation Script Errors and Resolutions
| Issue | Error Message | Resolution |
|---|---|---|
| The script is previously run and interrupted before it finished. The script possibly created a test record the previous time it was run unsuccessfully. When the script is run again, it tries to create a duplicate test record and fails. | Cannot add a duplicate record.
Test record: name:occne.dns.local.com, ip-address: 10.0.0.3 |
Delete the existing test record from the system and rerun the validation script. |
| A record similar to the test record is added manually. | Cannot add a duplicate record.
Test record: name:occne.dns.local.com, ip-address: 10.0.0.3 |
Delete the existing test record from the system and rerun the validation script. |
| Local DNS API is not available. | The Local DNS API is not running or is in an error state | Validate if the Local DNS feature is enabled properly. For more information, see Troubleshooting Local DNS API. |
| Local DNS API returns 50X status code. | Kubernetes Admin Configmap missing or misconfigured | Check if Kubernetes admin.conf is properly set to allow the API to interact with Kubernetes. |
Note:
The name and ip-address of the test record are managed by the script. Use these details for validation purpose only.Unable to reload configuration
Beginning local DNS validation - Getting the occne-metallb-controller pod's name. - Validating occne.ini. - Adding DNS A record. - Adding DNS SRV record. - Reloading local coredns. - Error while trying to reload the local coredns, error: .... # Reason Omitted
In such cases, analyze the cause of the issue using the Local DNS logs. For more information, see Troubleshooting Local DNS API.
Other miscellaneous errors
If you are encountering other miscellaneous errors (such as, "unable to remove record"), follow the steps in the Troubleshooting Local DNS API section to generate logs and analyze the issue.
8.3 Managing the Kubernetes Cluster
This section provides instructions on how to manage the Kubernetes Cluster.
8.3.1 Creating CNE Cluster Backup
This section describes the procedure to create a backup of CNE cluster
data using the createClusterBackup.py script.
Critical CNE data can be damaged or lost during a fault recovery scenario. Therefore, it is advised to take a backup of your CNE cluster data regularly. These backups can be used to restore your CNE cluster when the cluster data is lost or damaged.
Backing up a CNE cluster data involves the following steps:- Backing up Bastion Host data
- Backing up Kubernetes data using Velero
The createClusterBackup.py script is used to backup both the
bastion host data and Kubernetes data.
Prerequisites
Before creating CNE cluster backup, ensure that the following prerequisites are met:
- Velero must be activated successfully. For Velero installation procedure, see Oracle Communications Cloud Native Core, Cloud Native Environment Installation, Upgrade, and Fault Recovery Guide.
- Velero v1.10.0 server must be installed and running.
- Velero CLI for v1.10.0 must be installed and running.
- boto3 python module must be installed. For more information, see the "Configuring PIP Repository" section in the Oracle Communications Cloud Native Core, Cloud Native Environment Installation, Upgrade, and Fault Recovery Guide.
- The S3 Compatible Object Storage Provider must be configured and ready to be used.
- The following S3 related credentials must be available:
- Endpoint Url
- Access Key Id
- Secret Access Key
- Region Name
- Bucket Name
- An external S3 compatible data store to store backup data must have been configured while installing CNE.
- The backup will only create an CNE Cluster backup that contains Bastion Host data, including Kubernetes.
- Cluster must be in a good state, that is all content included in the following
namespaces must be up and running:
- occne-infra
- kube-system
- rook-ceph (for Bare Metal)
- All bastion-controller PVCs must be in Bound status.
Note:
- This procedure creates only a CNE cluster backup that contains Bastion Host data, including Kubernetes.
- For Kubernetes, this procedure creates the backup content included in the
following namespaces only:
- occne-infra
- kube-system
- rook-ceph (for Bare Metal)
- You must take the Bastion backup in the ACTIVE Bastion only.
8.3.1.1 Creating a Backup of Bastion Host and Kubernetes Data
This section describes the procedure to back up the Bastion Host and
Kubernetes data using the createClusterBackup.py script.
Note:
Before creating a backup, Velero must be enabled.- Bastion Backup
- Velero Kubernetes Backup
Both are created in order when the createClusterBackup.py
initializes.
- Access the active Bastion using
ssh. - Run the following command to verify if you are currently on an
active Bastion. If you are not, log in to an active Bastion and continue this
procedure.
$ is_active_bastionSample output:IS active-bastionNote:
If the active Bastion is not being used, log in to the other Bastion, and continue this procedure. - Use the following commands to run the
createClusterBackup.pyscript:Note:
Theboto3library is required for the backup procedure. This is only required for CNE versions 23.3 and higher.$ cd /var/occne/cluster/${OCCNE_CLUSTER}/ $ ./scripts/backup/createClusterBackup.pySample output:Initializing cluster backup occne-example-20250310-145503 Creating bastion backup: 'occne-example-20250310-145503' Successfully created bastion backup GENERATED LOG FILE AT: /var/occne/cluster/occne-example/logs/velero/backup/createBastionBackup-20250310-145503.log Creating velero backup: 'occne-example-20250310-145503' Successfully created velero backup Successfully created cluster backup GENERATED LOG FILE AT: /var/occne/cluster/occne-example/logs/velero/backup/createBastionBackup-20250310-145503.log - Verify that the backup tar file was generated at
/home/${USER}.$ ls ~Sample output:
createBastionBackup-20250310-144552.log occne4-example-20250310-145503.tar OCCNE_PIPELINE_2025-03-06_234008.log createBastionBackup-20250310-145503.log OCCNE_PIPELINE_2025-03-06_200544.log OCCNE_PIPELINE_2025-03-08_010753.log createClusterBackup-20250310-144552.log OCCNE_PIPELINE_2025-03-06_222802.log createClusterBackup-20250310-145503.log OCCNE_PIPELINE_2025-03-06_233319.log
8.3.1.2 Verifying Backup in S3 Bucket
This section describes the procedure to verify the CNE cluster data backup in S3 bucket.
Log in into the S3 cloud storage that was used to save the backup for verifying that the Bastion backup was successfully uploaded.
bastion-data-backups: for storing Bastion backupvelero-backup: for storing Velero backup
- Verify if the Bastion Host data is stored as a
.tarfile in the{BUCKET_NAME}/bastion-data-backups/{CLUSTER-NAME}/{BACKUP_NAME}folder. Where,{CLUSTER-NAME}is the name of the cluster and{BACKUP_NAME}is the name of the backup. - Verify if the Velero Kubernetes backup is stored in the
{BUCKET_NAME}/velero-backup/{BACKUP_NAME}/folder. Where,{BACKUP_NAME}is the name of the backup.Caution:
Thevelero-backupfolder must not be modified manually as this folder is managed by Velero. Modifying the folder can corrupt the structure or files.For information about restoring CNE cluster from a backup, see "Restoring CNE from Backup" in Oracle Communications Cloud Native Core, Cloud Native Environment Installation, Upgrade, and Fault Recovery Guide.
8.3.2 Renewing Kubernetes Certificates
Some of the Kubernetes certificates in your cluster are valid for a period of one year. These certificates include various important files that secure the communication within your cluster, such as the API server certificate, the etcd certificate, and the controller manager certificate. To maintain the security and operation of your CNE Kubernetes cluster, it is important to keep these certificates updated. The certificates are renewed automatically during the CNE upgrade. If you have not performed an CNE upgrade in the last year, you must run this procedure to renew your certificates for the continued operation of the CNE Kubernetes cluster.
Introduction
Kubernetes uses many different TLS certificates to secure access to internal services. There certificates are automatically renewed during upgrade. However, if upgrade is not performed regularly, these certificates may expire and cause the Kubernetes cluster to fail. To avoid this situation follow the procedure below to renew all certificates used by Kubernetes. This procedure can also be used to renew expired certificates and restore access to the Kubernetes cluster.
List of K8s internal certificates
Table 8-17 Kubernetes Internal Certificates and Validity Period
| Node Type | Componet Name | .crt File Path | Validity (in years) | .pem File Path | Validity (in years) |
|---|---|---|---|---|---|
| Kubernetes Controller | etcd | /etc/pki/ca-trust/source/anchors/etcd-ca.crt | 100 | /etc/ssl/etcd/ssl/admin-<node_name>.pem | 100 |
| Kubernetes Controller | etcd | NA | NA | /etc/ssl/etcd/ssl/ca.pem | 100 |
| Kubernetes Controller | etcd | NA | NA | /etc/ssl/etcd/ssl/member-<node_name>.pem | 100 |
| Kubernetes Controller | etcd | NA | NA | /etc/ssl/etcd/ssl/member-<node_name>.pem | 100 |
| Kubernetes Controller | Kubernetes | /etc/kubernetes/ssl/ca.crt | 10 | NA | NA |
| Kubernetes Controller | Kubernetes | /etc/kubernetes/ssl/apiserver.crt | 1 | NA | NA |
| Kubernetes Controller | Kubernetes | /etc/kubernetes/ssl/apiserver-kubelet-client.crt | 1 | NA | NA |
| Kubernetes Controller | Kubernetes | /etc/kubernetes/ssl/front-proxy-ca.crt | 10 | NA | NA |
| Kubernetes Controller | Kubernetes | /etc/kubernetes/ssl/front-proxy-client.crt | 1 | NA | NA |
| Kubernetes Node | Kubernetes | /etc/kubernetes/ssl/ca.crt | 10 | NA | NA |
Prerequisites
Caution:
Run this procedure on each controller node and verify that the certificates are renewed successfully to avoid cluster failures. The controller nodes are the orchestrator and maintainers of the metadata of all objects and components of the cluster. If you do not run this procedure on all the controller nodes and the certificates expire, the integrity of the cluster and the applications that are deployed on the cluster are staged at risk. This causes the communication within the internal components to be lost resulting in a total cluster failure. In such a case, you must recover each controller node or in the worst case scenario, recover the complete cluster.Checking Certificate Expiry
$ sudo su
# export PATH=$PATH:/usr/local/bin
# kubeadm certs check-expiration[check-expiration] Reading configuration from the cluster... [check-expiration] FYI: You can look at this config file with 'kubectl -n kube-system get cm kubeadm-config -o yaml' W0214 13:39:25.870724 84036 utils.go:69] The recommended value for "clusterDNS" in "KubeletConfiguration" is: [10.233.0.10]; the provided value is: [169.254.25.10] CERTIFICATE EXPIRES RESIDUAL TIME CERTIFICATE AUTHORITY EXTERNALLY MANAGED admin.conf Feb 14, 2026 17:42 UTC 364d ca no apiserver Feb 14, 2026 17:42 UTC 364d ca no apiserver-kubelet-client Feb 14, 2026 17:42 UTC 364d ca no controller-manager.conf Feb 14, 2026 17:42 UTC 364d ca no front-proxy-client Feb 14, 2026 17:42 UTC 364d front-proxy-ca no scheduler.conf Feb 14, 2026 17:42 UTC 364d ca no super-admin.conf Feb 14, 2026 17:42 UTC 364d ca no CERTIFICATE AUTHORITY EXPIRES RESIDUAL TIME EXTERNALLY MANAGED ca Feb 12, 2035 17:42 UTC 9y no front-proxy-ca Feb 12, 2035 17:42 UTC 9y no
Procedure
- Use SSH to log in to the active Bastion Host.
- Run the following command to verify if the Bastion Host is the
active Bastion
Host:
The system displays the following output if the Bastion Host is the active Bastion Host:$ is_active_bastion
If the Bastion Host is not the active Bastion Host, try a different Bastion Host.IS active-bastionNote:
If the certificates are expired, theis_active_bastioncommand doesn't work as it depends onkubectl. In this case, skip this step and move to the next step. - Perform the following steps to log in to a controller node as a
root user and back up the SSL directory:
- Use SSH to log in to Kubernetes controller node as a root
user:
$ ssh <k8s-ctrl-node> $ sudo su # export PATH=$PATH:/usr/local/bin - Take a backup of the
ssldirectory:# cp -r /etc/kubernetes/ssl /etc/kubernetes/ssl_backup
- Use SSH to log in to Kubernetes controller node as a root
user:
- Renew all
kubeadmcertificates:# kubeadm certs renew allSample output:[renew] Reading configuration from the cluster... [renew] FYI: You can look at this config file with 'kubectl -n kube-system get cm kubeadm-config -o yaml' W0212 18:04:43.840444 3620859 utils.go:69] The recommended value for "clusterDNS" in "KubeletConfiguration" is: [10.233.0.10]; the provided value is: [169.254.25.10] certificate embedded in the kubeconfig file for the admin to use and for kubeadm itself renewed certificate for serving the Kubernetes API renewed certificate for the API server to connect to kubelet renewed certificate embedded in the kubeconfig file for the controller manager to use renewed certificate for the front proxy client renewed certificate embedded in the kubeconfig file for the scheduler manager to use renewed certificate embedded in the kubeconfig file for the super-admin renewed Done renewing certificates. You must restart the kube-apiserver, kube-controller-manager, kube-scheduler and etcd, so that they can use the new certificates.
- Perform the following steps to remove the manifest files in the
/etc/kubernetes/manifests/directory and restart the static pods:Note:
This step requires removing (moving the file totmpfolder) the manifest files in the/etc/kubernetes/manifests/directory and copying back the file to the same directory to restart thekube-apiserverpod. Each time you remove and copy the manifest files, the system waits for a period configured infileCheckFrequency.fileCheckFrequencyis a Kubelet configuration and the default value is 20 seconds.- Perform the following steps to restart the API server
pod:
- Remove the
kube-apiserverpod:# mv /etc/kubernetes/manifests/kube-apiserver.yaml /tmp - Run the watch command until the
kube-apiserverpod is removed. When the pod is removed, useCtrl+Cto exit the watch command:
Sample output:# watch -n 1 "sudo /usr/local/bin/crictl -r unix:///run/containerd/containerd.sock ps | grep -e api -e kube-controller-manager -e scheduler"Every 1.0s: sudo /usr/local/bin/crictl -r unix:///run/containerd/contain... occne-example-k8s-ctrl-1: Fri Feb 14 13:52:26 2025 ff79b19fdffd7 9aa1fad941575 27 seconds ago Running kube-scheduler 2 ab0da7c51b413 kube-scheduler-occne-example-k8s-ctrl-1 64059f7efadc5 175ffd71cce3d 27 seconds ago Running kube-controller-manager 3 9591cd755dae4 kube-controller-manager-occne-example-k8s-ctrl-1 - Restore the
kube-apiserverpod to the/etc/kubernetes/manifests/directory:# mv /tmp/kube-apiserver.yaml /etc/kubernetes/manifests - Run the watch command until the
kube-apiserverpod appears in the output. When the pod appears, useCtrl+Cto exit the watch command:
Sample output:# watch -n 1 "sudo /usr/local/bin/crictl -r unix:///run/containerd/containerd.sock ps | grep -e api -e kube-controller-manager -e scheduler"Every 1.0s: sudo /usr/local/bin/crictl -r unix:///run/containerd/contain... occne-example-k8s-ctrl-1: Fri Feb 14 13:53:28 2025 67c8d5c42645f 6bab7719df100 10 seconds ago Running kube-apiserver 0 3bb9f31dad8c6 kube-apiserver-occne-example-k8s-ctrl-1 ff79b19fdffd7 9aa1fad941575 About a minute ago Running kube-scheduler 2 ab0da7c51b413 kube-scheduler-occne-example-k8s-ctrl-1 64059f7efadc5 175ffd71cce3d About a minute ago Running kube-controller-manager 3 9591cd755dae4 kube-controller-manager-occne-example-k8s-ctrl-1
- Remove the
- Perform the following steps to restart the controller
manager pod:
- Remove the
kube-controller-managerpod:# mv /etc/kubernetes/manifests/kube-controller-manager.yaml /tmp - Run the watch command until the
kube-controller-managerpod is removed. When the pod is removed, useCtrl+Cto exit the watch command:
Sample output:# watch -n 1 "sudo /usr/local/bin/crictl -r unix:///run/containerd/containerd.sock ps | grep -e api -e kube-controller-manager -e scheduler"Every 1.0s: sudo /usr/local/bin/crictl -r unix:///run/containerd/contain... occne-example-k8s-ctrl-1: Fri Feb 14 13:55:48 2025 67c8d5c42645f 6bab7719df100 2 minutes ago Running kube-apiserver 0 3bb9f31dad8c6 kube-apiserver-occne-example-k8s-ctrl-1 ff79b19fdffd7 9aa1fad941575 3 minutes ago Running kube-scheduler 2 ab0da7c51b413 kube-scheduler-occne-example-k8s-ctrl-1 - Restore the
kube-controller-managerpod to the/etc/kubernetes/manifests/directory:# mv /tmp/kube-controller-manager.yaml /etc/kubernetes/manifests - Run the watch command until the
kube-controller-managerpod appears in the output. When the pod appears, useCtrl+Cto exit the watch command:
Sample output:# watch -n 1 "sudo /usr/local/bin/crictl -r unix:///run/containerd/containerd.sock ps | grep -e api -e kube-controller-manager -e scheduler"Every 1.0s: sudo /usr/local/bin/crictl -r unix:///run/containerd/contain... occne-example-k8s-ctrl-1: Fri Feb 14 13:57:11 2025 fa16530da2e04 175ffd71cce3d 15 seconds ago Runningeconds ago kube-controller-manager 0 9b6c69c940bfa kube-controller-manager-occne-example-k8s-ctrl-1 67c8d5c42645f 6bab7719df100 3 minutes ago Running kube-apiserver 0 3bb9f31dad8c6 kube-apiserver-occne-example-k8s-ctrl-1 ff79b19fdffd7 9aa1fad941575 5 minutes ago Running kube-scheduler 2 ab0da7c51b413 kube-scheduler-occne-example-k8s-ctrl-1
- Remove the
- Perform the following steps to restart the scheduler
pod:
- Remove the
kube-schedulerpod:# mv /etc/kubernetes/manifests/kube-scheduler.yaml /tmp - Run the watch command until the
kube-schedulerpod is removed. When the pod is removed, useCtrl+Cto exit the watch command:
Sample output:# watch -n 1 "sudo /usr/local/bin/crictl -r unix:///run/containerd/containerd.sock ps | grep -e api -e kube-scheduler -e scheduler"Every 1.0s: sudo /usr/local/bin/crictl -r unix:///run/containerd/contain... occne-example-k8s-ctrl-1: Thu Feb 13 13:16:06 2025 fa16530da2e04 175ffd71cce3d 19 minutes ago Running kube-controller-manager 0 9b6c69c940bfa kube-controller-manager-occne-example-k8s-ctrl-1 67c8d5c42645f 6bab7719df100 23 minutes ago Running kube-apiserver 0 3bb9f31dad8c6 kube-apiserver-occne-example-k8s-ctrl-1 - Restore the
kube-schedulerpod to the/etc/kubernetes/manifests/directory:# mv /tmp/kube-scheduler.yaml /etc/kubernetes/manifests - Run the watch command until the
kube-schedulerpod appears in the output. When the pod appears, useCtrl+Cto exit the watch command:
Sample output:# watch -n 1 "sudo /usr/local/bin/crictl -r unix:///run/containerd/containerd.sock ps | grep -e api -e kube-scheduler -e scheduler"Every 1.0s: sudo /usr/local/bin/crictl -r unix:///run/containerd/contain... occne-example-k8s-ctrl-1: Fri Feb 14 14:16:35 2025 8c4500f3d61d7 9aa1fad941575 16 seconds ago Running kube-scheduler 0 7c175d8106f0c kube-scheduler-occne-example-k8s-ctrl-1 fa16530da2e04 175ffd71cce3d 19 minutes ago Running kube-controller-manager 0 9b6c69c940bfa kube-controller-manager-occne-example-k8s-ctrl-1 67c8d5c42645f 6bab7719df100 23 minutes ago Running kube-apiserver 0 3bb9f31dad8c6 kube-apiserver-occne-example-k8s-ctrl-1
- Remove the
- Perform the following steps to restart the API server
pod:
- Renew the
admin.conffile and update the contents of$HOME/.kube/config. Type yes when prompted.# cp -i /etc/kubernetes/admin.conf $HOME/.kube/config cp: overwrite '/root/.kube/config'? yes # chown $(id -u):$(id -g) $HOME/.kube/config - Run the following command to validate if the certificates are
renewed:
Sample output:# kubeadm certs check-expiration[check-expiration] Reading configuration from the cluster... [check-expiration] FYI: You can look at this config file with 'kubectl -n kube-system get cm kubeadm-config -o yaml' W0214 14:21:49.907835 143445 utils.go:69] The recommended value for "clusterDNS" in "KubeletConfiguration" is: [10.233.0.10]; the provided value is: [169.254.25.10] CERTIFICATE EXPIRES RESIDUAL TIME CERTIFICATE AUTHORITY EXTERNALLY MANAGED admin.conf Feb 14, 2026 18:51 UTC 364d ca no apiserver Feb 14, 2026 18:51 UTC 364d ca no apiserver-kubelet-client Feb 14, 2026 18:51 UTC 364d ca no controller-manager.conf Feb 14, 2026 18:51 UTC 364d ca no front-proxy-client Feb 14, 2026 18:51 UTC 364d front-proxy-ca no scheduler.conf Feb 14, 2026 18:51 UTC 364d ca no super-admin.conf Feb 14, 2026 18:51 UTC 364d ca no CERTIFICATE AUTHORITY EXPIRES RESIDUAL TIME EXTERNALLY MANAGED ca Feb 12, 2035 17:42 UTC 9y no front-proxy-ca Feb 12, 2035 17:42 UTC 9y no - Perform steps 3 through 7 on the remaining controller nodes.
- Exit from the root user privilege:
# exit - Copy the
/etc/kubernetes/admin.conffile from the controller node to the artifacts directory of the active Bastion.Note:
- Replace
<OCCNE_ACTIVE_BASTION>and<OCCNE_CLUSTER>with the values corresponding to your system. Refer to Step 2 for the value of<OCCNE_ACTIVE_BASTION>(For example,occne-example-bastion-1). - Type yes and enter your password if prompted.
$ sudo scp /etc/kubernetes/admin.conf ${USER}@<OCCNE_ACTIVE_BASTION>:/var/occne/cluster/<OCCNE_CLUSTER>/artifacts - Replace
- Log in to the active Bastion Host and update the server address in the
admin.conffile to https://lb-apiserver.kubernetes.local:6443:$ ssh <active-bastion> $ sed -i 's#https://127.0.0.1:6443#https://lb-apiserver.kubernetes.local:6443#' /var/occne/cluster/${OCCNE_CLUSTER}/artifacts/admin.conf - Recreate the secrets that contains the
admin.config:- CNLB only:
- Delete the existing
cnlb-man-admin-configsecret and recreate a new one from the newadmin.conffile.Run the following command to delete the existing cnlb-man-admin-config secret:
kubectl -n occne-infra delete secret cnlb-man-admin-configRun the following command to recreate a new
cnlb-man-admin-configsecret from the newadmin.conffile.kubectl -n occne-infra create secret generic cnlb-man-admin-config --from-file=/var/occne/cluster/${OCCNE_CLUSTER}/artifacts/admin.conf - Patch the
cnlb-man-admin-configsecret and restart the cnlb-manager pod and cnlb-app pods:$ kubectl -n occne-infra patch --type=merge secret cnlb-man-admin-config --patch '{"data":{"admin.conf":"'"$(kubectl -n occne-infra get secret cnlb-man-admin-config -o jsonpath='{.data.admin\.conf}' | base64 -d | sed 's/https:\/\/lb-apiserver.kubernetes.local:6443/https:\/\/kubernetes.default:443/g' | base64 -w0)"'"}}'Run the following command to obtain the number of replicas of the cnlb app pods:
$ kco get deploy | grep cnlbRun the following command to remove the cnlb manager and app pods:
$ kco scale deploy cnlb-manager --replicas=0 $ kco scale deploy cnlb-app --replicas=0Restore the cnlb manager and app pods:
$ kco scale deploy cnlb-manager --replicas=1 $ kco scale deploy cnlb-app --replicas=<Number of replicas obtained previously> $ kco scale deploy cnlb-app --replicas=<Number of replicas obtained previously>
- Delete the existing
- CNLB only:
8.3.2.1 Renewing Kyverno Certificates
Kyverno 1.9.0 doesn't support automatic certificate renewal. Therefore, if you are using Kyverno 1.9.0, you must renew the certificates manually. This section provides the procedure to renew Kyverno certificates.
- Renew the Kyverno certificates by deleting the secrets from the
kyvernonamespace:
Sample output:$ kubectl delete secret occne-kyverno-svc.kyverno.svc.kyverno-tls-ca -n kyvernosecret "occne-kyverno-svc.kyverno.svc.kyverno-tls-ca" deleted
Sample output:$ kubectl delete secret occne-kyverno-svc.kyverno.svc.kyverno-tls-pair -n kyvernosecret "occne-kyverno-svc.kyverno.svc.kyverno-tls-pair" deleted - Perform the following steps to verify if the secrets are recreated and
the certificates are renewed:
- Run the following command to verify the Kyverno
secrets:
Sample output:$ kubectl get secrets -n kyvernoNAME TYPE DATA AGE occne-kyverno-svc.kyverno.svc.kyverno-tls-ca kubernetes.io/tls 2 21s occne-kyverno-svc.kyverno.svc.kyverno-tls-pair kubernetes.io/tls 2 11s sh.helm.release.v1.occne-kyverno-policies.v1 helm.sh/release.v1 1 26h sh.helm.release.v1.occne-kyverno.v1 helm.sh/release.v1 1 26h - Run the following commands to review the expiry dates of Kyverno
certificates:
Sample output:$ for secret in $(kubectl -n kyverno get secrets --no-headers | grep kubernetes.io/tls | awk {'print $1'}); do currdate=$(date +'%s'); echo $secret; expires=$(kubectl -n kyverno get secrets $secret -o jsonpath="{.data['tls\.crt']}" | base64 -d | openssl x509 -enddate -noout | awk -F"=" {'print $2'} | xargs -d '\n' -I {} date -d '{}' +'%s'); if [ $expires -le $currdate ]; then echo "Certificate invalid, expired: $(date -d @${expires})"; echo "Need to renew certificate using:"; echo "kubectl -n kyverno delete secret $secret"; else echo "Certificate valid, expires: $(date -d @${expires})"; fi doneoccne-kyverno-svc.kyverno.svc.kyverno-tls-ca Certificate valid, expires: Wed Feb 25 05:35:03 PM EST 2026 occne-kyverno-svc.kyverno.svc.kyverno-tls-pair Certificate valid, expires: Fri Jul 25 06:35:12 PM EDT 2025
- Run the following command to verify the Kyverno
secrets:
8.3.2.2 Renewing Kubelet Server Certificates
This section provides the procedure to renew Kubelet server certificate
using the renew-kubelet-server-cert.sh script.
The certificate rotation configuration of the Kubelet server renews
the Kubelet client certificates automatically, as this configuration is
enabled by default. The renew-kubelet-server-cert.sh script
sets the --rotate-server-certificates flag to true, which enables the
serverTLSBootstrap variable in the Kubelet
configuration.
Note:
Perform this procedure from the active Bastion.- Use SSH to log in to the active Bastion Host.
- Run the following command to verify if the Bastion Host is
the active Bastion
Host:
The system displays the following output if the Bastion Host the active Bastion Host:$ is_active_bastion
If the Bastion Host is not the active Bastion Host, try a different Bastion Host.IS active-bastionNote:
If the certificates are expired, theis_active_bastioncommand doesn't work as it depends onkubectl. In this case, skip this step and move to the next step. - Navigate to the
/var/occne/cluster/${OCCNE_CLUSTER}/artifacts/directory:$ cd /var/occne/cluster/${OCCNE_CLUSTER}/artifacts/ - Run the
renew-kubelet-server-cert.shscript:
Sample output:$ ./renew-kubelet-server-cert.sh============ Checking if all nodes are accessible via ssh ============ occne3-k8s-ctrl-1 occne3-k8s-ctrl-2 occne3-k8s-ctrl-3 occne3-k8s-node-1 occne3-k8s-node-2 occne3-k8s-node-3 occne3-k8s-node-4 All nodes are healthy and accessible using ssh, Starting kubelet server certificate renewal procedure now... ---------------------------------------------------------------------------------------------- Starting renewal of K8s kubelet server certificate for occne3-k8s-ctrl-1. Adding the line --rotate-server-certificates=true --tls-cipher-suites=TLS_ECDHE_RSA_WITH_AES_128_GCM_SHA256 to kubelet environment file. Restarting Kubelet to trigger Certificate signing request... Kubelet is successfully restarted! A signing request has been raised, Verifying it now.... A Certificate signing request csr-lfsq9 has been found, Approving it now! certificatesigningrequest.certificates.k8s.io/csr-lfsq9 approved The CSR has been approved for the node occne3-k8s-ctrl-1. Checking if the new K8s kubelet server certificate has been generated... New K8s kubelet server certificate has been successfully generated for the node occne3-k8s-ctrl-1 as shown below. lrwxrwxrwx. 1 root root 59 Jul 24 08:05 kubelet-server-current.pem -> /var/lib/kubelet/pki/kubelet-server-2024-07-24-08-05-40.pem Marked occne3-k8s-ctrl-1 as RENEWED. Kubelet server certificate creation was successful for the node occne3-k8s-ctrl-1.
8.3.3 Renewing the Kubernetes Secrets Encryption Key
This section describes the procedure to renew the key that is used to encrypt the Kubernetes Secrets stored in the CNE Kubernetes cluster.
Note:
Secret encryption is enabled by default during CNE installation or upgrade.The key that is used to encrypt Kubernetes Secrets does not expire. However, it is recommended to change the encryption key periodically to ensure the security of your Kubernetes Secrets. If you think that your key is compromised, you must change the encryption key immediately.
To renew a Kubernetes Secrets encryption key, perform the following steps:
- From bastion host, run the following
commands:
$ NEW_KEY=$(head -c 32 /dev/urandom | base64) $ KEY_NAME=$(cat /dev/random | tr -dc '[:alnum:]' | head -c 10) $ kubectl get nodes | awk '/control-plane/ {print $1}' | xargs -I{} ssh {} " sudo sed -i '/keys:$/a\ - name: key_$KEY_NAME\n\ secret: $NEW_KEY' /etc/kubernetes/ssl/secrets_encryption.yaml; sudo cat /etc/kubernetes/ssl/secrets_encryption.yaml"This creates a random encryption key with a random key name, and adds it to the
/etc/kubernetes/ssl/secrets_encryption.yamlfile within each controller node. The output shows the new encryption key, the key name, and the contents of the/etc/kubernetes/ssl/secrets_encryption.yamlfile.Sample Output:This site is for the exclusive use of Oracle and its authorized customers and partners. Use of this site by customers and partners is subject to the Terms of Use and Privacy Policy for this site, as well as your contract with Oracle. Use of this site by Oracle employees is subject to company policies, including the Code of Conduct. Unauthorized access or breach of these terms may result in termination of your authorization to use this site and/or civil and criminal penalties. kind: EncryptionConfig apiVersion: v1 resources: - resources: - secrets providers: - secretbox: keys: - name: key_ZOJ1Hf5OCx secret: l+CaDTmMkC85LwJRiWJ0LQPYVtOyZ0TdtNZ2ij+kuGA= - name: key secret: ZXJ1Ulk2U0xSbWkwejdreTlJWkFrZmpJZjhBRzg4U00= - identity: {} - Restart the API server by running the following command. This
ensures that all the secrets get encrypted with the new key while encrypting the
secrets in the next
step:
kubectl get nodes | awk '/control-plane/ {print $1}' | xargs -I{} ssh {} " sudo mv /etc/kubernetes/manifests/kube-apiserver.yaml ~; sleep 2; sudo mv ~/kube-apiserver.yaml /etc/kubernetes/manifests" - To encrypt all the existing secrets with a new key, run the
following
command:
kubectl get secrets --all-namespaces -o json | kubectl replace -fSample output:secret/cloud-config replaced secret/external-openstack-cloud-config replaced secret/occne-kyverno-svc.kyverno.svc.kyverno-tls-ca replaced secret/occne-kyverno-svc.kyverno.svc.kyverno-tls-pair replaced secret/sh.helm.release.v1.occne-kyverno-policies.v1 replaced secret/sh.helm.release.v1.occne-kyverno.v1 replaced secret/alertmanager-occne-kube-prom-stack-kube-alertmanager replaced secret/etcd-occne6-j-jorge-l-lopez-k8s-ctrl-1 replaced secret/etcd-occne6-j-jorge-l-lopez-k8s-ctrl-2 replaced secret/etcd-occne6-j-jorge-l-lopez-k8s-ctrl-3 replaced secret/occne-alertmanager-snmp-notifier replaced secret/occne-kube-prom-stack-grafana replaced secret/occne-kube-prom-stack-kube-admission replaced secret/occne-kube-prom-stack-kube-prometheus-scrape-confg replaced secret/occne-metallb-memberlist replaced secret/occne-tracer-jaeger-elasticsearch replaced secret/prometheus-occne-kube-prom-stack-kube-prometheus replaced secret/prometheus-occne-kube-prom-stack-kube-prometheus-tls-assets-0 replaced secret/prometheus-occne-kube-prom-stack-kube-prometheus-web-config replaced secret/sh.helm.release.v1.occne-alertmanager-snmp-notifier.v1 replaced secret/sh.helm.release.v1.occne-bastion-controller.v1 replaced secret/sh.helm.release.v1.occne-fluentd-opensearch.v1 replaced secret/sh.helm.release.v1.occne-kube-prom-stack.v1 replaced secret/sh.helm.release.v1.occne-metallb.v1 replaced secret/sh.helm.release.v1.occne-metrics-server.v1 replaced secret/sh.helm.release.v1.occne-opensearch-client.v1 replaced secret/sh.helm.release.v1.occne-opensearch-dashboards.v1 replaced secret/sh.helm.release.v1.occne-opensearch-data.v1 replaced secret/sh.helm.release.v1.occne-opensearch-master.v1 replaced secret/sh.helm.release.v1.occne-promxy.v1 replaced secret/sh.helm.release.v1.occne-tracer.v1 replaced secret/webhook-server-cert replaced Error from server (Conflict): error when replacing "STDIN": Operation cannot be fulfilled on secrets "alertmanager-occne-kube-prom-stack-kube-alertmanager-generated": the object has been modified; please apply your changes to the latest version and try again Error from server (Conflict): error when replacing "STDIN": Operation cannot be fulfilled on secrets "alertmanager-occne-kube-prom-stack-kube-alertmanager-tls-assets-0": the object has been modified; please apply your changes to the latest version and try again Error from server (Conflict): error when replacing "STDIN": Operation cannot be fulfilled on secrets "alertmanager-occne-kube-prom-stack-kube-alertmanager-web-config": the object has been modified; please apply your changes to the latest version and try againNote:
You may encounter some errors on the output depending on how the secret is created. You can ignore these errors and verify that the encrypted secret's key is replaced with a new one using the following steps. - Run the following command from a controller node with any
cert pemandkey pempair files to show all existing secrets:sudo ETCDCTL_API=3 /usr/local/bin/etcdctl --cert /etc/ssl/etcd/ssl/<cert-pem-file> --key /etc/ssl/etcd/ssl/<key-pem-file> get --keys-only=true --prefix /registry/secretsSelect any secret path you want to verify from the output.
- To verify that the secret is using the newly generated key, run the
following command from a controller node. Replace
<cert pem file>,<key pem file>and<secret-path>in the following command with the corresponding values.sudo ETCDCTL_API=3 /usr/local/bin/etcdctl --cert /etc/ssl/etcd/ssl/<cert-pem-file> --key /etc/ssl/etcd/ssl/<key-pem-file> get <secret-path> -w fields | grep ValueExample:[cloud-user@occne3-user-k8s-ctrl-3 ~]$ sudo ETCDCTL_API=3 /usr/local/bin/etcdctl --cert /etc/ssl/etcd/ssl/node-occne3-user-k8s-ctrl-1.pem --key /etc/ssl/etcd/ssl/node-occne3-user-k8s-ctrl-1-key.pem get /registry/secrets/default/secret1 -w fields | grep Value "Value" : "k8s:enc:secretbox:v1:key_ZOJ1Hf5OCx:&9\x90\u007f'*6\x0e\xf8]\x98\xd7t1\xa9|\x90\x93\x88\xebc\xa9\xfe\x82<\xebƞ\xaa\x17$\xa4\x14%m\xb7<\x1d\xf7N\b\xa7\xbaZ\xb0\xd4#\xbev)\x1bv9\x19\xdel\xab\x89@\xe7\xaf$L\xb8)\xc9\x1bl\x13\xc1V\x1b\xf7\bX\x88\xe7\ue131\x1dG\xe2_\x04\xa2\xf1n\xf5\x1dP\\4\xe7)^\x81go\x99\x98b\xbb\x0eɛ\xc0R;>աj\xeeV54\xac\x06̵\t\x1b9\xd5N\xa77\xd9\x03㵮\x05\xfb%\xa1\x81\xd5\x0e \xcax\xc4\x1cz6\xf3\xd8\xf9?Щ\x9a%\x9b\xe5\xa7й\xcd!,\xb8\x8b\xc2\xcf\xe2\xf2|\x8f\x90\xa9\x05y\xc5\xfc\xf7\x87\xf9\x13\x0e4[i\x12\xcc\xfaR\xdf3]\xa2V\x1b\xbb\xeba6\x1c\xba\v\xb0p}\xa5;\x16\xab\x8e\xd5Ol\xb7\x87BW\tY;寄ƻ\xcaċ\x87Y;\n;/\xf2\x89\xa1\xcc\xc3\xc9\xe3\xc5\v\x1b\x88\x84Ӯ\xc6\x00\xb4\xed\xa5\xe2\xfa\xa9\xff \xd9kʾ\xf2\x04\x8f\x81,l"This example shows a new key,
key_ZOJ1Hf5OCx, being used to encryptsecret1secret.
8.3.4 Adding a Kubernetes Worker Node
This section describes how to add a Kubernetes node (formally called a "worker" node) to an existing CNE Kubernetes cluster. The procedure is applicable to both CNLB and non-CNLB clusters. However, certain steps may differ depending on that.
Note:
- For a BareMetal installation, ensure that you are familiar with the inventory file preparation procedure. For more information about this procedure, see the "Inventory File Preparation" section in Oracle Communications Cloud Native Core, Cloud Native Environment Installation, Upgrade, and Fault Recovery Guide.
- Run this procedure from the active Bastion Host only.
Limitations
- vCNE CNLB deployment: Node names are defined as a list of string identifiers in
cluster.tfvars. Each identifier can contain up to four characters. By default, a single-character identifier is used and must be enclosed in quotation marks. - BareMetal Deployment: Only one node can be added at a time. Nodes are defined in the
hosts.inifile, and no specific sequence is required. However, duplicate entries are not allowed. If two or more nodes were removed using theremoveBmWorkerNode.pyscript, comment out the other removed nodes inhosts.iniand add them back one at a time. - Ensure that the cluster is in a healthy state before performing this procedure. No nodes should be in a
NotReadystate. Remove any unreachable nodes before proceeding.
Adding a Kubernetes Worker Node on vCNE (OpenStack and VMware)
This section provides procedures to add Kubernetes worker nodes on vCNE CNLB and vCNE VMWare deployments.
Pre-procedure:
- Log in to Bastion Host and verify if it's an active Bastion
Host. If the Bastion Host isn't an active Bastion Host, then log in to
another.
Run the following command to check if the Bastion Host is an active Bastion Host:The system displays the following output if the Bastion Host is an active Bastion Host:
is_active_bastionIS active-bastionThe system displays the following output if the Bastion Host isn't an active Bastion Host:
NOT active-bastion - Run the following command to navigate to the cluster
directory:
$ cd /var/occne/cluster/${OCCNE_CLUSTER}/ - Ensure the
secrets.inifile is present and properly populated.
Perform the following steps to add a Kubernetes node for vCNE CNLB deployments
Note:
CNE now supports the addition of medium Kubernetes worker nodes and CNLB nodes. Adding multiple nodes at a time is also supported.If this feature was enabled during installation, you can use the script to add a standard Kubernetes worker node, a medium Kubernetes worker node, or a CNLB node to the cluster.
If this feature is disabled, you can use the script to add only a standard Kubernetes worker node or a medium Kubernetes worker node.
- Run the following command to open the
$OCCNE_CLUSTER/cluster.tfvarsfile.Modify only one of the fields at a time, and add a new "name" to the lists of node names. The items in a given list cannot be repeated within the same list, and each item must have a maximum of 4 characters (lowercase). OpenTofu sorts each list alphabetically, turning it into a set, a new node can be added regardless of being first, second or last in the set.
Table 8-18 Node Names
Field Example: Old value Example: New value Valid only if occne_node_names ["1", "2", "3"] ["1", "2", "3", "4"]
or
["0", "1", "2", "3"]
All types of vCNE CNLB deployments medium_node_names ["1", "2", "3", "4", "5"] ["1", "2", "3", "4", "5", "6"] or
["1", "2", "a", "3", "4", "5"]This is an optional field. All types of vCNE CNLB deployments.
cnlb_node_names ["1", "2", "3", "4", "5"] ["1", "2", "3", "4", "5", "6"] or
["1", "2", "a", "3", "4", "5"]
CNLB Nodes feature is enabled: cnlb_node_label = TrueEdit the
cluster.tfvarsfile.$ vi $OCCNE_CLUSTER/cluster.tfvarsSample output:
Adding a new node name at the end of the list ... # K8s nodes # occne_node_names = ["1", "2", "3", "4"] ...Adding a new node name at the middle of the list ... # Medium nodes # occne_medium_node_names = ["1", "2", "a", "3", "4", "5"]Adding a new node name at the end of the list ... # CNLB nodes # cnlb_node_names = ["0", "1", "2", "3", "4", "5"] - Run the
addK8sNode.pyscript.Note:
- Log file location: Information will be
displayed on screen and logged to a log file. This file is
located at the path,
/var/occne/cluster/${OCCNE_CLUSTER}/logs/maintenance/add_cnlb_k8s_node_<yyyy-mm-dd_hhmmss>.log.Long‑running processes (such as cluster tests or the node provison) will not appear in the file until they have finished. The process must complete before its entry is recorded.
The standard output (stdout) and standard error output (stderr) commands will be logged to the file, each on a separate line. - Backup file location: The script creates a
backup of the
cluster.tfvars,terraform.tfstatefiles and saves them to the/var/occne/cluster/${OCCNE_CLUSTER}/backup_config/add_cnlb_k8s_node_<yyyy-mm-dd_hhmmss>/location.By default, each run of the script creates a dedicated directory and copy of the files.
The
terraform.tfstatefile is renamed toterraform.tfstate.ORIGto prevent it from being used by the inventory.
- Log file location: Information will be
displayed on screen and logged to a log file. This file is
located at the path,
- For OpenStack, perform this step to source the
openrc.shfile. Theopenrc.shfile sets the necessary environment variables for OpenStack. For VMware, skip this step and move to the next step.- Source the
openrc.shfile.$ source openrc.sh - Enter the OpenStack username and password when
prompted.
The following block shows the username and password prompt displayed by the system:
Please enter your OpenStack Username: Please enter your OpenStack Password as <username>:
- Source the
- Run the
addK8sNode.pyscript. Adding any type of node will produce similar outputs, regardless of whether it is a CNLB node or a regular Kubernetes node.
Sample output for both OpenStack and VMware:$ ./scripts/addK8sNode.py- Initializing Add K8s Node(s) Process - Backing up configuration files... Backup files location: /var/occne/cluster/test-cluster/backup_config/add_cnlb_k8s_node_2025-09-05_162745 - Log file location: /var/occne/cluster/test-cluster/logs/maintenance/add_cnlb_k8s_node_2025-09-05_162745.log, long-running processes will write to it as they finish. - Initializing tofu... Tofu successfully initialized. - Update tfstate (tofu plan)... Tofu successfully planned. - List of new or affected nodes: test-cluster-k8s-node-4 - Testing cluster health... Test pipeline completed successfully. - Setting maintenance banner... Maintenance banner set successfully. - Updating infrastructure (tofu apply)... Tofu successfully applied. - Updating /etc/hosts files... Successfully updated file: /etc/hosts on all servers. - Running provision container (pipeline.sh) - may take considerable time to complete... Provision pipeline completed successfully. - Running Cluster Test: Provision... Test pipeline completed successfully. - Running k8s_install container (pipeline.sh) - may take considerable time to complete... K8s pipeline completed successfully. - Running Cluster Test: Kubernetes... Test pipeline completed successfully. - Running Cluster Test: Common Services... Test pipeline completed successfully. - Restoring default banner... Successfully restored default banner. - Add K8s Node(s) successfully completed - Check the log file for details: /var/occne/cluster/test-cluster/logs/maintenance/add_cnlb_k8s_node_2025-09-05_162745.log
Adding a Kubernetes Worker Node in BareMetal Deployment (MetalLB and CNLB)
- Log in to Bastion Host and verify if it's an active Bastion Host. If the Bastion Host isn't an active Bastion Host, then log in to another.
Run the following command to check if the Bastion Host is an active Bastion Host:The system displays the following output if the Bastion Host is an active Bastion Host:
is_active_bastionIS active-bastionThe system displays the following output if the Bastion Host isn't an active Bastion Host:
NOT active-bastion - Run the following command to navigate to the cluster directory:
$ cd /var/occne/cluster/${OCCNE_CLUSTER}/ - Ensure the
secrets.inifile is present and properly populated. - Ensure the correct Oracle Linux ISO image is available.
- Verify that the Oracle Linux ISO image exists and that it corresponds to the desired version for the new node.
- Verify its permissions and ownership so that Ansible can read it.
$ ls -l /var/occne/osSample output:
total 12305408 -rw------- 1 admusr admusr 12600737792 Mar 21 22:34 OracleLinux-R9-U7-x86_64-dvd.iso - If the ISO is missing, download it from the central repository before proceeding.
- Verify that the cluster is healthy.
Note:
vCNE CNLB script includes this pre-test.$ OCCNE_STAGES=(TEST) pipeline.sh
- Edit the
hosts.inifile by adding a new line for <NODE_FULL_NAME> along with all required properties. Add it under the appropriate hardware sections:- [host_hp_gen_X] for HP
- [host_netra_X] for Netra hardware
hosts.inifile must follow these validation rules:- The required parameters are
<NODE_FULL_NAME>,ansible_host, eitherhp_iloornetra_ilom, andmac. The values for these parameters must be unique across thehosts.inifile. - The
<mac-address>must be a string of six two-digit hexadecimal numbers separated by a dash. - All IP address values must use valid IPv4 format.
- Optional properties include:
pxe_config_ks_nic,pxe_config_nic_list,pxe_uefi, and any extra properties not listed in the documentation. - All properties, whether required or optional, must follow the format,
<KEY>=<VALUE>. There must be no spaces before or after the equals sign. For example,ansible_host=192.168.1.10 - Comments must be added on a separate line using
#. Inline comments are not allowed.For more information on how to fill the inventory file, see the "Inventory file preparation" section in Oracle Communication Cloud Native Core, Cloud Native Environment Installation, Upgrade, and Fault Recovery Guide.
- Open the
hosts.inifile.$ vi hosts.ini - Identify the hosts group:
[host_hp_gen_10]/[host_netra_X] k8s-node.example.oracle.com ansible_host=<ipv4> hp_ilo=<ipv4> mac=<mac-address> pxe_config_ks_nic=<nic0> pxe_config_nic_list=<nic0>,<nic1>,<nic2> pxe_uefi=FalseExample:
<NODE_FULL_NAME>=k8s-node-5.test.us.oracle.comSample output:
... [host_hp_gen_10] k8s-host-1.test.us.oracle.com ansible_host=179.1.5.2 hp_ilo=172.16.9.44 mac=a2-27-3d-d3-b4-00 oam_host=10.75.216.13 k8s-host-2.test.us.oracle.com ansible_host=179.1.5.3 hp_ilo=172.16.9.45 mac=4d-d9-1a-e2-7e-e8 oam_host=10.75.216.14 k8s-host-3.test.us.oracle.com ansible_host=179.1.5.4 hp_ilo=172.16.9.46 mac=e1-15-b4-1d-32-10 k8s-node-1.test.us.oracle.com ansible_host=179.1.5.5 hp_ilo=172.16.9.47 mac=3b-d2-2d-f6-1e-20 k8s-node-2.test.us.oracle.com ansible_host=179.1.5.6 hp_ilo=172.16.9.48 mac=a8-1a-37-b1-c0-dc k8s-node-3.test.us.oracle.com ansible_host=179.1.5.7 hp_ilo=172.16.9.49 mac=a4-be-2d-3f-21-f0 k8s-node-4.test.us.oracle.com ansible_host=179.1.5.8 hp_ilo=172.16.9.35 mac=3a-d9-2c-e6-35-18 # New node k8s-node-5.test.us.oracle.com ansible_host=179.1.5.9 hp_ilo=172.16.9.46 mac=2a-e1-c3-d4-12-a9 ...
- Open the
- Add the
<NODE_FULL_NAME>under the[kube-node]header, then save and exit.- Open the
hosts.inifile.$ vi hosts.ini - Add the new node name:
[kube-node] k8s-node.example.oracle.comExample:
<NODE_FULL_NAME>=k8s-node-5.test.us.oracle.comSample output:
... [kube-node] k8s-node-1.test.us.oracle.com k8s-node-2.test.us.oracle.com k8s-node-3.test.us.oracle.com k8s-node-4.test.us.oracle.com # New node k8s-node-5.test.us.oracle.com ...
- Open the
- For BareMetal CNLB only: Add the new node in the
hosts.ini[cnlb_node]section if it is to be added as cnlb_node.- Open the
hosts.inifile.$ vi hosts.ini - Add the new node name:
[cnlb_node] k8s-node.example.oracle.comExample:
<NODE_FULL_NAME>=k8s-node-5.test.us.oracle.comSample output:
... [cnlb_node] k8s-node-2.test.us.oracle.com k8s-node-4.test.us.oracle.com # New node k8s-node-5.test.us.oracle.com [cnlb:children] k8s-cluster occne_bastion
- Open the
- Run the
addBmWorkerNode.pyscript using the same<NODE_FULL_NAME>that was added to thehosts.inifile.Note:
The script displays information on the screen and also logs it to a file at the following location:/var/occne/cluster/${OCCNE_CLUSTER}/addBmWkrNodeCapture-<mmddyyyy_hhmmss>.logLong-running processes, such as node provisioning, are written to the log file only after they complete.
$ scripts/maintenance/addBmWorkerNode.py -nn <NODE_FULL_NAME>Example:
$ scripts/maintenance/addBmWorkerNode.py -nn k8s-5.test.us.oracle.comSample output:
Beginning add worker node: k8s-5.test.us.oracle.com - Backing up configuration files - Verify hosts.ini values - Updating /etc/hosts on all nodes with new node - Successfully updated file: /etc/hosts on all servers - check /var/occne/cluster/test/addBmWkrNodeCapture-05312024_224446.log for details. - Set maintenance banner - Successfully set maintenance banner - check /var/occne/cluster/test/addBmWkrNodeCapture-05312024_224446.log for details. - Create toolbox - Checking if the rook-ceph toolbox deployment already exists. - rook-ceph toolbox deployment does not exist. - Creating the rook-ceph toolbox deployment. - rook-ceph toolbox created. - Wait for Toolbox pod - Waiting for Toolbox pod to be in Running state. - Waiting for toolbox pod in namespace rook-ceph to be in Running state, current state: Pending - ToolBox pod in namespace rook-ceph is now in Running state. - Updating OS on new node - Successfully run Provisioning pipeline - check /var/occne/cluster/test/addBmWkrNodeCapture-05312024_224446.log for details. - Scaling new node into cluster - Successfully run k8_install scale playbook - check /var/occne/cluster/test/addBmWkrNodeCapture-05312024_224446.log for details. - Running verification - Node k8s-5.test.us.oracle.com verification passed. - Restarting rook-ceph operator - rook-ceph pods ready! - Restoring default banner - Successfully run POST stage on PROV container - check /var/occne/cluster/test/addBmWkrNodeCapture-05312024_224446.log for details. Worker node: k8s-5.test.us.oracle.com added successfully
Post Verification
- Run the following commands to verify if the node is added successfully:
$ kubectl get nodesExample output for BareMetal:
NAME STATUS ROLES AGE VERSION k8s-master-1.test.us.oracle.com Ready control-plane 8d10h v1.33.1 k8s-master-2.test.us.oracle.com Ready control-plane 8d10h v1.33.1 k8s-master-3.test.us.oracle.com Ready control-plane 8d10h v1.33.1 k8s-node-1.test.us.oracle.com Ready <none> 8d10h v1.33.1 k8s-node-2.test.us.oracle.com Ready <none> 8d10h v1.33.1 k8s-node-4.test.us.oracle.com Ready <none> 8d10h v1.33.1 k8s-node-5.test.us.oracle.com Ready <none> 15m v1.33.1 # <------ Example: New nodeExample output for vCNE OpenStack CNLB (CNLB Nodes enabled):
NAME STATUS ROLES AGE VERSION test-cluster-k8s-ctrl-1 Ready control-plane 45h v1.33.1 test-cluster-k8s-ctrl-2 Ready control-plane 45h v1.33.1 test-cluster-k8s-ctrl-3 Ready control-plane 45h v1.33.1 test-cluster-k8s-node-1 Ready <none> 45h v1.33.1 test-cluster-k8s-node-2 Ready <none> 45h v1.33.1 test-cluster-k8s-node-a Ready <none> 9m v1.33.1 # <------ Example: New node test-cluster-k8s-node-cnlb-1 Ready <none> 45h v1.33.1 test-cluster-k8s-node-cnlb-2 Ready <none> 45h v1.33.1 test-cluster-k8s-node-cnlb-3 Ready <none> 45h v1.33.1 test-cluster-k8s-node-cnlb-4 Ready <none> 45h v1.33.1 test-cluster-k8s-node-cnlb-5 Ready <none> 45h v1.33.1 - Verify that the cluster is healthy. The following are simple examples.
- Retrieve all nodes from all namespaces and verify that they are all up and running.
$ kubectl get pods -A - For MetalLB Only, verify that all services are assigned and accessible.
$ kubectl get svc -A
- Retrieve all nodes from all namespaces and verify that they are all up and running.
Troubleshooting
If an issue occurs while adding a new node, it is strongly recommended to contact the support team.
Advanced Options for vCNE CNLB
The vCNE CNLB script, addK8sNode.py, supports additional arguments that can help troubleshoot common issues or resume a node addition process after a previous failure.
Use the script’s help option for more information about each argument.
$ scripts/addK8sNode.py -hSample output:
usage: addK8sNode.py [-h] [-d] [-nb] [-nr] [-r] [-s {PRE,PROV,K8S,CFG} [{PRE,PROV,K8S,CFG} ...]] [-R] [-D]
Add one or more K8s nodes or CNLB K8s nodes (control plane nodes are not supported) to an OCCNE cluster.
Optional arguments:
-d, --debug Debug mode.
-nb, --no-backup Do not create backup.
-nr, --include-not-ready
Include NotReady nodes in the provisioning and k8s_install procedure. Allows the script to resume from a previous failure or unhealthy cluster state. Use with
caution.
-r, --resume Allow the script to resume after a previous failure.
-s {PRE,PROV,K8S,CFG} [{PRE,PROV,K8S,CFG} ...], --skip-test {PRE,PROV,K8S,CFG} [{PRE,PROV,K8S,CFG} ...]
Do not test the cluster health. By default, all tests are run; specify individual tests to be skipped.
-R, --refresh Allow OpenTofu to synchronize its state with current infrastructure resources. Internally sends a -refresh-only command to both tofu plan and apply commands.
-D, --dry-run Test mode. Identifies new or affected nodes without applying changes. Stops in the init phase.
Examples:
./addK8sNode.py
./addK8sNode.py --debug
./addK8sNode.py -nb -d -nr -r
./addK8sNode.py --debug --no-backup --dry-run
./addK8sNode.py --include-not-ready --resume
./addK8sNode.py --resume --refresh
./addK8sNode.py -d -nr --skip-test PRE CFG --resume -R8.3.5 Removing a Kubernetes Worker Node
This section describes how to remove a Kubernetes node (formally called a "worker" node) to an existing CNE Kubernetes cluster. The procedure is applicable to both CNLB and non-CNLB clusters. However, certain steps may differ depending on that.
Prerequisites
- For a BareMetal installation, ensure that you are familiar with the inventory file preparation procedure. For more information about this procedure, see "Inventory File Preparation" section in Oracle Communications Cloud Native Core, Cloud Native Environment Installation, Upgrade, and Fault Recovery Guide.
- Run this procedure from the active Bastion Host only.
Points to note
- For dedicated CNLB nodes in a CNE cluster, a minimum of three nodes is recommended to provide resilience. At least two CNLB nodes are required for the CNE cluster to function.
- vCNE CNLB deployment: Only one node can be removed at a time.
- BareMetal deployment: Only one node can be removed at a time.
- All platforms: It is possible to run this procedure multiple times in a row to remove various nodes from the cluster, however there must be a minimum number/set of nodes available for the cluster to function correctly. See the prerequisites section for more information.
- Bare Metal: CNE does not support standard recovery procedures when more than one node enters the NotReady state. In such cases, the cluster is considered impaired, and the customer must raise a support ticket for further assistance.
Pre-procedure:
- Log in to Bastion Host and verify if it's an active Bastion
Host. If the Bastion Host isn't an active Bastion Host, then log in to
another.
Run the following command to check if the Bastion Host is an active Bastion Host:The system displays the following output if the Bastion Host is an active Bastion Host:
is_active_bastionIS active-bastionThe system displays the following output if the Bastion Host isn't an active Bastion Host:
NOT active-bastion - Run the following command to navigate to the cluster
directory:
cd /var/occne/cluster/${OCCNE_CLUSTER}/ - Ensure the
secrets.inifile is present and properly populated.
Perform the following steps to remove a Kubernetes node for vCNE CNLB deployments (Openstack and VMware)
Note:
- The procedure and script are applicable to “CNLB nodes”.
- If this feature was previously enabled (only during installation), the script can be used to remove either a new Kubernetes node or a CNLB node to the cluster.
- If the feature is disabled, this script can be used to remove a standard Kubernetes node.
- Run the following command to open the
$OCCNE_CLUSTER/cluster.tfvarsfile.Modify only one of the fields at a time, and add a new "name" to the lists of node names. The items in a given list cannot be repeated within the same list, and each item must have a maximum of 4 characters (lowercase). OpenTofu sorts each list alphabetically, turning it into a set, a new node can be added regardless of being first, second or last in the set.
Table 8-19 Node Names
Field Example: Old value Example: New value Valid only if occne_node_names ["1", "2", "3"] ["1", "2", "3", "4"]
or
["0", "1", "2", "3"]
All types of vCNE CNLB deployments cnlb_node_names ["1", "2", "3", "4", "5"] ["1", "2", "3", "4", "5", "6"]
or
["1", "2", "a", "3", "4", "5"]
CNLB Nodes feature is enabled: cnlb_node_label = TrueEdit the
cluster.tfvarsfile.$ vi $OCCNE_CLUSTER/cluster.tfvarsSample output: Removing a node name at the end of the list
... # K8s nodes # occne_node_names = ["1", "2", "3", "4"] ...Sample output: Removing a node name at the beginning of the list
... # CNLB nodes # cnlb_node_names = ["2", "3", "4", "5"] - Run the
removeK8sNode.pyscript.Note:
- Log file location: Information will be
displayed on screen and logged to a log file. This file is
located at the path,
/var/occne/cluster/${OCCNE_CLUSTER}/logs/maintenance/remove_cnlb_k8s_node_<yyyy-mm-dd_hhmmss>.log.Long-running processes (such as cluster tests or the node provison) will not appear in the file until they have finished. The process must complete before its entry is recorded.
The standard output (stdout) and standard error output (stderr) commands will be logged to the file, each on a separate line. - Backup file location: The script creates a
backup of the
cluster.tfvars,terraform.tfstatefiles and saves them to the/var/occne/cluster/${OCCNE_CLUSTER}/backup_config/remove_cnlb_k8s_node_<yyyy-mm-dd_hhmmss>/location.By default, each run of the script creates a dedicated directory and copy of the files.
The
terraform.tfstatefile is renamed toterraform.tfstate.ORIGto prevent it from being used by the inventory.
- Log file location: Information will be
displayed on screen and logged to a log file. This file is
located at the path,
- For OpenStack, perform this step to source the
openrc.shfile. Theopenrc.shfile sets the necessary environment variables for OpenStack. For VMware, skip this step and move to the next step.- Source the
openrc.shfile.$ source openrc.sh - Enter the OpenStack username and password when prompted.
The following block shows the username and password prompt displayed by the system:
Please enter your OpenStack Username: Please enter your OpenStack Password as <username>:
Note:
It is assumed that the provided credentials and theopenrc.shfile are current, valid, and have the necessary permissions.
- Source the
- Verify that the cluster is healthy.
Note:
As mentioned in the introduction, while it is possible to run this procedure even if the node to be removed is considered unhealthy, it is recommended to perform this step to check the cluster health. The vCNE CNLB script includes this health pre-check by default.$ OCCNE_STAGES=(TEST) pipeline.sh - Run the
removeK8sNode.pyscript. removing any type of node will produce similar outputs, regardless of whether it is a CNLB node or a regular Kubernetes node.Run the following script to remove a Kubernetes node:
Sample output for both OpenStack and VMware:./scripts/removeK8sNode.pyInitializing Remove K8s Node(s) Process - Backing up configuration files... Backup files location: /var/occne/cluster/test-cluster/backup_config/remove_cnlb_k8s_node_2025-09-10_003841/ - Log file location: /var/occne/cluster/test-cluster/logs/maintenance/remove_cnlb_k8s_node_2025-09-10_003841.log, long-running processes will write to it as they finish. - Initializing tofu... Tofu successfully initialized. - Update tfstate (tofu plan)... Tofu successfully planned. - List of nodes to be removed: cluster-test-k8s-node-cnlb-2 - PRE: Testing cluster health... Test pipeline completed successfully. - Setting maintenance banner... Maintenance banner set successfully. - Cordoning node(s)... Node(s) successfully cordoned. - Draining node(s) - can take considerable time to complete... Node(s) successfully drained. - Removing node(s) from Kubernetes cluster... Node(s) removed successfully from Kubernetes. - Updating infrastructure (tofu apply)... Tofu successfully applied. - Update /etc/hosts files on all remaining servers... Update /etc/host successful. - POST: Testing cluster health... Test pipeline completed successfully. - Restoring default banner... Successfully restored default banner. - Remove K8s Node(s) successfully completed - Check the log file for details: /var/occne/cluster/test-cluster/logs/maintenance/remove_cnlb_k8s_node_2025-09-10_003841.log
Note:
For any failure or successful run, the system maintains all pipeline outputs in the
/var/occne/cluster/${OCCNE_CLUSTER}/removeWrkNodeCapture-<mmddyyyy_hhmmss>.log
file. The system displays other outputs, messages, or errors directly on the
terminal during the runtime of the script.
- Log in to Bastion Host and verify if it's an active Bastion Host. If the Bastion
Host isn't an active Bastion Host, then log in to another.
Use the following command to check if the Bastion Host is an active Bastion Host:
The system displays the following output if the Bastion Host is an active Bastion Host:$ is_active_bastionIS active-bastionThe system displays the following output if the Bastion Host isn't an active Bastion Host:
NOT active-bastion - Navigate to the
/var/occne/cluster/${OCCNE_CLUSTER}/scripts/maintenancedirectory:$ cd /var/occne/cluster/${OCCNE_CLUSTER}/scripts/maintenance - Run the following command to remove the targeted worker node:
Note:
- Log file location: Information will be displayed
on screen and logged to a log file. This file is located at the
path,
/var/occne/cluster/${OCCNE_CLUSTER}/removeBmWkrNodeCapture-<mmddyyyy_hhmmss>.log.Long‑running processes (such as node provisioning) will not appear in the file until they have finished. The process must complete before its entry is recorded.
- Backup file location: The script creates a backup
of the
lbCtrlData.json,/etc/hosts,registries.conf, andhosts.inifiles and saves them to the/var/occne/cluster/${OCCNE_CLUSTER}/backUpConfig/location.
where,$ artifacts/maintenance/removeBmWorkerNode.py -nn <NODE_FULL_NAME><NODE_FULL_NAME>is the name of the node that you want to remove (in this case,k8s-3.test.us.oracle.com).For example:$ artifacts/maintenance/removeBmWorkerNode.py -nn k8s-3.test.us.oracle.comSample output:
Beginning remove worker node: k8s-3.test.us.oracle.com - Backing up configuration files. - Backup folder: /var/occne/cluster/delta/backupConfig - Removing BM worker node, could take considerable amount of time. - k8s-3.test.us.oracle.com is not reachable - Performing node cleanup. - k8s-3.test.us.oracle.com pods are scheduled for deletion. - Node cleanup completed. - Removing... Please Wait. Do not cancel. - Removed. Check /var/occne/cluster/delta/removeBmWkrNodeCapture-05312024_215105.log for details. - Checking if the rook-ceph toolbox deployment already exists. - rook-ceph toolbox deployment does not exist. - Creating the rook-ceph toolbox deployment. - rook-ceph toolbox created. - Waiting for Toolbox pod to be Running. - Waiting for toolbox pod in namespace rook-ceph to be in Running state, current state: - ToolBox pod in namespace rook-ceph is now in Running state. - Getting the OSD Id. - Found OSD ID: 1, for worker node: k8s-3.test.us.oracle.com - Scaling down the rook-ceph-operator deployment. - rook-ceph-operator deployment scaled down. - Scaling down the OSD deployment. - rook-ceph-osd-1 deployment scaled down. - Purging OSD Id. - OSD.1 purged. - OSD host k8s-3.test.us.oracle.com removed. - OSD auth key osd.1 removed. - Deleting OSD deployment. - rook-ceph-osd-1 deleted. - Scaling up the rook-ceph-operator deployment. - rook-ceph-operator deployment scaled up. - Checking if the rook-ceph toolbox deployment exists. - Removing the rook-ceph toolbox deployment. - rook-ceph toolbox removed. - Cleanup leftover rook-ceph-mon replicasets - Found pod rook-ceph-mon-c-74f5d4d498-tw4d6, getting replica set... - Found deployment rook-ceph-mon-c, deleting... - rook-ceph-mon cleanup completed. Worker node: k8s-3.test.us.oracle.com removed Successfully - Edit the
hosts.inifile, remove the lines that contain <NODE_FULL_NAME>, must be the same node used the previous step.Run the following command to open the
hosts.inifile:$ vi hosts.iniFor the following sample output,
<NODE_FULL_NAME>isk8s-node-3.test.us.oracle.com[host_hp_gen_X]/[host_netra_X] # Host header may vary depending on your hardware k8s-host-1.test.us.oracle.com ansible_host=179.1.5.2 hp_ilo=172.16.9.44 mac=a2-27-3d-d3-b4-00 oam_host=10.75.216.13 k8s-host-2.test.us.oracle.com ansible_host=179.1.5.3 hp_ilo=172.16.9.45 mac=4d-d9-1a-e2-7e-e8 oam_host=10.75.216.14 k8s-host-3.test.us.oracle.com ansible_host=179.1.5.4 hp_ilo=172.16.9.46 mac=e1-15-b4-1d-32-10 k8s-node-1.test.us.oracle.com ansible_host=179.1.5.5 hp_ilo=172.16.9.47 mac=3b-d2-2d-f6-1e-20 k8s-node-2.test.us.oracle.com ansible_host=179.1.5.6 hp_ilo=172.16.9.48 mac=a8-1a-37-b1-c0-dc k8s-node-3.test.us.oracle.com ansible_host=179.1.5.7 hp_ilo=172.16.9.49 mac=a4-be-2d-3f-21-f0 # <------ Remove this whole line k8s-node-4.test.us.oracle.com ansible_host=179.1.5.8 hp_ilo=172.16.9.35 mac=3a-d9-2c-e6-35-18 . . . [kube-node] k8s-node-1.test.us.oracle.com k8s-node-2.test.us.oracle.com k8s-node-3.test.us.oracle.com # <------ Remove this whole line k8s-node-4.test.us.oracle.comSave and exit.
- Log file location: Information will be displayed
on screen and logged to a log file. This file is located at the
path,
Post verification
This procedure provides steps to verify if the node is removed successfully.Perform the following steps to verify the node is no longer part of Kubernetes cluster:$ kubectl get nodesBefore performing the procedure, the node k8s-node-4.test.us.oracle.com was part of the cluster. The following sample output for BareMetal shows that the node is removed:
NAME STATUS ROLES AGE VERSION
k8s-master-1.test.us.oracle.com Ready control-plane 8d10h v1.33.1
k8s-master-2.test.us.oracle.com Ready control-plane 8d10h v1.33.1
k8s-master-3.test.us.oracle.com Ready control-plane 8d10h v1.33.1
k8s-node-1.test.us.oracle.com Ready <none> 8d10h v1.33.1
k8s-node-2.test.us.oracle.com Ready <none> 8d10h v1.33.1
k8s-node-3.test.us.oracle.com Ready <none> 8d10h v1.33.1
k8s-node-5.test.us.oracle.com Ready <none> 8d10h v1.33.1
k8s-node-6.test.us.oracle.com Ready <none> 8d10h v1.33.1/etc/hosts file:$ cat /etc/hostsBefore performing the procedure, the node test-cluster-k8s-node-6 was part of the cluster. The following sample output for vCNE shows that the node is removed:
127.0.0.1 localhost localhost.localdomain localhost4 localhost4.localdomain4
::1 localhost localhost.localdomain localhost6 localhost6.localdomain6
10.1.1.3 centralrepo
192.168.202.3 test-cluster-bastion-2.novalocal test-cluster-bastion-2
192.168.202.4 test-cluster-k8s-node-1.novalocal test-cluster-k8s-node-1
192.168.202.5 test-cluster-k8s-node-2.novalocal test-cluster-k8s-node-2
192.168.200.6 test-cluster-k8s-node-3.novalocal test-cluster-k8s-node-3
192.168.203.7 test-cluster-k8s-node-4.novalocal test-cluster-k8s-node-4
192.168.201.8 test-cluster-k8s-node-5.novalocal test-cluster-k8s-node-5
192.168.201.9 test-cluster-k8s-ctrl-1.novalocal test-cluster-k8s-ctrl-1
192.168.201.10 test-cluster-k8s-ctrl-2.novalocal test-cluster-k8s-ctrl-2
192.168.201.11 test-cluster-k8s-ctrl-3.novalocal test-cluster-k8s-ctrl-3
127.0.0.1 occne-repo-host test-cluster-bastion-1
192.168.201.9 lb-apiserver.kubernetes.local
192.168.201.10 lb-apiserver.kubernetes.local
192.168.201.11 lb-apiserver.kubernetes.local$ ./hosts --hostfileBefore performing the procedure, the node cluster-test-k8s-node-3 was part of the cluster. The following sample output for vCNE (CNLB Nodes) shows that the node is removed:
## begin hosts generated by terraform.py ##
10.123.154.116 cluster-test-bastion-1
10.123.154.60 cluster-test-bastion-2
192.168.202.217 cluster-test-k8s-node-cnlb-1
192.168.202.33 cluster-test-k8s-node-cnlb-2
192.168.200.219 cluster-test-k8s-node-cnlb-3
192.168.203.179 cluster-test-k8s-node-cnlb-4
192.168.201.229 cluster-test-k8s-node-cnlb-5
192.168.201.204 cluster-test-k8s-ctrl-1
192.168.201.130 cluster-test-k8s-ctrl-2
192.168.201.206 cluster-test-k8s-ctrl-3
192.168.203.205 cluster-test-k8s-node-1
192.168.203.205 cluster-test-k8s-node-2
192.168.203.205 cluster-test-k8s-node-4
## end hosts generated by terraform.py ##Verify that the cluster is healthy. The following are simple examples.
Run the following command to retrieve all node from all namespaces and verify that they are all up and running:
$ kubectl get pods -ARun the following command to verify that all services are assigned and accessible.
$ kubectl get svc -Akco get deploy,sts,ds -o json | jq -r '
.items[]
| select(.spec.template.metadata.annotations["oracle.com.cnc/cnlb"])
| "\(.metadata.name): \(.spec.template.metadata.annotations."oracle.com.cnc/cnlb" | fromjson[0].cnlbIp)"'Troubleshooting
The vCNE CNLB script
(removeK8sNode.py) can accept additional arguments that
are useful for troubleshooting common issues or for resuming a node deletion
process if it failed
previously.
$ scripts/removeK8sNode.py -hNote:
Use the script’shelp option for more information about each
argument.
Sample output:
usage: removeK8sNode.py [-h] [-d] [-nb] [-i] [-iq] [-s {PRE,POST} [{PRE,POST} ...]] [-R] [-D]
Remove one or more K8s nodes or CNLB K8s nodes (control plane nodes are not supported) from an OCCNE cluster.
Optional arguments:
-d, --debug Debug mode.
-nb, --no-backup Do not create backup.
-i, --ignore-disruption
Ignores pod disruption budget while draining a node. This could lead to service disruption use with caution or manually shift load around before attempting to
remove a node.
-iq, --ignore-quota Allows the script to remove a node even if the number of nodes would be too low to execute its load. Use it only to replace a node (add it back immediately after
the removal is complete).
-s {PRE,POST} [{PRE,POST} ...], --skip-test {PRE,POST} [{PRE,POST} ...]
Do not test the cluster health. By default, all tests are run; specify individual tests to be skipped.
-R, --refresh Allow OpenTofu to synchronize its state with current infrastructure resources. Internally sends a -refresh-only command to both tofu plan and apply commands.
-D, --dry-run Test mode. Identifies new or affected nodes without applying changes. Stops in the init phase.
Examples:
./removeK8sNode.py
./removeK8sNode.py --debug
./removeK8sNode.py -nb -d
./removeK8sNode.py --debug --no-backup --dry-run
./removeK8sNode.py --ignore-disruption
./removeK8sNode.py --ignore-quota --refresh
./removeK8sNode.py -d --skip-test PRE POST -R8.3.6 Adding a New External Network
This section provides the procedure to add a new external network that applications can use to talk to external clients, by adding a Peer Address Pool (PAP) in a Bare Metal after installation in CNE.
OCCNE_STAGES=(TEST) pipeline.sh8.3.7 Performing an etcd Data Backup
This section describes the procedure to back up the etcd database.
- After a 5G NF is installed, uninstalled, or upgraded
- Before and after CNE is upgraded
- Find Kubernetes controller hostname: Run the following command to
get the names of Kubernetes controller nodes. The backup must be taken from any
one of the controller nodes that is in Ready
state.
$ kubectl get nodes - Run the etcd-backup script:
- On the Bastion Host, switch to the
/var/occne/cluster/${OCCNE_CLUSTER}/artifactsdirectory:$ cd /var/occne/cluster/${OCCNE_CLUSTER}/artifacts - Run the
etcd_backup.shscript:$ ./etcd_backup.shOn running the script, the system prompts you to enter the k8s-ctrl node name. Enter the name of the controller node from which you want to back up the etcd data.
Note:
The script keeps only three backup snapshots in the PVC and automatically deletes the older snapshots.
- On the Bastion Host, switch to the
8.4 Managing Kyverno
Note:
- PodSecurityPolicies (PSP) are not supported from CNE 23.2.x onwards (that is, Kubernetes 1.25.x onwards).
- If you are creating your own custom Kyverno policies, ensure that you
exclude
occne-infranamespace as shown in the following example. This ensures that the existingoccne-infradeployments are not affected.policyExclude: disallow-capabilities: any: - resources: kinds: - Pod - DaemonSet namespaces: - kube-system - occne-infra - rook-ceph
Kyverno Deployment
Kyverno framework is deployed as a common service in CNE. All PSP based policies are removed. CNE is configured with number of baseline policies that are applied across CNE clusters.
Table 8-20 Kyverno Policies
| Policy | Policy Level (23.1.x) | Policy Level (23.2.x to 24.2.x) | Policy Level (24.3.x onwards) |
|---|---|---|---|
| disallow-capabilities | audit | enforced | enforced |
| disallow-host-namespaces | audit | enforced | enforced |
| disallow-host-path | audit | enforced | enforced |
| disallow-host-ports | audit | enforced | enforced |
| disallow-host-process | audit | enforced | enforced |
| disallow-privileged-containers | audit | enforced | enforced |
| disallow-proc-mount | audit | enforced | enforced |
| disallow-selinux | audit | enforced | enforced |
| restrict-apparmor-profiles | audit | enforced | enforced |
| restrict-seccomp | audit | enforced | enforced |
| restrict-sysctls | audit | enforced | enforced |
| require-emptydir-requests-and-limits | NA | NA | audit |
In release 23.1.x, the baseline policies are set to the "audit" level. This means that, the cluster keeps record of the policy failures, but doesn’t cause non-compliant resources to fail. Starting 23.2.x, the policies are set to the "enforced" level. This means that, any resource that are non-compliant to any policy will fail. When a new policy is added in a release, CNE determines the level of the policy to control how a non-compliant scenario is handled.
References:
- Kyverno pod security policy: https://github.com/kyverno/kyverno/tree/main/charts/kyverno-policies
- Kyverno policy validation and enforcement: https://kyverno.io/docs/writing-policies/validate/
- Kyverno policy writing: https://kyverno.io/docs/kyverno-policies/
- Kyverno reporting: https://kyverno.io/docs/policy-reports/
- Kyverno metrics: https://kyverno.io/docs/monitoring/#installation-and-setup
8.4.1 Accessing Cluster Policy Report
Kyverno performs regular scans and updates validation status in
"ClusterPolicyReport". When a new
resource is created by a user or process, Kyverno checks the
properties of the resource against the validation rule. This
section provides information about access
ClusterPolicyReport.
ClusterPolicyReport :$ kubectl get policyreport -ANAMESPACE NAME PASS FAIL WARN ERROR SKIP AGE
ingress-nginx polr-ns-ingress-nginx 11 1 0 0 0 10d
occne-infra polr-ns-occne-infra 263 13 0 0 0 10ddescribe policyreport command to get details about the policies that is violated. For example, in the above example, the ingress-nginx deployment reports one violation. You can use the following command to get details about the policy violation in ingress-nginx:$ kubectl describe policyreport polr-ns-ingress-nginx -n ingress-nginxName: polr-ns-ingress-nginx
Namespace: ingress-nginx
Labels: managed-by=kyverno
Annotations: <none>
API Version: wgpolicyk8s.io/v1alpha2
Kind: PolicyReport
.
.
.
Results:
Category: Pod Security Standards (Baseline)
Message: validation error: Use of host ports is disallowed. The fields spec.containers[*].ports[*].hostPort , spec.initContainers[*].ports[*].hostPort, and spec.ephemeralContainers[*].ports[*].hostPort must either be unset or set to `0`. Rule autogen-host-ports-none failed at path /spec/template/spec/containers/0/ports/0/hostPort/
Policy: disallow-host-ports
Resources:
API Version: apps/v1
Kind: DaemonSet
Name: ingress-nginx-controller
Namespace: ingress-nginxingress-nginx-controller resource violates the disallow-host-ports policy.
8.4.2 Migrating from PSP to Kyverno
Every component that runs on CNE 23.2.x and above must migrate all PSP based policy resources to Kyverno pod security policies. For information and examples about performing a migration from PSP to Kyveno, see Kyverno pod security policy and Kyverno source documentations.
8.4.3 Adding Policy Exclusions and Exceptions
This section provides details about adding exclusions and exceptions to Kyverno policies.
Adding Exclusions
Exclusions simplify policy management when used alongside Pod Security Admission
(PSA). Instead of creating multiple policies for each control in PSA, you can
leverage Kyverno to provide detailed and selective exclusions, reducing policy
overhead and enhancing overall manageability. You can add exclusion to policies by
editing the current policies or running kubectl patch. For more
information about policy exclusions, see Kyverno documentation.
Adding Exceptions
PolicyException
resource:apiVersion: v1
items:
- apiVersion: kyverno.io/v2alpha1
kind: PolicyException
metadata:
name: cncc-exception
namespace: occne-infra
spec:
exceptions:
- policyName: disallow-capabilities
ruleNames:
- adding-capabilities
match:
any:
- resources:
kinds:
- Pod
- Deployment
names:
- cncc-debug-tool*
namespaces:
- cncc
kind: List
metadata:
resourceVersion: ""In this example, PolicyException allows the pods named
cncc-debug-tool* (the * character indicates
the system to include any resources belonging to a deployment to be allowed) in the
"cncc" namespace to bypass the "disallow-capabilities >
adding-capabilities" policy.
policyException.yaml), proceed to create the
resource:$ kubectl create -f policyException.yaml8.4.4 Managing Kyverno Metrics
When you install Kyverno using Helm, additional services are created inside the Kyverno namespace that expose metrics on port 8000. This section provides details about managing Kyverno metrics.
By default, the service type of these services is ClusterIP.
$ kubectl -n kyverno get svcSample output:
NAME TYPE CLUSTER-IP EXTERNAL-IP PORT(S) AGE
occne-kyverno-reports-controller-metrics ClusterIP 10.233.21.143 <none> 8000/TCP 10d
occne-kyverno-svc ClusterIP 10.233.20.88 <none> 443/TCP 10d
occne-kyverno-svc-metrics ClusterIP 10.233.6.173 <none> 8000/TCP 10d8.4.5 Validating Kyverno Compliance
This section provides the steps to validate if the CNE cluster runs Kyverno policy management tool and if all CNE resources run in compliance mode.
Prerequisites
- CNE cluster must be healthy.
- The CNE cluster version must be at least 23.2.0.
- All pods in the cluster must be running.
- There must be no violations in the Kyverno report.
- Verify Kyverno Policies:
- Run the following command to list all
clusterpolicyconfigured by Kyverno:$ kubectl get clusterpolicy -n kyvernoSample output:NAME BACKGROUND VALIDATE ACTION READY AGE disallow-capabilities true Enforce true 10h disallow-host-namespaces true Enforce true 10h disallow-host-path true Enforce true 10h disallow-host-ports true Enforce true 10h disallow-host-process true Enforce true 10h disallow-privileged-containers true Enforce true 10h disallow-proc-mount true Enforce true 10h disallow-selinux true Enforce true 10h restrict-apparmor-profiles true Enforce true 10h restrict-seccomp true Enforce true 10h restrict-sysctls true Enforce true 10h - Run the following command and ensure that there are no policy violations
in any policy report in any
namespace:
$ kubectl get policyreport -ASample output:NAMESPACE NAME PASS FAIL WARN ERROR SKIP AGE ingress-nginx cpol-disallow-capabilities 4 0 0 0 0 10h ingress-nginx cpol-disallow-host-namespaces 4 0 0 0 0 10h ingress-nginx cpol-disallow-host-path 4 0 0 0 0 10h ingress-nginx cpol-disallow-host-process 5 0 0 0 0 10h ingress-nginx cpol-disallow-privileged-containers 4 0 0 0 0 10h ingress-nginx cpol-disallow-proc-mount 5 0 0 0 0 10h ingress-nginx cpol-disallow-selinux 10 0 0 0 0 10h ingress-nginx cpol-restrict-apparmor-profiles 5 0 0 0 0 10h ingress-nginx cpol-restrict-seccomp 5 0 0 0 0 10h ingress-nginx cpol-restrict-sysctls 5 0 0 0 0 10h kube-system cpol-disallow-host-process 62 0 0 0 0 10h kube-system cpol-disallow-proc-mount 62 0 0 0 0 10h kube-system cpol-disallow-selinux 124 0 0 0 0 10h kube-system cpol-restrict-apparmor-profiles 62 0 0 0 0 10h kube-system cpol-restrict-seccomp 62 0 0 0 0 10h kube-system cpol-restrict-sysctls 62 0 0 0 0 10h kyverno cpol-disallow-capabilities 3 0 0 0 0 9h kyverno cpol-disallow-host-namespaces 3 0 0 0 0 9h kyverno cpol-disallow-host-path 3 0 0 0 0 9h kyverno cpol-disallow-host-ports 3 0 0 0 0 9h kyverno cpol-disallow-host-process 5 0 0 0 0 9h kyverno cpol-disallow-privileged-containers 3 0 0 0 0 9h kyverno cpol-disallow-proc-mount 5 0 0 0 0 9h kyverno cpol-disallow-selinux 10 0 0 0 0 9h kyverno cpol-restrict-apparmor-profiles 5 0 0 0 0 9h kyverno cpol-restrict-seccomp 5 0 0 0 0 9h kyverno cpol-restrict-sysctls 5 0 0 0 0 9h occne-infra cpol-disallow-host-process 86 0 0 0 0 9h occne-infra cpol-disallow-proc-mount 86 0 0 0 0 9h occne-infra cpol-disallow-selinux 172 0 0 0 0 9h occne-infra cpol-restrict-apparmor-profiles 86 0 0 0 0 9h occne-infra cpol-restrict-seccomp 86 0 0 0 0 9h occne-infra cpol-restrict-sysctls 86 0 0 0 0 9h - Run the following command to verify that there are no pods running in
the cluster due to Kyverno
clusterpolicy:
$ kubectl get pods -A | grep -v RunnSample output:NAMESPACE NAME READY STATUS RESTARTS AGE
- Run the following command to list all
- Verify the daemonset, statefulset, and deployment in the cluster:
- Run the following command to verify all the deamonset (ds) in the
cluster:
$ kubectl -n occne-infra get dsSample output:NAME DESIRED CURRENT READY UP-TO-DATE AVAILABLE NODE SELECTOR AGE occne-kube-prom-stack-prometheus-node-exporter 7 7 7 7 7 11h occne-metallb-speaker 4 4 4 4 4 kubernetes.io/os=linux 11h occne-tracer-jaeger-agent 4 4 4 4 4 11h - Run the following command to verify all the statefulset (sts) in the
cluster:
$ kubectl -n occne-infra get stsSample output:NAME READY AGE alertmanager-occne-kube-prom-stack-kube-alertmanager 2/2 11h occne-opensearch-cluster-client 3/3 11h occne-opensearch-cluster-data 3/3 11h occne-opensearch-cluster-master 3/3 11h prometheus-occne-kube-prom-stack-kube-prometheus 2/2 11h - Run the following command to verify all the deploy in the
cluster:
$ kubectl -n occne-infra get deploySample output:NAME READY UP-TO-DATE AVAILABLE AGE occne-bastion-controller 1/1 1 1 11h occne-kube-prom-stack-grafana 1/1 1 1 11h occne-metallb-controller occne-kube-prom-stack-kube-operator 1/1 1 1 11h occne-kube-prom-stack-kube-state-metrics 1/1 1 1 11h occne-metallb-controller 1/1 1 1 11h occne-metrics-server 1/1 1 1 11h occne-opensearch-dashboards 1/1 1 1 11h occne-promxy 1/1 1 1 11h occne-promxy-apigw-nginx 2/2 2 2 11h occne-snmp-notifier 1/1 1 1 11h occne-tracer-jaeger-collector 1/1 1 1 11h occne-tracer-jaeger-query 1/1 1 1 11h
- Run the following command to verify all the deamonset (ds) in the
cluster:
- Scale down and scale up the deployments to verify any impact of Kyverno
clusterpolicy:
- Run the following command to scale down the deployment in the
cluster:
kubectl scale --replicas=0 deploy --all -n occne-infra - Run the following command to scale up the deployment in the
cluster:
$ kubectl scale --replicas=1 deploy --all -n occne-infra $ kubectl scale --replicas=2 deploy occne-promxy-apigw-nginx -n occne-infra - Run the following command to get the deployment
list:
$ kubectl -n occne-infra get deploySample output:NAME READY UP-TO-DATE AVAILABLE AGE occne-bastion-controller 1/1 1 1 12h occne-kube-prom-stack-grafana 1/1 1 1 12h occne-kube-prom-stack-kube-operator 1/1 1 1 12h occne-kube-prom-stack-kube-state-metrics 1/1 1 1 12h occne-metallb-controller 1/1 1 1 12h occne-metrics-server 1/1 1 1 12h occne-opensearch-dashboards 1/1 1 1 12h occne-promxy 1/1 1 1 12h occne-promxy-apigw-nginx 2/2 2 2 12h occne-snmp-notifier 1/1 1 1 12h occne-tracer-jaeger-collector 1/1 1 1 12h occne-tracer-jaeger-query 1/1 1 1 12h - Run the following command to scale down the statefulset (sts) in the
cluster:
$ kubectl scale --replicas=0 sts --all -n occne-infraSample output:statefulset.apps/alertmanager-occne-kube-prom-stack-kube-alertmanager scaled statefulset.apps/occne-opensearch-cluster-client scaled statefulset.apps/occne-opensearch-cluster-data scaled statefulset.apps/occne-opensearch-cluster-master scaled statefulset.apps/prometheus-occne-kube-prom-stack-kube-prometheus scaled - Run the following command to scale up the statefulset (sts) in the
cluster:
$ kubectl scale sts occne-opensearch-cluster-master occne-opensearch-cluster-data occne-opensearch-cluster-client -n occne-infra --replicas 3 - Run the following command to get the list of
statefulset:
$ kubectl -n occne-infra get stsSample output:NAME READY AGE alertmanager-occne-kube-prom-stack-kube-alertmanager 2/2 2d19h occne-opensearch-cluster-client 3/3 2d19h occne-opensearch-cluster-data 3/3 2d19h occne-opensearch-cluster-master 3/3 2d19h prometheus-occne-kube-prom-stack-kube-prometheus 2/2 2d19h - Run the following command to restart the daemonset
(ds):
$ kubectl rollout restart ds -n occne-infraSample output:daemonset.apps/occne-kube-prom-stack-prometheus-node-exporter restarted daemonset.apps/occne-metallb-speaker restarted daemonset.apps/occne-tracer-jaeger-agent restarted - Run the following command to get the list of
daemonset:
$ kubectl -n occne-infra get dsSample output:NAME DESIRED CURRENT READY UP-TO-DATE AVAILABLE NODE SELECTOR AGE occne-kube-prom-stack-prometheus-node-exporter 7 7 7 7 7 <none> 2d19h occne-metallb-speaker 4 4 4 4 4 kubernetes.io/os=linux 2d19h occne-tracer-jaeger-agent 4 4 4 4 4 <none> 2d19h
- Run the following command to scale down the deployment in the
cluster:
- Reverify Kyverno Policies:
- Run the following command to list all the cluster policies configured by
Kyverno:
$ kubectl get clusterpolicy -n kyvernoSample output:NAME BACKGROUND VALIDATE ACTION READY AGE disallow-capabilities true Enforce true 12h disallow-host-namespaces true Enforce true 12h disallow-host-path true Enforce true 12h disallow-host-ports true Enforce true 12h disallow-host-process true Enforce true 12h disallow-privileged-containers true Enforce true 12h disallow-proc-mount true Enforce true 12h disallow-selinux true Enforce true 12h restrict-apparmor-profiles true Enforce true 12h restrict-seccomp true Enforce true 12h restrict-sysctls true Enforce true 12h - Run the following command and ensure that there are no policy violations
in any policy report in any
namespace:
$ kubectl get policyreport -ASample output:NAMESPACE NAME PASS FAIL WARN ERROR SKIP AGE ingress-nginx cpol-disallow-capabilities 4 0 0 0 0 2d15h ingress-nginx cpol-disallow-host-namespaces 4 0 0 0 0 2d15h ingress-nginx cpol-disallow-host-path 4 0 0 0 0 2d15h ingress-nginx cpol-disallow-host-process 5 0 0 0 0 2d15h ingress-nginx cpol-disallow-privileged-containers 4 0 0 0 0 2d15h ingress-nginx cpol-disallow-proc-mount 5 0 0 0 0 2d15h ingress-nginx cpol-disallow-selinux 10 0 0 0 0 2d15h ingress-nginx cpol-restrict-apparmor-profiles 5 0 0 0 0 2d15h ingress-nginx cpol-restrict-seccomp 5 0 0 0 0 2d15h ingress-nginx cpol-restrict-sysctls 5 0 0 0 0 2d15h kube-system cpol-disallow-host-process 62 0 0 0 0 2d15h kube-system cpol-disallow-proc-mount 62 0 0 0 0 2d15h kube-system cpol-disallow-selinux 124 0 0 0 0 2d15h kube-system cpol-restrict-apparmor-profiles 62 0 0 0 0 2d15h kube-system cpol-restrict-seccomp 62 0 0 0 0 2d15h kube-system cpol-restrict-sysctls 62 0 0 0 0 2d15h kyverno cpol-disallow-capabilities 3 0 0 0 0 2d15h kyverno cpol-disallow-host-namespaces 3 0 0 0 0 2d15h kyverno cpol-disallow-host-path 3 0 0 0 0 2d15h kyverno cpol-disallow-host-ports 3 0 0 0 0 2d15h kyverno cpol-disallow-host-process 5 0 0 0 0 2d15h kyverno cpol-disallow-privileged-containers 3 0 0 0 0 2d15h kyverno cpol-disallow-proc-mount 5 0 0 0 0 2d15h kyverno cpol-disallow-selinux 10 0 0 0 0 2d15h kyverno cpol-restrict-apparmor-profiles 5 0 0 0 0 2d15h kyverno cpol-restrict-seccomp 5 0 0 0 0 2d15h kyverno cpol-restrict-sysctls 5 0 0 0 0 2d15h occne-infra cpol-disallow-host-process 88 0 0 0 0 2d15h occne-infra cpol-disallow-proc-mount 88 0 0 0 0 2d15h occne-infra cpol-disallow-selinux 176 0 0 0 0 2d15h occne-infra cpol-restrict-apparmor-profiles 88 0 0 0 0 2d15h occne-infra cpol-restrict-seccomp 88 0 0 0 0 2d15h occne-infra cpol-restrict-sysctls 88 0 0 0 0 2d15h - Run the following command to verify that there are no pods running in
the cluster due to Kyverno
clusterpolicy:
$ kubectl get pods -A | grep -v RunnSample output:NAMESPACE NAME READY STATUS RESTARTS AGE
- Run the following command to list all the cluster policies configured by
Kyverno:
8.5 Updating Grafana Password
This section describes the procedure to update the password of Grafana which is used to access the graphical user interface of Grafana dashboard.
Prerequisites
- A CNE cluster of version 22.x or above must be deployed.
- The Grafana pod must be up and running.
- The Load Balancer IP of Grafana must be accessible through browser.
Limitations and Expectations
- This procedure works on the existing Grafana deployments instantly. However, this procedure requires a restart of the Grafana pod causing temporary unavailability of the service.
- The grafana-cli is used to update the password by running an
execto get into the pod, which means it's ephemeral. - The newly set password is not persistent. Therefore, if the Grafana pod restarts or crashes due to any unfortunate incidents, then rerun this procedure to set the password. Otherwise, the GUI displays the Invalid Username or Password errors.
- Only the password that is updated during an installation is persistent. However, if you change this password impromptu and patch the new password into the secret again, the password change doesn't take effect. To update and persist a password, use this procedure during installation of the CNE cluster.
Procedure
- Log in to the Bastion Host of your CNE cluster.
- Get the name of the Grafana pod in the
occne-infranamespace:$ kubectl get pods -n occne-infra | grep grafanaFor example:$ kubectl get pods | grep grafanaSample output:occne-prometheus-grafana-7f5fb7c4d4-lxqsr 3/3 Running 0 12m - Use
execto get into the Grafana pod:$ kco exec -it occne-prometheus-grafana-7f5fb7c4d4-lxqsr bash - Run the following command to update the password:
Note:
Use a strong unpredictable password consisting of complex strings of more than 10 mixed characters.$ grafana-cli admin reset-admin-password <password>where,
<password>is the new password to be updated.For example:occne-prometheus-grafana-7f5fb7c4d4-lxqsr:/usr/share/grafana$ grafana-cli admin reset-admin-password samplepassword123#Sample output:INFO [01-29|07:44:25] Starting Grafana logger=settings version= commit= branch= compiled=1970-01-01T00:00:00Z WARN [01-29|07:44:25] "sentry" frontend logging provider is deprecated and will be removed in the next major version. Use "grafana" provider instead. logger=settings INFO [01-29|07:44:25] Config loaded from logger=settings file=/usr/share/grafana/conf/defaults.ini INFO [01-29|07:44:25] Config overridden from Environment variable logger=settings var="GF_PATHS_DATA=/var/lib/grafana/" INFO [01-29|07:44:25] Config overridden from Environment variable logger=settings var="GF_PATHS_LOGS=/var/log/grafana" INFO [01-29|07:44:25] Config overridden from Environment variable logger=settings var="GF_PATHS_PLUGINS=/var/lib/grafana/plugins" INFO [01-29|07:44:25] Config overridden from Environment variable logger=settings var="GF_PATHS_PROVISIONING=/etc/grafana/provisioning" INFO [01-29|07:44:25] Config overridden from Environment variable logger=settings var="GF_SECURITY_ADMIN_USER=admin" INFO [01-29|07:44:25] Config overridden from Environment variable logger=settings var="GF_SECURITY_ADMIN_PASSWORD=*********" INFO [01-29|07:44:25] Target logger=settings target=[all] INFO [01-29|07:44:25] Path Home logger=settings path=/usr/share/grafana INFO [01-29|07:44:25] Path Data logger=settings path=/var/lib/grafana/ INFO [01-29|07:44:25] Path Logs logger=settings path=/var/log/grafana INFO [01-29|07:44:25] Path Plugins logger=settings path=/var/lib/grafana/plugins INFO [01-29|07:44:25] Path Provisioning logger=settings path=/etc/grafana/provisioning INFO [01-29|07:44:25] App mode production logger=settings INFO [01-29|07:44:25] Connecting to DB logger=sqlstore dbtype=sqlite3 INFO [01-29|07:44:25] Starting DB migrations logger=migrator INFO [01-29|07:44:25] migrations completed logger=migrator performed=0 skipped=484 duration=908.661µs INFO [01-29|07:44:25] Envelope encryption state logger=secrets enabled=true current provider=secretKey.v1 Admin password changed successfully ✔ - After updating the password, log in to the Grafana GUI using the updated password. Ensure that you are aware of the limitations listed in Limitations and Expectations.
8.6 Updating OpenStack Credentials
This section describes the procedure to update the OpenStack credentials for vCNE.
Prerequisites
- You must have access to active Bastion Host of the cluster.
- All commands in this procedure must be run from the active CNE Bastion Host.
- You must have knowledge of kubectl and handling base64 encoded and decoded strings.
Modifying Password for Cinder Access
Kubernetes uses the cloud-config secret when interacting with OpenStack Cinder to acquire persistent storage for applications. The following steps describe how to update this secret to include the new password.
- Run the following command to decode and save the current
cloud-config secret configurations in a temporary
file:
$ kubectl get secret cloud-config -n kube-system -o jsonpath="{.data.cloud\.conf}" | base64 --decode > /tmp/decoded_cloud_config.txt - Run the following command to open the temporary file in vi editor
and update the username and password fields in the file with required
values:
$ vi /tmp/decoded_cloud_config.txtSample to edit the username and password:username="new_username" password="new_password"After updating the credentials, save and exit from the file.
- Run the following command to re-encode the
cloud-configsecret in Base64. Save the encoded output to use it in the following step.$ cat /tmp/decoded_cloud_config.txt | base64 -w0 - Run the following command to edit the
cloud-configKubernetes secret:$ kubectl edit secret cloud-config -n kube-systemRefer to the following sample to edit thecloud-configKubernetes secret:Note:
Replace<encoded-output>in the following sample with the encoded output that you saved in the previous step.# Please edit the object below. Lines beginning with a '#' will be ignored, # and an empty file will abort the edit. If an error occurs while saving this file will be # reopened with the relevant failures. # apiVersion: v1 data: cloud.conf: <encoded-output> kind: Secret metadata: annotations: kubectl.kubernetes.io/last-applied-configuration: | {"apiVersion":"v1","data":{"cloud.conf":"<encoded-output>"},"kind":"Secret","metadata":{"annotations":{},"name":"cloud-config","namespace":"kube-system"}} creationTimestamp: "2022-01-12T02:34:52Z" name: cloud-config namespace: kube-system resourceVersion: "2225" uid: 0994b024-6a4d-41cf-904c type: OpaqueSave the changes and exit the editor.
- Run the following command to remove the temporary
file:
$ rm /tmp/decoded_cloud_config.txt
Modifying Password for OpenStack Cloud Controller Access
Kubernetes uses the external-openstack-cloud-config
secret when interacting with the OpenStack Controller. The following steps describe
the procedure to update the secret to include the new credentials.
- Run the following command to decode the current
external-openstack-cloud-configsecret configurations in a temporary file:$ kubectl get secret external-openstack-cloud-config -n kube-system -o jsonpath="{.data.cloud\.conf}" | base64 --decode > /tmp/decoded_external_openstack_cloud_config.txt - Run the following command to open the temporary file in vi editor
and update the username and password fields in the file with required
values:
$ vi /tmp/decoded_external_openstack_cloud_config.txtSample to edit the username and password:username="new_username" password="new_password"After updating the credentials, save and exit from the file.
- Run the following command to re-encode
external-openstack-cloud-configin Base64. Save the encoded output to use it in the following step.$ cat /tmp/decoded_external_openstack_cloud_config.txt | base64 -w0 - Run the following command to edit the Kubernetes Secret named,
external-openstack-cloud-config:$ kubectl edit secret external-openstack-cloud-config -n kube-systemRefer to the following sample to edit theexternal-openstack-cloud-configKubernetes Secret with the new encoded value:Note:
- Replace
<encoded-output>in the following sample with the encoded output that you saved in the previous step. - An empty file aborts the edit. If an error occurs while saving, the file reopens with the relevant failures.
apiVersion: v1 data: ca.cert: cloud.conf:<encoded-output> kind: Secret metadata: annotations: kubectl.kubernetes.io/last-applied-configuration: | {"apiVersion":"v1","data":{"ca.cert":" ","cloud.conf":"<encoded-output>"},"kind":"Secret","metadata":{"annotations":{},"name":"external-openstack-cloud-config","namespace":"kube-system"}} creationTimestamp: "2022-07-21T17:05:26Z" name: external-openstack-cloud-config namespace: kube-system resourceVersion: "16" uid: 9c18f914-9c78-401d-ae79 type: OpaqueSave the changes and exit the editor.
- Replace
- Run the following command to remove the temporary
file:
$ rm /tmp/decoded_external_openstack_cloud_config.txt
Restarting Affected Pods to Use the New Password
Note:
Before restarting the services, verify that all the affected Kubernetes resources to be restarted are in healthy state.- Perform the following steps to restart Cinder Container Storage
Interface (Cinder CSI) controller plugin:
- Run the following command to restart Cinder Container
Storage Interface (Cinder CSI)
deployment:
$ kubectl rollout restart deployment csi-cinder-controllerplugin -n kube-systemSample output:deployment.apps/csi-cinder-controllerplugin restarted - Run the following command to get the pod and verify if it is
running:
$ kubectl get pods -l app=csi-cinder-controllerplugin -n kube-systemSample output:NAME READY STATUS RESTARTS AGE csi-cinder-controllerplugin-7c9457c4f8-88sbt 6/6 Running 0 19m - [Optional]: If the pod is not up or if the pod is in the
crashloopstate, get the logs from thecinder-csi-plugincontainer inside thecsi-cinder-controllerpod using labels and validate the logs for more information:$ kubectl logs -l app=csi-cinder-controllerplugin -c cinder-csi-plugin -n kube-systemSample output to show a successful log retrieval:I0904 21:36:09.162886 1 server.go:106] Listening for connections on address: &net.UnixAddr{Name:"/csi/csi.sock", Net:"unix"}Sample output to show a log retrieval failure:W0904 21:34:34.252515 1 main.go:105] Failed to GetOpenStackProvider: Authentication failed
- Run the following command to restart Cinder Container
Storage Interface (Cinder CSI)
deployment:
- Perform the following steps to restart Cinder Container Storage
Interface (Cinder CSI) nodeplugin daemonset:
- Run the following command to restart Cinder Container
Storage Interface (Cinder CSI) nodeplugin
daemonset:
$ kubectl rollout restart -n kube-system daemonset csi-cinder-nodepluginSample output:daemonset.apps/csi-cinder-nodeplugin restarted - Run the following command to get the pod and verify if it is
running:
$ kubectl get pods -l app=csi-cinder-nodeplugin -n kube-systemSample output:NAME READY STATUS RESTARTS AGE csi-cinder-nodeplugin-pqqww 3/3 Running 0 3d19h csi-cinder-nodeplugin-vld6m 3/3 Running 0 3d19h csi-cinder-nodeplugin-xg2kj 3/3 Running 0 3d19h csi-cinder-nodeplugin-z5vck 3/3 Running 0 3d19h csi-cinder-nodeplugin-z5vck 3/3 Running 0 3d19h csi-cinder-nodeplugin-z5vck 3/3 Running 0 3d19h csi-cinder-nodeplugin-z5vck 3/3 Running 0 3d19h - [Optional]: If the pod is not up or if the pod is in the
crashloopstate, verify the logs for more information
- Run the following command to restart Cinder Container
Storage Interface (Cinder CSI) nodeplugin
daemonset:
- Run the following command to restart the OpenStack cloud controller
daemonset:
- Run the following command to restart the OpenStack cloud
controller
daemonset:
$ kubectl rollout restart -n kube-system daemonset openstack-cloud-controller-managerSample output:daemonset.apps/openstack-cloud-controller-manager restarted - Run the following command to get the pod and verify if it
is
running:
$ kubectl get pods -l k8s-app=openstack-cloud-controller-manager -n kube-systemSample output:NAME READY STATUS RESTARTS AGE openstack-cloud-controller-manager-qtfff 1/1 Running 0 38m openstack-cloud-controller-manager-sn2pg 1/1 Running 0 38m openstack-cloud-controller-manager-w5dcv 1/1 Running 0 38m - [Optional]: If the pod is not up, or is in the
crashloopstate, verify the logs for more information.
- Run the following command to restart the OpenStack cloud
controller
daemonset:
Changing Inventory File
When you perform the steps to modify password for Cinder access and modify password for OpenStack cloud controller access, you modify the
Kubernetes secrets to contain the new credentials. However, running the pipeline
(for example, performing a standard upgrade or adding a new node to the cluster)
takes the current credentials stored in the occne.ini file, causing
the changes to be overridden. Therefore, it is important to update the
occne.ini file with the new credentials.
- Navigate to the cluster
directory:
$ cd /var/occne/cluster/${OCCNE_CLUSTER}/ - Open the
occne.inifile:$ vi occne.ini - Update External Openstack credentials (both username and password) as shown
below:
external_openstack_username = USER external_openstack_password = PASSWORD - Update Cinder credentials (both username and password) as shown
below:
cinder_username = USER cinder_password = PASSWORD
8.7 Updating OpenStack TLS Certificate
When the Certificate Authority (CA) certificate for OpenStack is updated, you can use this procedure to update the certificate which CNE uses to access OpenStack.
Note:
This procedure is applicable only to CNE instances running on OpenStack.Procedure to update the certificate
Note:
All commands must be run from the default CNE user account (for example,cloud-user) on the active Bastion host.
- Use SSH to log in to the active Bastion and run the following command to confirm if
it is the active Bastion:
Sample output:$ is_active_bastionIS active-bastion - Get the renewed OpenStack
cacert.pemfile from the Openstack admin. - Copy the new
.pemcertificate file to/var/occne/cluster/${OCCNE_CLUSTER}/openstack-cacert.pem, replacing the existing file. - Change to cluster directory and read the
.pemcertificate file into variables:$ cdcl $ PEM=$(<openstack-cacert.pem) $ ENCODED_PEM=$(base64 -w0 openstack-cacert.pem) - Write the new PEM content into the
.pemfiles used for OpenStack access throughout the cluster:$ occne_all.sh "echo -n '${PEM}' | sudo tee /etc/kubernetes/cinder-cacert.pem /etc/kubernetes/external-openstack-cacert.pem" k8s-cluster - On one of the control nodes, update the Kubernetes secret that stores the
base64-encoded PEM
data.
$ SECRET_PATH=/etc/kubernetes/external-openstack-cloud-config-secret.yml $ occne_all.sh "if [ -f '${SECRET_PATH}' ] ; then sudo sed -i '/ca.cert/c\ ca.cert: ${ENCODED_PEM}' ${SECRET_PATH}; sudo -E env "PATH=\$PATH" kubectl apply -f ${SECRET_PATH}; fi" kube-master - Restart all OpenStack controller and cinder
pods:
$ kubectl -n kube-system rollout restart ds/openstack-cloud-controller-manager ds/csi-cinder-nodeplugin deployment/csi-cinder-controllerplugin
8.8 Updating the Guest or Host OS
You must update the host OS (for Bare Metal installations) or guest OS (for both Bare Metal and virtualized installations) periodically so that CNE has the latest Oracle Linux software. If the cluster is not upgraded recently, or there are known security patches then perform an update by referring to the "Performing an Upgrade" section in Oracle Communications Cloud Native Core, Cloud Native Environment Installation, Upgrade, and Fault Recovery Guide. Ensure that you follow the specific steps for performing an OS update (the cluster version remains the same), and not a Cluster Upgrade.
8.9 CNE Grafana Dashboards
Grafana is an observability tool available as open source and enterprise versions. Grafana supports number of data sources such as Prometheus from where it can read data for analytics. You can find the official list of supported data sources at Grafana Datasources.
- CNE Kubernetes dashboard
- CNE Prometheus dashboard
- CNE logging dashboard
- CNE persistent storage dashboard (only for Bare Metal)
Note:
The Grafana dashboards provisioned by CNE are read-only. Refrain from updating or modifying these default dashboards.You can clone these dashboards to customize them as per your requirement and save the customized dashboards in JSON format. This section provides details about the features offered by the open source Grafana version to add the required observability framework to CNE.
8.9.1 Accessing Grafana Interface
This section provides the procedure to access Grafana web interface.
- Perform the following steps to get the Load
Balancer IP address and port number for accessing the Grafana web interface:
- Run the following command to get the Load Balancer IP address of the
Grafana
service:
$ export GRAFANA_LOADBALANCER_IP=$(kubectl get services occne-kube-prom-stack-grafana --namespace occne-infra -o jsonpath="{.status.loadBalancer.ingress[*].ip}") - Run the following command to get the LoadBalancer port number of the
Grafana
service:
$ export GRAFANA_LOADBALANCER_PORT=$(kubectl get services occne-kube-prom-stack-grafana --namespace occne-infra -o jsonpath="{.spec.ports[*].port}") - Run the following command to get the complete URL for accessing Grafana in
an external
browser:
$ echo http://$GRAFANA_LOADBALANCER_IP:$GRAFANA_LOADBALANCER_PORT/$OCCNE_CLUSTER/grafanaSample output:http://10.75.225.60:80/mycne-cluster/grafana
- Run the following command to get the Load Balancer IP address of the
Grafana
service:
- Use the URL obtained in the previous step (in this case, http://10.75.225.60:80/mycne-cluster/grafana) to access the Grafana home page.
- Click Downloads and select Browse.
- Expand the CNE folder to view the CNE dashboards.
Note:
CNE doesn't support user access management on Grafana.
8.9.2 Cloning a Grafana Dashboard
This section describes the procedure to clone a Grafana dashboard.
- Open the dashboard that you want to clone.
- Click the Share dashboard or panel icon next to the dashboard name.
- Select Export and click Save to file to save the dashboard in JSON format in your local system.
- Perform the following steps to import the saved dashboard to
Grafana:
- Click Dashboards and select Import.
- Click Upload JSON file and select the dashboard that you saved in step 3.
- Change the name and UID of the
dashboard.
You have cloned the dashboard successfully. You can now use the cloned dashboard to customize the options as per your requirement.
8.9.3 Restoring a Grafana Dashboard
The default Grafana dashboards provided by CNE are stored as configmap in the CNE cluster and artifact directory to restore them to their default state. This section describes the procedure to restore a Grafana dashboard.
Note:
- This procedure is used to restore the dashboards to the default state (that is, the default dashboards provided by CNE).
- When you restore the dashboards, you lose all the customizations that you made on the dashboards. You can't use this procedure to restore the customizations that you made on top of the CNE default dashboards.
- You can't use this procedure to restore other Grafana dashboards that you created.
- Navigate to the
occne-grafana-dashboarddirectory:$ cd /var/occne/cluster/${OCCNE_CLUSTER}/artifacts/occne-grafana-dashboard - Run the following command to restore all the
dashboards present in the
occne-grafana-dashboarddirectory to its default state. The command uses the YAML files of the dashboards in the directory to restore them.$ kubectl -n occne-infra apply -R -f occne-grafana-dashboardYou can also restore a specific dashboard by providing a specific YAML file name in the command. For example, you can use the following command to restore only the CNE Kubernetes dashboard:$ kubectl -n occne-infra apply -f occne-grafana-dashboard/occne-k8s-cluster-dashboard.yaml
8.10 Managing 5G NFs
This section describes procedures to manage 5G NFs in CNE.
8.10.1 Installing an NF
This section describes the procedure to install an NF in the CNE Kubernetes cluster.
Prerequisites
- Load container images and Helm charts onto Central Server
repositories.
Container and Helm repositories are created on a Central Server for easy CNE deployment at multiple customer sites. These repositories store all of the container images and Helm charts required to install CNE. When necessary, Helm pulls container images and Helm charts to the central server repositories on the local CNE Bastion Hosts. Similarly, NF installation uses Helm so that the container images and Helm charts needed to install NFs are loaded onto the same Central Server repositories. This procedure assumes that all container images and Helm charts required to install the NF are already loaded onto the Central Server repositories.
- Determine the NF deployment parameters
The following values determine the NF's identity and where it is deployed. These values are used in the following procedure:
Table 8-21 NF Deployment Parameters
Parameters Value Description nf-namespace Any valid namespace name The namespace where you want to install the NF. Typically each NF is installed in its own namespace. nf-deployment-name Any valid Kubernetes deployment name The name that this NF instance is known to the Kubernetes.
Load NF artifacts onto Bastion Host repositories
All the steps in this section are run on the CNE Bastion Host where the NF installation happens.
- Create a file container_images.txt listing the Container
images and tags as required by the
NF:
<image-name>:<release>Example:
busybox:1.29.0 - Run the following command to load the container images into the CNE
Container
registry:
$ retrieve_container_images.sh <external-container-repo-name>:<external-container-repo-port> ${HOSTNAME}:5000 < container_images.txtExample:
$ retrieve_container_images.sh mycentralrepo:5000 ${HOSTNAME%%.*}:5000 < container_images.txt
- Create a file helm_charts.txt listing the Helm chart and
version:
<external-helm-repo-name>/<chart-name> <chart-version>Example:
mycentralhelmrepo/busybox 1.33.0 - Run the following command to load the charts into the CNE Helm
chart
repository:
$ retrieve_helm.sh /var/www/html/occne/charts http://<external-helm-repo-name>/occne/charts [helm_executable_full_path_if_not_default] < helm_charts.txtExample:
$ retrieve_helm.sh /var/www/html/occne/charts http://mycentralrepo/occne/charts < helm_charts.txt
Install the NF
- On the Bastion Host, create a YAML file named
<nf-short-name>-values.yamlto contain the values to be passed to the NF Helm chart. - Add NF-specific values to file
See the NF installation instructions to understand which keys and values must be included in the values file.
- Additional NF configuration
Before installing the NF, see the installation instructions to understand the requirements of additional NF configurations along with Helm chart values.
- Run the following command to install the
NF:
$ helm install --namespace <nf-namespace> --create-namespace -f <nf-short-name>-values.yaml <nf-deployment-name> <chart-or-chart-location>
8.10.2 Upgrading an NF
This section describes the procedure to upgrade a 5G network function that was previously installed in the CNE Kubernetes cluster.
Prerequisites
Load container images and Helm charts onto Central Server repositories.
Container and Helm repositories are created on a Central Server for easy CNE deployment at multiple customer sites. These repositories store all of the container images and Helm charts required to install CNE. When necessary, Helm pulls container images and Helm charts to the central server repositories on the local CNE Bastion Hosts. Similarly, Network Function (NF) installation uses Helm so that the container images and Helm charts needed to install NFs are loaded onto the same Central Server repositories. This procedure assumes that all container images and Helm charts required to install the NF are already loaded onto the Central Server repositories.
Procedure
Load NF artifacts onto Bastion Host repositories
All the steps in this section are run on the CNE Bastion Host where the NF installation happens.
- Create a file container_images.txt listing the Container
images and tags as required by the
NF:
<image-name>:<release>Example:busybox:1.29.0 - Run the following command to load the container images into the
CNE Container
registry:
$ retrieve_container_images.sh <external-container-repo-name>:<external-container-repo-port> ${HOSTNAME%%.*}:5000 < container_images.txtExample:
$ retrieve_container_images.sh mycentralrepo:5000 ${HOSTNAME%%.*}:5000 < container_images.txt
- Create a file helm_charts.txt listing the Helm chart and
version:
<external-helm-repo-name>/<chart-name> <chart-version>Example:
mycentralhelmrepo/busybox 1.33.0 - Run the following command to load the charts into the CNE Helm
chart
repository:
$ retrieve_helm.sh /var/www/html/occne/charts http://<external-helm-repo-name>/occne/charts [helm_executable_full_path_if_not_default] < helm_charts.txtExample:
$ retrieve_helm.sh /var/www/html/occne/charts http://mycentralrepo/occne/charts < helm_charts.txt
Upgrade the NF
- On the Bastion Host, create a YAML file named
<nf-short-name>-values.yamlto contain the values to be passed to the NF Helm chart. - Create a YAML file that contains new and changed values
needed by the NF Helm chart.
See the NF installation instructions to understand which keys and values must be included in the values file. Only values for parameters that were not included in the Helm input values applied to the previous release, or parameters whose names changed from the previous release, must be included in this file.
- If the yaml file is created for this upgrade, run the
following command to upgrade the NF with new
values:
$ helm upgrade -f <nf-short-name>-values.yaml <nf-deployment-name> <chart-name-or-chart-location>Note:
Thenf-deployment-namevalue must match the value used when installing the NF.
$ helm upgrade --reuse-values <nf-deployment-name> <chart-name-or-chart-location>
Note:
Thenf-deployment-name value must match the value used when
installing the NF.
8.10.3 Uninstalling an NF
This section describes the procedure to uninstall a 5G network function that was previously installed in the CNE Kubernetes cluster.
Prerequisites
- Determine the NF deployment parameters. The following values determine the
NF's identity and where it is deployed:
Table 8-22 NF Deployment Parameters
Variable Value Description nf-namespace Any valid namespace name The namespace where you want to install the NF. Typically each NF is installed in its own namespace. nf-deployment-name Any valid Kubernetes deployment name The name by which the Kubernetes identifies this NF instance. - All commands in this procedure must be run from the Bastion Host.
Procedure
- Run the following command to uninstall an
NF:
$ helm uninstall <nf-deployment-name> --namespace <nf-namespace> - If there are remaining NF resource such as PVCs and namespace, run the following
command to remove them:
- Run the following command to remove residual
PVCs:
$ kubectl --namespace <nf-namespace> get pvc | awk '{print $1}'| xargs -L1 -r kubectl --namespace <nf-namespace> delete pvc - Run the following command to delete
namespace:
$ kubectl delete namespace <nf-namespace>Note:
Steps a and b are used to remove all the PVCs from the <nf-namespace> and delete the <nf-namespace>, respectively. If there are other components running in the <nf-namespace>, manually delete the PVCs that need to be removed and skip thekubectl delete namespace <nf-namespace>command.
- Run the following command to remove residual
PVCs:
8.10.4 Update Alerting Rules for an NF
This section describes the procedure to add or update the alerting rules for any Cloud Native Core 5G NF in Prometheus Operator and OSO.
Prerequisites
- For CNE Prometheus Operator, a YAML file containing an PrometheusRule CRD
defining the NF-specific alerting rules is available. The YAML file must be
an ordinary text file in a valid YAML format with the extension
.yaml. - For OSO Prometheus, a valid OSO release must be installed and an alert file describing all NF alert rules according to old format is required.
Procedure for Prometheus Operator
- To copy the NF-specific alerting rules file from your computer to the /tmp directory on the Bastion Host, see the Accessing the Bastion Host procedure.
- Run the following command to create or update the PrometheusRule
CRD containing the alerting rules for the
NF:
$ kubectl apply -f /tmp/rules_file.yaml -n occne-infra # To verify the creation of the alert-rules CRD, run the following command: $ kubectl get prometheusrule -n occne-infra NAME AGE occne-alerting-rules 43d occne-dbtier-alerting-rules 43d test-alerting-rules 5mThe alerting rules automatically loads into all running Prometheus instances within 1 minute.
- In the Prometheus GUI, select the Alerts tab. Select individual
rules from the list to view the alert details and verify if the new rules are
loaded.
Figure 8-1 New Alert Rules are loaded in Prometheus GUI
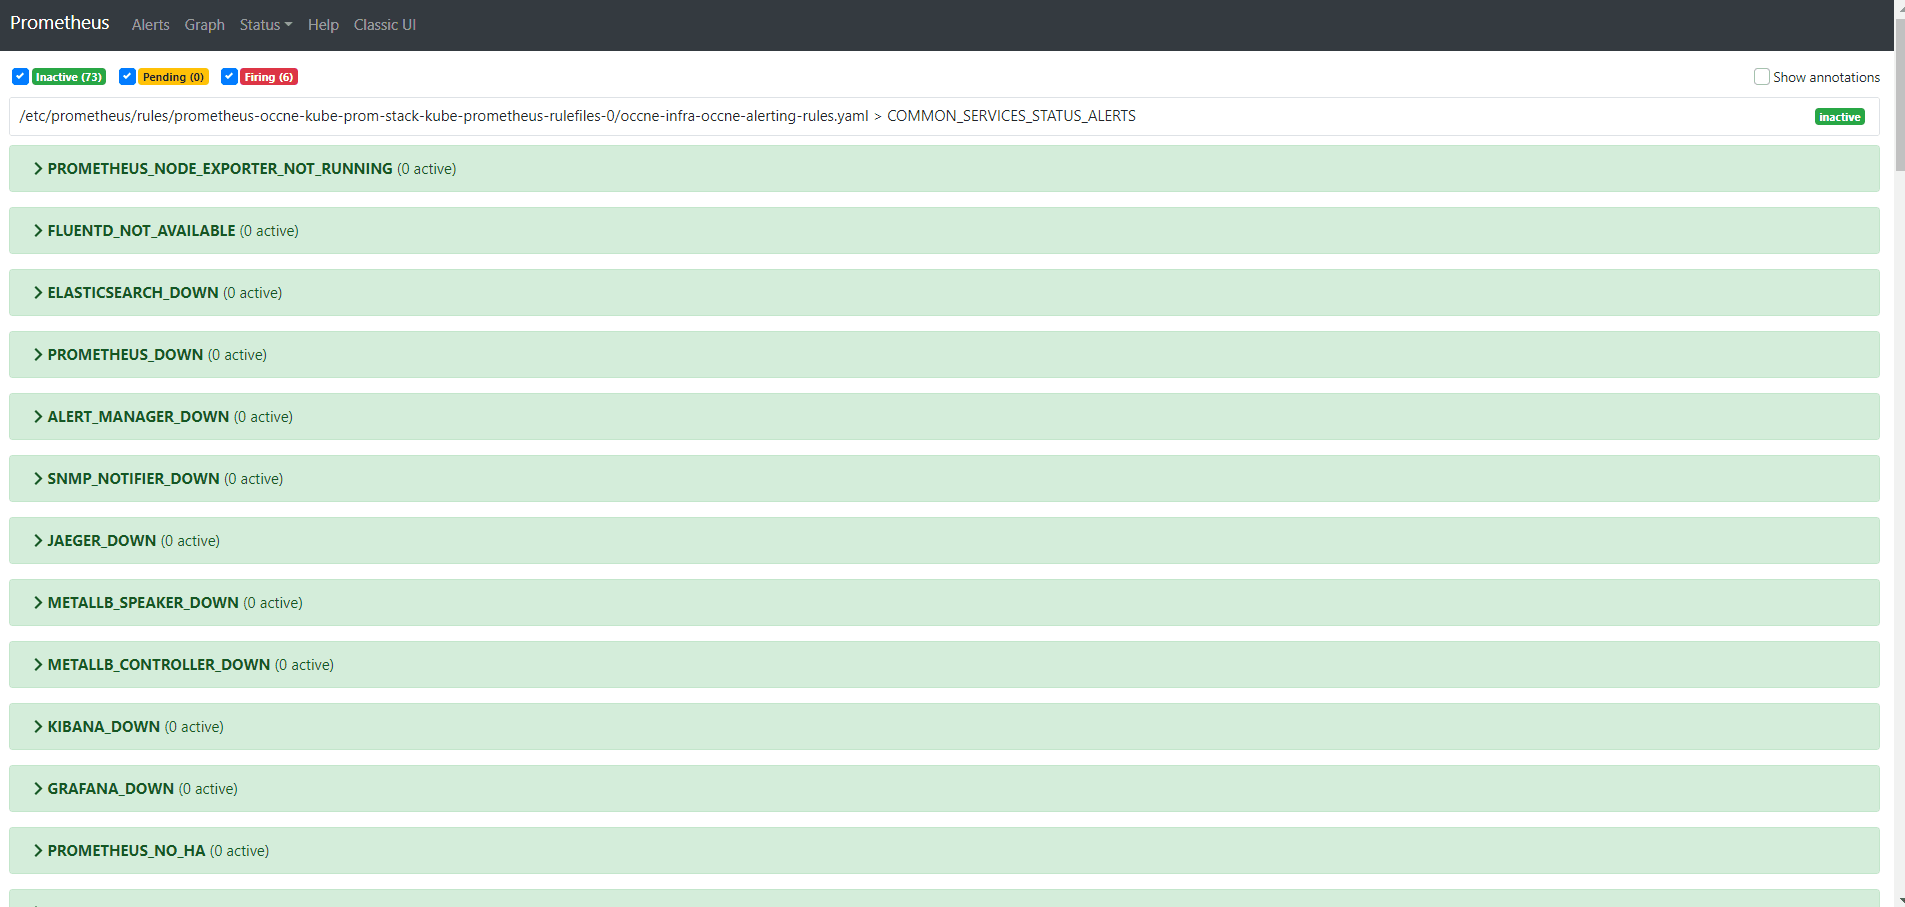
Procedure for OSO
Perform the following steps to add alert rules in OSO promethues GUI:- Take the backup of the current configuration map of OSO
Prometheus:
$ kubectl get configmaps <OSO-prometheus-configmap-name> -o yaml -n <namespace> > /tmp/tempPrometheusConfig.yaml - Check and add the NF alert file name inside Prometheus configuration map. The NF
alert file names vary from NF to NF. Retrieve the name of the NF alert rules
file to add the name in Prometheus configuration map. Once you retrieve the file
name, run the following commands to add the NF alert file name inside Prometheus
configuration
map:
$ sed -i '/etc\/config\/<nf-alertsname>/d' /tmp/tempPrometheusConfig.yaml $ sed -i '/rule_files:/a\ \- /etc/config/<nf-alertsname>' /tmp/tempPrometheusConfig.yaml - Update configuration map with the updated
file:
$ kubectl -n <namespace> replace configmap <OSO-prometheus-configmap-name> -f /tmp/tempPrometheusConfig.yaml - Patch the NF Alert rules in OSO Prometheus configuration map by mentioning the
alert rule file
path:
$ kubectl patch configmap <OSO-prometheus-configmap-name> -n <namespace> --type merge --patch "$(cat ./NF_altertrules.yaml)"
8.10.5 Configuring Egress NAT for an NF
This section provides information about configuring NF microservices that originate egress requests to ensure compatibility with CNE.
Annotation for Specifying Egress Network
Starting CNE 22.4.x, egress requests do not get the IP address of the Kubernetes worker node assigned to the source IP field. Instead, each microservice that originates egress requests specifies an egress network through an annotation. An IP address from the indicated network is inserted into the source IP field for all egress requests.
annotations:
oracle.com.cnc/egress-network: "oam"Note:
- The value of the annotation must match the name of an external network configured.
- This annotation must not be added for microservices that do not originate egress requests, as it leads to decreased CNE performance.
- CNE does not allow any microservice to pick a separate IP address. When CNE is installed, a single IP address is selected for each network.
- All pods in a microservice get the same source IP address attached to all egress requests.
- CNE 22.4.x supports this annotation in vCNE deployments only.
Configuring Egress Controller Environment
Note:
Do not edit any variables that are not listed in the following table.Table 8-23 Egress Controller Environment Configuration
| Environment Variable | Default Value | Possible Value | Description |
|---|---|---|---|
| DAEMON_MON_TIME | 0.5 | Between 0.1 and 5 | This value reflects the time in seconds and highlights the frequency at which the Egress controller checks the cluster status. |
Configuring Egress NAT for Destination Subnet or IP Address
Destination subnet or IP address must be specified to route traffic trough a particular network. The destination subnet or IP address is specified in the form of a dictionary, where the pools are the dictionary keys and the lists of subnets or IP addresses are the dictionary values.
- Specifying annotation for destination
subnet:
annotations: oracle.com.cnc/egress-destination: '{"<pool>" : ["<subnet_ip_address>/<subnet_mask>"]}'For example:annotations: oracle.com.cnc/egress-destination: '{"oam" : ["10.20.30.0/24"]}' - Specifying annotation for destination IP
address:
annotations: oracle.com.cnc/egress-destination: '{"<pool>" : ["<ip_address>"]}'For example:annotations: oracle.com.cnc/egress-destination: '{"oam" : ["10.20.30.40"]}' - Specifying annotation for multiple
pools:
annotations: oracle.com.cnc/egress-destination: '{"<pool_one>" : ["<subnet_ip_address>/<subnet_mask>"], "<pool_two>" : ["<subnet_ip_address>/<subnet_mask>"]}'For example:annotations: oracle.com.cnc/egress-destination: '{"oam" : ["10.20.30.0/24"], "sig" : ["30.20.10.0/24"]}' - Specifying annotation for multiple pools and multiple
destinations:
annotations: oracle.com.cnc/egress-destination: '{"<pool_one>" : ["<subnet_ip_address>/<subnet_mask>", "<subnet_ip_address>/<subnet_mask>"], "<pool_two>" : ["<subnet_ip_address>/<subnet_mask>", "<ip_address>"]}'For example:annotations: oracle.com.cnc/egress-destination: '{"oam" : ["10.20.30.0/24", "100.200.30.0/22"], "sig" : ["30.20.10.0/24", "20.10.5.1"]}'
Compatibility Between Egress NAT and Destination Egress NAT
Both Egress NAT and Destination Egress NAT annotations are independent and compatible. This means that they can be used independently or combined to create more specific rules. Egress NAT is enabled to route all traffic from a particular pod through a particular network. Whereas, Destination Egress NAT permits traffic to be routed using a destination subnet or IP address before regular Egress NAT rules are matched within the routing table. This feature allows more granularity to route traffic through a particular network.
sig network, except the traffic
destined for 10.20.30.0/24 subnet, which is routed through the
oam
network:annotations:
oracle.com.cnc/egress-destination: '{"oam" : ["10.20.30.0/24"]}'
oracle.com.cnc/egress-network: sig8.11 Updating CNLB Networks
This section provides information on how to update the network in an existing CNLB deployment and also explains the non-disruptive and disruptive network updates.
Note:
Network attachment updates are supported for BareMetal, vCNE OpenStack and vCNE VMware deployments only.Prerequisites
Before updating the network, ensure that the following prerequisites are met:
- CNLB cluster must be installed and configured.
- All nodes are up, reachable, and have the correct network settings.
- For VMware, this procedure applies to CNLB deployments on VCD 10.4.3 and VCD 10.6.0.
VCD 10.2 is not supported.
- For vCNE on VMware, it is recommended that before running this procedure, while performing any disruptive update, application traffic must be diverted to another georedundant site.
Expectations
Before updating the network, ensure to note the following points:
- This procedure applies to vCNE on OpenStack, vCNE on VMware, and Bare Metal deployments.
- For vCNE on VMware, when performing a Disruptive Update, it is strongly recommended to divert application traffic to another georedundant site before running this procedure. For more information, see the maintainence-procedures.html#GUID-BFACC26B-6613-4634-A581-4AE6F6A0C5B4__GUID-CA5CE3C4-54F5-4F53-BDAD-768213A4448D section.
- This procedure assumes that the user is fully familiar with configuring the
cnlb.inifile.
Disruptive Updates
Disruptive updates remove or modify the settings in the cnlb.ini
file, which can affect the traffic flow due to the current cloud configuration. In
such instances, the impact varies depending on the platform and may include an
outage of all applications or NFs' that use CNLB.
The following table lists the operations that are performed for a disruptive network update:
Table 8-24 Disruptive Updates
| Description | Assumptions | Type | Platform | How to prevent outage |
|---|---|---|---|---|
| Adding a new network | All the applications or NFs (for example, Deployments and StatefulSets) including CNE common services must be restarted after the script completes. This allows CNLB to refresh its status from each annotation. | Add | VMware |
This change will switch around the order and network interface names (mac addresses and IPs may also be impacted). This is an inherent limitation that arises due to VMware Cloud Director (VCD) and OpenTofu providers. The outage will occur as soon as OpenTofu applies the new configuration (as part of the script), and will resolve only after the script has successfully completed and all the applications or NFs or common services have been restarted. |
| Removing an unused network | All the applications or NFs (for example, Deployments and StatefulSets) including CNE common services must be restarted after the script is run. This allows CNLB to refresh its status from each annotation. | Remove | VMware |
This change will switch around the order and network interface names (mac addresses and IPs can be impacted). This is an inherent limitation that arises due to VMware Cloud Director (VCD) and OpenTofu providers. The outage will occur as soon as OpenTofu applies the new configuration (as part of the script), and will resolve only after the script has successfully finished and all the applications or NFs or common services have been restarted. |
| Changing an existing network range or CIDR | The existing network remains configured in cnlb.ini, but its network range is changed. For example, internal_network_range changes from /25 to /24.
|
Replace | VMware | On VMware, the outage starts when OpenTofu applies the new configuration as part of the script. This change can cause OpenTofu to replace a VCD vApp network because of provider-level changes, such as gateway or netmask replacement. This is not supported as an in-service CNLB network update on VCD 10.4.1 and later.
The outage is resolved only after the script completes successfully and the applications, NFs, and CNE Common Services are restarted so CNLB can refresh the annotation status. |
| Removing a network | The network is used by annotated applications or NFs. | Replace | BareMetal, OpenStack and VMware | Before performing this action, all applications or NFs annotated with this network must be reconfigured, that is change the annotation to point to a different active network to avoid an outage. |
Removing an IP address from service_ip_addr list of an existing network
|
The service IP is used by an annotated application or NF. | Remove | BareMetal, OpenStack and VMware | Before performing this action, the application or NF using this service_ip must be reconfigured, that is change the annotation to point to a different service_ip in the same network or another network, to avoid an outage.
|
Removing an IP address from an egress_dest list of an existing network
|
The egress_dest is used by one or more annotated applications or NFs.
There can be more than one egress_dest in the list. |
Remove | BareMetal, OpenStack and VMware | Before performing this action, all applications or NFs annotated with the egress_dest list must be reconfigured, that is change the annotation to point to a different egress_dest. |
Replacing an existing IP address from the service_ip_addr list of an existing network
|
There is an application or NF (for example, Deployments or StatefulSets) with annotation that is actively using this service IP address.
The annotations are updated immediately after the script finishes. |
Remove | BareMetal, OpenStack and VMware | To clear the outage, the application or NFs annotations must be reconfigured. |
Updating an existing network network_id or subnet_id |
The network is being used by annotated applications or NFs.
The annotations (for all the applicable applications or NFs) are updated immediately after the script execution is complete. Fields such as service_ip_addr and egress_dest must also be updated to match the new network. |
Replace | BareMetal, OpenStack and VMware | To clear the outage, the application or NFs' annotations must be reconfigured. |
| Modifying shared-internal variable from true to false (or vice versa) | The network is being used by annotated applications or NFs.
Network attachment definitions (for all the applicable applications or NFs) are updated immediately after the script is run completely. Restart annotated applications or NFs for the changes made to network attachment definitions to reflect. |
Replace | BareMetal, OpenStack and VMware | To clear the outage, the application deployments using modified network attachment definitions must be restarted to reflect the updated configuration. |
Non-Disruptive Updates
Non-disruptive updates perform network operations on an existing network that does not affect the current traffic flow. For example, Adding a new network, Adding an IP address to an existing network, and so on.
Note:
Deleting a network or an IP address can be non-disruptive depending on how the network or IP address is configured in the cluster.The following table lists the operations that are performed for a non-disruptive network update:
Table 8-25 Non-Disruptive Updates
| Description | Assumptions | Type | Platform |
|---|---|---|---|
| Adding a new network | None | Add | BareMetal and OpenStack |
Adding an IP address to the service_ip_addr list of an existing network
|
None | Add | BareMetal, OpenStack and VMware |
Adding an IP address to the egress_dest list of an existing network
|
None | Add | BareMetal, OpenStack and VMware |
| Removing an unused network | There are no applications or NFs (for example, Deployments or StatefulSets) with annotations pointing to this network. | Remove | BareMetal and OpenStack |
Removing an IP address to the service_ip_addr list of an existing network
|
There is no application or NF (for example, Deployment or StatefulSets) with an annotation that uses this service IP address. | Remove | BareMetal, OpenStack and VMware |
Removing an IP address to the egress_dest list of an existing network
|
There is no application or NF (for example, Deployments or StatefulSets) with an annotation that uses this IP address. | Remove | BareMetal, OpenStack and VMware |
Replacing an existing IP address from the service_ip_addr list of an existing network
|
There is no application or NF (for example, Deployments or StatefulSets) with an annotation that uses this service IP address. | Replace | BareMetal, OpenStack and VMware |
| Changing an existing network range or CIDR | The change does not remove or replace the network resource, and there are no applications/NFs using addresses or annotations affected by this change. | Replace | BareMetal and OpenStack |
Procedure to update a network attachment
To add, delete, or update a CNLB network, perform the following procedure.
Update the cnlb.ini file before running the script, located at /var/occne/cluster/${OCCNE_CLUSTER}/installer/updNetwork.py. Once the script is run successfully, verification must be performed.
Note:
It is recommended to identify the changes to be made in thecnlb.ini file before running the updNetwork.py script. Running the script with updates that include deletion and/or updates of configuration made to the cnlb.ini file, can be disruptive to the current CNLB configuration. In such cases, validation can be performed only on the syntax of the cnlb.ini file.
Running the updNetwork.py script, it performs the following steps:
- The
cnlb.inifile is validated, ensuring the changes made are syntactically correct and that there are no unsupported duplicate IPs used. - The updated
cnlb.auto.tfvarsfile is generated. - The
OpenTofuis run to generate the new configuration resources. - The
installCnlb.pyis run to generate the Kubernetes objects in the cluster.
The following two files are generated which show the results of the script after it completes. Check these files to ensure that the script is successful.
updNetwork-<timestamp>.logThis file must include the output from the OpenTofu run.
installer.logThis file must include any logs generated by the
installCnlb.pyscript.
Note:
The-h option in the command syntax, displays the help.
Note:
For this release, only occne-infra namespace is operational. If the script is run without any parameters, the default namespace used is occne-infra. The -ns/--namespace option can be used, but must be set to occne-infra namespace only. It is recommended not to insert any other namespace.
Run the following command to display the help option.
$ installer/updNetwork.py -hThe following sample output shows the usage of the configuration options:
usage: updNetwork.py [-h] [-ns NAMESPACE] [-db]
Used to update the network on an existing CNLB deployment.
Parameters:
Required parameters:
None
Optional Parameters:
-ns/--namespace: Namespace for network
-db/--debug: Print tracebacks on error
optional arguments:
-h, --help show this help message and exit
-ns NAMESPACE, --namespace NAMESPACE
namespace for network
-db, --debug
Examples:
./updNetwork.py
./updNetwork.py -ns occne-infra -dbThis procedure provides the steps to follow when updating an existing CNLB network configuration. The following example demonstrates how to add a network to the existing CNLB Network configuration.
For specific examples, refer to Examples cases section in this chapter. After running the updNetwork.py script, all changes made must be manually verified. Refer to the section, to validate the update.
- Edit the
cnlb.inifile located at/var/occne/cluster/$OCCNE_CLUSTER/to add the configuration for the new network. In this case, the network named sig is added to thecnlb.inifile, to the existing oam network. This includes adding the necessary service IPs along with all other necessary fields for the new network.The following sample code snippet shows how to add a sig network.
Run the following command to add the configurations required for the new network:
$ vi /var/occne/cluster/$OCCNE_CLUSTER/cnlb.iniBelow is a sample
cnlb.inifile:[cnlb] [cnlb:vars] cnlb_replica_cnt = 4 [cnlb:children] oam sig [oam:vars] service_network_name = "oam" subnet_id = "43df8249-8316-48ed-a6b7-79de5413ddbb" network_id = "18e0s112-ac40-4c57-bedf-a16b9df497cf" external_network_range = "10.199.180.0/24" external_default_gw = "10.199.180.1" egress_ip_addr = ["10.199.180.11", "10.199.180.189"] internal_network_range = "132.16.0.0/24" service_ip_addr = ["10.199.180.128", "10.199.180.10", "10.199.180.247", "10.199.180.174", "10.199.180.131", "10.199.180.4"] egress_dest = ["10.199.180.0/24","10.123.155.0/25"] [sig:vars] service_network_name = "sig" subnet_id = "2f317932-91bd-4440-a2fe-f3e5fc0af49c" network_id = "7375bbd7-a787-4f33-ae60-dbcc58c075c2" external_network_range = 10.199.201.0/24 external_default_gw = "10.199.201.1" egress_ip_addr = ["10.199.201.10", "10.199.201.11"] internal_network_range = 172.16.0.0/24 service_ip_addr = ["10.199.201.15","10.199.201.16"] shared_internal = False - For OpenStack-only deployment, source the
openrc.shfile in the cluster directory and provide the OpenStack credentials as prompted.$ source openrc.sh - Run the
updNetwork.pyscript to add a sig network.$ ./installer/updNetwork.pySample output:
Updating CNLB network as indicated in the cnlb.ini file - Validating the cnlb.ini file - Successfully validated cnlb.ini file - Generating new cnlb.auto.tfvars file - Successfully created cnlb.auto.tfvars file - Initializing and running tofu apply - Tofu initialized - Running tofu apply... (may take several minutes) - Apply complete! Resources: 14 added, 0 changed, 0 destroyed - Successful run of tofu apply - check /var/occne/cluster/occne-user/updNetwork-08122024_164714.log for details - Running installCnlb.py - Successfully ran installCnlb.py - Restarting cnlb-manager and cnlb-app deployments - Deployment: cnlb-manager was restarted. Please wait for the pods status to be 'running' - Deployment: cnlb-app was restarted. Please wait for the pods status to be 'running' - Network update successfully completed
For vCNE VMware only:
On VCD 10.4.1 and later, removing a VCD vApp network from a powered-on vApp is not supported.
If a cnlb.ini change would remove or replace a VCD vApp network, updNetwork.py script blocks the change from being applied as an in-service CNLB network update. This block occurs before stale interface cleanup or tofu apply is run.
Procedure to Identify and Manually Remove or Replace VCD vApp Networks:
- Run the
updNetwork.pyscript first to identify the VCD vApp networks that must be manually removed while the vApp is powered off. The script detects and lists unsafe actions without applying changes or interrupting traffic.In this example, the script detected two VCD vApp networks that require manual removal:
sig-networkandoccne-test-dia-int-net. The first planned action removes a network. The second planned action replaces a network because of gateway or netmask changes. Use the reported VCD network name values when selecting networks in the VCD GUI.Following is an example for blocked output:
$ ./installer/updNetwork.pyExample output:
ERROR: Unable to update network - err: Unsafe VCD vApp network change detected in OpenTofu plan. VCD 10.4.1+ requires the parent vApp to be powered off before removing a vApp network. Powering off the parent vApp will also power off the bastion nodes and the entire cluster. This operation is not safe and is blocked. Consult the documentation. Planned VCD vApp network removal/replacement: - module.isolated_network.vcd_vapp_network.isolated["sig"] (vcd_vapp_network): actions=[delete], replace_paths=[N/A] VCD network name: sig-network - module.isolated_network.vcd_vapp_network.isolated["dia"] (vcd_vapp_network): actions=[delete, create], replace_paths=[gateway, netmask] VCD network name: occne-test-dia-int-net - Perform the following manual vApp actions in the VMware Cloud Director (VCD) GUI:
Navigate to All Virtual Data Centers > Data center: <target data center> > Compute > vApps > <target vApp>.
- Power off the target VCD vApp.
- In the target vApp, select Networks.
- Select each affected VCD vApp network reported by
updNetwork.py, and click Delete. - Power on the target VCD vApp.
- Wait for all non-CNLB components to be up and running. The user is responsible for verifying cluster health after the vApp is powered on again.
Note:
CNLB application pods are expected to be inCrashLoopBackOff. This is acceptable and is caused by the network removal. The subsequent script run restores the CNLB configuration.- Verify that all nodes are
Ready.kubectl get nodes - Verify that pods across all namespaces are up and running.
kubectl get pods -A
- Verify that all nodes are
- Run the
updNetwork.pyscript again../installer/updNetwork.py - Restart applications or NFs and CNE Common Services so CNLB can refresh annotation status.
- Verify that CNLB pods return to Running:
- Verify the CNLB App pods.
kubectl -n occne-infra get pods -l app=cnlb-app - Verify the CNLB Manager pods.
kubectl -n occne-infra get pods -l app=cnlb-manager
- Verify the CNLB App pods.
Validating Updates
This procedure validates the CNLB network configuration update after running the updNetwork.py script.
All changes must be manually verified using the following commands. The required validation commands depend on the changes made in the cnlb.ini file.
- Run the following
describecommand to retrieve and display the data fromcnlb-manager-networks.kubectl describe cm cnlb-manager-networks -n occne-infraSample output:
Name: cnlb-manager-networks Namespace: occne-infra Labels: <none> Annotations: <none> Data ==== cnlb_manager_net_cm.json: ---- { "networks": [ { "external-network": [ { "range": "10.199.180.0/24", "gatewayIp": "10.199.180.1" } ], "internal-network": [ { "range": "132.16.0.0/24", "egressIp": [ [ "10.199.180.11", "132.16.0.193" ], [ "10.199.180.189", "132.16.0.194" ] ] } ], "networkName": "oam" }, { "external-network": [ { "range": "10.199.201.0/24", "gatewayIp": "10.199.201.1" } ], "internal-network": [ { "range": "172.16.0.0/24", "egressIp": [ [ "10.199.201.10", "172.16.0.193" ], [ "10.199.201.11", "172.16.0.194" ] ] } ], "networkName": "sig" } ] } BinaryData ==== - The data can also be retrieved and displayed using the
kubectl get net-attach-def -Acommand. This command retrieves the set of network attachment objects created for the oam and sig networks.$ kubectl get net-attach-def -ASample output:
NAMESPACE NAME AGE default nf-oam-egr1 3h5m default nf-oam-egr2 3h5m default nf-oam-ie1 3h5m default nf-oam-ie2 3h5m default nf-oam-ie3 3h5m default nf-oam-ie4 3h5m default nf-oam-ie5 3h5m default nf-oam-ie6 3h5m default nf-oam-int1 3h5m default nf-oam-int2 3h5m default nf-oam-int3 3h5m default nf-oam-int4 3h5m default nf-oam-int5 3h5m default nf-oam-int6 3h5m default nf-sig-egr1 26m default nf-sig-egr2 26m default nf-sig-ie1 26m default nf-sig-ie2 26m default nf-sig-int1 86m default nf-sig-int2 86m occne-infra lb-oam-ext 3h5m occne-infra lb-oam-int 3h5m occne-infra lb-sig-ext 86m occne-infra lb-sig-int 86m - Validate the following:
- There is 1 "ie" object and 1 "int" for each
service_ip_addrlist. - There is 1 "int" and 1 "egr" for each
egress_ip-addrlist. - There are
lbobjects for external and internal networks for oam and sig.
- There is 1 "ie" object and 1 "int" for each
- For Multiple networks only: If SIN was enabled or disabled, verify the change by selecting one network attachment definition, such as int1, and running the following command. Confirm that the interfaces for the previously SIN-configured networks were updated accordingly.
Following is an example for SIN enabled:
Note:
SIN-enabled networks share the same interface as OAM.for x in oam sig; do kubectl describe net-attach-def nf-${x}-ie1 | egrep "Name:|Config:";echo; doneSample output:
Name: nf-oam-ie1 Config: {"cniVersion": "0.4.0", "name": "nf-oam-ie1", "plugins": [{"type": "macvlan", "mode": "bridge", "master": "oam-int", "ipam": {"type": "whereabouts", "range": "142.16.0.0/24", "range_start": "142.16.0.129", "range_end": "142.16.0.190", "gateway": "142.16.0.1", "routes": [{"dst": "10.75.212.0/23", "gw": "142.16.0.1"}]}}]} Name: nf-sig-ie1 Config: {"cniVersion": "0.4.0", "name": "nf-sig-ie1", "plugins": [{"type": "macvlan", "mode": "bridge", "master": "oam-int", "ipam": {"type": "whereabouts", "range": "143.16.0.0/24", "range_start": "143.16.0.129", "range_end": "143.16.0.190", "gateway": "143.16.0.1", "routes": [{"dst": "10.75.212.0/23", "gw": "143.16.0.1"}]}}]}
Following is an example for SIN disabled:
Note:
Networks disabled use their own interface.$ for x in oam sig; do kubectl describe net-attach-def nf-${x}-ie1 | egrep "Name:|Config:";echo; doneSample output:
Name: nf-oam-ie1
Config: {"cniVersion": "0.4.0", "name": "nf-oam-ie1", "plugins": [{"type": "macvlan", "mode": "bridge", "master": "oam-int", "ipam": {"type": "whereabouts", "range": "142.16.0.0/24", "range_start": "142.16.0.129", "range_end": "142.16.0.190", "gateway": "142.16.0.1", "routes": [{"dst": "10.75.212.0/23", "gw": "142.16.0.1"}]}}]}
Name: nf-sig-ie1
Config: {"cniVersion": "0.4.0", "name": "nf-sig-ie1", "plugins": [{"type": "macvlan", "mode": "bridge", "master": "sig-int", "ipam": {"type": "whereabouts", "range": "143.16.0.0/24", "range_start": "143.16.0.129", "range_end": "143.16.0.190", "gateway": "143.16.0.1", "routes": [{"dst": "10.75.212.0/23", "gw": "143.16.0.1"}]}}]}The examples provided in this section are for an OpenStack cluster deployment. The flow of the script is same for both the platforms, however, VMware includes additional configurations for the infrastructure after running OpenTofu Apply.
Note:
The examples provided in this section, indicate at the beginning, if it corresponds to the output of the script ran on a vCNE cluster or on a VMware cluster.Refer to the section, to validate the update of the CNLB network configuration.
Note:
These are examples only. The IPs used must be changed as per the system on which these commands are run.- Adding a New Network
- Deleting a network
- Adding an IP to the service_ip_addr list of an existing network
- Changing an IP in the service_ip_addr list of an existing network
- Deleting an IP from the service_ip_addr list of an existing network
- Adding a CIDR to the egress_dest field of an existing network
- Deleting a CIDR from the egress_dest field of an existing network
8.11.1 Adding a New Network
This section describes the steps to add a new network to an existing CNLB deployment.
Prerequisites
Before adding a network, ensure that the oam network is added during CNE installation.Procedure
The following procedure provides an example output of a script run on a VMware vCNE cluster.
- Edit the
cnlb.inifile to add the sig network to thecnlb.inifile.[cnlb] [cnlb:vars] # if set to true, it will use list of worker nodes mentioned in cnlb group to host lb client pods, if not set then use all cnlb_replica_cnt = 4 [cnlb:children] # Network names to be used for pod and external # networking, these networks and ports # will be created and attached to hosts # in cnlb host group oam sig [oam:vars] service_network_name = "oam" subnet_id = "cnlb-dhcp2" network_id = "cnlb-dhcp2" external_network_range = 10.199.180.0/25 external_default_gw = "10.199.180.1" egress_ip_addr = ["10.199.180.76","10.199.180.77"] internal_network_range = 132.16.0.0/24 service_ip_addr = ["10.199.180.78","10.199.180.79","10.199.180.80","10.199.180.81","10.199.180.82","10.199.180.83"] # Optional variable. Uncomment and specify external destination subnets to communicate with. # If egress NADs are not needed for a network, then below variable should not be added. egress_dest = ["10.199.180.0/25"] [sig:vars] service_network_name = "sig" subnet_id = "cnlb-dhcp2" network_id = "cnlb-dhcp2" external_network_range = 10.199.201.0/25 external_default_gw = "10.199.201.1" egress_ip_addr = ["10.199.201.2","10.199.201.6"] internal_network_range = 172.16.0.0/24 service_ip_addr = ["10.199.201.16","10.199.201.28"] # Optional variable. Uncomment and specify external destination subnets to communicate with. # If egress NADs are not needed for a network, then below variable should not be added. egress_dest = ["10.199.201.0/25"] shared_internal = False - Run the
updNetwork.pyscript to update the CNLB network.$ ./installer/updNetwork.pySample output:
Updating CNLB network as indicated in the cnlb.ini file - Validating the cnlb.ini file - Successfully validated cnlb.ini file - Generating new cnlb.auto.tfvars file - Successfully created cnlb.auto.tfvars file - Removing Stale Network Interfaces - No stale interfaces found to remove - Initializing and running tofu apply - Tofu initialized - Running tofu apply... (may take several minutes) - Apply complete! Resources: 1 added, 4 changed, 0 destroyed - Successful run of tofu apply - check /var/occne/cluster/occne-user/updNetwork-08092024_183741.log for details - Renew DHCP Lease - Renewing DHCP lease for host occne-user-k8s-node-1... - Renewing DHCP lease for host occne-user-k8s-node-2... - Renewing DHCP lease for host occne-user-k8s-node-3... - Renewing DHCP lease for host occne-user-k8s-node-4... - DHCP lease was successfully renewed - Validate Number of Networks and NICs match - Compare active connections against TF state number of networks - Success: Correct number of Active Connections across all nodes - Refresh tofu state, refresh IP allocation - Successful run of tofu refresh - check /var/occne/cluster/occne-user/updNetwork-08092024_183741.log for details - Running installCnlb.py - Successfully ran installCnlb.py - Restarting cnlb-manager and cnlb-app deployments - Deployment: cnlb-manager was restarted. Please wait for the pods status to be 'running' - Deployment: cnlb-app was restarted. Please wait for the pods status to be 'running' - Network update successfully completed - Verify the changes using the following
command.
$ kubectl describe cm cnlb-manager-networks -n occne-infraSample output:
After the verification, run the following command to fetch the additional default network attachment definitionsName: cnlb-manager-networks Namespace: occne-infra Labels: <none> Annotations: <none> Data ==== cnlb_manager_net_cm.json: ---- { "networks": [ { "external-network": [ { "range": "10.199.180.0/24", "gatewayIp": "10.199.180.1" } ], "internal-network": [ { "range": "132.16.0.0/24", "egressIp": [ [ "10.199.180.76", "132.16.0.193" ], [ "10.199.180.77", "132.16.0.194" ] ] } ], "networkName": "oam" }, { "external-network": [ { "range": "10.199.201.0/24", "gatewayIp": "10.199.201.1" } ], "internal-network": [ { "range": "172.16.0.0/24", "egressIp": [ [ "10.199.201.2", "172.16.0.193" ], [ "10.199.201.6", "172.16.0.194" ] ] } ], "networkName": "sig" } ] } BinaryData ====ie1andie2for sig network.$ kubectl get net-attach-def -ASample output:
NAMESPACE NAME AGE default nf-oam-egr1 118m default nf-oam-egr2 118m default nf-oam-ie1 118m default nf-oam-ie2 118m default nf-oam-ie3 118m default nf-oam-ie4 118m default nf-oam-ie5 118m default nf-oam-ie6 118m default nf-oam-int1 118m default nf-oam-int2 118m default nf-oam-int3 118m default nf-oam-int4 118m default nf-oam-int5 118m default nf-oam-int6 118m default nf-sig-int1 19m default nf-sig-int2 19m occne-infra lb-oam-ext 118m occne-infra lb-oam-int 118m occne-infra lb-sig-ext 19m occne-infra lb-sig-int 19m
8.11.2 Deleting a network
This section describes the steps to delete a network.
Prerequisites
Before deleting a network, ensure that the sig network is added as explained in the section, Adding a New Network or ensure that the cluster was initially deployed with this network.Procedure
The following procedure provides an example output of a script run on a VMware vCNE cluster.
- Edit the
cnlb.inifile to delete the sig network. Remove the sig name under thecnlb:childrenand thesig:varsgroups with all the indicated fields as shown below.[cnlb] [cnlb:vars] # if set to true, it will use list of worker nodes mentioned in cnlb group to host lb client pods, if not set then use all cnlb_replica_cnt = 4 [cnlb:children] # Network names to be used for pod and external # networking, these networks and ports # will be created and attached to hosts # in cnlb host group oam sig [oam:vars] service_network_name = "oam" subnet_id = "cnlb-dhcp2" network_id = "cnlb-dhcp2" external_network_range = 10.199.180.0/25 external_default_gw = "10.199.180.1" egress_ip_addr = ["10.199.180.76","10.199.180.77"] internal_network_range = 132.16.0.0/24 service_ip_addr = ["10.199.180.78","10.199.180.79","10.199.180.80","10.199.180.81","10.199.180.82","10.199.180.83"] # Optional variable. Uncomment and specify external destination subnets to communicate with. # If egress NADs are not needed for a network, then below variable should not be added. egress_dest = ["10.199.180.0/25"] - Run the updNetwork.py script to update the CNLB network.
For VMware on VCD 10.4.1 and later, the first run blocks before tofu apply and reports the affected VCD vApp network name. Refer to the section "VCD vApp Network Removal or Replacement Maintenance Workflow", to perform the required manual VCD vApp network changes, and then rerun
updNetwork.py.After the VCD vApp network has been manually removed and
updNetwork.pyis rerun, the script completes the CNLB configuration update.$ ./installer/updNetwork.pySample output:
Updating CNLB network as indicated in the cnlb.ini file - Validating the cnlb.ini file - Successfully validated cnlb.ini file - Generating new cnlb.auto.tfvars file - Successfully created cnlb.auto.tfvars file - Initializing tofu - Tofu initialized - Planning tofu changes - Saved temporary tofu plan: /var/occne/cluster/occne-user/cnlb-tofu-plan.tmp - Checking VCD vApp network plan safety - Inspecting tofu plan for VCD vApp network safety check - No VCD vApp network removal or replacement detected - Removing Stale Network Interfaces - No stale interfaces found to remove - Running tofu apply - Running tofu apply using saved plan... (may take several minutes) - Apply complete! Resources: 0 added, 4 changed, 0 destroyed - Successful run of tofu apply - check /var/occne/cluster/occne-user/updNetwork-08092024_183741.log for details - Activating disconnected VCD network devices - Renew DHCP Lease - Renewing DHCP lease for host occne-user-k8s-node-1... - Renewing DHCP lease for host occne-user-k8s-node-2... - Renewing DHCP lease for host occne-user-k8s-node-3... - Renewing DHCP lease for host occne-user-k8s-node-4... - DHCP lease was successfully renewed - Validate Number of Networks and NICs match - Compare active connections against expected network count per node type - Success: Correct number of Active Connections across all nodes - Refresh tofu state, refresh IP allocation - Successful run of tofu refresh - check /var/occne/cluster/occne-user/updNetwork-08092024_183741.log for details - Validating network interfaces health (after Tofu apply) - Validating number of interfaces across nodes. - Number of interfaces is consistent across nodes. - Validating interfaces names and networks consistency across nodes. - Interfaces names and newroks are consistent across nodes - Running installCnlb.py - Successfully ran installCnlb.py - Restarting cnlb-manager and cnlb-app deployments - Deployment: cnlb-manager was restarted. Please wait for the pods status to be 'running' - Deployment: cnlb-app was restarted. Please wait for the pods status to be 'running' - Network update successfully completed - Verify the changes using the following
command:
$ kubectl describe cm cnlb-manager-networks -n occne-infraSample output:
Name: cnlb-manager-networks Namespace: occne-infra Labels: <none> Annotations: <none> Data ==== cnlb_manager_net_cm.json: ---- { "networks": [ { "external-network": [ { "range": "10.199.180.0/24", "gatewayIp": "10.199.180.1" } ], "internal-network": [ { "range": "132.16.0.0/24", "egressIp": [ [ "10.199.180.76", "132.16.0.193" ], [ "10.199.180.77", "132.16.0.194" ] ] } ], "networkName": "oam" } ] }After the verification, run the following command to fetch the additional default network attachment definitions for oamie1andie2.$ kubectl get net-attach-def -ASample output:
NAMESPACE NAME AGE default nf-oam-egr1 3h24m default nf-oam-egr2 3h24m default nf-oam-ie1 3h24m default nf-oam-ie2 3h24m default nf-oam-ie3 3h24m default nf-oam-ie4 3h24m default nf-oam-ie5 3h24m default nf-oam-ie6 3h24m default nf-oam-int1 3h24m default nf-oam-int2 3h24m default nf-oam-int3 3h24m default nf-oam-int4 3h24m default nf-oam-int5 3h24m default nf-oam-int6 3h24m occne-infra lb-oam-ext 3h24m occne-infra lb-oam-int 3h24m
8.11.3 Adding an IP to the
service_ip_addr list of an existing network
This section describes the steps to add an IP to the
service_ip_addr list of an existing network.
Prerequisites
Before adding an IP to a network, ensure that the sig network is added as explained in the section, Adding a New Network.Procedure
- Edit the
cnlb.inifile and add a valid external IP to the end of the service_ip_addr field for the sig network.Below is a sample
cnlb.inifile.[cnlb] [cnlb:vars] # if set to true will use list of worker nodes mentioned in cnlb group to host lb client pods, if not set then use all cnlb_replica_cnt = 4 [cnlb:children] # Network names to be used for pod and external # networking, these networks and ports # will be created and attached to hosts # in cnlb host group oam sig [oam:vars] service_network_name = "oam" subnet_id = "43df8249-8316-48ed-a6b7-79de5413ddbb" network_id = "18e0s112-ac40-4c57-bedf-a16b9df497cf" external_network_range = "10.199.180.0/24" external_default_gw = "10.199.180.1" egress_ip_addr = ["10.199.180.11", "10.199.180.189"] internal_network_range = "132.16.0.0/24" service_ip_addr = ["10.199.180.128", "10.199.180.10", "10.199.180.247", "10.199.180.174", "10.199.180.131", "10.199.180.4"] egress_dest = ["10.199.180.0/24","10.123.155.0/25"] [sig:vars] service_network_name = "sig" subnet_id = "2f317932-91bd-4440-a2fe-f3e5fc0af49c" network_id = "7375bbd7-a787-4f33-ae60-dbcc58c075c2" external_network_range = 10.199.201.0/24 external_default_gw = "10.199.201.1" egress_ip_addr = ["10.199.201.10", "10.199.201.11"] internal_network_range = 172.16.0.0/24 service_ip_addr = ["10.199.201.15","10.199.201.16","10.199.201.76"] shared_internal = FalseThe IP 10.199.201.76 is added.
- Run the updNetwork.py script to update the CNLB
network.
$ ./installer/updNetwork.pySample output:
Updating CNLB network as indicated in the cnlb.ini file - Validating the cnlb.ini file - Successfully validated cnlb.ini file - Generating new cnlb.auto.tfvars file - Successfully created cnlb.auto.tfvars file - Initializing and running tofu apply - Tofu initialized - Running tofu apply... (may take several minutes) - Apply complete! Resources: 1 added, 0 changed, 0 destroyed - Successful run of tofu apply - check /var/occne/cluster/occne-user/updNetwork-08122024_171433.log for details - Running installCnlb.py - Successfully ran installCnlb.py - Restarting cnlb-manager and cnlb-app deployments - Deployment: cnlb-manager was restarted. Please wait for the pods status to be 'running' - Deployment: cnlb-app was restarted. Please wait for the pods status to be 'running' - Network update successfully completed - Verify the changes using the following
command:
$ kubectl describe cm cnlb-manager-networks -n occne-infraSample output:
Name: cnlb-manager-networks Namespace: occne-infra Labels: <none> Annotations: <none> Data ==== cnlb_manager_net_cm.json: ---- { "networks": [ { "external-network": [ { "range": "10.199.180.0/24", "gatewayIp": "10.199.180.1" } ], "internal-network": [ { "range": "132.16.0.0/24", "egressIp": [ [ "10.199.180.11", "132.16.0.193" ], [ "10.199.180.189", "132.16.0.194" ] ] } ], "networkName": "oam" }, { "external-network": [ { "range": "10.199.201.0/24", "gatewayIp": "10.199.201.1" } ], "internal-network": [ { "range": "172.16.0.0/24", "egressIp": [ [ "10.199.201.10", "172.16.0.193" ], [ "10.199.201.11", "172.16.0.194" ] ] } ], "networkName": "sig" } ] } BinaryData ==== - After the verification, run the following command to fetch the
additional default network attachment
definitions.
$ kubectl get net-attach-def -ASample output:
NAMESPACE NAME AGE default nf-oam-egr1 132m default nf-oam-egr2 132m default nf-oam-ie1 132m default nf-oam-ie2 132m default nf-oam-ie3 132m default nf-oam-ie4 132m default nf-oam-ie5 132m default nf-oam-ie6 132m default nf-oam-int1 132m default nf-oam-int2 132m default nf-oam-int3 132m default nf-oam-int4 132m default nf-oam-int5 132m default nf-oam-int6 132m default nf-sig-int1 33m default nf-sig-int2 33m default nf-sig-int3 6m11s occne-infra lb-oam-ext 132m occne-infra lb-oam-int 132m occne-infra lb-sig-ext 33m occne-infra lb-sig-int 33m
8.11.4 Deleting an IP from the
service_ip_addr list of an existing network
This section describes the steps to delete an IP from the
service_ip_addr list of an existing network.
Prerequisites
Before proceeding to delete an IP from a network, ensure that the sig network is added as explained in the section, Adding a New Network in addition to the service IP10.199.201.76.
Procedure
- Edit the
cnlb.inifile to remove the external IP10.199.201.76from theservice_ip_addrfield for the sig network.Below is a sample
cnlb.inifile.[cnlb] [cnlb:vars] # if set to true, it will use list of worker nodes mentioned in cnlb group to host lb client pods, if not set then use all cnlb_replica_cnt = 4 [cnlb:children] # Network names to be used for pod and external # networking, these networks and ports # will be created and attached to hosts # in cnlb host group oam sig [oam:vars] service_network_name = "oam" subnet_id = "43df8249-8316-48ed-a6b7-79de5413ddbb" network_id = "18e0s112-ac40-4c57-bedf-a16b9df497cf" external_network_range = "10.199.180.0/24" external_default_gw = "10.199.180.1" egress_ip_addr = ["10.199.180.11", "10.199.180.189"] internal_network_range = "132.16.0.0/24" service_ip_addr = ["10.199.180.128", "10.199.180.10", "10.199.180.247", "10.199.180.174", "10.199.180.131", "10.199.180.4"] egress_dest = ["10.199.180.0/24","10.123.155.0/25"] [sig:vars] service_network_name = "sig" subnet_id = "2f317932-91bd-4440-a2fe-f3e5fc0af49c" network_id = "7375bbd7-a787-4f33-ae60-dbcc58c075c2" external_network_range = 10.199.201.0/24 external_default_gw = "10.199.201.1" egress_ip_addr = ["10.199.201.10", "10.199.201.11"] internal_network_range = 172.16.0.0/24 service_ip_addr = ["10.199.201.15","10.199.201.16"] shared_internal = False - Run the updNetwork.py script to update the CNLB network.
$ ./installer/updNetwork.pySample output:
Updating CNLB network as indicated in the cnlb.ini file - Validating the cnlb.ini file - Successfully validated cnlb.ini file - Generating new cnlb.auto.tfvars file - Successfully created cnlb.auto.tfvars file - Initializing and running tofu apply - Tofu initialized - Running tofu apply... (may take several minutes) - Apply complete! Resources: 0 added, 0 changed, 1 destroyed - Successful run of tofu apply - check /var/occne/cluster/occne-user/updNetwork-08122024_172857.log for details - Running installCnlb.py - Successfully ran installCnlb.py - Restarting cnlb-manager and cnlb-app deployments - Deployment: cnlb-manager was restarted. Please wait for the pods status to be 'running' - Deployment: cnlb-app was restarted. Please wait for the pods status to be 'running' - Network update successfully completed - Verify the changes using the following
command.
$ kubectl describe cm cnlb-manager-networks -n occne-infraSample output:
After the verification, run the following command to fetch the additional default network attachment definitions.Name: cnlb-manager-networks Namespace: occne-infra Labels: <none> Annotations: <none> Data ==== cnlb_manager_net_cm.json: ---- { "networks": [ { "external-network": [ { "range": "10.199.180.0/24", "gatewayIp": "10.199.180.1" } ], "internal-network": [ { "range": "132.16.0.0/24", "egressIp": [ [ "10.199.180.11", "132.16.0.193" ], [ "10.199.180.189", "132.16.0.194" ] ] } ], "networkName": "oam" }, { "external-network": [ { "range": "10.199.201.0/24", "gatewayIp": "10.199.201.1" } ], "internal-network": [ { "range": "172.16.0.0/24", "egressIp": [ [ "10.199.201.10", "172.16.0.193" ], [ "10.199.201.11", "172.16.0.194" ] ] } ], "networkName": "sig" } ] } BinaryData ====$ kubectl get net-attach-def -ASample output:
NAMESPACE NAME AGE default nf-oam-egr1 143m default nf-oam-egr2 143m default nf-oam-ie1 143m default nf-oam-ie2 143m default nf-oam-ie3 143m default nf-oam-ie4 143m default nf-oam-ie5 143m default nf-oam-ie6 143m default nf-oam-int1 143m default nf-oam-int2 143m default nf-oam-int3 143m default nf-oam-int4 143m default nf-oam-int5 143m default nf-oam-int6 143m default nf-sig-int1 44m default nf-sig-int2 44m occne-infra lb-oam-ext 143m occne-infra lb-oam-int 143m occne-infra lb-sig-ext 44m occne-infra lb-sig-int 44m
8.11.5 Changing an IP in the
service_ip_addr list of an existing network
This section describes the steps to change an IP in the
service_ip_addr list of an existing network.
Prerequisites
Before proceeding to delete an IP from a network, ensure that the sig network
is added as explained in the section, Adding a New Network in addition to the service IP 10.199.201.76.
Procedure
- Edit the
cnlb.inifile to change the service IP10.199.201.76to10.199.201.16in the service_ip_addr field for the sig network.Below is a sample
cnlb.inifile.[cnlb] [cnlb:vars] # if set to true will use list of worker nodes mentioned in cnlb group to host lb client pods, if not set then use all cnlb_replica_cnt = 4 [cnlb:children] # Network names to be used for pod and external # networking, these networks and ports # will be created and attached to hosts # in cnlb host group oam sig [oam:vars] service_network_name = "oam" subnet_id = "43df8249-8316-48ed-a6b7-79de5413ddbb" network_id = "18e0s112-ac40-4c57-bedf-a16b9df497cf" external_network_range = "10.199.180.0/24" external_default_gw = "10.199.180.1" egress_ip_addr = ["10.199.180.11", "10.199.180.189"] internal_network_range = "132.16.0.0/24" service_ip_addr = ["10.199.180.128", "10.199.180.10", "10.199.180.247", "10.199.180.174", "10.199.180.131", "10.199.180.4"] egress_dest = ["10.199.180.0/24","10.123.155.0/25"] [sig:vars] service_network_name = "sig" subnet_id = "2f317932-91bd-4440-a2fe-f3e5fc0af49c" network_id = "7375bbd7-a787-4f33-ae60-dbcc58c075c2" external_network_range = 10.199.201.0/24 external_default_gw = "10.199.201.1" egress_ip_addr = ["10.199.201.10", "10.199.201.11"] internal_network_range = 172.16.0.0/24 service_ip_addr = ["10.199.201.15","10.199.201.16","10.199.201.16"] shared_internal = False - Run the updNetwork.py script to update the CNLB
network.
$ ./installer/updNetwork.pySample output:
Updating CNLB network as indicated in the cnlb.ini file - Validating the cnlb.ini file - Successfully validated cnlb.ini file - Generating new cnlb.auto.tfvars file - Successfully created cnlb.auto.tfvars file - Initializing and running tofu apply - Tofu initialized - Running tofu apply... (may take several minutes) - Apply complete! Resources: 1 added, 0 changed, 1 destroyed - Successful run of tofu apply - check /var/occne/cluster/occne-user/updNetwork-08122024_173855.log for details - Running installCnlb.py - Successfully ran installCnlb.py - Restarting cnlb-manager and cnlb-app deployments - Deployment: cnlb-manager was restarted. Please wait for the pods status to be 'running' - Deployment: cnlb-app was restarted. Please wait for the pods status to be 'running' - Network update successfully completed - Verify the changes using the following commands.
$ kubectl describe cm cnlb-manager-networks -n occne-infra $ kubectl get net-attach-def -ASample output:
Name: cnlb-manager-networks Namespace: occne-infra Labels: <none> Annotations: <none> Data ==== cnlb_manager_net_cm.json: ---- { "networks": [ { "external-network": [ { "range": "10.199.180.0/24", "gatewayIp": "10.199.180.1" } ], "internal-network": [ { "range": "132.16.0.0/24", "egressIp": [ [ "10.199.180.11", "132.16.0.193" ], [ "10.199.180.189", "132.16.0.194" ] ] } ], "networkName": "oam" }, { "external-network": [ { "range": "10.199.201.0/24", "gatewayIp": "10.199.201.1" } ], "internal-network": [ { "range": "172.16.0.0/24", "egressIp": [ [ "10.199.201.10", "172.16.0.193" ], [ "10.199.201.11", "172.16.0.194" ] ] } ], "networkName": "sig" } ] } BinaryData ====Run the following command:$ kubectl get net-attach-def -ANAMESPACE NAME AGE default nf-oam-egr1 153m default nf-oam-egr2 153m default nf-oam-ie1 153m default nf-oam-ie2 153m default nf-oam-ie3 153m default nf-oam-ie4 153m default nf-oam-ie5 153m default nf-oam-ie6 153m default nf-oam-int1 153m default nf-oam-int2 153m default nf-oam-int3 153m default nf-oam-int4 153m default nf-oam-int5 153m default nf-oam-int6 153m default nf-sig-int1 53m default nf-sig-int2 53m occne-infra lb-oam-ext 153m occne-infra lb-oam-int 153m occne-infra lb-sig-ext 53m occne-infra lb-sig-int 53m
8.11.6 Adding a CIDR to the
egress_dest field of an existing network
This section describes the steps to add a Classless Inter-Domain Routing
(CIDR) to the egress_dest field of an existing network.
Prerequisites
Before adding a CIDR to the egress_dest field, ensure that the sig network is added as explained in the section, Adding a New Network.
Validation commands
The following commands are used to validate the changes.
Table 8-26 Validation commands
| Command | Purpose |
|---|---|
kubectl describe cm cnlb-manager-networks -n
occne-infra |
This command is used to retrieve and display the
data from cnlb-manager-networks.
|
kubectl get net-attach-def -A |
This command is used to get the network attachment
definition through out the cluster.
Here, |
kubectl describe net-attach-def nf-sig-egr1 -n
default |
This command is used to retrieve the contents of the
network attachment definition, nf-sig-egr1 in
default namespace.
|
Procedure
- Edit the
cnlb.inifile to add the IP,10.199.100.0/25to the egress_dest field for the sig network.For more information on how to add sig network, see Adding a New Network.
Below is a sample
cnlb.inifile.[cnlb] [cnlb:vars] # if set to true, it will use list of worker nodes mentioned in cnlb group to host lb client pods, if not set then use all cnlb_replica_cnt = 4 [cnlb:children] # Network names to be used for pod and external # networking, these networks and ports # will be created and attached to hosts # in cnlb host group oam sig [oam:vars] service_network_name = "oam" subnet_id = "43df8249-8316-48ed-a6b7-79de5413ddbb" network_id = "18e0s112-ac40-4c57-bedf-a16b9df497cf" external_network_range = "10.199.180.0/24" external_default_gw = "10.199.180.1" egress_ip_addr = ["10.199.180.11", "10.199.180.189"] internal_network_range = "132.16.0.0/24" service_ip_addr = ["10.199.180.128", "10.199.180.10", "10.199.180.247", "10.199.180.174", "10.199.180.131", "10.199.180.4"] egress_dest = ["10.199.180.0/24","10.123.155.0/25"] [sig:vars] service_network_name = "sig" subnet_id = "2f317932-91bd-4440-a2fe-f3e5fc0af49c" network_id = "7375bbd7-a787-4f33-ae60-dbcc58c075c2" external_network_range = 10.199.201.0/24 external_default_gw = "10.199.201.1" egress_ip_addr = ["10.199.201.10", "10.199.201.11"] internal_network_range = 172.16.0.0/24 service_ip_addr = ["10.199.201.15","10.199.201.16","10.199.201.16"] egress_dest = ["10.199.201.0/25","10.199.100.0/25"] shared_internal = False - Run the updNetwork.py script to update the CNLB
network.
$ ./installer/updNetwork.pySample output:
Updating CNLB network as indicated in the cnlb.ini file - Validating the cnlb.ini file - Successfully validated cnlb.ini file - Generating new cnlb.auto.tfvars file - Successfully created cnlb.auto.tfvars file - Initializing and running tofu apply - Tofu initialized - Running tofu apply... (may take several minutes) - Apply complete! Resources: 0 added, 0 changed, 0 destroyed - Successful run of tofu apply - check /var/occne/cluster/occne-user/updNetwork-08122024_174922.log for details - Running installCnlb.py - Successfully ran installCnlb.py - Restarting cnlb-manager and cnlb-app deployments - Deployment: cnlb-manager was restarted. Please wait for the pods status to be 'running' - Deployment: cnlb-app was restarted. Please wait for the pods status to be 'running' - Network update successfully completed - Verify the changes using the following command.
$ kubectl describe net-attach-def nf-sig-egr1 -n defaultThe parameter net-attach-def route from the configuration is added to the /Spec/Config section and also as shown below. See "routes" below where {"dst": "10.199.100.0/25", "gw": "172.16.0.193"} is added.
Sample output:
Name: nf-sig-egr1 Namespace: default Labels: <none> Annotations: <none> API Version: k8s.cni.cncf.io/v1 Kind: NetworkAttachmentDefinition Metadata: Creation Timestamp: 2024-08-12T17:48:09Z Generation: 2 Resource Version: 55141 UID: f3720ac4-f49e-487b-a0cc-5b2096d12432 Spec: Config: {"cniVersion": "0.4.0", "name": "nf-sig-egr1", "plugins": [{"type": "macvlan", "mode": "bridge", "master": "eth3", "ipam": {"type": "whereabouts", "range": "132.16.0.0/24", "range_start": "132.16.0.129", "range_end": "132.16.0.190", "gateway": "132.16.0.193", "routes": [{"dst": "10.199.201.0/23", "gw": "132.16.0.193"}, {"dst": "10.199.100.0/25", "gw": "172.16.0.193"}]}}]} Events: <none> - Restart the affected NF pods so that the updated CNLB network configuration is picked up by the application or NF.
8.11.7 Deleting a CIDR from the
egress_dest field of an existing network
This section describes the procedure to delete a CIDR from the
egress_dest field from an existing network
Prerequisites
Before deleting a CIDR from the egress_dest field, ensure that the sig network is added as explained in the section, Adding a New Network.
Procedure
- Edit the
cnlb.inifile and delete IP10.199.100.0/25from the egress_dest field for the sig network.Below is a sample
cnlb.inifile.[cnlb] [cnlb:vars] # if set to true, it will use list of worker nodes mentioned in cnlb group to host lb client pods, if not set then use all cnlb_replica_cnt = 4 [cnlb:children] # Network names to be used for pod and external # networking, these networks and ports # will be created and attached to hosts # in cnlb host group oam sig [oam:vars] service_network_name = "oam" subnet_id = "43df8249-8316-48ed-a6b7-79de5413ddbb" network_id = "18e0s112-ac40-4c57-bedf-a16b9df497cf" external_network_range = "10.199.180.0/24" external_default_gw = "10.199.180.1" egress_ip_addr = ["10.199.180.11", "10.199.180.189"] internal_network_range = "132.16.0.0/24" service_ip_addr = ["10.199.180.128", "10.199.180.10", "10.199.180.247", "10.199.180.174", "10.199.180.131", "10.199.180.4"] egress_dest = ["10.199.180.0/24","10.123.155.0/25"] [sig:vars] service_network_name = "sig" subnet_id = "2f317932-91bd-4440-a2fe-f3e5fc0af49c" network_id = "7375bbd7-a787-4f33-ae60-dbcc58c075c2" external_network_range = 10.199.201.0/24 external_default_gw = "10.199.201.1" egress_ip_addr = ["10.199.201.10", "10.199.201.11"] internal_network_range = 172.16.0.0/24 service_ip_addr = ["10.199.201.15","10.199.201.16","10.199.201.16"] egress_dest = ["10.199.201.0/25"] shared_internal = False - Run the updNetwork.py script to update the CNLB
network.
$ ./installer/updNetwork.pySample output:
Updating CNLB network as indicated in the cnlb.ini file - Validating the cnlb.ini file - Successfully validated cnlb.ini file - Generating new cnlb.auto.tfvars file - Successfully created cnlb.auto.tfvars file - Initializing and running tofu apply - Tofu initialized - Running tofu apply... (may take several minutes) - Apply complete! Resources: 0 added, 0 changed, 0 destroyed - Successful run of tofu apply - check /var/occne/cluster/occne-user/updNetwork-08122024_175715.log for details - Running installCnlb.py - Successfully ran installCnlb.py - Restarting cnlb-manager and cnlb-app deployments - Deployment: cnlb-manager was restarted. Please wait for the pods status to be 'running' - Deployment: cnlb-app was restarted. Please wait for the pods status to be 'running' - Network update successfully completed - Verify the following changes by running the command
$ kubectl describe net-attach-def nf-sig-egr1 -n default:- route
net-attach-defis removed from/spec/configsection as shown in the sample output below - Observe that in the
routesfield, the IPs{"dst": "10.199.100.0/25", "gw": "172.16.0.193"}are deleted.
Sample output:
Name: nf-sig-egr1 Namespace: default Labels: <none> Annotations: <none> API Version: k8s.cni.cncf.io/v1 Kind: NetworkAttachmentDefinition Metadata: Creation Timestamp: 2024-08-12T17:48:09Z Generation: 2 Resource Version: 55141 UID: f3720ac4-f49e-487b-a0cc-5b2096d12432 Spec: Config: {"cniVersion": "0.4.0", "name": "nf-sig-egr1", "plugins": [{"type": "macvlan", "mode": "bridge", "master": "eth3", "ipam": {"type": "whereabouts", "range": "132.16.0.0/24", "range_start": "132.16.0.129", "range_end": "132.16.0.190", "gateway": "132.16.0.193", "routes": [{"dst": "10.199.201.0/23", "gw": "132.16.0.193"}]}}]} Events: <none> - route
- Restart the affected NF pods so that the updated CNLB network configuration is picked up by the application or NF.
8.11.8 Common Issues and Solutions
This section outlines basic steps to resolve common errors encountered when running the network update procedure.
Failed to connect to nodes
This error typically occurs when one or more cluster nodes cannot be reached.
| Cause | Solution |
|---|---|
| Nodes are powered off | Verify all nodes are powered on. |
| Nodes have incorrect or incomplete network settings | Ensure that network connectivity is enabled on all nodes and that network settings (IP, gateway, routes, DNS as applicable) are configured correctly. Confirm that the nodes are reachable over the management or control network (for example, using ping or SSH, depending on your environment). |
Inconsistent interfaces found across nodes
This error typically occurs when one or more nodes have different network interface names than the rest of the cluster.
| Cause | Solution |
|---|---|
| Network interface names changed on one or more nodes | Ensure interface names are consistent and enabled across all nodes. If naming is driven by udev rules, reloading udev rules may resolve the issue. A common approach is to safely reboot the affected nodes one at a time (drain each node before rebooting, if applicable to your cluster). |
| Network interface IP addresses are misconfigured | Verify the relevant interfaces are configured on the correct subnet and consistently across all nodes. |
8.12 Secure DNS Zone Customization through CNLB
Overview
DNS Zone Customization functionality in the CNE environment enhances the security and scalability of DNS requests by routing traffic based on domain zones, such as OAM or Signaling. The feature isolates DNS traffic and forwards requests through Cloud Native Load Balancers (CNLB) to external DNS servers, which are managed by customers. CNE does not control these external servers, but ensures the secure routing of requests.Note:
When this feature is enabled, it is required that CoreDNS pods are not scheduled to run on control plane nodes.DNS Zone Customization feature modifies the DNS resolution flow within the CNE environment to optimize name resolution and centralize DNS routing through the CNLB application. It improves the control over external DNS traffic by routing it through an active CNLB application, bypassing the Bastion-host-based resolution flow.
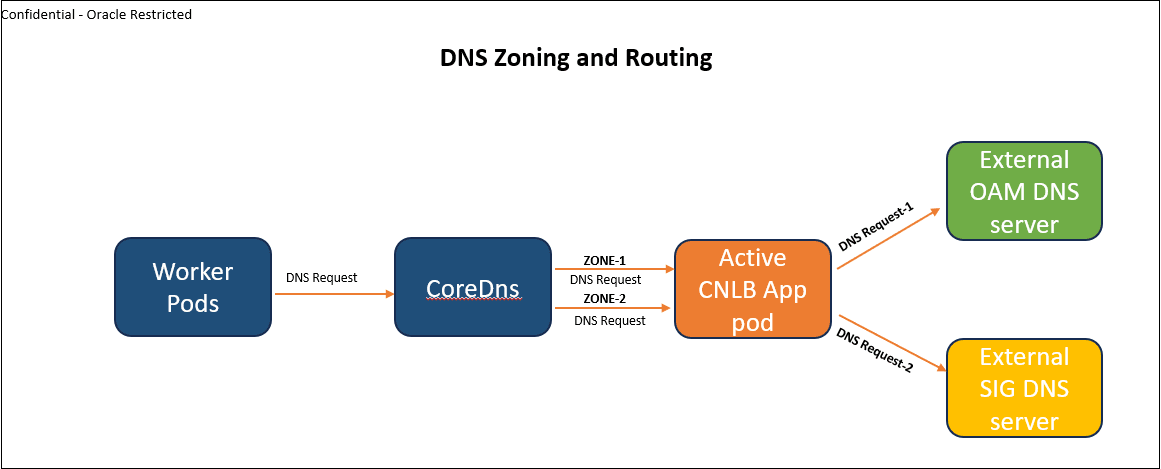
DNS requests originating from worker pods are routed through CoreDNS, which examines the requested domain zone (for example, OAM, Signaling). Depending on the zone type, the DNS request is forwarded through the appropriate CNLB (Cloud Native Load Balancer) application to the corresponding external DNS server.
Egress Network Attachment Definitions (NADs) isolate DNS traffic paths for different domain zones, such as OAM and Signaling. CoreDNS pods must not be running on control nodes when this feature is enabled, it must be restricted to worker nodes only, ensuring that DNS requests are handled within the local cluster network before being forwarded to external DNS servers.
DNS traffic is routed through specific CNLB interfaces, enabling detailed control over egress traffic and supporting customer-specific routing rules to ensure each zone's traffic uses a secure and dedicated path.
Note:
- The cluster should be CNLB enabled.
- External IPs of the DNS servers will be provided and maintained by the Customers.
- During the implementation of the DNS enhancement procedure, CNE cluster may experience a momentary service disruption due to transient DNS lookup unavailability affecting Network Functions (NFs) and other dependent components during the configuration switchover. The disruption is brief and self-limiting, with services expected to automatically stabilize upon completion of the procedure.
Note:
After activating the flow, no issues have been observed during subsequent self-update and upgrade processes. All components continue to function as expected. Additionally, the ConfigMap changes for NodeLocalDNS and CoreDNS remain intact.Switch DNS Routing using CNLB
- Determining the active Bastion Host
- Defining variables to configure the External DNS server and zone settings in occne.ini
- Enabling TLS in zones
- Enabling DNS enhancement
8.12.1 Determining Active Bastion Host
- Log in to either Bastion Host (typically Bastion 1).
- Check if the Bastion Host is hosting the active cluster services by
running the following command:
$ is_active_bastionSample output:
IS active-bastion - If the current Bastion is not active, log out and connect to the mate Bastion Host.
- Repeat the check using the same
command:
Sample output:$ is_active_bastionIS active-bastion - Confirm that the Bastion is hosting active services before proceeding with any further actions.
8.12.2 Defining Variables for External DNS Server
Populate the required values in the occne.ini file or hosts.ini for BM file.
For this step, ensure that the following values are correctly populated in the [occne:vars] section of the occne.ini file for vCNE deployments, or in the hosts.ini file for BareMetal deployments.
Table 8-27 Variables for External DNS Server
| Field Name | Description | Required/Optional | Structure | Notes |
|---|---|---|---|---|
| enable_dns_enhancement | This field enables the DNS enhancement flow when set to
True.
|
Required | enable_dns_enhancement: True |
|
| upstream_dns_servers | Indicates if any request that does not match the zones defined in
coredns_external_zones will be forwarded to these
upstream servers for resolution.
|
Required | upstream_dns_servers: ["IP1"] |
|
| coredns_egress_nad | Indicates the list of Network Attachment Definitions (NADs) for routing CoreDNS egress traffic. | Required | coredns_egress_nad =
["default/nad-egr@nad-egr"] |
|
| coredns_external_zones | Each entry is a combination of the fields: zones, nameservers, and cache used to define how specific DNS queries must be resolved using external DNS servers. | Required | coredns_external_zones = [{"cache":
30,"zones":["zone1"],"nameservers":["IP1"]}] |
|
The following table lists the fields to be added to the
coredns_external_zones variable.
Table 8-28
coredns_external_zones Fields
| Field Name | Description | Required/Optional | Structure | Notes |
|---|---|---|---|---|
| zones | List of zones (domains) for which DNS queries should be forwarded | Required | "zones": ["zone1"] |
|
| nameservers | List of External DNS server IPs to which these zone queries should be forwarded | Required | "nameservers": ["IP1"] |
|
| cache | TTL (in seconds) for caching responses from the DNS servers | Required | "cache": 30 |
|
| rewrite | Rules to rewrite DNS queries before forwarding (for example, changing domain names) | Optional | "rewrite": ["rule1", "rule2"] |
|
Example:
[occne:vars]
enable_dns_enhancement = True
upstream_dns_servers = ["10.**.**.**"]
coredns_egress_nad = ["default/egr-nad-name@egr-nad-name"]
coredns_external_zones = [{"zones":["example1.com","example2.io:1053"],"nameservers":["1.1.1.1","2.2.2.2"],"cache":5},{"zones":["examplesvc1.local:4453"],"nameservers":["192.168.0.53"],"cache":9},{"zones":["exampledomain.tld"],"nameservers":["10.233.0.3"],"cache":5,"rewrite":["name stop example.tld example.namespace.svc.cluster.local"]}]
Note:
- Ensure that zones are written entirely in lowercase letters.
- The enable_dns_enhancement parameter requires an exact boolean value of True (case-sensitive) to activate DNS enhancement. Any deviation from this value, such as true or 1, will result in the feature being disabled.
- DNS enhancement feature can also be enabled along with local DNS feature.
- If enable_dns_enhancement is set to
True, then all the other 3 variables are required, else it will fail.
8.12.3 Enabling TLS in Zones
This section explains how to enable TLS for secure communication in the DNS Enhancement setup.
If TLS is not required for communication between CoreDNS and external DNS servers, this section can be skipped.
CoreDNS supports TLS connections with external DNS servers. DNS enhancement allows to enable TLS in each zone independently.
Enabling TLS in Zones
- For vCNE deployments, edit the
occne.inifile in the cluster directory:$ vi /var/occne/cluster/${OCCNE_CLUSTER}/occne.ini - For BareMetal deployments, edit the
hosts.inifile in the cluster directory:$ vi /var/occne/cluster/${OCCNE_CLUSTER}/hosts.ini - To enable TLS in DNS enhancement, a JSON Object named
tls must be defined in the
coredns_external_zonesvariable. The following table lists the fields to be added to the tls JSON Object.Table 8-29 tls JSON Object Variables
Field Description Required/Optional Structure Notes tls_port Port used for communication with the external DNS server via TLS Optional "tls_port": "port_number" - Default port for TLS is 853
- Other port numbers may be used
tls_servername Server name of the external DNS server used during the TLS handshake. Required "tls_servername": "server_name" - Used to validate certificates for TLS handshake
tls_key_path Relative path of client's key used during the TLS handshake. Optional "tls_key_path": "client.key" - Depends on the TLS configuration of the external DNS server
- If defined, tls_crt_path must be also defined
- When omitted, no client authentication is performed
- The TLS client key must be created or located under the /var/occne/cluster/${OCCNE_CLUSTER}/installer/dns_enhancement directory. Sub directories are allowed.
tls_crt_path Relative path of client's cert used during the TLS handshake. Optional "tls_crt_path": "client.crt" - Depends on the TLS configuration of the external DNS server
- If defined, tls_key_path must be also defined
- When omitted, no client authentication is performed
- The TLS client cert must be created or
located under the
/var/occne/cluster/${OCCNE_CLUSTER}/installer/dns_enhancementdirectory. Sub directories are allowed.
tls_ca_path Relative path of CA cert used during the TLS handshake. Optional "tls_ca_path": "ca.crt" - Depends on the TLS configuration of the external DNS server
- Can be used without defining tls_crt_path and tls_key_path.
- The TLS CA cert must be created or
located under the
/var/occne/cluster/${OCCNE_CLUSTER}/installer/dns_enhancementdirectory. Sub directories are allowed.
Note:
- TLS configuration requires zones that have it enabled, to only have one nameserver defined.
- Ensure that
tls_servernameis always defined in the zones that have TLS enabled. - If
tls_key_path,tls_crt_path, ortls_ca_pathuses subdirectories, the value must be specified using the following directory structure:sub_directory/second_sub_directory/client_key_crt_or_ca_crtFollowing is an example TLS configuration:
[occne:vars]....coredns_external_zones = [{"zones":["example1.com","example2.io:1053"],"nameservers":["1.1.1.1"],"cache":5,"tls":{"tls_port":"853","tls_key_path":"example1_zone_keys/coredns.key","tls_crt_path":"example1_zone_keys/certs/coredns.crt","tls_servername":"example.local"}},{"zones":["examplesvc1.local:4453"],"nameservers":["192.168.0.53"],"cache":5},{"zones":["exampledomain.tld"],"nameservers":["10.233.0.3"],"cache":5,"tls":{"tls_ca_path":"ca.crt","tls_servername":"exampledomain.local"},"rewrite":["name stop example.tld example.namespace.svc.cluster.local"]}]
8.12.4 Enabling DNS Enhancement
The coreDnsEnhancement.py script is used to enable the DNS
enhancement feature.
This script automates the necessary configuration steps to update CoreDNS and related components as part of the DNS enhancement process.
Enabling DNS Enhancement
- Navigate to the cluster
directory.
cd /var/occne/cluster/${OCCNE_CLUSTER} - Run the
coreDnsEnhancement.pyscript.The
coreDnsEnhancement.pyscript configures and enhances the DNS setup based on theoccne.inifile for vCNE deployments orhosts.inifile for BareMetal deployment../installer/dns_enhancement/coreDnsEnhancement.pySample output:
Using2025-07-24 09:06:55,077 CNLB_LOGGER:INFO: step-1: Load ini file into file parser 2025-07-24 09:06:55,078 CNLB_LOGGER:INFO: step-2: Check for enable_dns_enhancement parameter 2025-07-24 09:06:55,078 CNLB_LOGGER:INFO: step-3: Check for upstream_dns_servers parameter 2025-07-24 09:06:55,078 CNLB_LOGGER:INFO: upstream_dns_servers is defined with value: ['10.75.200.13'] 2025-07-24 09:06:55,078 CNLB_LOGGER:INFO: step-4: Check for coredns_egress_nad parameter 2025-07-24 09:06:55,078 CNLB_LOGGER:INFO: coredns_egress_nad is defined with value: ['default/nf-oam-egr2@nf-oam-egr2'] 2025-07-24 09:06:55,078 CNLB_LOGGER:INFO: NAD to be attached to coredns is: nf-oam-egr2 2025-07-24 09:06:55,078 CNLB_LOGGER:INFO: step-5: Check for coredns_external_zones parameter 2025-07-24 09:06:55,078 CNLB_LOGGER:INFO: step-6: Take back up of configurations 2025-07-24 09:06:55,273 CNLB_LOGGER:INFO: step-7: Run kubernetes pipeline to update coreDNS 2025-07-24 09:07:37,107 CNLB_LOGGER:INFO: step-8: update the zones file with new data 2025-07-24 09:07:37,113 CNLB_LOGGER:INFO: step-9: restart resources for adoption of changes 2025-07-24 09:07:37,322 CNLB_LOGGER:INFO: step-10: push dns validation image to occne-repo-host 2025-07-24 09:07:42,134 CNLB_LOGGER:INFO: SUCCESS: DNS is enhanced, now coredns can reach external zonescoreDnsEnhancement.pyscript:[cloud-user@occne-cluster-name-bastion-1 cluster-name]$ ./installer/dns_enhancement/coreDnsEnhancement.py -h usage: coreDnsEnhancement.py [-h] [-nn TESTNODENAME] [-t TESTRECORD] [-sz] [-d] Used to update the network on an existing CNLB deployment. Parameters: Required parameters: None Optional Parameters: -nn/--testNodeName: Node to be used for testing the DNS query (allowed only with -t) -t/--testRecord: runs test only -sz/--syncZoneFile: Only syncs external zone file in bastion host -d/--debugOn: sets the debug level as OnFollowing are some example arguments that can be passed with the script:
./coreDnsEnhancement.py ./coreDnsEnhancement.py -nn k8s-node-1 -t testrecord.oam ./coreDnsEnhancement.py -t testrecord.oam ./coreDnsEnhancement.py -sz ./coreDnsEnhancement.py -dFollowing are some of the optional arguments:
- -h, --help show this help message and exit
- -nn TESTNODENAME, --testNodeName TESTNODENAME Node used for testing the DNS query
- -t TESTRECORD, --testRecord TESTRECORD runs only test of enhancement for the given record
- -sz, --syncZoneFile only syncs the zone file in bastion host
- -d, --debugOn sets the log level as Debug
Note:
- The
-szargument syncs the zone file on the Bastion host with theoccne.inifile for vCNE deployments or thehosts.inifile for BareMetal deployments. - Test node name can only be sent with the
-toption, else it will be ignored and the setup proceeds with the default parameters.
./installer/dns_enhancement/coreDnsEnhancement.py -t <zonename> -nn k8s-node-1 - Testing DNS Resolution:
The DNS enhancement
script includes a testing feature that enables verification of DNS resolution
for a specified zone name. To perform a DNS test, run the script with the
-t option followed by a valid zone name.
Example 1:
./installer/dns_enhancement/coreDnsEnhancement.py -t testrecord.abcSample output:
2025-07-24 09:11:45,489 CNLB_LOGGER:INFO: Update configurations in validationPod.yaml and kubectl apply it. 2025-07-24 09:11:49,845 CNLB_LOGGER:INFO: waiting for dnsvalidation pod to be up 2025-07-24 09:11:50,265 CNLB_LOGGER:INFO: nslookup of testrecord.pranavs, result: Server: 169.254.25.10 Address: 169.254.25.10#53 Name: testrecord.abc Address: 10.4.1.8 Name: testrecord.abc Address: abbb:abbb::1 2025-07-24 09:11:50,265 CNLB_LOGGER:INFO: Deleting the temporary test podExample 2:
./installer/dns_enhancement/coreDnsEnhancement.py -t dns1.abcSample output:
This test checks DNS resolution for the specified zone name and provides insight into the functionality of the DNS enhancement. Additionally, the2025-07-24 09:13:45,955 CNLB_LOGGER:INFO: Update configurations in validationPod.yaml and kubectl apply it. 2025-07-24 09:13:47,128 CNLB_LOGGER:INFO: waiting for dnsvalidation pod to be up 2025-07-24 09:13:47,488 CNLB_LOGGER:INFO: nslookup of dns1.abc, result: Server: 169.254.25.10 Address: 169.254.25.10#53 Name: dns1.abc Address: 10.4.1.1 2025-07-24 09:13:47,488 CNLB_LOGGER:INFO: Deleting the temporary test pod-nnoption can be used to specify a particular node to test DNS connectivity, allowing for more targeted testing. For example:./installer/dns_enhancement/coreDnsEnhancement.py -t <zonename> -nn <node_name>
8.12.5 Verifying Packet Flow Through the CNLB Interface
This section explains about verifying packet flow through the CNLB interface to monitor network traffic in cloud-native environments.
- Run the following command to get the coredns pod IPs
(nf-oam-egr2):
kubectl -n kube-system describe po -l k8s-app=kube-dns | grep -A3 egr2 "name": "default/nf-oam-egr2", "interface": "nf-oam-egr2", "ips": [ "132.16.0.142" ], -- k8s.v1.cni.cncf.io/networks: default/nf-oam-egr2@nf-oam-egr2 kubectl.kubernetes.io/restartedAt: 2025-04-03T09:10:41Z Status: Running SeccompProfile: RuntimeDefault -- "name": "default/nf-oam-egr2", "interface": "nf-oam-egr2", "ips": [ "132.16.0.139" ], -- k8s.v1.cni.cncf.io/networks: default/nf-oam-egr2@nf-oam-egr2 kubectl.kubernetes.io/restartedAt: 2025-04-03T09:10:41Z Status: Running SeccompProfile: RuntimeDefaultIn the above sample output, the coredns pod IPs are
132.16.0.142and132.16.0.139. - Run the following command to get the gateway IP from the net-attach-definition
configuration:
kubectl describe net-attach-def nf-oam-egr2Sample output:
Name: nf-oam-egr2 Namespace: default Labels: <none> Annotations: <none> API Version: k8s.cni.cncf.io/v1 Kind: NetworkAttachmentDefinition Metadata: Creation Timestamp: 2025-04-01T08:39:54Z Generation: 2 Resource Version: 985125 UID: 75c9c2ef-141b-49b7-929e-93fb16cc2d67 Spec: Config: {"cniVersion": "0.4.0", "name": "nf-oam-egr2", "plugins": [{"type": "macvlan", "mode": "bridge", "master": "eth2", "ipam": {"type": "whereabouts", "range": "132.16.0.0/24", "range_start": "132.16.0.129", "range_end": "132.16.0.190", "gateway": "132.16.0.194", "routes": [{"dst": "10.75.201.0/24", "gw": "132.16.0.194"}]}}]} Events: <none>In the above sample output, the gateway IP is
132.16.0.194. - Run the following command to get the pods IP using the gateway
IP:
$ kubectl -n occne-infra exec -it $(kubectl -n occne-infra get po --no-headers -l app=cnlb-manager -o custom-columns=:.metadata.name) -- curl http://localhost:5001/net-info | python -m json.tool | jqSample output:
From the above sample output the pod IP is{ "10.233.68.72": [ { "egressIpExt": "10.75.200.91", "gatewayIp": "132.16.0.193", "networkName": "oam" } ], "10.233.68.73": [ { "egressIpExt": "10.75.200.12", "gatewayIp": "132.16.0.194", "networkName": "oam" } ] }10.233.68.73. - Run the following command to retrieve the pod name using the pod
IP:
$ kubectl -n occne-infra get po -l app=cnlb-app -o wide | grep <active cnlb app ip>Sample output:
cnlb-app-fd566bffb-mhmg2 1/1 Running 0 145m 10.233.68.73 occne3-prince-p-pranav-k8s-node-4 <none> - Get into the active pod to monitor the traffic.
The pod whose name matches the IP address is the current active one, where traffic can be monitored. To do so, run the following commant in the same pod and monitor the traffic while performing the queries.
kubectl -n occne-infra exec -it <POD_NAME> -- bash - Run the following command to capture the
packets:
bash-5.1# tcpdump -i lb-oam-int port 53 and udp -n -vvSample output:
dropped privs to tcpdump tcpdump: listening on lb-oam-int, link-type EN10MB (Ethernet), snapshot length 262144 bytes09:13:49.476867 IP (tos 0x0, ttl 64, id 60831, offset 0, flags [DF], proto UDP (17), length 75) 132.16.0.142.58822 > 10.75.201.36.domain: [udp sum ok] 50867+ [1au] A? testrecord.pranavs. ar: . OPT UDPsize=2048 DO (47) 09:13:49.479133 IP (tos 0x0, ttl 61, id 19793, offset 0, flags [none], proto UDP (17), length 91) 10.75.201.36.domain > 132.16.0.142.58822: [udp sum ok] 50867* q: A? testrecord.pranavs. 1/0/1 testrecord.pranavs. A 10.4.1.8 ar: . OPT UDPsize=1232 DO (63) 09:13:49.480514 IP (tos 0x0, ttl 64, id 60832, offset 0, flags [DF], proto UDP (17), length 75) 132.16.0.142.58822 > 10.75.201.36.domain: [udp sum ok] 676+ [1au] AAAA? testrecord.pranavs. ar: . OPT UDPsize=2048 DO (47) 09:13:49.481049 IP (tos 0x0, ttl 61, id 19794, offset 0, flags [none], proto UDP (17), length 103) 10.75.201.36.domain > 132.16.0.142.58822: [udp sum ok] 676* q: AAAA? testrecord.pranavs. 1/0/1 testrecord.pranavs. AAAA abbb:abbb::1 ar: . OPT UDPsize=1232 DO (75) 09:13:49.701706 IP (tos 0x0, ttl 64, id 60833, offset 0, flags [DF], proto UDP (17), length 73) 132.16.0.142.58822 > 10.75.201.36.domain: [udp sum ok] 65302+ [1au] A? ipv6test.pranavs. ar: . OPT UDPsize=2048 DO (45) 09:13:49.702754 IP (tos 0x0, ttl 61, id 19871, offset 0, flags [none], proto UDP (17), length 125) 10.75.201.36.domain > 132.16.0.142.58822: [udp sum ok] 65302* q: A? ipv6test.pranavs. 0/1/1 ns: pranavs. SOA dns1.pranavs. hostmaster.pranavs. 3001 21600 3600 604800 86400 ar: . OPT UDPsize=1232 DO (97) 09:13:49.704475 IP (tos 0x0, ttl 64, id 60834, offset 0, flags [DF], proto UDP (17), length 73) 132.16.0.142.58822 > 10.75.201.36.domain: [udp sum ok] 63895+ [1au] AAAA? ipv6test.pranavs. ar: . OPT UDPsize=2048 DO (45) 09:13:49.704855 IP (tos 0x0, ttl 61, id 19873, offset 0, flags [none], proto UDP (17), length 101) 10.75.201.36.domain > 132.16.0.142.58822: [udp sum ok] 63895* q: AAAA? ipv6test.pranavs. 1/0/1 ipv6test.pranavs. AAAA abbb:abbb::2 ar: . OPT UDPsize=1232 DO (73) 09:13:49.825753 IP (tos 0x0, ttl 64, id 60835, offset 0, flags [DF], proto UDP (17), length 70) 132.16.0.142.58822 > 10.75.201.36.domain: [udp sum ok] 5680+ [1au] A? alias.pranavs. ar: . OPT UDPsize=2048 DO (42) 09:13:49.826438 IP (tos 0x0, ttl 61, id 19888, offset 0, flags [none], proto UDP (17), length 111) 10.75.201.36.domain > 132.16.0.142.58822: [udp sum ok] 5680* q: A? alias.pranavs. 2/0/1 alias.pranavs. CNAME testrecord.pranavs., testrecord.pranavs. A 10.4.1.8 ar: . OPT UDPsize=1232 DO (83) 09:13:49.942999 IP (tos 0x0, ttl 64, id 60836, offset 0, flags [DF], proto UDP (17), length 64) 132.16.0.142.58822 > 10.75.201.36.domain: [udp sum ok] 34442+ [1au] MX? pranavs. ar: . OPT UDPsize=2048 DO (36) 09:13:49.943851 IP (tos 0x0, ttl 61, id 19911, offset 0, flags [none], proto UDP (17), length 101) 10.75.201.36.domain > 132.16.0.142.58822: [udp sum ok] 34442* q: MX? pranavs. 1/0/2 pranavs. MX mail.pranavs. 10 ar: mail.pranavs. A 10.4.1.15, . OPT UDPsize=1232 DO (73) 09:13:50.067124 IP (tos 0x0, ttl 64, id 60837, offset 0, flags [DF], proto UDP (17), length 64) 132.16.0.142.58822 > 10.75.201.36.domain: [udp sum ok] 30499+ [1au] TXT? pranavs. ar: . OPT UDPsize=2048 DO (36) 09:13:50.067926 IP (tos 0x0, ttl 61, id 20007, offset 0, flags [none], proto UDP (17), length 104) 10.75.201.36.domain > 132.16.0.142.58822: [udp sum ok] 30499* q: TXT? pranavs. 1/0/1 pranavs. TXT "v=spf1 ip4:10.4.1.0/24 -all" ar: . OPT UDPsize=1232 DO (76) ^C 14 packets captured 14 packets received by filter 0 packets dropped by kernelNote:
To capture the above packets, DNS server's external IP must be in the range of egress_dest = ["10.*.*.*/25"], defined in thecnlb.inifile. If it doesn't, change the egress_dest with the required subnet range and runupdNtework.py. Delete (or restart) each coredns pod manually so that the new annotation can take effect. The tcpdump command does not process any traffic until pods are restarted.
8.12.6 Rolling back coredns and nodelocaldns deployment and configmap
This section explains how to rollback CoreDNS deployment and nodelocaldns deployment, as well as any associated ConfigMap or zone files that were modified or added. This ensures that the DNS resolution returns to its original state before the changes were made.
- Run the following command to change the directories to the cluster
directory:
cd /var/occne/cluster/${OCCNE_CLUSTER} - The following values must be modified under the
[occne:vars]section in theoccne.inifile for vCNE deployments and in thehosts.inifile for BareMetal deployments:[occne:vars] enable_dns_enhancement = False #upstream_dns_servers = ["10.**.**.**"] #coredns_egress_nad = ["default/egr-nad-name@egr-nad-name"] #coredns_external_zones = [{"cache": 30,"zones":["sample1"],"nameservers":["10.**.**.**"]}] - After commenting the above variables in
occne.inifile, run the scriptcoreDnsEnhancement.pyto trigger cleanup:./installer/dns_enhancement/coreDnsEnhancement.pySample output:
2025-07-21 13:11:28,230 CNLB_LOGGER:INFO: step-1: Load ini file into file parser 2025-07-21 13:11:28,231 CNLB_LOGGER:INFO: step-2: Check for enable_dns_enhancement parameter 2025-07-21 13:11:28,232 CNLB_LOGGER:INFO: step-3: Running cleanup since the enable_dns_enhancement variable is removed/made as False 2025-07-21 13:11:28,682 CNLB_LOGGER:INFO: Ran ./tests/setupZones.sh -c in cloud-user@10.75.200.57 server 2025-07-21 13:11:28,682 CNLB_LOGGER:INFO: running k8s pipeline to update coredns and nodelocaldns
8.12.7 Updating DNS Enhancement
If the DNS enhancement setup script has already been run and you need to run it again, either without changes or after modifying parameters such as nameservers, cache values, zone names, or other configuration variables in the occne.ini file for vCNE or the hosts.ini file for BareMetal, delete the external_zones.yaml file generated under the dns_enhancement directory before running the script again. This step ensures that any updated values are properly applied and prevents stale or conflicting configuration from previous runs.
[cloud-user@cluster-name-bastion-1 cluster-name]$ cd /var/occne/cluster/${OCCNE_CLUSTER}/installer/dns_enhancement
[cloud-user@cluster-name-bastion-1 dns_enhancement]$ ls
backUp coreDnsEnhancement.py external_zones.yaml validationPod.yaml
[cloud-user@cluster-name dns_enhancement]$ rm external_zones.yaml
#to fetch new changes in dns enhancement
[cloud-user@cluster-name dns_enhancement]$ ./coreDnsEnhancement.py8.12.8 Validating DNS Enhancement
To ensure the proper functioning of DNS Enhancement, it is necessary to check the following:
- Ensure CoreDNS pods are in Running State
- Verify CoreDNS ConfigMap
- Ensure NodeLocalDNS pods are in Running State
Perform the following steps to validate DNS enhancement:
- Ensure CoreDNS pods are in the running state. CoreDNS is an essential part of DNS
enhancement therefore, CoreDNS pods must be healthy.
Run the following command to check the status of the CoreDNS pods:
$ kubectl -n kube-system get pod -l k8s-app=kube-dnsSample output:
NAME READY STATUS RESTARTS AGE coredns-5965687c46-4hjfk 1/1 Running 0 13h coredns-5965687c46-8q9d4 1/1 Running 0 13h - Review the CoreDNS pods logs. See ALL logs from both CoreDNS
pods.
$ for pod in $(kubectl -n kube-system get pods | grep coredns | awk '{print $1}'); do echo "----- $pod -----"; kubectl -n kube-system logs $pod; doneSample output:
----- coredns-8ddb9dc5d-5nvrv ----- [INFO] plugin/ready: Still waiting on: "kubernetes" [INFO] plugin/auto: Inserting zone `occne.lab.oracle.com.' from: /etc/coredns/..2023_04_12_16_34_13.510777403/db.occne.lab.oracle.com .:53 [INFO] plugin/reload: Running configuration SHA512 = 2bc9e13e66182e6e829fe1a954359de92746468f433b8748589dfe16e1afd0e790e1ff75415ad40ad17711abfc7a8348fdda2770af99962db01247526afbe24a CoreDNS-1.9.3 linux/amd64, go1.18.2, 45b0a11 ----- coredns-8ddb9dc5d-6lf5s ----- [INFO] plugin/auto: Inserting zone `occne.lab.oracle.com.' from: /etc/coredns/..2023_04_12_16_34_15.930764941/db.occne.lab.oracle.com .:53 [INFO] plugin/reload: Running configuration SHA512 = 2bc9e13e66182e6e829fe1a954359de92746468f433b8748589dfe16e1afd0e790e1ff75415ad40ad17711abfc7a8348fdda2770af99962db01247526afbe24a CoreDNS-1.9.3 linux/amd64, go1.18.2, 45b0a11 ### TIP ### # Additionally, the above command can be piped to a file, for better readability and sharing purposes. $ for pod in $(kubectl -n kube-system get pods | grep coredns | awk '{print $1}'); do echo "----- $pod -----"; kubectl -n kube-system logs $pod; done > coredns.logs $ vi coredns.logs - Run the following command to verify the changes implemented by DNS Enhancement that
can be viewed in the CoreDNS
ConfigMap:
$ kubectl -n kube-system get cm coredns -o yamlSample output:
apiVersion: v1 data: Corefile: | example.com { log errors { } forward . tls://10.95.18.61:853 { tls /etc/ssl/example-com/tls.crt /etc/ssl/example-com/tls.key /etc/ssl/example-com/ca.crt tls_servername named.local } loadbalance cache 5 reload } test.com { log errors { } forward . tls://10.12.15.16 { tls /etc/ssl/test-com/tls.crt /etc/ssl/test-com/tls.key /etc/ssl/test-com/ca.crt tls_servername named.local } loadbalance cache 5 reload } .:53 { errors { } health { lameduck 5s } ready kubernetes occne-example in-addr.arpa ip6.arpa { pods insecure fallthrough in-addr.arpa ip6.arpa } prometheus :9153 forward . 10.75.144.85 { prefer_udp max_concurrent 1000 } cache 30 loop reload loadbalance } kind: ConfigMap metadata: annotations: kubectl.kubernetes.io/last-applied-configuration: | {"apiVersion":"v1","data":{"Corefile":"example.com {\n log\n errors {\n }\n forward . tls://10.75.180.161:853 {\n tls /etc/ssl/example-com/tls.crt /etc/ssl/example-com/tls.key /etc/ssl/example-com/ca.crt\n tls_servername named.local\n }\n loadbalance\n cache 5\n reload\n}\ntest.com {\n log\n errors {\n }\n forward . tls://10.75.180.161 {\n tls /etc/ssl/test-com/tls.crt /etc/ssl/test-com/tls.key /etc/ssl/test-com/ca.crt\n tls_servername named.local\n }\n loadbalance\n cache 5\n reload\n}\n.:53 {\n errors {\n }\n health {\n lameduck 5s\n }\n ready\n kubernetes occne-example in-addr.arpa ip6.arpa {\n pods insecure\n fallthrough in-addr.arpa ip6.arpa\n }\n prometheus :9153\n forward . 10.75.144.85 {\n prefer_udp\n max_concurrent 1000\n }\n cache 30\n\n loop\n reload\n loadbalance\n}\n"},"kind":"ConfigMap","metadata":{"annotations":{},"labels":{"addonmanager.kubernetes.io/mode":"EnsureExists"},"name":"coredns","namespace":"kube-system"}} creationTimestamp: "2025-07-31T20:51:39Z" labels: addonmanager.kubernetes.io/mode: EnsureExists name: coredns namespace: kube-system resourceVersion: "1654250" uid: c5a4a0b6-3795-43ae-b0c2-1ec52212d0f5 - Run the following command to ensure that NodeLocalDNS pods are in running
state:
$ kubectl -n kube-system get pod -l k8s-app=node-local-dnsSample output:
NAME READY STATUS RESTARTS AGE nodelocaldns-65657 1/1 Running 0 14h nodelocaldns-6hzn6 1/1 Running 0 14h nodelocaldns-8lrd7 1/1 Running 0 14h nodelocaldns-jdxct 1/1 Running 0 14h nodelocaldns-ktjsx 1/1 Running 0 14h nodelocaldns-qfvjx 1/1 Running 0 14h nodelocaldns-xcn7j 1/1 Running 0 14h
8.13 Enabling Public Endpoint for CNE (Kubernetes) API Server
This section provides an overview of the implementation for exposing the Kubernetes API Server as a public endpoint.
Note:
After enablingoccne-apiserver-proxy, any client certificate signed by the
same CA that signed the server certificate will be accepted and will grant full
administrative access to the CNE cluster.
Users accessing the public endpoint are required to authenticate using mTLS. In the current release, the nginx proxy uses a service account token with cluster admin-level privileges.
Figure 8-2 CNE Cluster
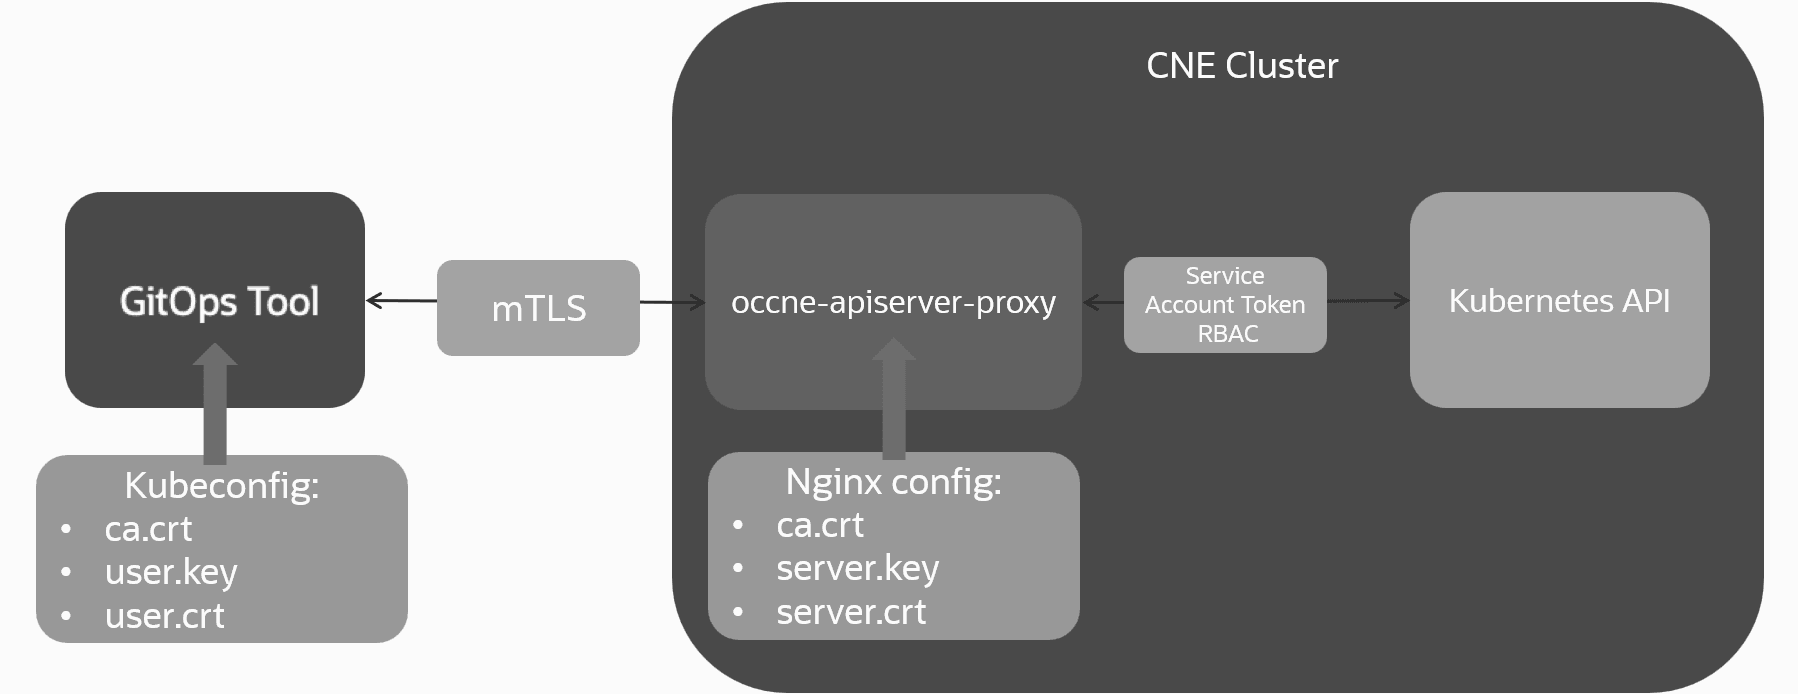
Note:
Ensure that all certificate files are generated and signed by the same Certificate Authority (CA).Prerequisites
To enable the mTLS communication for the occne-apiserver-proxy
service, the following three files are required:
- CA certificate
- Server key
- Server certificate
The CA certificate, server key, and server certificate must be generated
and signed by the same Certificate Authority (CA) that is used to create the user
certificates for communication with the
occne-apiserver-proxy.
Examples on how to create keys and certificates
The following are examples about how to create keys and certificates but can vary according to the CA and the algorithm that will be used to create them.
Following is an example about how to create a service key and certificate using a Certificate Authority (CA) key.
$ cat server.confSample output:
[ req ]
default_bits = 2048
distinguished_name = req_distinguished_name
req_extensions = req_ext
prompt = no
[ req_distinguished_name ]
C = US
ST = NC
L = Morrisville
O = Oracle
CN = occne6-cluster-apiserver-proxy # This should match the name that will be resolved to the occne-apiserver-proxy in the DNS servers
[ req_ext ]
subjectAltName = @alt_names
keyUsage = critical, digitalSignature, keyEncipherment
extendedKeyUsage = serverAuth
basicConstraints = critical, CA:FALSE
[ alt_names ]
DNS.1 = lb-apiserver.kubernetes.local # DNS entry
DNS.2 = OCCNE_CLUSTER-apiserver-proxy
IP.1 = 10.75.200.111 # The actual IP for the occne-apiserverver-proxyCreating nginx key and certificate:
$ openssl genrsa -out server.key 4096
$ openssl req -new -key server.key -out server.csr -config server.conf
$ openssl x509 -req -in server.csr -CA ca.crt -CAkey ca_private.key -CAcreateserial -out server.crt -days 365 -extensions req_ext -extfile server.conf -passin pass:${CA_KEY_PASS}Following is an example about how to create an user key and certificate using a Certificate Authority (CA) key:
$ cat client.confSample output:
[ req ]
default_bits = 2048
distinguished_name = req_distinguished_name
req_extensions = req_ext
prompt = no[ req_distinguished_name ]
C = US
ST = NC
L = Morrisville
O = Oracle
CN = client.OCCNE_CLUSTER-apiserver-proxy
[ req_ext ]
keyUsage = critical, digitalSignature, keyEncipherment
extendedKeyUsage = clientAuth
basicConstraints = critical, CA:FALSECreating nginx key and certificate:
$ openssl genrsa -out client.key 4096
$ openssl req -new -key client.key -out client.csr -config client.conf
$ openssl x509 -req -in client.csr -CA ca.crt -CAkey ca_private.key -CAcreateserial -out client.crt -days 365 -extensions req_ext -extfile client.conf -passin pass:${CA_KEY_PASS}Limitations
Note:
Onceoccne-apiserver-proxy is enabled, any client certificate signed
by the same CA used to sign the server certificate will be trusted and will grant
full administrative access to the CNE cluster.
- CNE will not be in charge of creating or maintaining the certificates that will be used to connect to the occne-apiserver-proxy, instead, these certificates and keys will be provided, maintained and rotated by the OCCNE CLUSTER ADMINISTRATOR.
- For Kubernetes API exposure, the nginx proxy uses a service account token which has cluster administrator equivalent privileges. Treat these certificates and access credentials with extreme caution as they grant full administrative control over the Kubernetes cluster.
8.13.1 Enabling occne-apiserver-proxy Service
Perform the following steps to enable occne-apiserver-proxy
service:
- Provide required certificates
- Create a directory to store the certificates. Run the following
command on the bootstrap host to enable the service during installation, or
on the Bastion host to enable it during an upgrade.
Create certificates directory
mkdir -m 700 -p /var/occne/certificates/occne-apiserver-proxy - Place the certificates into the bootstrap or Bastion host. Run
the following command to copy nginx server's key and
certificate:
$ scp <user>@<system>:/<path_to_certificates>/ca.crt <user>@<bootstrap/bastion_ip>:/var/occne/certificates/occne-apiserver-proxy/ $ scp <user>@<system>:/<path_to_certificates>/server.key <user>@<bootstrap/bastion_ip>:/var/occne/certificates/occne-apiserver-proxy/ $ scp <user>@<system>:/<path_to_certificates>/server.crt <user>@<bootstrap/bastion_ip>:/var/occne/certificates/occne-apiserver-proxy/
- Create a directory to store the certificates. Run the following
command on the bootstrap host to enable the service during installation, or
on the Bastion host to enable it during an upgrade.
- Configure
occne-apiserver-proxyservice- Edit the
occne.inifile to enable theoccne-apiserver-proxyand specify the IP address that will be used for access.$ vi /var/occne/cluster/${OCCNE_CLUSTER}/occne.iniSample output:
... TRUNCATED ... occne_apiserver_cnlb = 10.75.200.111 ... TRUNCATED ... # Specify 'True' (case matters, no quotes) to expose occne apiserver proxy publicly. Default is 'False' occne_apiserver_proxy_enabled = True ... TRUNCATED ... - Ensure that the IP for the service is also defined in
cnlb.inifile. Run the following command to enable the service as a standalone procedure:$ vi /var/occne/cluster/${OCCNE_CLUSTER}/cnlb.iniSample output:
... TRUNCATED ... [oam:vars] ... service_ip_addr = [<IPs for other services>,"10.75.200.111"] ... TRUNCATED ...
- Edit the
- Enable occne-apiserver-proxy
- Enable occne-apiserver-proxy during CNE cluster installation
and upgrades:
To enable the
occne-apiserver-proxyservice during CNE installation or upgrade, proceed with the standard installation or upgrade procedure. - Enable
occne-apiserver-proxyas a standalone procedure:To enable the service, run the following steps:
- If you added a new IP to the
service_ip_addrvariable incnlb.ini, run the network upgrade script to create a new NetworkAttachmentDefinition for the service. if the IP used for the occne-apiserver-proxy already exists, skip this step.cd /var/occne/cluster/${OCCNE_CLUSTER}/ ./installer/updNetwork.py - Run the
pipeline.shscript for installing theoccne-apiserver-proxydeployment and its dependencies:OCCNE_STAGES=(DEPLOY) OCCNE_CONTAINERS=(CFG) OCCNE_ARGS="--tags=apiserver-proxy" pipeline.sh
- If you added a new IP to the
- Enable occne-apiserver-proxy during CNE cluster installation
and upgrades:
8.13.2 Using occne-apiserver-proxy
To utilize the occne-apiserver-proxy service, you'll need to gather some essential information:
- Retrieve occne-apiserver-proxy External Details:
On the cluster where the Kubernetes API is exposed, perform the following steps:
- Obtain the Service’s External IP
Retrieve the external IP address for occne-apiserver-proxy:
kubectl -n occne-infra get pod -l app.kubernetes.io/name=apiserver-proxy -o jsonpath="{.items[].metadata.annotations['oracle\.com\.cnc\/cnlb']}" | jq -r '.[].cnlbIp' - Encode Keys and Certificates
Encode the required certificate files in base64:
export ca_crt=$(cat ca.crt | base64 -w 0) export client_cert=$(cat client.crt | base64 -w 0) export client_key=$(cat client.key | base64 -w 0)
- Obtain the Service’s External IP
- Create kubeconfig file
On the external or secondary Kubernetes cluster:
- Create a Kubeconfig to connect into the exposed API cluster
Render the kubeconfig file with the previously obtained values:
apiVersion: v1 clusters: - cluster: certificate-authority-data: <Value for $ca_cert> server: https://<Value for occne-apiserver-proxy IP>:6443 name: <Value for $CLUSTER_NAME> contexts: - context: cluster: <Value for $CLUSTER_NAME> user: flux-user-<Value for $CLUSTER_NAME> name: flux-user-<Value for $CLUSTER_NAME>@<Value for $CLUSTER_NAME> current-context: flux-user-<Value for $CLUSTER_NAME>@<Value for $CLUSTER_NAME> kind: Config preferences: {} users: - name: flux-user-<Value for $CLUSTER_NAME> user: client-certificate-data: <Value for $client_cert> client-key-data: <Value for $client_key> - Connect to the exposed API cluster
Use the
kubeconfigfile that was created in the previous step to connect to the Kubernetes cluster using theoccne-apiserver-proxy:kubectl --kubeconfig ~/external_kubeconfig.conf get nodesSample output:
NAME STATUS ROLES AGE VERSION occne-cluster-k8s-ctrl-1 Ready control-plane 136m v1.31.1 occne-cluster-k8s-ctrl-2 Ready control-plane 136m v1.31.1 occne-cluster-k8s-ctrl-3 Ready control-plane 136m v1.31.1 occne-cluster-k8s-node-1 Ready <none> 135m v1.31.1 occne-cluster-k8s-node-2 Ready <none> 135m v1.31.1 occne-cluster-k8s-node-3 Ready <none> 135m v1.31.1 occne-cluster-k8s-node-4 Ready <none> 135m v1.31.1
- Create a Kubeconfig to connect into the exposed API cluster
8.13.3 Customizing the Nginx Configuration
This section describes how to update the configmap that manages nginx.conf for occne-apiserver-proxy. This procedure is optional.
- Retrieve the Current Nginx Configuration
The
nginx.conffile is stored in theoccne-apiserver-proxy-nginx-configconfigmap. To extract it, run the following command:kubectl -n occne-infra get cm occne-apiserver-proxy-nginx-config -o json | jq -r '.data."nginx.conf"' > nginx.conf - Edit the nginx.conf
Modify the
nginx.conffile as needed, ensuring all changes use valid Nginx parameters (invalid configurations will cause the pod to fail):vi nginx.conf - Apply the Updated Configuration
Delete and re-create the configmap with your modified
nginx.conffile, then restart the deployment. Perform the following steps:- Run the following command to delete the
configmap:
kubectl -n occne-infra delete cm occne-apiserver-proxy-nginx-configSample output:
configmap "occne-apiserver-proxy-nginx-config" deleted - Run the following command to create the
configmap:
kubectl -n occne-infra create cm occne-apiserver-proxy-nginx-config--from-file=data=nginx.confSample output:
configmap/occne-apiserver-proxy-nginx-config created - Run the following command to restart the API
server:
kubectl -n occne-infra rollout restart deployment occne-apiserver-proxy
- Run the following command to delete the
configmap:
- Verify the Update
Check the status of the pods to confirm that the update was successful:
kubectl -n occne-infra get pods | grep apiserverSample output:
occne-apiserver-proxy-7c55658548-ps469 1/1 Running 0 19s
8.14 Grafana Dashboards
The CNE Grafana dashboards combine CNE custom node metrics with Kubernetes default health or utilization views to monitor cluster readiness, capacity, and workload distribution.
8.14.1 Custom Metrics
CNE Metrics component is part of CNE common services. These metrics are derived from cluster node data and are not specific to CNLB.
CNE Metrics collects information for each node in the cluster, including details about every vCPU and each network interface. The component has its own Podman image, Helm chart, and Grafana dashboard panels.
Grafana CNE Metrics Dashboard Panels
A series of panels are available on the CNE Kubernetes Cluster Dashboard that display useful CNE Metrics data custom Metrics Panel.
Table 8-30 CNE Metrics Variables
| Variable Name | Description |
|---|---|
| Host Selector | This variable helps select which cluster node or host to monitor by displaying metric values for the selected node. The node or host value can be changed by the user from the top of the dashboard. |
| Bottom N Idle% | This variable helps identify the vCPUs with the lowest idle percentage by displaying the bottom N vCPUs with the least Idle%. The value of N can be changed by the user. |
| Top N Soft% IRQ | This variable helps identify the vCPUs with the highest Soft IRQ percentage by displaying the top N vCPUs with the most Soft% IRQ. The value of N can be changed by the user. |
The metrics displayed in the following panels are obtained by running the mpstat command on the cluster worker nodes:
Note:
mpstat (multiprocessor statistics) is a Linux command that reports CPU activity for each processor or vCPU. In the CNE Grafana dashboard, it runs on cluster worker nodes to collect per-vCPU %idle and %soft (software interrupt) metrics.
-
Idle Percentage Average: This metric captures
%idleevery second and stores the values in a list. During the same run, the gauge value is updated with the average of the collected values. The list is cleared after Prometheus scrapes the gauges, while preserving the last value. The%idlevalues are displayed for each vCPU of the selected host. -
Bottom N vCPUs with Less Average Idle Percentage: This panel helps identify the vCPUs with the lowest average idle percentage by displaying the bottom
NvCPUs with the least averageIdle%. The value ofNis configured using the dashboard variable at the top. -
Idle Percentage Low Watermark: This metric captures
%idleevery second and stores the values in a list. During the same run, the gauge value is updated with the minimum value from the collected list. The list is cleared after Prometheus scrapes the gauges, while preserving the last value. The%idlevalues are displayed for each vCPU of the selected host. -
Bottom N vCPUs with Less Low Watermark Idle Percentage : This panel helps identify the vCPUs with the lowest low watermark idle percentage by displaying the bottom
NvCPUs with the least low watermarkIdle%. The value ofNis configured using the dashboard variable at the top. -
Soft IRQ Percentage Average: This metric captures
%softevery second and stores the values in a list. During the same run, the gauge value is updated with the average of the collected values. The list is cleared after Prometheus scrapes the gauges, while preserving the last value. The%softvalues are displayed for each vCPU of the selected host. -
Top N vCPUs with Most Average Soft IRQ Percentage : This panel helps identify the vCPUs with the highest average Soft IRQ percentage by displaying the top
NvCPUs with the most averageSoft%IRQ. The value ofNis configured using the dashboard variable at the top. -
Soft IRQ Percentage High Watermark: This metric captures
%softevery two seconds and stores the values in a list. During the same run, the gauge value is updated with the maximum value from the collected list. The list is cleared after Prometheus scrapes the gauges, while preserving the last value. The%softvalues are displayed for each vCPU of the selected host. -
Top N vCPUs with Most High Watermark Soft IRQ Percentage: This panel helps identify the vCPUs with the highest high watermark Soft IRQ percentage by displaying the top
NvCPUs with the most high watermarkSoft% IRQ. The value ofNis configured using the dashboard variable at the top.
The metrics displayed in the following panels are obtained by reading data from the /proc/net/dev file on the cluster nodes:
- Bytes Sent per Interface: This metric shows the number of bytes transmitted per second for each network interface on the selected host. CNE reads the values in
/proc/net/dev, waits one second, reads them again, and calculates the difference. The resulting values are displayed in bytes per second (BpS). - Bytes Received per Interface: This metric shows the number of bytes received per second for each network interface on the selected host. CNE reads the values in
/proc/net/dev, waits one second, reads them again, and calculates the difference. The resulting values are displayed in bytes per second (BpS). - Packets Sent per Interface: his metric shows the number of packets transmitted per second for each network interface on the selected host. CNE reads the values in
/proc/net/dev, waits one second, reads them again, and calculates the difference. The resulting values are displayed in packets per second (PpS). - Packets Received per Interface: This metric shows the number of packets received per second for each network interface on the selected host. CNE reads the values in
/proc/net/dev, waits one second, reads them again, and calculates the difference. The resulting values are displayed in packets per second (PpS). - Errors Sent per Interface: This metric shows the number of transmission errors per second for each network interface on the selected host. CNE reads the values in
/proc/net/dev, waits one second, reads them again, and calculates the difference. The resulting values are displayed in errors per second (EpS). - Errors Received per Interface: This metric shows the number of receive errors per second for each network interface on the selected host. CNE reads the values in
/proc/net/dev, waits one second, reads them again, and calculates the difference. The resulting values are displayed in errors per second (EpS). - Outgoing Gbps Bandwidth Usage: This metric shows the total outgoing bandwidth usage, in gigabits per second (Gbps), for the selected host. It adds the transmitted bytes-per-second values from all network interfaces and converts the result to Gbps.
- Incoming Gbps Bandwidth Usage: This metric shows the total incoming bandwidth usage, in gigabits per second (Gbps), for the selected host. It adds the received bytes-per-second values from all network interfaces and converts the result to Gbps.
Grafana Kubernetes Default Dashboard Panels
These panels are part of the default Kubernetes dashboards used for cluster supervision.
-
Kubernetes Version: This panel displays the Kubernetes version running in the cluster, which helps verify cluster compatibility, confirm feature support, and identify when an upgrade may be required.
-
Nodes Ready/Nodes Not Ready: This panel shows the number of cluster nodes that are currently in a Ready state and the number of nodes that are Not Ready. A healthy cluster is expected to have all worker and control plane nodes marked as Ready. Nodes in a Not Ready state may indicate issues with kubelet, network connectivity, or resource exhaustion.
-
Pods Running: This panel displays the total number of active Pods that are scheduled and running across the cluster. It helps indicate current workload utilization, while a sudden drop in the number of running Pods may point to failures, evictions, or scheduling issues.
-
Cluster Max Pods Allowed: This panel shows the maximum number of Pods that can be deployed in the cluster based on node capacity and kubelet configuration. It is useful for assessing cluster saturation and capacity planning by comparing the maximum allowed Pods with the current number of running Pods.
-
Cluster Memory Usage: This panel monitors total memory consumption across all nodes in the cluster, including used memory, total memory, and overall usage percentage. Healthy utilization is typically shown in the green zone, while sustained high usage may indicate memory pressure that can affect Pod scheduling or lead to OOM kills.
-
Cluster CPU Usage: This panel shows the overall CPU utilization across the entire cluster, including used CPU, total CPU, and overall usage percentage. Low CPU usage indicates available capacity for scaling, while sustained high CPU usage may indicate the need for additional nodes or performance tuning.
-
Cluster Disk Usage: This panel tracks overall disk consumption across all nodes, including used disk, total disk, and overall usage percentage. Monitoring disk usage is important to ensure enough storage is available for Pods, logs, and container images. High disk usage may degrade node performance or cause scheduling issues.
-
Node Summary Table: This table provides node-level details that help identify resource usage, capacity, and potential issues across the cluster.
Table 8-31 Node Summary Table
Column Description Instance Displays the node IP address and kubelet port, which helps identify and troubleshoot specific nodes. FQDN Displays the fully qualified domain name of the node, helping map IP addresses to logical node identifiers. Uptime Displays how long each node has been running since the last reboot or restart. Consistent uptime across nodes indicates stability. Cores Displays the number of CPU cores available on each node. Memory Displays the total memory available on each node. Disk Size Displays the available disk capacity for each node. CPU Usage Displays a visual bar and percentage showing how much CPU each node is using. Values below approximately 80% are generally healthy, while spikes may indicate workload pressure or scheduling imbalance. Memory Usage Displays a visual bar and percentage showing node memory consumption. High memory usage, typically around 80–90%, may indicate Pods with memory leaks or insufficient memory limits. Disk Usage Displays the percentage of disk space used on each node which helps to monitor node-level storage pressure.
Pods Overview
This section provides a detailed view of Pod distribution and resource usage across the Kubernetes cluster, helping administrators understand how workloads are distributed across nodes and identify possible imbalances or resource bottlenecks.
This panel displays the number of Pods currently running on each node in the cluster. It helps operators quickly review workload distribution and identify nodes that may be overloaded or underutilized.
Figure 8-3 PODS on NODE
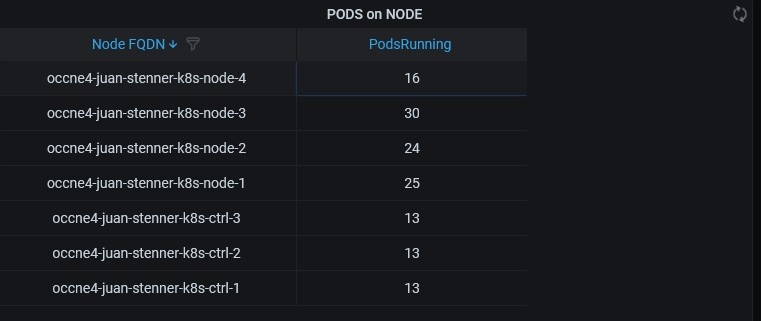
Table 8-32 PODS on NODE
| Column | Description |
|---|---|
| Node FQDN | Displays the fully qualified domain name of each node. |
| PodsRunning | Shows the number of Pods actively running on the node. Pod counts should generally be balanced across nodes to maintain even workload distribution. Large differences may indicate scheduling bias, resource constraints, or taints and tolerations affecting Pod placement. |
This panel displays Pod-level resource usage, including memory and CPU consumption, grouped by namespace. It helps operators monitor resource usage across workloads and identify Pods with high utilization.
Figure 8-4 Pod-level Resource Usage
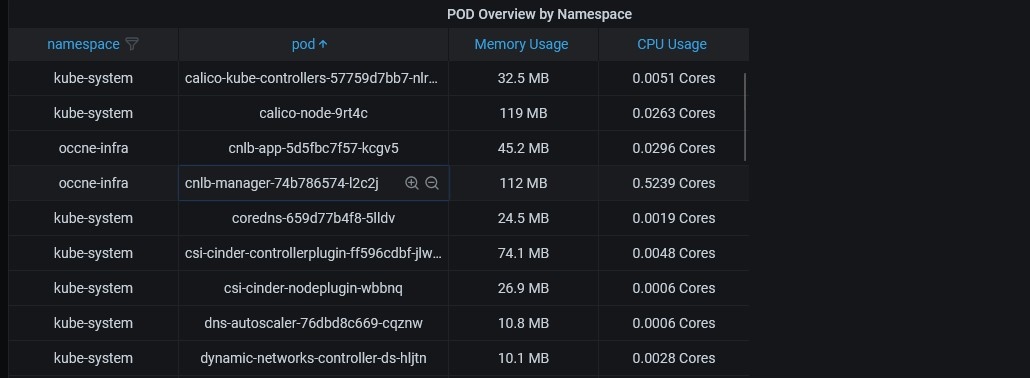
Table 8-33 Pod-level Resourse Usage
| Column | Description |
|---|---|
| Namespace | Displays the logical grouping of Kubernetes resources to which the Pod belongs. |
| Pod | Displays the name of each Pod instance, helping identify the application or service associated with the resource usage. |
| Memory Usage | Shows the current memory consumption of each Pod, which is useful for detecting memory leaks or Pods exceeding expected memory limits. |
| CPU Usage | Shows the CPU usage of each Pod, expressed in cores, and helps identify CPU-bound workloads. |
8.14.2 CNLB Dashboard
CNLB Dashboard in CNE is a common service that provides visibility into CNLB metrics across the cluster. It helps monitor the cnlb app pods and network status into the CNE observability stack.
CNLB Dashboard Panels Overview
This helps monitor the number of connections established to each Service IP managed that expose the apps in the cluster. Users can track:
- Active connections per Service IP
- Historical connection trends
Figure 8-5 IPVS Connections per Service IP
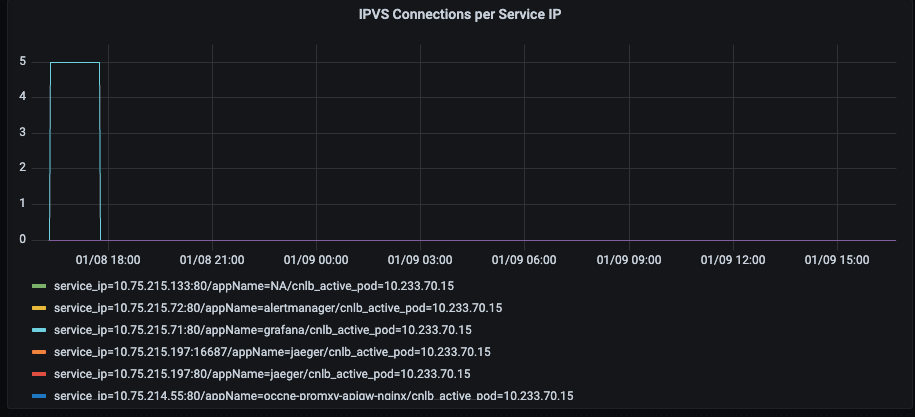
This helps to track how many live client connections are being managed currently by Cloud Native Load Balancer (CNLB) pods. Users can track:
- Number of connections per pod
- Total active connections across all active CNLB pods
Figure 8-6 Connections handled by CNLB Active Pods
This helps to visualize the amount of messages handled by each service IP on a time chart. Users can track the Inbound/outbound MPS, per Service IP, over time.
Figure 8-7 Incoming/Outgoing MPS/IPVS - Service IP
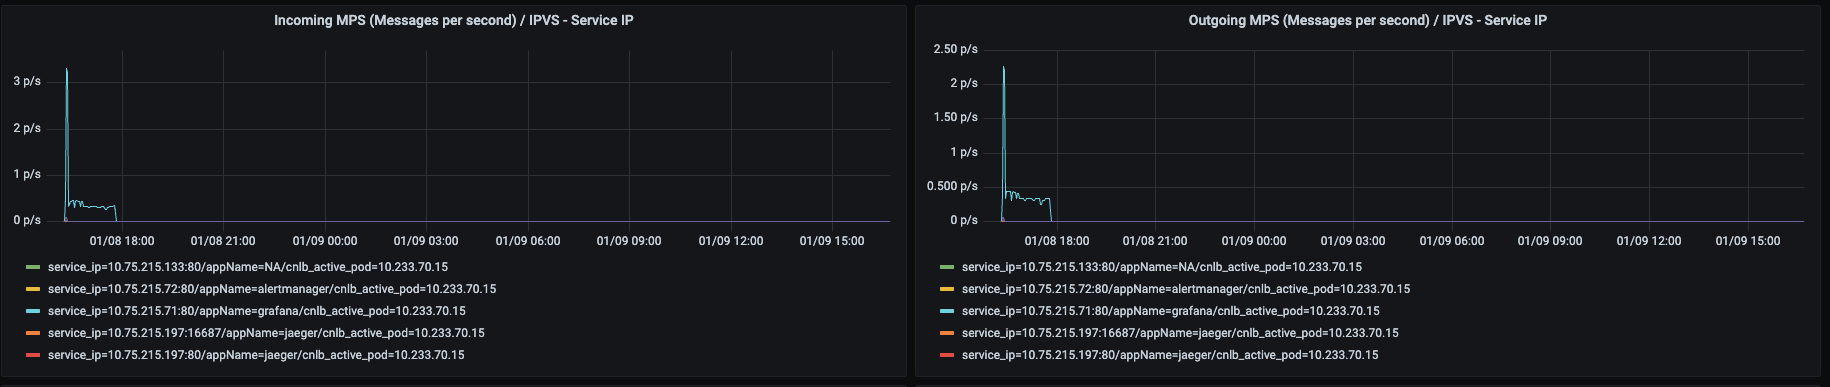
This displays the amount of messages handled by each multus external interface on a time chart. Users can track the Inbound or outbound MPS per external interface.
Figure 8-8 Incoming or Outgoing MPS or INTERFACE - Multus External Network
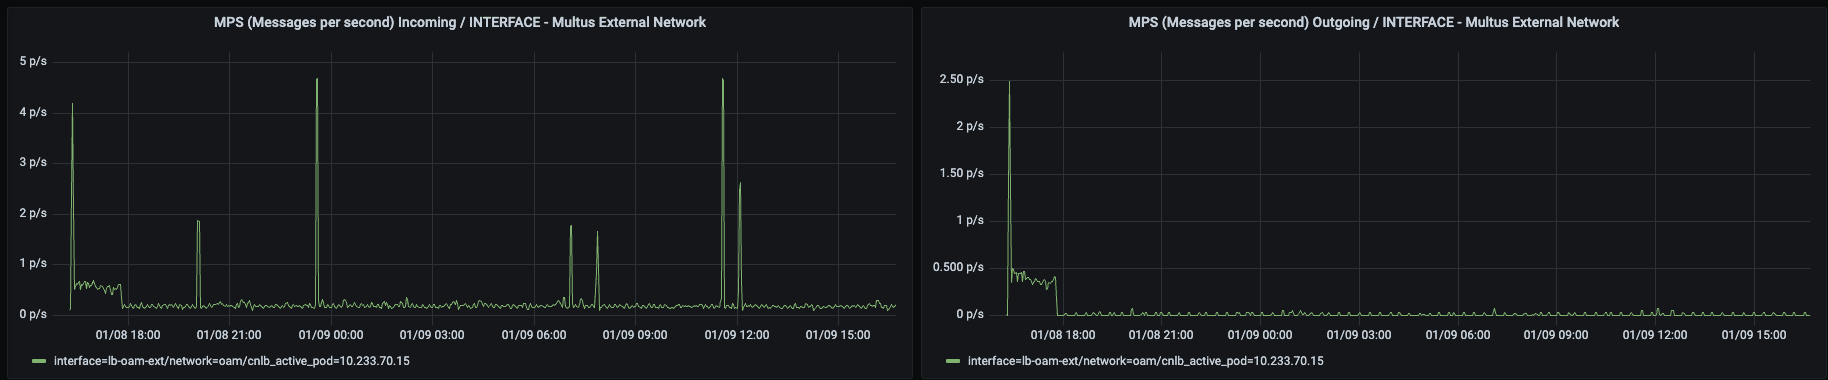
This helps to visualize the volume of bytes processed by each service IP over time using a time series chart. Users can track Incoming or Outgoing bytes per second, per Service IP, on a time chart.
Figure 8-9 Incoming or Outgoing Bytes per Second/IPVS
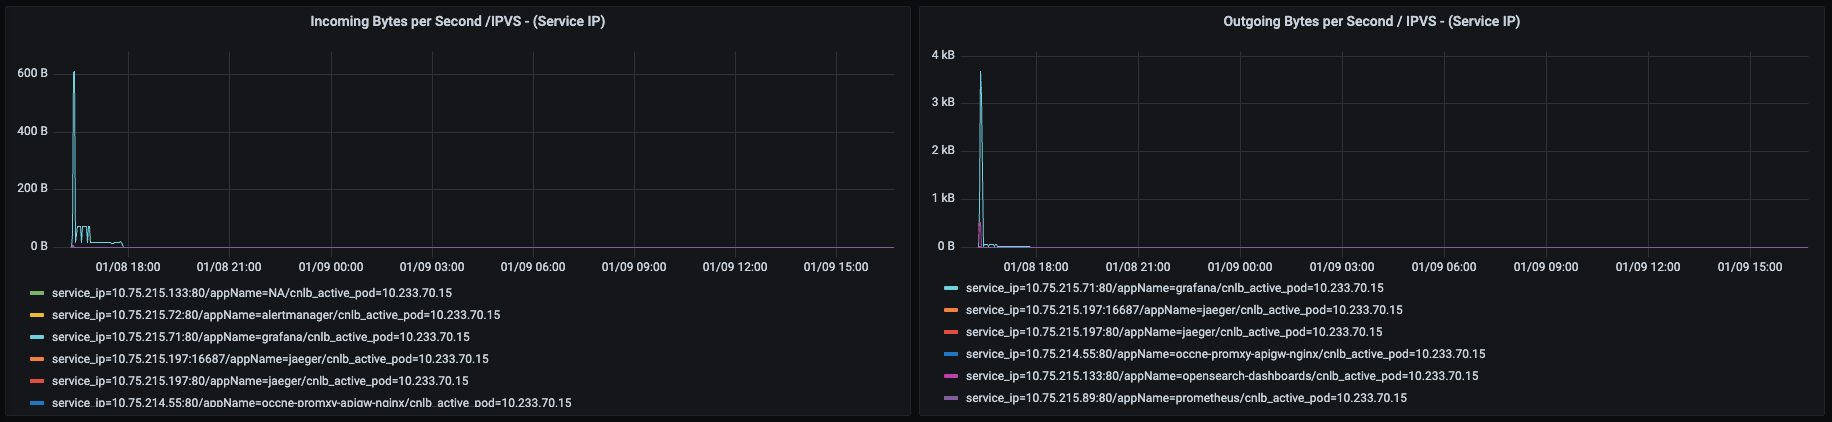
This helps to visualize the number of messages processed by each Multus internal interface over time using a time series chart. Users can track the Inbound/outbound MPS per internal interface.
Figure 8-10 Incoming or Outgoing MPS or INTERFACE - Multus Internal Network
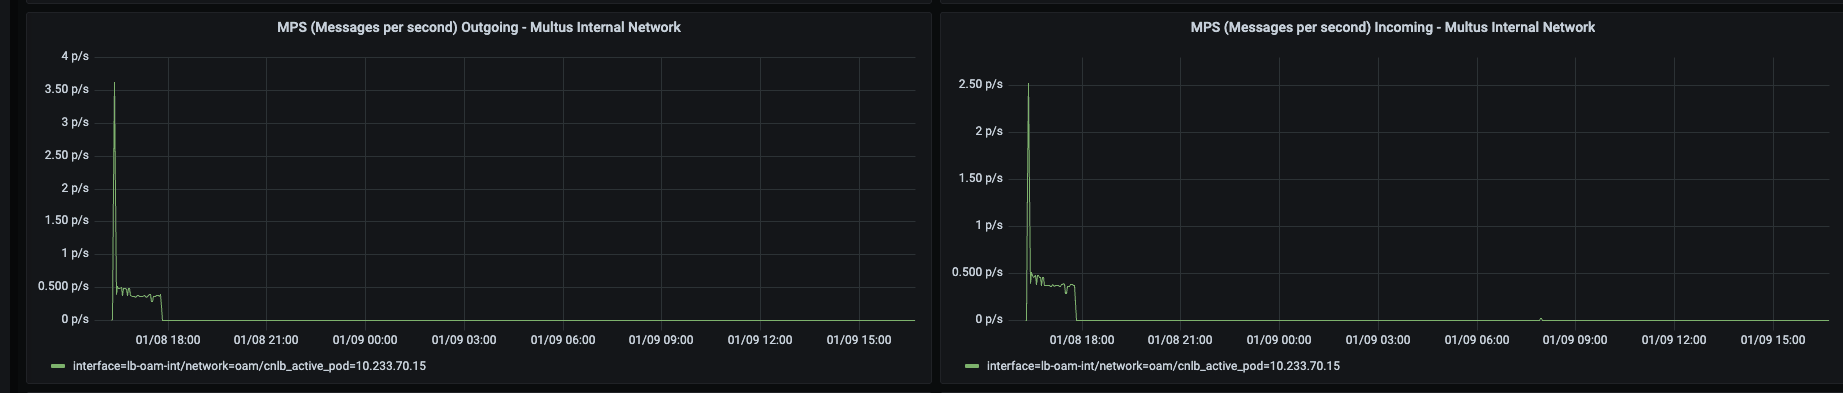
8.14.3 Kyverno Dashboard
The Kyverno Dashboard in CNE is a common services that offers visibility into Kyverno policy metrics across the cluster. It helps track policy compliance, rule execution, and admission requests, all integrated with the CNE observability stack.
Grafana Kyverno Dashboard Panels Overview
A series of panels have been added to the CNE Kyverno Policy Dashboard to display key Kyverno policy metrics, providing enhanced visibility and insight into policy enforcement and compliance across the cluster.
The following is an overview on CNE Kyverno section.
Latest Status
This panel displays the percentage of Kyverno policy rule executions that have failed in the past 24 hours. This metric provides insight into the cluster’s overall policy compliance status. An elevated failure rate may indicate possible misconfigurations or the presence of non-compliant resources.
Figure 8-11 Rule Execution Failure
This panel displays the total number of active cluster-wide Kyverno policies applied throughout the Kubernetes environment. This metric helps users assess the overall scope of governance and security controls currently enforced at the cluster level.
Figure 8-12 Cluster Policies
This panel displays the total number of active Kyverno policies, encompassing both cluster- wide and namespaced policies. This provides a quick overview of how many governance and compliance rules are currently being enforced within the Kubernetes environment.
Figure 8-13 Policies
This panel displays the total number of active Kyverno validation rules configured in the cluster. These rules verify that resource configurations adhere to defined compliance or security standards, helping users understand the breadth of validation checks enforced across the environment.
Figure 8-14 Validate Rules
This panel displays the total number of active Kyverno mutation rules currently defined in the cluster. These rules automatically modify or add fields to Kubernetes resources during creation or updates, helping users track how many rules are actively ensuring consistent and compliant resource configurations.
Figure 8-15 Mutate Rules
This panel displays the total number of active Kyverno generation rules in the cluster. These rules automatically create or replicate Kubernetes resources according to predefined policies, helping users monitor how many automation rules are in place to ensure consistency and enforce desired configurations across namespaces.
Figure 8-16 Generate Rules
Policy-Rule Results (per rule)
This panel displays the number of Kyverno policy rule evaluations triggered by admission requests, categorized by result (pass, fail, or skip). This provides visibility into the performance of individual rules during resource creation or modification events, helping administrators identify specific rules that frequently result in policy violations during admission reviews.
Figure 8-17 Admission Review Results per Rule
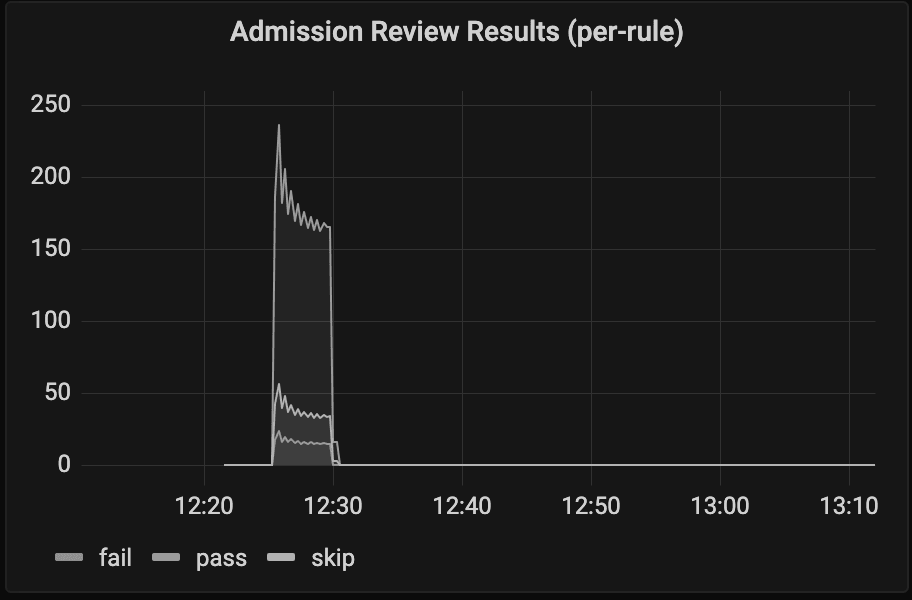
This panel displays the total number of failed Kyverno policy executions, grouped by policy type (Cluster or Namespaced). This helps users identify which category of policies is experiencing more compliance issues. Frequent failures may suggest misconfigured policies or workloads that do not comply with defined governance rules.
Figure 8-18 Policy Failures
This panel displays the number of Kyverno admission review outcomes grouped by policy, indicating how many admission requests passed or failed for each policy. This helps users identify which policies are most frequently triggered and assess their effectiveness in enforcing compliance. This view also helps pinpoint policies that may need adjustment or review due to frequent failures.
Figure 8-19 Admission Review Results per Policy
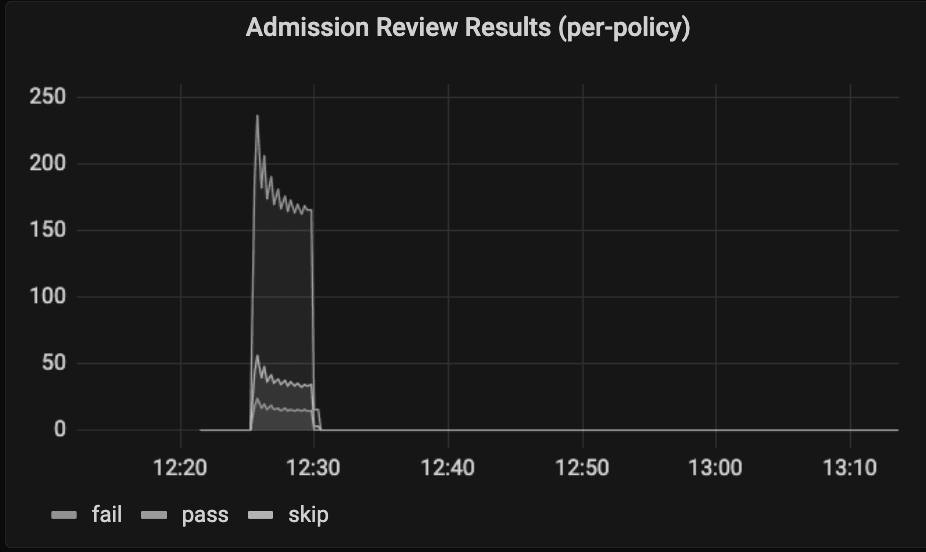
Policy-Rule Info
This panel displays the total number of active Kyverno policies, categorized by type—Cluster or Namespaced. This provides a clear overview of how policy enforcement is distributed across the cluster, helping users understand the balance between global and namespace-specific governance rules.
Figure 8-20 Active Policies by Policy Type
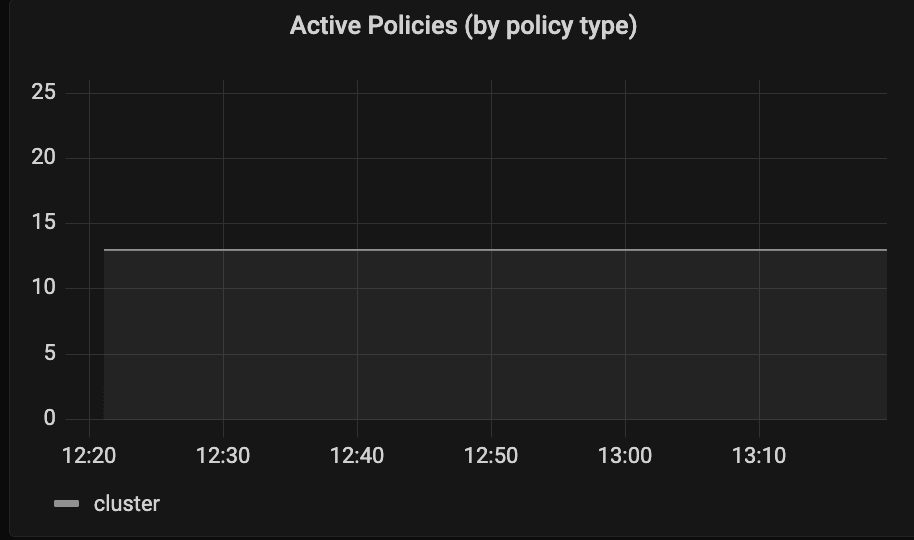
This panel displays the total number of active Kyverno policies grouped by their validation action, such as enforce or audit. This helps to understand how many policies are actively blocking non-compliant resources versus those that are only logging violations for monitoring and analysis.
Figure 8-21 Active Policies by Policy Validation Action
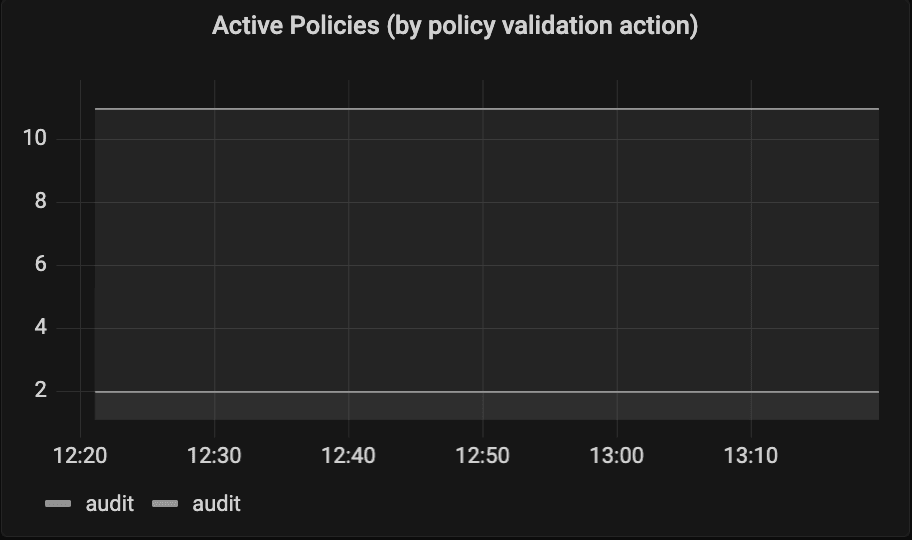
Active Policies running in background mode displays the number of Kyverno policies configured to perform periodic background scans on existing resources. This metric helps to understand how many policies continuously evaluate resource compliance beyond admission requests, ensuring ongoing enforcement throughout the cluster.
Figure 8-22 Active Policies Running in Background
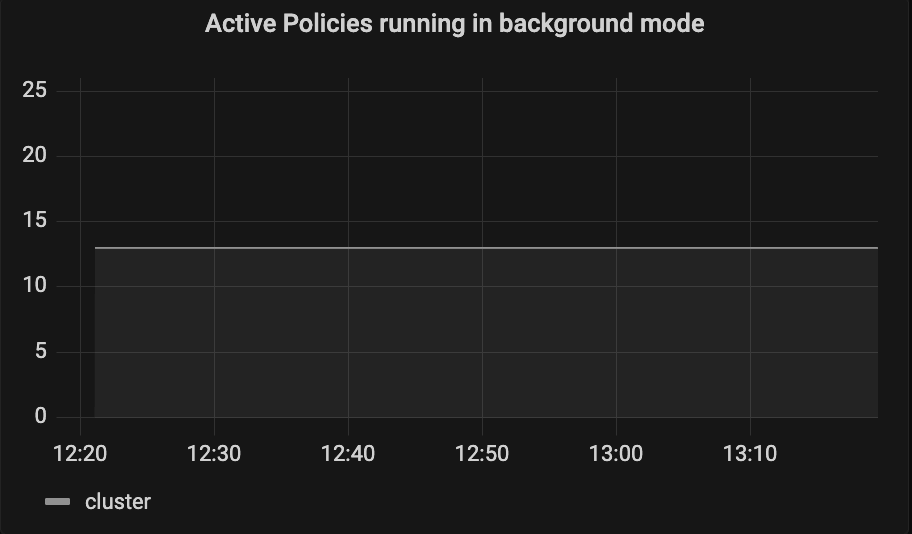
Active Policies running in background mode displays the number of Kyverno policies configured to perform periodic background scans on existing resources. This metric helps to understand how many policies continuously evaluate resource compliance beyond admission requests, ensuring ongoing enforcement throughout the cluster.
Figure 8-23 Active Namespaced Policies
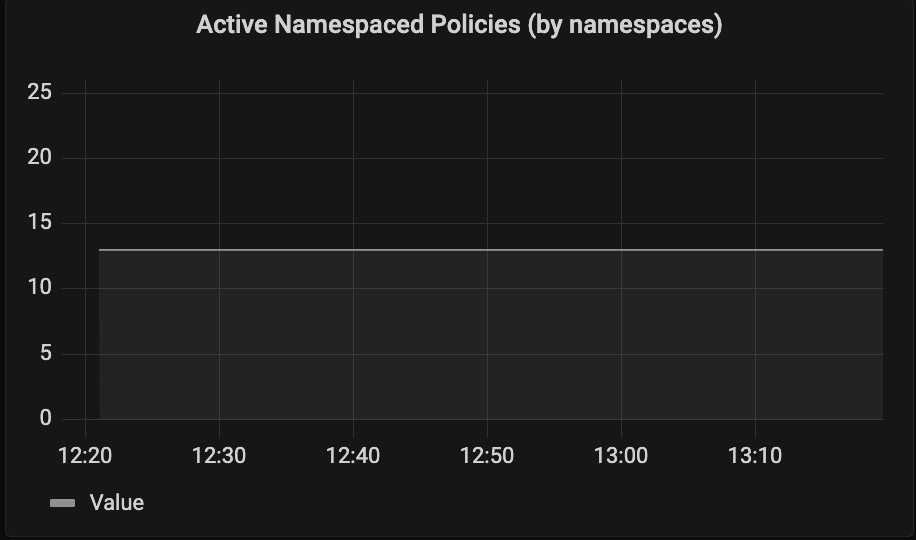
Active Rules (by rule type) displays the total number of active Kyverno rules, categorized by type —such as validate, mutate, or generate. This helps users understand the makeup of rules enforcing compliance, automation, and configuration management within the cluster.
Figure 8-24 Active Rules by Rule Type
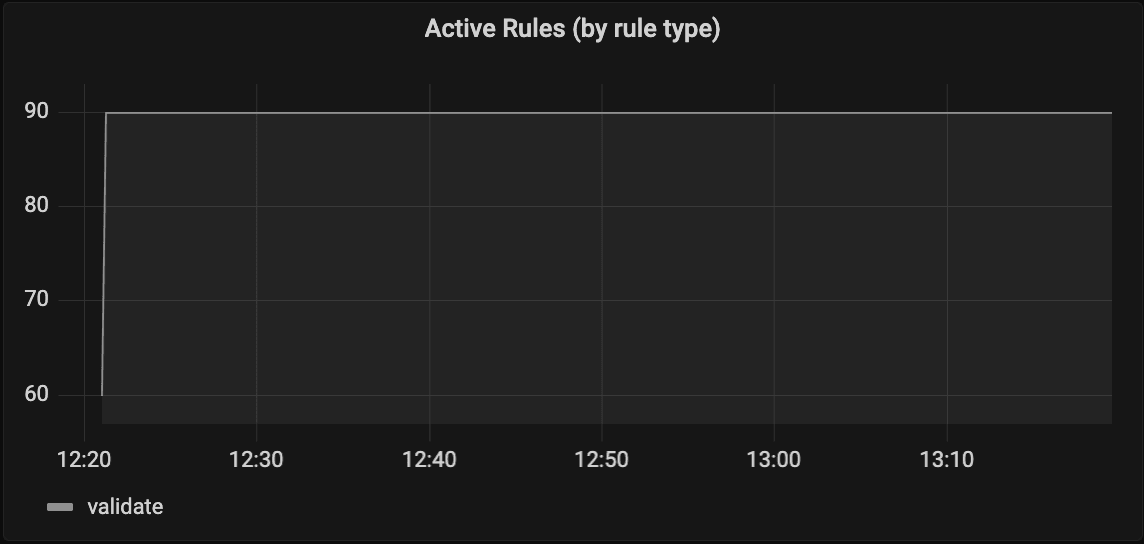
Policy-Rule Execution Latency
This panel displays the average time Kyverno takes to execute individual policy rules during admission or background operations, segmented by rule type (validate, mutate, and generate). This helps to evaluate the performance and efficiency of each rule category over time, identifying any potential delays that might impact admission request processing or policy enforcement.
Figure 8-25 Average Rule Execution Latency over Time
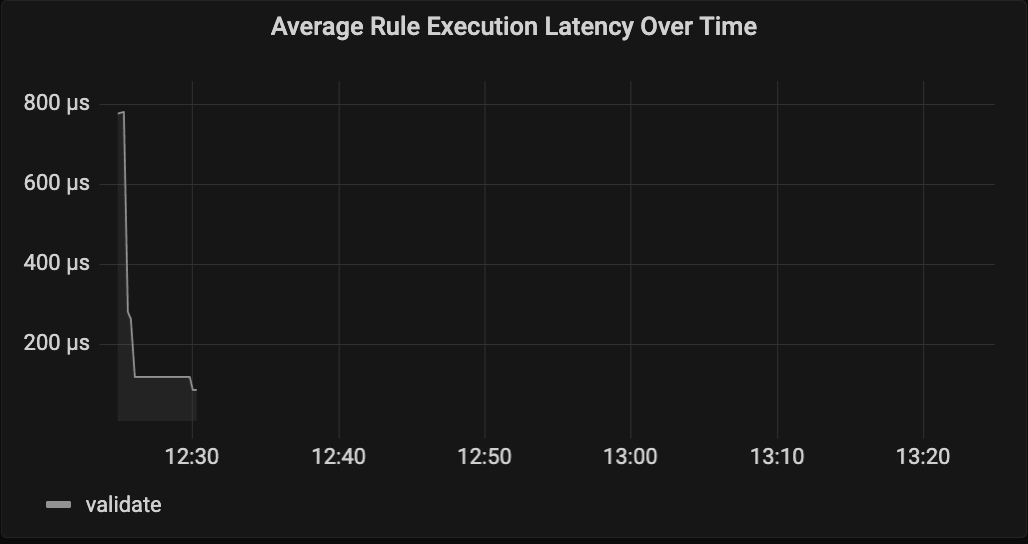
This panel displays the average time Kyverno takes to execute entire policies—including all associated rules—during admission or background operations. The panel breaks down latency by policy type, distinguishing between Cluster Policies and Namespaced Policies, enabling users to compare performance between global and namespace-scoped policies. This helps identify latency trends that may impact policy enforcement and overall cluster responsiveness.
Figure 8-26 Average Policy Execution Latency over Time
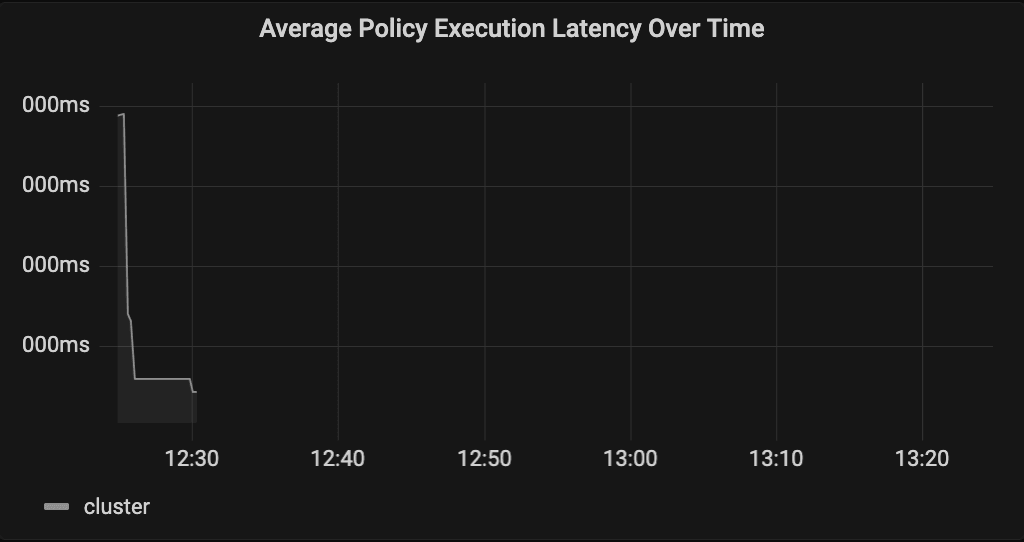
This panel displays the cumulative average time Kyverno takes to execute all policy rules across the cluster. This provides users with a high- level overview of rule processing performance and helps assess the overall efficiency of Kyverno’s policy evaluations.
Figure 8-27 Overall Average Rule Execution Latency
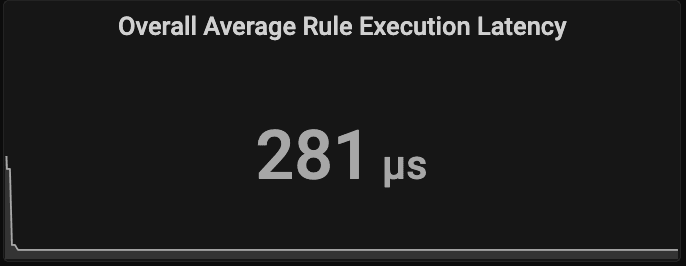
This panel displays the cumulative average time Kyverno takes to execute all policies across the cluster. This offers users an overall measure of policy processing efficiency, helping to identify performance trends that may impact admission control or background policy operations.
Figure 8-28 Overall Average Policy Execution Latency
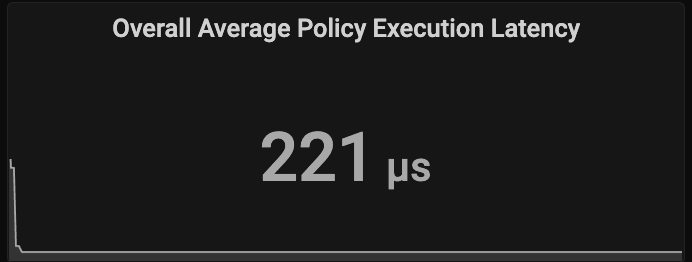
Admission Review Latency
This panel displays the average time Kyverno takes to process admission review requests, categorized by operation type such as CREATE, UPDATE, or DELETE. This helps users assess the efficiency of Kyverno in handling different types of admission requests and identify any operation-specific latency issues.
Figure 8-29 Admission Review Duration over Time
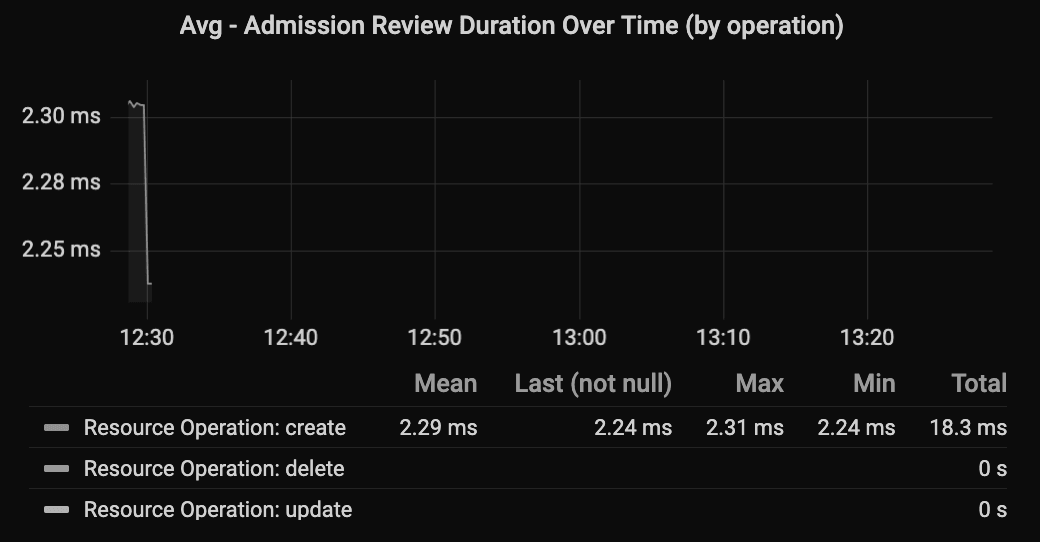
This panel displays the average time Kyverno takes to process admission review requests for various Kubernetes resource types, such as Pods, Deployments, or ConfigMaps. This helps users identify which resource kinds experience higher review latency, supporting performance analysis and optimization efforts.
Figure 8-30 Admission_Review_Duration_Time_Resourcekind
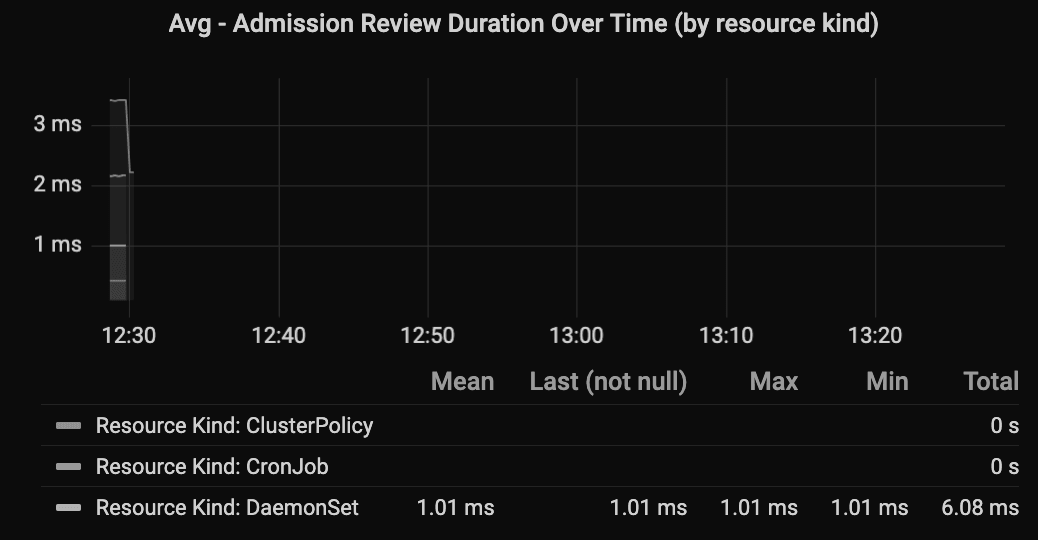
This panel displays the number of admission requests received and processed by Kyverno within each five-minute interval. This helps users monitor the workload and request traffic managed by Kyverno, offering insights into policy evaluation frequency and overall cluster admission activity levels.
Figure 8-31 Incoming Administration Requests
This panel displays the average time Kyverno takes to process all admission review requests cluster-wide. This provides users with an overall measure of admission webhook performance, helping to identify latency trends that may impact resource creation or update operations.
Figure 8-32 Overall_Admission_Review_Duration
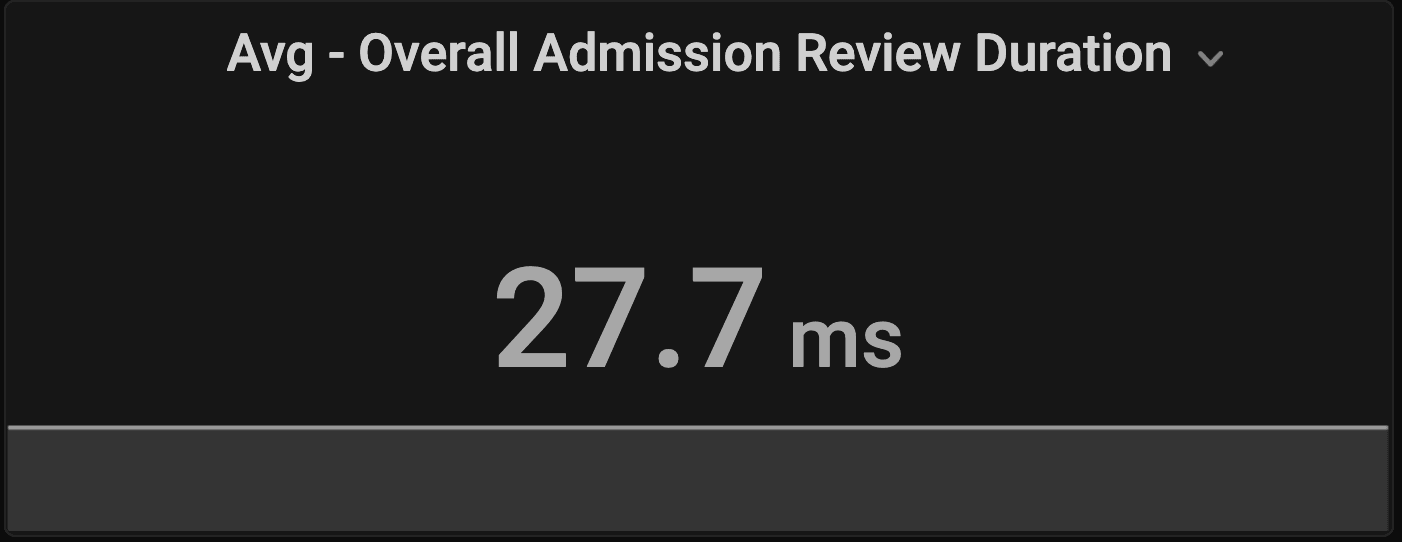
Policy Changes
This panel displays the number of Kyverno policy modifications, categorized by change type such as create, update, or delete. This helps users track how often policies are changed over time, providing visibility into configuration activity and policy lifecycle management within the cluster.
Figure 8-33 Policy Changes over Time
This panel displays the number of Kyverno policy modifications over time, categorized by policy type—Cluster or Namespaced. This helps users understand where most policy changes are taking place and whether updates are concentrated in global or namespace-specific governance rules.
Figure 8-34 Policy_Changes_Over_Time_Policy_Type
This panel displays the total number of Kyverno policy modifications —such as creations, updates, or deletions—recorded over the past 24 hours. This allows users to quickly assess recent policy activity and understand how frequently governance configurations are being updated within the cluster.
Figure 8-35 Total Policy Changes
This panel displays the frequency of Kyverno policy modifications over the past five minutes. It helps users to monitor recent configuration activity, providing insight into how actively policies are being created, updated, or deleted in near real time.
Figure 8-36 Policy Changes (Last 5m)
Admission Requests
This panel displays the number of admission requests processed by Kyverno, categorized by operation type such as CREATE, UPDATE, or DELETE. It helps users to understand the distribution of admission activities within the cluster and identify patterns or spikes in specific types of operations.
Figure 8-37 Admission Requests by Operation
This panel displays the number of admission requests handled by Kyverno, grouped by Kubernetes resource type such as Pod, Deployment, or ConfigMap. It helps users to analyze which resource kinds generate the most admission traffic and assess how policy enforcement activity varies across different resource types.
Figure 8-38 Admission Request by Resource Kind
This panel displays the total number of admission requests processed by Kyverno during the past 24 hours. It provides users with an overall measure of Kyverno’s activity level, helping to assess policy evaluation workload and cluster admission request volume over a daily period.
Figure 8-39 Total Admission Requests in Last 24 Hours
8.14.4 Fluentd Logging Dashboard
The Fluentd Log Ingestion Dashboard is a common service that offers visibility into Fluentd metrics across the cluster. It enables monitoring of logs, events, records, and pod status within the CNE observability stack.
Fluentd Monitoring Panels Overview
The Fluentd Monitoring dashboard has the following panels:
This panel displays the current Fluentd version by extracting it from the running pod metadata.
This panel displays the count of active Fluentd pods.
This panel helps visualize write operation rates per pod over 5-minute intervals.
This panel provides buffer-related metrics:
- Buffer Usage: Ratio of used vs. total buffer space.
- Buffer Total Size: Total buffer capacity in bytes.
- Buffer Queue Size: Size of the buffer queue in bytes.
- Buffer Stage Size: Size of staged (event) data in bytes.
This panel displays the total events emitted per Fluentd pod.
This panel displays the total records emitted per Fluentd pod.
This panel displays the sum of errors recorded per pod.
This panel displays the timeline displaying error occurrences for each pod.
This panel displays the total retry attempts by Fluentd, reflecting error handling activity.
This panel displays the average time Fluentd waits between retries, resetting after successful attempts.
This panel displays the total number of rollbacks, indicating error recovery actions.
This panel displays the count of slow flushes in the buffer, useful for bottleneck detection.
8.14.5 Persistence Storage Dashboard
The CNE Persistent Storage Dashboard, which is available in CNE as part of the common services, offers comprehensive visibility into Rook Ceph metrics across the cluster. It monitors OSD pods, provides a cluster and resource overview, and integrates with the CNE observability stack.
Persistence Storage Dashboard Panel Overview
- Ceph Version: Displays the currently running Ceph cluster version.
- In/Out OSDs: Indicates the number of OSDs that are part of the cluster versus those that are out.
- Up/Down OSDs: Shows the number of OSDs that are operational versus those that are down or unresponsive.
- Capacity: Provides a visual gauge of the overall storage usage as a percentage.
- Used: Indicates the amount of storage space currently consumed.
- Total: Shows the total raw storage capacity available in the cluster.
- Read Throughput: Displays the current data read rate across the cluster.
- Write Throughput: Displays the current data write rate across the cluster.
- Avg Op Read Latency: Shows the average time required to complete read operations.
- Avg Op Write Latency: Shows the average time required to complete write operations.
Figure 8-40 Persistence Storage Dashboard
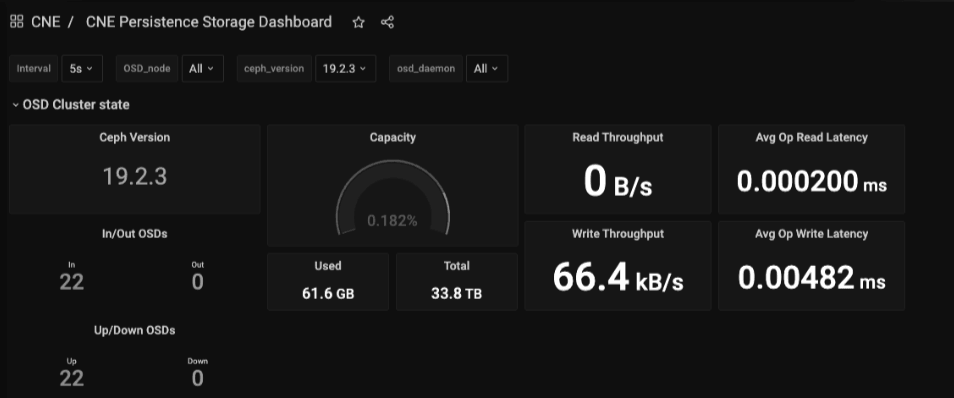
- OSD: Name of the Object Storage Daemon.
- Node: The node where the OSD resides.
- Pod: The pod responsible for managing the OSD.
- Available: Indicates whether the OSD is currently part of the cluster or marked as out.
- Status: Shows the current state of the OSD, such as running or not responding.
Figure 8-41 Cluster Summary
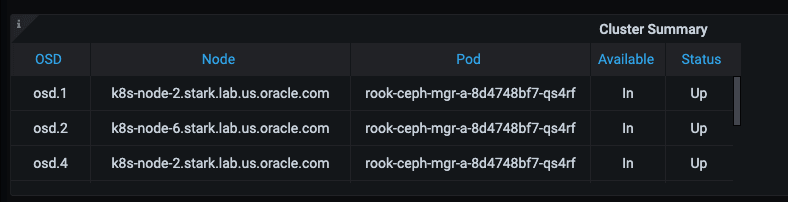
- Ceph Node: Name of the node hosting the Rook Ceph pod.
- Pod: Name of the Rook Ceph pod.
- Uptime: Duration the pod has been running and available.
- Cores: Number of CPU cores allocated to the pod.
- Memory: Amount of memory currently consumed by the pod.
- CPU Usage: Amount of CPU resources currently used by the pod.
8.15 Changing Bastion Registry Credentials
The Bastion container registry can be configured to require authentication for image operations such as pull, push, and list. This allows registry access to be secured by requiring credentials for users or automation interacting with the registry.
This procedure describes how to update the Bastion container registry credentials after installation. It supports changing credentials from one existing set to another, as well as enabling credential-based access where no credentials were previously configured.
The update is designed to be non-disruptive. It does not require Kubernetes nodes or pods to restart and is not expected to impact the availability of services running on the Kubernetes cluster. Existing workloads and cluster-provided services should continue operating normally while the registry credential configuration is updated.
Enabling Credentials on a New Installation
To enable Bastion registry credentials on a new CNE installation, set the variables occne_registry_user and occne_registry_pass to your desired string values in the [occne:vars] section of the secrets.ini file, prior to the installation.
Note:
Use a strong password when configuringoccne_registry_pass. Choose a complex and unique password, and avoid common passwords to reduce the risk of unauthorized access.
Following is a sample.ini file:
[occne:vars]
...
occne_registry_user=registryUser
occne_registry_pass=registryPass
...Enabling or Changing Credentials on an Existing System
To enable Bastion registry credentials on an existing system running version 25.2.100 or later, perform the following steps:
- Place the
secrets.inifile in/var/occne/cluster/${OCCNE_CLUSTER}/on the active Bastion, alongside the inventory file, such asoccne.iniorhosts.ini. - Set
occne_registry_userandoccne_registry_passto your desired string values in the[occne:vars]section of thesecrets.inifile.Following is a
sample.inifile:[occne:vars] ... occne_registry_user=registryUser occne_registry_pass=registryPass ... - Plan a maintenance window before running the following command from the active Bastion. The command takes a few minutes to reconfigure the registries on the Bastions and update the credentials across the Kubernetes cluster.
OCCNE_STAGES=(DEPLOY) OCCNE_CONTAINERS=(PROV K8S) OCCNE_ARGS=--tags=containerd,registry_setup pipeline.sh
After completing this procedure, the registry requires the new credentials for image access. The default Bastion accounts, such as admusr or cloud-user, are automatically updated to use the new credentials, as are all Kubernetes nodes. If additional Bastion accounts access the registry, those users must run podman login with the appropriate credentials before accessing the registry.
8.16 Log Externalization Support
Overview
This section provides instructions on how to enable log externalization in CNE CNLB cluster. When log externalization is enabled, CNE and network function (NF) logs are no longer processed by the OpenSearch solution. Instead, these logs are exported from the CNE cluster to an external service provided by the customer through Fluentd using HTTP communication.
Figure 8-42 Log Externalization Architecture
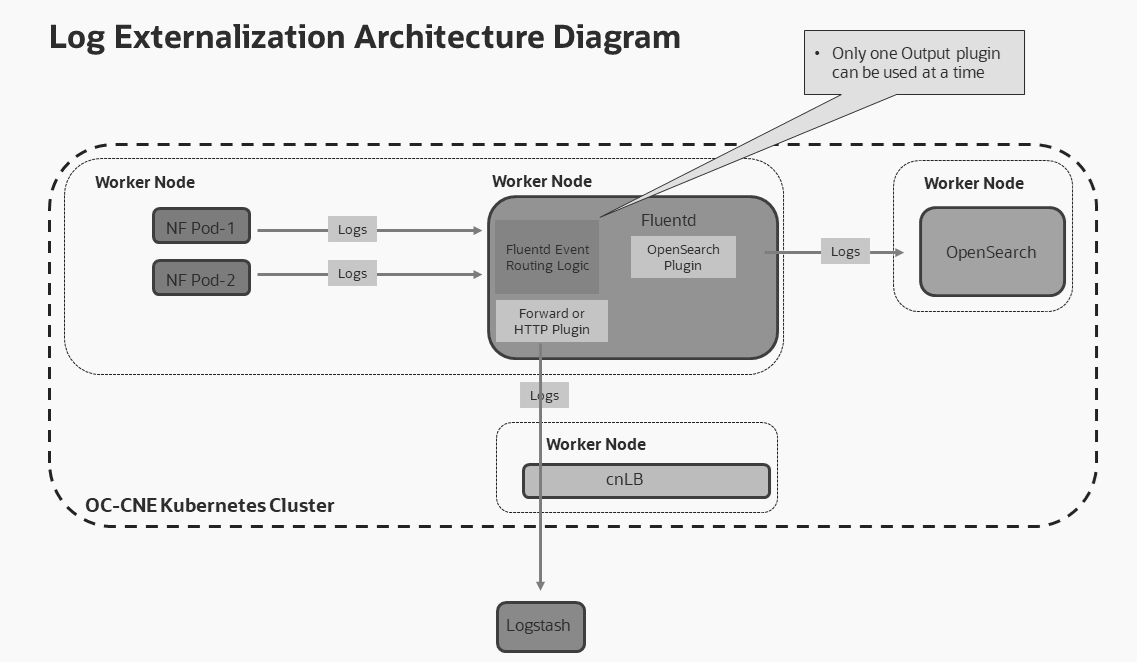
Prerequisites
- This procedure must be performed on a cluster where CNLB is enabled.
- If the cluster is already deployed, you must perform the procedure from the active Bastion. Confirm you are on the active Bastion using the following command:
If the output does not indicate active-bastion, switch to the active bastion host before proceeding.$ is_active_bastion IS active-bastion - Users must know how to configure egress annotations (for example, which annotation keys or values are expected in your environment and where to apply them, for example, namespace, pod, deployment, and so on).
Limitations and Expectations
The following are limitations and expectations associated with enabling log externalization in CNE.
- There is no rollback procedure.
- Opensearch will not be installed in CNE.
- Jaeger will not be installed in CNE.
- Users must provide the correct configuration for Fluentd.
- It is user's responsibility to configure dimensioning of Fluentd.
- This procedure only offers to externalize logs; you cannot bring logs back in CNE.
- CNE is not responsible for log loss resulting from external backend failures, misconfiguration, or capacity limitations beyond the configured retry mechanism.
- Log externalization is enabled when:
- OpenSearch and Jaeger are not installed in CNE
- Fluentd installation is enabled
Configuring Log Externalization
Currently, CNE routes all logs to an in-cluster OpenSearch by default, which limits users from using centralized observability platforms (for example, Splunk or Elastic) and forces non- tracing users to allocate resources to components they may not need (such as Jaeger and OpenSearch).
If you are enabling log externalization before installation, perform the steps in the Bootstrap section. Otherwise, perform the steps in the Active Bastion section.
The following variables from occne.ini file will be modified in this procedure:
Table 8-34 occne.ini Variables
| occne.ini Variable | Default Value | Log Externalization Enabled Value |
|---|---|---|
occne_opensearch_enabled
|
True | False |
occne_jaeger_enabled |
True | False |
fluentd_logs_output_config_f ile_path |
None | Absolute path for output_plugin file.
Example: "/var/occne/cluster/ my_cluster/fluentd_config/ output_plugin" |
occne_fluentd_egress_annotat ion |
None | Desired egress annotation.
Example: “nf-sigegr1@ nf-sig-egr1" |
OpenSearch
Disabling OpenSearch enables log externalization through Fluentd over HTTP. When OpenSearch is disabled, its Helm charts and related Kubernetes resources are not deployed in the cluster.
Perform the following steps to edit the occne.ini file to disable Opensearch:
- Edit the
occne.inifile inside the cluster directory:$ vi /var/occne/cluster/$OCCNE_CLUSTER/occne.ini - Add and set the variable
occne_opensearch_enabledtoFalse. Inside theoccne.inifile add the following line at the end:occne_opensearch_enabled=False
Jaeger
Disabling Jaeger is an optional step for log externalization, but Jaeger cannot operate as a standalone component without OpenSearch. Therefore, if OpenSearch is disabled, Jaeger should also be disabled to optimize cluster resources; when Jaeger is disabled, its Helm charts and related Kubernetes resources are not deployed.
Note:
OpenSearch can be deployed without Jaeger (enabling log search and analysis only), while deploying OpenSearch with Jaeger enables both log search and distributed tracing.Perform the following steps to edit the occne.ini file to disable Jaeger:
- Edit the
occne.inifile in the cluster directory:vi /var/occne/cluster/$OCCNE_CLUSTER/occne.ini - Add the following line at the end of the file to disable Jaeger:
occne_jaeger_enabled=False
Configuring Fluentd Output Plugin
Users must provide their own Fluentd out_http plugin configuration. The HTTP output plugin should be configured according to the official Fluentd documentation (Fluentd HTTP Output Plugin).
Note:
In the official documentation, the parameter endpoint_url is shown as endpoint. Using endpoint can cause configuration errors, which will be visible in the Fluentd pod logs.Perform the following steps to configure Fluentd output plugin:
- Create the Fluentd directory:
Run the following command to create a
fluentd_configdirectory inside the cluster directory:mkdir /var/occne/cluster/$OCCNE_CLUSTER/fluentd_config - Create the configuration file:
Inside the directory that was created in the previous step, create the configuration file
output_pluginfor Fluentd HTTP Output Plugin and insert its configuration:
Insert the Fluentd out_http configuration. Following is an example configuration:vi /var/occne/cluster/$OCCNE_CLUSTER/fluentd_config/output_plugin<match **> @type http endpoint_url http://10.1.0.1:8080/ http_method post serializer json <buffer> flush_interval 2s </buffer> </match>
Setting the configuration file path in the occne.ini file.
- Edit the
occne.inifile in the cluster directory:vi /var/occne/cluster/$OCCNE_CLUSTER/occne.ini - Add and set the variable
fluentd_logs_output_config_file_pathwith the absolute path of the Fluentd configuration file:Inside occne.ini file add the next line at the end fluentd_logs_output_config_file_path="<Absolute path for output_plugin file>"Example:
fluentd_logs_output_config_file_path="/var/occne/cluster/my_cluster/ fluentd_config/output_plugin"
Configuring Egress Annotation
This section is an optional step and may be skipped in order for Fluentd to externalize traffic through default network oam and default egress annotation nf-oam-egr1@nf-oam-egr1. In the case a different network is needed instead, perform the following steps:
Note:
Ensure the Logstash server IP is present incnlb.ini file, egress_dest variable for the egress annotation network.
Example:
Logstash server IP: 10.80.10.115
egress_dest = ["10.80.10.0/23"]- From the
cnlb.inifile, obtain the available egress annotation network name:nf- <service_network_name>-egr1:
Sample output:$ cat /var/occne/cluster/$OCCNE_CLUSTER/cnlb.ini... [oam:vars] service_network_name = "oam" ... egress_dest = ["10.75.100.0/23"] ... [sig:vars] service_network_name = "sig" ... egress_dest = ["10.80.10.0/23"] - With the previously identified network name, set the egress annotation by editing the
occne.iniand setting it in the variableoccne_fluentd_egress_annotation:$ vi /var/occne/cluster/$OCCNE_CLUSTER/occne.iniInside the
occne.inifile, add the following line at the end with the required egress annotation:occne_fluentd_egress_annotation="<Egress annotation name>@<Egress annotation name>"Example:
occne_fluentd_egress_annotation="nf-sig-egr1@nf-sig-egr1"
Applying the Configuration
This configuration can be done before deploying a cluster or on an already running cluster.
To deploy a cluster with Log Externalization enabled, perform the steps provided in Oracle Communications Cloud Native Core, Cloud Native Environment Installation, Upgrade, and Fault Recovery Guide.
Upgrade cluster to apply the changes:
To enable Log Externalization by upgrading the whole cluster, perform the steps provided in the "CNE Upgrade" section in Oracle Communications Cloud Native Core, Cloud Native Environment Installation, Upgrade, and Fault Recovery Guide.Update only the services:
If these changes are needed on an cluster that is already deployed and a full upgrade is not needed, run the pipeline with the following parameters:$ OCCNE_CONTAINERS=(CFG) OCCNE_STAGES=(UPGRADE) OCCNE_ARGS='--
tags=opensearch,fluentd-opensearch,jaeger' pipeline.shValidating the Fluentd pods configuration
Once the changes are applied by deploying, upgrading or just updating the services, validate the configuration:
- Run the following command to validate that the egress annotation is the selected one:
kco describe pod occne-fluentd-opensearch-<pod_id>Example output:
Name: occne-fluentd-opensearch-65f6f Namespace: occne-infra Priority: 0 Priority Class Name: default-priority-class Service Account: occne-fluentd-opensearch Node: my_cluster-k8s-node-1/192.168.0.1 Start Time: Thu, 26 Feb 2026 18:17:55 +0000 Labels: app.kubernetes.io/instance=occne-fluentd-opensearch app.kubernetes.io/name=fluentd controller-revision-hash=5b4d5456d6 pod-template-generation=9 topology.kubernetes.io/region=RegionOne topology.kubernetes.io/zone=nova Annotations: . . . k8s.v1.cni.cncf.io/networks: default/nf-sig-egr1@nfsig-egr1 # "nf-sig-egr1" egress annotation present - Run the following command to validate the Fluentd output plugin configuration:
$ kco logs occne-fluentd-opensearch-<pod_id> -f | grep "<label @OUTPUT>" - A 10Sample output:
<label @OUTPUT> <match **> @type http endpoint_url "http://10.1.0.1:8080/" http_method post serializer json <buffer> flush_interval 2s </buffer> </match>
Using Custom Log Handler
You can disable Fluentd and use an alternative log collection/forwarding solution.
- OpenSearch and Jaeger cannot operate as standalone components without Fluentd in this workflow.
- Disabling Fluentd will disable log externalization, because there will be no in-cluster log collection/tracking service.
- When Fluentd is disabled, its Helm charts and related Kubernetes resources are not deployed.
If Fluentd is disabled, it is the user’s responsibility to deploy and manage an equivalent application to handle log collection and forwarding.
- Edit the
occne.inifile inside the cluster directory:$ vi /var/occne/cluster/$OCCNE_CLUSTER/occne.ini - Add and set the variable
occne_fluentd_opensearch_enabledtoFalse. Inside theoccne.inifile add the following line at the end:occne_fluentd_opensearch_enabled=False - Apply the configuration as provided in the step "Applying the Configuration".
8.17 Using CNLB Command Line Utility
CNLB CLI (cnlbctl) is a lightweight, kubectl-style command-line utility used to inspect and validate the runtime state of CNLB in an CNE cluster. It connects to the CNLB manager pod (in the occne-infra namespace) and presents human-readable status tables for CNLB service sets, active/standby pods, frontend services, backend endpoint mappings, egress source IPs/connection counts, and network attachment definitions—enabling quick health checks and troubleshooting from the Bastion host.
Overview
cnlbctl is a kubectl-like CLI that communicates with the CNLB manager pod in the occne-infra namespace and renders status tables for:
- service sets
- pods
- services
- backends
- egress mappings
- network attachments
All commands support a --mock flag for offline testing.
Installing cnlbctl Utility
Run the following commands from the Bastion host to install CNLBCTL_VERSION=1.0.0:
- Download the binary:
wget http://$CENTRAL_REPO/occne/binaries/cnlbctl/occne-cnlbctl_${CNLBCTL_VERSION}.zip - Extract the
occne-cnlbctl_${CNLBCTL_VERSION}.zipfile:unzip occne-cnlbctl_${CNLBCTL_VERSION}.zip - Change the file permissions:
chmod +x cnlbctl - Move to system path:
sudo mv cnlbctl /usr/local/bin/ - Verify installation:
cnlbctl --help
Using cnlbctl Utility
The following are a few basic usage examples for cnlbctl utility:
Use the following command to display the CLI’s built-in help text, a summary of what cnlbctl is, the supported commands/subcommands:
cnlbctl --helpUse the following command to isolate CLI vs cluster issues:
cnlbctl --mock get infoCommand Reference
Table 8-35 Command Reference
| Command | What it shows | Common options |
|---|---|---|
|
Overall CNLB service-set sync status | |
|
CNLB pods, role (active/standby), and node | |
|
Frontend services exposed by CNLB | |
|
Frontend IP → backend IP/ports mapping | |
|
Pod-to-egress network mappings and connection counts | |
|
NADs, gateways, routes, CNLB pod assignments | |
|
Interactive generator for pod annotations | |
Get Command Examples
This section provides a few Get command usage examples that are run on Bastion host. These examples provide real time CLI output formats.
cnlbctl get infoEnabled sync state.$ cnlbctl get infoSample output:
SERVICE SET SYNC STATUS ACTIVE POD IP ACTIVE POD NAME STANDBY POD NAME
serviceIpSet0 Enabled 10.233.94.141 cnlb-app-6d4889585d-m8rqb cnlb-app-6d4889585d-r8vgf- Start here when validating CNLB health.
- Confirm that the service set is in Enabled state before checking pod or egress activity.
cnlbctl get pods$ cnlbctl get podsSERVICE SET POD IP CNLB POD NAME POD ROLE NODE NAME
serviceIpSet0 10.233.94.141 cnlb-app-6d4889585d-m8rqb active occne1-luis-botello-ortega-k8s-node-cnlb-2
serviceIpSet0 10.233.104.144 cnlb-app-6d4889585d-r8vgf standBy occne1-luis-botello-ortega-k8s-node-cnlb-3Description:
- The active pod IP should match the IP shown in cnlbctl get info.
- Standby rows appear without connection counts.
cnlbctl get servicescnlbctl get servicesSERVICE SET APP NAME CNLB POD NAME FRONTEND IP PORT NETWORK NAME
serviceIpSet0 grafana cnlb-app-6d4889585d-m8rqb 10.75.200.27 80 oam
serviceIpSet0 alertmanager cnlb-app-6d4889585d-m8rqb 10.75.200.44 80 oam
serviceIpSet0 alertmanager cnlb-app-6d4889585d-m8rqb 10.75.200.44 80 oam
serviceIpSet0 prometheus cnlb-app-6d4889585d-m8rqb 10.75.200.51 80 oam
serviceIpSet0 tcp-test-app cnlb-app-6d4889585d-m8rqb 10.75.200.112 80 sig- Use this to verify which workloads are fronted by CNLB.
- This is also the quickest way to confirm the exposed frontend IP for an application.
cnlbctl get backendscnlbctl get backendsFRONTEND-IP BACKEND-IPS BACKEND-PORT-NAME BACKEND-PORT NETWORK-NAME GATEWAY-IP NETWORK-DEFINITION
10.75.200.27 112.16.0.129 grafana 3000 oam 112.16.0.6 nf-oam-int3
10.75.200.44 112.16.0.130 http-web 9093 oam 112.16.0.5 nf-oam-int2
10.75.200.44 112.16.0.130 http-web 9093 oam 112.16.0.5 nf-oam-int2
10.75.200.51 112.16.0.135, 112.16.0.144 http-web 9090 oam 112.16.0.4 nf-oam-int1
10.75.200.112 113.16.0.129 test 8008 sig 113.16.0.4 nf-sig-int1Description:
- Use
--net oamto filter by network. - Use
--svc 10.75.200.27to inspect a specific frontend service. - This command is useful when tracing frontend traffic to backend endpoints.
cnlbctl get egresscnlbctl get networksSample output:
CNLB POD NAME POD IP EGRESS SRC IP NETWORK NAME GATEWAY IP EGR_CONN_COUNT
cnlb-app-6d488958... 10.233.94.141 10.75.200.85 oam 112.16.0.193 26
cnlb-app-6d488958... 10.233.94.141 10.75.200.81 sig 113.16.0.193 26cnlbctl get networkscnlbctl get networksSample output:
NETWORK DEFINITION GATEWAY IP ROUTES CNLB POD IP EGRESS SRC IP
nf-oam-egr1 112.16.0.193 10.75.201.0/25, 10.75.201.0/25, 10.75.201.0/25,... 10.233.94.141 10.75.200.85
nf-oam-ie1 112.16.0.59 10.75.200.0/25 N/A N/A
nf-oam-ie2 112.16.0.58 10.75.200.0/25 N/A N/A
nf-oam-ie3 112.16.0.57 10.75.200.0/25 N/A N/A
nf-oam-ie4 112.16.0.56 10.75.200.0/25 N/A N/A
nf-oam-ie5 112.16.0.55 10.75.200.0/25 N/A N/A
nf-oam-ie6 112.16.0.54 10.75.200.0/25 N/A N/A
nf-oam-int1 112.16.0.4 N/A N/A
...
nf-sig-egr1 113.16.0.193 10.75.253.0/25, 10.75.200.0/25 10.233.94.141 10.75.200.81
nf-sig-ie1 113.16.0.59 10.75.200.0/25 N/A N/A
nf-sig-int1 113.16.0.4 N/A N/ADescription:
- This view cross-references NADs with the pods currently consuming them.
N/Aindicates that the network is defined but not currently assigned to an active CNLB pod.
cnlbctl generate config Command
cnlbctl generate config walks you through building the pod annotations required for ingress and egress connectivity. Below is a sample interactive session captured from the bastion host.$ cnlbctl generate configSample output:
CNLB Configuration Generator
==================================================
──────────────────── Available Networks ────────────────────
Configured networks in cnlb.ini:
Include OAM network?
============================================================
→ 1. Yes - Include this network
2. No - Skip this network
Enter your choice (1-2): 1
...
Include SIG network?
...
✓ Selected networks: OAM
Select Application Communication Type
============================================================
→ 1. IE - Ingress/Egress (bidirectional)
2. EGR - Egress Only
3. INT - Ingress Only
Enter your choice (1-3): 1
✓ Single network selected; using SN (Single Network) ingress mode
Enter backend port name and frontend port ...Troubleshooting Common CLI Issues
If a subcommand is mistyped, the CLI returns a validation error with valid choices.
Example:
cnlbctl get egrss Sample output:
invalid choice: 'egrss' (choose from ...) EGR_CONN_COUNT is shown only when both of the following are true:
syncStatus = EnabledpodRole = activeEnsure that the cnlb.ini is readable from the bastion:
/var/occne/cluster/$OCCNE_CLUSTER/cnlb.iniAppend --mock to simulate output without touching the cluster.
This is especially useful for demos, documentation, and offline testing.