Configuration from the Web GUI
The procedures for configuring the Oracle® Enterprise Session Border Controller from the Web GUI are consistent in how they begin and end. What varies are the steps in between, which are unique to each configuration procedure. Once you are familiar with the common steps for beginning and ending any configuration procedure, the unique information that you need is about the fields, selections, and options available within each procedure. The Web GUI Guide and the online Help system provide procedural, conceptual, and referential topics to help you with the steps in between. Procedural topics provide the "how" information, such as the prerequisites, the configuration steps, and the next steps. Conceptual topics provide the "why?" information, such as a description of the purpose and benefits of the configuration or feature. Reference topics provide the "what?" information, such as a list of the acceptable values for fields.
The following sections describe the common steps for beginning and ending configuration procedures from the Web GUI in Basic mode and in Expert mode.
The common beginning in Basic mode
- From the Web GUI in Basic mode, click the Configuration tab.
- On the Configuration page, you can do one or both of the following:
- Drag an icon into the workspace. This gesture causes the system to display the corresponding configuration dialog.
- Click Wizards, Settings, Network, Security, Management, or Other, and select a configuration option from the resulting drop down menu. The system displays the corresponding configuration dialog.
The common ending in Basic mode
- When you finish configuring the fields, selections, and options in the configuration dialog, click OK or Close, depending on the dialog.
- On the Web GUI toolbar, click Save.
- Click Activate.
- Click OK.
The common beginning in Expert mode
- From the Web GUI in Expert mode, click the Configuration tab.
- On the Configuration page, at the bottom of the Objects pane, click Show advanced.
- Click the arrow by the object group name, for which you want to see the list of configuration elements.
- Click the element that you want to configure, and the system displays the corresponding dialog.
The common ending in Expert mode
- When you finish configuring the fields, selections, and options, and the system displays the page where you began the configuration, click OK.
- On the Web GUI toolbar, click Save.
- Click Activate.
- Click OK.
Note:
Click Show advanced in the configuration dialogs to display all of the settings available within each function. Click Hide advanced to display only the minimum required settings.Configuration Error Messages
If you save a configuration that contains errors, the system displays the following error message: There were errors! Are you sure you want to activate the configuration?
The system displays a list of errors at the bottom the page. Click an error to go to the location in the configuration where the error occurred and edit the configuration as needed.
| Severity | Identifies the level of severity that the Oracle
Enterprise Session Border Controller assigns to the error. Valid values are:
|
| Message | Identifies the element field where the error, warning, or critical error occurred, and the reason for the error. |
| Object | Identifies the element and the field for that element where the error occurred. |
| Attribute Name | Identifies the attribute within the element where the error occurred. |
| Other | Identifies any other pertinent information relating to the error. |
Configuration Deletion Methods
In Basic mode, you can delete a configuration by way of the following methods.
Delete from an Icon
For any device or interface in the workspace, right-click the icon and select Delete from the drop-down menu. The following illustration shows an example of deleting a configuration by way of the PBX icon.
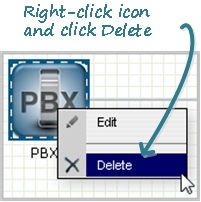
The system deletes the configuration from the workspace and from the Oracle® Enterprise Session Border Controller.
Delete from a Configuration Dialog
To delete a configuration from a toolbar menu, you click the configuration object that you want from the menu, and use one of the following methods to delete the configuration:
- Select an item on the list and click Delete.
- Select an item on the list, right click, and select Delete from the task menu.
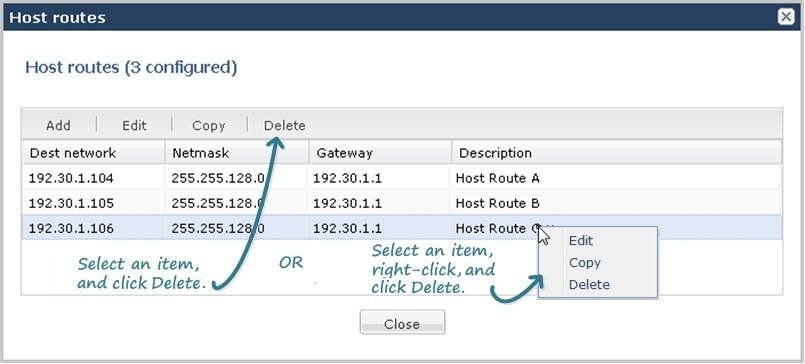
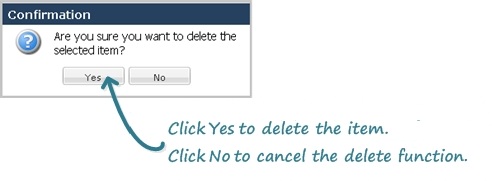
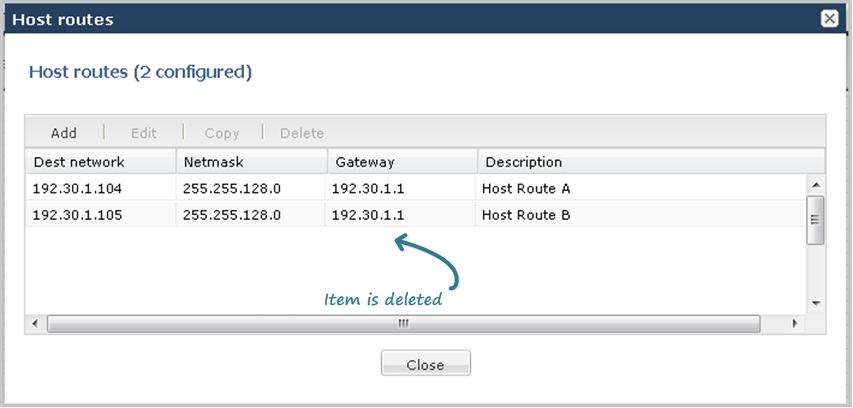
Delete an Individual Parameter Configuration
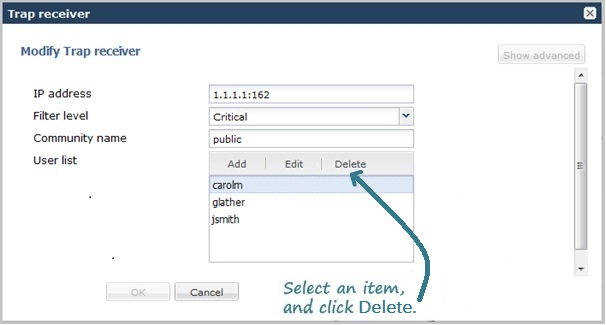
Some configuration dialogs require additional configuration of a particular parameter. The following illustration shows an example of the deletion dialog for the User List parameter within the trap-receiver configuration dialog.
Note:
After editing a configuration, you must save and activate the configuration for the changes to take affect.Configuration Copying Methods
In Basic mode you can copy a configuration by way of the object menus on the toolbar, but not from the icons in the workspace.
To copy a configuration, use one of the following methods:
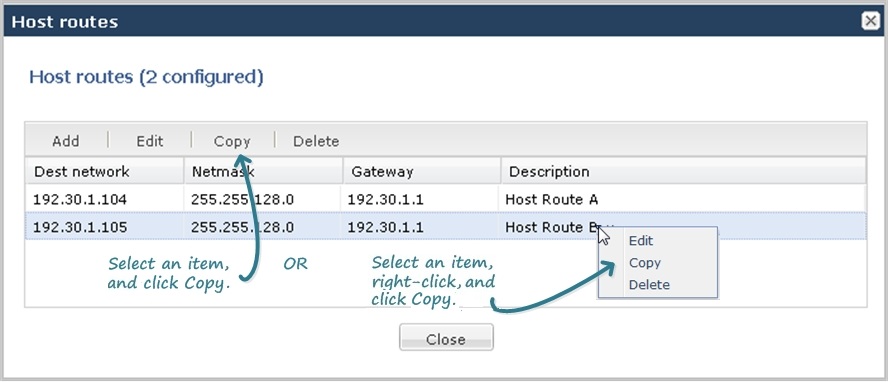
- Select an item on the list and click Copy.
- Select an item on the list, right click, and select Copy from the task menu.
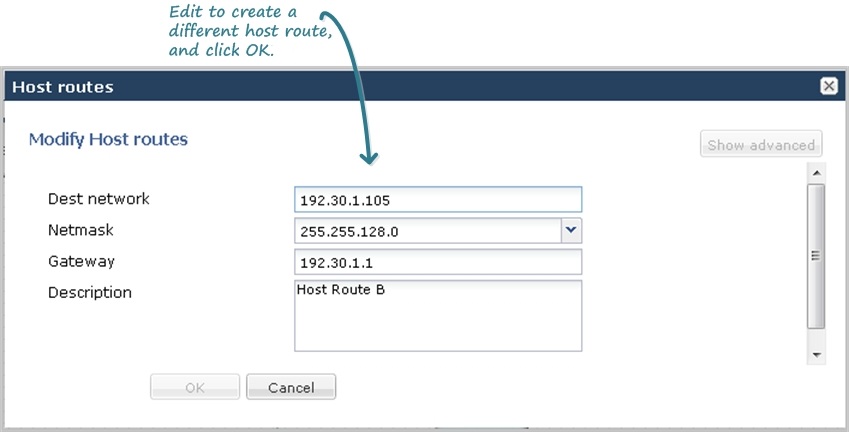
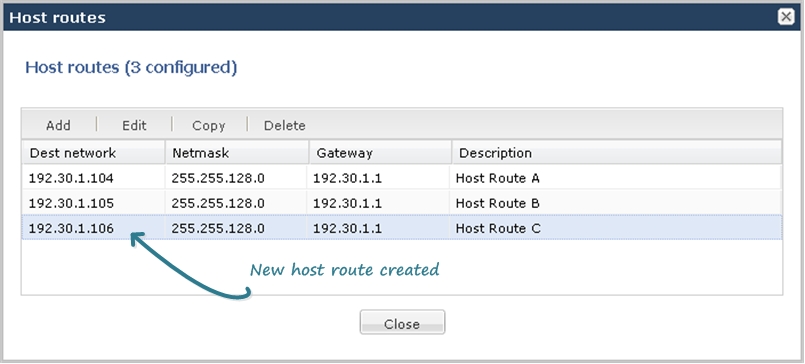
The following illustrations show host route 192.30.1.105 copied and edited as a new host route of 192.30.1.106.
Configuration Editing Methods
In Basic mode, you can edit a configuration by way of the following methods.
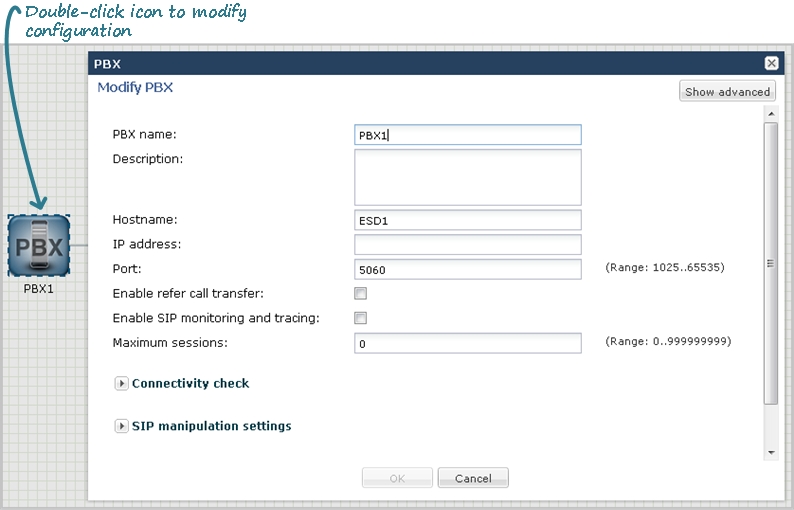
Edit from an Icon
- Double-click the icon.
- Right-click the icon and select Edit from the drop-down menu.
Edit from a Configuration Dialog
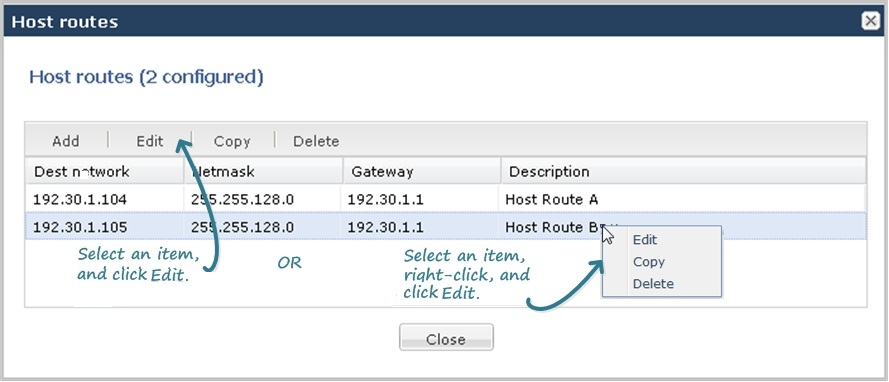
To edit a configuration from a toolbar menu, you click the configuration object that you want from the menu, and use one of the following methods to display the configuration dialog:
- Select an item on the list and click Edit.
- Select an item on the list, right click, and select Edit from the task menu.
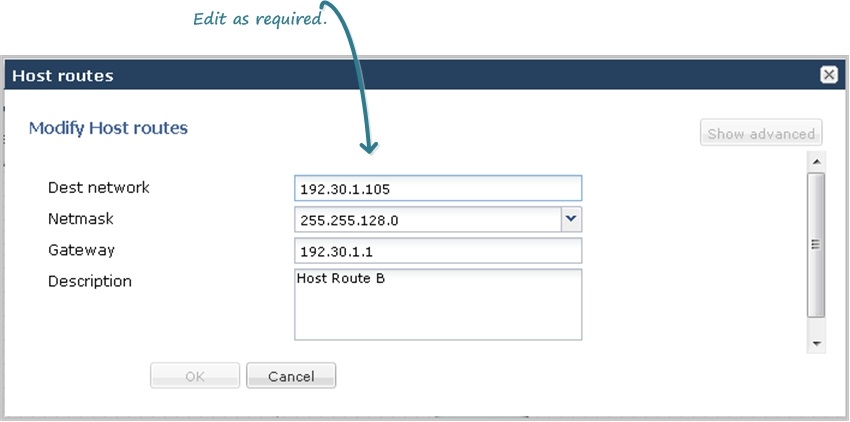
The following illustrations show examples of editing a host route configuration by both methods.
Edit an Individual Parameter
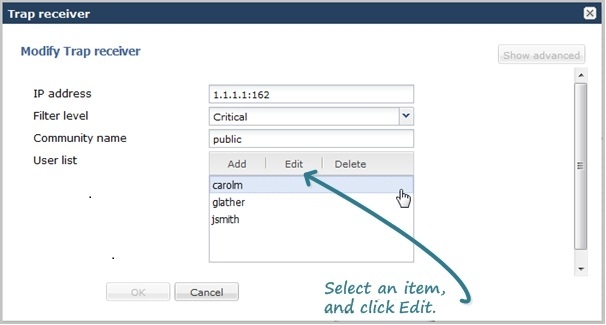
Some configuration dialogs require additional configuration of a particular parameter. The following illustration shows an example of the editing dialog for the User List parameter within the trap-receiver configuration dialog.
Note:
After editing a configuration, you must save and activate the configuration for the changes to take affect.